
Michelle Bruhn's Blog: Forks in the Dirt, page 4
April 26, 2024
Raising Local Flower Power
With Mother’s Day coming up – which accounts for about 25% of all cut flower sales in the U.S. annually, I thought it was time to dig deeper into the dirty side of floriculture and look into the growing trend of local flowers…

Did you know that cut flowers are one of the biggest offenders when it comes to being sprayed with synthetic pesticides and herbicides. And with a nearly $60 billion industry in the U.S., Americans bring a lot of those sprayed blooms home and then seat themselves around them for meals…
The cut flower industry needs to drastically reduce their negative impact on the planet. The largest number of flowers sold in the U.S. are flown into North America from South America (specifically Colombia and Ecuador). The carbon footprint from refrigerated air travel is mind blowing!
Chemical Heavy IndustryMost refrigerated containment systems emit hydrofluorocarbons, or HFCs, which are greenhouse gases estimated to be 9,000 times more potent than CO2 at warming the atmosphere.
–
Flowers also require lots of water to grow, and are usually grown in large-scale greenhouse environments, which then need pesticides and herbicides to deal with because of planting in monocultures. Areas around large-scale flower farms also experience negative run off effects and lowering of regional water tables.
The workers are showing signs of poisoning from the intense use of chemicals as well, after working 16-hour days for unfair wages. The chemical they may be having the biggest reaction to is methyl bromide, which is a fumigant sprayed onto flowers before shipping to make sure all bugs and fungi die in transit. This is illegal in food, but since flowers are not food, the industry gets away with it- even though it has been shown to cause neurological damage – to us humans along with the pollinators!

But then there are the greenhouses that aren’t in South America that require heating to grow the flowers we want for that special celebration… which can have much higher carbon footprints even with shorter travel times.
 Here’s How You Can HelpBuy Local Flowers when in season, dubbed “Slow Flowers” from your flower farmer.Ask your florist where their flowers came from and if they were treated.Reduce packaging by bringing your own vase, or asking if there are compostable options.Buy a potted plant instead of cut flowers. Many plants are grown in similar circumstances as cut flowers, but at least it will have a longer life and give you back some oxygen.Grow Your Own! I love growing flowers along with veggies. Some of my favorite flowers to grow are covered in this article.
I truly love the local flowers available at our farmers markets, but for when you can’t get there, or as a gift- I love that there are now bouquet subscriptions available from local flower farmers! Local Bouquet CSA
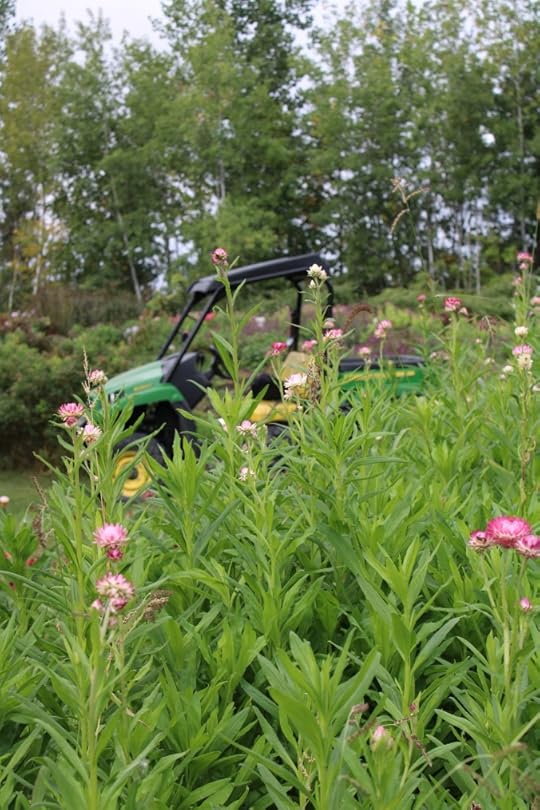
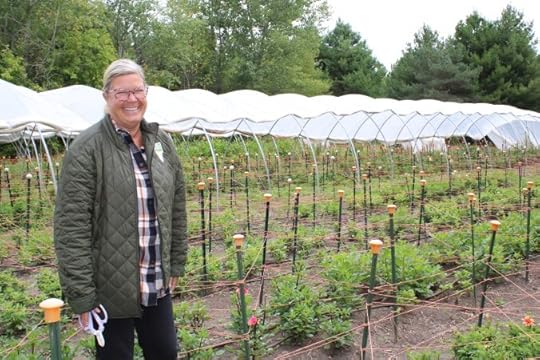
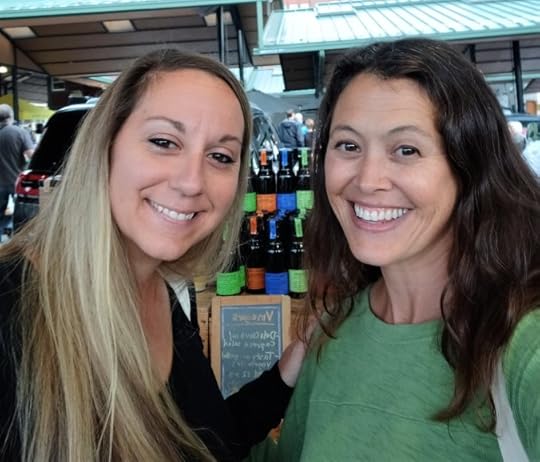
Meet a Local Flower Farmer Raising Flower Power! Sarah at her home garden gate.
I had the great joy of visiting Sarah’s home gardens, landscape company and flower farm collectively known as Sarah’s Cottage Creations. This woman walks the walk of sustainable farming and truly is so passionate about flowers; including the people who help her grow them and the people who bring them home!
When you think of starting a flower farm you might think of someone coming from a farming or horticultural background, right? But this story starts with an “Oprah’s Best Life” aha moment when owner and now flower farmer, Sarah Buerkley, realized she wanted to do something with her hands outside in nature.
She started Sarah’s Cottage Creations in Stillwater, Minnesota in 2000 by installing seasonal pots and window boxes in her area. And two decades later… she’s grown into multi-faceted landscape and gardening business where she still gets to plant out seasonal blooms in pots and window boxes, but has expanded to landscape design and installation, plus her newest venture – the flower farm! All told, she employs over a dozen plant crazy people year-round and doubles that during the summer months.
She focuses on Dahlias, Peonies and early season Fancy Tulips on the flower farm, but also grows a lot of variety (ranunculus, zinnias, strawflowers etc.) for bridal bouquet orders- and oh my goodness, swoon, the colors all season long on her farm are breathtaking!

 Flower Purchase Power
We often overlook the ecological impact of flowers. They’re often a fun, last-minute splurge so we don’t sit down to think about how our flowers were grown, or where they came from like we do with our food.
But that is changing. Sarah has seen a shift in the last few years with people wanting to know if their flowers were grown locally, and if they had chemicals sprayed on them. Sarah is so happy to support this healthier option for people and the planet. It is also why she grows her flowers without harmful chemicals.
“I really love being able to ship my flowers with zero chemicals added like so many huge grow houses that ship across the US do,” says Sarah. “We also wrap our blooms in paper not plastic because we can with our blooms travelling a shorter time and distance”. All these things really do add up to a larger than expected environmental impact.
 So what does it take to run a flower farm?
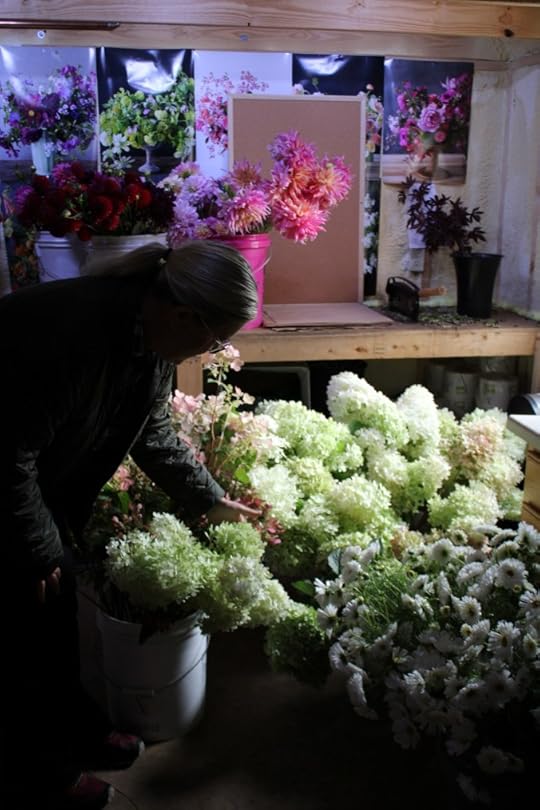
Patience and lots of hard work! But many flower farmers start on small parcels of land and slowly grow.
Like so many gardeners, Sarah is mostly self-taught. But she was immensely grateful for the “Floret Farm” flower farmer workshop that she took years ago.
Sarah currently works with about 3,000 dahlia tubers and added over an acre of peonies! She holds a tuber sale every January (tubers ship out in late April or early May here in Minnesota) I am eagerly awaiting my shipment of new Dahlia Tubers as I write this!
She also sells many different “Bouquet Subscriptions” for weekly delivery starting in April with fancy tulips and going on through the season. What a wonderful gift idea! In order to house all those cut beauties, even for a day, they have a single cold storage area (that is usually pretty dark as you can tell from the photo).

You can follow along with Sarah’s swoon worthy growing season on her Instagram Account, or sign up for her monthly emails to be the first to access her sales (some dahlias go very fast).
So next time to decide to gift someone a bouquet, take the time to look into where those flowers came from and how they were grown. You’ll end up giving a more meaningful, and more healthful gift on so many levels!
Are you ready to Dig In to Local Flowers for a healthier planet? I truly hope I’ve inspired you to think before you buy your next bouquet!
~Michelle
The post Raising Local Flower Power appeared first on Forks in the Dirt.


April 1, 2024
Homemade Mayonnaise
It is so empowering to be able to make something like homemade mayonnaise in your own kitchen you thought you had to buy from a store!
This is such an easy staple to be able to swap out, and so much healthier for you and your family too- with all real ingredients and it tastes so much better than anything you can buy in the store!
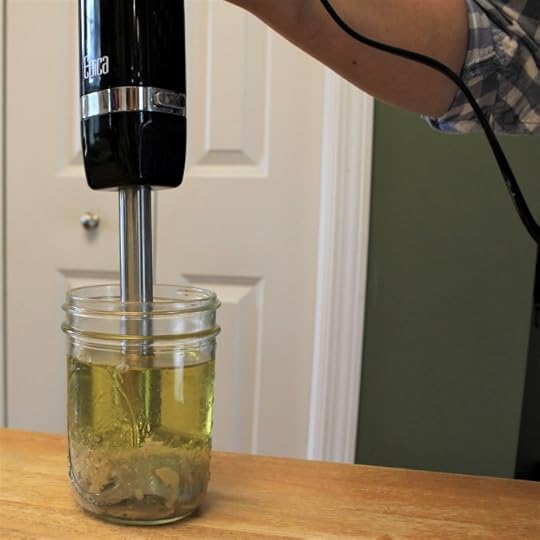
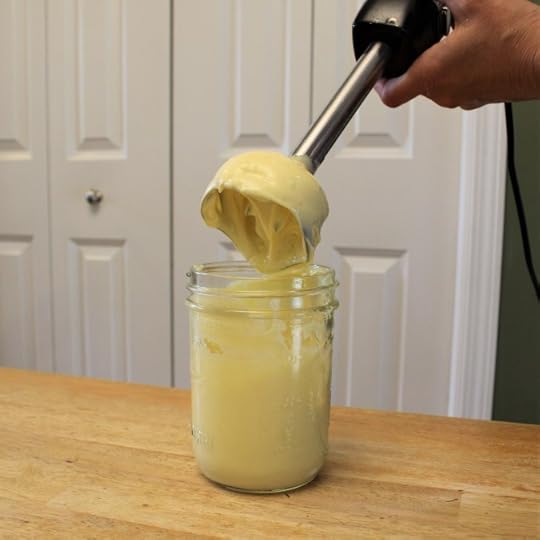
With a stick blender and some simple ingredients; oil + egg + acid you’ll be amazed at how quickly this comes together!
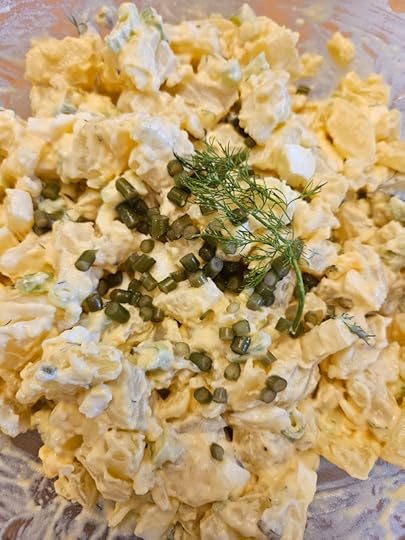
Making small batches like this recipe’s proportions with a stick blender means it’s lots easier than most recipes which call for a food processor, plus much larger quantities which always spoiled before I could use 4-6 cups of mayonnaise. This makes just around 1 cup, a perfect mount for whipping up egg salad! (Especially when all those Naturally Dyed Easter Eggs need to be eaten)!
The trick to making this recipe work is using a jar that is just barely bigger than your stick blender. For me this is a wide mouth (straight sided) pint-sized mason jar.
You can use lots of different oils; I prefer avocado or sunflower oil. But you can find your own blend from favorites like: avocado, olive, untoasted sesame, sunflower and coconut oils. Use what you’ve got, knowing whatever oil you do use will end up affecting the overall flavor of your finished homemade mayonnaise. *I do suggest staying away from using all olive oil as it won’t taste right, at least to me.*
Yield: 1 cup of mayonnaise
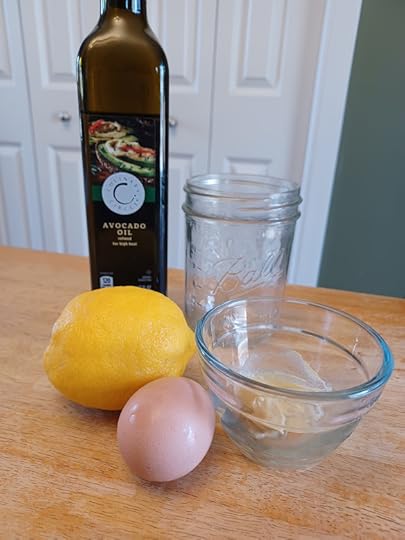 Homemade Mayonnaise Ingredients1 large (or two small) raw egg- room temperature1 T lemon juice or raw apple cider vinegar1 T Dijon1 pinch of salt3/4 C to 1 Cup OilPlace room temperature egg (temp is important here!), lemon juice or vinegar, mustard, and salt in the jar, add oil(s) to the top. With the blender blades over the yolk, keep the blender firmly on the bottom of the jar and start blending. You’ll see the oil and egg start to emulsify almost immediately. Keep blender blades at the bottom for around a minute and once most of the ingredients are blended you can raise the stick blender up a little to incorporate any extra oils.
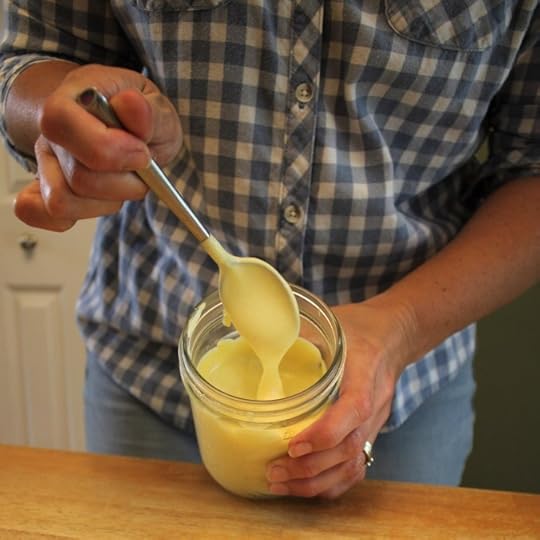
This will not feel quite as thick as store bought mayonnaise right away, but once refrigerated it will firm up and spread like any store bought mayo – but it will taste SO MUCH BETTER!
You can add other seasonings after the main emulsifying process, like garlic mayo, spicy mayo etc…
You can add more vinegar, mustard, or salt to suit your tastes with each new batch.
This mayonnaise will keep refrigerated for three to four weeks.
Perfect for egg salad and deviled eggs… which is something we eat a lot of since we raise our own backyard chickens!
Let me know if you liked the mayo and how you used it most.
Dig In, Michelle
The post Homemade Mayonnaise appeared first on Forks in the Dirt.
February 16, 2024
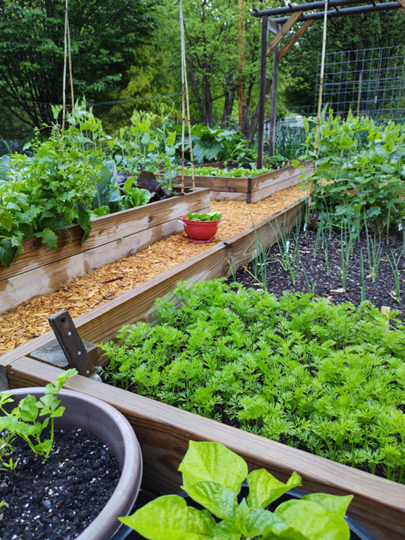
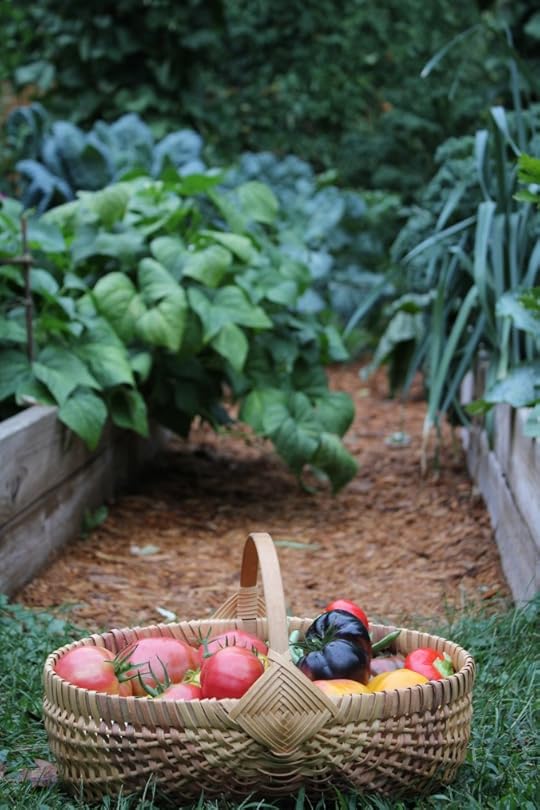
Vegetable Garden Design Basics
Let’s get your garden dreams onto paper so you can make harvesting from your garden a reality this summer! A little planning can go a long way.
First – let’s get clear on what YOUR garden goals are. Setting an intention up front (and knowing it will change with/in the seasons) can be a welcome guidepost later in the planning process. Try to not to compare your gardens or goals to anyone else’s.
Also, I’ll suggest you start small and manageable and plan to add on as you get comfortable with growing more and more. I really want gardening to be a joyful experience for you- not a slogging chore hanging over your head.
Before We Dig InDid you know I have a FREE Garden Design Class video on my YouTube Channel? We go over all the basics covered here plus even more details so check it out if you’re looking for more information.
Let’s Dig In!
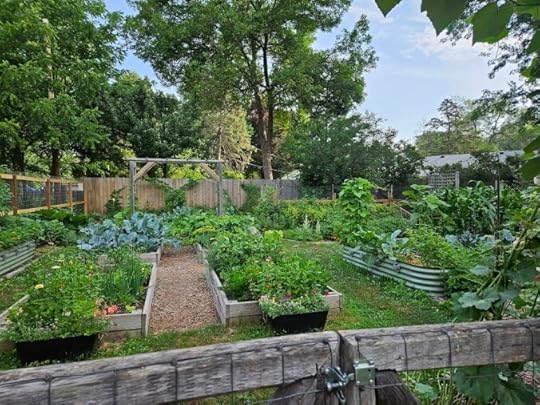
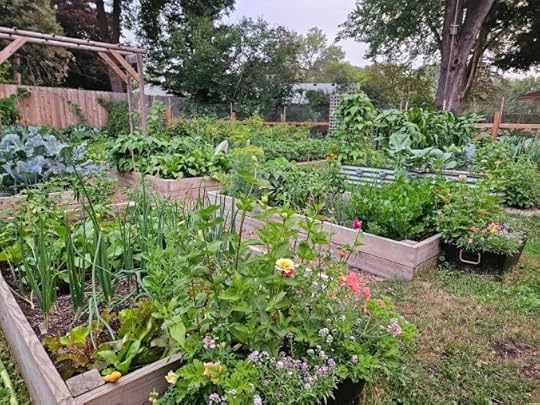
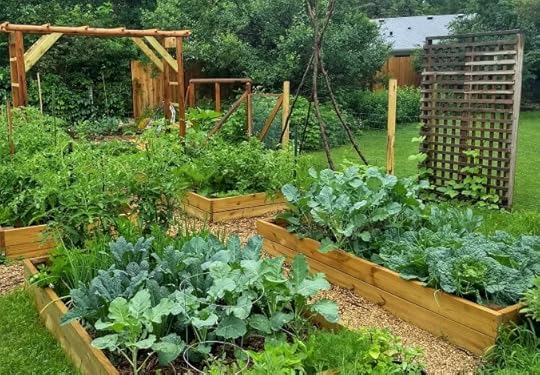
Let’s plan making our vegetable gardens places of beauty for us and the rest of nature that we want to invite in!
The more you start using your front and back yard, the more you’ll want to make the most of every square foot.
Mapping it out on paper will help you see your space in new ways. Keep in mind water, easy access, electrical and zoning requirements for sheds, chicken coops etc.
There are as many ways to design and implement a garden as there are gardeners. And, if there’s a friend or neighbor’s garden that you admire, ask them if you can use their plans in your space; imitation is the highest form of flattery…
Focus on growing what you and your family like to eat, and what will grow well in the space you have. Know Your Growing Zone! Follow THIS LINK to find your USDA Plant Hardiness Zone.
 Call Before You Dig
 #811 is the national number to call to request that all buried utilities be marked before you start digging. Plan to give them a few days lead time to mark buried electrical, cable and water lines.
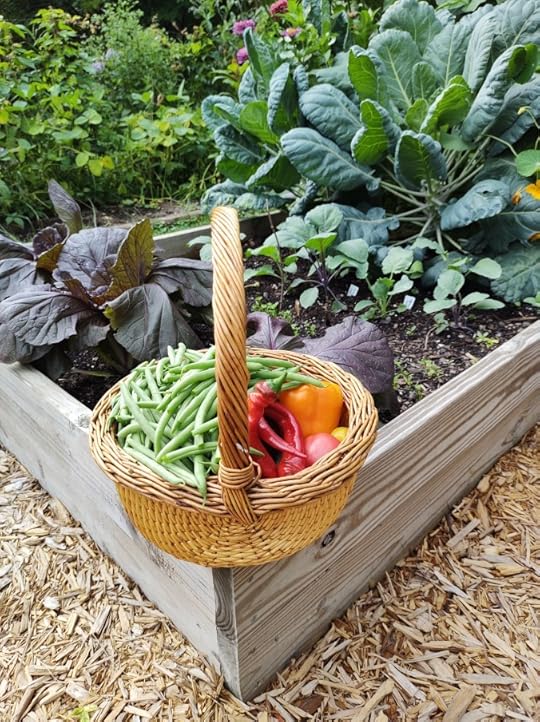
Layout Basics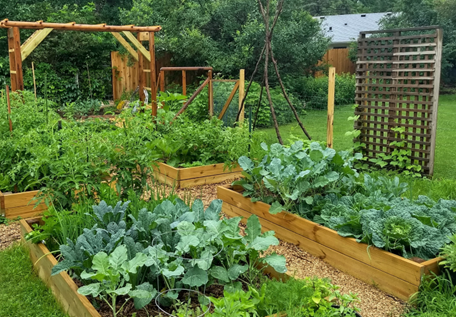
Garden beds function best when built to the 3-4-foot wide range.
Main pathways are best kept at 2 feet wide. Some smaller gardens can get away with 18” pathways, but if you need to get a wheelbarrow into a space, you’ll need a minimum of 2 feet.
Just a reminder that beds do not have to be straight. Depending on materials, the shapes are limited only by your imagination and the space itself.
Basic Planning Steps Draw the garden perimeter.Draw in hardscapes. These non-plant items include fences, paths, and fixed items, now you’ve got a ‘Base Plan’. STOP and make copies at this point so you can play with design.
Draw rough outline of garden bed shapes and sizes.
Make a list of all the plants you want to grow in your garden (grow what you eat).
Draw plants into beds (remembering orientation, spacing, trellising, harvesting accessibility).
Add in companion planting options.
Add in succession planting options.
Revise, revise, revise.
Save your plans from year to year and make notes and use for planning crop rotation.
 Orientation
When starting your plant layout keep in mind the suns’ orientation. Plant taller plants on the north end of the bed so you don’t block sun from other shorter plants (unless you want to create shade for lettuces etc.). If you plan on making any of your raised beds into cold frames, know that an east west orientation (with the window slanted towards the south) is recommended.
Design Your Layout Sketch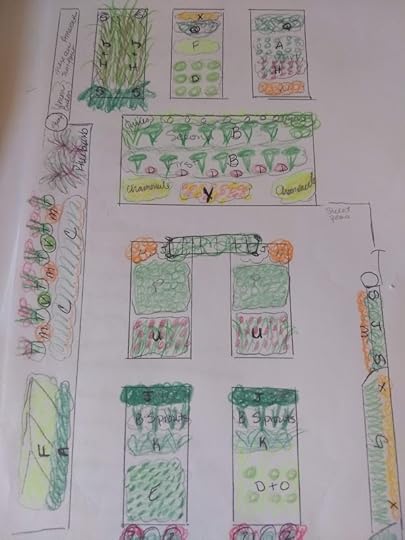
Next is sketching the shape of your garden. Get outside and measure existing spaces or walk the area and measure it out. Draw the perimeter of the space to scale on graph paper. Most garden beds will work well drawn to a scale of 1 foot to 1 square on regular graph paper. Next, add existing hardscapes that won’t be moving. Then, stop and make copies of this ‘base plan’ so you can markup many drafts without having to repeat this step again!
Now’s the time to refer to the list of ‘want to grow’ plants you’ve been gathering. If your list of what you want to grow is longer than what you have space for, narrow the list down by considering what your original garden goals were. Keep in mind what your family likes to eat most, what you could buy from a local farmer instead, and what is most cost effective to grow. This is the tough part- rarely is their room for all the things we want to grow. Now is the time to compromise.
 Plant Spacing
How you space your plants is going to depend a little on the kind of gardener you are… Do you like things orderly, or does a little chaos feed your soul? Of course, read the seed packets and consider their recommendations. Many of those packets focus on ‘row’ gardening, although some are starting to include square foot spacing as well.
Most gardeners (us included!) struggle with remembering just how big plants really get by the end of the growing season. Giving plants ample space will help them flourish and make your late season gardening jobs more enjoyable too.
Spacing plants too close can decrease air flow and light, both of which can lead to weakened plants. Weak plants are more susceptible to disease and pest pressure. I tend to crowd my plants a little but am aware that I need to pay extra attention to them. Also of note, the more crowded the plants, the trickier the harvest.

For me, spacing ends up looking like this in a 4 foot wide beds:
24 carrots12 onions or garlic8-10 beets4-5 pak choi, celery, head or leaf lettuce3 broccoli, cabbage, cucumber, kale, peppers or potatoes2- Tomatoes1 zucchini, summer or winter squashRow spacing will vary based on plants, and you can really play with space when it comes to plants you’ll trellis like pole beans, cucumbers and squash! More information on Playing with Space by Growing Vertically in my online class, coming soon. I also tend to interplant a lot which can alter plant spacing.
 Place Your Plants
 Taking into consideration the elements we talked about before: orientation, vertical planting, and plant spacing, start placing plants into your ‘Base Plan’. Know you’ll likely move things around quite a few times as you work this out.
This is the step where some garden alchemy happens – you’re using your imagination along with your experience. This process gets easier to see each time you do it. Think about your garden through the seasons, imagine pollinators, harvesting, and how the sun changes. Envisioning your garden in fall can help you get the most out of your space without it becoming overwhelming!
*Confession: It is still hard for me to remember how big broccoli plants really get as I’m transplanting tiny seedlings into the garden!
Getting a plan on paper will help you visualize the garden better but remember there’s nothing like seeing a garden grow throughout the seasons. Living the experience is really what it’s all about- and nature is the best teacher.
Try keeping a record of what you grew in which garden spaces. I tend to lean on my Instagram account and story archives for this, along with a spreadsheet of seed starting dates and a few notes on how plants performed. This practice helps you fine tune your garden skills year over year. It also helps you practice crop rotation in the future.
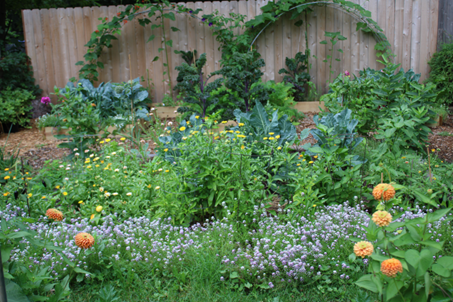
Plan space for companion flowers to help with pest defense too. Flowers add beauty, pollinators, habitat and joy to any vegetable garden.
Consider succession planting options for growing multiple crops in the same garden beds throughout the season.
Consider the rest of the ecosystem when garden planning, see your garden as part of nature and work with it instead of against it.
All that dreaming you’ve done up to this point will pay off in the long run with happier plants and heartier harvests.
I hope this helps you Dig In and plan your best garden yet!
-Michelle
The post Vegetable Garden Design Basics appeared first on Forks in the Dirt.
January 28, 2024
Soil Blocking for Seed Starting Success!
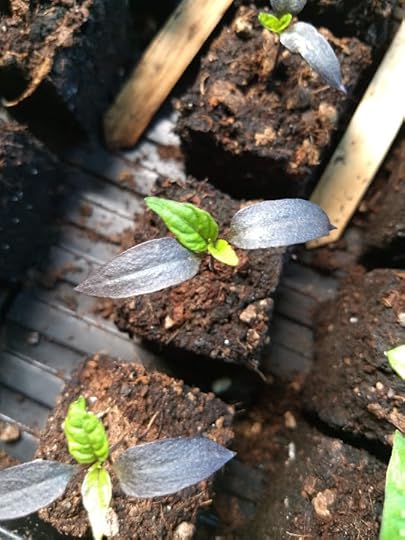
Soil blocks produce some of the best transplants from seed starting I’ve ever grown. This is my hands down favorite way to start tomatoes, peppers and my earliest cold hardy crops.
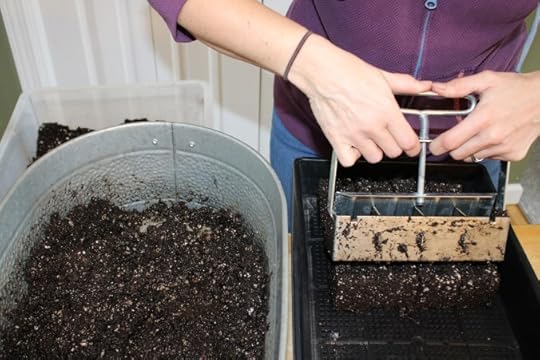
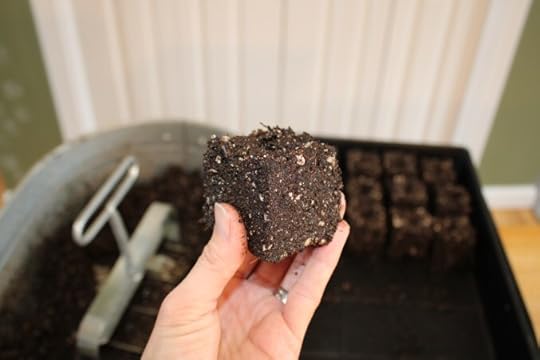
The method uses a metal ‘press’ that you fill with an oversaturated (think cement slop for the right consistency) seed starting mix. You get this mix packed into the ‘press’ and push a lever to pop out the cutest soil cubes you ever saw. And if the mix is done right, they stick together great, even though it seems like they’re defying the laws of gravity.
This has proven a great way to get your seedlings off to a solid start and use less plastic. It was brought over to America in the 1970’s by Eliot Coleman, the OG Organic Gardener.
Soil Blocking Benefits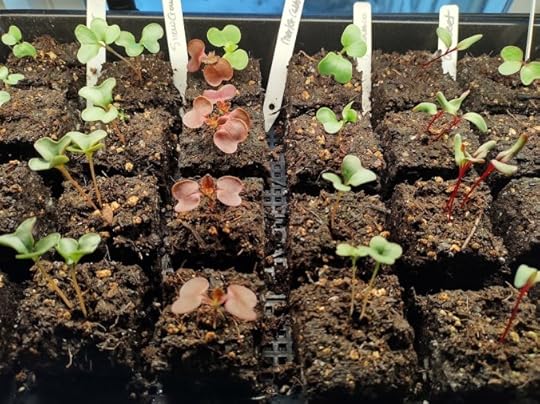
There are a few stacked bonuses to starting seeds this way. One is that it uses less plastic overall. It also creates a good environment for a seedling’s roots to ‘air prune’. This basically means the root hairs stop trying to grow out and instead bulk up closer to the plant. This avoids any circling of roots in a pot so no worry about root gridling. The air pruning process primes the plants for less transplant shock as well. The soil blocks also have great germination rates. They’re almost impossible to overwater as the blocks shed excess water right away.

The standard for seed starting trays is the “1020” which is roughly 10” X 20”. I mostly use a solid 1020 tray with a mesh 1020 nestled inside this for my soil blocks. But, I also have an assortment of older pots that I use to plant into, always with a solid 1020 tray underneath. I absolutely swear by Bootstrap Farmer’s trays. They cost more up front but will literally never need to be replaced- so much stronger then the box store trays!
You can also start soil blocks on any tray with a lip, and I’ve got some old school lunch room trays I’ve repurposed for this.
Getting the Seed Starting Mix Right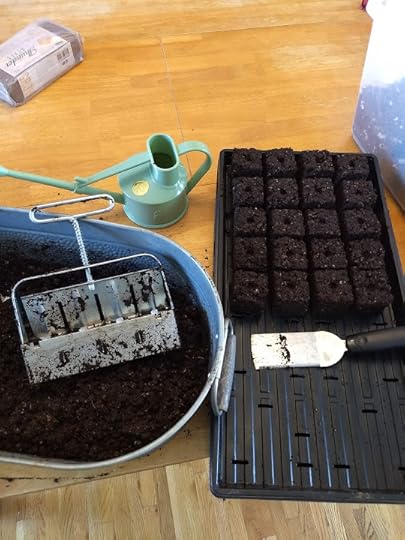
Start with a sterile seed starting mix. Do not use regular garden soil. There are quite a few good brands out there, I’ll use Promix if I’m buying a pre bagged blend. But when I do my main seed starting, I mix up my own, to be able to control the exact contents (yes, I’m a control freak) and to save money!
I buy compressed bricks of organic coco coir, like these, to make up about half of this mix. You’ll get roughly 2.5–3 gallons from one compressed brick after soaking in 1+ gallon of water and letting it expand for a few hours.
There are lots of opinions and ways to create a good seed starting mix. Here’s what I found works well for me when starting soil blocks. If you’re making a seed starting mix for starting seeds in pots instead of soil blocks, you can skip the peat moss altogether.
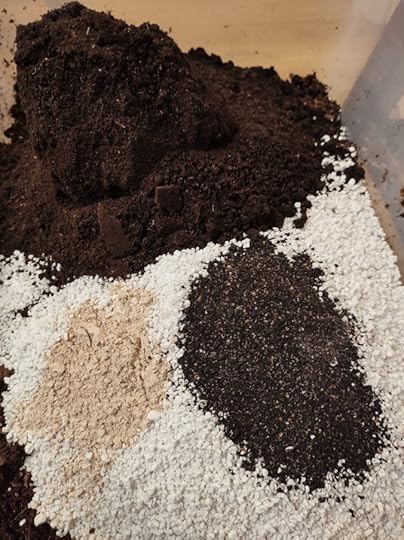
 Soil Blocking Mix
3 parts coconut coir
3 parts peat moss
2 parts compost or 1-2 parts worm castings
2 parts perlite
1/4 cup blood meal
< 1/4 cup bone meal
< 1/4 cup Azomite (aka rock dust)
SOAK COCONUT COIR FOR AT 2+ HOURS PRIOR TO MIXING
Here’s a link to my Amazon seed starting page if you’re interested in seeing all the products together. But remember, reusing any existing trays, pots and food grade plastic is an option too!
The soil blockers cost a little more than trays and pots but can make endless soil blocks for you – and all your garden friends. This is something I love demonstrating at schools too- it really is like playing with mud!
Enjoy starting seeds however you choose to go about it- and marvel at nature’s will to grow!
Dig In,
Michelle
The post Soil Blocking for Seed Starting Success! appeared first on Forks in the Dirt.
December 31, 2023
Best of Garden Podcasts
As an avid gardener and garden writer I’ve listened to a lot of garden podcasts- and some are better than others. I’ve also had the joy of being interviewed by a dozen podcast hosts (you’ll see some of their names below).
There’s something soothing about listening to others who have been there and done that. I love listening as I work with my hands or out on walks. If you’re not a podcast listener, I have to say (even as a writer) you are missing out!
Listen to podcasts where my coauthor Stephanie and I are interviewed about our book, Small-Scale Homesteading HERE, scroll about ½ way down for the list of links.
The following podcasts have given me inspiration, new ideas and company as I go about my days. While these are mostly gardening focused, I figured I’d share all my favorite podcasts… in a general order of how many episodes I’ve listened to over the years.
My Favorite Garden Podcasts
*Note – these either link to a main website or the Spotify podcast page as I did this from my desktop computer*
The Joe Gardener Show
Joe Lamp’l is a legend and for good reason, he’s interviewed so many experts, plus talks in depth about how he grows great gardens- I absolutely love garden geeking out with him!
The BEET – The Epic Gardening Daily Podcast
Kevin Ispiritu of EPIC Gardening doles out daily 5-10 minute podcasts where he interviews experts and riffs on questions asked by gardeners in these short, easy to binge listen!
Cultivating Place
Jennifer Jewell’s delightfully deep-dive program focused on conservation, natural history and gardening. She really brings on enchanting guests that makes this seasoned gardener question things!
Homesteaducation hosted by two well-known homesteaders Angela Ferraro-Fanning and Mandi Pickering, who talk about gaining the skills and mindset of modern homesteaders. Pretty infrequent posts lately.
Minnesota Gardening Podcast
Brad Tabke talks about gardening in the north and so much more. Focusing on eco-friendly gardening practices, this is one I always try to catch.
Beginners Garden Podcast
Jill McSheehey guides listeners through both interviews and personal experience. She’s got great garden tips, resources and ideas for home gardeners.
Food Garden Life Show
Steven + Emma Biggs are a father daughter duo from Canada. They keep it real and do both interviews with experts and deep dives into how they grow, especially growing food that shouldn’t be able to grow as far north as they are.
Growing Joy with Maria
Focused on the indoor plant lover, Maria interviews all shades of plant lovers, while letting plants nurture us in return.
The Good Dirt is hosted by the mother daughter duo of Mary & Emma and focuses on sustainable lifestyle from the soil on up. I appreciate listening to their relationship as much as the topics covered.
 Podcasts can help us envision better gardens and better ways to tend them and ourselves.
Well Loved Plant Podcasts
Podcasts can help us envision better gardens and better ways to tend them and ourselves.
Well Loved Plant Podcasts
In Defense of Plants
Matt Candeias offers up his true love of plants in these shows that take deeper dives into specific topics about plants – not necessarily on how to grow them better, but about reverence for them.
Let’s Argue About Plants
The editors of Fine Gardening bring this fun, informative podcast tackles all things gardening. You’ll listen to the insights (and polite arguments) and hear from today’s leading horticultural minds.
On Being with Krista Tippet
“Wisdom to replenish and orient in a tender, tumultuous time to be alive.
Spiritual inquiry, science, social healing, and poetry. Conversations to live by.”
Coffee with the Chicken Ladies is hosted by best friends Holly & Christie is all about chickens. I love how they break up their podcast into segments including interviews, breed deep dives and product reviews.
Good Together The Brightly brand’s podcast on eco-friendly sustainable living
Suggestions from Readers like YouThe Grow Guide A newer grower, Maggie Wysocki teams up with master grower Dave Hanson to chat on all those questions that new gardeners have, but with a deep dive. They’re in Manitoba so this is especially for my northern gardeners.
Pioneering Today is hosted by Melissa K Norris and homesteading focused.
Foodie Pharmacology , hosted by ethnobotanist, Dr. Cassandra Quave, this looks at food topics through a scientific lens.
 I love listening as I harvest, weed and preserve from the garden Audio Books I Adore
 Have you heard of Libro.fm? it’s a way to listen to audio books that supports local book stores!
Wendell Berry’s The Unsettling of America read by Nick Offerman
Braiding Sweetgrass read by Author Robin Wall Kimmerer
The Story of More read by author Hope Jahren
I hope these garden podcasts help us all dream of doing better with the plants, earth and time that we have.
So, what’s your favorite podcast? I’d love to listen…
Dig In,
Michelle
The post Best of Garden Podcasts appeared first on Forks in the Dirt.
December 5, 2023
Chai Tea
A favorite festive recipe is Chai Tea!
This will not only warm your body and soul, but makes your home smell like the holidays along the way… once I start making this Hygge season has officially arrived on our homestead.
Simple and completely able to tailor to your tastes, this recipe lets you add more or less of ingredients as you like.
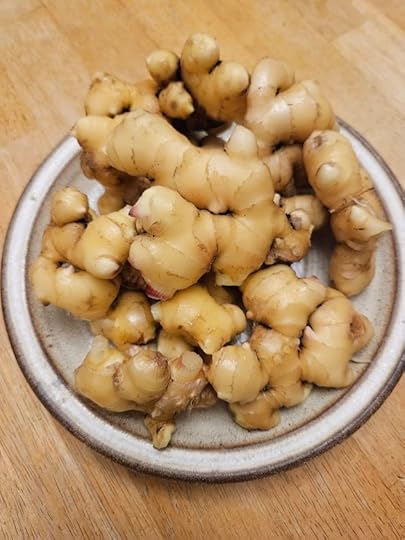
I adore how I start craving this tea right around the same time I harvest my ginger each year. I’ve got an in-depth article on growing ginger in the north.
Chai Tea Recipe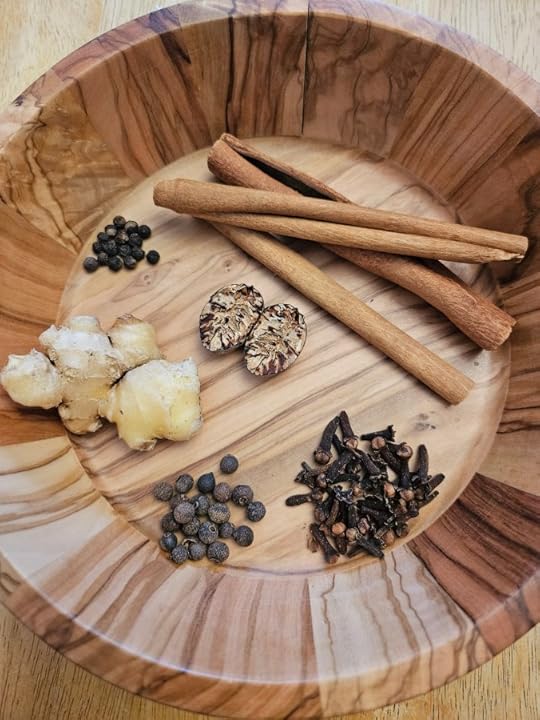 Cinnamon sticks, cloves, allspice, ginger root, peppercorns and a nutmeg pod.Ingredients
3-4” of fresh ginger, chopped or grated
3 Sticks of Cinnamon
(ground cinnamon will make the tea gritty)
2 tsp Whole Cloves (or 1/2 tsp ground)
1/2 of a Whole Nutmeg (or 1 tsp ground)
1 tsp Peppercorns ( do not substitute ground)
2 tsp Allspice
Optional: 6-8 cardamom pods
or 2-4 Star Anise
1 Vanilla Bean (or add 2 tsp vanilla extract after you take off heat)
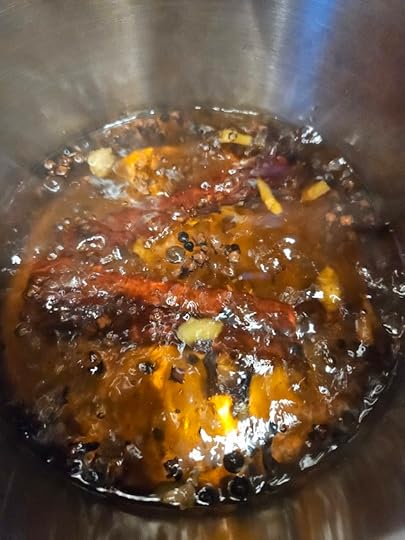
Simmer all the above in a medium pot with 3-4 cups of water for 15-20 minutes.
Add 6-8 black tea bags, turn off heat and let steep for 5 minutes.
Strain into a heat proof container. Store in refrigerator for up to a week.
To serve, heat tea concentrate and then add milk, or milk with a splash of cream , or half and half- yum! Up to a 50/50 ratio. Sweeten with honey or maple syrup.
I will often keep the strained ingredients in a pot on the stove, and keep simmering in water like a stovetop potpourri!
Cheers to simple, slow cups of chai tea, herbal tea or whatever warms your soul!
Michelle
The post Chai Tea appeared first on Forks in the Dirt.
November 14, 2023
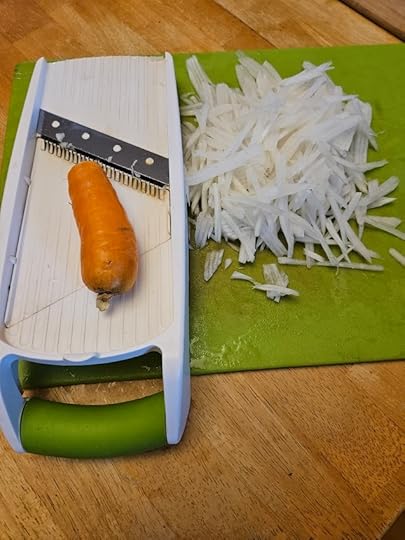
Pickled Daikon + Carrot Salad
One of my all-time favorite condiments has always been the slightly sweet, slightly vinegary and always crunchy pickled daikon + carrot ‘salad’. This is typical in Vietnamese dishes like Banh Mi and rice noodle salads. I’m also known to just eat this straight out of the jar.
 A typical quick dinner, with pickled veggies playing an important supporting role!
I feel so lucky to have grown up around the Twin Cities where I’ve been able to savor all the flavors of the metro area. Growing up more on the east side of the metro, on the outskirts of St. Paul, I always had ample Vietnamese options. My dad used to work at the state capitol, and I would beg him to bring me to lunch at The Lagoon, an old school Vietnamese restaurant that used to be tucked in right there on University Avenue.
Hence, my days of slurping pho, nibbling spring rolls with fish sauce and eating all variety of bun (rice noodles) started early – and never really stopped.
Pickled Daikon + Carrots Unite!I love making this as a way to pack a few more fresh and crunchy veggies into meals, especially late in the fall when I have so many daikon and carrots coming out of my garden!

I used to make this with rice wine vinegar and enjoy it as a quick pickle. But then I read about fermenting foods even if the brine includes some vinegar. The main idea is that vinegar usually slows (or potentially stops) the fermentation process. Salt also slows the process.
So, this recipe uses salt to wilt the veggies, and then is rinsed off. Then we add a mild vinegar and sugar brine and let it ferment for a few days at room temperature. You can absolutely make this without fermenting, as a quick pickle- and the cooler the ambient temperature the less/slower foods ferment in general anyways.
After looking up traditional Vietnamese recipes and playing with fermenting the veggies even though they had vinegar, plus adding in some ginger… I’ve come to a happy place. A very happy + crunchy place indeed.
I love playing with my food, and making items and recipes my own… I hope this recipe makes you feel comfortable playing in your kitchen too. Know that this recipe is a place to jump off from or follow exactly. I’m happy as long as you’re trying new veggies!
 Ingredients
½ lb Daikon
½ lb Carrot
1” ginger knob (optional)
1 TBSP Salt
Vinegar Brine
½ C water
4 TBSP Sugar
4 TBSP Vinegar (white distilled) or Rice Wine
InstructionsPeel (or just scrub really well) daikon and carrots. Either Julienne them if you have mad knife skills, or use a mandolin on a medium size shred. Peel ginger and leave whole or slice in two- the flavor will infuse and be easier to remove the larger it is.
Sprinkle with salt, massage in and let sit for around 10-15 minutes.
Combine brine ingredients, bring to a simmer for a minute to make sure all the sugar is dissolved.
Rinse the now wilted veggies gently and squeeze off excess liquid. I do a two-hand squish here. But don’t go overboard, it needs to retain a little salt.
Then pack a jar quart jar with the shredded veggies, and pour brine over, making sure to fully submerge veggies. Use a pickle pebble or weight if needed.
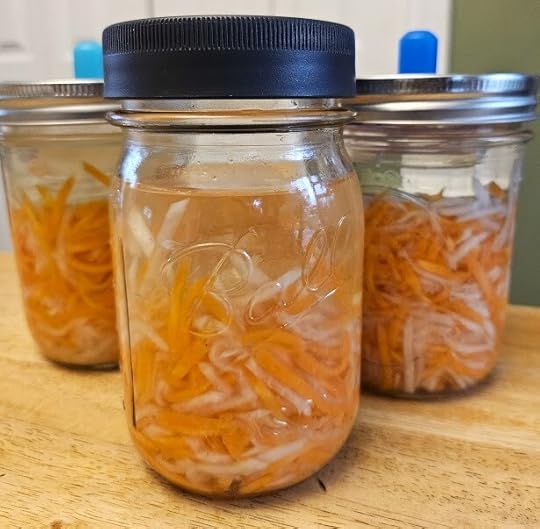
Ferment for 5-7 days depending on temperature and your taste preferences. You’ll be able to taste a different kind of tang to the veggies once they start to ferment. You may also find some white bubbles forming. This is called kahm yeast and is to be expected, scrape off the top and carry on.
Boom. You have your pickled Daikon + Carrot.
Store in refrigerator up to 1 month. Veggies will continue to soften so you can make in small batches as both carrots and daikon can hold their freshness better in the refrigerator than in this relish.
Dig In,
Michelle
The post Pickled Daikon + Carrot Salad appeared first on Forks in the Dirt.
November 2, 2023
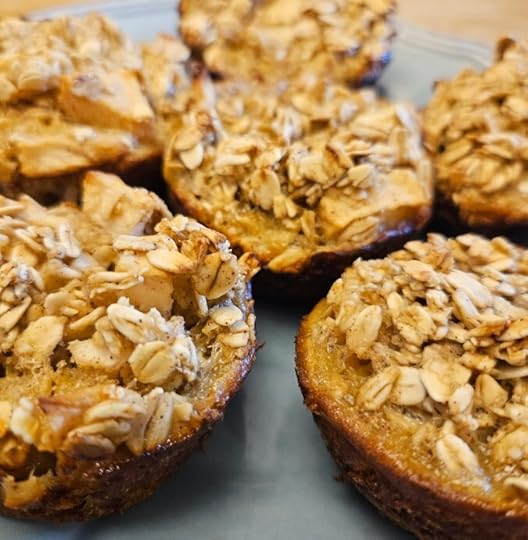
Baked Apple Oatmeal Cake (GF)
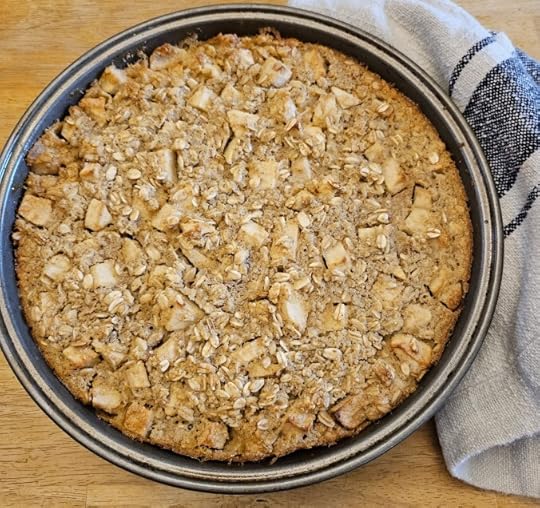
A little crisp on the top layer, dense and perfectly spiced with chunks of warm apple throughout… This baked apple oatmeal recipe is so easy, uses a single bowl and can feel like a hearty breakfast or delicious dessert depending on how you dress it up!
I love the ‘idea’ of baked oatmeal but so many recipes can fall apart and feel like a good attempt gone wrong. This recipe teeters between baked oatmeal and oat cake/muffins, but I’m 100% comfortable with rocking the oat boat like this- because these are absolutely delicious!
Oat Power Oat Comparison- fresh ground flour on the left, and whole on the right.
 I love making oat flour out of my oats and think this is my second favorite gluten free flour of all time. So, this recipe uses the humble oat in three ways. We use whole rolled oats (not the instant kind please), oat bran and then more of the rolled oats, pulverized to a flour to bring all the health benefits of oats but help it hold this dish together like a flour. Because it only uses oats, it is also naturally gluten free!
I don’t want to call this a health food, because there is maple syrup (or brown sugar) and butter (or coconut oil) in it- but the oat’s naturally high amounts of soluble fiber (specifically called beta glucan) lowers blood glucose and cholesterol levels. The oat bran also provides high levels of antioxidants. Oat groats and steel cut oats both naturally contain oat bran. But oat bran is also sold on its own, usually in the bulk bins from your local coop.
And I’ll give a shout out here to farmers growing grains sustainably and organically. It takes a lot more land to grow marketable amounts of these grains compared to vegetable farming operations. I see you and appreciate you!
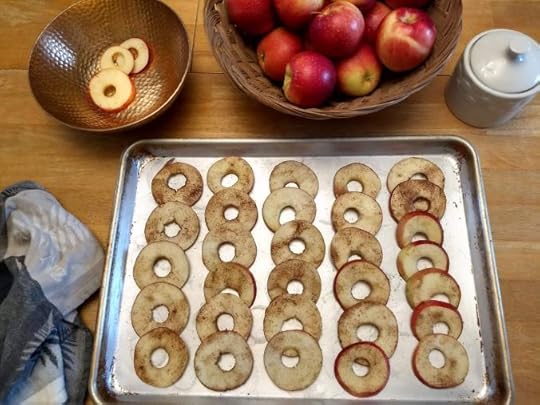
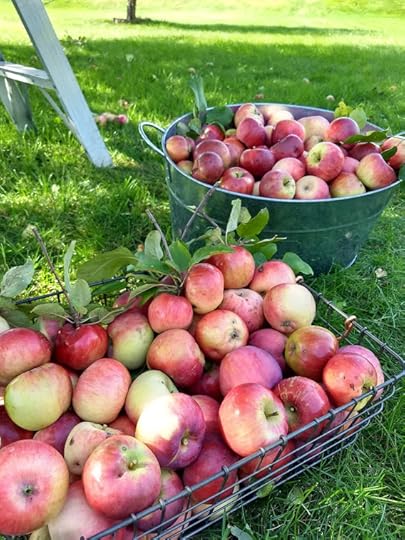 Back to the Apples
It’s the perfect pairing of the nutty oats with a spiced fall apple flavor. I am not an apple snob, so I say use whatever apples you have on hand, but I do prefer a slightly tart apple in these.
Granny Smith is the classic, but I prefer Honeycrisp, Cortland, Macintosh or if you can find them Northern Spy. Whatever apple you use, these will be simply satisfying.
If you’re looking for an Organic Apple Orchard I’ve got you covered there too!
I’ve also baked these in a 9X12” (lots of crispy edges and tops), a 9” round (almost overflows), and muffins (this makes a slightly awkward 18 muffins) – all are delicious. I will suggest you steer clear of paper muffin liners because this is such a wet batter going in that half the muffin will stick to the liner when you’re trying to eat them.
Baked Apple Oatmeal Cake RecipeIngredients
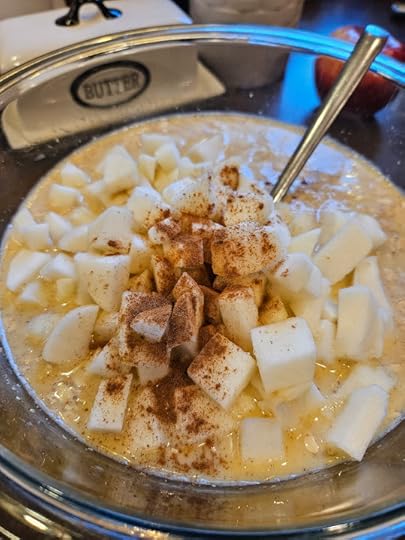 2 ½ c. rolled oats – 1 cup pulverized into flour½ c. oat bran (or another ½ cut rolled oats)1 tsp. baking powder1/2 tsp. ground cinnamon1/2 tsp. kosher salt1/8 tsp. freshly grated nutmeg2 large eggs2 c. milk (2% or whole)1 tsp. pure vanilla extract1/4 c. maple syrup (or brown sugar)2 small apples cored, peeled, and chopped (about 2 c.)4 tbsp. (1/2 stick) butter (or coconut oil) melted, plus more, softened, for pan1/2 c. chopped nuts (pecans, walnuts or hazelnuts) *optional
Preheat oven to 350F.
Start by mixing the dry ingredients in a large bowl.
Measure 2 cups of milk into a 2 cup measurer- then you can crack and beat two eggs (gently) and add the vanilla, pour and then measure the maple syrup all in the same measurer before pouring into the dry ingredients.
Mix and let that mixture soak up the liquids while you peel, core and chop enough apples to make around 2 cups. Chop and add nuts if using. Mix with the other ingredients.
Grease your pan or muffin tins with coconut oil. and fill to just under the rim. These do not expand much.
Bake in 350F oven for allotted time:
9X12 – 20-25 minutes9” Round- 25-30 minutesMuffin tins- 20 minutes Enjoy it Your Way
And then we can dress it up. My one son LOVES whipped cream- and straight cream with a little vanilla extract whipped in is a delightful topper. I also push whole fats with my boys and paired with the oats this is a healthy way for them to eat them.
I prefer whole fat Greek yogurt spiced with vanilla, cinnamon and ginger, maybe cardamom too… the yogurt feels like a breakfast, but the whipped cream brings this fully into the dessert realm in our home.
For More Apple goodness check out my post An Apple A Day that has loads of delicious ways to cook with and preserve the fall apple bounty!
Let me know how you prefer to enjoy these healthful, delicious apple + oat treats.
Dig in,
Michelle
The post Baked Apple Oatmeal Cake (GF) appeared first on Forks in the Dirt.
October 3, 2023
Dream of Wild Health Indigenous Farm
 Dream of Wild Health Logo
Seeds and centuries of gardening knowledge feed a community at Dream of Wild Health farm. ��
Inspired by the people it serves and centuries of gardening knowledge, Dream of Wild Health embodies working with nature. One of the oldest, continually operating Native American nonprofits in the Twin Cities, Dream of Wild Health���s intertribal working and teaching farm brings together the best of seed saving, Earth-focused farming practices and youth development. In short, this farm is flourishing.
���We are working to repair the health of our relatives through food,��� says Neely Snyder,��St. Croix Ojibwe tribal member and executive director of Dream of Wild Health. ���We believe food is medicine. This starts with our young ones, so they understand that nutrition is vital to our overall health.
���Our families wanted to reclaim their traditional relationship with the Earth, which is how the organization began,��� Snyder says. ���We are working to restore the health and well-being of our community through increased access to the foods that we grow.���
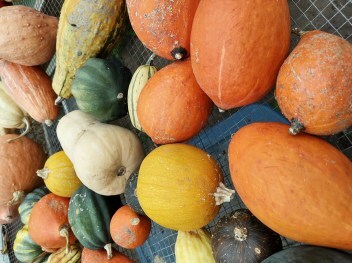
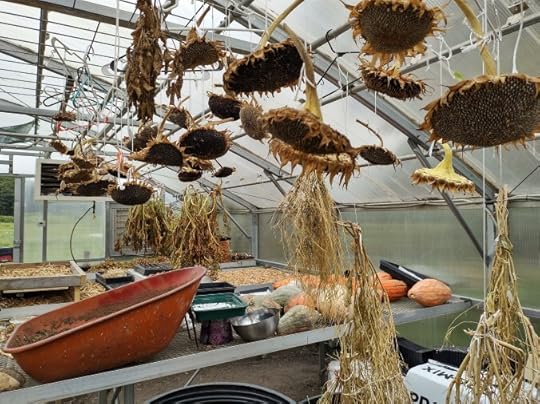 Sunflower heads, bean pods, seeds and gourds drying and curing in the main greenhouse.Farm of the Future, Because of the Past
Together they���re living out this mission on their farm in Hugo, just north of the Twin Cities. The farm welcomes native youth and volunteers of all backgrounds to dig into the process of growing food with nature. Visitors are reminded that we are all part of nature, not separate from it; that we eat because of the gifts of the earth.
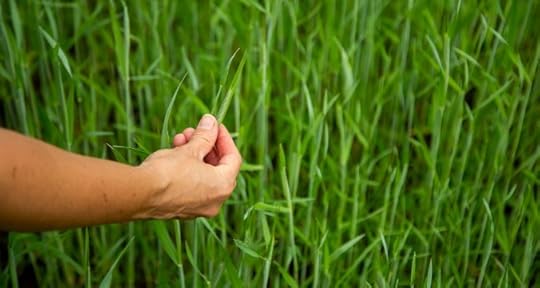
As gardeners, we recognize nature for the teacher it is. That practice of paying attention is at the heart of how the farm operates. Jessika Greendeer, a Ho-Chunk Nation tribal member and a Deer Clan member, has been their seed keeper and farm manager for three seasons. Greendeer instills the practice of treating seeds as relatives while listening to the land for where and what to plant. This rich knowledge base also explains why many gardeners are paying closer attention to Indigenous farming and gardening practices.
Depending on when you visit the farm, you could see swaths of pollinator habitat (so many sunflowers!) in bloom, hear the insects at work, smell the lingering smoke of the morning prayer fire or feel ice-cold water up to your elbows as you help wash freshly harvested vegetables. This is like other small-scale farms���with a few distinct differences.
DWH is a nonprofit focused on teaching the next generation to respect the land and farm it well. Currently, it teaches these values through youth programs like Garden Warriors, Cora���s Kids, Youth Leaders and an on-farm internship.
 Dream Beginnings
The organization began in 1986 as an Indigenous outreach program called Peta Wakan Tipi. The focus on foods and medicines emerged in 1998 in response to resident requests. A gift of an Indigenous seed keeper���s lifelong seed collection in 2000 created a tangible beginning point for the farming operation. DWH purchased its first 10 acres of farmland in 2004. The organization has farmed the land ever since, adding crops and volunteers along the way.
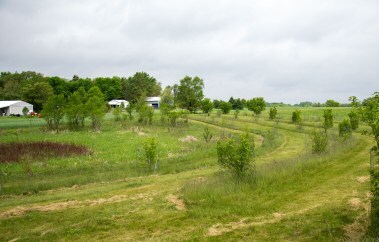
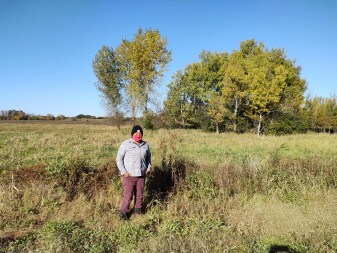 Jessika Greendeer standing on some of their newer farmland.
In 2020, DWH added 20 acres just down the road from the existing farm, which provides space to grow more food, while apprenticing Indigenous farmers on-site. Plans for the newly acquired land include an orchard, a processing and packing building plus a space for the community to gather.
Beyond OrganicThe greenhouse is where the season begins and where the harvests dry or cure. Fields nearest to the greenhouse are rotationally planted in market crops like Indigenous varieties of corn, squash, herbs and greens. A recently added moveable high tunnel extends the harvests. DWH grows with ���regenerative farming practices��� that often go beyond organic. These practices include leaving the land fallow in between cropping and growing cover crops to restore nutrients and balance to the soil. Another notable practice is having crews of volunteer gleaners harvest the last of crops and fruits, keeping the total farm waste down to only 20 pounds. Astonishing, given that the average American wastes over 200 pounds of food per year.
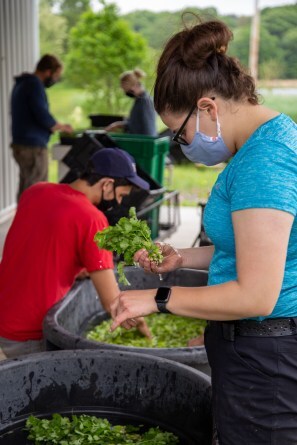
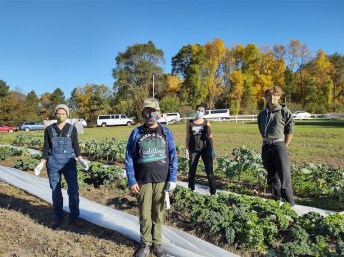 These folks are gleaners, a group of volunteers that come and harvest food that would otherwise go to waste.
Integral to the farm���s operations are the swaths of pollinator plantings. You���ll also find medicinal herbs and dozens of berry bushes, plus fruit and nut trees interplanted amid the fields as a way to mitigate disease and increase pollination. With Greendeer���s leadership, the farmers have worked to regenerate not only the seed stock but the soils they grow in as well. She urges gardeners to think before they dig, saying, ���Let your intuition guide you, and consider what your methods do to the Earth that provides for you.���
 Examples of Glass Gem Corn in all it multi-colored beauty.Saving Seeds and Knowledge
Seeds are seen as relatives to Indigenous growers, not commodities. But seeds were separated from their Native American families. Indigenous seed keepers, like Greendeer, have emerged over the last decade to find and regrow those ancestral seeds. Getting those seeds back into the hands of their original families is a process known as ���Seed Rematriation.��� She recommends that those interested in purchasing and growing Indigenous seeds buy from Seed Savers Exchange in Iowa.
For those ready to start saving their own seeds, Greendeer suggests starting with beans. ���They���re one of the easiest and most rewarding seeds to save,��� she says. To save bean seeds, wait until the pod dries in fall and harvest. There is a less than 1 percent chance that the seed will be cross-pollinated. This happens only when a native bee chews through a bean flower to access pollen. ���Seeds tend to stay true to type,��� she says, adding that after seven years of saving and regrowing a type of seed, the seed is considered your own variety. You could even rename it if you chose to.
For more information, look into my article on Seed Saving for the Home Gardener
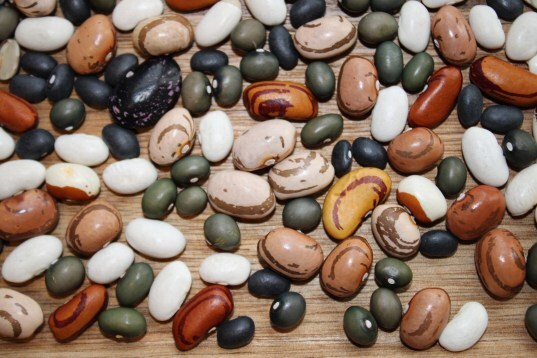 A variety of the author’s bean seed collection.Sharing Local Flavor
As vegetable gardeners know, growing food is one thing, making it into dishes people love is another. Part of the mission of DWH is to bring Indigenous foods to their communities and the Twin Cities at large, and DWH has been part of a surge in interest in Indigenous foods and restaurants, supplying produce and working with local chefs. ���Our vision for a healthier and stronger community means getting Indigenous foods into the mouths of our people,��� says Snyder.
In addition to selling produce at the Midtown Farmers��� Market and the Four Sisters Farmers��� Market, DWH offers a food share program similar to community-supported agriculture shares. Sean Sherman, chef, DWH board member and author of The Sioux Chef’s Indigenous Kitchen purchases produce from Dream of Wild Health for use in his Minnepolis-based, James Beard Award Winning restaurant, Owamni.
Dream of Wild Health also offers volunteer and educational opportunities. Attending talks, classes and volunteer days at the farm has made me a better gardener. It is inspiring to see how food can be grown on a large scale without the use of chemicals. The relationships between the soil and the endemic plants and animals remain at the core of the farm���s operations as it continues to grow. We can all benefit from cultivating a deeper respect for the soil and remembering that we are gardening as part of nature, not separate from it.
ResourcesBuffalo Bird Woman���s Garden (Minnesota Historical Society Press, 1987) by Gilbert L. Wilson is a compilation of Hidatsa gardening techniques.
Braiding Sweetgrass (Milkweed Editions, 2013) by Robin Wall Kimmerer examines modern sustainability efforts through a traditional Indigenous lens. Kimmerer dives into how today���s botany is braided together with traditional teachings.
Get Involved!
 The Farm’s plantings of Indigenous fruit trees and shrubs.
Visit dreamofwildhealth.org for more information on ways to increase your native plant and medicinal herb knowledge. You can also volunteer for Farm Fridays, a chance to work on the farm.
Dig Into Indigenous Foods,
Michelle
Copyright 2021, Michelle Bruhn. Reprinted courtesy of Northern Gardener magazine, 1935 West County Rd. B2, Suite 125, Roseville, MN 55113.
The post Dream of Wild Health Indigenous Farm appeared first on Forks in the Dirt.
September 28, 2023
Season Extension: Garden + Harvest into Winter
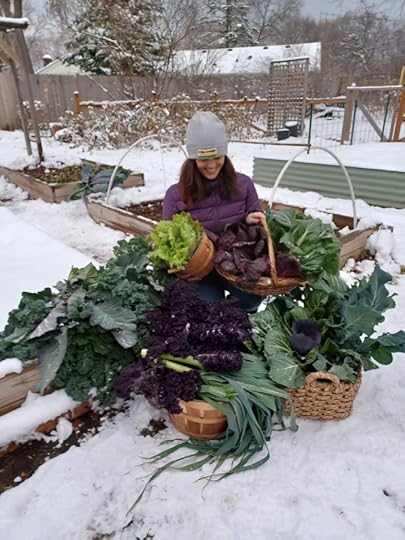 One last harvest deep into winter from all my veggies grown under cover
Fall temps can quite literally cool our northern garden jets once September hits its stride and apple season arrives. But for those of us that enjoy those frost sweetened crops and don’t mind gardening into the cool of autumn, Season Extension opens another mini-season of gardening and harvesting!
For those just getting started on season extension, you may be wondering why we bother with this extra work?
For me the reason is that by keeping plants alive in the ground, it allows them to hold onto their nutrients, compared to if we harvested at the first sign of frost. Food loses around 30% of its nutrients within three days of harvest.
Practicing season extension can add weeks or even months of harvesting FRESH FOOD from your garden. And isn’t harvesting healthy food one of our main goals?
*This post includes some links to products I have tested, and as an Amazon Associate I earn from qualifying purchases.*
Season Extension Factors[image error]You can remove the plastic completely for easy harvesting, especially during the warmest part of the day.Successfully extending the harvesting season depends on a few individual factors. Each one affecting the other; like the plant variety, weather, your growing zone, microclimates within your garden and if deciduous trees drop leaves and add a little more sunlight to an area that is shady during the summer months. But it all starts with the right plants!
Knowing which plants do well in cool weather is key to success. We’ve got a list of the 21 most common garden plants (everything from Arugula to Zucchini) and their germination temps and their low temperature threshold listed on page 46 of our book, Small-Scale Homesteading. You can also find most of this information online at whichever seed company you purchased your seeds from as well. Johnny’s Seeds and High Mowing are especially good at adding this info online. It can be surprising how much low temp threshold variation there can be between what we all typically think of as cool weather crops. So do your research and you’ll be ahead of the game!
Growing Under Coverage[image error]The next key to success is adding some physical cover over the plants. There are many ways to add a layer of protection over your plants, from simply setting a plastic bin over a few plants, or quick to set up and moveable low tunnels, to permanent cold frame structures. Even adding a layer of dry, shredded leaves will help protect many root crops for a few more weeks.
We pop up these kinds of covers for two different reasons.
To protect frost sensitive plantsTo hold cold-hardy plants in the garden longerThe first category of plants we cover up tend to be lettuce and other plants like broccoli and cauliflower that can typically handle down to 28F without damage. So, if we know a frost is coming, we’ll get the cover structure up *at least* a day or two before the temps dip. This allows the soil and air temps to gain a few degrees before they get to the critical low temperature.
Managing the temperatures inside low tunnels and cold frames is a bit of an art. The air temps under coverage will vary greatly depending on how sunny the days are. Even with air temps in the 20F’s outside, we’ve had air temps inside low tunnels above 70F (this happens both in the spring and the fall).
 Another way to add a little heat to low tunnels (especially on cloudy or very cold days) is to add warm water to milk jugs or buckets and add them under the plastic.Temperature Fluctuations
The thing to watch in adding a low tunnel to plants in the fall is that the sun still drastically warms the air. Sudden changes can cause plants stress because they have to quickly change up their internal metabolic processes. Even experiencing this one time can lead to a weakening of the plant’s overall vigor. This in turn makes it more susceptible to diseases and pests. If we’re using this practice at the end of the season for an annual plant, this weakening isn’t crucial for longevity. It is good to know both for spring low tunnel use – and because drastic air temperature fluctuations will affect the quality of produce you harvest.
 Nothing beats harvesting fresh food after other ground is frozen!
Depending on when the sun hits the low tunnel (or cold frame) temps can easily rise 10F every half an hour. And this is where plants can suffer from temperature shock.
In a typical Minnesota fall, temps can be down in the low 40’s overnight and back up to the 70’s in the afternoon- so it doesn’t make sense to say there’s a specific number of degrees plants can handle in a day. The issue is that under a plastic cover the temps increase more rapidly than in a natural setting, so the plants don’t have time to adjust their internal processes.
Opening up the end of the low tunnel in the morning, and closing back down early in the afternoon to keep temperatures as close to 50F is typically my goal.
DIY Low Tunnel[image error]Sliding a piece of 1/2″ PVC over a 1/4″ piece of rebar to build a low tunnel.Low Tunnels are easy to construct and move around to follow your crop rotations. Start by pounding in 2-foot lengths of rebar at your corners and along the edges every 2’ or so. Then slide some ½” PVC over the rebar. This creates an arch over the bed when you slide the PVC onto the rebar on the other side of the bed. Then add a stick of PVC the length of the bed. At the top of and perpendicular to the arches, to add strength to the structure. You can easily secure with zip ties.
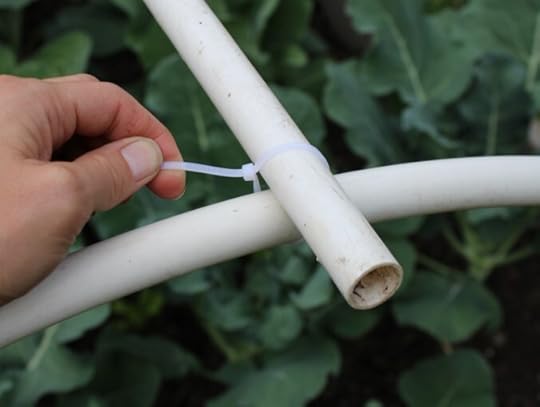 Using a zip tie to secure the cross piece and arch of the low tunnel structure.
Cover in plastic between 2-6 millimeters thick. Cut so you have enough to make good contact with the soil all the way around. You can use a longer piece of rebar or rocks, lumber etc… to weigh down the edges. Secure the plastic to the PVC with clips or clamps. This whole set up can cost as little as $40 and will last for years.
Know that you’ll be peeking in to check on temps often, so adding a soil thermometer and a regular small exterior thermometer where you can easily see it makes that step lots easier.
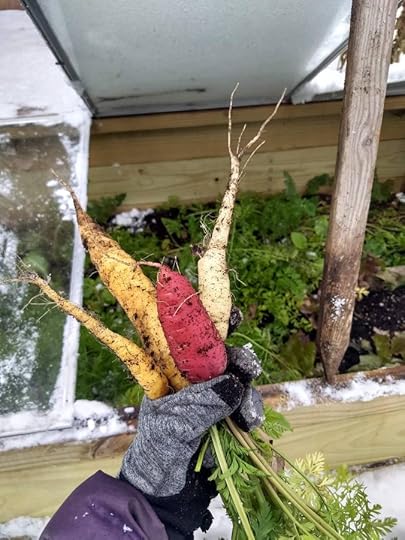
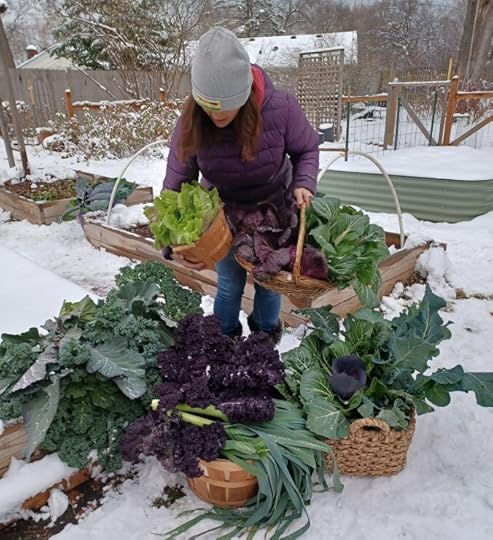 Harvesting the last crops of the season in December. These cold hardy vegetables were grown mostly under cover.
If you’re looking for an easy all in one option? I know garden friends who enjoy this combo of a structure and easily to install 3-Season Plant Protection Tent from Gardener’s Supply. (I am not affiliated with them).
Season Extension has added months of fresh harvests for my family over the years, and I hope it can do the same for you!
What questions do you still have about starting this process?
Let’s Dig In!
Michelle
The post Season Extension: Garden + Harvest into Winter appeared first on Forks in the Dirt.
Forks in the Dirt

- Michelle Bruhn's profile
- 4 followers

