
April Davila's Blog, page 29
November 18, 2019
Revision Mode in Scrivener

This week, in the #52WeeksOfScrivener series, we’re talking about Revision Mode: how to use it, what it’s good for, and how it differs from Word’s Track Changes.
To go into Revision Mode go to Format -> Revision Mode, and chose which revision you’re working on. We’ll start with First Revision.

After choosing First Revision, you’ll get a pop-up window explaining that you’re entering Revision Mode. Go ahead and click Ok.
With a plea for Melville’s forgiveness, here’s what chapter one of Moby Dick looks like with some First Revision edits made (you can see they appear in red):

From what I understand, this is SUPER useful if you’re co-writing something with a partner. Because they can easily see what you’ve changed. Then they can go into Second Revision mode and all the changes THEY make will appear in blue. And so you can pass it back and forth easily.
A Few Things To Note
You can export the whole thing to Word with the colors intact by going to File -> Compile. Click form the drop down menu at the top to export to Word. Click the settings wheel. And then make sure that the check box for “remove all text color” is NOT clicked.

It is worth noting that Revision Mode is different from Track Changes in Word in one significant way: you don’t get the little balloon in the sidebar alerting you to where changes have been made, allowing you to accept or reject the change. If you use Word, this will look familiar:

That said, something you can do in Scrivener, that you can’t do in Word, is to save versions as you go.
Scrivener Snapshots
With Scrivener Snapshots, you can save a copy of your draft at any point, label it, and keep it safe for future reference (or to revert back to). Click here to read a detailed post on Snapshots.
Let’s say I’ve done two rounds of edits, the first in red, second in blue, and I have saved Snapshots before starting in on the second round. I can click on the saved version called First Revision in the snapshot menu and the click Compare.

In the Inspector Window, I will get something that looks a lot like track changes does in Word, so that I can review where changes were made:
Wrapping Up Revisions
When you’re all done revising, save a Sanpshot of your work and label it in whatever way will help you remember where you are in your process.
Then go to Format -> Revision Mode -> None.
Then Select All and click to change your font color to black:
You could also export it and check the box in the export settings to remove text color (see above).
Or, you know, just print it on a black and white printer.
Next Week
Next week we’ll talk a little bit about Scrivener’s Quick Reference Windows. Stay tuned, follow on Twitter with #52WeeksOfScrivener, or sign up for my newsletter to get a weekly digest of all my posts.


November 15, 2019
Art Cars
 This post is part of an extended series I’m writing about California.
 You can find out more on my Why California page.
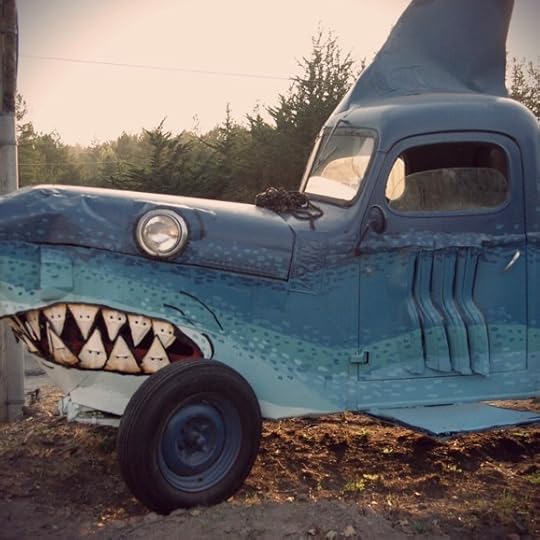
Ranging from the subtle to the gaudy, art cars seem to have evolved out of the hippie era of the 1960’s when John Lennon drove a paisley Rolls Royce and the Merry Pranksters painted a school bus in day glo colors.
 This post is part of an extended series I’m writing about California.
 You can find out more on my Why California page.
These days, some art cars sport unique paint jobs, while others go much further, pushing the boundaries of what can be considered an automobile by altering the body through welding or by soldering and gluing items to the exterior of the cars.
Usually each car has a theme, and often the interior is altered appropriately to match. Sometimes the owner will even dress to match for special occasions and car shows.
This post is part of an extended series I’m writing about California. You can find out more on my Why California page.
The “cartists” who create and care for these giant rolling art projects convene in the Bay Area every September for informal caravan parades, and story swapping. Generally the cars are admired while parked as almost all of the modifications add significant weight to the cars and they often get terrible gas mileage.
November 13, 2019
A Self-Publishing Success Story
I haven’t talked a lot about self-publishing here on my blog, mostly because there are a lot of excellent websites out there with awesome resources for indie- and self-publishing (check out BookWorks and the Jane Friedman Blog for a start) and I wasn’t sure what I could add to the conversation.
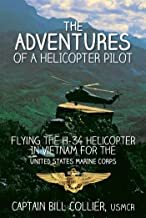
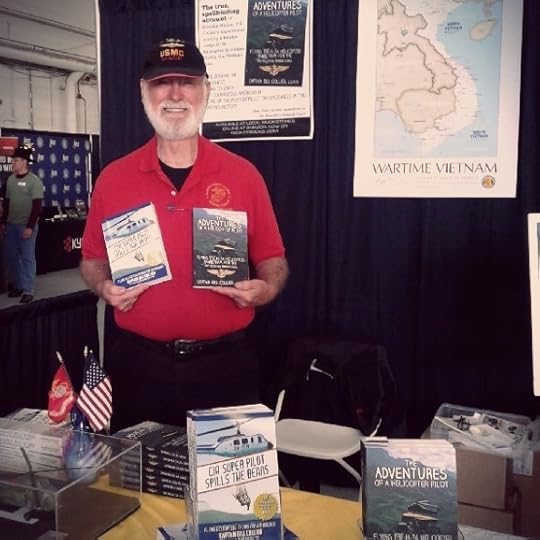
But my dad was visiting recently and we got to talking about his success as a self-published author. He has two books out: The Adventures of a Helicopter Pilot and CIA Super Pilot Spills the Beans. Both memoirs. Both self-published.
His USMC book has been inducted into the library at the National Museum of Naval Aviation at Pensacola, Florida, and his Air America book was recently added to the shelves of the “Company Store” at CIA HQ in Langley, Virgina (and if you’re thinking about a Christmas gift for the pilot or Marine in your life… just saying… you should maybe click on one of those links above).
It occurred to me that his story is an excellent example of self-publishing done well. He’s sold thousands of books, more than most traditionally published books I’d wager, and had a lot of fun doing it. Here’s what I’ve learned by watching him.
Know Your Audience
From what I’ve observed, self-publishing works best when you have a very specific audience that you can target. I guess this could be called a platform, but when I think of “platform” I think social media, or a PhD or something.
For my dad, it was all about tapping the military flying community. He goes to all the reunions (which, frankly, he would go to anyway), and the air shows, and the flying museums. When he’s on a trip, he looks up all the local military themed spots, including bases, bookstores, veteran associations, etc. Sometimes he calls ahead. Sometimes he just stops by. But he always has books at the ready.
Invest In Your Book
My dad is a very good speller and excellent grammarian, but even he hired a professional editor to look over his book before he printed out the final version.
He also invested in professional cover design. It shows. I can tell you as a consumer, that when I see a shoddy cover, I assume that the writer gave an equal amount of consideration to their prose (that is to say – very little) and I’m less likely to buy that writer’s book. Unfair? Probably. But true.
Make it Easy
When my dad’s selling hard copies face-to-face, he doesn’t get fussy about it. As each customer steps up he gives them a book, they give him a twenty. Easy peasy. He works out the taxes and such on his own time. This way lines move quickly and no one gets tired of waiting around for an online credit card charge to go through.
Bookmarks
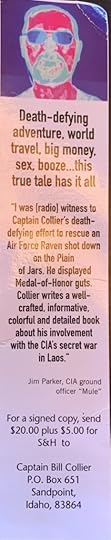
My dad had bookmarks made up as promotional material. The front is a slender version of the cover art of his book. The back has a short description; a blurb from a fellow, former member of the CIA; and then (and this is the brilliant part) he tells people exactly how to order one.
He doesn’t bother giving a QRC to his Amazon page. He knows that any tech-savvy reader will find him there. But he also knows that a large percentage of his target audience isn’t online.
Knowing that vets are a huge part of his target audience, and that they tend to be older and more comfortable with things like paper, he keeps it super simple.
He carries these around with him everywhere he goes. Whenever he sees someone wearing a veterans cap or any kind of military gear, he hands them one and introduces himself.
He also sticks one under the windshield wiper of any car or van with a semper fi sticker on the back.
You’d be surprised how many sales this has gotten him.
Other Writing
Again, this could be considered part of his “platform,” but it’s all stuff he would be doing anyway. It’s just who he is.
He’s active with his local writer’s group.His has written about him.He writes pieces for veteran publications and websites.He even started a blog in 2011 to raise money so that he could buy the hulking frame of an old H34 helicopter and fix it up. It took years, and while he blogged about that, he also dropped in excerpts from his books, and other short stories he’s written.
If you’re ever in Sandpoint, Idaho and want to see the refurbished H34, just ask around for “the helicopter guy.” The whole town knows him. Here’s a video of him talking about his project:
The Long Haul
When you’re passionate about something, that shines through and compels people to want to hear your story. But it takes time and dedication. I guess the main take away here is that a successful self-publishing campaign is more than just a little side project.
In fact, one of the biggest challenges my dad faces is how to find time to work on book number three (he’s working on a memoir about his time flying helicopters in Alaska), while he’s so busy promoting his first two books.
But it’ll get done when it gets done. He’s having far too much fun to worry about it.
November 11, 2019
Composition Mode in Scrivener

This week, in the #52WeeksOfScrivener series, we’re talking about Composition Mode, which can be super handy for removing distractions. We touched on it a bit last week in my post about Scrivener and NaNoWriMo, but I want to dive a little deeper today and explore what we can and cannot do in this mode.
Open Composition Mode
It’s super easy. Just click the button at the top of your screen next to the Inspector window icon.
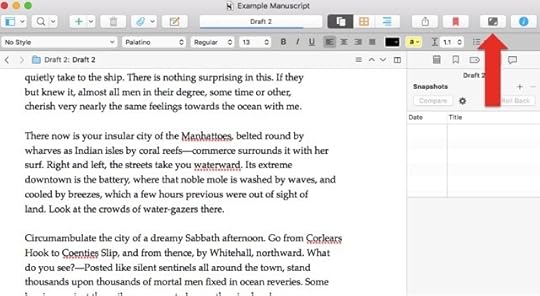
The screen will go black for a second and then give you a full-screen version of what you’re working on. Something like this:

Composition Mode is excellent for writing without distraction, especially if you’re trying to hit a certain word count (cough – NaNoWriMo – cough).
You won’t even see that little menu across the bottom unless you move your mouse down there and hover for a second. And since the details on this image are pretty small, let me walk you through what’s there.
Left to Right, you’ve got:
Text Scale is pretty self-explanatory. You can make your text bigger or smaller. Page Position is useful when you want to leave a reference panel open (more on that in a second). You can move the “page” of your writing left right or center.Paper Width is also self-explanatory. You can make the page appear wider or thinner. I recommend not messing around with Key Words while you’re in inspector mode. Key Words are more for conceptual planning and outlining. (If you DO use Key Words in Composition mode drop me a note in the comments and tell how – I’ve never understood why Scrivener included this in Composition Mode). Inspector. This is actually really handy. If you click on this, you open your Inspector Window without actually leaving Composition Mode. It will pop up in a reference panel (a little window that floats over your writing window), so you can check your notes on that chapter. If you want to leave your notes open, you can shift your page position (see above) so that the reference window doesn’t cover your actual writing. Go To -> will let you jump to a different section of your WIP.Word Count is your word count. Duh.And the very last icon on the right is the most important. It controls how much you can see through the background of your Composition Mode window. Slide that baby all the way to the right. Otherwise, why bother with Composition Mode at all?
View Research in Composition Mode
If you have notes in your research file that you’d like to view while working in Composition Mode, do this.
Control click on the item in your research folderGo to Open -> as Quick Reference
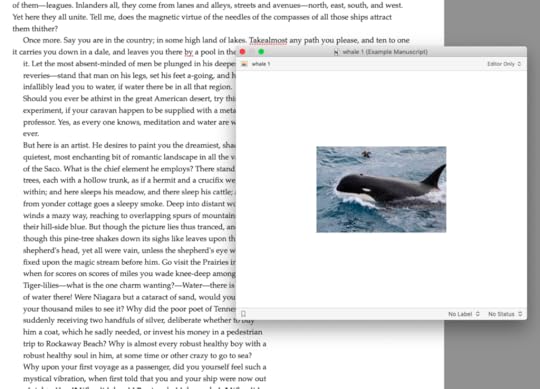
The research item (in this case an image of a whale) will open in a floating reference window. Then click back into the chapter you’re working on and go back into Composition Mode and the reference window will stay floating on top. Like so:
Composition Mode Settings
You can play around with the settings for Composition Mode by going to Preferences -> Behaviors -> Composition Mode. But honestly, there’s not much to fiddle with, as the whole idea is keep things simple and block out distractions.
Next Week
I’m still thinking about what to cover next week. Maybe more on Quick Reference Windows. Or maybe Track Changes… Stay tuned, follow on Twitter with #52WeeksOfScrivener, or sign up for my newsletter to get a weekly digest of all my posts.
November 8, 2019
Eucalyptus
 This post is part of an extended series I’m writing about California.
 You can find out more on my Why California page.
Eucalyptus trees were imported to California in the 1850s after Australian gold miners sung their praises as a fast growing, super strong building material.
Unfortunately, while the trees do grow quickly, the wood is not viable commercially until the trees mature (the wood brought by the Australians was cut from virgin forests, and presumably was much older), and unless treated correctly after harvesting, it rapidly grows brittle and cracks easily.
This lead to many a disappointed entrepreneur, but the eucalyptus did thrive in one capacity in Northern California. When planted in long rows, it serves as an excellent windbreak for crops, especially grape vines. Planted four feet apart in staggered rows, their flexible trunks direct wind up, and in some areas their extensive use has changed local climates, turning sandy stretches into viable agricultural fields. A strategically planted eucalyptus windbreak can reduce a home’s energy needs by as much as 30%.
Some residents view the proliferation of eucalyptus as a blight, and a reminder of the many get-rich-quick plots of California’s past, but there’s no denying that their leathery trunks, long silver-grey leaves, and slightly medicinal scent have become hallmarks of the region.
November 6, 2019
Your Amazon QID#

This post was inspired (and informed) by Brian Schwartz at ReviewerPerks.com. He noticed that the link I was sending out to friends and family, encouraging them to pre-order my book, included a QID#, and that any reviews that were posted with this QID# might get flagged and taken down by the Amazon bots.
To which I said: “huh?” What’s a QID#?
The QID# Explained
The QID#, I know now, is a snippet of code included in any link you copy from Amazon. It’s the series of numbers that comes right after “qid=” and apparently it tracks where, when and from whom (meaning whose Amazon account) the link was copied. Here’s what a link to my book looks like (as copied from within my Amazon account).
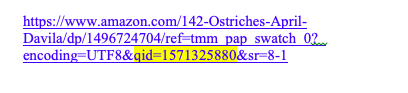
I highlighted the QID# there, so you can see it.
Why It Matters
What Brian pointed out to me is that Amazon can use this code to draw connections between book reviewers and the authors they are reviewing.
If your reviewer has ever logged in from the same IP address as you, or if you’ve ever bought your reviewer a gift, Amazon might assume your reviewer is a close acquaintance and pull down the review. The assumption here is the review is too biased if it comes from someone close to you.
This can be really unfortunate for those of us collecting early reviews, as friends and family are often included in our first rounds of readers.
What To Do About It
The solution is to send a clean, anonymous, url code. One without the QID# in it. The basic format includes your ISBN and looks like this:
https://www.amazon.com/dp/YOUR.ISBN.HERE
So for my book, the anonymous link looks like this:
https://www.amazon.com/dp/1496724704
You can click on that link and pre-order my book without any fear of Amazon pulling your review. (That was a not-too-subtle hint, by the way, the book is available for pre-order and you should totally click that link.)
ISBN vs ASIN
Your ISBN (International Standard Book Number) is the unique number assigned to your book so that sales can be tracked. If you intend to sell any hard copy version of you book, you will need an ISBN. Your publisher will take care of getting this number. If you’re self-publishing, check out self-publishingschool.com to learn more than you ever wanted to know about ISBNs and how to get one.
E-books sold on Amazon will be given an ASBN (Amazon Standard Book Number). Here’s what the product details for the Kindle version of my book looks like:
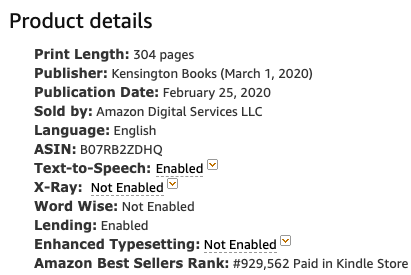
Notice that instead of an ISBN, there is an ASIN. This number can be used in place of the ISBN when you’re sending out an anonymous link to family and friends. Here’s what the link to the e-book version of my novel looks like:
https://www.amazon.com/dp/B07RB2ZDHQ
If you click on that, you’ll get taken to the sales page for the Kindle version of my book, but Amazon won’t know I sent you.
Early Reviews
So there you have it. Go ahead and ask your friends and family for early reviews, but make sure you send them an anonymous link so Amazon doesn’t take down their comments.
November 4, 2019
Four NaNoWriMo Scrivener Tips
This week, in the #52WeeksOfScrivener series, I’m doing something a little different. In honor of NaNoWriMo I thought I’d share four NaNoWriMo Scrivener tips that have been super helpful to me in the past when trying to write 50,000 words in a month. Because this challenge is not for lightweights, and anything that makes it a little easier is worth knowing.
Here they are:
1. Make Notes
When you’re writing for NaNoWriMo, you don’t have time to stop and research, so just make notes to remind yourself to come back.
To do that, quick and easy, first make sure your Notes window is open in your Inspector window (that’s the window that opens to the right of your manuscript). Do that by clicking here:
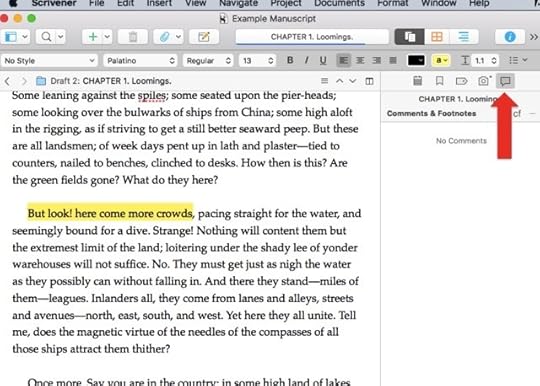
Then highlight a section of your text. Then click on the little note icon just below the chapter name in the Inspector window (see below).
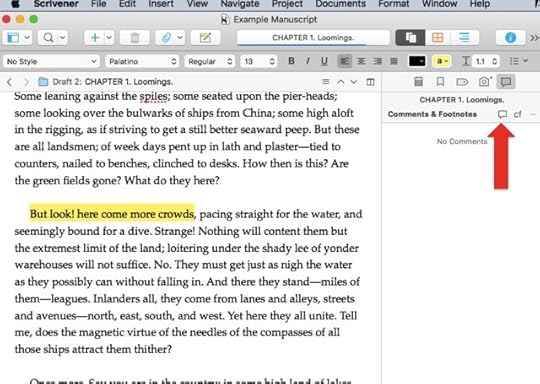
You can also go to the menu at the top and click Insert -> Comment. Or use Shift Command Star as a shortcut. However you do it, you’ll get a little window there where you can type up your note and it will wait there with your text so you can keep working and come back to it later.
2. Split Screen
If you’ve been using Scrivener for any length of time, you probably know this one, but just in case (and because it’s super handy), here’s how you split your screen so you can view things side by side.
Click the same button again to un-split the screen.
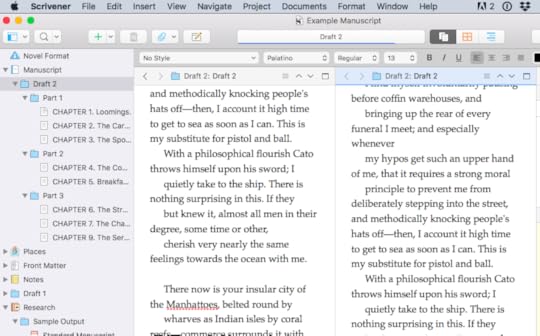
Quick tip: you can change whether the screen splits vertically (like I did here) or horizontally by go to View -> Editor Layout.
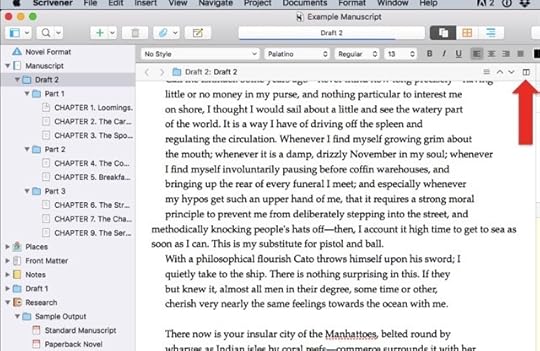
3. Mimimize Distractions
If your eye is easily drawn to things that are open on your desktop (hello, Facebook), try clicking this button right here.
You can adjust the display at the bottom of the screen. When you’re ready to minimize it again, just hit ESC on your keyboard.
And now, dear writers, I’ve saved the best for last…
4. Project Targets
This is one of my favorite features of Scrivener. Because for all the best laid plans, life gets in the way. Or maybe you already know you can’t write every day and are trying to figure out your game plan. By using the Project Targets function you can set Scrivener to tell you how many words you have to write every day, and automatically recalculates if you miss a day.
Step 1: Go to Project -> Show Project Targets

You’ll get a window that looks like this:
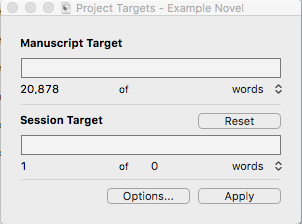
Under the top bar you’ll see the number of words you have written so far. In this example it says 20,878 of (and then a blank) words. Click on that blank space, and when you get a cursor, enter your goal of 50,000.Step
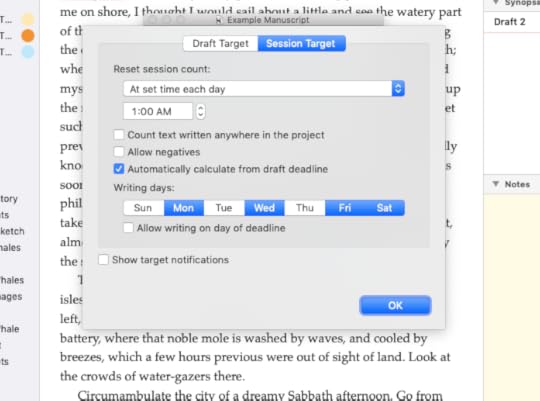
2: Click Options to get this window:

Set your due date at November 30th.
3: Click the button at the top for Sessoin Target. Then click the box for “Automatically calculate from draft deadline” and choose the days you plan to write. In this example, I’m planning to write four days a week. You can choose to allow writing on the day of the deadline or not (with the little check box under the days of the week).
When you click OK, you’ll get the first popup screen again and it will show, under the lower bar (your Session Target) how many words you need to write on each of your writing days to stay on target. If you miss a day, the program automatically recalculates your daily goal for the remaining days.
Play around with it a little. I’m telling you, this is SUPER handy when you’re just working for a word count with a specific deadline.
Good luck to everyone out there taking on this beefy challenge! May the words flow like water in a stream.
Next Week
Next Monday we will return to our regular programming with an in depth look at Composition Mode. Stay tuned, follow on Twitter with #52WeeksOfScrivener, or sign up for my newsletter to get a weekly digest of all my posts.
November 1, 2019
California Wetlands
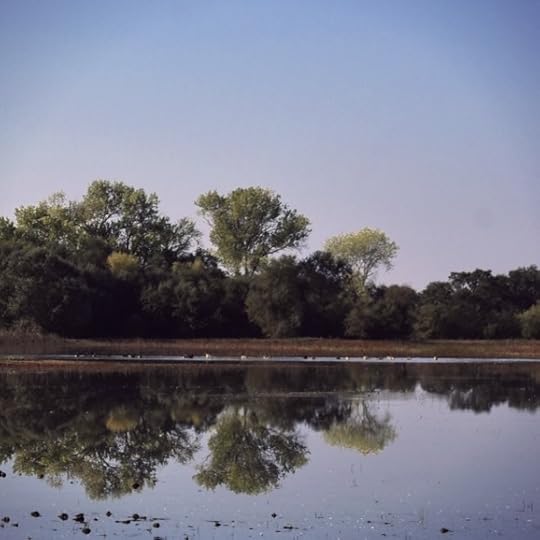
California’s central valley once contained more than four million acres of wetlands, where water from the mountains meandered its way toward the ocean, providing vital habitat for fish, birds and terrestrial animals alike.
Gradually California’s wetlands have been drained for real estate development, flooded for recreational use, and converted to agricultural fields. Today less than five percent of the original wetlands remain. Thankfully, activists have recently sought to return local wetlands to their original state.
Since 2000, hundreds of projects have been initiated. Some have been small, restoring an acre or less, but others have been massive. In 2003 the South Bay Salt Pond Restoration Project began returning over 15,000 acres of commercial salt ponds to their native wetland state. In 2008 levees in Point Reyes were removed and 560 acres of cattle land were once again overtaken by the tides.
In total, the acreage restored is a fraction of what was lost, but when leopard sharks are seen cruising a former cow pasture or a bald eagle dives down to pluck a fat fish from a former dump site, environmentalists are inclined to feel optimistic.
October 30, 2019
To NaNo or Not To NaNo…
For anyone who maybe doesn’t know about NaNoWriMo, it stands for National Novel Writing Month. It happens every November. The challenge is to write 50,000 words in 30 days.
As with anything in this crazy world, it has rabid supporters and adamant detractors. On the one hand, who wouldn’t be proud of completing a challenge like that? On the other hand, what kind of quality can really be expected when quantity is the only benchmark?
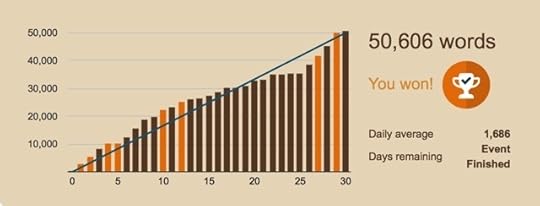
I’ve been a NaNoWriMo voyeur for a long time and in 2016, I participated successfully for the first time (that’s my progress chart in the image above). After much deliberation, I think I’m going to take the plunge again this year. I have an idea cooking for novel #3 and this seems like a good way to get a solid start.
Arguments For NaNoWriMo
Pro: More Words Written
Even if you fail to hit 50,000 words, you will write and odds are, you will write much more than you will if you don’t attempt the challenge. That’s a win.
Pro: Community
It feels like a club. You can go to in-person meet-ups, or you can use the hashtag #NaNoWriMo on Twitter and meet all kinds of people all over the world who are right there with you the whole way.
Pro: Encouragement
In addition to the people (strangers, even) who will cheer you along, you will enter your word count every day and watch the little chart on the NaNoWriMo page grow. It is surprisingly satisfying.
Pro: Quiet Your Inner Critic
You will be writing too fast for your inner critic to get a word in edgewise. If you’re like most writers, you won’t be quitting your day job or passing you kids off for an entire month, so you’ll have to squeeze that writing in and do it fast, which is great for shutting up that little voice of doubt. Stupid voice.
Arguments Against NaNoWriMo
Con: You will not end up with a finished book.
Never mind that 50,000 words is not long enough for a commercial novel, what you have at the end of November will be a draft. Don’t fool yourself, it will need work, a lot of work.
Con: Bad Timing
November can be a tough month to put your writing first, especially for the parents out there. My kids don’t have school the whole week of Thanksgiving (WTF?). Family comes to town. You know how it goes.
Con: What if You’re Mid-Project?
The format of NaNoWriMo doesn’t really lend itself to those of us editing an existing project. As a result, I feel like NaNoWriMo encourages us to keep starting projects without ever getting any of them across the finish line.
Con: It’s hard.
I debated whether this was actually a con. I could also argue it as a pro – since pushing past what’s comfortable is always a good exercise. But ultimately, writing is hard enough. We don’t need additional pressure, self-imposed or not.
So tell me: are you doing NaNoWriMo this year? Have you done it in the past? If you do it every year, do you have a pile of unfinished manuscripts? Drop some knowledge.
October 28, 2019
Scrivener’s Research Folder
Last week in the #52WeeksOfScrivener series we talked about how to embed websites. Today I want to continue by exploring some of the other things we can do in the program’s Research folder.
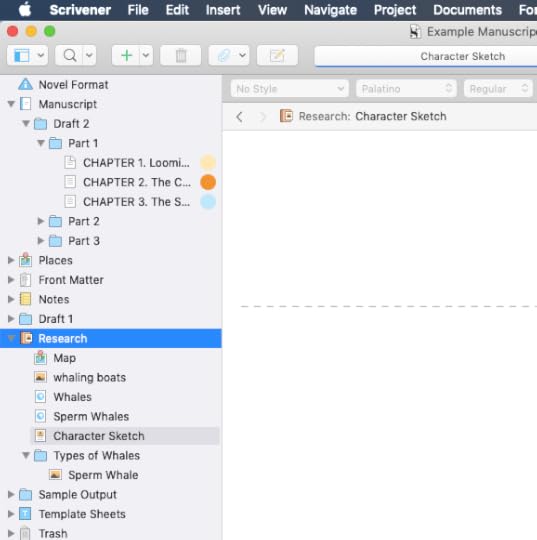
Find Your Research File
Pretty easy, this one. It’s right here, in your binder.
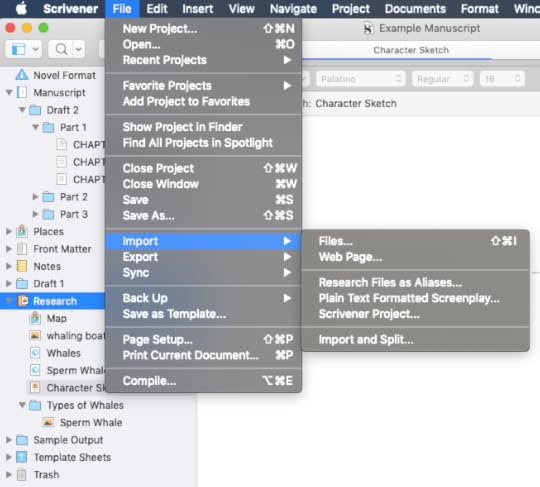
To add things to this file you can go to File -> Import, or just control click the folder itself as a short cut (I’m all for shortcuts).
What Can You Add?
The better question is what can’t you add. I mean, really.
WEBSITES. I wrote a post last week about how to embed a web page into your research folder. A recent OS glitch aside, this is super useful.
IMAGES. You can drag and drop images into your Research folder from your desktop (or any folder on your computer). Or Control Click -> Add -> Existing Files, then find and select an image from your hard drive.
Tip: You can create a text file and drag multiple images into that file so you can scroll through them all easily.
PDFs AND OTHER DOCUMENTS. The same way you added images, you can add pdfs and other documents from your computer.
A Few More Tips
1. You can drop links to your research into the draft of your WIP, or into the Notes section of the Inspector of a given chapter, so that you have the information right at your finger tips. Again, I wrote about that pretty extensively last week, so check out that post for details on how to play around with it.
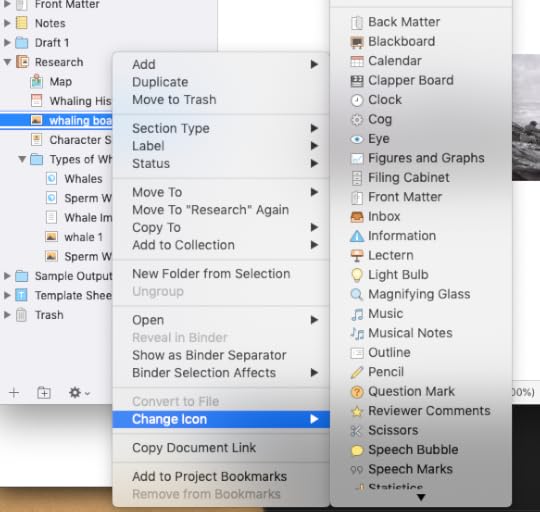
2. You can change the icon that displays beside any bit of research. Just control click the item you want to change, go to Change Icon, and take your pick.
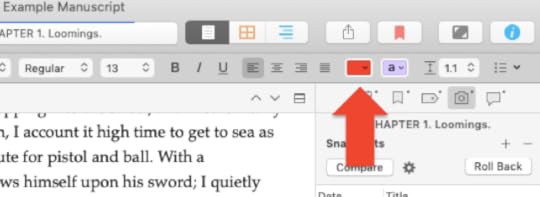
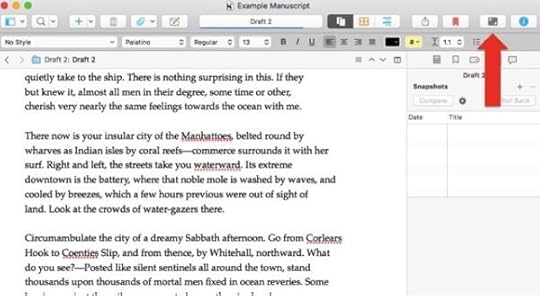
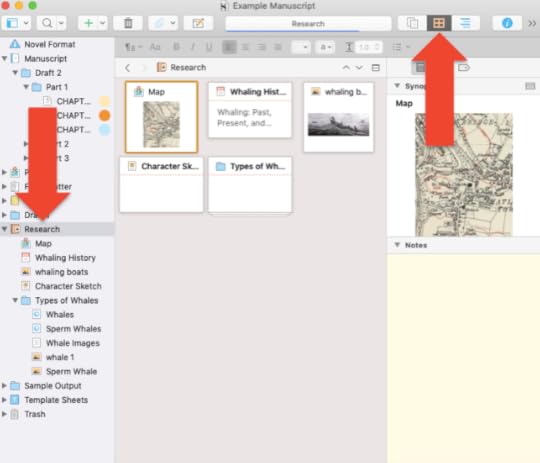
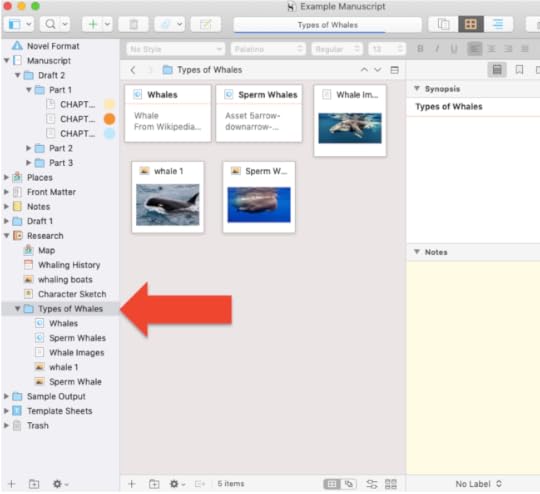
3. If you click on your Research folder and then click the button for the corkbaord view (upward facing red arrow below), you can see all of your items displayed together. Whichever one you click on will display in the window on the right there, in the Inspector Notes section.
4. You can create subfolders inside your Research folder to group your research items by topic, character, chapter or whatever way works best for you. Note that the corkboard view works the same for a subfolder as it does for the main Research folder.
And that’s everything I have to say about storing research in Scrivener. If I missed anything, please feel free to leave a note in the comments below.
Next Week
Next Monday, in honor of NaNoWriMo, I’ll share 4 little tricks that make trying to write 50,000 words in a month just a little bit easier. Stay tuned, follow on Twitter with #52WeeksOfScrivener, or sign up for my newsletter to get a weekly digest of all my posts.


