
Harold Davis's Blog, page 182
May 18, 2014
Overlooking the Dordogne River
I got to talking about photography with the couple who ran the B&B where I was staying in the ancient monastery town of Cadouin, France, and they suggested I check out a spot overlooking the Dordogne River a little way above the old riverside village of Tremolat. There was a little path from the parking area leading to the cliffs overlooking a bend in the river. By the time I got there rain was moving in, and the sky to the southwest was diffuse and soft, while the clouds to the the northeast were dark and ominous over the village of Lumeuil and the confluence of the Dordogne and Vezere Rivers.

Bend in the River – Dordogne in Black & White © Harold Davis
I ignored the oncoming weather, and mounted my camera on the tripod. Looking left, straight ahead, and right and shot bracketed sequences of exposures for later HDR processing. I did my best to take my time and shoot following a proper and patient protocol despite the raindrops falling on my gear.

Bend in the River – Dordogne © Harold Davis
Combining the three images into a panorama meant first combining the exposure sequences, then using Photoshop’s Photomerge capabilities. You’ll find Photomerge in Photoshop on the File > Automate menu. After a bit of experimenting, I found the the Reposition layout setting with the Blend Images Together option checked worked best. There’s always a bit of manual retouching after blending images together using Photomerge, and this set of images was no exception, but generally the Photoshop automation got me about 95% of the way!
The final image is really quite high resolution, about 50 inches wide at 300 ppi without any enlargement (the file size is about 450 megabytes). It’s hard to see in an online version the level of detail this implies in some image areas, but you would see this detail if you were looking at a good print. You can begin to see the resolution in larger versions that will fit on the horizontally-oriented pages of my blog, click here to see a larger size black and white version, or here for the color version.
Speaking of black and white versus color, which version do you prefer?


May 16, 2014
Papaver Somniferum and friends
Returning home from travels abroad in mid-May, one great pleasure was to find poppies still in bloom in my garden. The large one as big as a platter towards the top of the composition is a Papaver somniferum, the notorious opium poppy. Other species shown are Papaver rhoeas (corn poppies), garlanded with campanula. You can also see poppies in the process of popping (on the right, coming out of its pod).

Papaver Somniferum and Friends © Harold Davis
Exposure data: Nikon D800, Zeiss Otus 55mm f/1.4, eight exposures shot on a light box, each exposure at f/11 and ISO 100, shutter speeds ranging from 1/40 of a second to 4 seconds, tripod mounted; exposures combined via layering and hand masking in Photoshop.
Making the Botanical Photo: If you are in the San Francisco area, I am presenting on this subject on Saturday June 7, 2014 at Photo Oakland. This is in conjunction with a “Best of Botanicals” exhibition, with print sales partially benefiting San Francisco Botanical Garden. My presentation at 3 PM is free of charge, but I do expect a crowd, so plan to arrive early. Click here for more info.
Photographing Flowers for Transparency: Due to many requests, I’ve just opened a new session of my weekend Photographing Flowers for Transparency workshop, scheduled for Saturday, October 4 and Sunday, October 5, 2014. The Papaver image that accompanies this post shows an example of utilizing this technique, and is the kind of image that is created in the workshop. This is a fun and popular event. Previous sessions have been attended by photographers from all over the world, and sold out quickly. Click here for more information and registration.

May 15, 2014
Shadow of the Glass
For me, one of the nice things about traveling with my iPhone is that I have a camera always with me—and a post-production digital darkroom always with me too. So I am never bored when by myself waiting for a train or sitting in a restaurant. In the restaurant, I can photograph the place setting, and shadows that are created, then process the photo. With luck, if there is connectivity, I can post the finished image online before my entree arrives!

Shadow of the Glass © Harold Davis
With this image, I was primarily interested in the differing way the shadow from my glass fell on the table cloth as opposed to the way the shadow falls on the wood of the table itself. The bright, curved lines within the shadow are created by bright reflections off the water in the wine glass, but they aren’t quite aligned at the borders of the cloth and wood, due to the differing refractive qualities of the two surfaces.

May 13, 2014
Room in Bourges
The old city of Bourges, France is known for its cathedral. This structure, a World Heritage Site, is probably the largest Gothic cathedral ever built. I think five Notre Dames would fit inside. The vast, soaring interior space is amazing, held in place by tiered flying buttresses—and built to emphasize the status of the church of Bourges as representative of the ancient kingdom of Aquitaine.
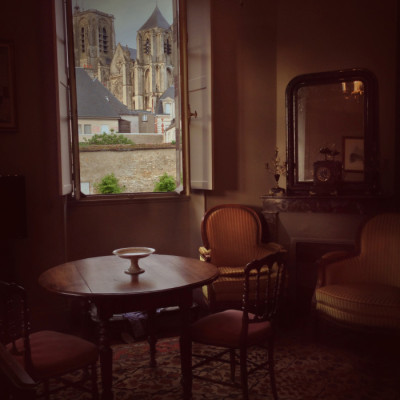
Room in Bourges near the Cathedral © Harold Davis
My first task when I got to Bourges was to find my lodgings, an apartment at the top of the watch tower that guarded one of the palaces in the old town. This was not easy to find in the maze of narrow one-way streets of the old city, but when I did, and I had been handed the key, I was pleased with well furnished chamber and the view of the famous cathedral in the late afternoon light.

May 7, 2014
Impregnable
Today the city of Cahors in the southwest of France is a slightly gritty provincial capital—but back in the middle ages it was fabulously wealthy. Protected on three sides by the river Lot, Cahors was nevertheless sacked, abandoned and rebuilt. But glory was never regained entirely (the Black Death didn’t help matters). You can see the remnants in the palaces and monuments of the old quarter, where today they have a wonderful fresh food market. I got my lunch today in this market. You really can’t beat a fresh loaf of bread, a tranche of locally made pate, strawberries and a tomato!
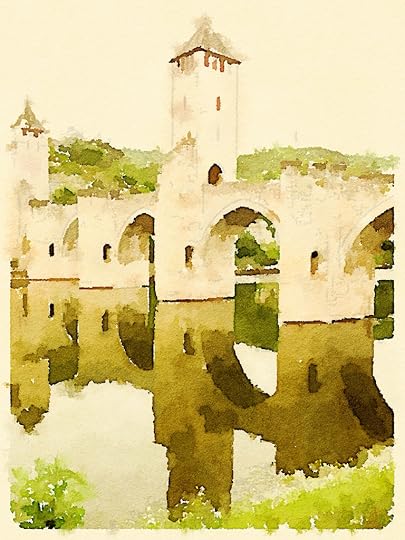
Pont Valentre Waterlogue © Harold Davis
Cahors may have fallen to brute force and treachery during the hundred years war during the convoluted battles between French and English monarchs, but the Pont Valentre, shown above and below via iPhone captures, was rightly regarded as impregnable. Originally a fortress in the center of the river, it was expanded across to both banks with ample fortifications to make direct attack well nigh impossible.
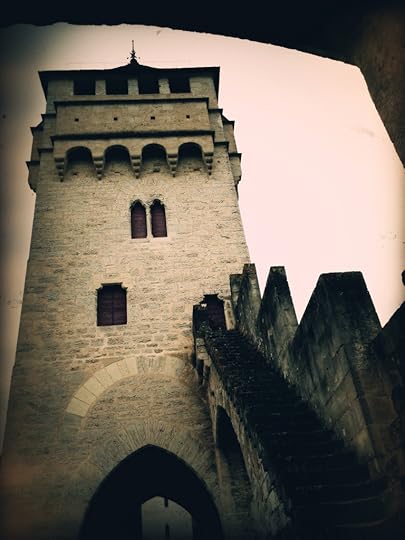
Pont Valentre Tower © Harold Davis
All this seems to me a bit like Game of Thrones—or maybe life is stranger (and more interesting) than fiction, at least in this case.

May 4, 2014
What’s new is old again in Paris
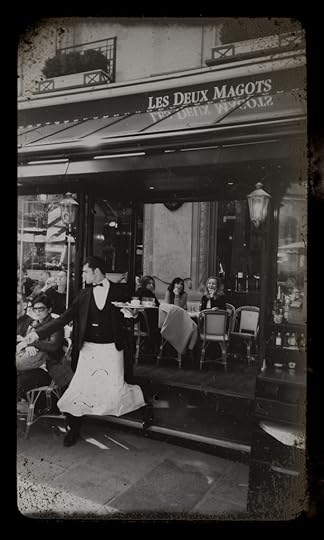
Les Deux Magots © Harold Davis
Paris is a city with a tremendous and varied historical legacy from many eras. But after you are here for a while you realize that it is also constantly changing. Construction and renovation is continual. There’s scaffolding on almost every block.
With some notable exceptions, retail decors change quickly to keep up with fashion. The laundromat I tried to go to this morning has disappeared in the year since I last washed clothes there, replaced by an upscale boutique.
With this continual reinvention against a backdrop of history in mind, it is fun to use a new technology (my iPhone camera in the image shown to the left) to capture an old landmark, Les Deux Magots—the Saint-Germain-des-Prés watering hole of Hemingway and a whole cavalcade of literary and artistic types of yore (today it is more the touristic types!).
Shot with my iPhone camera and processed on the spot with Filterstorm, Lo-Mob and Plastic Bullet as I was out “flaneuring” today.
May 3, 2014
Splash
Rain left puddles along the paths and trails of the Parc de Sceaux, on the outskirts of Paris. I positioned my camera to take advantage of the perspective generated by the reflections of rows of trees in one puddle, and—splash!—tossed a pebble in to the water to take advantage of the concentric rings that this generated.
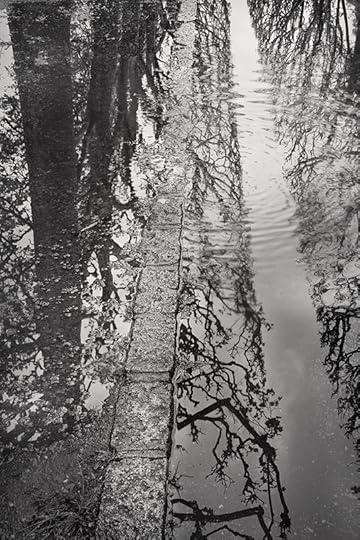
Splash © Harold Davis
The underlying exposure for full depth-of-field and low noise was at ISO 100 and f/22 to capture the reflections in the puddle, while the exposure for capturing the splash part of the image was at ISO 2,000 and 1/25 of a second. Obviously this is the kind of image that usually takes some trial and error to get right—not only in terms of photographic exposure, but also where one aims the splash.

May 2, 2014
Night at the Louvre
Photographing after dark in the grand courtyard of the Louvre is always great fun. The pyramid becomes an abstraction, and is an interesting contrast in its modernity with the ornate structure of the grand old palace.
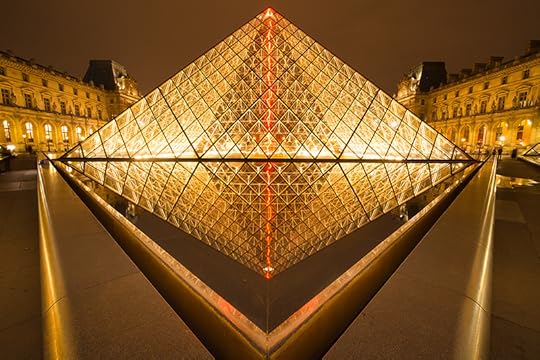
Pyramide © Harold Davis
Do you prefer this image in color or black and white? I started with the color version (above), then thought that the lines and shapes of the diamonds within the pyramid, and the triangular-shaped reflecting pool, would make a strong composition in monochrome (below).
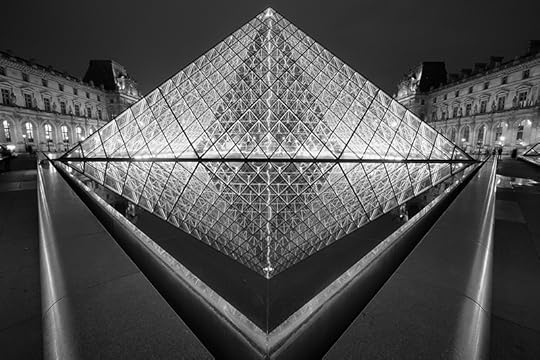
Pyramide in Black and White © Harold Davis

May 1, 2014
Under the Pont de la Concorde
A pedestrian esplanade runs from the Musée d’Orsay to the Tour Eiffel along the left bank of the Seine River. This walk way has been reclaimed from vehicular traffic only fairly recently, and it is the scene of art exhibitions, music, and much general festivity.

Under the Pont de la Concorde © Harold Davis
Wandering with my camera on this esplanade I was caught in a heavy spring downpour. Along with a crowd, I took refuge under the Pont de la Concorde. There was no place to put my tripod, so I placed my camera on the stone railing. I added a neutral density filter, and shot this six minute exposure to soften the water while keeping the detail in the stone work that supports the bridge.

April 30, 2014
Giverny via iPhone
I shot this image of Monet’s water gardens at Giverny with my iPhone camera, and processed it into three versions on the spot. Instant gratification is sweet! But I’m also looking forward to seeing what my images with the D800 look like. They may take a bit of time to process. It’s fair to say that my entire group had a great time at Giverny, it is truly a highlight!
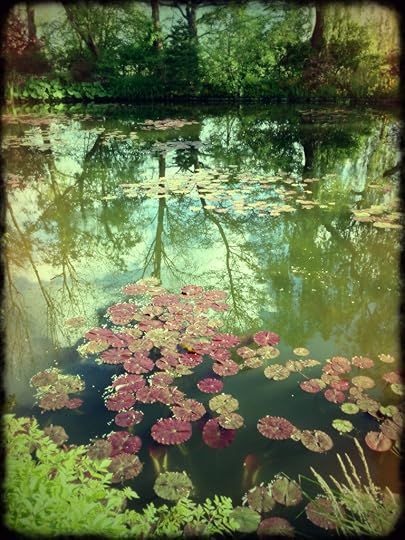
Giverny via iPhone #1 © Harold Davis
One nice thing about processing on the iPhone is that it very easy to see what difference a slight shift in colors makes.

Giverny via iPhone #2 © Harold Davis
Fun I think to take a subject that is so very colorful, and render it in black and white. I am looking forward to printing all three together.
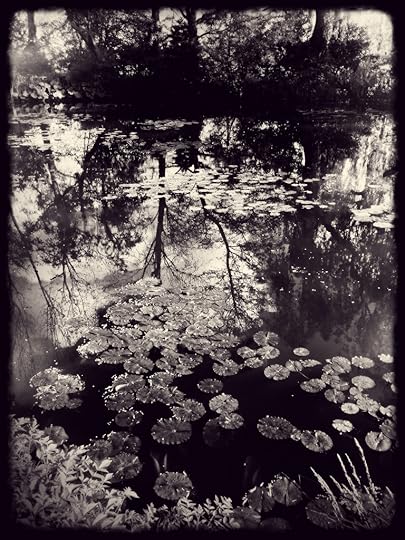
Giverny via iPhone #3 © Harold Davis


