
Mary Sage Nguyen's Blog, page 7
June 2, 2015
Making a book trailer for your book!
Dear Readers,
So you want to make a book trailer? I have seen people charging up to $1000 bucks for a movie trailer. This is a great alternative way to make a book trailer, if you don’t want to pay $1000 dollars, and etc. Beware: This is a laborious, and time consuming task.
Materials you will need cyberlink power director 12 or windows movie maker. Also as usual adobe photoshop!
Picking the photos for your movie trailer!
Step 1: Once, again go to http://depositphotos.com?ref=4769579 You can choose another site, if you wish. I just prefer them.
Note: You must know the synopsis of your book. Do the same as last time, use keywords. Type in keywords, that has meaning with your synopsis. [I always suggest the small pictures for downloading. As I stated earlier, they charge extra for downloading large files.]
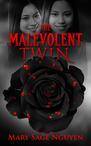
For example: My evil twin is asian, and always shows up in provocative clothing. So, therefore I typed the words, provocative asian girl. I skimmed through a few photos, til I found the one. This is for The Malevolent Twin trailer.

Here are the photos, I used for my trailer.
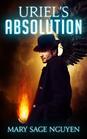
Step 2: Got all the photos? Time to start typing and sizing. As you can see in my book trailer for The Malevolent Twin. All of the typing is done on the side, displaying the picture without font on it. If you want the same result, open up a canvas in photoshop, and copy and paste your photo on it. Then start a new layer by typing beside it. [look below on photo advice]. Dimensions, you choose. My best advice on dimensions is whatever you size you downloaded for your stock photo. On my other trailer for Uriel’s Absolution, I just typed on the photo, which is fine. Use the tips, I advised you earlier on photoshop in my previous blog.
Photo advice: [Open up your photo by using the file menu on photoshop. Do the following when your photo opens. Hit the CTRL button, and A button on your keyboard, must be done at same time (selects photo). Go back to your canvas, and Hit the CTRL button and V button, must be done at same time (pastes the photo on canvas). Hit the CTRL button and the T button, must be done at same time (assist you with resizing photo).]
Font advice: [Make sure the text button is on and you have created a layer for title. Click anywhere on canvas to add font]

Step 3: Organizing your photos on cyberlink power director 12. Its same process with windows movie maker, which is much more user friendly. Open up Powerdirector 12. If you have windows 8, search in your apps for it. Or search for using the search bar type cyberlink powerdirector 12.

Step 4: Click on the slideshow creator.

Step 5: start importing your book trailer photos by uploading them. (click import photos)

Step 6: Then click next.

Click on the normal for slideshow style.
As far as background music. I used music, I bought from itunes. One of things, I love about intunes is you can buy a single song for $1.29.
How to import intunes files. Follow the screenshots.


Note: Ya, I love marcy playground’s song Sex and Candy. Its a great song!
Step 7: Now, you have your music choice, and have organized your photos. Preview your video by clicking next.

Step 8: Once, you are satisfied with the video. Click next, and now we move onto production. Click product video after clicking next.

Step 9: Click on MPEG-4, then on the output folder. Save the book trailer, in a easily accessible folder (your choice). Then hit produce.

Step 10: Once, your book trailer is finished producing. upload it on youtube, and voila you are finished! Have any questions? Post a comment below, or contact me via my website!
Thank you for reading,
Mary Sage Nguyen
Author of
Entertaining readers, one book at a time!


Designing your own book cover with stock photos!
Dear readers,
It is pretty easy to make your own book cover. If you have the time, and creative instincts. I used three stock photos to make my new book cover. It really just took me, maybe about an hour or less to create this cool book cover!

The materials you will need is photoshop.
Retrieving your photos!
Step 1: Open up a new canvas in photoshop. Dimensions: 2400 pixels by 1600 pixels. Background: Doesn’t matter….
Step 2: go to http://depositphotos.com/?ref=4769579 They have amazing photos! In my humble opinion, one of the best stock photo sites!
Step 3: Pick photos you would like to use from their website. Note: It is all about keywords. I knew, I wanted my character to reflect on the book cover. I type in the word albino at first. Flip through to photos, with no luck. Then, I type in albino woman, and this photo popped up! Remember to be specific as possible, when typing in keywords.

Portrait of mysterious albino woman

Note: For this photo, I used the keyword leaves background.

beautiful woman’s eyes isolated on a white background
Note: For this photo, I used the keyword green eyes at first. Then I moved on to more specific keywords, woman’s green eyes.
Step 4: Download the photos, you chose to use. Now, deposit photos offers small, x-small, medium, large, extra large, and etc. I always choose small. Note: They charge you more for larger files!
Step 5: Now you have the images, you want to use for your book cover. Flip, back to photoshop. The canvas you created earlier in step 1.
Creating the book cover!
Step 1: Use your character or the image, you want for the first layer. Open up your photo by using the file menu on photoshop. Do the following when your photo opens. Hit the CTRL button, and A button on your keyboard, must be done at same time (selects photo). Go back to your canvas, and Hit the CTRL button and V button, must be done at same time (pastes the photo on canvas). Hit the CTRL button and the T button, must be done at same time (assist you with resizing photo). My first layer was the albino woman.
Portrait of mysterious albino woman

Step 2: Add another layer by repeating the steps above, in step 1. My second layer was the green woman’s eyes.
beautiful woman’s eyes isolated on a white background
Note: You must I cropped it, first. I cropped the image until, all I had was the actual green eye ball, and then duplicated the layer. Which I placed strategically, on the albino woman eyes, which was grey in the original photo. Hit the after you are done cropping, or adjusting the image. Do the same thing you did with the keyboard, as you did in the previous step. I also use the blending opinions. (Right click, the layer, and you will see blending as an option. Adjust to your taste). Advanced graphic artists, use more layers. For me, I just want to keep it simple.
 Crop tool is the one that is selected.
Step 3: Create another layer. I used the leaves background.
Note: With this as with the green woman’s eyes. I had two layers for it. What I did was was. I opened up the photo using the steps as in step one. I adjusted the leaves background to the way, I wanted it. Then I realized another layer of this would make the photo really pop. I flipped the photo 180 degrees using the image tab on photoshop. After flipping it, I added it to the cavas and blended it using the blending method in step 2. [Right click, the layer, and you will see blending as an option. Adjust to your taste]

Step 4: Moving on to font. This is all according to your preference. Font menu can be found here.

Note: Make sure the text button is on and you have created a layer for title. Click anywhere on canvas to add font. I used a variety of fonts. Including: Gabriola Regular for my title, Adobe Gurmukhi Regular for the subtitle, and Impact Regular for my pen name.
Now you know how to make a simple book cover, the easiest way possible. If you have any questions, I can be reached at the link below!
Thank you for reading,
Mary Sage Nguyen
Author of
Entertaining readers, one book at a time!


May 23, 2015
What you need to know about Ingramspark!
Dear Readers,
Ingramspark is a print on demand company as you may know. Here’s what you need to know about them, in my humble opinion. You can use both Ingramspark and Createspace.
Steps on how to use both Createspace & Ingramspark!
Step 1: Log into your createspace account. https://www.createspace.com/
Step 2: Click on your book title.
Step 3: Click on the channels in the distribute tab.
Step 4: De select ALL expanded distribution with createspace. (Bookstores, and online retailers, plus Createspace direct) Note: If you have already selected Createspace expanded distribution, Ingramspark will reject your title at first. You will have to wait a few weeks to start an Ingramspark account. Six weeks at the most.
Step 5: Start a free account with IngramSpark! https://www.ingramspark.com/
Why do you want to use both?
The answer is simple. Use Createspace for your Amazon distribution, and then use Ingramspark to further your book’s distribution!
I have read numerous articles about Ingramspark. No one ever mentions this, I had to figure it out for myself. One of the best benefits of Ingramspark is your print book gets listed on Barnes & Noble, Books a Million websites, and so on. I really like this because it furthers your credibility as an author! Also your book isn’t just available on Amazon. In my humble opinion of course. You will have to wait a couple of weeks for your cover to appear. It take a while for it to show up on Barnes & Noble, Books A Million websites, etc.
Barnes & Noble Website Books A Million Website
To see more of their distribution partners click this link
https://www.ingramspark.com/Portal/distribution_partner
Note: You have to pay $49 dollars for a new title set up with IngramSpark, and an additional $25 dollars for each new revision after you approve your book’s proof. Before your book is reviewed and you approve proof. You can make as many revisions as you want and it won’t cost you a dime! See their set up fees here
https://www.ingramspark.com/documents/IngramSparkPriceSheet.pdf
I do not recommend using Ingramspark for your ebook distribution. Instead use Smashwords. I highly recommend them! Smashwords is user friendly, FREE, and easy to use! They take 10% of your retail price once you sell a copy of your ebook. It will cost you $25 dollars it you use Ingramspark to setup your ebook title!
Disclaimer: Smashwords, Mark Coker owns this logo!
You can visit their website here http://www.smashwords.com/
Tune in next time, I will be talking about ISBN (International Standard Book Numbers) What you need to now, and how to get one! I will be posting a blog post about how to make a cool book trailer soon!
Thank you for reading!
Mary Sage Nguyen
You can reach me at http://www.marysagenguyen.com/ for more information!


May 21, 2015
The companies I used for editing, formatting, and book cover design.
Dear Readers,
One of the very first things, I learned about writing is it is freaking hard! Not just that, but finding people to edit, and design your book is difficult as well. I sent many queries to editors, book cover designers, and etc. I finally came up with two amazing companies.
Disclaimer: Ebook Launch, Kevin Anderson & Associates own these logos!
The first one is Kevin Anderson & Associates. I used them for my editing. I can not stress enough, how important editing is. The editing company is professional, easy to work with, and respond in a timely fashion. In fact, you can even call them, and speak to Kevin Anderson himself. Their turnaround time is one and a half weeks for any books with a 40,000 word count. With book that have a higher words count, such as 85,000 words, the turnaround time can be 3 weeks. Keep in mind, this was my experience. I don’t know about the others who the company has worked with. Kevin Anderson is the editor in chief and will assign you an editor of his choice. An editor who specializes in your genre.
The editor does a number of things for your book. They will assist you with flow, and structure of your book. Not just that but also spelling errors, typos, and grammatical mistakes. Here’s what you need to know about the editing process with this editing company. First, you query to Kevin and see if he will take your book. Then you pay the invoice and wait until you get copies of your manuscript back. You will receive a comments copy and a clean copy. From here, you have to read the comments copy. The clean copy is as it states clean with no comments. The reason you must read the comments copy is because your editor types comments using track changes on Microsoft Word. A really useful tool, I wish I have known about before. Read all of the comments the editor writes for you, fix it if you want. Remember the editor isn’t your boss. You can choose whether or not to take their advice or just leave the book the way it is. I also would like the mention, you are going to pay a pretty penny to get your book edited. You can reach Kevin Anderson & Associates here http://ka-writing.com/
As far as my book cover design and formatting. I use Ebook Launch. I highly recommend them to any emerging authors! Ebook Launch’s turnaround time is 7 business days for book covers, and ebook formatting. The createspace formatting takes 14 business days. I met an author at a writer’s guild meeting who did not get professional formatting for her book. It really upset me quite a bit. This woman was suppose to be teaching us about writing, yet she didn’t even pay for professional formatting. You must get professional formatting for your print, and ebook. You have one shot, make the best impression you can! I am quite happy with my print book formatting for The Malevolent Twin. You can see how professional it looks here http://www.amazon.com/Malevolent-Twin-Mary-Sage-Nguyen/dp/0996256105/ref=sr_1_1?ie=UTF8&qid=1432239358&sr=8-1&keywords=the+malevolent+twin
Ebook formatting is different as well. The list include these ebook formatting options smashwords , kindle mobi file, epub file for Apple, Kobo, and so forth. Last but not least a google play file. I didn’t choose the epub files, because I didn’t feel like I need them. I got the most important ones which are the mobi file, and the smashwords file. I am happy with how my ebook The Malevolent Twin. Check out a sample at this link. https://www.smashwords.com/books/view/533201
Moving on to book cover design. I knew exactly how I wanted my book cover to look. I filled out the form with ebook launch, and told them exactly what I wanted. I even added pictures of covers I liked and other pictures for reference. This helps the designer out a lot, if you upload pictures with the form. The first time, there was some miscommunication, but eventually I got the book cover I wanted. The miscommunication was due to me…. The second time, I had them do my book cover. The designer was dead on. I didn’t have to go back and enter in changes. Be specific as possible when filling out the form. Such as the color you want the font to be, the color the background should be, and so forth. They do offer pre designed cover you can buy for a reasonable price. You can reach Ebook Launch here http://ebooklaunch.com/
Now you know which companies I used for editing, and designing my book! You can always do more research if none of these companies appeal to you. Tune, in next week! I will be writing about how to make a cool book trailer for your book!
Thank you for reading,
Mary Sage Nguyen
Entertaining readers, one book at a time!
You can reach me at http://www.marysagenguyen.com/ for more information.


![[image error]](https://marysagenguyen.files.wordpress.com/2015/05/screenshot-4.png)
![[image error]](https://marysagenguyen.files.wordpress.com/2015/05/screenshot-5.png)
![[image error]](https://marysagenguyen.files.wordpress.com/2015/05/screenshot-6.png)
![[image error]](https://marysagenguyen.files.wordpress.com/2015/05/screenshot-8.png)
![[image error]](https://marysagenguyen.files.wordpress.com/2015/05/swlogo.png)
![[image error]](https://marysagenguyen.files.wordpress.com/2015/05/lp.jpeg)
![[image error]](https://marysagenguyen.files.wordpress.com/2015/05/kevin-anderson-associates-logo21.png)
![[image error]](https://marysagenguyen.files.wordpress.com/2015/05/ebooklaunch_logo_whitenegative_170wide1.jpg)