
Heather Hepler's Blog, page 4
August 8, 2011
Week Two -- Cheese (Mozzarella)
This week we decided to make cheese. After the obvious (and I know sort of gross) jokes about "cutting the cheese"…. (Keep in mind I am cooking with an ten-year-old), we got to work. But, let me say right up front that the work begins when you have to find milk that will work in this project. The best choice is local, raw milk. But, that isn't available to everyone and is frankly somewhat cost-prohibitive. (The gallon my mom found at a local farm was eight dollars.) The second best choice is organic milk, but here's the rub. It can't be super or ultra pasteurized. While ultra-pasteurization is awesome for extending the shelf life of milk, it kills the necessary components for turning that milk into cheese. For more information on this, check out The Cheese Queen's website. She is the best resource for making cheese. For more a more detailed explanation of the types of milk, go to: http://www.cheesemaking.com/store/pg/... For a list of milk that might be available in your area, go to: http://www.cheesemaking.com/rawmilkfo...
Like I said, we were able to find raw milk at Lucky Layla Farms. By the way, this is also the very best place to buy Dulche de Leche. I didn't know what this was until I tried it. Imagine the best caramel sauce you have ever had, and then take it up about seven notches. Now you're close.
With raw milk, it is suggested that you heat it to kill anything that might be lurking in its creamy depths. I poured the gallon of milk into a big stainless pot and put it on the stove with my handy dandy candy thermometer in it. (I'm serious… I've gotten more use out of that thing in the last two weeks, than ever before.) I really had to keep an eye on the milk. It heated up quickly. I got it up to 145 degrees for 30 minutes. Then we had to cool it quickly. I used an ice bath for this. After that, the cheese making began. The directions are pretty straight-forward, but I had to read them about seventy times. I think now I get it after having read it once. Following is the recipe from The Cheese Queen. Barbara Kingsolver mentions Ricki Carroll (The Cheese Queen) in her book, Animal, Vegetable, Miracle. Caroll's website, www.cheesemaking.com is the best place I found for recipes, sources, and help for making any kind of cheese. We started with Mozzarella because it seems to be one of the easiest. Other easy things to make include: Cream Cheese, Sour Cream, Yogurt, Fromage Blanc, Creme Fraiche, Mascarpone, Lemon Cheese, Herb Cheeses, Buttermilk, Kefir, Panir, Queso Blanco, and ricotta.
Following is the recipe that we used for mozzarella cheese. It was really easy and I'm not just saying that. Harrison wants to make hard cheeses next, but that might have to wait awhile. That seems anything but easy.
Mozzarella Cheese
________________________________________
Ingredients:
The Milk:
Make sure the milk you use for this cheese is NOT
ULTRA- PASTEURIZED
--Homogenized milk will work fine.
--Fresh farm milk will also work well but we encourage you to try with 1 gallon of store bought whole milk first.
--Low fat milk will work but the cheese will be drier and less flavorful
1/4 tablet of rennet (we used the vegetarian option)
1 1/2 tsp. citric acid
1 1/4 c. water
1 T cheese salt (although I think most any salt would do)
You will also need:
--A 6 to 8 quart stainless steel pot. Aluminum or cast iron will not work.
--A stainless steel or strong plastic slotted spoon.
--A two quart microwave safe mixing bowl
--measuring spoons
--A thermometer which will clearly read between 80 - 120 degrees F.
Process:
Crush 1/4 tablet of rennet and dissolve in 1/4 cup of cool unchlorinated water and set aside to use later.
Add 1.5 tsp. of citric acid (diluted in 1 cup cool water to 1 gallon of cold milk and stir well.
Now pour cold milk into your pot quite quickly to mix well with the citric acid . This will bring the milk to the proper acidity to stretch well later.
Next Heat this milk to 90F As you approach 90F you may notice your milk beginning to curdle slightly due to acidity and temp.
NOTE: if having problems with milk forming a proper curd you may need to increase this temp to 95 or even 100F
At 90F remove the pot from the burner and slowly add your rennet (which you prepared in previous step) to the milk and stir in a top to bottom motion for app. 30 seconds, then stop.
Cover the pot and leave undisturbed for 5 minutes.
Check the curd, it will look like custard, with a clear separation between the curds and whey. If too soft or the whey is milky, let set for a few more minutes.
Cut the curds into a 1" checkerboard pattern (as in photos above) and if a drier cheese is desired carefully cut and stir this curd to release more whey.
Place the pot back on the stove and heat to 105F, while slowly stirring the curds with your ladle. (If you will be stretching the curds in a hot water bath heat to 110F in this step.)
Take off the burner and continue slowly stirring for 2-5 minutes. (More time will make a firmer cheese)
Then scoop the curds with a slotted sp0on into a heat proof bowl to be used in the microwave. (If the curd is too soft at this point let sit for another minute or so)
You will now press this curd gently with your hand, pouring off as much whey as possible. Reserve this whey to use in cooking.
Next microwave the curd on High for 1 minute. You will notice more whey has run out of the curd. Drain off all whey as you did before. Quickly work the cheese with a spoon or your hands until it is cool enough to touch (rubber gloves will help since the cheese is almost too hot to touch at this point)
Microwave 2 more times for 35 seconds each and repeat the kneading as in the last step. Drain all of the whey off as you go.
Knead quickly now as you would bread dough until it is smooth and shiny. Add salt near the finish. At this point the cheese should be soft and pliable enough to stretch like taffy.
It is ready to eat when it cools.
Form it into a ball and drop into ice water to cool and refrigerate.
When cold you can wrap in plastic wrap and it will last for several days but is best when eaten fresh.
PS... I'll admit the cheese looks a little weird in the last photo, but it did firm up and get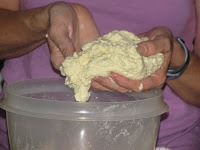 smooth as the recipe indicated and it was DELICIOUS!

Like I said, we were able to find raw milk at Lucky Layla Farms. By the way, this is also the very best place to buy Dulche de Leche. I didn't know what this was until I tried it. Imagine the best caramel sauce you have ever had, and then take it up about seven notches. Now you're close.
With raw milk, it is suggested that you heat it to kill anything that might be lurking in its creamy depths. I poured the gallon of milk into a big stainless pot and put it on the stove with my handy dandy candy thermometer in it. (I'm serious… I've gotten more use out of that thing in the last two weeks, than ever before.) I really had to keep an eye on the milk. It heated up quickly. I got it up to 145 degrees for 30 minutes. Then we had to cool it quickly. I used an ice bath for this. After that, the cheese making began. The directions are pretty straight-forward, but I had to read them about seventy times. I think now I get it after having read it once. Following is the recipe from The Cheese Queen. Barbara Kingsolver mentions Ricki Carroll (The Cheese Queen) in her book, Animal, Vegetable, Miracle. Caroll's website, www.cheesemaking.com is the best place I found for recipes, sources, and help for making any kind of cheese. We started with Mozzarella because it seems to be one of the easiest. Other easy things to make include: Cream Cheese, Sour Cream, Yogurt, Fromage Blanc, Creme Fraiche, Mascarpone, Lemon Cheese, Herb Cheeses, Buttermilk, Kefir, Panir, Queso Blanco, and ricotta.
Following is the recipe that we used for mozzarella cheese. It was really easy and I'm not just saying that. Harrison wants to make hard cheeses next, but that might have to wait awhile. That seems anything but easy.
Mozzarella Cheese
________________________________________
Ingredients:
The Milk:
Make sure the milk you use for this cheese is NOT
ULTRA- PASTEURIZED
--Homogenized milk will work fine.
--Fresh farm milk will also work well but we encourage you to try with 1 gallon of store bought whole milk first.
--Low fat milk will work but the cheese will be drier and less flavorful
1/4 tablet of rennet (we used the vegetarian option)
1 1/2 tsp. citric acid
1 1/4 c. water
1 T cheese salt (although I think most any salt would do)
You will also need:
--A 6 to 8 quart stainless steel pot. Aluminum or cast iron will not work.
--A stainless steel or strong plastic slotted spoon.
--A two quart microwave safe mixing bowl
--measuring spoons
--A thermometer which will clearly read between 80 - 120 degrees F.
Process:
Crush 1/4 tablet of rennet and dissolve in 1/4 cup of cool unchlorinated water and set aside to use later.
Add 1.5 tsp. of citric acid (diluted in 1 cup cool water to 1 gallon of cold milk and stir well.
Now pour cold milk into your pot quite quickly to mix well with the citric acid . This will bring the milk to the proper acidity to stretch well later.

Next Heat this milk to 90F As you approach 90F you may notice your milk beginning to curdle slightly due to acidity and temp.
NOTE: if having problems with milk forming a proper curd you may need to increase this temp to 95 or even 100F
At 90F remove the pot from the burner and slowly add your rennet (which you prepared in previous step) to the milk and stir in a top to bottom motion for app. 30 seconds, then stop.
Cover the pot and leave undisturbed for 5 minutes.
Check the curd, it will look like custard, with a clear separation between the curds and whey. If too soft or the whey is milky, let set for a few more minutes.
Cut the curds into a 1" checkerboard pattern (as in photos above) and if a drier cheese is desired carefully cut and stir this curd to release more whey.
Place the pot back on the stove and heat to 105F, while slowly stirring the curds with your ladle. (If you will be stretching the curds in a hot water bath heat to 110F in this step.)
Take off the burner and continue slowly stirring for 2-5 minutes. (More time will make a firmer cheese)

Then scoop the curds with a slotted sp0on into a heat proof bowl to be used in the microwave. (If the curd is too soft at this point let sit for another minute or so)
You will now press this curd gently with your hand, pouring off as much whey as possible. Reserve this whey to use in cooking.
Next microwave the curd on High for 1 minute. You will notice more whey has run out of the curd. Drain off all whey as you did before. Quickly work the cheese with a spoon or your hands until it is cool enough to touch (rubber gloves will help since the cheese is almost too hot to touch at this point)
Microwave 2 more times for 35 seconds each and repeat the kneading as in the last step. Drain all of the whey off as you go.
Knead quickly now as you would bread dough until it is smooth and shiny. Add salt near the finish. At this point the cheese should be soft and pliable enough to stretch like taffy.
It is ready to eat when it cools.
Form it into a ball and drop into ice water to cool and refrigerate.
When cold you can wrap in plastic wrap and it will last for several days but is best when eaten fresh.
PS... I'll admit the cheese looks a little weird in the last photo, but it did firm up and get
 smooth as the recipe indicated and it was DELICIOUS!


August 1, 2011
The beginning
Who: One ten-year-old mad scientist and his eccentric, writer mother.
When: One year, starting August 1, 2011
What: 52 kitchen projects that will range from making cheese to building a gingerbread castle.
Why: Because life is too short not to do something crazy fun for no reason.
How: Who knows.
Where: Our crazy kitchen

When: One year, starting August 1, 2011
What: 52 kitchen projects that will range from making cheese to building a gingerbread castle.
Why: Because life is too short not to do something crazy fun for no reason.
How: Who knows.
Where: Our crazy kitchen
October 28, 2010
Getting Your Chocolate Fix
Okay, I'll admit that I'm sort of a chocolate freak. In fact, when people say -- "Nah, I don't really care for chocolate all that much", it makes me a little nervous. I believe that they are A) mentally unsettled, B) in denial, or C) been force fed Chips Ahoy and Oreos and therefore cannot be held responsible for their opinions.
But, tonight I have to admit something. While generally I'm all about good, real desserts, there are sometimes those moments when I just want something gooey and sweet and well, now. This is where these come in. And please don't sneer at them until you've tried them.
Chocolate Smoothies
1/2 c butter (the original recipe calls for 1/4 cup butter and 1/4 cup shortening -- but the butter is better)
1/2 c dark brown sugar
1/2 cup flour
pinch of salt
1/2 t vanilla
Mix this all together until crumbly then press it into the bottom of a glass dish. A pie pan is fine (glass only) or a 9x9 cake pan (also glass).
Microwave at 50% power for approximately 4 minutes. This will vary, so keep an eye on it. You want it all to be soft, but be careful of scorching. It can get nasty quickly.
Remove from microwave and sprinkle 6 oz of semi-sweet chocolate chips on top. (I suppose you could use any chips -- white chocolate, milk chocolate, even peanut butter chips.)
Let this melt then spread it all over the top like you are icing a cake.
Top with 1/2 crushed nuts (I like toasted pecans, but any nuts will do.) You can leave these off -- my sister does, but I do think they make it better.
Eat. That's it. Easy, gooey, yummy.
October 13, 2010
It has been a hum dinger of a year. (I know it is only Oc...
It has been a hum dinger of a year. (I know it is only October). And you know what? My spell check cannot seem to decide whether hum dinger is two words or one.
Anyway, in the midst of a summer traveling and working on my new book and trying desperately to stay ahead of the ever-growing mound of papers that need to be graded and that seem to follow me everywhere I go, I've let this blog slide. For the past seven weeks, I've been camping out at my parents' house, helping care for my dad after he decided once and for all to make all the doctors stop poking him and injecting him and radiating him. He's doing really well. (Thanks for asking).
I'm headed back home now, or at least I will be in a day or so. It will be nice and weird to be back there. I know my over-stuffed and over-indulged cat will be happy to have us back full-time and it will be nice to be able to leave my dishes in the sink if I want to… not that I will. I'm pretty OCD about that stuff.
I'm including a recipe that's kept me going this summer. This isn't for the faint of heart. These are for people who like a little kick in their cookie. I hope you like them. No photos for now, but soon. :)
Seriously Ginger Cookies
2 1/4 cups all-purpose flour
1 teaspoon baking soda
2 teaspoons ground cinnamon
1 1/2 teaspoons ground cloves
1/2 teaspoon ground nutmeg
1/2 teaspoon ground ginger
1/4 teaspoon kosher salt
1 cup dark brown sugar, lightly packed
1/4 cup vegetable oil
1/3 cup unsulfured molasses
1 egg
1 1/4 cups chopped crystallized ginger (6 ounces)
Granulated sugar, for rolling the cookies (I use turbinado sugar for this, but then I'm sort of a snob that way.)
Directions
Preheat the oven to 350 degrees F.
1. In a large bowl, sift together the flour, baking soda, cinnamon, cloves, nutmeg, ginger, and salt and then combine the mixture with your hands.
2. In another bowl, beat the brown sugar, oil, and molasses. You can use a mixer or just stir like the dickens.
3. Add the egg, and beat for 1 minute.
4. Slowly add the dry ingredients to the bowl and mix until combined. Add the crystallized ginger and mix until combined.
5. Okay… now this is just a suggestion. At this point, you could get a little crazy and add some chunked bitter sweet chocolate if you want. I don't because I like my ginger cookies straight, but if you're a chocolate lover, try this. It's really good.
6. With your hands, roll each cookie into a 1 3/4-inch ball and then flatten them lightly with your fingers.
7. Press both sides of each cookie in granulated sugar and place them on the sheet pans. (You can line your pans with Silpat or parchment for easier clean-up.
8. Bake for exactly 13 minutes. Don't mess this up. EXACTLY 13 MINUTES! The cookies will be crackled on the top and soft inside. Let the cookies cool on the sheets for 1 to 2 minutes, then transfer to wire racks to cool completely
It's been a hum dinger of a year. (I know it's only Octob...
It's been a hum dinger of a year. (I know it's only October). And wouldn't you know it, my spell check can't decide whether hum dinger is two words or one.
Anyway, in the midst of a summer traveling and working on my new book and trying desperately to stay ahead of the ever-growing mound of papers that need to be graded and that seem to follow me everywhere I go, I've let this blog slide. For the past seven weeks, I've been camping out at my parents' house, helping care for my dad after he decided once and for all to make all the doctors stop poking him and injecting him and radiating him. He's doing really well. (Thanks for asking).
I'm headed back home now, or at least I will be in a day or so. It will be nice and weird to be back there. I know my over-stuffed and over-indulged cat will be happy to have us back full-time and it will be nice to be able to leave my dishes in the sink if I want to… not that I will. I'm pretty OCD about that stuff.
I'm including a recipe that's kept me going this summer. This isn't for the faint of heart. These are for people who like a little kick in their cookie. I hope you like them. No photos for now, but soon. :)
Seriously Ginger Cookies
2 1/4 cups all-purpose flour
1 teaspoon baking soda
2 teaspoons ground cinnamon
1 1/2 teaspoons ground cloves
1/2 teaspoon ground nutmeg
1/2 teaspoon ground ginger
1/4 teaspoon kosher salt
1 cup dark brown sugar, lightly packed
1/4 cup vegetable oil
1/3 cup unsulfured molasses
1 egg
1 1/4 cups chopped crystallized ginger (6 ounces)
Granulated sugar, for rolling the cookies (I use turbinado sugar for this, but then I'm sort of a snob that way.)
Directions
Preheat the oven to 350 degrees F.
1. In a large bowl, sift together the flour, baking soda, cinnamon, cloves, nutmeg, ginger, and salt and then combine the mixture with your hands.
2. In another bowl, beat the brown sugar, oil, and molasses. You can use a mixer or just stir like the dickens.
3. Add the egg, and beat for 1 minute.
4. Slowly add the dry ingredients to the bowl and mix until combined. Add the crystallized ginger and mix until combined.
5. Okay… now this is just a suggestion. At this point, you could get a little crazy and add some chunked bitter sweet chocolate if you want. I don't because I like my ginger cookies straight, but if you're a chocolate lover, try this. It's really good.
6. With your hands, roll each cookie into a 1 3/4-inch ball and then flatten them lightly with your fingers.
7. Press both sides of each cookie in granulated sugar and place them on the sheet pans. (You can line your pans with Silpat or parchment for easier clean-up.
8. Bake for exactly 13 minutes. Don't mess this up. EXACTLY 13 MINUTES! The cookies will be crackled on the top and soft inside. Let the cookies cool on the sheets for 1 to 2 minutes, then transfer to wire racks to cool completely
February 3, 2010
Whoopie Pies
Whoopie Pies – although not the best. The best you can make at home.
I cheat. I do and I admit it. I actually make my whoopie pies in a muffin pan and then slice them in half and fill them. I'm sure whoopie pie purists out there are shuddering reading this, but it's a lot easier. We made the classic chocolate cake and vanilla filling pies. There are a lot of variations out there. I also love pumpkin with cream cheese filling or gingerbread with vanilla. My son likes chocolate with peanut butte...
I cheat. I do and I admit it. I actually make my whoopie pies in a muffin pan and then slice them in half and fill them. I'm sure whoopie pie purists out there are shuddering reading this, but it's a lot easier. We made the classic chocolate cake and vanilla filling pies. There are a lot of variations out there. I also love pumpkin with cream cheese filling or gingerbread with vanilla. My son likes chocolate with peanut butte...
January 11, 2010
Banana Nut Muffins

Banana Nut Muffins and an Apology
I know that I've been remiss in posting. December just go away from me. However, we did a lot of fun things in the kitchen, so now all I need to do is get it all online.
The first project was banana nut muffins. Okay, I know… boring, but these are anything but boring. And, they aren't terrible for you. In fact, they are pretty good for you – bananas, yogurt, nuts… I won't say they're good for you like Brussels sprouts are good for you, but who wants to eat...
December 1, 2009
Week Ten -- Salsa
Salsa
I realize that I've pretty much stuck with sweet items recently, so I thought we'd try something decidedly not sweet. After moving from one side of the country to the other and then almost all the way back again, I've discovered a secret. If you move, take some recipes from your old home with you. When you make salsa for Mainers, they think you're a genius. If you made that same salsa in Texas, they'd probably tell you it was okay, but that they could do better. I've brought whoopie pies...
I realize that I've pretty much stuck with sweet items recently, so I thought we'd try something decidedly not sweet. After moving from one side of the country to the other and then almost all the way back again, I've discovered a secret. If you move, take some recipes from your old home with you. When you make salsa for Mainers, they think you're a genius. If you made that same salsa in Texas, they'd probably tell you it was okay, but that they could do better. I've brought whoopie pies...
November 24, 2009
Week Nine -- Serious Cookies

Serious Cookies
Cookies are so often maligned as being only for an afternoon snack or just for kids, but I'm tired of going to dinner at someone's house or to a restaurant and having some fancy-shmancy nonsense that some people call dessert served to me simply because it's fancy or complicated. I have decided to start a movement that will hopefully help elevate cookies to their appropriate place in the culinary world. And I'm pretty sure that these cookies will go a long way toward making...
November 2, 2009
Week Eight -- Pecan Pie

Week Eight – Pecan Pie (The South)
This week's project and next week's project are an homage to both of my homes… I was born in the north, but I've lived in Texas longer than I've lived anywhere else. So, clearly I am neither a Yankee nor a Texan, but a little of both. Pecans are falling from the trees (or rather, the squirrels are chucking them at us whenever we get too close to the pecan treee in our backyard.)here in Texas, so I had to whip together a classic pecan pie. Harrison and I also ...
Heather Hepler's Blog

- Heather Hepler's profile
- 273 followers
Heather Hepler isn't a Goodreads Author
(yet),
but they
do have a blog,
so here are some recent posts imported from
their feed.

