
Heather Hepler's Blog, page 2
December 22, 2011
Nut Brittles
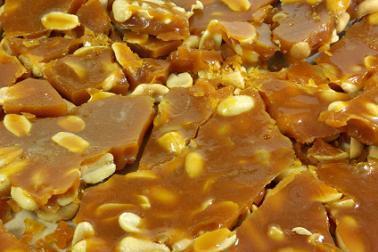
It's so embarrassing. I've probably made fifty batches ofnut brittles over the years, but this weekend I tried to make peanut brittle –and I failed miserably. It was yummy, but the texture was gross. The nuts wereactually chewy. Not good. So, I'm determined to redeem myself. This is therecipe I usually use. I tried a different one this weekend, so maybe that wasthe problem?
You can change this up endless ways, using different nuts orseeds. I'm a huge fan of pecan brittle, but if you've never made it before, trypeanut first. It's more forgiving. Pecans go from deliciously toasted toopen-the-window-to-clear-the-room-of-smoke black so quickly. If you want to getreally fancy, you could add herbs or spices to the mixture. Just be careful ofthe quantities here. Remember while cooking is an art, baking (and candy making)are also a science. I'm thinking pinenuts and rosemary? That might be awesome.
Here is the recipe I've used a million times. Use this one.It rocks. It's from – who else?—Martha Stewart.
Ingredients· Nonstick cooking spray· 1 1/2 cups sugar· 1/2 cup light cornsyrup· 3/4 teaspoon salt· 2 tablespoons butter· 1 1/2 cups mixed nuts,such as pecan halves, cashews, pistachios, coarsely chopped if large· 1 teaspoon vanillaextract· 1/4 teaspoon bakingsoda
DirectionsSpray a rimmed bakingsheet and a wide metal spatula with cooking spray; set aside.
In a 2-quart glassmeasuring cup, combine sugar, corn syrup, and salt, stirring until sugar ismoistened. Microwave on high for 4 minutes. Stir in butter and nuts; return tomicrowave for about 5 minutes, until the sugar mixture is thick, bubbly, andvery pale brown in color. Mixture is very hot; use handle when holding andpouring. (Alternatively… and this is the way I do it… place everything in a potand on the stove.) I've found I can monitor things better and avoid scorchingthe sugar and burning everything.)
Remove from microwave,stir in vanilla and baking soda (mixture may foam up). Immediately pour ontoprepared baking sheet, spreading mixture as thinly as possible with theprepared spatula. Let stand 20 minutes until hardened, then lift off sheet, andbreak brittle into bite-size pieces.


December 15, 2011
Peppermint Bark
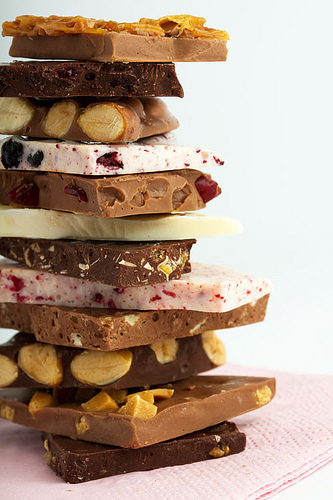 I've been on a roll with Christmas treats this year. Peppermint Bark is always on the menu at our house in December. I mean, seriously. It's the easiest thing to make in the whole world. Never, ever buy it. We actually saw it in a tiny box at the store today for $5.99. You can get a box of candy canes for 99 cents and a bag of chocolate chips for less than two dollars. And I'm guessing you can make at least twice (if not three times) as much as there was in the box.
Ingredients:
Candy canes (or peppermint candies). I've actually seen this with other hard candies, like butterscotch and Lifesavers, but I'm sort of a traditional gal. A bag of chocolate chips. I go with Ghirardelli 60% Cacao Bittersweet, but Harrison loves milk chocolate. And while I'm not a fan of white chocolate, that is also an option.
This is also your chance to be creative. Basically anything that will stick in melted chocolate (and seriously, what doesn't?), you can add. Some suggestions: nuts, cookies, candies, cereal, marshmallows, crystallized ginger, crystallized citrus peel, chilies, dried fruit, pretzels, caramels, chips. I'm thinking....pretzels and toasted pecans in dark chocolate. Or what about dried cherries and chilies in bittersweet? Or crystallized ginger and almonds in milk. Sigh. So much bark, so little time.
Method:Start by melting the chocolate. This is best done over very low heat in a heavy pot, but you can use the microwave. Just be sure to monitor it carefully. It'll scorch if you walk away.Unwrap the candies and put them all in a heavy ziploc bag. I let Harrison do this part. He loves it. Then just start bashing them with a rolling pin or even a hammer. I usually have him do this on a towel to protect the counter. Spread the melted chocolate on a parchment lined baking sheet. You can use Silpat, but it gets messy. Sprinkle with the crunched up peppermint candy. Then using a metal spatula, press the candy into the melted chocolate. Let cool.Then break it up into pieces and eat.Options to consider: Different chocolates or even a marbling of a couple of chocolates would be yummy. You might also try to add nuts or dried fruit. I've seen white chocolate, almond and dried cranberry bark. Another good one might include crystallized ginger or dried chili peppers. You can really use whatever would stick to the chocolate -- sprinkles or sugar decorations might be fun. And seriously -- M&M's or chocolate covered nuts or chunks of other candy bars or cookies or pretzels or chips. Yum.

December 14, 2011
Reindeer Cookies
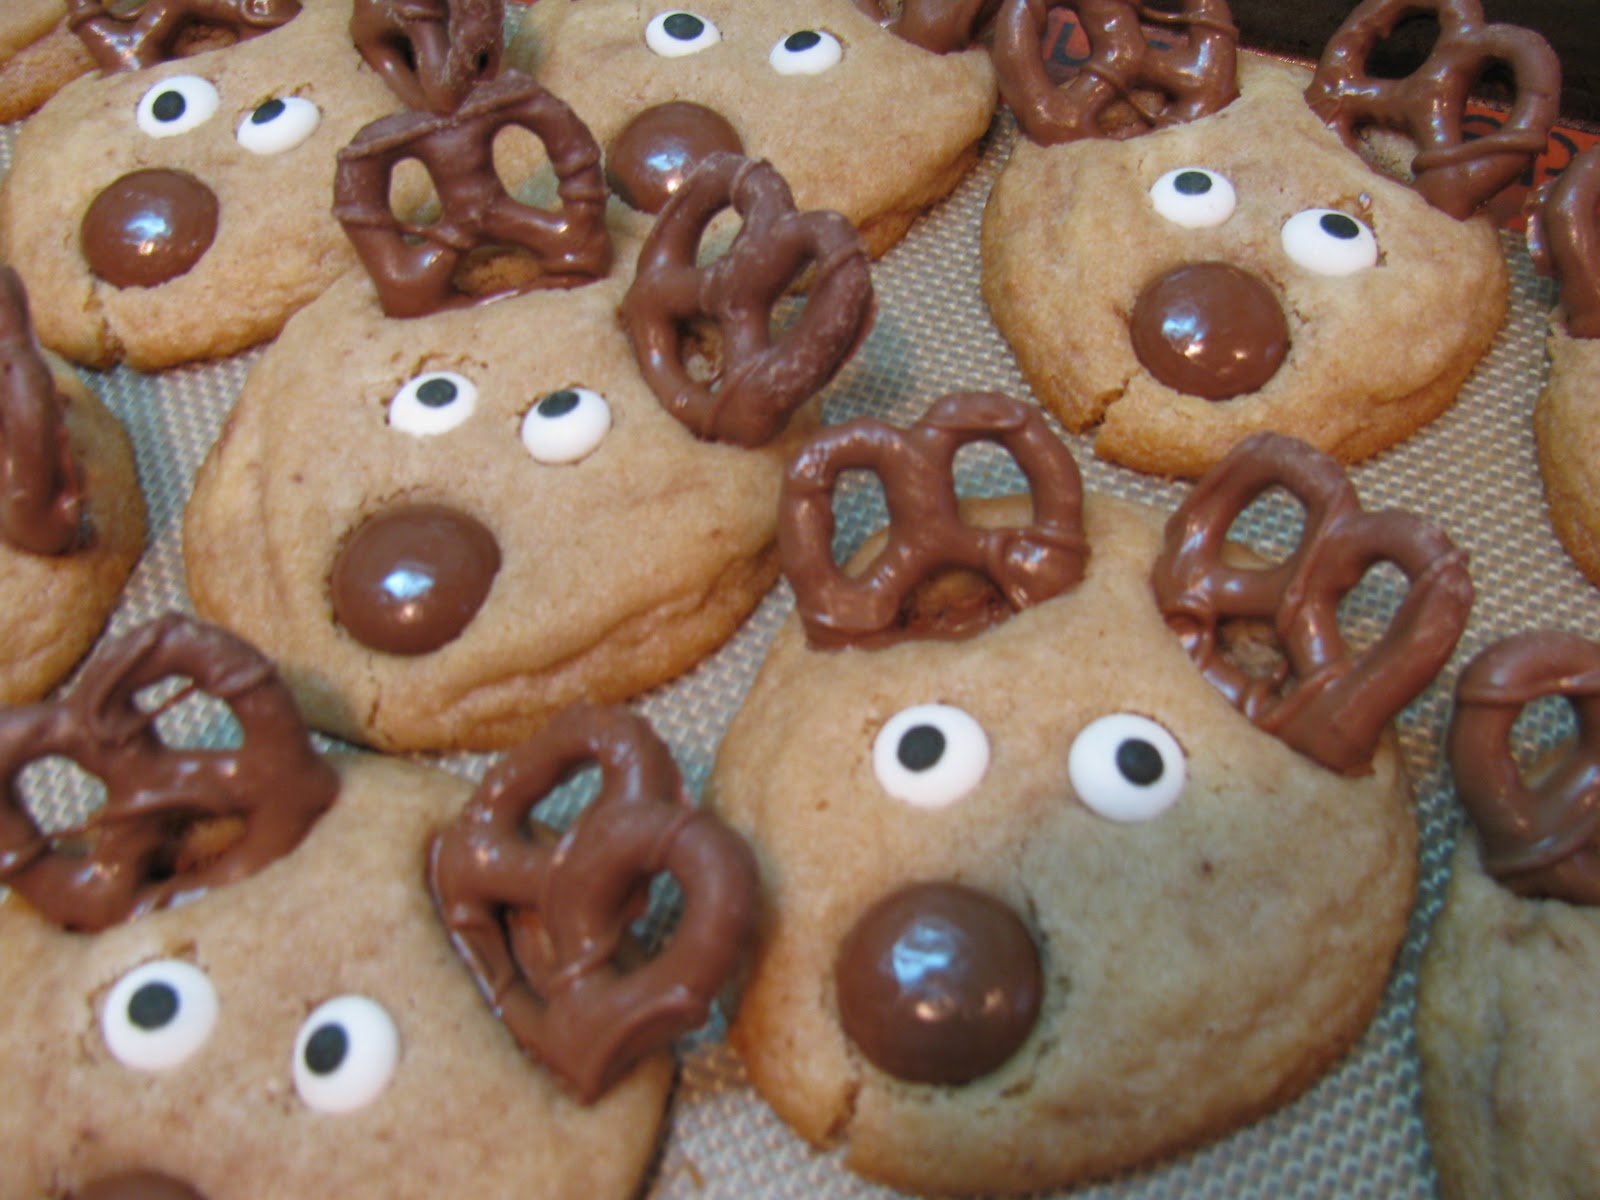
Every once in a while we manage to make something that is even better than the inspiration. I think this is one of those times. We needed to make some cookies for the school Christmas party. And we wanted them to be awesome, so of course we turned to Pintrest for inspiration. So cute and so easy! I'll give you both the uber-easy way and the "I have a little more time today" way.
The Easy Way
Ingredients:
This makes fifteen good sized cookies.
One package of cookie mix (the original recipe called for peanut butter, but one of the kids in Harrison's class is allergic to nuts, so we used sugar cookie dough which I tinted with about 1/4 c of baking cocoa. (You will also need the ingredients for the cookie dough -- for the sugar cookie dough, you'll need one stick of butter and an egg. For the peanut butter, you'll need 3T of vegetable oil and an egg.)Hershey's Chocolate drops. Milk chocolate Flips -- or other chocolate covered pretzels.Edible sugar googly eyes. (If you can't find these... use M&M's like the original version, but I think the googly eyes make these really special.)Method:
Mix the dough together, then shape into fifteen balls. For the reindeer shape, make the balls slightly narrower on one end, forming a cone. Chill in the freezer for about five minutes.Bake in a 350 degree oven for approximately 12 minutes.Remove the cookies from the oven. Working quickly, press the pretzels, the drops, and the eyes into the cookies. Let them cool slightly, then transfer them carefully to a wire rack. Be careful. The chocolate is very soft at this point. But it will firm up once the cookies cool.The "I Have More Time Way"
Ingredients:
3/4 cup peanut butter1 1/4 cup firmly packed brown sugar1/2 cup shortening3 tablespoons milk1 tablespoon vanilla1 egg1 3/4 cup all-purpose flour3/4 teaspoon baking soda3/4 teaspoon saltChocolate-covered mini pretzelsEdible googly eyes or M&M'sHershey's chocolate drops
Method: Preheat oven to 375°F.Combine brown sugar, peanut butter, shortening, milk, and vanilla in large bowl. Beat at medium speed until well blended. Add egg; beat until just blended.In a separate bowl, combine flour, baking soda, and salt. Add to creamed mixture at low speed. Mix just until blended.Form dough into 1-inch balls. To make reindeer-shaped cookies, pinch the bottom of the ball slightly to form a point, then gently flatten with your hand. Space cookies about 2 inches apart on a greased cookie sheet and bake for 7 to 8 minutes, until set or just beginning to brown. Remove from oven and immediately (and gently) press two mini pretzels into the tops of the cookies for the reindeer's antlers. Press two googly eyes or M&M's into the reindeer for the eyes. Then press one chocolate drop for the nose.Allow to cool 2 minutes on the baking sheet and then transfer to a wire rack or paper towel to cool completely.
Makes about 40 reindeer cookies.
Source: Peanut butter cookie recipe from Jif. This is the original photo. I really do think we nailed this one.[image error] Scroll to Top

December 12, 2011
Week Eighteen -- Santa Hat Brownies
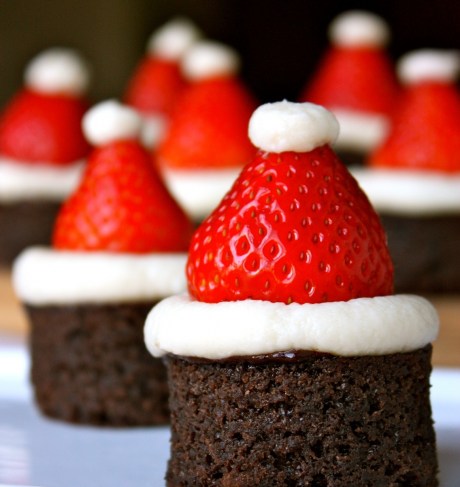
I always have such high hopes for the holidays. I imaginedays of baking and making cute gift bags with homemade treats. The reality is alittle less, well, Martha-ish. However, I do firmly believe in making time fora few fun (and new projects)….. hence the Santa Hat Brownies.SantaHat Brownies
Adapted from this recipe found on Erica's Sweet Tooth
Yields 12-16 browniesIngredients· 1pan of your favorite brownies, cooled and cut into desired size and shape (Iused a round cutter) – or for the really rushed baker – those two-bite browniesthey sell in the bakery department of every grocery store. (Shhh. I won'ttell.)· 12-16small strawberries, cleaned and hulled – Try to find smallish ones. The usualones are enormous and way too big for this project.· Vanillafrosting. Either use the recipe below or just buy a can of white frosting. Imean, seriously. These are so cute, no one will notice. To assemble, pipe a ring of vanillabuttercream on top of each brownie. Cut off the base of a strawberry soit is flat and place it upside down on each brownie, pushing slightly to securein place. Top the tip of the strawberry with a dot of buttercream tofinish the Santa hat. MascarponeButtercream
Ingredients:
1/2 cup (1 stick) unsalted butter, room temperature
8 ounces mascarpone cheese, room temperature
2-1/2 to 3 cups powdered sugar
2 teaspoons vanilla extract
pinch of saltMethod:
Using a stand mixer with a paddle attachment, beat butter and mascarpone cheeseuntil light and creamy, about 2 minutes. Add vanilla extract and salt. Add 2-1/2 cups of sugar, half a cup at a time and continue beating untilsmooth. Add more sugar, if needed to reach desired consistency andsweetness.

November 21, 2011
Week Seventeen -- Gingerbread
Bang!'s Gingerbread
Courtesy of Bang! Restaurant
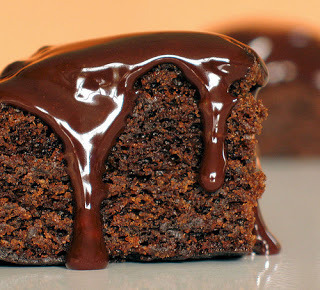
This cake refrigerates and freezes well, and is best served reheated for a few seconds in the microwave oven.
1 1/2 cups water1 1/2 teaspoons baking soda1/2 cup butter1 cup sugar1 cup dark molasses2 tablespoons finely minced fresh gingerzest of 1 lemon3 1/2 cups all-purpose flour2 teaspoons cinnamon1 1/2 teaspoon baking powder1/2 teaspoon ground cloves1/4 teaspoon salt3 eggs
Preheat oven to 350°. Butter or oil a 9" x 13" cake pan. Line the bottom with parchment paper for easier removal.
Bring water and baking soda to a boil. Take off heat and set aside.
In a separate bowl, combine minced ginger, lemon zest, flour, cinnamon, baking powder, ground cloves, and salt. Set aside.
Cream butter and sugar together until light and fluffy. Add molasses and continue creaming until light in color.
Add flour mixture and water and soda mixture, alternately, in three parts. Mix well between additions.
Add eggs, one at a time, mixing well between additions. Scrape bowl and mix well for 2 minutes.
Pour batter into greased, lined cake pan. Batter should come up to the halfway point in the pan. Spread evenly. Bake at 350° for 45-60 minutes or until toothpick inserted in the middle comes out clean.
Cool for 30 minutes in the pan. Slice into squares and serve warm with lightly sweetened, fresh whipped cream. Who are we kidding? Just gobble it up. (My sister likes her's with some chocolate bits melted on top. I favor a schmear of Nutella.)
November 15, 2011
Week Sixteen --Getting Your Chocolate Fix
Okay, I will admit that I am sort of a chocolate freak. In fact, when people say -- "Nah, I not really a fan of chocolate", it makes me a little nervous. I believe that they are A) mentally unsettled, B) in denial, or C) have been force fed Chips Ahoy and Oreos and therefore cannot be held responsible for their opinions.
But, tonight I have to admit something. While generally I'm all about good, real desserts, there are sometimes those moments when I just want something gooey and sweet and well, now. This is where these come in. And please don't sneer at them until you've tried them.
Chocolate Smoothies
1/2 c butter (the original recipe calls for 1/4 cup butter and 1/4 cup shortening -- but the butter is better)
1/2 c dark brown sugar
1/2 cup flour
pinch of salt
1/2 t vanilla
1 cup of chocolate chips
1 cup of chopped nuts (toasted) (optional)
1 cup of broken pretzels (optional)
Mix this all together until crumbly then press it into the bottom of a glass dish. A pie pan is fine (glass only) or a 9x9 cake pan (also glass).
Microwave at 50% power for approximately 4 minutes. This will vary, so keep an eye on it. You want it all to be soft, but be careful of scorching. It can get nasty quickly.
Remove from microwave and sprinkle 1 cup of semi-sweet chocolate chips on top. (I suppose you could use any chips -- white chocolate, milk chocolate, even peanut butter chips.)
Let this melt then spread it all over the top like you are icing a cake.
Top with 1/2 crushed nuts (I like toasted pecans, but any nuts will do.) You can leave these off -- my sister does, but I do think they make it better.
Eat. That's it. Easy, gooey, yummy.
November 8, 2011
Week Fifteen -- Layered Liquids and Layered Bars
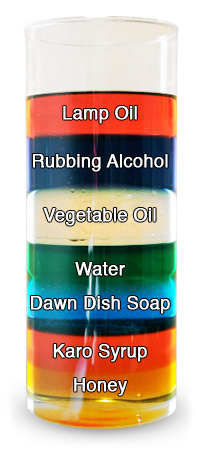
It's odd how things line up this way. We found this VERYcool experiment online and had to do it. It's from Steve Spangler Science,which is seriously the coolest site ever for kitchen projects. http://www.stevespanglerscience.com/We decided to do the Density Tower, which is less sinister than it sounds. I'llgo through all the steps, but you can also just watch the video on Steve Spangler's site.
What You Need:
· A tall, thin glass cylinder. This can be aflower vase, a graduated cylinder, or simply a tall glass. · A turkey baster· Honey· Karo syrup· Maple syrup· Dawn dish soap (important as this is a knowndensity)· Water –colored with food coloring· Vegetable oil· Rubbing alcohol – colored with food coloring.· Lamp oil· (An optional addition is milk, which we didn'tuse. We thought it might get gross.)
WhatYou Do:

Youmust add the substances in order. First, the honey, then the Karo syrup, thenthe maple syrup. Pour slowly and try to keep the substances from touching thesides of the cylinder. Then, using the turkey baster begin adding the otheringredients in this order: dish soap, water, vegetable oil, rubbing alcohol,then lamp oil. For these ingredients, it's best to also go slowly and let thesubstances slide down the inside of the cylinder. Then you're done!
Magic CookieBars (or Seven Layer Bars)
Bring on theMagic Cookie Bars. Okay, to be truthful, the only magical thing about them isthat they are so easy. Well, I guess they are also pretty darn good. Ingredients:
1 1/2 cups graham cracker crumbs
1/2 cup butter, melted
1 (14 oz.) can Eagle Brand® Sweetened Condensed Milk
2 cups (12 oz. pkg.) semi-sweet chocolate chips
1 1/3 cups flaked coconut
1 cup chopped nuts
(You will notice that there are only six layers here. The optional layer can be1 cup of peanut butter chips or a drizzle of caramel topping. We went with justsix ingredients.
Our modifications: We (I mean Harrison)aren't big coconut fans, so we omitted the coconut in favor of toffee bits. (1cup). Then we increased the nuts to 1 ½ cups. We used pecans, toasted (duh). Directions:
HEAToven to 350°F. Spray 13 x 9-inch baking pan with no-stick cooking spray.COMBINEgraham cracker crumbs and butter in small bowl. Press into bottom of preparedpan. Pour sweetened condensed milk evenly over crumb mixture. Layer evenly withchocolate chips, coconut and nuts. Press down firmly with fork.BAKE25 to 30 minutes or until lightly browned. Loosen from sides of pan while stillwarm; cool on wire rack. Cut into bars or diamonds. Forperfectly cut cookie bars, line entire pan with foil, extending foil over edgeof pan. Coat lightly with no-stick cooking spray. After bars have baked andcooled, lift up with edges of foil to remove from pan. Cut into individualbars. (Sigh…. That's the Eagle Brandmethod. We just pretty much scooped out what we wanted into a dish and ateit..)
Keep in mind that these aresweet! I mean, make your teeth ache sweet. And, I'm no baby, but whoa.
What You Need:
· A tall, thin glass cylinder. This can be aflower vase, a graduated cylinder, or simply a tall glass. · A turkey baster· Honey· Karo syrup· Maple syrup· Dawn dish soap (important as this is a knowndensity)· Water –colored with food coloring· Vegetable oil· Rubbing alcohol – colored with food coloring.· Lamp oil· (An optional addition is milk, which we didn'tuse. We thought it might get gross.)
WhatYou Do:
Youmust add the substances in order. First, the honey, then the Karo syrup, thenthe maple syrup. Pour slowly and try to keep the substances from touching thesides of the cylinder. Then, using the turkey baster begin adding the otheringredients in this order: dish soap, water, vegetable oil, rubbing alcohol,then lamp oil. For these ingredients, it's best to also go slowly and let thesubstances slide down the inside of the cylinder. Then you're done!
Magic CookieBars (or Seven Layer Bars)
Bring on theMagic Cookie Bars. Okay, to be truthful, the only magical thing about them isthat they are so easy. Well, I guess they are also pretty darn good. Ingredients:
1 1/2 cups graham cracker crumbs
1/2 cup butter, melted
1 (14 oz.) can Eagle Brand® Sweetened Condensed Milk
2 cups (12 oz. pkg.) semi-sweet chocolate chips
1 1/3 cups flaked coconut
1 cup chopped nuts
(You will notice that there are only six layers here. The optional layer can be1 cup of peanut butter chips or a drizzle of caramel topping. We went with justsix ingredients.
Our modifications: We (I mean Harrison)aren't big coconut fans, so we omitted the coconut in favor of toffee bits. (1cup). Then we increased the nuts to 1 ½ cups. We used pecans, toasted (duh). Directions:
HEAToven to 350°F. Spray 13 x 9-inch baking pan with no-stick cooking spray.COMBINEgraham cracker crumbs and butter in small bowl. Press into bottom of preparedpan. Pour sweetened condensed milk evenly over crumb mixture. Layer evenly withchocolate chips, coconut and nuts. Press down firmly with fork.BAKE25 to 30 minutes or until lightly browned. Loosen from sides of pan while stillwarm; cool on wire rack. Cut into bars or diamonds. Forperfectly cut cookie bars, line entire pan with foil, extending foil over edgeof pan. Coat lightly with no-stick cooking spray. After bars have baked andcooled, lift up with edges of foil to remove from pan. Cut into individualbars. (Sigh…. That's the Eagle Brandmethod. We just pretty much scooped out what we wanted into a dish and ateit..)
Keep in mind that these aresweet! I mean, make your teeth ache sweet. And, I'm no baby, but whoa.
October 31, 2011
Week Fourteen -- Alien Cupcakes and Fruit Kabobs
 More often than not the image of what we're going to makedoesn't match up with what we actually make. This week was a prime example ofthis. My son's teacher sent an email asking if we could send treats for PumpkinDay. Well, sure. So, after much discussion we decided to make alien cupcakesand fruit kabobs because nothing says Pumpkin Say like a bunch of fruit on astick and a weird aliens made out of fluorescent green frosting and Twizzlers.
 And the image I had of all of this, of course, came fromMartha Stewart. (That was your first problem, you say.) So, we go to the storeand buy a chocolate cake mix – no, Martha didn't recommend this – obviously.And we buy a can of vanilla frosting (also not very M.S.). We searched for thegreen taffy that she used, but all we found were bags of multicolored taffy.And I'm thinking to make 24 cupcakes, we'll need to buy about eleven bags, sowe kept looking. Luckily Twizzlers now has rainbow colored licorice (which I'mnot entirely sure can actually be called licorice. (Seriously.) I already hadsome giant gumdrops at home (courtesy of Whole Foods – try the Acai berry ones.Yum).
So, here's what we did:
1. Mix cake mix according to the packagedirections. I'm sorry. I know. But, there it is.
2. Pour the mix evenly into a lined cupcake pan. Wefilled them about ¾ full. I like a puffy cupcake.
3. Bake according to the directions. Gotta love DuncanHines.
4. While the cupcakes baked, we mixed up some acidgreen frosting, sliced the gumdrops in half and sliced the Twizzlers intothirds.
5. Cool the cupcakes. Frost. Decorate. Done. (Takethat M.S.)
The fruit kabobs are also way easy. I would have to say Iprobably wouldn't do these for the under six crowd. Halloween just isn't goingto be as much fun if someone gets a skewer in the eye. Buy fruit, wash, cut asappropriate, slide the fruit onto the skewers. We also used marshmallows, butbeware if you want to do this. Add the marshmallows just before you serve them.They get mushy.

That's it. Like I said, our photos probably morerealistically reflect a ten-year-old and his crazy mom's abilities than thebeautiful photos that M.S. turns out. I like to lower the bar. It makes iteasier to step over it.

October 24, 2011
Week Thirteen -- Apple Pie in an Apple
An Apple Pie in an Apple is all kinds of genius. First ofall you can convince yourself that it is fairly healthy. After all it's anapple! Second, it's really good.
Ingredients:
Four apples (We used Granny Smith, but I imagine any applewould do.)
Granulated sugar to taste. We ended up using approximately ½ a cup.
2T of unsalted butter
2T of flour
2t of ground cinnamon
pinch of nutmeg (optional)
One round of prepared pie dough.
What You Do:
· Peel and core the apples.
· Slice offthe top ½ inch of the apples.
· If youhave a melon baller tool, this next step is easy. If not, it's a little morecomplicated, but not much. Carve your apple into a bowl shape, being carefulnot to break through the walls of the apples. Reserve the chopped apple bits.
· Place the carved apples on a parchment linedbaking sheet.
· Place the chopped apples, flour, sugar, cinnamonand nutmeg into a bowl and toss gently.
· Stuff the hollowed out apples with the applebits and top with ½ T of butter. (Be sure to really overstuff the apples sinceit will all cook down in the oven.)
· Using a large round cookie cutter, an empty jaror a knife, slice your dough into four rounds.
· Top each apple with a round of dough and cutslashes in the dough to vent any steam.
Bake the apples at 350 degrees for approximately 45 minutesor until the apples are soft and the crusts are golden.
You could serve these with ice cream or whipped cream, butwe enjoyed them plain.
October 17, 2011
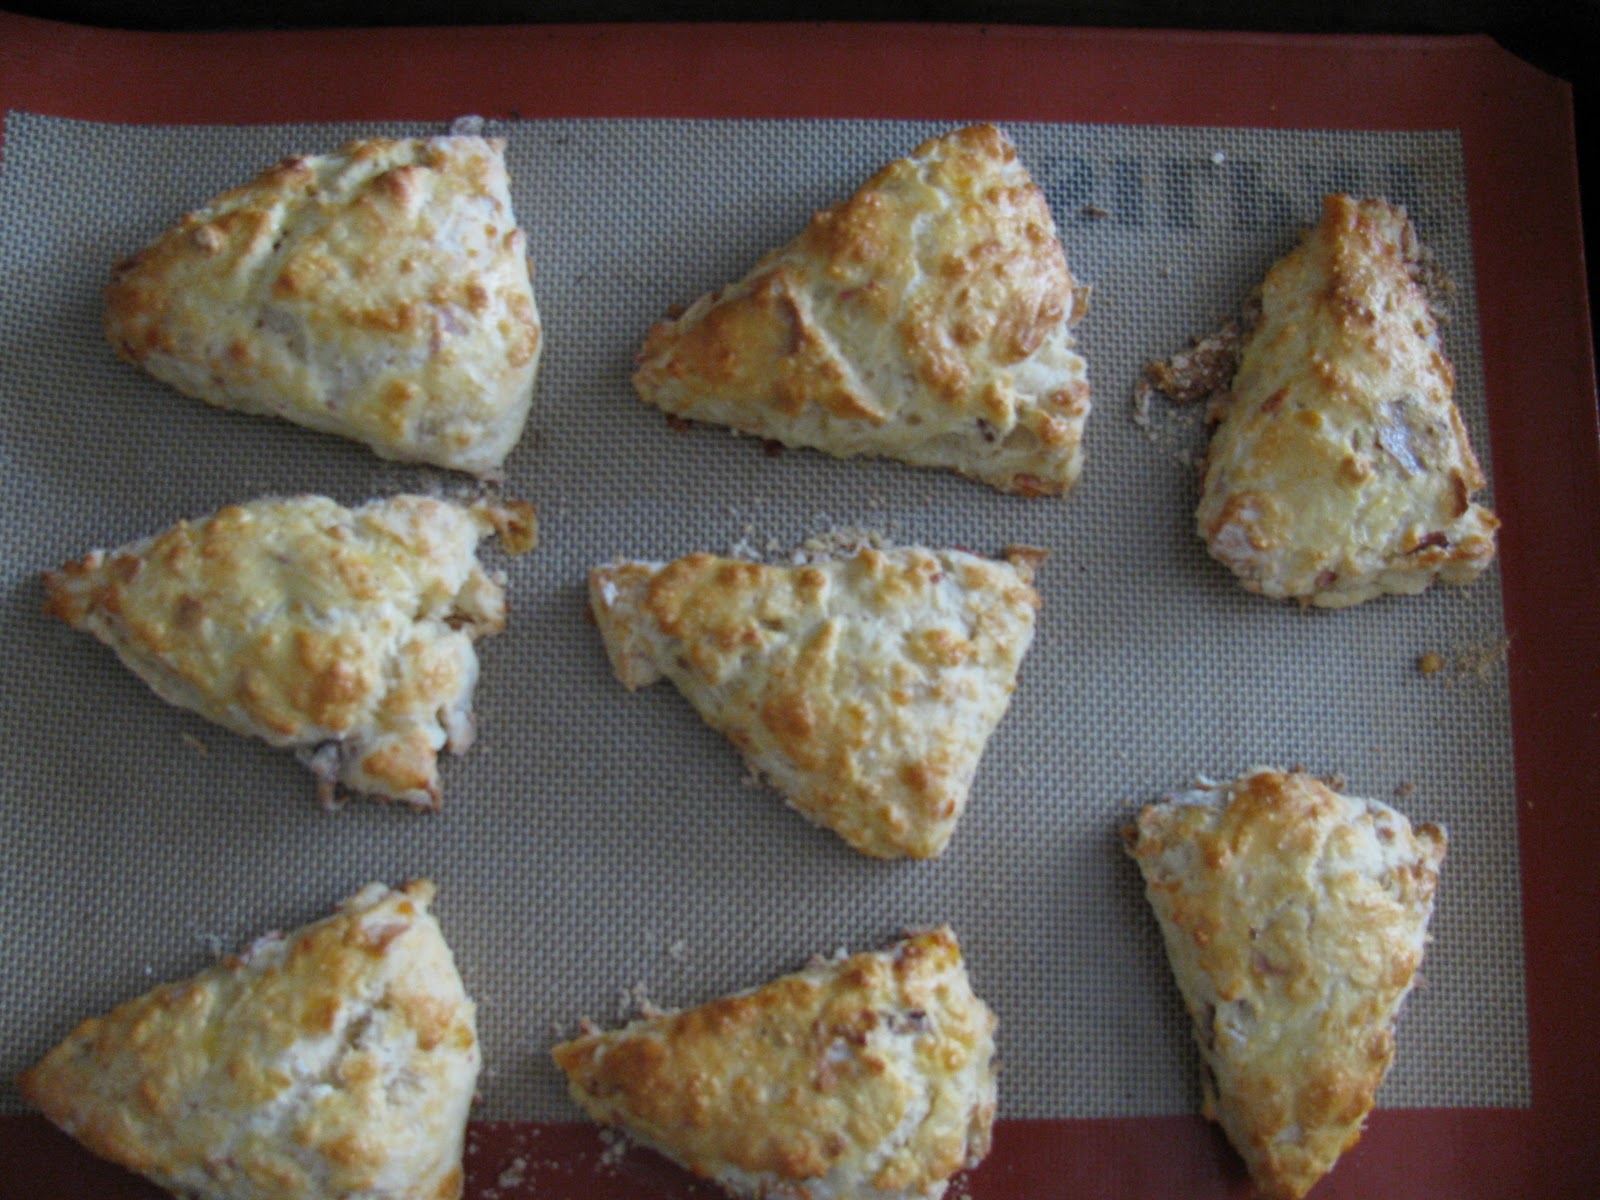
Week Twelve --Bacon Cheddar Scones and Baked Doughnuts
We've been reading The Emerald Atlas by John Stevens. I completely blame the book for our bakefest yesterday. Okay… blame isn't the best word. Maybe credit? There is a scene in the novel where a dwarf delivers a breakfast for dinner feast to the Emma and Michael and Dr. Pym. Maybe it was just that we were hungry or maybe the description was so great or maybe both,
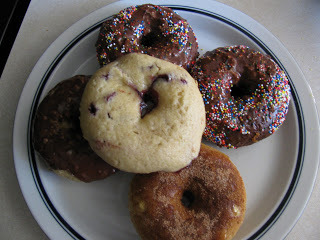 but we decided to partly mimic the meal. I say partly because in the book, the dwarf delivers at least seven different things. We started by making baked doughnuts, which we've done before, but which we enhanced with this round. The recipe is pretty basic, but it's infinitely versatile. They're really tasty despite being somewhat healthy. For best results, you really need a doughnut pan, but a muffin pan would work just as well, you'd just have doughnuts without any holes. Both of these recipes come from King Arthur Flour – which seriously is the greatest place for recipes, ingredients, mixes, and cool baking gadgets. Baked Doughnuts
Ingredients:
1 cup Unbleached All-Purpose Flour
1/2 cup sugar
1 teaspoon baking powder
1/8 teaspoon nutmeg
1/4 teaspoon salt
1 teaspoon cinnamon
3 tablespoons dried buttermilk powder
2 large eggs
3 tablespoons vegetable oil
2 tablespoons water
Directions
1) Whisk together all of the dry ingredients in a medium-sized mixing bowl.
2) In a separate bowl, beat the eggs, oil and water (or buttermilk or yogurt) until foamy.
3) Pour the liquid ingredients all at once into the dry ingredients and stir
just until combined.
4) Butter or grease the doughnut pan; non-stick pan spray works well here. Note: even though the pan is non-stick, since the doughnuts are low-fat they may stick unless you grease the pan first. Fill each doughnut form half full.
5) Bake the doughnuts in a preheated 375°F oven for 10 to 12 minutes. When done, they'll spring back when touched lightly, and will be quite brown on the top.
6) Remove the doughnuts from the oven, remove them from the pan, and allow them to cool on rack. Glaze with icing, or coat with cinnamon-sugar or any non-melting sugar.
*** We made a few alterations. We put more batter in the pan. Using the amount the recipe called for made these wimpy flat doughnuts. By filling them to the brim, you get nice plump doughnuts.
*** We made a chocolate glaze with cocoa power and confectioner's sugar and a bit of water. We added sprinkles to those. We also brushed a couple with butter and sprinkled cinnamon sugar over them. Finally we tried jelly-filled, which worked pretty well. Although I'd put a sheet pan under the pan to catch any runaway jelly. For these we put in half the batter, added about 2T of jelly, then topped with the remaining batter.
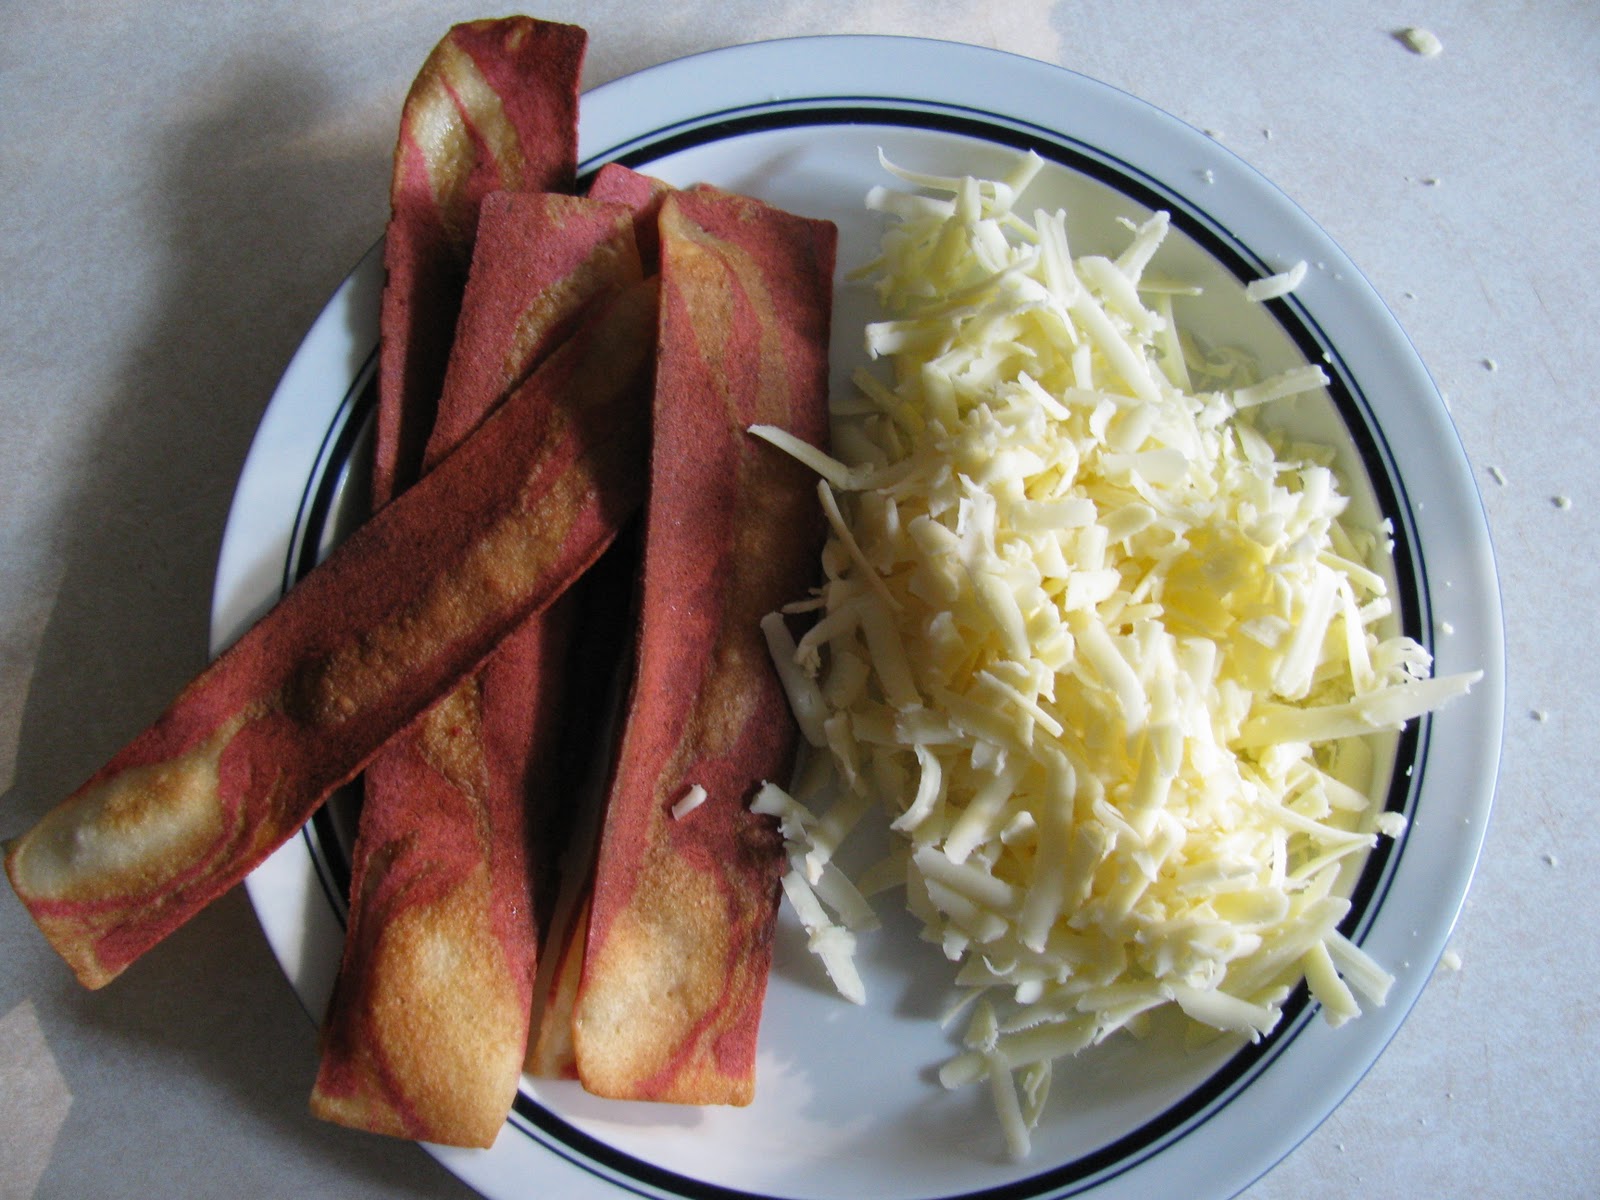
Bacon Cheddar Scones – note these are seriously the BEST scones I have ever tasted. Also we're both veg, so we used soy bacon. You might try it. I think regular bacon might make the scones too greasy.
2 cups All-Purpose Flour or Pastry Blend
1 teaspoon salt
1 tablespoon baking powder
2 teaspoons sugar
4 tablespoons (1/2 stick, 2 ounces) cold butter
1 cup (4 ounces) very coarsely grated sharp cheddar cheese
1/2 pound bacon, cooked, cooled, and crumbled (about 1 cup) We used Morning
Star bacon.
3/4 cup + 2 tablespoons plain Greek
 yogurt. (K.A.F. uses heavy cream here, but we substituted the yogurt.
Preheat the oven to 425°F. Lightly grease a baking sheet, or line it with parchment.
1) Whisk together the flour, salt, baking powder, and sugar.
2) Work the butter into the flour until the mixture is unevenly crumbly.
3) Mix in the cheese and bacon till evenly distributed.
4) Add ¾ cup of the yogurt, stirring to combine. Try squeezing the dough together; if it's crumbly and won't hang together, or if there are crumbs remaining in the bottom of the bowl, add yogurt until the dough comes together. Transfer the shaggy dough to a well-floured work surface.
5) Pat the dough into a smooth 7" disk about ¾" thick. Transfer the disk to the prepared baking sheet.
6) Use a knife or bench knife to cut the disk into 8 wedges, spreading the wedges apart a bit on the pan.
7) Brush the scones with a bit of beaten egg; this will help their crust brown.
8) Bake the scones for 22 to 24 minutes, until they're golden brown. Remove them from the oven, and cool right on the pan. Serve warm, or at room temperature.
Yield: 8 large scones

 but we decided to partly mimic the meal. I say partly because in the book, the dwarf delivers at least seven different things. We started by making baked doughnuts, which we've done before, but which we enhanced with this round. The recipe is pretty basic, but it's infinitely versatile. They're really tasty despite being somewhat healthy. For best results, you really need a doughnut pan, but a muffin pan would work just as well, you'd just have doughnuts without any holes. Both of these recipes come from King Arthur Flour – which seriously is the greatest place for recipes, ingredients, mixes, and cool baking gadgets. Baked Doughnuts
Ingredients:
1 cup Unbleached All-Purpose Flour
1/2 cup sugar
1 teaspoon baking powder
1/8 teaspoon nutmeg
1/4 teaspoon salt
1 teaspoon cinnamon
3 tablespoons dried buttermilk powder
2 large eggs
3 tablespoons vegetable oil
2 tablespoons water
Directions
1) Whisk together all of the dry ingredients in a medium-sized mixing bowl.
2) In a separate bowl, beat the eggs, oil and water (or buttermilk or yogurt) until foamy.
3) Pour the liquid ingredients all at once into the dry ingredients and stir
just until combined.
4) Butter or grease the doughnut pan; non-stick pan spray works well here. Note: even though the pan is non-stick, since the doughnuts are low-fat they may stick unless you grease the pan first. Fill each doughnut form half full.
5) Bake the doughnuts in a preheated 375°F oven for 10 to 12 minutes. When done, they'll spring back when touched lightly, and will be quite brown on the top.
6) Remove the doughnuts from the oven, remove them from the pan, and allow them to cool on rack. Glaze with icing, or coat with cinnamon-sugar or any non-melting sugar.
*** We made a few alterations. We put more batter in the pan. Using the amount the recipe called for made these wimpy flat doughnuts. By filling them to the brim, you get nice plump doughnuts.
*** We made a chocolate glaze with cocoa power and confectioner's sugar and a bit of water. We added sprinkles to those. We also brushed a couple with butter and sprinkled cinnamon sugar over them. Finally we tried jelly-filled, which worked pretty well. Although I'd put a sheet pan under the pan to catch any runaway jelly. For these we put in half the batter, added about 2T of jelly, then topped with the remaining batter.
Bacon Cheddar Scones – note these are seriously the BEST scones I have ever tasted. Also we're both veg, so we used soy bacon. You might try it. I think regular bacon might make the scones too greasy.
2 cups All-Purpose Flour or Pastry Blend
1 teaspoon salt
1 tablespoon baking powder
2 teaspoons sugar
4 tablespoons (1/2 stick, 2 ounces) cold butter
1 cup (4 ounces) very coarsely grated sharp cheddar cheese
1/2 pound bacon, cooked, cooled, and crumbled (about 1 cup) We used Morning
Star bacon.
3/4 cup + 2 tablespoons plain Greek
 yogurt. (K.A.F. uses heavy cream here, but we substituted the yogurt.
 Preheat the oven to 425°F. Lightly grease a baking sheet, or line it with parchment.
1) Whisk together the flour, salt, baking powder, and sugar.
2) Work the butter into the flour until the mixture is unevenly crumbly.
3) Mix in the cheese and bacon till evenly distributed.
4) Add ¾ cup of the yogurt, stirring to combine. Try squeezing the dough together; if it's crumbly and won't hang together, or if there are crumbs remaining in the bottom of the bowl, add yogurt until the dough comes together. Transfer the shaggy dough to a well-floured work surface.
5) Pat the dough into a smooth 7" disk about ¾" thick. Transfer the disk to the prepared baking sheet.
6) Use a knife or bench knife to cut the disk into 8 wedges, spreading the wedges apart a bit on the pan.
7) Brush the scones with a bit of beaten egg; this will help their crust brown.
8) Bake the scones for 22 to 24 minutes, until they're golden brown. Remove them from the oven, and cool right on the pan. Serve warm, or at room temperature.
Yield: 8 large scones
Heather Hepler's Blog

- Heather Hepler's profile
- 273 followers
Heather Hepler isn't a Goodreads Author
(yet),
but they
do have a blog,
so here are some recent posts imported from
their feed.

