
Kristina Seleshanko's Blog, page 40
September 9, 2016
How Moms Can Make Money at Home
 It's a question I frequently hear - on playgrounds, on social media, among friends meeting for coffee.
 It's a question I also ask myself: How can I make money to help out my husband or family? A reader also recently asked this question of me:
"Hi Kristina,
My name is Jamie. I'm a 34 year old Christian wife and homeschooling mama of 4 little ones (only 2 of them are school aged)...I have a simple question to ask you that may be difficult to answer but I'd love any advice you have! I often think about what it means to be a Proverbs 31 wife, and something has been tugging at my heart for several years now. I long to help my husband out in the financial area, (i.e. work from home) but there's one major problem...I don't know what my talents are! Sounds funny I know, but I honestly don't know what I could do to make a little extra money to help us out. We are not necessarily in dire straits with finances but my husband is self employed and is often stressed about money since all the weight is on him and I wish I could do more to help...I feel stuck. And I know we are total strangers but do you have any advice? Right now the only answer I can come up with is 'Pray.'
Thank you for any help!
In Christ,
Jamie"
Jamie, you're not alone! I think most stay at home moms ask themselves this question on a regular basis. Many stay at home moms even feel guilty for not helping their family financially. In fact, it seems that in our society, it's expected that both the husband and wife should bring in some income. Even in my own household, I often feel there's an expectation that I must bring in some sort of income, or earn extra money when it is needed.
But I'd like you to question this whole idea.
Until quite recently, in all but the very poorest American families, wives were not expected to make money. Not because they weren't capable of doing so, and not even because our society expected husbands should be able to support their wives and children all by themselves. Wives generally didn't work because...they were already working.
They were working in the home. Caring for the children, keeping the house tidy, cooking...All important things, and all things that would cost an arm and a leg to hire someone to do.
So, if you think about it, they were helping their husbands financially by not going out and getting a job.
Even today, if you add up what the average working mom earns, then subtract all the expenses of her working away from home (including fuel, work clothes, lunches, convenience or restaurant dinner food, and childcare), you'll usually find she's not adding much at all to the family income. (Here's a good example.)
Maybe that's why so many modern moms strive to work at home.
But here's another little secret that didn't use to be a secret at all: Back in the day, housewives contributed to the family income in another important way. They were excellent house managers.
That's not a term we hear anymore. What exactly is a house manager? It's someone who keeps the household running smoothly. It's someone who saves her husband time and frustration. It's someone who makes it easier for her husband to go off to work every morning. And it's someone who sees to it he has to work less hard, rather than more hard.
That's a far cry from many wives I see today, who go on shopping sprees with the attitude that "he'll just have to figure out a way to pay for it."
And so one very important way you can contribute to the family income is by spending the family income wisely.
How much can you save by being a good household manager? Potentially thousands every year.
Now, maybe you already are a good household manager and all you (and your husband) need to do is appreciate just how much you contribute to the family. If that's the case, another thing to consider is your lifestyle. Do you live like the average American, expecting expensive vacations, the latest gadgets and grown up toys, lots of stuff, lots of "going out," and lots of debt?
If so, learning to love a life living within your means is an important goal. Start recognizing that debt is slavery. (Really think on that!) Start realizing that stuff is also a sort of slavery. And start recognizing that if your husband is stressed out trying to pay for things you don't really need it's not worth it. At. All.
I don't know you, Jamie. So I don't know what your lifestyle is like or whether I'm "preaching to the choir." You may still be thinking, "We still need some extra cash." I get it. I seriously do! So here are some thoughts on how you can save or earn money, making your family more comfortable:
* Keep praying. Prayer is so powerful, and if you allow God to, he will either change your heart so you don't feel the need to work, or he will provide the perfect job for you.
* Remember Proverbs 31. I don't believe for a second that she did her trading and clothes selling while she had young children at home. Because young children require pretty much everything a woman has! That section of the Bible shows us the entire life of one "noble woman." Keep that in mind.
* Build skills. Build one of your interests until you're an expert at a marketable skill. For example, in the full version of the email you sent me, you said you like to write; so consider developing that skill by blogging and contributing to small local publications, and eventually you may become professional enough to grow your blog or write for national publications. Or choose one of your other interests to develop.
* Use Swagbucks to earn gift certificates for places like Amazon, where you can buy discounted food and other necessities. Or use those gift cards for school supplies and gifts throughout the year.
* Consider doing more shopping online. Some people find they can get better prices on diapers, toilet paper, and so on by shopping at Amazon, especially if they use Subscribe and Save.
* Keep a price book for groceries, toiletries, and other commonly used household items.
* Stock up when you can. When items you use go on sale, buy a bunch. In the long run, that saves money.
* If you're not already, get organized about serving food. Meal plan (here's my super easy method) and always have easy peasy meals on hand (in the pantry or freezer) for those "I'm too tired to cook nights." Eating out is not only unhealthy, but it burns through money fast.
* Pack your husband's lunch, if possible. If he loves eating out for lunch, see if he'll agree to doing it only once or twice a month.
* Shop used. Children's clothes, for example, are so much cheaper used. Also, depending upon where you live, you may find thrift stores, Craigslist, etc., can provide quality household goods for a fraction of the cost.
* Dump the dish or cable. TV is outrageously expensive. Learn to live with Netflix (saving thousands per year). Consider DVDs from the library, too (as long as you can get them returned in a timely way).
* Cook from scratch as much as possible. Your family will not only be more healthy, but you'll save a lot of money. I also think you'll find that cooking from scratch often really isn't that much more time consuming.
Readers: What are your suggestions for how Jamie - or anyone - can save or earn money?


September 3, 2016
Weekend Links
 In which I share my favorite posts from this blog's Facebook page.
"He changes times and seasons; he removes kings and sets up kings; he gives wisdom to the wise and knowledge to those who have understanding."
Daniel 5:21
* UPDATE: Friends, I found another apple tree. I previously overlooked it because a small wild tree is trying to grow through it. But even though it's been neglected, there are some apples on it. I think that brings us up to 11 apple and 11 plum trees. Amazing blessings.
* My newest Pinterest board is all about raising sheep...because hubby thinks they should be our next homestead addition. Turns out, they are very good at keeping down vegetation - better than goats. Plus...lamb chops.
 * Costco has a reputation for carrying only high end products. That's why I was so disappointed when I discovered the canned mandarin oranges we got there are a product of China. No thanks; I don't want food from China. Read labels carefully, friends!
* These "Bouncy Bands" look like a great invention for young kids who must sit all day in public/private school. A reader who works for Head Start says they use them with their kids and they work well!
* I've been using these free first day of school questionnaires with my kids since kindergarten. They make wonderful keepsakes!
* "Studies show a direct link between the amount of physical possessions in a house and the stress level of the female homeowner. One study done at UCLA found that the more stuff was in a woman’s house, the higher her level of stress hormones. This same study also found that women subconsciously relate how happy they are with their home-life and family to how they feel about their homes. So the more clutter and chaos in the home, the less happy the woman is with her family and her life."
* Ibuprofen isn't especially safe for anyone, but there are special considerations if you're over 40.
* The FDA bans antibacterial soap .
* "We now know that those iPads, smartphones and Xboxes are a form of digital drug. Recent brain imaging research is showing that they affect the brain’s frontal cortex - which controls executive functioning, including impulse control - in exactly the same way that cocaine does. Technology is so hyper-arousing that it raises dopamine levels - the feel-good neurotransmitter most involved in the addiction dynamic - as much as sex. This addictive effect is why Dr. Peter Whybrow, director of neuroscience at UCLA, calls screens 'electronic cocaine' and Chinese researchers call them 'digital heroin.'"
 Ed.
Ed.* An interesting article about heirloom apples and why you've never heard of them.
* The puppy Ed is primarily my 7 year old son's responsibility. He's doing a good job, but today he said, "He wants to go out again? I wish there were 10 of me!" Ha! Now he knows how every mama feels!
Oldies But Goodies:
* How We Homeschool on a Shoestring Budget
* Want Big Savings on Groceries? Use a Price Book!
* Quesadillas for a quick, healthy meal anytime.
* How to Get Your Kids to Eat Healthy
 Source of this meme is unknown.
 September 1, 2016
Old Fashioned Baked Apples Recipe
 This post contains affiliate links. All opinions are my own. Please see FCC disclosure for full information. Thank you for supporting this site!
Around here, we love apple everything. Each year, I can applesauce, make dried apple rings, fill the freezer with apple pie filling...and of course we eat lots of plain, fresh apples - or apple slices slathered in peanut butter. But, for some reason, until recently, I'd never made my children an apple classic: Baked apples.
This old fashioned recipe is so simple, and so much healthier than most other desserts. But I didn't grow up eating it. In fact, I'd never even heard of baked apples until I was in my early 20s and a doctor put my mom on a special diet. Baked apples were on her short list for desserts. We hated most of the recipes her doctor gave her. But baked apples? That dish was a keeper!
People have been baking apples for hundreds of years, and there are about a bazillion ways to make baked apples, but I tend to stick with this simple recipe. It takes only four or five minutes to prepare and has great flavor.
Old Fashioned Baked Apple Recipe
4 apples (Pippin, Granny Smith, Honeycrisp, Rome Beauty, Golden Delicious, or Jonagold are considered great for baking, but experiment to discover what type of apple you like best! For this post, I used apples from our orchard; I have no idea what variety they are, but they are yummy!)
1/4 cup chopped walnuts or pecans
1/4 cup packed brown sugar
2 tablespoons butter, at room temperature
1/2 teaspoon ground cinnamon
1/2 cup water
1. Preheat the oven to 350 degrees F. Using an apple corer or a knife, remove the core from the apple. The dessert will be less messy if you leave the bottom (blossom end) of the apple in tact, but it's not the end of the world if you remove the entire core, as I did.

2. In a small bowl, stir together the brown sugar, butter, and cinnamon. Fold in the nuts.

3. Place the apples in a baking dish and spoon the nut mixture inside each apple. Pour the water into the baking dish and bake for about 40-45 minutes, or until the apples can easily be pierced with a fork.
4. Remove the baking dish from the oven and allow apples to cool in it. Serve warm. If desired, serve with vanilla ice cream.
Related Posts
Apple Skillet Cake Recipe
Apple Spice Bread Recipe
Apple Butter Oatmeal Crumb Bars Recipe
Canning Apple Pie Jam
Freezing Apple Pie Filling
The Best Tasting, Easiest Applesauce Ever
Making Dried Apple Rings in the Warmer Drawer
How to Preserve Apples
What to do with Crab Apples
Picking Unripe Apples for Making Apple Pectin
August 30, 2016
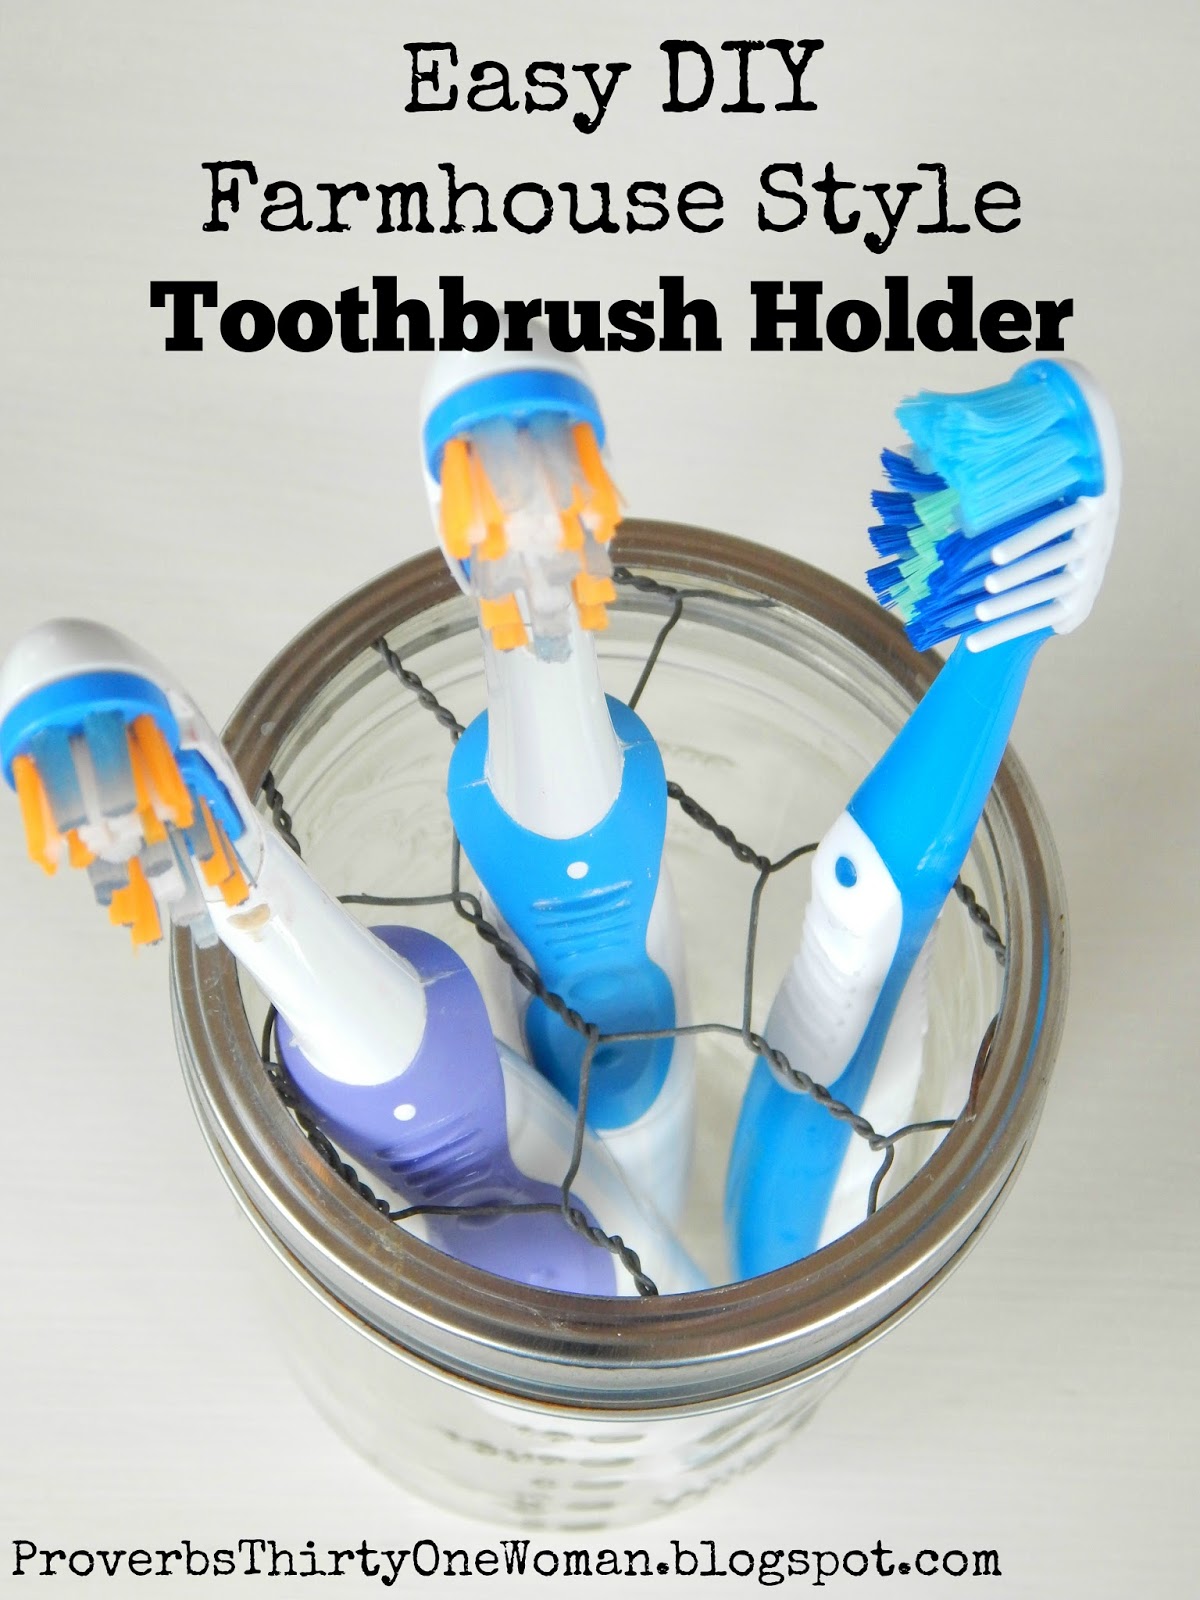
Easy DIY Farmhouse Style Toothbrush Holder
 This post contains affiliate links. All opinions are my own. Please see FCC disclosure for full information.
Our old suburban bathroom had a luxurious amount of counter space. Our new rural homestead bathroom has almost none. Organizing it is a bit of a challenge, and the toothbrush situation has been driving me to distraction. Four toothbrushes - plus a special toothbrush for my daughter's retainer - all strewn across one sink, along with toothpaste and soap...It was constant mess.
I looked both locally and online to find a toothbrush holder that would hold that many toothbrushes - some electric, with thicker handles than the manual kind - to no avail. Everything was either too breakable, too small, or too chintzy or cheap looking. (And, occasionally, more than I wanted to pay.) So last weekend, I whipped up a super easy solution that also fits in with my farmhouse vision for this house. And I did it all with stuff I had on hand.
First I'll walk you through how I made the toothbrush holder at zero cost, then I'll show you some simple and inexpensive ways to customize the look.
 The commercially made inspiration for this project.How to Make a Farmhouse Style Toothbrush Holder
You will need:
One pint sized canning jar with lid and screw band (I used a widemouth jar)
Small piece of chicken wire
Wire cutters
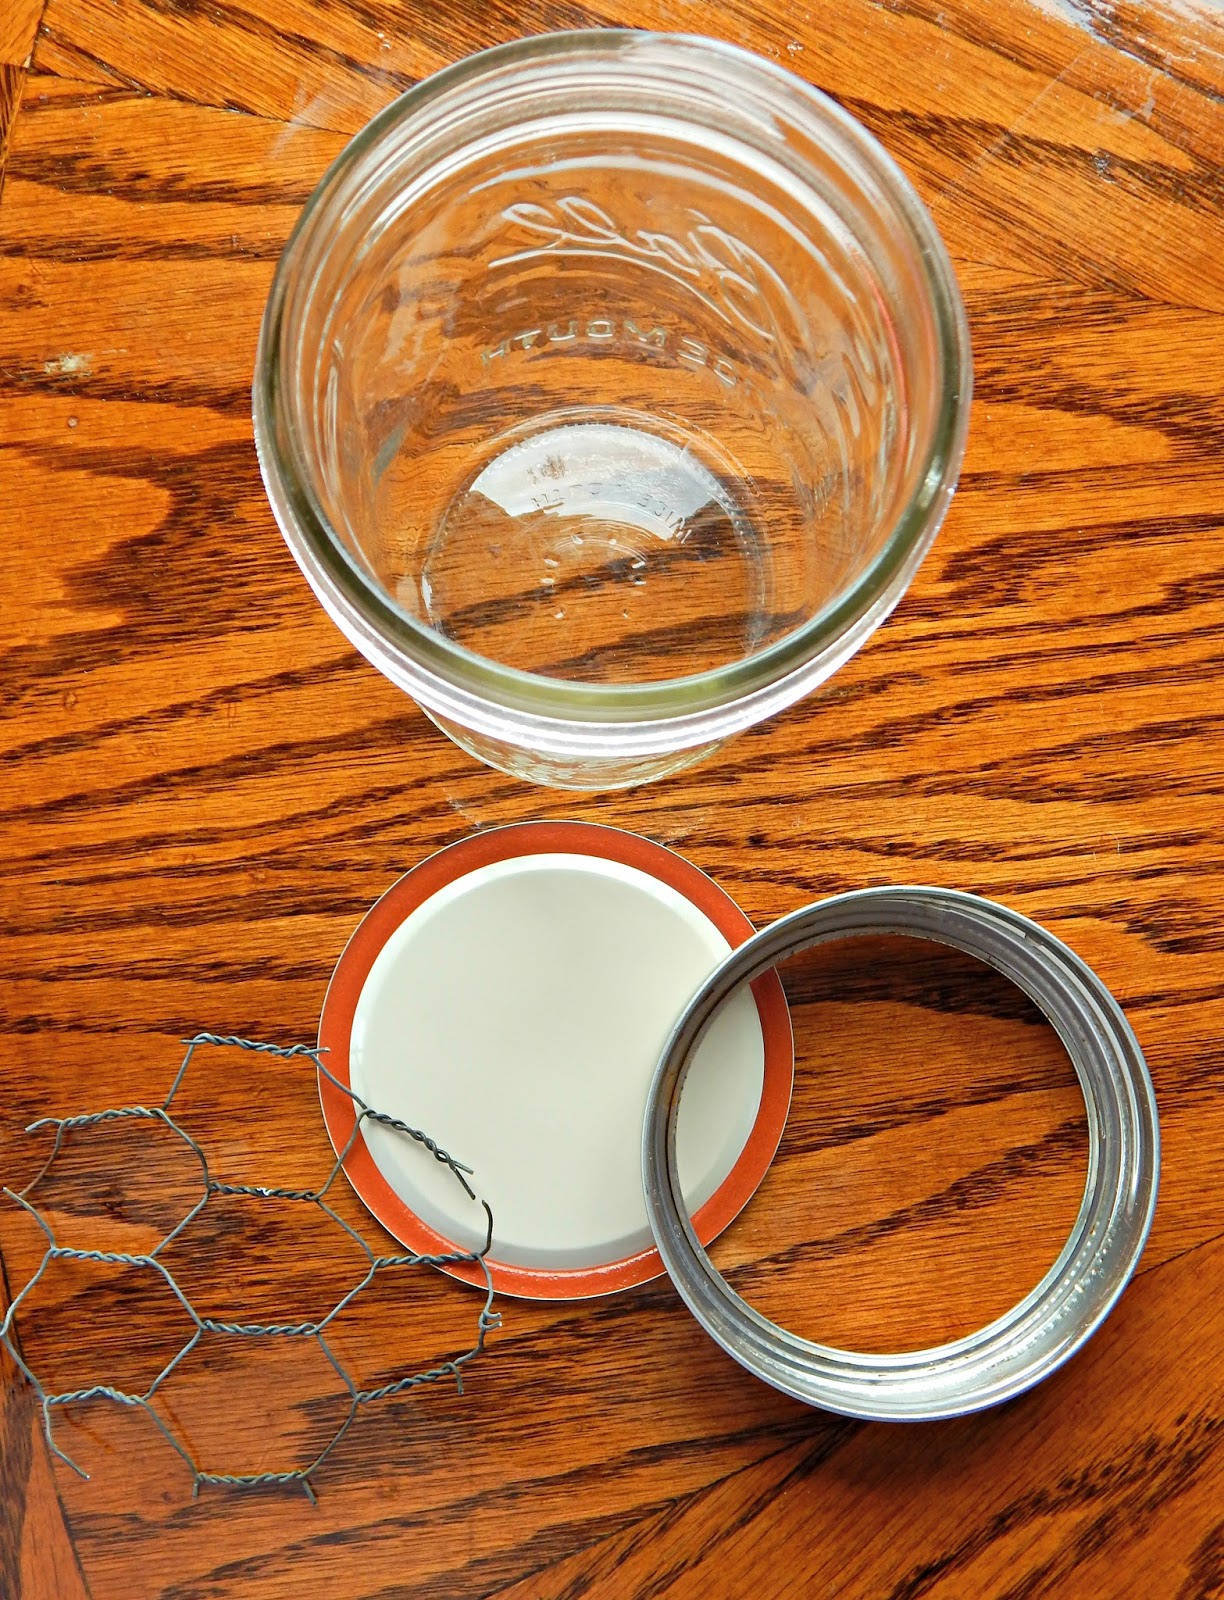
1. Lay the chicken wire flat on a hard surface and place the jar lid over it. Use the lid as a template for cutting the chicken wire into a circle the same size as the lid. Be sure to use wire cutters!

2. Lay the circle of chicken wire inside the canning jar ring.

3. Screw the ring onto the jar.
 Viola! It doesn't get any easier than that!
Variations
* Use one of the "heritage" canning jars, which come in blue, green, and purple.
* Color the jar any color you like; there are many methods for doing this: This basic method; distressed method; "sea glass" look; metallic look; or colored glass look.
* Use any type wire mesh you have on hand, as long as a toothbrush will fit in the holes.
* Use a store-bought toothbrush insert for the jar, like this or this or this.
* Not crafty? Buy the Mason jar that inspired this project!
* Want a matching soap dispenser? That's really easy, too. Just purchase a pump! (This foaming pump insert works, too.)
August 27, 2016
Weekend Links & Updates
 Meet Ed.In which I share my favorite posts from this blog's Facebook page.
"Trust in the Lord with all your heart and lean not on your own understanding; in all your ways submit to him and he will make your paths straight."
Proverbs 3: 5-6
* Meet the newest edition to our homestead: Ed. He came home with us this week and we think he's the cutest puppy ever. So far, he's very polite with the rabbit and the chicks.
* UPDATE: All the homestead plums are picked and preserved. Most of the berries are gone, too. Now we're just waiting on some apple trees. I suddenly feel like I have tons of time...but I'm missing my daily dose of orchard-fresh fruit!
* Why we need mean moms.
 We see some amazing skies, here on the homestead.
* A nice little over view covering a few of the facts and stats supporting the effectiveness of homeschooling.
* Tummy troubles? There's a great herbal tea for that.
* Super easy to for knowing when to water any tree.
* College students get a free 6 month trial of Amazon Prime!
Oldies But Goodies:
* Why Homeschool Preschool?
* Back to School Breakfasts
* Preparing for Sabbath, a Day of Rest
 Our sunsets are pretty nice, too.
August 23, 2016
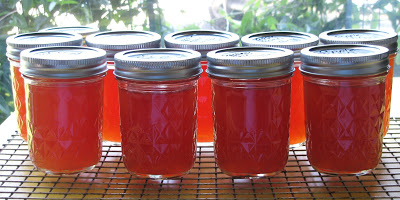
Understanding Pectin
 Even among many life-long canners, pectin is a mysterious thing. How does it work? Why are there different types of pectin? What's it really made from? How can you use it and get consistent results? Recently, I chatted with representatives from some of the most popular commercial pectin-making companies, then coupled the information I gleaned from them with my own research. The result? Some definitive answers.
What is Pectin?
Speaking non-technically, pectin is a component (basically, a starch) found in the tissue of all fruits. Under-ripe fruit has more pectin than fully ripe fruit - and some fruits naturally have more pectin than others. Apples, quince, and citrus, for example, all contain higher amounts of pectin than other fruits.
For the purposes of canning, pectin is used to thicken and jell jams and jellies. Pectin will only jell, however, when it's cooked to the right temperature (210 and 220ºF, depending upon altitude). Cooking it cooler or hotter than this will produce jams and jellies with too much liquid. In addition, pectin typically requires sugar in order to form a jell.
Pectin "In the Old Days"
If you look at 19th century canning recipes, you'll never find one that calls for pectin. That's because canners relied on the natural pectin found in fruit, plus a long cook time, and perhaps even the addition of just enough under-ripe or tart apples, to create a jell. In fact, it wasn't until the early 1800s that scientists discovered that pectin is what makes jams and jellies jell, when mixed with the proper amount of sugar.
Here's a good explanation of how pectin works, from the British newspaper, The Guardian:
"Pectin was first isolated by French chemist Henri Braconnot in 1825 and was named from the Greek pektikos, which means congealed or curdled. It is a polysaccharide so, like cellulose and starch, it is made up of long chains of sugar molecules. In fruit, pectin is concentrated in the skins and cores where it acts as structural 'cement' in the plant cell walls. In jam, pectin forms a mesh that traps the sugary liquid and cradles suspended pieces of fruit.
"Branches that stick out from the long chains of pectin bond with each other to form the three dimensional network that jam makers crave. In a solution, these branches are reluctant to bond, first because they attract water molecules, which stops them bonding, and second because they have a slight negative electrical charge, which means they repel one another.
"To solve the first problem we add sugar, which binds to the water molecules and frees up the pectin chains to form their network. The negative charges are reduced by acid naturally found in the fruit or added to the mixture. The acid reduces the electrical charge on the pectin branches and so allows them to bond. To increase acidity lemon juice can be added. But be careful: if your mixture is too acidic, this will damage the pectin."
 Citrus pith is an excellent source of pectin. (Photo courtesy of
 Leslie Seaton.) Commercially Made Pectin
There are two types of commercially made pectin: Powdered and liquid. By and large, most canners in the United States use powdered pectin. It should always be used as directed on the package, and there may be slight but important differences in the instructions, depending upon the manufacturer.
Liquid pectin is added near the end of cooking. Many expert canners prefer liquid pectin, saying it produces a softer jell than powdered pectin, as well as more consistent results. Again, you should always carefully follow the manufacturer's directions for use.
Powdered and liquid pectin are not interchangeable. In fact, which type you use is determined by the recipe you're using. You cannot successfully use liquid pectin for a powdered pectin recipe, and vice versa.
There is some controversy online about what commercially made pectin is made from. Some say "mostly apples," some say "mostly citrus pith," while others say - believe it or not - mold. The answers came easily enough from producers of commercial pectin:
A Sure-Jell Certo (Kraft) representative responded to my inquiries, saying their pectin is made from lime peels.
Ball's representative said their pectin is made "from apple pomace, which is rendered as a byproduct of juice manufacturing. The Ball Canning liquid pectin is derived from citrus peels."
Connie Sumberg of Pomona Pectin said, "Our pectin is made from the dried peel of lemon, lime, and orange, after the fruit has been juiced and the oil has been pressed out of the peel. Pomona's Pectin contains only 100% pure citrus pectin, which is vegan, gluten free, and GMO free. There are no additives, preservatives, sugar, or dextrose. There are no corn or apple by-products." She also noted that other brands of pectin contain additives and sometimes preservatives; some, like dextrose and citric acid, are made from corn, and therefore may be GMO. Other manufacturers didn't respond to my inquiries about GMO ingredients in their pectin.
Interestingly, I have yet to find any commercial pectin that is organic - and both apples and citrus are some of our most heavily sprayed crops.
No Sugar Pectin
Pomona's Pectin is a little different from the other available brands in other ways, too. Unlike most commercial pectin, which need the right amount of sugar to create a jell, Pomona's actually uses calcium to make a jell. This allows canners to use less - or even no - sugar in their jams and jellies, or to easily use alternative sweeteners like honey, maple syrup, or stevia. Pomona's is more costly than other commercial pectin, but each box also makes up to four batches of jam or jelly, which is more than other brands.
Other pectin makers also have low- or no-sugar pectin available; these can be used with fruit juices, sugar substitutes, and honey.
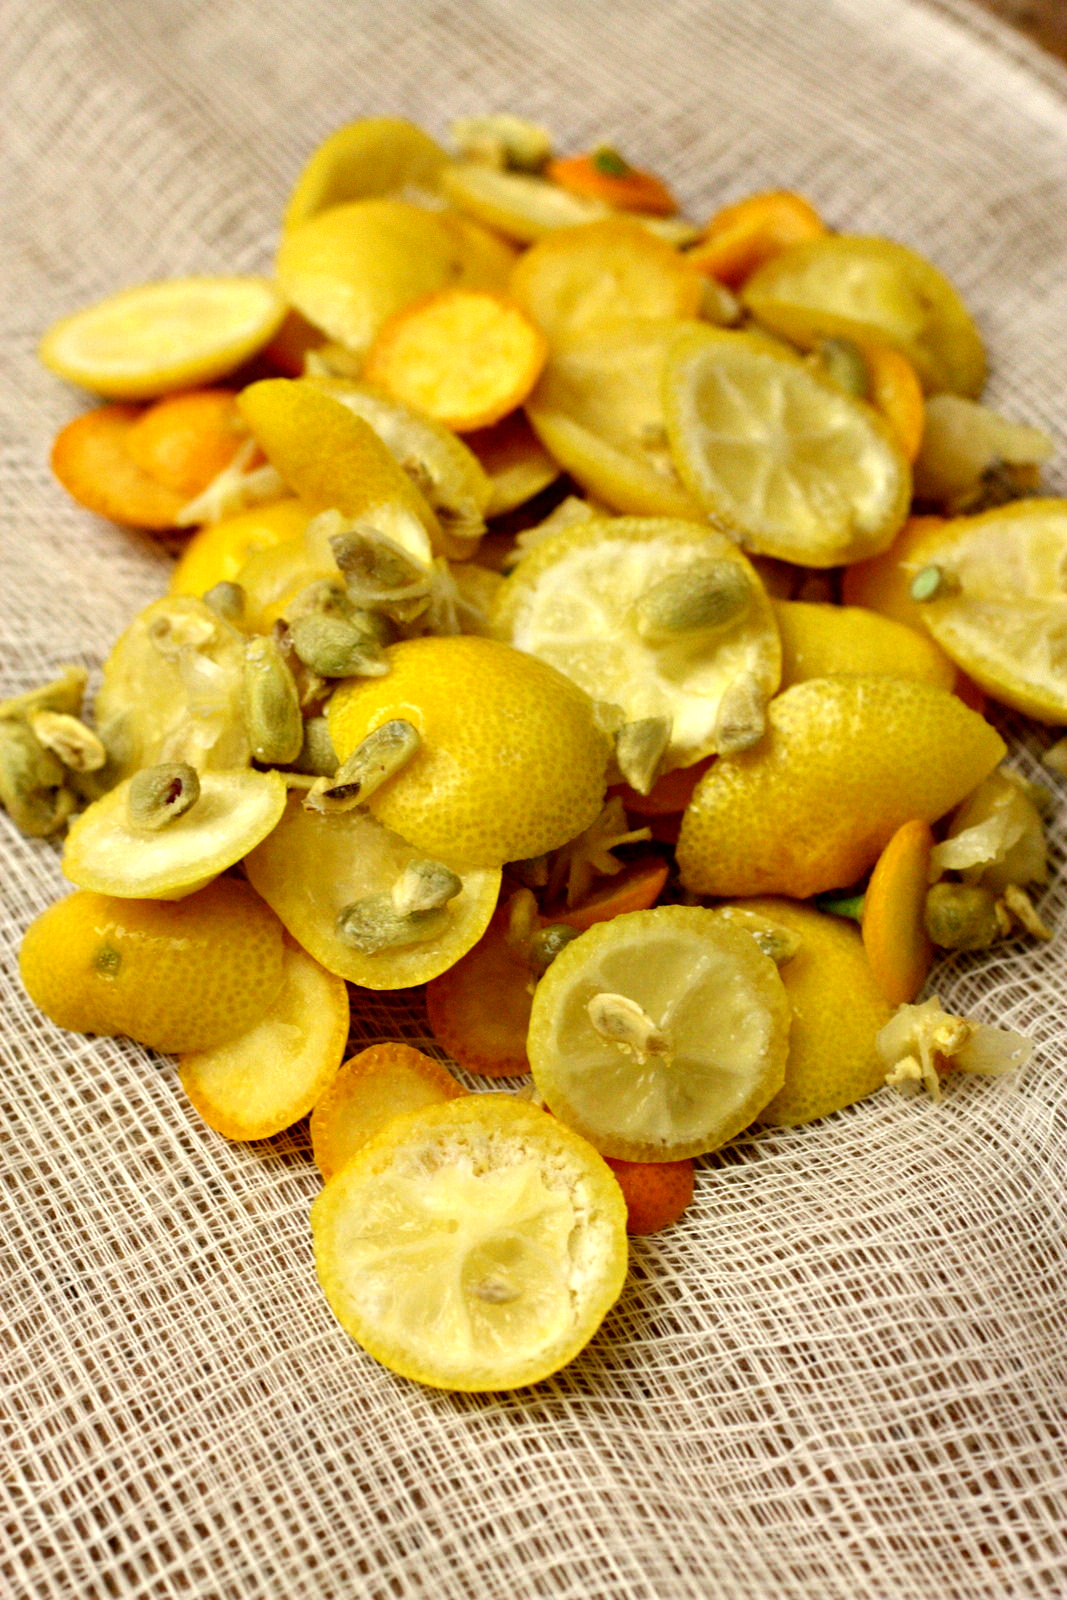
Homemade Pectin
 Homemade pectin.
Some canners enjoy making their own pectin from under-ripe apples or crab apples. It's not a difficult task, but it does take a lot of apples to make much pectin. (However, it's a great use for all the tiny, immature windfall apples you'll get if you don't thin your fruit.) Some expert jam makers dislike homemade pectin, however, because it can lead to inconsistent results (due to the fact that you have no way of knowing exactly how much pectin is in any given batch).
In addition, jellies made with homemade pectin may turn cloudy - not a big issue for most of us, but something to consider if you plan on entering your jelly into a competition - a local fair, for example. In addition, homemade pectin (and commercially made powdered pectin, too) will likely lead to any fruit in your jam rising to the top of the canning jar.
No Added Pectin Recipes
It's perfectly possible to make fruit jams and jellies without adding any pectin whatsoever. However, the fruit must be cooked down longer, which results in a different look to the finished jam or jelly - and a more cooked flavor. In addition, compared to making fruit with added pectin, it will take considerably more fruit to make the same amount of jam or jelly. The upside is that you can often use less sugar in no-added-pectin jams.
When making no-pectin-added jelly, you may wish to add some under-ripe fruit to help the jelling process; although I have never personally had a problem getting a jell even when using quite ripe fruit, results vary depending upon the natural pectin amounts found in various fruits.
 Photo courtesy of Sarah Ivey Rock
 Testing for the Perfect Jell
Unfortunately, pectin doesn't jell jams or jellies until the mixture cools down. That's why my favorite way to test for jelling is the cold plate test.
Before you start cooking the jam, place a small saucer or plate in the freezer. Once you think the jam is finished cooking, place a dollop of jam on the plate, place it in the freezer for a minute, and then run your finger through it. If the jam or jelly runs back together, you need to keep cooking the jam. But if a clear pathway stays where your finger ran through, the jam is finished.
Troubleshooting Pectin
Here are a few of the most common jam and jelly making problems canners encounter - and their solutions.
Lumpy: Too much pectin.
Stiff: Too much pectin; overcooked.
Runny: Too little pectin; jam not cooked long enough; jam overheated.
Too soft: Overcooked; undercooked; insufficient acid; recipe doubles or otherwise increased; jam or jelly not allowed to sit in the jar long enough to set properly.
Too Stiff: Overcooking; too much pectin; too little sugar.
Weeping: Storage space is too warm or the temperature fluctuates; too much acid.
Moldy: Not processed in a water bath canner for 10 minutes after putting in the jar; poor seal on jar; jars stored in too warm or bright a location.
Related Posts:
* How to Make Apple Pectin
* Other Uses for Homemade Pectin
* Peach Jam With No Added Pectin
* Bumbleberry (Mixed Berry) Jam
* Apple Pie Jam
* Dandelion Jelly
* Title image courtesy of
Charlotte Clarke Geier.
August 20, 2016
Weekend Links & Updates
 In the orchard.In which I share my favorite posts from this blog's Facebook page.
"A righteous man has regard for the life of his animal, but even the compassion of the wicked is cruel."
Prov. 12:10
* My children's chapter book, based on a true American Revolution story, is free this weekend! Don't have a Kindle? No problem! Use the Kindle app to read the book on your computer or mobile device.
* When your kids, when everyone and/or everything is driving you out of your mind...remember this.
* It's so hard to find beginning reader books kids actually want to read. I'm checking out this list of "not boring" early readers for my little guy.
* FREE downloadable, printable grammar and spelling books for grades K - 6!
* How eliminating screen time can "magically" change your household.
* Tylenol use by pregnant women is linked to ADD and other behavioral problems in children.
* Lots of lawsuits now against Mansanto, makers of RoundUp, for putting our health at risk. One of the more compelling stories (found here) is that farmers who use RoundUp have a higher incidence of lymphoma.
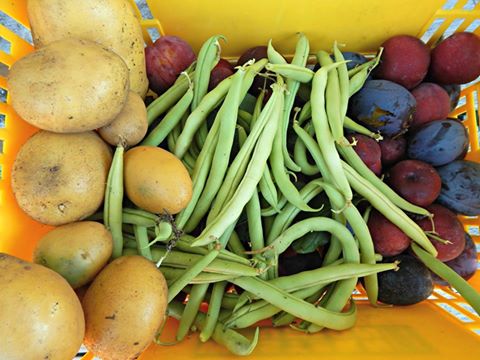 Some of the things I'm harvesting.
* If you own a smartphone and you want to avoid buying GMO foods, check out this app!
* Vitamin deficiencies are linked to many diseases...and, in this case, even anxiety.
* Here is something new to me: Canning jar labels that stick on...but WASH OFF in water! Nifty! And perfect for gift giving.
 Puppy love!*Another addition to the homestead is coming next week! He doesn't have a name yet, but just look at his face! Not only has my son been pining painfully for a dog for at least two years, but we really needed a dog the kids could take with them around the property, to scare away bear and cougar. This big-little puppy's parents are both working hobby farm dogs, which is just an added bonus for us! The mama is half German Shepherd and half King Shepherd, and the papa is English Shepherd. They are some of the most gentle, mellow dogs I've ever met...and this pup latched right on to my son, even letting him pick him up awkwardly (because he's heavy for a puppy). He never wiggled, let along scratched or yelped. He was perfectly content to be held for as long as my son desired. We're pretty excited to bring him home next week.
Oldies But Goodies:
* Canning Salsa - a recipe you can safely adjust to your taste!
* Canning Green or Frozen Tomatoes
* An Easy Way to Make Tomato Paste from Tomato Skins
* Avoiding Food Waste Through Freezing
August 19, 2016
Midnight Ride Without Paul Revere - My New Children's Chapter Book!
 In 2011, when my kids were madly reading through (or having me read) select titles in The Magic Treehouse series, I felt inspired to write a chapter book with a similar action-packed storyline, but a Christian world view. I loved every minute of writing the resulting book, which became
A Day With the Dinosaurs
. Initially, I wrote it just for my kids, but later I published the book and made it free for everyone. Kids read it and loved it - even some Sunday school teachers read it to their classes, who could hardly wait between Sundays to hear what happened next. Everyone was happy.
In 2011, when my kids were madly reading through (or having me read) select titles in The Magic Treehouse series, I felt inspired to write a chapter book with a similar action-packed storyline, but a Christian world view. I loved every minute of writing the resulting book, which became
A Day With the Dinosaurs
. Initially, I wrote it just for my kids, but later I published the book and made it free for everyone. Kids read it and loved it - even some Sunday school teachers read it to their classes, who could hardly wait between Sundays to hear what happened next. Everyone was happy. I fully intended to write more books with the same characters, but during those years, I grew increasingly ill with two autoimmune disease and other, more general health problems. But last summer, as I was planning my children's homeschool curriculum, I felt inspired to pick up those characters again, at last. The result was Midnight Ride Without Paul Revere. And again, I'm releasing the story to the public.
In this, the second Tilly's Time Machine book, Matt and Tilly risk another attempt at time travel and find themselves amid strangers who think they are Revolutionary War spies. Just when the friends think they might be in real trouble, a teenage girl named Sybil Luddington chooses to believe their loyalties lie not with the King of England, but with American revolutionaries. And Sybil trusts them enough to take them on a special mission - a mission that proves kids can change history.
Sybil Luddington was, by the way, a real person - a heroine of the War, though many people today have never heard of her.
As with A Day With the Dinosaurs , the back of this book features discussion questions, fun facts, and activities to go along with the story. The book is also lightly illustrated.
So whether your child just needs a fun book to read at the end of summer, or you want to use the book as part of your homeschool or after school curriculum, Midnight Ride Without Paul Revere is sure to fit the bill.
Normally, the book will be just 99 cents - but from August 19th through the 23rd, I'm offering it entirely FREE. And, of course, A Day With the Dinosaurs continues to be free, too. Enjoy!
Age range: about 7 - 11.
Grade range: about 1st - 5th.
Flesch-Kinkaid Reading Level: 3.2
P.S. Like the book? PLEASE take just a moment to leave a review on Amazon! This helps other people find the book, since Amazon buries any books with zero or little reviews. Even just one line counts as a review! Thank you.
Midnight Ride Without Paul Revere - My New FREE Children's Chapter Book!
In 2011, when my kids were madly reading through (or having me read) select titles in The Magic Treehouse series, I felt inspired to write a chapter book with a similar action-packed storyline, but a Christian world view. I loved every minute of writing the resulting book, which became
A Day With the Dinosaurs
. Initially, I wrote it just for my kids, but later I published the book and made it free for everyone. Kids read it and loved it - even some Sunday school teachers read it to their classes, who could hardly wait between Sundays to hear what happened next. Everyone was happy. I fully intended to write more books with the same characters, but during those years, I grew increasingly ill with two autoimmune disease and other, more general health problems. But last summer, as I was planning my children's homeschool curriculum, I felt inspired to pick up those characters again, at last. The result was Midnight Ride Without Paul Revere. And again, I'm releasing the story to the public.
In this, the second Tilly's Time Machine book, Matt and Tilly risk another attempt at time travel and find themselves amid strangers who think they are Revolutionary War spies. Just when the friends think they might be in real trouble, a teenage girl named Sybil Luddington chooses to believe their loyalties lie not with the King of England, but with American revolutionaries. And Sybil trusts them enough to take them on a special mission - a mission that proves kids can change history.
Sybil Luddington was, by the way, a real person - a heroine of the War, though many people today have never heard of her.
As with A Day With the Dinosaurs , the back of this book features discussion questions, fun facts, and activities to go along with the story. The book is also lightly illustrated.
So whether your child just needs a fun book to read at the end of summer, or you want to use the book as part of your homeschool or after school curriculum, Midnight Ride Without Paul Revere is sure to fit the bill.
Normally, the book will be just 99 cents - but from August 19th through the 23rd, I'm offering it entirely FREE. And, of course, A Day With the Dinosaurs continues to be free, too. Enjoy!
Age range: about 7 - 11.
Grade range: about 1st - 5th.
Flesch-Kinkaid Reading Level: 3.2
P.S. Like the book? PLEASE take just a moment to leave a review on Amazon! This helps other people find the book, since Amazon buries any books with zero or little reviews. Even just one line counts as a review! Thank you.
August 17, 2016
The Lazy Way to Freeze Green Beans
 In case you haven't noticed, I have a lot going on! That's why it's nice to have super easy ways to preserve things from the garden. For example, when I realized there was a crop of green beans that needed picking yesterday, I decided right then and there I was going to freeze them the "lazy" way.
Now, the "correct" way to freeze green beans is to bring a pot of water to a boil, drop in the green beans, and set the timer for 3 minutes. When the 3 minutes are up, immediately drain the green beans and submerge in a bowl or sink of ice water until fully cooled. Pat dry, place in freezer bags, and pop into the freezer. It's not hard, but it does take a wee bit of time, especially if you have a large crop of green beans.
However, a few years back, I discovered that this method (called "blanching") isn't absolutely necessary. Yes, scientists say it preserves the beans' nutrients best. But, actually, I rather prefer my green beans frozen without blanching. And not just because it's easy; I also find that not blanching the beans mostly does away with the weird squeakiness blanched and frozen green beans have!
 The Lazy Way to Freeze Green Beans
1. Wash the beans in cool water. Thoroughly, pat dry.
2. Pinch off or cut the stem ends. If you like, pinch or cut off the tail ends, too. Leave the green beans whole, or cut them up, as desired.
3. Place the green beans in a freezer bag. Squeeze out as much air as possible.
4. Pop into the freezer.
It doesn't get any easier than this, folks!


