
Using the Sitemap

UXPin’s sitemap feature helps you create more complex wireframes with multiple nested pages in order to move your designs to a higher level. With the sitemap and basic interactions, you can link between pages for fully interactive prototypes.
Creating New Pages
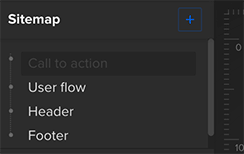
Here is a wireframe with four pages. You can see them in the upper left corner of the editor.

Adding a new page to the sitemap is very simple. Can you see a blue plus sign in the sitemap section of the editor?

Click it and the following modal appears:

Here you can name your page and add it to the sitemap. Every new page appears as the last one in the list. Of course you can change its position; I’ll show you how in a moment.
Active Page Options
First, let’s focus on the active page. As you can see not all the pages in the sitemap look the same. The name of the page “Call to action” is written in grey and has darker background, because someone is working on it right now. Every time you switch between pages, the active page will be marked this way:
Pages in the sitemap have several options. When you hover over the page’s name, you can rename, duplicate or remove it. There is just one thing you need to remember here. When you want to remove a page, first check if there are any other pages nested to it. If you delete a page, you will also delete any sub-pages attached to it and you might not want to do that. However, you can always unnest your sub-pages before you delete a parent page (you’ll find the instructions below).

Organizing and Nesting Pages
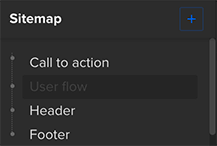
You can also change the order of the pages. To do that you just need to grab the page and drag it to the place you want to have it in the sitemap. Wait till you see a blue line in this place and drop your page there.
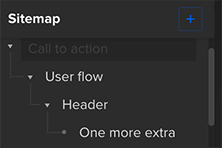
See what’s happened? The page called “Call to action” is no longer the first one in the sitemap. We moved it and now it is second page, below “User flow”. It is also possible to nest a page. imply grab the page you want to nest, then drag it so it’s placed over the other page and drop it there. It’s done!
You can nest a page to already nested one — no problem. There is no limit to the number of sub-pages you can create. As a final result you can achieve a complex sitemap which suits your needs the best. This is just an example, you can really go crazy with it.
The sitemap also allows you to unnest pages. Just grab a page and move it back to the main line in the sitemap. Once again wait till you see a blue line indicating where the page will go.
Start organizing your complex, interactive prototypes with a free UXPin account.
The post Using the Sitemap appeared first on Studio by UXPin.


UXpin's Blog

- UXpin's profile
- 68 followers

