Rig it Right: Edgelooping for a parallel workflow (pt 2) or Creating edgeloops like an artist or Making peace with Zremesher
Creating edgeloops like an artist.
Normally, I edgeloop in Maya and send that low-res (well looped mode) on for simultaneous rigging and sculpting in zbrush. This lets the rigging get a head start. Read up on that process here: https://coffeediem.wordpress.com/2023/09/04/rig-it-right-edgelooping-for-a-parallel-workflow-pt-1/
But what if I wanted to sculpt more before making the edgeloops? Ah, I have to make peace with Zbrush’s Zremesher. Below is my attempt to capture my experimentation with this process.
There is something satisfying in painting edgeloops though. Once you get the hot keys down.
The final-ish results (a technical exercise, those loops need better placement, and the sculpt isn’t SCULPTed):
 Using Zbrush Polygroups to define edgeloops when using Zremesher (Don’t look at her ear. It did get lost in the testing. I’m just focused on the face.)
Getting the hot keys down for your sanity:
Set center of camera rotate: Command click (Mac) on an area and the rotate centers around that areaAdjust the polyframe to be lighter so you can see the polygroups!: Preferences > Draw > PFrame ,PFill, PFillSat, and put on a Skin Shader so that thing reflects more light! Adjusting PFrame on dense meshes so you can see the polygroup edges. Model has a Skin Shader applied so it is not too dark
Using Zremesher and polygroups to make edgeloops
 Draw the mask for the desired edgeloop (CNTRL + LMB)Draw the mask for the desired edgeloop (CNTRL + LMB)Blur it – CNTRL click. (FYI make it sharper by ctrl+alt click. (CNTRL + Option on mac))Polygroup > Group MaskedZremesher – turn on Keep Groups and zremesh (100 = 100,000)
 Mask with polyframe showing (very dense mesh) – still have clay shader here, so it is dark
 Polygroups created from the masked areas – still have clay shader here, so it is dark
 Zremesher, keep groups turned on, at highest polygon count (100 = 100,000)
Not too bad. But we need to add more polygroups and remesh to get more control of your edgeloops!
How to get more control of zremesher’s edgeloops with strategic polygroups
Add mask for the inner eye socket, make that mask sharperRepeat – polyggroup > Group Masked & Zremesher with keep groups onBut those jaggies –Geometry > EdgeLoop. With default options, click on Group Loops
 Smoothing out the jaggies by adding edgeloop with group loops turned on
Now you have rings that are a little better
Before using Zremesher we need to add those to the existing polygroups. This one baked my noodle the first time I saw someone do all of this clicking.
Buttons we need to know:
Polygroup > Group VisiblePolygroup > AutoGroupAnd toggling polygroup visibilityThese were listed at the top of the pageIsolate a polygroup: Shift + CNTRL and click on the polygroupToggle visible polygroups: Shift + CNTRL and click and drag a box on the empty grey spaceShow all polygroups: Shift + CNTRL and click on empty grey spaceMy first goal is to add the light purple to the dark purple polygroups around the eyemask. This is the technique:
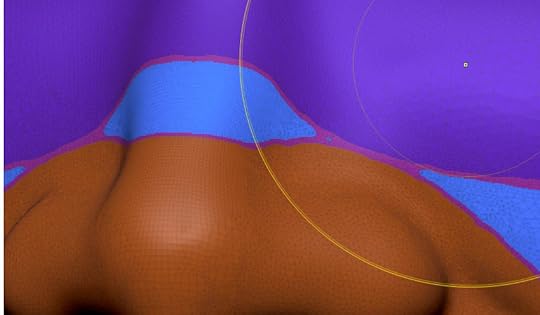
The main part I want gone is the face –
Isolate the area by Shift + CNTRL and click on the face polygroupThen reverse that by Shift + CNTRL and dragging a box on the grey area. Now the eyes and nose are showing and not the rest of the faceNow Shift + CNTRL on the eyes, for example and hide them. Since some items are already hidden, this will now hide polygroups. I know. That’s weird AF.I masked the parts of the loops that I didn’t want to deal with. (Cntrl and paint a mask.) Then reversed what was masked (Cntrl click on the grey blank space) I know. Then hid what was unmasked (Visibility > Hide pt)PolyPaint > Auto Groups.Shift+ Cntrl click in grey space to get everything back.Repeat for other areas 1) Isolate the area by Shift + CNTRL and click on the face polygroup
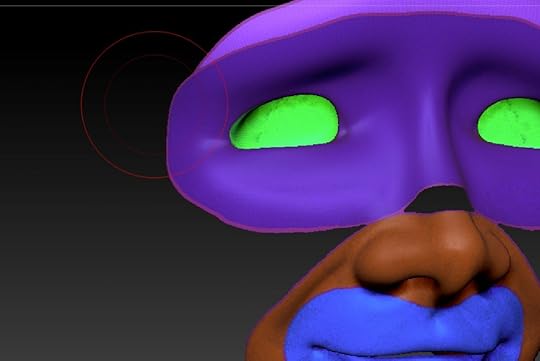 2) Reverse what polygroups are visible
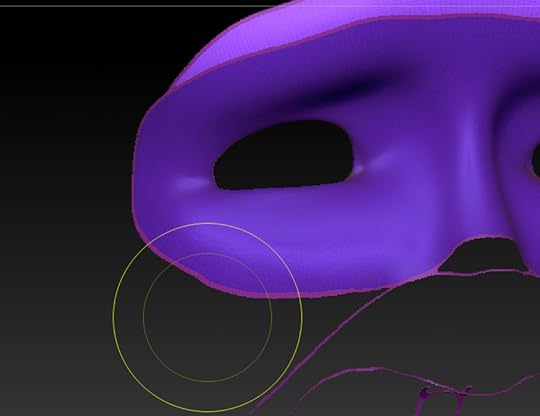 3 & 4 hide polygroups, hide masked, whatever you need to do to get to the loop groups you want to combine then proceed with steps 5 – 6 listed above.
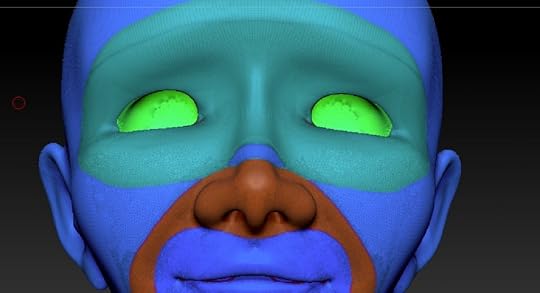 Better edges to the polygroups by using edgeloop’s group loop turned on
That takes a second to master all of the clicking, maybe it’s just me. Eventually, it becomes second nature, like any tech.
Look at this nose area. I want that to join the eye mask polygroup.
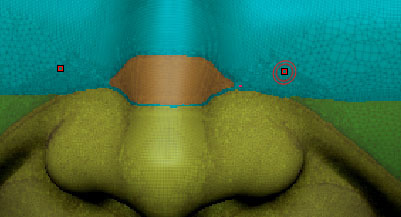
(The mouth is in a separate polygroup – it’s just a very close color to the others ones, FYI) That little blue line on the nose is bugging me too.
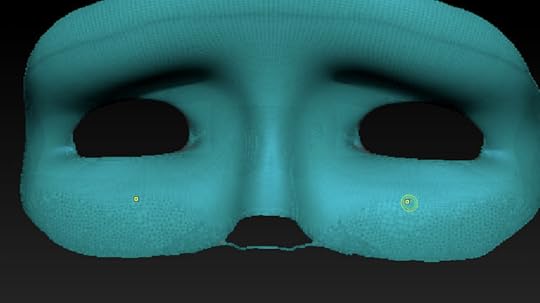 Eye mask area in one polygroup now. But that missing bit)
Cleaning up areas if you got sloppy in the original masking
Hide all polygroups but the eyemask, in this caseMask the offensive bitPolygroup > Group MaskedNow show only the polygroups that you want to have as onePolygroup > Group VisibleOkay, I’ve got some more patience to put into this technique – but I’ll get quicker at each go. Let’s see what type of edgeloops we get out of this now.
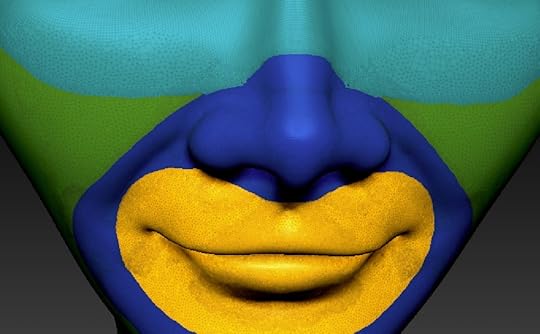 Cleaned up polygroups on very high res sculpt
 Zremesher with groups on, set to 100,000 polygons
 Closeup of zremesher’s edgeloops using polygroups. Workable.
Well, not amazing – but something that can be worked with. Let me test a little more and move some quads around.
Testing 1 — 12 million polys:
First I’ll take my 627,000 sculptris pro model with messy geometry (Note for myself as to which file: 01_Brandy_Body_GEO_02.5_sc12bEL.ztl)
Duplicate it, zremesh without polygroups to 100,000 (the highest I think I can get that to go with zremesh). Now I have a model with no actual thought out edgeloops on it.
Check the silhouette and details. Matches. Good.
 627,000 sculptris sculpted model
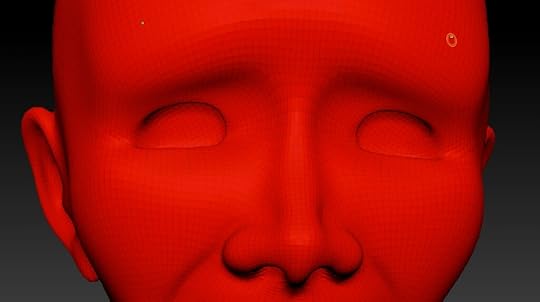 100,000 polygons with zremesher, no polygroups just to get flat quad topology. Silhouettes match.
Now I’ll duplicate that 100,000 version and mess with edgeloops.
HUGE!! Made a 12,000,000 polygon version, polished the 2nd division.
Added polygroups. Did a few loop groups.
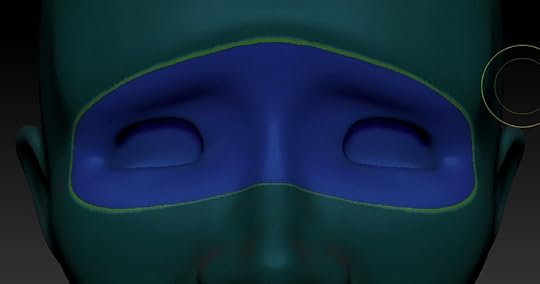
Zremesher with curve strength at 53
Dark purple loop should flow along the top of the mouth/nose loop.
 12 million polygon with polgygroups
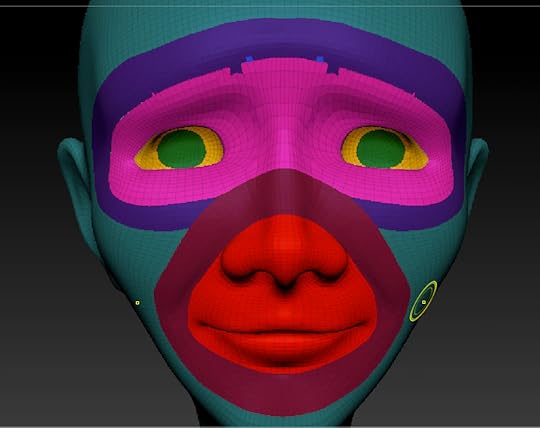 zremeshed to 100,00 from 12 million. Get a nicer flow, as expected.
Some clean up needed, but not awful. There is a nicer flow having more polygons as the base. That’s not surprising. I got a few weird blips in the brow region that need to be cleaned up
I tried different numbers of polys with zremesher. Turning out very well. (those polygroups aren’t the best edgeloops in the world, btw). I’ve adjusted the polyfill to be less saturated in the pictures below so I could see the polframe (Edgeloops) better. Starting to lose the ears at 50,000.
 100,000
 75,000
 50,000
Testing 2 — less than 1 million polys:
Note to me: Medium (01_Brandy_Body_GEO_02.5_sc12bEL.ztl)
Test with not an insane amount of polys, and not doing a lot for the edgeloop edges
Going back to the 627,000 sculptris model and recreating polygroups
Making polygroups on mask from outer to inner so I don’t get weird missing sections over the nose. That worked out much nicer. Less futzing around with lost bits. Mask from outer to inner. Got it.


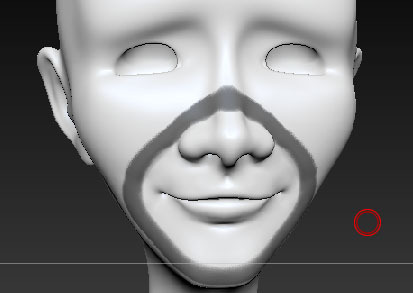
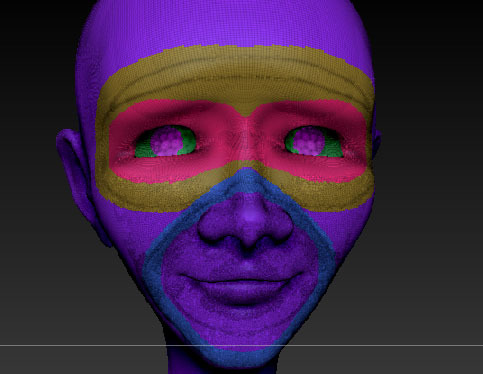
Zremesh polycount 100 defaut. Pretty good!

Testing small loop groups:
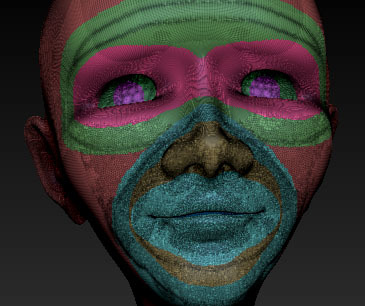
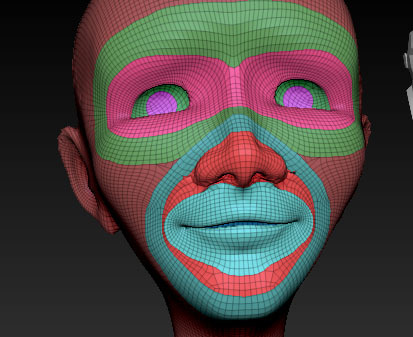
Adjusted Zremesher’s curve strength to help eliminate strays. You can see the improvement around the nose:
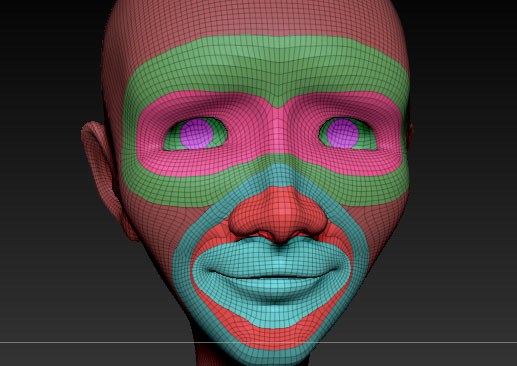
Testing putting in edgeloops on groups and not adding them to the polygroup then remeshing gives a distinct edgeloop:
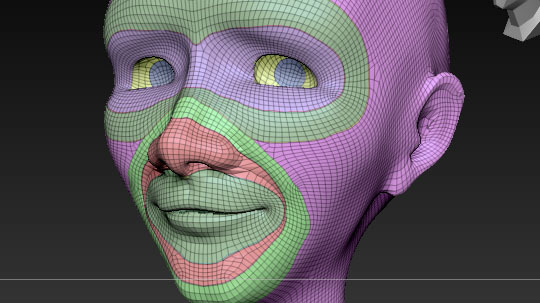
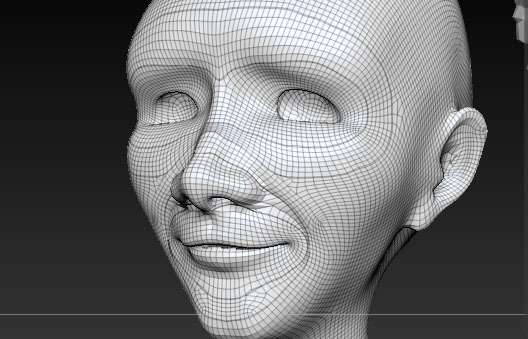
Divided twice then zremeshed back down – sure enough, that does a good job and those distinct edgeloops could be easily collapsed:
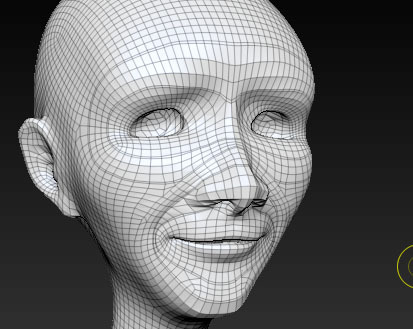
In conclusion: using zremesher and polygroups works surprising well for creating edgeloop flow. For artists that do not know polygon modeling, or don’t want to bother with it can – they create loops in zbrush. This low res with edgeloops could be sent to the riggers as the base mesh while the sculpter continues sculpting. The model itself might need just a little bit of cleanup with polygon tweaking. That’s a workable pipeline.
Fun. (with a lot of hot keys)


