How to Design A Professional eBook Cover

Ah…the book cover. You’ve overworked your brain, pumped out the best story of your life, and now comes the decision. Do you pay someone for a professional cover? Does your budget demand a DIY version? Are time constraints boxing in your options? No worries! I’m here to help. I’ll teach you how you can create your own professional ebook and print cover—in a flash.
***The instructions I provide will require at least the FREE versions of Picmonkey and Canva. If you use another editing service, don’t panic. Just follow along and improvise with what you have.
***I will use my own book cover and a made-up book cover as examples. Do not copy either for your personal use, please.
EBOOK COVER DESIGN
Sign into Picmonkey or Canva and choose: CREATE NEW> BLANK CANVAS > KINDLE BOOK COVER
Add the photo, or photos, you wish to use in your design: GRAPHICS> ADD YOUR OWN IMAGE > UPLOAD. Adjust the size and position by hovering over the edge until the drag or stretch icons appears.
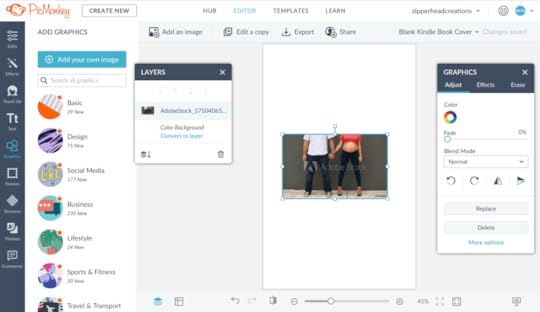 This is the picture I purchased from Adobe Stock Photo to use for my book cover.
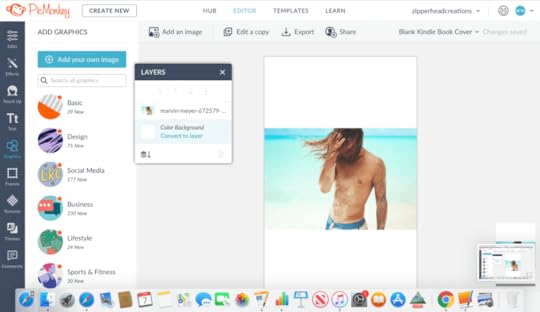 Photo by Marvin Meyer on Unsplash
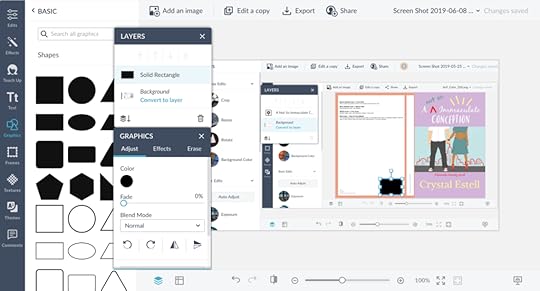
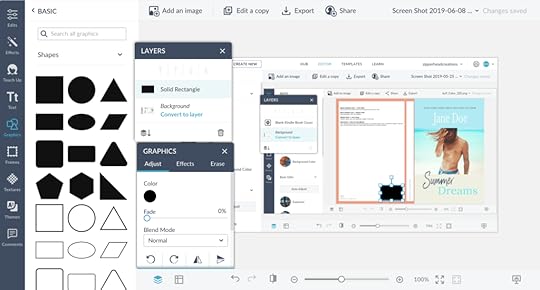
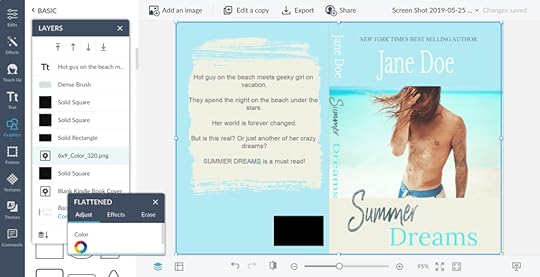
If you don’t want the entire cover to be your photo, then go back and add rectangles to fill the blank spaces, or another photo: GRAPHICS > BASIC> [choose rectangle] or GRAPHICS> ADD YOUR OWN> UPLOAD. Drag and stretch the rectangle to fit the space. If you need another one for the bottom, right-click the rectangle and then click duplicate.

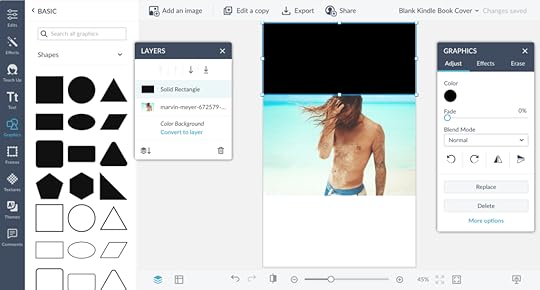
TIP: You can change the color of your rectangle by clicking the color circle in the graphics box. You can also add special effects using EFFECTS or TEXTURES. Try layering images, adding textures to images and fonts, fading one image over another. The possibilities are endless, so I recommend taking advantage of the easy-to-understand tutorials Picmonkey and Canva offer. Experiment. It is incredibly user friendly.
Once you have the design elements appropriately placed, you can move on to adding a title and author name.
Unless you want to turn your photo into artwork like I did for my romantic comedy, A Not So Immaculate Conception. If so, I’ll show you how.
TRANSFORMING YOUR STOCK PHOTO INTO ARTWORK
Select the photo you will use, then choose: EFFECTS> WARHOL. Don’t panic! It will look crazy…but we will change that.
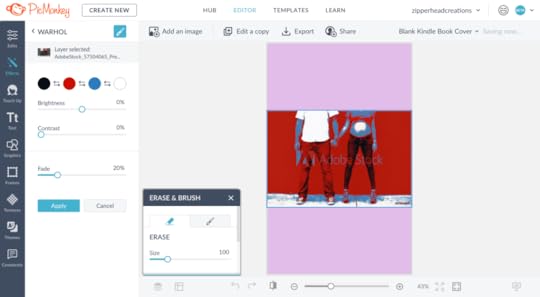
Click the colored circles and make them all the SAME color, whichever color you will paint with first. When you are ready for the next color, change all the circles to match again.
Click the paintbrush icon in the upper righthand corner next to the word WARHOL. When the Erase & Brush box appears, click the paintbrush icon again and voila, your picture is normal.
But before you start painting, change the settings. Set your brush to the size you need for the area you are painting. Set Fade to 0% and set Strength and Hardness to 100%.
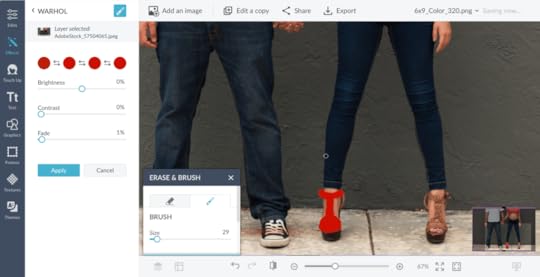 See the red shoe? That's it! The start of great things.
Now, you are ready to paint. And no worries, if you mess up or color outside the lines, just click the eraser icon and fix your mistakes.
 The finished product! Woohoo!
With your photo transformed into the next Picasso masterpiece, it’s time to move on to the next step, adding your title and author name: TEXT> ADD FONT.
Play around with your title design, choose different fonts, add font effects and overlays. Highlight different words and change the color, bold, italicize. Move and angle the words wherever you like. Do whatever makes your ebook cover rock!


With your front cover complete, creating your print book will be a breeze!
PRINT BOOK COVER
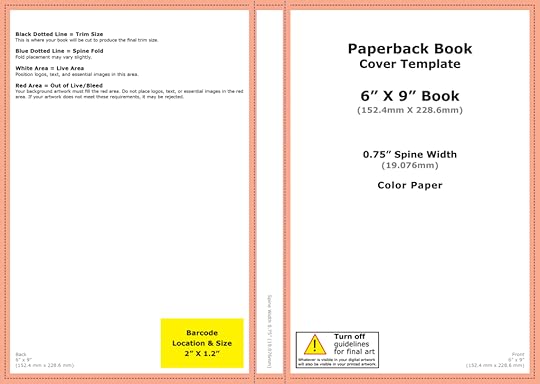
First, you need to download the kindle e-book cover template here. You will need to enter the specifics of your book to obtain your template: choose 6″x9″ and enter # of pages.
FRONT COVER
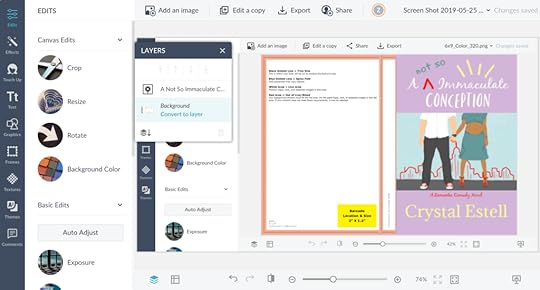
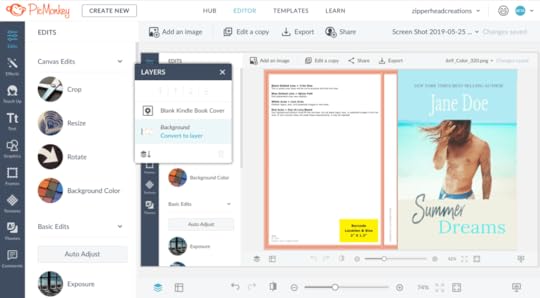
Go into Picmonkey and click: CREATE> COMPUTER> [choose your kindle book template]
The key to getting this done quickly and without a headache is working in sections. I start with the front cover. And guess what?
If you’ve already created your ebook cover add it now: GRAPHICS> ADD YOUR OWN> [choose your ebook cover]. Now, stretch it to fit. Drag it to fit the top, bottom, and outside edge [none of the template should be visible on those edges] and just to the dotted line on the inside edge [spine side]. If you have not created your ebook cover, then use those instructions to complete the front cover of your print book now.
BACK COVER
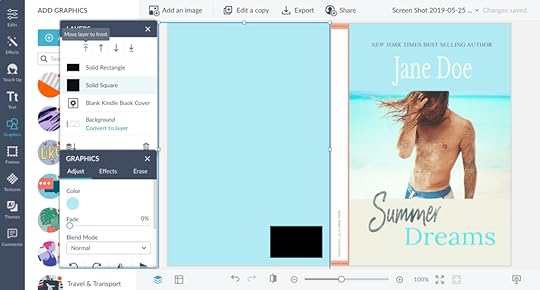
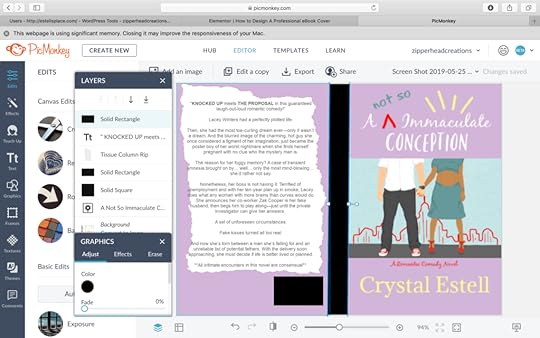
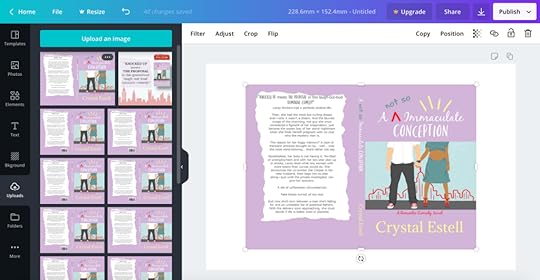
The back cover requires space for the barcode. To make sure you leave a space for this in the correct place, create a rectangle that matches the size now: GRAPHICS> BASIC> [choose the rectangle]
Now, make the background for your back cover: GRAPHICS> BASIC> [choose rectangle]> [flip it using the rotating icon in the box view]. Stretch it the same way you did the front cover. At this point, the only visible template section should be the spine. Wait?! The barcode box is gone. How do I find it?
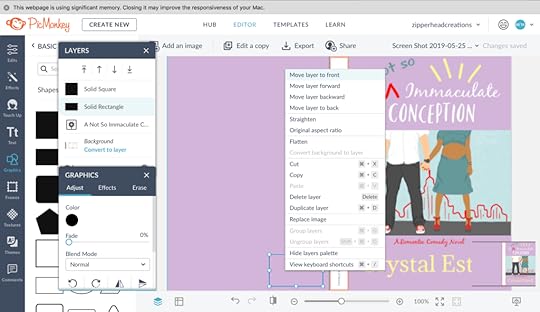
In the Layers box, choose the rectangle that represents your barcode> right-click> Move to Front. *Note: Once it appears, do not touch it. This will be where the barcode goes permanently.
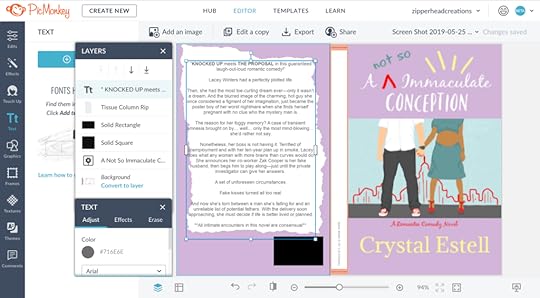
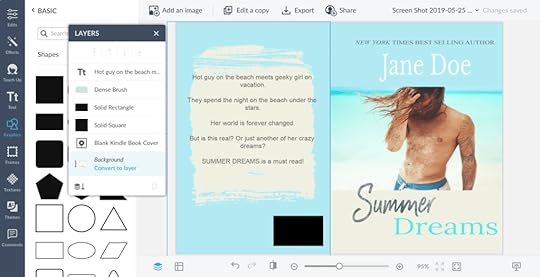
Time to get creative. You can add more rectangles or a paper graphic to place your blurb on, or even add more photos. Do whatever you feel best fits your design.
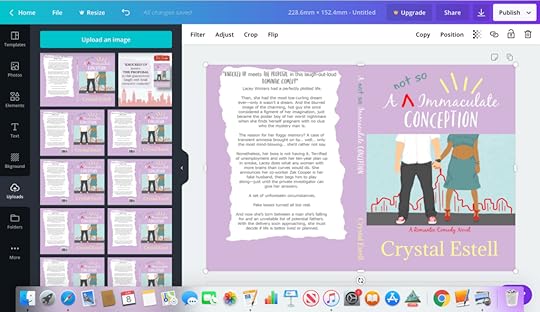
To add the blurb: TEXT> ADD TEXT> [type your blurb or copy and paste it]> [choose the font and font size]. Then drag your text box to fit the area you would like it to stay.
TIP: Anything past the outside dotted lines of the template may be cut off in the book design. So be careful with your blurb placement.
SPINE COVER
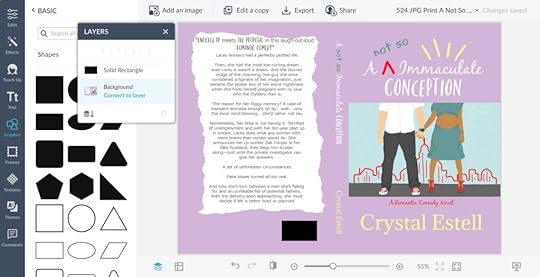
Create a rectangle box that fits the spine: GRAPHICS> BASIC> [choose rectangle]. Flip and stretch it to fit the center of the template.
Note: I would leave this a different color for now, for better visibility.
If you want your spine to match your front photo, you can stretch your front cover until it meets the dotted edge that begins the back cover. If you do this, make sure you stretch both sides [even though you won’t see the part that extends the outside edge] so your title stays centered.
How you place your title and author name on the spine will be decided by how you created your front cover. If you made it from scratch on the print template, then:
In the Layers box, choose the text box used for the title or author name [work with one box at a time] > right-click> duplicate.Grab the top circle on the text box you selected and rotate it until it is at 90°. Change the font size and position so that it fits within the spine, making sure to leave some room so it does not bleed over the bend. Repeat until the title and author name are aligned where you like them.
If you created your front cover by uploading your ebook cover and stretching it to fit, then:
Click TEXT> ADD TEXT> [choose the same font used for your title and author name, using more than one text box as needed].
Once you have them recreated, rotate each one until it is at 90°. Change the font size and position so that it fits within the spine, making sure to leave some room so it does not bleed over the bend. Repeat until the title and author name are aligned where you like them.
After you have the title and author name in the correct place, change the color of the rectangle on the spine cover to match the rest of your book or to the color you desire.
Note: Ignore this if you stretched your front cover over the spine.
Yay! Your print book cover is complete…well…almost. Kindle and Barnes & Nobles require a PDF format. Picmonkey only allows you to save to this format with a very expensive upgrade, beyond the affordable and recommended subscription. And just to throw a monkey wrench in your plan, Barnes & Nobles wants the cover a tad bit larger than the one you created.
But no worries! I’ve figured out a simple solution.
CONVERT THE PRINT COVER TO A PDF
Kindle Cover PDF:
Open CANVA> CREATE A DESIGN> CUSTOM DIMENSION> 228.6mm x 152.4mmBarnes & Noble Cover PDF:
Open CANVA> CREATE A DESIGN> CUSTOM DIMENSION> 12.8 in x 9.25in
Click UPLOAD> UPLOAD IMAGE> [choose your print book cover]. It will not fit at first, but that’s okay. We will fix it.
Stretch the picture to fit, one side at a time and just to the edge. Then stretch the top and bottom to fit.
Time to download the PDF version: Click the Underlined Down Arrow in the top right corner next to Publish. Then click PDF Print> Download. Note: Do this for both versions, the Kindle and Barnes & Nobles.
Believe it or not, you’re done! Upload your new covers along with your awesome manuscript and prepare to sell books. Want to share your own tips and tricks? Or your finished product? Please share!
Your friend and cohort!

Share on facebook
Share on twitter
#mc_embed_signup{background:#fff; clear:left; font:14px Helvetica,Arial,sans-serif; width:100%;}
/* Add your own Mailchimp form style overrides in your site stylesheet or in this style block.
We recommend moving this block and the preceding CSS link to the HEAD of your HTML file. */
Join Typewriters, Toolboxes, and Bandaids Monthly Newsletter for FREE MONTHLY GIVEAWAYS
A NOT SO IMMACULATE CONCEPTION RELEASE DAY COUNTDOWN
Days Hours Minutes

Want to read the first FIVE chapters FREE? Click here!