
Nancy I. Sanders's Blog, page 60
April 26, 2014
Add Tension to Your Manuscript

A story without tension isn’t a story at all—it’s just a series of events. Learn simple strategies to build tension into scenes, chapters, and the entire story arc. From picture books to novels, learn how to up the stakes and tighten the pressure on your characters with this tele class I’ll be teaching next Tuesday, April 29, 2014.
During this teleclass, we’ll examine:
*How tension impacts your plot structure and influences your characters
*Upping the tension in a scene, a chapter, and the entire story arc
*Worksheet of 75 Tense Moments to plug into your manuscript
You can join me LIVE at this tele class on next Tuesday, April 29 at 2:00 P.M. Pacific Time. Or you can get the recorded audio file afterward if that time simply doesn’t work for you.
Go to the Working Writers Club to sign up! And if you’re not yet a member, be sure to join for the discount price…membership is free!
And to read a recent article about character development that I wrote for the children’s column at the Working Writer’s Club, CLICK HERE. You’ll find a treasure trove of helpful articles and tools in this great club to help you along your writing journey.


April 25, 2014
Nonfiction Picture Book in 3 Weeks: Hip Hip Hooray!
Once again, thanks for your personal e-mails about your writing journeys as you work on your nonfiction picture books.
Some of us finished and are wrapping everything up. Some of us are racing toward the finish line. And some of us are still in the middle of it all.
Whichever stage you’re at, I want you to be encouraged! Don’t despair if you’re not yet done. Try not to see this as a time crunch. The exciting thing is that we’re moving forward as a writer and acquiring new skills. Just take the time you need to take to finish the first draft of your manuscript.
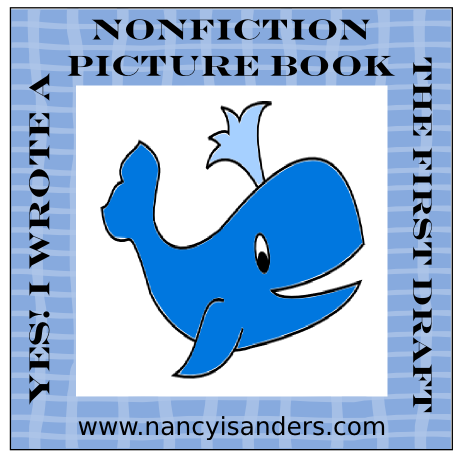
For those of you who wrote the first draft of your picture book in 3 weeks, and for those of you who will reach it on the day you get there, I’ve got a fun little picture you can add to your website or blog if you want. Or if you simply want to put it on your desktop or print it out and hang at your desk, you can do that too! I made this just to cheer you on and say, “Hip hip hooray for a job well done!” I hope you had a whale of a good time!
Here it is, nice and big if you want to save it and print it out:
And here it is as a cute little thumbnail if you want to save it and put it on your website or blog:
And starting in a few weeks, for those of us who are ready to roll up our sleeves and start writing the first draft of a nonfiction picture book from beginning to end, join me right here on my blog to print out the calendar we can follow to get our picture book done in just ONE WEEK!
And if you’re not at the place where you can join in this next adventure because you’re still working on this draft (or whatever other commitment you may have) you can still print out the upcoming calendar and follow along to see how to really write the first draft of a nonfiction picture book in just ONE WEEK.


Nonfiction Picture Book in 3 Weeks: Week 3

Here we are…the last and final day of our 3-week adventure! It’s time to wrap up any loose ends in your manuscript and also finish the last part of your Author’s Note at the end of the published book.
And if you’ve fallen behind, don’t despair!
We’re going to spend the next couple of weeks working together with tips and strategies I share here on my blog to help you edit and polish your manuscript so that it’s no longer in the rough shape of a first draft.
You’ll have plenty of time to get your first draft completed and start to work on it and get it into better shape.
But for those of you who finished writing the first draft of your picture book from beginning to end in just 3 weeks, do a happy dance!!! You did it!!! Hip hip hooray!


April 24, 2014
Nonfiction Picture Book in 3 Weeks: Week 3
Today’s focus as we’re drawing to the end of our 3-week writing marathon is to research and write the Author’s Note you want to include at the back of your nonfiction picture book.
Start by reading the Author’s Note in the back of your mentor text. Some of these can be quite long spanning several pages and some are very succinct with just a half-page of text to fill in the gaps so a teacher or parent can talk with their child more in-depth about your topic.
With this big of a variety, you can feel safe by using your mentor text as your guide. In fact, when you write the cover letter for submitting this picture book to a publisher, you can mention that your book is similar in structure to your mentor text and include it’s title. This will give the editor a frame of reference.
So today’s the day to start working on your Author’s Note. You might have to dig up new research to fill in the gaps on your topic or you might be able to glean everything from research you’ve already done. Whichever is the case, you’ll probably spend an hour researching, an hour brainstorming your ideas, and an hour writing the first half of the Author’s Note.
Have fun!


April 23, 2014
Nonfiction Picture Books in 3 Weeks: Week 3
Today’s session is similar to yesterday’s.
Start your self-editing session again today by fact checking any spot in your manuscript that you stated a fact. Be sure you have at least one primary source or three other sources to verify each fact you state.
Read over your mentor text again so it’s fresh in your mind as you’re revising your own.
Use my Nonfiction Picture Book Self-Editing Checklist you downloaded from yesterday’s post as a guideline on what to check for as you go over your manuscript multiple times.
Continue to trim your word count as you’re editing and revising to aim closer to your goal. Some editors and agents prefer 800 word manuscripts, even in nonfiction. Others, though, are open to a word count that is longer and some even prefer 3,000 words or more. Just go with the word count in your mentor text and you’ll be targeting the word count in that publisher’s recent acquisition.
And if you’re including sidebars, today’s the day to wrap these up.


April 22, 2014
Nonfiction Picture Book in 3 Weeks: Week 3
Start your self-editing session again today by fact checking any spot in your manuscript that you stated a fact. Be sure you have at least one primary source or three other sources to verify each fact you state.
Read over your mentor text again so it’s fresh in your mind as you’re revising your own.
Use my Nonfiction Picture Book Self-Editing Checklist you downloaded from yesterday’s post as a guideline on what to check for as you go over your manuscript multiple times.
Continue to trim your word count as you’re editing and revising to aim closer to your goal. Some editors and agents prefer 800 word manuscripts, even in nonfiction. Others, though, are open to a word count that is longer and some even prefer 3,000 words or more. Just go with the word count in your mentor text and you’ll be targeting the word count in that publisher’s recent acquisition.
And if you’re including sidebars, continue researching and writing them.


April 21, 2014
Nonfiction Picture Book in 3 Weeks: Week 3
Let’s get started on the third and final week of our adventure for writing the first draft of a nonfiction picture book in just three weeks.
As you can see on the calendar we’re following, today and all this week we’re going to work on self-editing our picture book manuscript. This is also a great time to catch up on segments you may have fallen behind that you haven’t yet written.
Start your self-editing session by fact checking any spot in your manuscript that you stated a fact. Be sure you have at least one primary source or three other sources to verify each fact you state.
Read over your mentor text again so it’s fresh in your mind as you’re revising your own.
I’ve posted a self-editing rubric for you to use during your self-editing sessions. This will give you some guidelines on what to check for as you go over your manuscript multiple times.
You can download this free rubric at the site of my writing buddies, Writing According to Humphrey and Friends. Just scroll down to the section on rubrics and click on the following printable pdf file:
Nonfiction Picture Book Self-Editing Checklist
If you’ve gone over your word count, take a few minutes to trim it down. See if there are any big chunks that aren’t necessary and can be cut. Be sure to save these for potential use in a sidebar or the author’s note or a website you can build for your book. I also like to trim my word count by going through the manuscript and deleting one word in most sentences.
And finally, if you plan to include sidebars, today is the day to start researching and writing them.
Have fun!


April 18, 2014
Nonfiction Picture Book in 3 Weeks: Week 2
You’re here! It’s time to work on the ending of your nonfiction picture book.
Your Editing
Start by spending a few minutes going back over the entire text you’ve written. Get this in your brain as you embark on writing the ending. Tweak and edit if you see anything you’d like to give a quick fix.
Your Mentor Text
For today, start by reading just the “Ending” of your mentor text. You should have noted the page numbers of this section on the plot worksheet you filled out on Wednesday last week. Read this section over again to get the flow/voice/format/structure fresh in your writer’s brain. Most of these books end with a very inspirational ending that ties in with the title. Note how your mentor text handles this.
Your Research
You actually might not need to do much research today since the ending to these picture books is often inspirational and wraps up the story. But if you need more details and facts to weave into your writing, now’s the time to dig those up.
Your Writing Session
Have the plot worksheet and the outline both handy to look at as you’re working on writing, actually writing, the ending of your first draft. Again, many of these picture books end with an inspirational thought, so if your mentor text does, make yours be inspirational as well. Try reading it aloud if it helps. Pretend you’re reading it to inspire a group of kids to make a difference in their world.
After your writing session is finished, take a few moments and plug in footnotes for each of the facts you decided to use (if any).
Then give a cheer! You’ve made it this far. Hurray!


April 17, 2014
Nonfiction Picture Book in 3 Weeks: Week 2
The goal today is to write the first draft of the second half of the middle.
Your Editing
Start by spending a few minutes going back over the text you wrote yesterday. Tweak any glaring spots to flow better. If this were a chapter book, it would also help to spend a couple minutes editing the previous chapter. But since this is a picture book, it might help you to read back over everything you’ve written so far.
Your Mentor Text
For today, start by reading just the “Second Half of the Middle” of your mentor text. You should have noted the page numbers of this section on the plot worksheet you filled out on Wednesday last week. It’s the second half of the middle. Read this section over again to get the flow/voice/format/structure fresh in your writer’s brain.
Since we’re starting to wrap up our story and head it toward the end, it also might help to read your entire mentor text today to see how this section takes what happened in the beginning and propels your MC toward the end.
Your Research
Focus on reading sections of your research books that have to do with the material you need for writing this section.
Your Writing Session
Have the plot worksheet and the outline both handy to look at as you’re working on writing, actually writing, the second half of the middle of your first draft.
After your writing session is finished, take a few moments and plug in footnotes for each of the facts you stated.
If you’ve reached this point and are having difficulty writing anything at all, just remember…this only needs to be 800 words. You can do this. Don’t worry that it’s not perfect or not as good as your mentor text. It won’t be. Why? Because this is a first draft.
Writing usually takes layers. The first layer is to get the first draft on paper. Then you can take that and rework it and revise it and cut and paste and reorganize and polish it over upcoming writing and editing sessions.
But you can’t do any of that if you don’t yet have a first draft from beginning to end. So get this section written. Because tomorrow we’ll be working on the end! You’re almost there.


April 16, 2014
Nonfiction Picture Book in 3 Weeks: Week 2

On today’s calendar date that we’re following to write our nonfiction picture book in 3 weeks, we’re writing our Turning Point.
Think of it as this dog I saw yapping at my husband Jeff and me as we walked past his yard. Picture your main character standing on a wall. It’s about to crumble underneath him. This will propel him toward the end of the story.
Your Editing
Start by spending a few minutes going back over the text you wrote yesterday. Tweak any glaring spots to flow better.
Your Mentor Text
For today, read just the “Turning Point” of your mentor text. You should have noted the page numbers of this section on the plot worksheet you filled out on Wednesday last week. It’s the middle of the middle. Read this section over again to get the flow/voice/format/structure fresh in your writer’s brain.
Your Research
Focus on reading sections of your research books that have to do with the material you need for writing your turning point.
Your Writing Session
Have the plot worksheet and the outline both handy to look at as you’re working on writing, actually writing, the turning point of your first draft. Once again, these two worksheets will be your roadmap, your GPS system, that you follow as you sit down to write.
This will probably be your shortest writing session of all. In some books, it’s just one word. In others, it’s a very short segment of the pivotal scene of your story. Just remember, though, the turning point takes your MC from the beginning of the story and propels him toward the finish line with no turning back.


Nancy I. Sanders's Blog

- Nancy I. Sanders's profile
- 76 followers

