
Cassey Ho's Blog, page 114
July 31, 2016
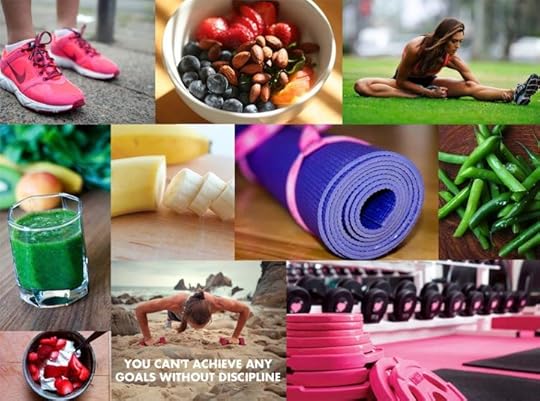
August 2016 Workout Calendar
Hey guys!
Can you believe we have arrived at the last FULL MONTH of SUMMER!!???? I’m crying inside. I am soooo in love with the warm weather, the shorts, the extra hours of daylight…oh my goodness…we all need to embrace the beauty of summer because it goes away so quickly! So, why don’t we close off summer with a bang? Let’s make it one to remember.
So starting right now I want you to commit to your body that you’re going to give it everything it needs. Nourish it with good food and train it to be stronger with great workouts.
Here is your workout Blogilates Workout Calendar for August 2016!
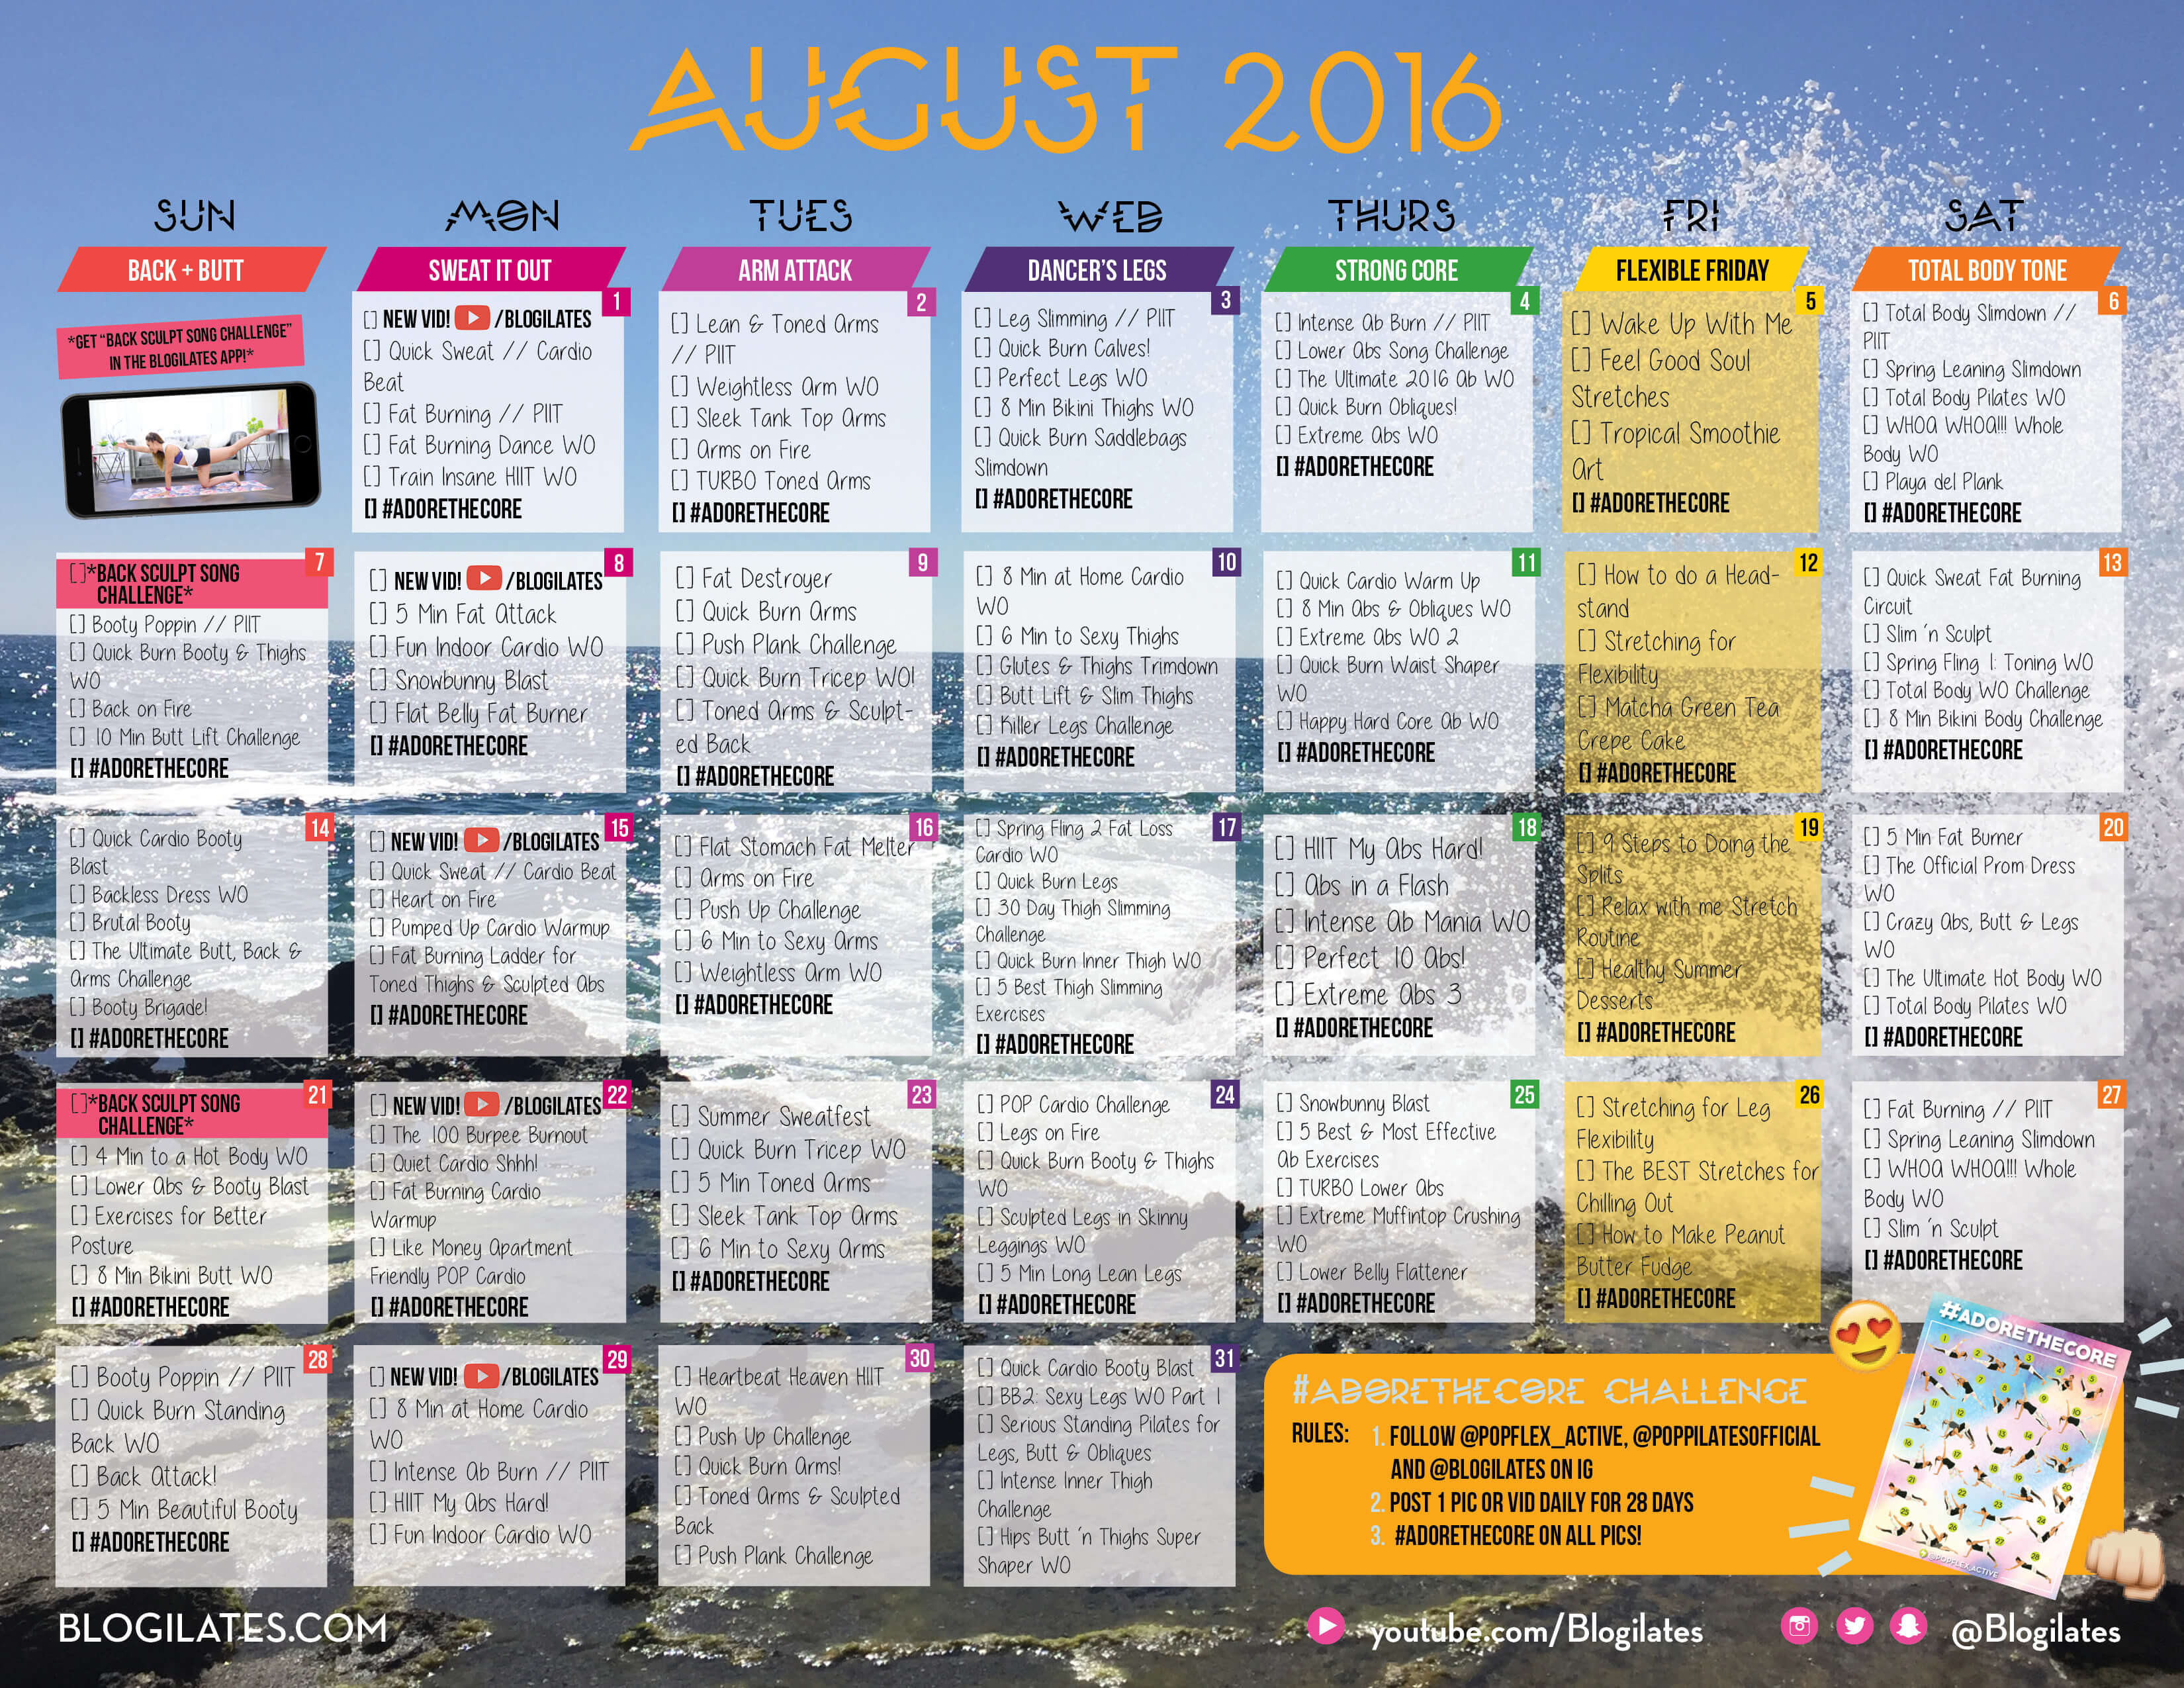
Click for high resolution calendar
As usual, do each workout on the calendar once through. You can find my playlists daily on YouTube.com/Blogilates or you can download the Blogilates Official App (free on iPhone and Android) and subscribe to the workout calendar there which will automatically provide you with the videos and the exclusive video of the month “Back Sculpt Song Challenge” (99c subscription to the app calendar) which you cannot find anywhere else.
Alright guys, I’m going to add something on for us that’s gonna be super fun. Are you ready for the last Instagram Challenge of the summer!!??? We’re going to be doing 28 days of abs to sculpt you a STRONGER CORE with the #AdoreTheCore Challenge!
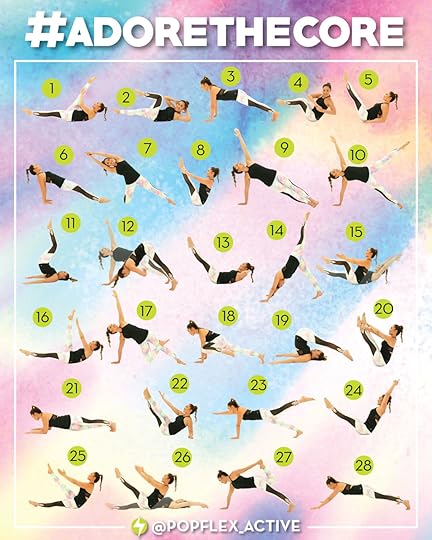
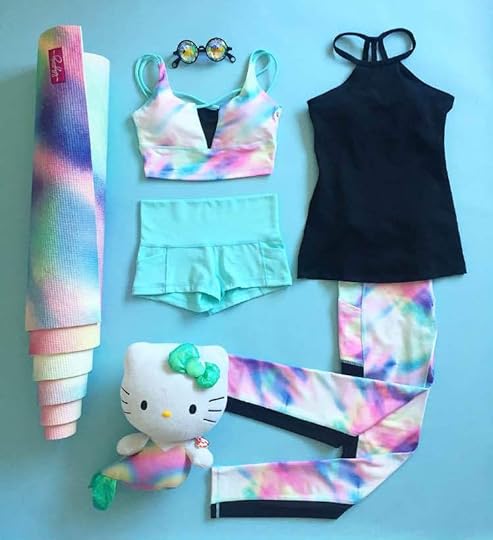
If you want to join in, just repost this graphic on your Instagram and declare it so! And by participating all 28 days, you’ll be entered to win the POPFLEX Super Prize Package!
The #AdoreTheCore Challenge begins on Aug 1 and ends Aug 28! You’ll find all the details on the challenge here.
Alrighty guys – let’s make August 2016 a month to remember!


July 27, 2016
28 Day Ab Challenge!
Hey guys!
I haven’t done a monthly challenge for a while so…guess what!!?? We are going to do a HARD CORE challenge for the month of August!!! It’s all about dem abs! WOOHOO!!!
It’s time to #AdoreTheCore.
Unlike the other challenges you may see on IG, these aren’t just poses…they are a mixture of static and dynamic movements. You are meant to ACTUALLY DO THEM. Not just take a pic doing it. It’s a 28 day challenge meant to strengthen your abs. It will be highly effective – trust me – as I know there are moves here that you probably haven’t done before. So, expect soreness.
You will execute one unique move each day from August 1-28! And I want you to Instagram a pic, video, or boomerang of you completing the move to basically sign off on the fact that you worked your abs! If you don’t have an IG account, no worries, just make one! You can even use the word “POP”, “PIIT”, “Blogilates” in your screen name if you’d like. You can make this your official fitness account! Once you have an account, comment below and let us know what it is so that we can follow each other!
To make this challenge a celebration of our amazing community, I will be hosting a giveaway for you guys!
If you participate in all 28 days of the #AdoreTheCore Challenge, you will have a chance to win the POPFLEX Super Prize Pack which includes:
1 T.Y. Hello Kitty Mermaid Plush
To be eligible, you must:
Follow @popflex_active, @poppilatesofficial and @blogilates
Repost the challenge graphic above and tag 3 friends to join!
Commit to posting the move of the day all 28 days
Hashtag all your pics/vids/boomerangs with #adorethecore
You can be from any country and of any age! I will pick one random winner on the last day of August and announce on the blog!
Here’s a breakdown of what each move is! The goal is to do a minimum of 28 reps of each move daily, per side, unless it is a static hold – then you’ll want to hold it for a minimum of 28 sec…each side! The static holds have *’s next to them.

I will post the move daily on my Instagram – so be sure to follow @blogilates so you know how to interpret the exercise correctly! Please invite a friend to do it with you too – this is going to be so so so fun!! Let’s make this big guys! Let’s do it together! Comment below if you’re in!!!! And don’t forget to post your IG handle so POPsters from all over the world can follow you!
8 TIPS FOR CURING PMS CRAVINGS!
One of the most commonly asked questions in our PIIT28 message boards is, “What do I do about PMS cravings when I’m trying so hard to eat clean?” We figured if our PIIT crew wants to know, chances are you guys do too.
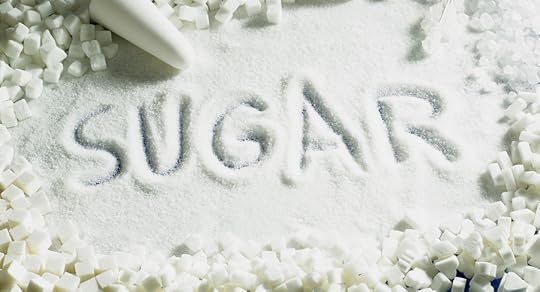
Up to 85% of women experience at least one PMS symptom per month! These symptoms range from mood swings and fatigue to bloating and food cravings. So no, you’re not alone! These symptoms are very real, and they’re related to hormonal shifts that occur any time in the last two weeks of your cycle. So if you have intense chocolate and pizza cravings, and a moodiness that seems to zap your otherwise healthy willpower, it’s not your fault; hormones are driving the ship. Fortunately, there are several ways to captain that ship if you’re feeling fed up and want control once and for all. If you eat well most weeks, except for when you’re on your period, those out of control days might be the reason you’re not reaching your goals. It’s simple math, really. Consuming an extra 850 calories over four days equals roughly 1 pound of fat gain. If you’re in a calorie deficit most other days, you might be staying the same. If not, you might slowly be gaining. Either way, it’s extremely frustrating given how hard I know you exercise and care about your body.
Before diving into the solutions, do you want to know WHY your body cries out for sweet, salty or extra carby foods that time of the month? Estrogen is a key player in our bodies, and as its levels go up and down, so does cortisol (our stress hormone). When cortisol levels are high, the body turns on its fight-or-flight response. This stimulates appetite, and causes cravings for carbs and fat, the two things that support and fuel that response (yep, the caveman days still affect us even now!).
The types of cravings we experience come from cortisol and serotonin ratios. Isn’t it crazy how one day you’re diving into doughnuts, and another you’re eating a box of macaroni and cheese?! You’re actually not crazy at all! It’s physiological. According to Web MD, “If cortisol is high and serotonin is low, you’ll seek carbs and fats, but really heavy duty on the simple carbs— sugar-based sweets like chocolate bars.” Simple sugars are metabolized quickly, so they offer a quick serotonin fix. “If cortisol is way up but serotonin is relatively normal, a woman is more likely to crave a fat-carb combo without a huge sweet component,” like pizza.
As if that weren’t bad enough, we are often bloated, tired and grouchy, which makes us throw in the towel and say, “oh well, I might as well eat whatever I want because I’m fat and uncomfortable already.” We’ve all done this, right? But that attitude is a lot like jumping on your cell phone just because you dropped it. You don’t need to break it just because it cracked. The same goes for your body. Sure, the scale might be up five pounds and you have a little Buddha belly for a couple days, but those things will go away once your hormones even out. So instead of diving into the Ben & Jerry’s, be proactive to ensure you don’t put on real weight during your period. And who knows, you might even prevent your cravings all together!
8 TIPS TO PREVENT PMS CRAVINGS
1. STABILIZE YOUR BLOOD SUGAR.
Research has linked PMS to low blood sugar/hypoglycemia. Drops in blood sugar lead to irritability, shakiness and further hunger, generally for simple carbs, which deliver a quick rush of sugar to the system. To avoid cravings that stem from low blood sugar, eat five balanced meals each day. This might mean Greek yogurt, fruit and nuts for breakfast, a protein shake for a snack, a quinoa salad for lunch, bananas and peanut butter for a snack and chicken tortilla soup for dinner. The meals are smaller than “3-square meals” because you’re eating five times per day. They include balanced ratios of protein, fat and carbs which eliminate the blood sugar spikes and plummets that come with a day comprised of pancakes, a sub sandwich and Chinese takeout for dinner. Blood sugar stabilization is the premise of The 28 Day Reset – the official meal plan of PIIT28.
2. EAT A PROTEIN-RICH BREAKFAST.
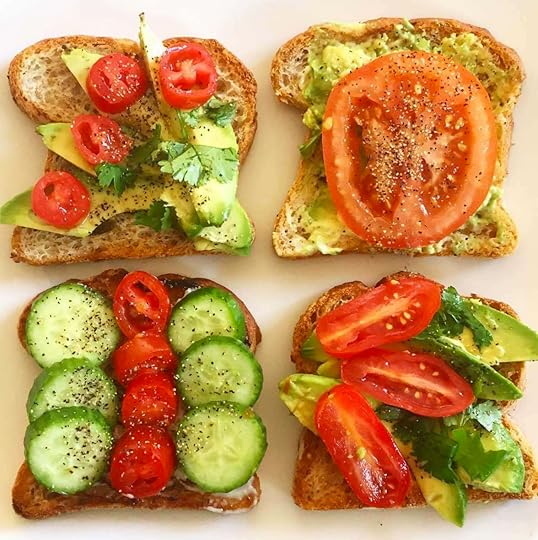
A breakfast of scrambled eggs with veggies and avocado starts your day off much better than waffles or cereal. Having protein and fat in the morning leaves you satiated and energized, and a lot less likely to crave chocolate by noon.
3. INCREASE FIBER.
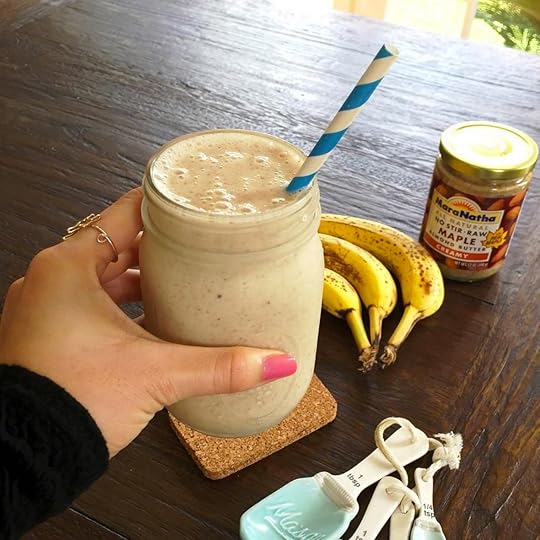
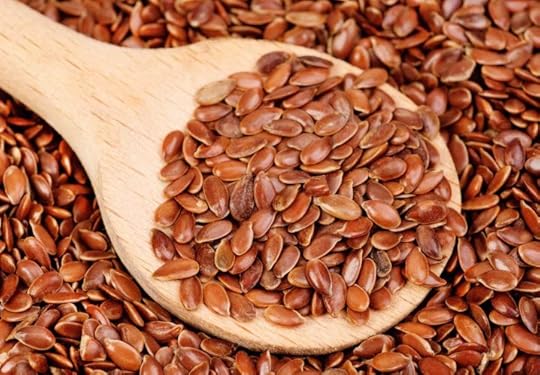
#1 New York Times Bestselling author, Dr. Hyman, suggests increasing vegetables, fruit, nuts, seeds, beans, and whole grains in order to ease PMS constipation, which affects your gut, which affects your cravings. “Two tablespoons of ground flax seeds a day are especially helpful in correcting constipation and balancing hormones. Put them in a shake or sprinkle them on salads or food.”
4. CARB UP.
Well, not really loading up, but a few moderate complex carbs can help raise your serotonin levels to stave off the, “I could kill for a Snickers bar right now,” moments. They key is having just enough to raise your serotonin without sending your blood sugar skyrocketing. So the next time you’re feeling crabby or a bit blue, and your period is near, go ahead and have two ounces of whole wheat pasta with marinara, a small baked potato or a slice of toast. The amount you have won’t ruin your diet, and might spare you from raiding the pantry tomorrow. It’s best not to eat these carbs with lots of fat, as fat will slow the absorption of the carbs, thus, postponing your serotonin surge.
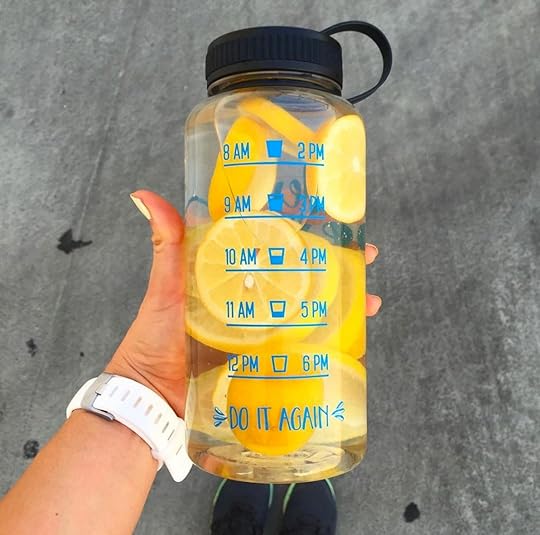
5. DRINK UP.
As much as you might feel like a beached whale, the best remedy for beating bloat is 8-10 glasses of water. The sooner the bloat is gone, the happier you’ll be, which mean you won’t be eating raw cookie dough to temporarily lift your spirits. The bottle above helps me stay hydrated throughout the day. You can get the Timer Bottle here.
6. SWEAT.
Whatever gets the blood pumping will raise serotonin and lower cortisol levels. Cortisol is your stress hormone, and nothing relieves stress like exercise! This can have a huge impact on your cravings too! The happier I am, the more I want healthy and clean foods. I know it’s hard, but get a short workout in, even when you want to crawl under the covers in your pj’s. You’ll never regret that workout!
7. GIVE IT A MAKEOVER.
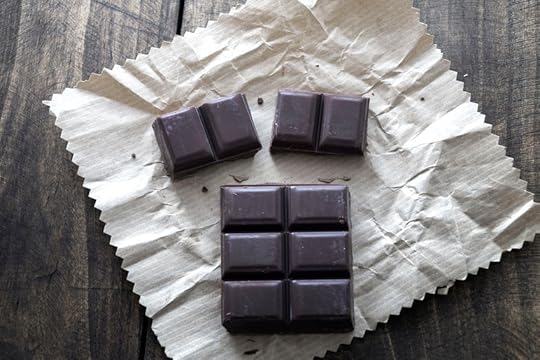
When all else fails and you just can’t force yourself to eat a salad because only a huge quesadilla will do, don’t fight it, make it healthier. There’s always a healthier option for the bad stuff. Craving a burger? Go turkey burger with avocado and half the bun. Need chocolate? Make an avocado chocolate mousse, or grab some chocolate covered edamame. French fries? Make your own baked sweet potato fries. You’ll have a lot less regret this way, and you’ll still satisfy your craving.
8. REDUCE CAFFEINE.
Caffeine spikes cortisol, so reducing it helps, once again, with your cravings. Chances are, though, if you cut it out completely, you’ll experience moodiness and fatigue, which won’t help your cause. So just try reducing it by half, or try a nice soothing tea.
That’s it guys! Can you do it? Can you cut your coffee by half, increase your fiber and eat balanced meals before and during your period? Let me know if you choose some, or all, of these PMS craving-cures and let me know how you feel!
Resources:
http://www.m.webmd.com/diet/features/is-pms-sabotaging-your-diet
http://drhyman.com/blog/2010/09/17/how-to-eliminate-pms-in-5-simple-steps/
July 21, 2016
Free POP Pilates Classes all over the US!
Hey guys!
We just wrapped up 3 full days at the IDEA World Fitness Convention, complete with a POPFLEX Pop Up Shop, a POP Pilates showcase party, and lots of POPsters! It was fun seeing you guys at the POP wings – I hope you had a chance to take a photo with them! We made them special just for you!

Racking the clothes was SUCH A PROCESS! But so fun to see everything on hangers and mannequins like a real shop, for the very first time! We even bought a price gun – you know those things they use to put prices on bread at the supermarket – yeah – one of those! It felt so legit!
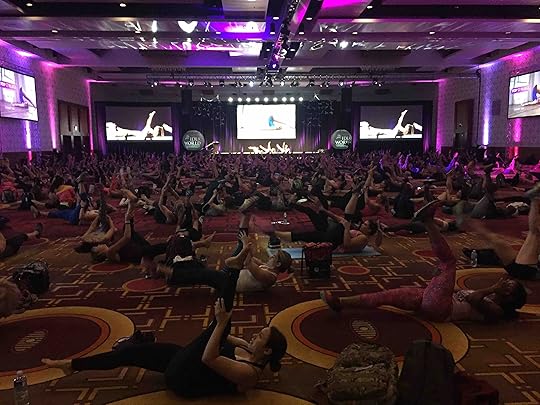
The POP Pilates Showcase Party was so nerve-wrecking for me because it was the first time that I was going to present POP Pilates alongside my Master Trainers. But it wasn’t stage fright or anything…it was the fact that I needed to SUPER MEMORIZE POP 6! You see, every quarter we release a brand new set of choreography with 13 new tracks for a whole 55 min class. We do this to keep classes fresh and to keep muscles constantly surprised with new exercises. So I spent the entire day before studying like it was finals week!!! I went to sleep listening to the music and I woke up doing the moves as I brushed my teeth. Brain farts happen and yeah I forget choreo sometimes, but I DID NOT want to mess this up! Funny to think the creator of the format has to practice so hard, but you gotta do what you gotta do!
I am so happy to report that it went sooooooo smooth!!!! AHH!!! I was dying at how beautiful the choreography looked. I uploaded some footage on my IG @Blogilates – so you can take a look there! And big thanks to MT’s Hue and Aimee for being amazing trainers and “back up dancers”! :P Thanks to my Program Director Jules for helping me come up with the best POP Pilates choreo to date!
If you guys did not get a chance to take the class, NO WORRIES! I have a surprise for you!
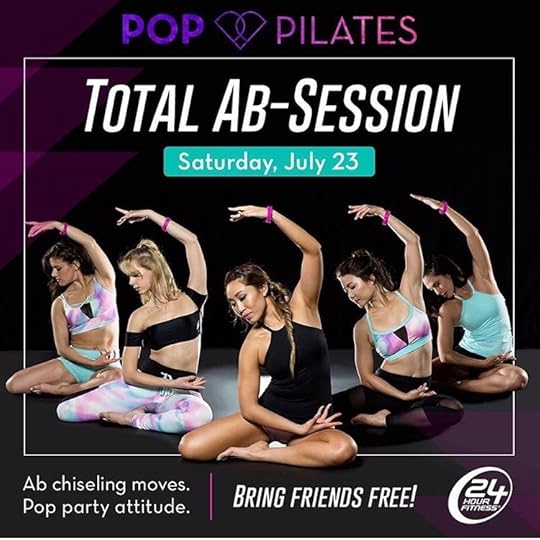
This Saturday the 23rd, 24 Hour Fitness will be hosting POP Parties all over the US! These are full length 55 min classes taught by our amazing, certified POP Pilates instructors! All POP classes on that day will be free, so even if you don’t have a membership, it’s all good. Just come in and tell the front desk that you’re there for the POP Party! You can even show them the ad above as your ticket.
To see if there is a POP Pilates class near you, just click on the image below, check “view by class” and type in your zip code! Then scroll down the list until it says “POP Pilates” and check for the times! Make sure the date is on Sat the 23rd!

It’s still crazy to me to think that this format that I started on YouTube is an ACTUAL class at 24 Hour Fitness. I mean, what!! I still remember my very first audition at 24 Hour Fitness in Puente Hills, CA. I was so nervous. I had only taught to classes of 3-5 people max at a tiny gym in Whittier…so for me, this was like going to the big leagues! When I got hired, I was scheduled to team teach a Pilates class with a very seasoned instructor to a class of over 50 students. I remember just TREMBLING. I WAS SO NERVOUS THAT I WAS GOING TO DIE.
She put the headset on me and said “You do abs and I’ll do the other muscle groups.” I remember showing the class the Hundred, the Single Straight Leg Stretch, Double Leg Lifts…all the classics! When I finished I ran to my car and basically started crying and shaking. Because I was so happy that I had survived.
(Yes, there was a time when Cassey could not handle teaching a live class.)
The adrenaline and the love from the students kept me coming back for more. After many months of subbing and working hard to show my GX Director that I deserved my own class on the schedule, I finally got one! It was far too – the drive was at least 30-40 min away from my dorm – but it was so worth it. I felt like I had won life!!
And now…9 years later…POP Pilates is a class that is a real format on the 24 Hour Fitness schedule! It still amazes me how magical life can be sometimes. How is it that it’s come full circle? I think it has a lot to do with working hard, sharing your passion genuinely, and creating things or services that bring value and happiness to people’s lives. Sometimes you don’t know your path, but you know what feels right. So keep going towards what feels right and then the right things will happen.
Also, I want you to know that I don’t have all the answers. Things are not perfect. I fail a lot. I cry a lot. I get upset and write journal entries about how I’ve been mistreated and misjudged. But you know what? Failing is learning and you cannot give up. Challenges are there to make you stronger. They are there to make you appreciate what you EARNED when the good finally happens. So embrace it all. As humans, we are soooo lucky to be able to feel all these emotions. It makes us dynamic. It makes us real.
Anyway…
I am super thankful for my 24 Hour Fitness family and their trust in the POP Pilates program. I really encourage you guys to head out of your comfort zones this Saturday and join a free POP Pilates class! Being in a group exercise studios alongside other people is not scary or intimidating at all. It is MOTIVATING. You cannot replicate that energy in your living room. Plus, you will be in very good hands with my POP Pilates Instructors. If you have ever thought about getting certified, I encourage you to do it. Being a fitness instructor is the BEST DECISION I have ever made in my life. Click here to learn more about getting certified.
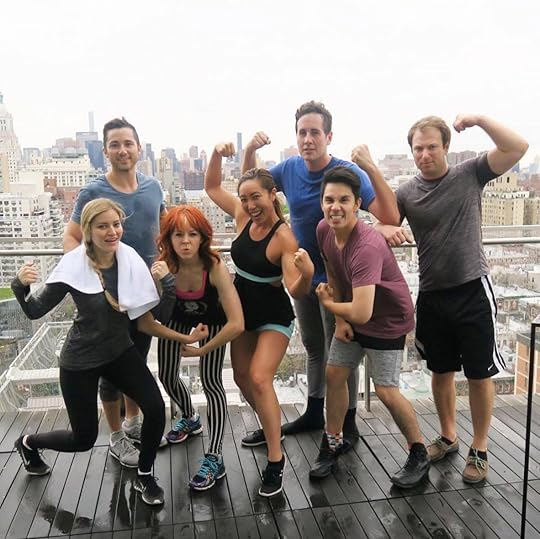
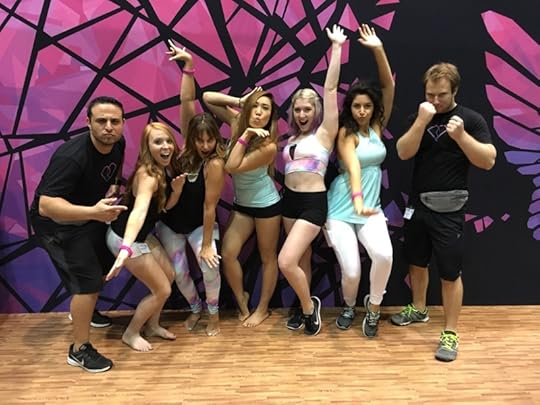
Until then, I’ll leave you with a silly pic from the POP booth!
Comment below where you are from and we can help you find a class near you!
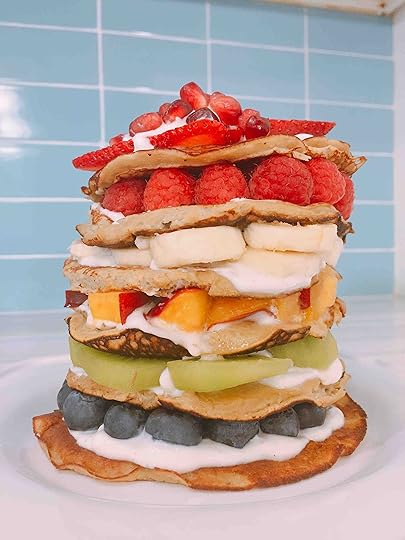
Instagram Worthy Rainbow Pancakes
Hey guys!
Have you ever whipped something up in your kitchen that was just for Instagram? (C’mon, let’s be honest here!!) I like making my recipes pretty (even if eating them becomes challenging) but I’d never prepare something I didn’t plan on devouring.
Can I get a “heck-yeah” to leftovers PLEASE?? I’m a firm believer in taking home or saving what I don’t eat. It’s less wasteful, and I never feel the need to stuff myself since there’s always a tomorrow! So if you don’t eat up this entire stack of eye-candy in one sitting with a couple friends, save some for later! Enjoy every bit of the soft cakey pancakes, slightly tangy yogurt and naturally sweet fruit, because this recipe is AH-MAZING. Just cut it carefully because you don’t want your masterpiece to topple over!
Watch me make it below in the latest Cheap Clean Eats episode!
RAINBOW PANCAKES
Yield: 3 servings
Serving Size: 1/3rd pancake stack
Prep Time: 15 min
Cook Time: 12 min
Ingredients:
2 large very ripe bananas
4 eggs
2 tablespoons coconut flour
1 tablespoon oat flour
1/2 teaspoon baking powder
1/2 teaspoon vanilla extract
1/2 cup blueberries
2 kiwi, sliced
1/2 cup chopped nectarines or peaches
1/2 banana, sliced
1/2 cup raspberries
1/4 cup pomegranate seeds
5.3 ounce container vanilla Greek yogurt
Method :
In a small blender, add the bananas, eggs, coconut and oat flours and vanilla extract; process until smooth. Let sit for at least 5 minutes to allow coconut flour to thicken a bit.
Heat a large, nonstick skillet, with cooking spray, over low-medium heat. Pour batter into a measuring cup to help you make 6 even pancakes. Pour 1/6th of the batter into the skillet and cook on low-medium until bubbly (about 2 minutes), then carefully flip and cook for about 1 minute. Repeat with remaining batter.
Spread 1 tablespoon of yogurt on the bottom pancake and cover with blueberries. Layer another pancake on top, spread with 1 tablespoon of yogurt, and cover with kiwis. Repeat this layering process with the remaining fruit. Cover the last pancake with remaining yogurt and sprinkle with pomegranate seeds.
Feel free to decorate the top with extra fruit in any colors you like!
Nutrition Info:
Calories: 330 | Protein: 15g | Fat: 8g | Net Carbs: 46g | Fiber: 8g
Comment below if you make these and if you changed up any of the fruit!
PS – I am TOTALLY aware that I switched the orange and the yellow in the rainbow order! OOPS!!!
July 18, 2016
How to Get Motivated!
Hey Guys!
What does MOTIVATION mean to you? Do you have it? Do you lack it? Do you want it? (Yes, probably!) What is it exactly, and why do some people seem to have it oozing from every pore? Just in case you want the definition, here it is:
mo·ti·va·tion
mōdəˈvāSH(ə)n/
noun
The reason or reasons one has for acting or behaving in a particular way.
The general desire or willingness of someone to do something.
I’ll bet 99% of the population wants to be healthy. I mean, who doesn’t want to live longer while feeling better? The desire is there for the majority of the planet. But what makes one person bolt out of bed at 5 a.m. to jog before the sun’s up, while another presses snooze and says, “I’ll start on Monday”? Why does a co-worker pack her perfect bento box every day, while you rely on the vending machine? Why do some people do exactly what they say they’re going to, while others have a constant silent dialogue with themselves that goes a little like this: “missing the gym today won’t matter, I’ll just go tomorrow for longer,” or, “I’m so stressed, I deserve chocolate,” or, “I’m going to start losing weight after my birthday”!?
Before you know it, variations of the same excuses crop up day after day, week after week, until disappointment and negative self-talk become the norm, and no progress is made. I’m here to tell you: you do not have to live this way! Life’s too short to beat yourself up! Most of us bully ourselves in ways we’d never dream of bullying another human being. Here’s where we say: ENOUGH IS ENOUGH! It’s time to change your thoughts in order to change your mind, habits and body. It might be tough, but it’ll be worth it. Creating new habits takes structure. None of us are going to wake up tomorrow, or even in one week, an entirely new person with brand new habits. But small and relentless commitments every day will change you and help you become all you were destined to be.
To get started, it helps to know the two types of motivation: intrinsic and extrinsic.
Intrinsic is when something is so completely natural, it’s simply a part of who you are. It’s inherent.
Extrinsic is the opposite; something that’s not entirely natural or a part of you. When someone is intrinsically motivated to exercise, for example, it’s second nature. The habit is so ingrained that the act of not doing it regularly feels depressing and foreign.
You can certainly be extrinsically motivated to hit the gym every day, but it means the fire to do so doesn’t come from within. You might be in a sport that requires it. Perhaps your doctor demanded you get on a waking routine, or you get to wear cute tank tops and chat with friends if you strap on the sneakers for a girly power walk. Just so we’re clear, I’m not saying there’s anything wrong with this, but it doesn’t always last. We’re after intrinsic motivation, or at the very least, habits that aren’t torture!
For me, exercise and work are 100% intrinsic. Like, I have to shut it down. I crave both, get lost in both and have to force myself to stop sometimes because it’s so natural and enjoyable. It’s where I’m in “the zone.” Maybe you feel that way about parenting, drawing, reading or cooking? Think about something in your life where you’re intrinsically motivated and meditate on that feeling a bit. It might be your form of expression, a creative outlet, or a sense of satisfaction in working hard at something. Recognize how that feels in one area of your life, because we are going to harness it and make it a habit for your health!
They say it takes 21 days to create a habit. Incorporate these ten tips and you’re sure to get there!
1. It’s not about Vanity
Fitness can’t only be about vanity. We have to dig a bit deeper than the surface to make things last. A goal of, “looking good for a wedding,” never lasts. It might get you to go to the gym every day for 3 weeks, but what happens after you take that bridesmaid dress off? Where does the motivation come from then?
You’ve got to find 3 specific reasons why exercising most days of the week is important to you. Let me help you with a few: cancer prevention, living with less pain, sleeping better, decreasing depression, more energy, curing your diabetes, endurance to play with your children. Those are just a few “big” reasons. Do you see the difference? Stating, “I will run 4 days per week to cut my risk of cancer,” is a lot more powerful than saying, “I will work out to lose 5 pounds.” The difference here is in the magnitude. Failing to lose 5 pounds isn’t a huge consequence, but failing to have energy to play with your kids, or failing to do all you can to prevent a serious disease, has real impact. Even if you’re too young to imagine a life where you don’t feel energetic, it helps to visualize the things you want to prevent. The steps you make today affect your future self!
2. Commit Out Loud
We make and break promises to ourselves multiple times per day, but as soon as there’s something on the line—money, your credibility, your loyalty—well, that’s another story. Some people go so far as to blog an entire experience just for the public accountability. Others simply sign a contract with a friend, promise to put $10 into a jar for every kickboxing class they miss, or start a closed Facebook page with a group of friends. The point is, people let themselves down often, but most don’t want to let someone else down. Ideally, you’ll buy a class pass with 3 or more friends, reserve a bike in advance so you can’t back out, or have a scheduled power walk at 5:00 p.m. Monday-Thursday to hold you to your routine. Ideally, you won’t just tell your BFF your goals! Tell a few more people, especially those who give you tough love when you need it.
3. Give Yourself a Present
Ok – it doesn’t have to be diamonds or anything, but scientists have discovered that you can take a string of habits that end in reward to create a positive habit. For example:
Set workout gear out the night before
Set alarm for 6:00 a.m. to hit the gym
Treat yourself to a green juice post workout
These are three separate things that end in something joyful. Even if you despise mornings AND exercise, your brain will begin to associate the pleasure (green juice) with the habit of working out.
Another option:
DVR your favorite reality t.v. show
Set your jump rope and dumbbells out before work
Come home to an at-home gym party while watching your show (which you agree to only watch if you are moving!)
Charles Duhigg, author of, The Power of Habit, says that habits are made up of three things: triggers, routines and rewards. And those CAN turn into intrinsic motivation! Something as small as your morning coffee can serve as a reward. A trigger can be your alarm and getting up. The routine is having your coffee pot set so that all you have to do is press “brew.” And the reward is sipping on that warm mug of happiness that gets your eyes aflutter and your day off to a great start. Don’t think you need to reward yourself with a mani/pedi every time you go to the gym. That’ll get expensive! Just reward yourself with something you love to do…but only after the workout is complete. Maybe it’s calling your bestie, reading a book, or making a smoothie.
4. Make a Plan
You must have measurable goals or you won’t know how to get where you want to go, and you won’t know what it feels like when you arrive. Saying, “I’m going to exercise more,” is failure waiting to happen. More than what?! Saying, “I will do four 30-minute POP Pilates videos on Monday, Wednesday, Friday and Saturday,” is completely measurable. You either do it or you don’t. People who say, “I want to lose 5 pounds,” are doomed to fail. What’s the plan? Do you want to lose it in 3 weeks or 3 years? A better plan is saying, “I will lose 5 pounds by June 2nd by logging my food daily and jogging 2 miles Monday-Friday.” Once you know the plan, write it down and put it where you can see it.
Here’s a 4 min video to get you started!
5. Buy Some New Clothes
The better you look and feel, the more motivated you’ll be. It’s surprising what people will spend on a dress they’ll only wear once, but they won’t invest in cute clothes they’ll exercise in multiple times per week. When you invest in exercise attire, it reinforces health and fitness as part of your identity. It becomes part of who you are, decreasing the excuses. Allow yourself to be an athlete. Think of yourself as someone who works out and it will define you as such. My fave POPFLEX outfit of the moment…
6. Feelings Journal
Write down how you feel after your workout. You might not think it carries a lot of weight, but putting pen to paper really does work! If you notice an elevated mood, a flatter tummy in the morning and a lack of rage at the office, you need to write it down! If you’re ever tempted to skip a workout, whip out your journal and sneak a peek at the positive things you’ve written down.
7. Measure it
The scale can be mean and unforgiving (and misleading!), but photos and measurements don’t lie. Progress can keep you motivated like nothing else. Sometimes the before photo alone is enough of a reality check. But a tape measure and a few snapshots tell a truer story than the scale, so be sure to get the pix and measurements for your ‘evidence file’ on day one of your journey.
8. Try new Things
Just because you hate yoga and cycling doesn’t mean you hate all exercise. It’s easy to lump those negative feelings together and assume they blanket every exercise program on the planet. But they don’t. There’s something out there for everyone. It may take kissing a few frogs to find your Prince Charming, but eventually you will find that class, or that instructor or that walking trail that leaves you excited, invigorated and craving more. Don’t stop until you’ve found it! And when you do, commit to it at least 3 days per week.
9. Explore all Sides of Health
Working out isn’t the only habit we’re after here. To be well-rounded, you really need to focus on your nutrition, sleep, stress, hydration and happiness. Finding motivation in other areas helps the exercise motivation because you begin to feel accomplished across the board. Make the same commitments with food by logging meals into an app so that you become aware of what you’re putting into your body. Commit to trying healthier recipes or start buying organic. Make a contract to go to sleep by 10 p.m. each night. Have a consequence for not going to sleep when you promised. Fill up four-20-ounce water bottles the night before and vow to drink them all the next day.
10. Create your Vision
Seeing is believing. It really is! Some of the most successful people in the world set their intentions daily, or weekly. They create Pinterest boards, vision boards or they meditate. Some simply express gratitude in the morning and vocalize 5 things they’re going to accomplish that day before their feet hit the floor. The mind is a powerful ally, so create the health, the look and the fitness you hope to achieve, and paint it colorfully in your mind. Better yet, go a step further and write it, draw it or save it on your computer.
Let me know in the comments below if you struggle with motivation and which of these tips you’re going to try first. I’d love to hear if your habits improve in the next 21 days! Don’t make excuses! The worst that can happen is that nothing changes. The best that can happen is you become intrinsically motivated to do something that will 100% improve your life!
July 13, 2016
Foods for Clear & Radiant Skin
Hey Guys!
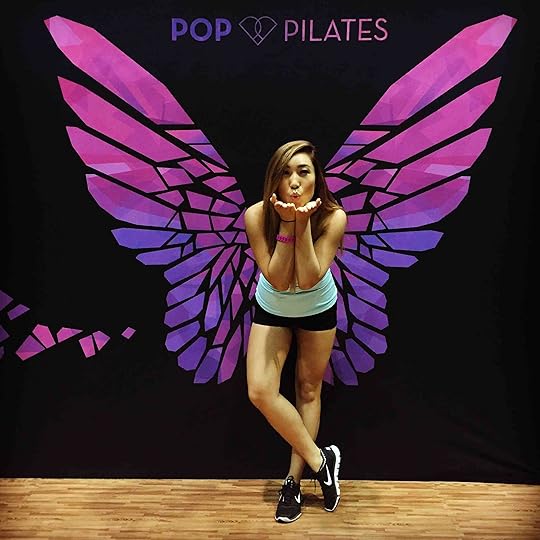
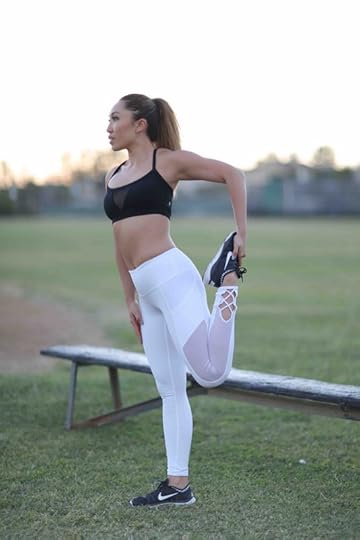
Did a lil photoshoot this past weekend and had so much fun frolicking around a random high school :P Here’s one of my fave pics from that sesh. What I like about this photo is the fact that I feel so calm and so strong all at once. It has a lot to do with being comfortable in my body and comfortable in my skin! I had acne all throughout my high school and college years and tried EVERYTHING to clear my skin. No creams worked, even strong ones prescribed by my doctor.
However, for the past year, my skin has been so good to me…because I’ve been good to myself. I started taking care of myself from the inside out and not only did my metabolism begin to function properly again, I lost some fat, gained some muscle, and my skin started to glow!! You guys even started to comment and ask for my skin care routine! And to be honest, I don’t really have one. I wash my face at night with a makeup remover wipe and that’s kinda it! I use moisturizer in the morning and at night, but I don’t do anything complicated. I actually owe it all to the way I eat.
So, here’s some research to help you understand which foods are champions for clear skin!
“Foods get digested and broken down into vitamins, minerals and amino acids that your body can use to build healthy skin,” says Dr. Jessica Wu, a dermatologist and skincare line creator. She says that not eating enough protein can prevent the skin from producing collagen and elastic tissue, both of which make skin strong and supple. I think that’s reason enough to keep that daily protein intake up, don’t you?
Here are the best foods top dermatologists and celebrity estheticians recommend for glowing and youthful skin, plus a few you should avoid. You know the “EAT IT” list will include plant-based foods, so I hope you like your greens! If not, find a green drink or green juice you can tolerate because there are over 25,000 phytonutrients found in plant foods! Phytonutrients help skin retain firmness by increasing the stability of cellular membranes. They also improve blood flow to the skin. Some of the most impressive include:
Carotenoids: Powerful antioxidants that combat harmful free radicals that damage tissues in the body.
Resveratrol: An antioxidant with powerful anti-inflammatory benefits. Also touted for anti-aging.
Flavonoids: Offer protection against certain types of cancer and heart disease.
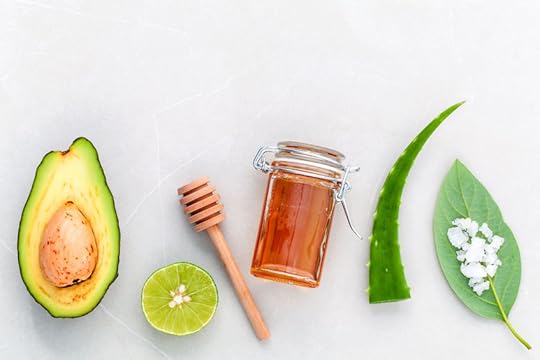
“EAT IT LIST”
Avocados are full of phytonutrients and healthy monounsaturated fats which help moisturize the skin from the inside out. Avocado is high in vitamin E, which stimulates collagen production.
Brazil nuts contain selenium, which produces the antioxidant responsible for reducing cell damage. (You heard right, this little guy can slow down the skin’s aging process!). Just two nuts supply your daily dose! Selenium also protects against sunburn and skin cancer.
Omega-3 and 6 fatty acids (nuts, chia seeds, salmon, flaxseed and walnuts) AKA- essential fatty acids-aren’t made by the body; you must eat them. They’re essential because they’re the building blocks of healthy cell membranes. These incredible polyunsaturated fats aid in creating the skin’s natural oil barrier, one of the components of plump, hydrated and younger looking skin. They also help diminish inflammation associated with acne.
Coconut oil is anti-viral, anti-microbial, and anti-fungal. Many people with acne also suffer from Candida overgrowth and can benefit from using coconut oil internally and topically. It’s a great moisturizer and contains a sunscreen protection of 4 (but please, still use your SPF!)
Bell peppers, strawberries, citrus fruits, kale, spinach and broccoli are collagen-boosting foods because they’re high in Vitamin C, which is a pre-cursor to collagen production. Fun fact: a red bell pepper contains more vitamin C than an orange.
Eggs, Brussels sprouts and onions are sulfur-containing foods, and sulfur is necessary for the production of collagen and keratin (so the bonus here is gorgeous hair on top of glowing skin)!
Garlic will scare vampires away (which will keep your skin radiant for sure!) but it’s quite magical and we should all be eating it daily! Garlic can prevent breakouts and maintain clear skin. According to Best Health Magazine, “it’s best to crush or chop garlic and leave it on the cutting board for a few minutes before cooking,” in order to maximize its antibiotic compounds.
Almond butter, pumpkin, sweet potatoes, carrots and cantaloupe are high in antioxidant-rich vitamins A and E (have you noticed a lot of fancy skin serums and creams contain those vitamins too?) Vitamin A is critical for moisture retention to the epidermis, which helps stave off wrinkles and remove dead skin.
Turmeric is one of the most powerful antioxidants and anti-inflammatory foods. Popular in Indian cuisine, this herb packs a more powerful punch than fruits and veggies. You can blend a piece of fresh turmeric into shakes, cook with the powder, or take a capsule daily.
Pineapple is super high in vitamin C and the enzyme bromelain, which is known to be a great skin softener.
Pomegranates contain Polyphenols which fight free radicals and regulate skin’s blood flow. This gives skin a rosy glow.
Tomatoes are antioxidant superstars. If you can, have them cooked with a little olive oil for the biggest nutrient punch. When eaten in the right doses, the skin’s ability to protect itself against UV damage increases significantly.
Kidney beans contain zinc, which has healing properties. “Studies indicate a correlation between blemishes and low zinc levels,” Dr. Wu explains. Just 4 ounces daily seems to do the trick.
Leafy greens contain amazing nutrients, and also increase nitric oxide in your blood, giving skin a healthy glow.
“USE IT LIST”
Food feeds us on a cellular level, but it’s also helpful topically. If an emergency arises, look no further than your kitchen cabinets.
Tea bags: Brew a cup of green tea and sip on it for the antioxidant benefits (namely EGCG which reduces redness) while you chill the tea bag. Once cold, apply it to blemishes for its antiseptic and anti-inflammatory benefits.
Lemons: Just a little bit on a cotton ball pressed on a blemish can calm inflammation. They’re a good source of vitamin C and they act as an astringent.
Honey: Make sure it’s raw, because raw honey is a powerful super-food, while the regular store-bought stuff is not! Rich in antioxidants, phytonutrients and live enzymes, a small dab on a breakout before bed can relieve blemishes and soften skin.
“DITCH IT LIST”
I hate to say it, but sugar is a big no-no if you want clear and radiant skin. Dr. Perricone, a famous skin doctor, author and creator of a skincare line says, simple carbohydrates cause your insulin levels to spike, causing “a burst of inflammation throughout the body.” Avoid high-glycemic foods and those high in saturated fats such as: white bread, candy, fried food, ice cream, juice, pasta, pizza, and packaged snacks. If you’re wondering what inflammation has to do with acne, here it is: It’s the body’s natural response to attackers (bacteria, chemicals, or certain foods). “When inflammation works like it’s supposed to, it helps your body fight off an attack by bringing in white blood cells and all the warriors of your immune system. When it’s done fighting the infection, it stops. The swelling goes down, the redness disappears, the wound heals,” says author of Clear Skin Forever, Devin Mooers.
Hope that helped guys! Comment below what your skin care regimen is!
Resources:
http://www.m.webmd.com/healthy-beauty/features/natural-skin-care-skinny-fats
http://stylecaster.com/beauty/healthy-fats-for-clear-skin/#ixzz45TvxDRx2
http://www.besthealthmag.ca/best-eats/nutrition/15-foods-to-eat-for-glowing-skin-and-healthy-hair/
http://www.beautyinthebag.com/
http://www.huffingtonpost.com/2013/09/05/fix-your-skin-mistakes_n_3861033.html
http://www.huffingtonpost.com/2013/10/10/sugar-bad-for-skin_n_4071548.html
July 12, 2016
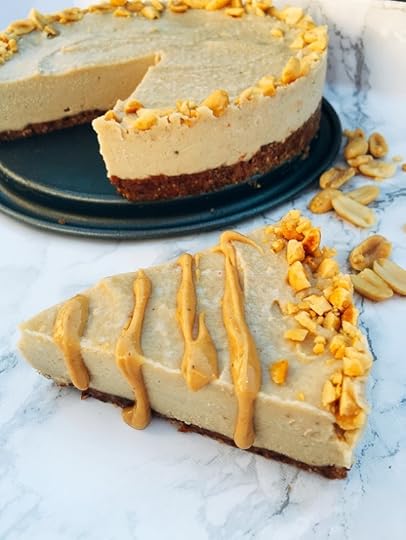
Vegan Peanut Butter Cheesecake
Hey guys!
I know it’s summer and we all want to keep fit, but I just had to share this recipe with you! OMG, it is so creamy and satisfying and peanut-buttery delicious, I’d feel like a bad friend if I kept it all to myself. Here’s its highlight reel: vegan, low carb, low sugar, gluten-free, made from healthy fat, and really simple. No, you cannot eat the whole thing guilt-free, but a slice, oh yeah, you MUST!
Regular cheesecakes can be a little fussy to make. They often crack on the top, and it’s hard to know when to pull them out of the oven to ensure the center is soft, smooth and firm, yet creamy and not over-baked. And let’s not even talk about all the gluten, sugar and cream cheese that it takes to make one! This perfectly sweet and subtly salty cheesecake is made in two simple steps and is no-bake! I’m dying to know what you think of it when you make it! Be sure to let me know on social media and tag your pics so I can enjoy them!
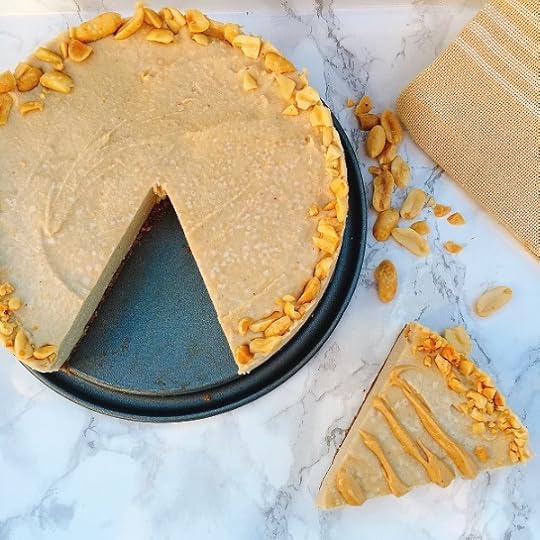
VEGAN PEANUT BUTTER CHEEECAKE
Yield: 8 servings
Serving Size: 1 SLICE
Prep Time: 15 min
Chill Time: 6 hours
Ingredients:
Crust
1/4 cup dry roasted and salted peanuts
1/4 cup raw almonds
6 medium pitted dates
2 teaspoons coconut oil
Filling
1 1/2 cups raw cashews
3 cups water
1/3 cup granulated zero-calorie sweetner
1/4 cup chilled coconut cream from the can
2 tablespoons natural peanut butter
1 tablespoon powdered peanut butter (or peanut flour)
2 tablespoons coconut oil, melted
1/2 teaspoon vanilla extract
1/4 teaspoon sea salt (plus a pinch for topping)
Method :
Soak the cashew in the water for 6 hours, or overnight. Drain and rinse.
Coat a 7-inch springform pan with cooking spray.
In a food processor, add crust ingredients and process until it resembles fine crumbs. Press into the bottom of the pan. Place in freezer as you make the filling.
Place the soaked cashews and remaining filling ingredients into the food processor and process until completely smooth (about 5 minutes). Pour over the crust. Sprinkle the top with a little extra sea salt, if desired.
You can make a fun trim around the top using crushed peanuts, if desired.
Place in fridge for 6-8 hours, or until firm, or place in a freezer for 2 hours and then a fridge for 2 hours.
Cut into 8 slices, and serve.
I cannot wait for you to make this and tell me all about it in the comments!
Nutrition Info:
Calories: 267 | Protein: 7g | Fat: 22g | Net Carbs: 11g | Fiber: 2g
July 10, 2016
POPFLEX POP UP SHOP!

Hmm this collage is super blurry but I can’t seem to find the original pics!
The pic on top is me in front of my first ever booth at IDEA WORLD Fitness Convention in 2013. It was a little bitty 10×10 booth and that was my first mannequin ever. We sold all the inspirational shirts from blogilatesdesigns.com and used the oGorgeous/Blogilates step and repeat as our background!
The pic on the bottom is from our 2014 BODYPOP booth, and that was the first time I had ever debuted that line of clothing! It was such a special moment for me, looking back at where we were and where we had expanded to. It was a 20×10 booth with soft wooden flooring, sheer curtains, fairy lights, and even a changing room!
There was no 2015 booth. If you’ve seen my vlog on about “Secrets on Starting a Clothing Line“, then you’d know that I took a year and a half off from debuting any new activewear styles for BODYPOP because I was personally unhappy with the price and the quality – I knew I could do better. I took that time to source my own fabrics, my own threads, my own WRAP-certified factories, and do whatever I could to cut out the middle man and bring the price of the clothing down while bringing the quality of the products up.
So in January 2016, POPFLEX was born. I can honestly say that I am so proud of this collection and I stand behind it 110%. FOR REAL. The fabric is so soft, so durable, and my designs actually look how I sketched them on paper! Seeing you guys wear POPFLEX to work out, take selfies, stretch, buy groceries, climb mountains, or do whatever in…makes me feel like I did it right this time. For me, and for you.
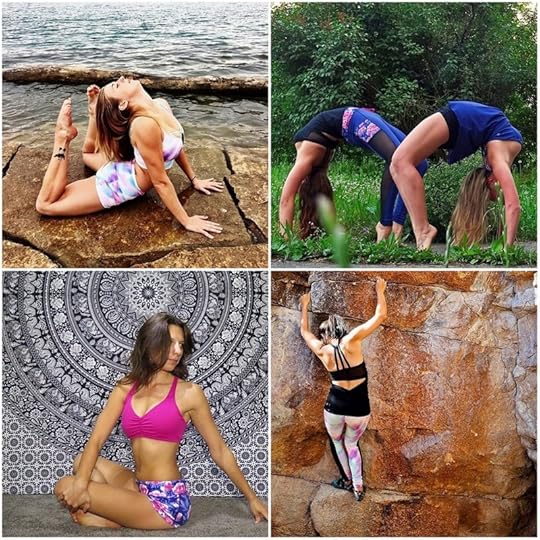
Top left in clockwise order: @popgoddessemily, @luce_fitlife, @mrs.yoga, and @estherjulee.
So this year, July 2016, we are back at IDEA with the first ever POPFLEX Pop Up Shop!!!!!! AHHHHHHHH!!!!!!! For the first time ever, you can come and see the clothing in person, feel how buttery the fabric is, and check what size you are! Everything will be discounted up to 40% (you’ll be getting the VIP discount), so you NEED to come!
PLUS…we spent a lot of time designing this year’s booth. I have a surprise there for you. I think you will really like it :)
To get into IDEA World, you need an expo hall pass. You can get there here. The special thing with that link is that you can use it to RSVP for my POP Pilates class & Showcase Party on sat July 16th at 12pm too!
The expo hall hours to shop are:
Thursday, July 14
12:20pm – 6:30pm
Friday, July 15
11:30am-6:30pm
Saturday, July 16
10:30am-6:30pm
Alrighty guys! I hope to see you there! It’s going to be a blast!
July 8, 2016
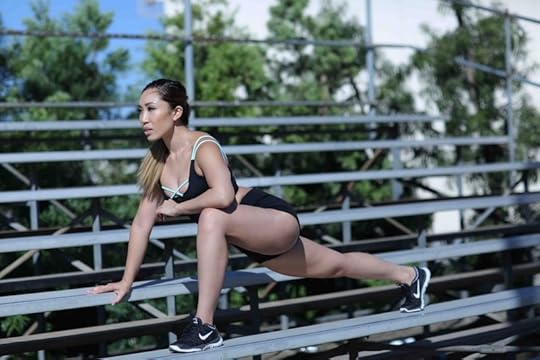
What it means to not have a six pack…
“She may not have a six pack but she’s tough.”
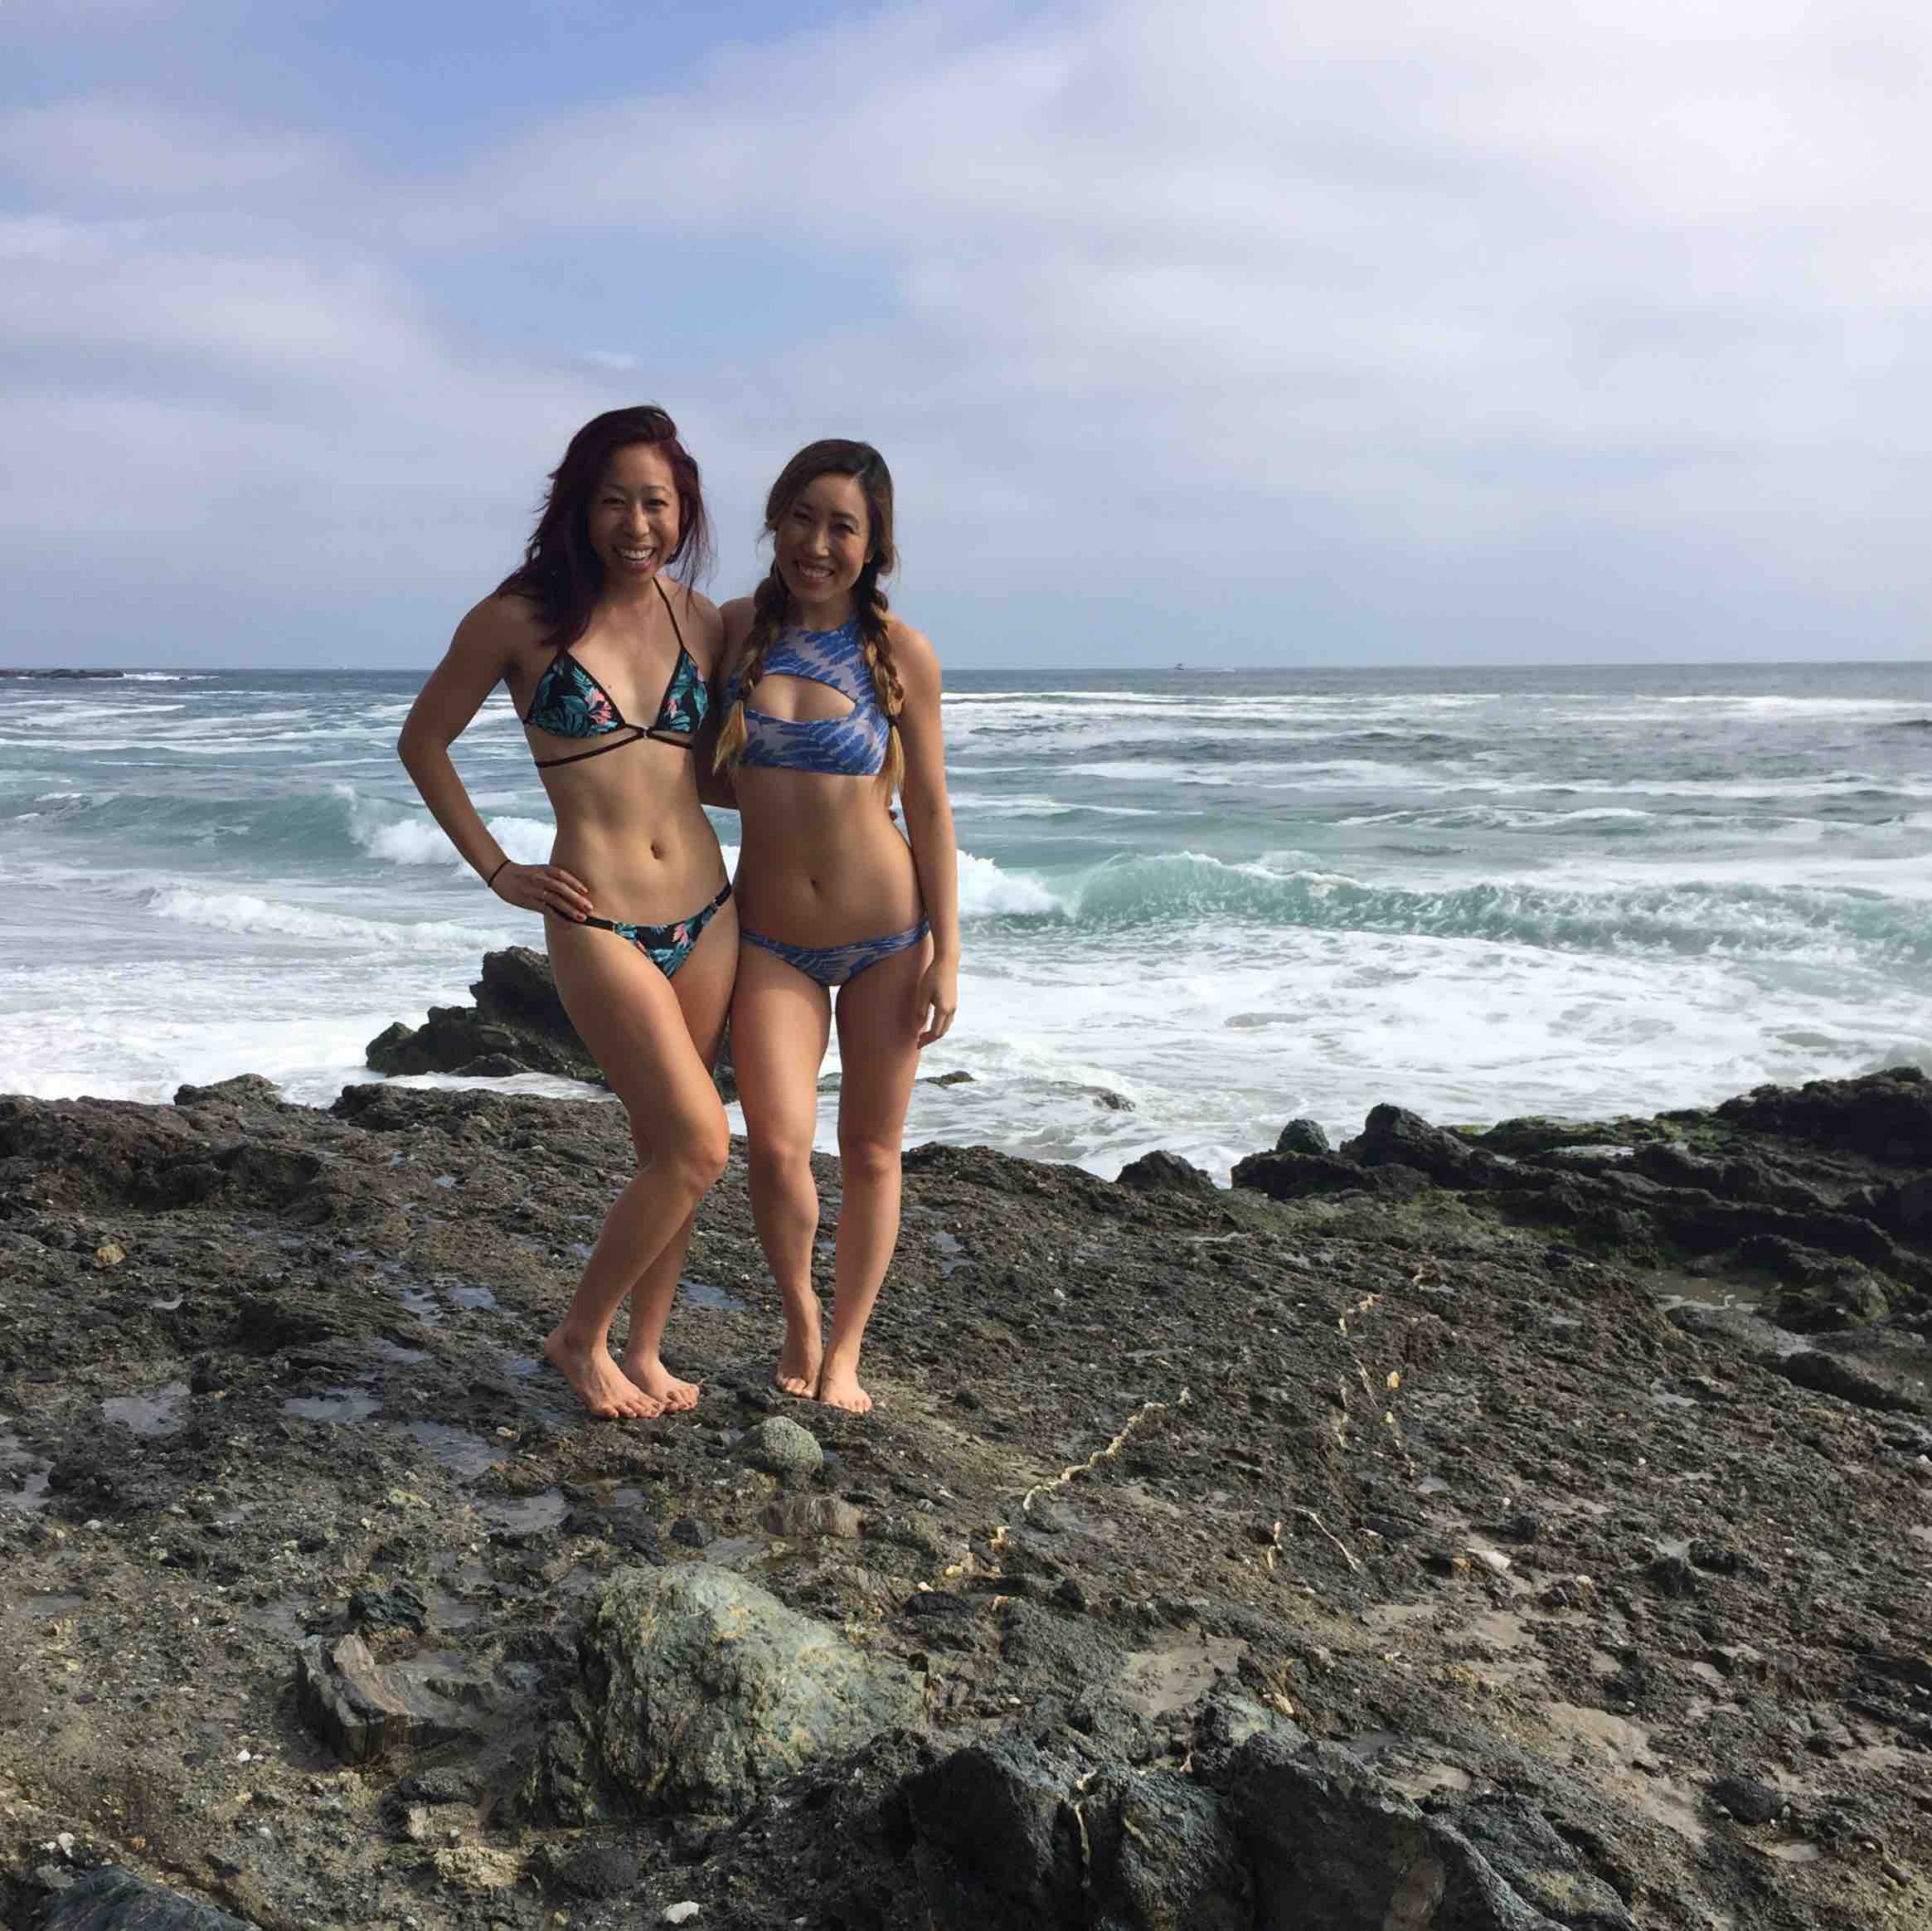
I used to let this comment upset me, but now it empowers me. You are correct. I don’t have a six pack. I never had one. Even when I was 15 lbs lighter on my 5’5″ frame. Even though I can sprint at 11mph and leg press 3 of me and hold Teasers like it ain’t nobody’s bizzness. Even though I am a fitness instructor. You are right. I DON’T HAVE A SIX PACK.
But do I let that define me?
No way do I let my physical shell define who I am and how strong I am inside. I don’t let it define my capability as a trainer. How I look has nothing to do with how I teach. This year, after breaking out of my metabolic disruption and doing PIIT28 with passion, I can kinda see some baby little lines on my abs and omg it’s crazy because my abs don’t even like to show me anything! But it’s cool abs! You do you, because leggies and armies aren’t being shy!
I’m proud of you, body!
Guys seriously – this is the most important thing. Let your body be your body. Stop pushing it so hard to LOOK like something it’s not meant to look like. The truth is, I used to work out 4 hrs a day and eat a low amount of calories and BARELY had any fat on my body (bikini competition times). But I still had fat on my abs. And I could barely think. It affected my business. It also frustrated the heck out of me because I let my body define who I was. That was stupid, and I don’t do that anymore.
Today I work out about 28 minutes a day and I don’t restrict my diet to just chicken breast and broccoli. I am super happy, super energetic, my head is full of ideas for my businesses, and I have time to actually ENJOY LIFE. It’s how I want to live.
I may not look like a bikini model, but my job isn’t to look like a bikini model, and looking like a bikini model does not make me better at my job. So I’m cool with that.
You just need to focus on getting stronger and you will sculpt yourself into what your best form should be, naturally. And most importantly respect your body as it changes because it needs that. It doesn’t need workouts and diets fueled by hate. It needs your encouragement. And just know, I’m always here encouraging you too.

Cassey Ho's Blog

- Cassey Ho's profile
- 49 followers

