Aventuras De Viaje's Blog, page 19
September 9, 2016
Estrella Falls Review, Narra, Palawan, Philippines
This post is an Estralla Falls review. Estralla Falls is found in Barangay Estrella in the town of Narra. Narra is on Palawan Island in the Philippines. This Estrella Falls review also contains costs, directions, pictures and other useful information.
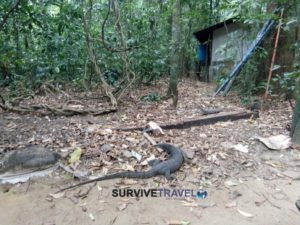
Estrella Falls is probably the biggest tourist attraction in Narra. My Filipina friend just picked me up on a motorcycle one afternoon and that is where we ended up.
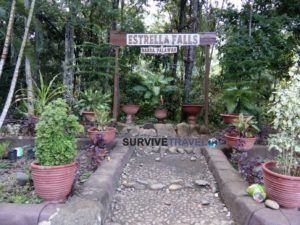
Right Picture: Sign at the entrance.
Featured Picture: The main part of the falls.
Estrella Falls Review, Narra
Cost(s): Free, I think. Maybe they charge on weekends.
Address: Barangay Estrella, Narra, Palawan, Philippines.
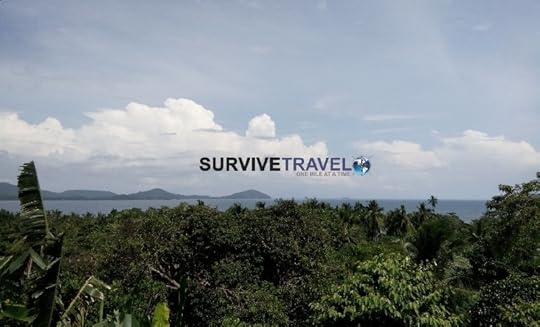
I was pretty happy to be driving a motorcycle in the Philippines again. As usual, the views were amazing.

Scenery on the way to Estralla Falls.
We arrived at Estrella falls around 1645pm. It closes at 1700pm but ti was enough time to have a look. It must get packed on weekends because there are a lot of huts.

You are not allowed to swim near the actual waterfall for safety reasons. It was too cold to swim for me anyway, but the locals were jumping off rocks into the water.

Locals having a swim.
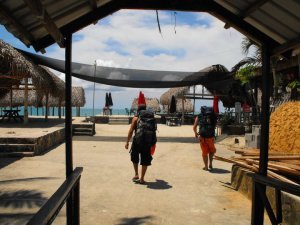
After visiting Estrella Falls we went for a stroll on the beach near the La Vista Beach Resort. At the time of day we were there all the little crabs were very active. Fun to watch.
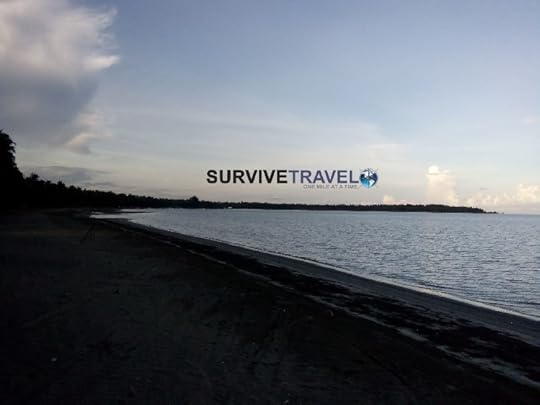
Beach near La Vista Resort.
Want to know more awesome things to do in Narra? Get all the information on Narra and the rest of the Philippines that you need with arguably the best travel guide books on the planet.
How to Get to Estrella Falls in Narra
My Filipina friend whom I had met online borrowed her cousins motorcycle. It was about a 15 minute casual ride from Narra.
You could get a tricycle to take you. I don’t think I would pay more than 150php round trip for that.
You could also day-trip to Estrella Falls from Puerto Princessa.
Do you agree with this Estrella Falls review? Feel free to leave your own Estrella Falls review (or anything else you want to say) in the comments 


September 4, 2016
Self Guided Walking Tour of Puerto Princesa – Palawan, Philippines
This post describes my self guided walking tour of Puerto Princesa. Puerto Princesa is the capital of Palawan. Palawan is the biggest island province in the Philippines.
Featured Picture: View of the bay.
Right Picture: Public market.
After my full day tour of the underground river I decided to stay another day in Puerto Princesa to chill and have a general look around. I wasn’t bothered with going too far so I just looked up the tourist attractions on my GPS and walked to them.
Self Guided Walking Tour of Puerto Princesa
This self guided walking tour of Puerto Princesa begins from the Matutina Pensionne, which was my accommodation.
1. Immaculate Conception Cathedral
The first place I went was to the Immaculate Conception Cathedral. I had planned to just have a little look inside but it was Sunday so mass was on. I just took a picture from outside instead.

I didn’t go inside because ti was Sunday and mass was on.
2. Plaza Cuartel
Just across the road from the cathedral is Plaza Cuartel. I think it is some kind of memorial park. Palawan was a strategic island during WW2.
Plaza Cuartel has a nice little garden with a path going through it. There were butterflies flying around and birds chirping. It was nice.

The garden path.
3. Bay Walk
My next stop on my self guided walking tour of Puerto Princesa was the Baywalk. I had been to the Baywalk on my first night but decided to go again during the day. It is definitely more lively at night. The only people I saw there during the day where two kids playing in a half sunk boat (pictured below) and an ice-candy salesman. The view of the bay (featured pic), however, is much nicer in the day-time.

Kids playing in a half sunken boat.
Want to know more awesome things to do during your walking tour of Puerto Princessa? Get all the information on Puerto Princesa and the rest of the Philippines that you need with arguably the best travel guide books on the planet.
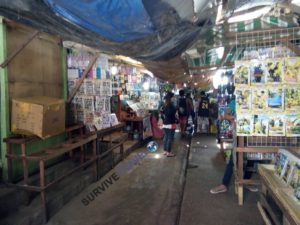
4. Public Market
Pretty much every town in the Philippines, including really small ones, have a public market. The one in Puerto Princessa is no different from all the others. Fresh fruit and vegetables, fish, meat, rice, and lots more random stuff.
The area around the public market is what I would consider the center of town. There are some shopping complexes, food, and lots of traffic.

A non-food related section of the public market.
5. Palawan Museum
The Palawan museum was probably the one thing I actually wanted to have a look in, but it was closed due to it being a Sunday.
Museum Hours: Mon to Sat. 0800 to 1200. 1330 to 1700.
Costs: Adult 50php, Student 20php, Children 10php, Seniors 40php.

Unfortunately the museum was closed due to it being a Sunday.
6 Mendoza Park
My last stop on this self guided walking tour of Puerto Princesa was Mendoza Park. Mendoza Park was just across the road from the Palawan Museum and there where some students practising a dance routine.
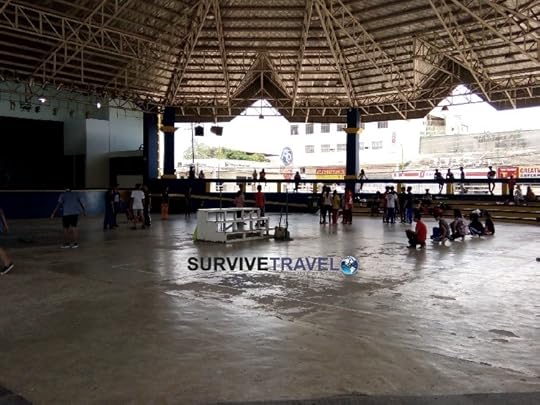
Kids practising their dance routine.
Accommodation in Puerto Princesa
Whilst in Puerto Princesa I stayed at the Matutina Pensionne.
Cost:700php per night for a single room.
Address: 40 Taft St. Palawan, 5300 Puerto Princesa, Philippines
I was the only guest there at the time. I enjoyed my stay there. The courtyard was nice.
My room was just big enough to do super-burpees and had aircon, cable and private bathroom. Wifi signal was low in my room but good in the courtyard and pretty fast. I’m sure this was because I was the only guest.
The staff were very friendly and the breakfast (included) was pretty good. I ate the vegetarian omelette every morning but there are some Filipino choices and pancakes as well.
The location was also pretty good. Close to the cathedral and 10 minutes walk to the town center and the bay view walk.
Get the very best deal available at the Matutina Pensionne or any accommodation you choose in Puerto Princesa.
Getting to Matutina Pensionne
It costs 50php for a tricycle from the airport. Ask the price before agreeing to go with them. If they won’t do it for 50php, go out the airport, turn right and walk down the street a little.
There is a jeepney stop on the corner of Roxas Street and Rizal Ave. You can catch a jeepney to/from the San Jose bus terminal, which is where you can catch buses to other parts of Palawan.
Here’s a map with all the places mentioned in this post.
Have you ever done a self guided walking tour of Puerto Princesa? Where did you go, what did you see? Share you experiences with us in the comments
September 3, 2016
Northern Hope Tours Palawan Underground River Review – Philippines
This post is a Northern Hope Tours Palawan Underground River review. The Palawan Underground River is considered one of the 7 new natural wonders of the world. It’s located on Palawan island in the Philippines, about 90 minutes drive outside of Puerto Princesa. This Northern Hope Tours Palawan Underground River review also contains costs, directions, pictures and other useful information.
It is possible to make your own way to the underground river in Palawan but after doing a little research i decided that it seemed like a lot of hassle for not much of a saving. In fact, since you would have to hire the boat to get there, unless you were a group of 4 or more (which I am not) you would probably end up paying more. Alternatively you could take the (approximately) 4km hike (one way) which I’m guessing is free.
Right Picture: Monitor lizards.
Featured Picture: Cave entrance.
Over the past year I have spent quite a bit of time in the Philippines and almost every tourist I meet says that Palawan is a must do, so I’m doing it. Also, the underground river was on my bucket list. I say was because (other than the fact that I have now done it) by the time you read this my bucket list will have gone through a major change in focus.
Northern Hope Tours Palawan Underground River Review
Cost(s): 1500php per person.
Address: Main office is in El Nido but they pick you up from your accommodation.
Website: NorthernHopeTours.com
I booked my underground river tour online. Northern Hope Tours was the cheapest company I could find at 1500php. This included transport, guide, buffet lunch, and all associated costs of the actual underground river tour. Once I had booked they automatically gave me a 100php, so it actually only cost my 1400php.
They picked me up at just after 0700am. I was the first one on board the mini-van and it took another 30 to 40 minutes to get everyone else. We had a full van.
Once we had everyone they stopped to pick up the permits and then our tour guide gave us a run down of the day. He was a good tour guide. I really have to start remembering to remember names!
The Drive to Sabang
The drive from Puerto Princesa to Sabang was about 90 minutes all up. We made a short pit stop after about an hour where you can eat, use the bathroom, and take a picture of the scenic view.
Scenic view from the pit-stop.
The long winding road was, for the most part, well maintained. No one got sick which was good. I spend a good deal of it chatting to an Austrian lass. She was part of a group of four. There was also two American (USA) students, two Filipino couples, and one other solo traveler, also a Filipino (from Manila). It was quite a pleasant group.
From Sabang to the Underground Cave
Once in Sabang we got on a pump boat for about a 15 minute ride to where the underground cave was. We had to wait to board the boat, about 30 minutes but i guess this varies a lot depending on how busy it is. This is the boat which you could opt to take the jungle trek instead if you wanted.
Once you arrive you have to wait a little bit for the guide to organize stuff. They give you an audio tour thing-a-majig. This is so there is minimal noise in the cave since it would mess up the bats sonar. Also, you get to keep the headphones afterwards. They are the ones I like with the in-ear buds.

A pump boat. Picture is taken from the beach at the entrance to the underground river cave tours, i.e., after the pump-boat ride.
The Underground River Tour
There is one last chance for a toilet stop and you can see some monitor lizards. Then you go to the waiting area to, well, wait. Then, finally, you do the underground river tour.
The audio guide is quite good. It had lots of information and even a bunch of bad jokes. It is supposed to correspond with the guys flashlight on your boat but I’m not sure if that actually happened. In any case, the tour went for about 40 minutes.
The cave itself was pretty impressive. It’s crazy full of tourists, as expected, but really well organised.
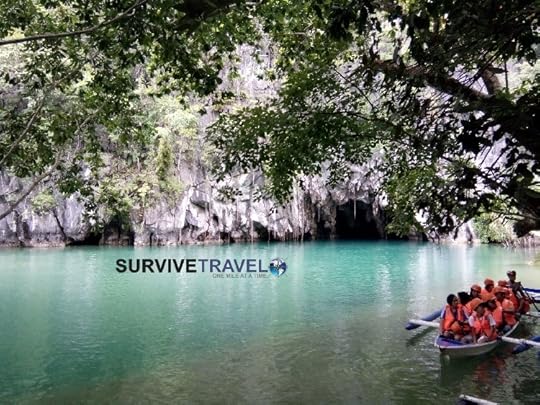
Cave entrance to the underground river.
After the Tour
After the tour we took the pump boat back and then had a buffet lunch which was good (Filipino food) before driving back. I arrived back at my accommodation around 1600. Long day for me. I napped it out for a good hour before heading out for dinner.
One other thing to mention is that there are some optional side-tours on offer (zip-line, mangroves, and one other). You have to pay extra for them – about 500php depending on which one you want to do. No-one in our group wanted to do them, including me.
Want to know more awesome things to do in Palawan? Get all the information on Palawan and the rest of the Philippines that you need with arguably the best travel guide books on the planet.
Getting to the Palawan Underground River
I came in from Baybay. My flight was from Tacloban to Puerto Princessa with a layover in Manila.
Every other time I had been to Tacloban the van dropped people at the airport. Apparently you need a minimum of three people. Instead, they dropped me where the jeepneys are to get to the airport. The van fare was the normal 150php (approximately 90 minutes to the Jeepney in Tacloban) and the jeepney was only 8php (approximately 10 mintues to the airport).
I got there at about 1030 and everyone was just sitting out the front. It opened at 1100. You have to pay a terminal fee of 150php with exact change.

Out the front of Tacloban airport.
Once in Puerto Princesa you can catch a tricycle to town. It should only cost 50php.
I didn’t do detailed research of getting from Puerto Princesa to the underground river solo. I imagine it is something along the lines of catching a but to Sabang, then a tricycle to the boats. Then either walk or take a pump boat to the cave entrance. Don’t forget to get your pass from Puerto Princesa before you go and take your ID.
Do you agree with this Northern Hope Tours Palawan Underground River review? Feel free to leave your own Northern Hope Tours Palawan Underground River review (or anything else you want to say) in the comments
August 31, 2016
How to Find the Best Flights
In this post I will share my personal method on how to find the best flights. By the words how to find the BEST flights I basically mean you get from point A to point B in the fastest and cheapest way possible.
Featured Image: View from the plane entering Kyrgyzstan.
Right Image: Airport in Japan at night.
How to Find the Best Flights
1. Choose Your Travel Date
It is preferable to book at least one month in advance.
Know the exact date you want to travel? Go to step two.
If your travel date is flexible for up to a week either side then choose Tuesday and go to step two.
For those of you whose dates are flexible for 2+ weeks then go to Matrix.itasoftware.com and use the “see calender of lowest fares” option. It won’t give you the cheapest flights (it will sometimes) but they will give you a general idea of the cheaper days in a month.
2. Search in Jet Radar
JetRadar.com is by far my favorite flight comparison website. You may have realized this because I promote them almost exclusively when it comes to flights. They deserve it. They don’t just compare the airlines like most booking sites, they compare all the major airline booking sites. This means the number of flights in the system is all the booking sites combined and you get the very best price from all of them.
If your flight day is flexible then check a few days either side also to see the best deals. If your flight is not urgent then create a price alert.
Occasionally there are no search results. I assume this is because there is no partnership of airlines that go from the departure point to the destination. You need to consult lonely planet and/or WikiTravel.org. Between these two sources of information you will discover which cities to use as intermediaries to your destination (or you may need to use some other mode of transport).
Once you know the intermediaries then do a few quick searches to find out which flight path will be cheapest. Make sure you use the same date for searches from the departure to the intermediaries and the same date (which can be different from the previous date) from the intermediaries to the destination.
This sounds like it will be a lot of searching but it isn’t really. This is because if Jetradar has no search results it means where-ever you are flying to is fairly remote. There are probably only a couple of places that it is possible to fly in from.
When choosing your connecting flights, i.e., not one the airline or booking site has selected for you, then it is best to give yourself at least a two hour layover, preferably 3+.
3. Search in Skiplagged
Skiplagged.com specializes in hidden ticketing. Hidden ticketing is when there is a lower-priced flight that connects through the place you actually want to fly to, so you just get off at the connection instead of flying all the way through.
There are two catches if you use hidden ticketing:
Do not buy a round-trip ticket.
Do not check-in luggage.
4. Pick Your Flight Path
Pick the flight path you like best of the results from Jet Radar and Skiplagged.
5. Search the Connections Separately
When your flight has connections it is worth seeing how much those flights would cost individually. Often it is cheaper than having the airline make the connection for you.
Use jetlagged to search this.
Note: Only do this when the layover is at least two hours, preferably three or more. This is because if you miss your connecting flight and you booked them separately then it’s your fault, but if the airline or jetradar did it then they will compensate you, e.g., put you on the next flight.
5. Check the Airlines Website
Sometimes the airline is cheaper, sometimes it isn’t. Much of the time it is the same.
Also, sometimes jetradar figures out connections that the airline does not directly offer, which is another advantage of using jetradar.
5. Book Your Flight
Now you have to choose whether to book through JetRadar.com or the actual website. Here are the things to consider.
When the airlines website is the same price or cheaper than JetRadar then book through them. In most cases it’s best to go directly though the airline in case anything goes wrong.
If JetRadar has made a connection that the airline does not do, then book with JetRadar. If the connection is missed then the booking site should compensate you, of course, make sure you check the fine print of the booking site you use.
Do you have your own method on how to find the best flights? Share it (or anything else you want to say) in the comments
August 27, 2016
How to Find the Best Accommodation
In this post I will share my personal method on how to find the best accommodation. By the words how to find the BEST accommodation I mean you will get as close as possible to your ideal accommodation at the best possible price and without spending too much time on it.
When I have a good internet connection it usually takes me about ten minutes to choose and book accommodation, twenty at the most.
Featured Image: The Lighthouse Resort in Bagasbas Beach.
Right Image: Las Veranas beach-front accommodation in Panama.
How to Find the Best Accommodation
1. Set Your Budget
Before you start looking, set yourself a maximum amount you are willing to spend on a single nights accommodation.
2. Decide What Your Require
What amenities do you require? Have two lists. One for “must have” things and one for “would be nice” things.
For example, a private bathroom and a good location might be things you absolutely must have. Free wifi, a pool, and free breakfast might be some things that you would like to have but if they don’t fit in your budget then you are willing to sacrifice them.
Want to know how to save tonnes of money whilst traveling? Get your hands on Aventura’s “How to Travel on a Budget” and get all the money saving travel tips you need!
3. Search Hotels Combined
Hotelscombined.com is by far my favorite accommodation booking site. You may have realized this because I promote them almost exclusively when it comes to accommodation. They deserve it. They don’t just compare the accommodations like most booking sites, they compare all the major booking sites. This means the number of properties in the system is all the booking sites combined and you get the very best price from all of them.
Here’s how I use HotelsCombined.com.
Search the place you need to stay in.
Make sure the price is including taxes (top right of the search results).
Sort the results by customer votes.
Choose the first place on the list that is in your price range. If it does not meet your “must have” criteria then try the next property in your price range.
When you have found two that meet your criteria choose which one you like best.
Compare the winner to the next property that meets your “must have” criteria in your price range.
Repeat this process until the postiive ratings get to less than 80%.
Book the winner.
4. In Remote Locations
Sometimes hotelscombined.com may not have anything in the place you are going to, or nothing in your price range. Here’s what I do in this case, and usually in this order:
Lonely Planet.
Wikitravel.org.
Look on my GPS to see what accommodation it shows and then google them.
Couchsurfing.
Do you have your own method on how to find the best accommodation? Share it (or anything else you want to say) in the comments
August 25, 2016
8 Ways to Cure Motion Sickness
In this post I will discuss 8 ways to cure motion sickness. Motion sickness is a common ailment for the traveler. I even get it just sitting in a hammock!
Some lucky people don’t get it ever and for others it can be enough to not want to do something. For years I stayed clear from boats because I got terribly seasick. Now-a-days it doesn’t bother me because I just employ one of these 8 ways to cure motion sickness. Actually, I usually use a few in combination.
Featured Image: A small crowded bus on a long, windy, mountain road in Nicaragua.
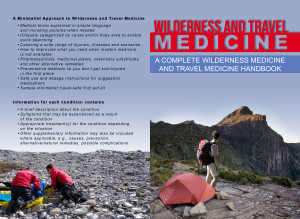
Right Image: The cover of Wilderness and Travel Medicine by Sam Fury.
8 Ways to Cure Motion Sickness
1. Ginger
Ginger is well known for natural relief of motion sickness and is my number on go to for motion sickness. I eat quite a lot of it everyday anyway which I think has helped me overall. When I know I am going on a journey I will have a strong ginger tea an hour or two before the journey and then suck on some ginger lollies during.
Even if it doesn’t help your motion sickness, ginger is ridiculously good for you on many levels.
2. Sleep
When the ginger is not enough I try to sleep though the journey. I’m quite lucky that I can sleep pretty much anywhere.
3. Get Some Fresh Air
When I was a kid in the car I would open the window and stick my head out like a dog. It does wonders.
4. Stare at the Horizon
This one is more for sea-sickness and works quite well. As a double-whammy, to see the horizon you will probably need to go outside in the fresh air.
5. Tiger Balm
Tiger balm is another good natural remedy. I read to put a tiny amount of tiger balm on your lips. Emphasis on the word tiny. Alternatively (and what I do) is just take a big whiff of it every now and again whilst traveling and/or rub a bit on my temples.
6. Clove Oil
Before I started carrying around tiger balm I used to carry clove oil. I would use it in the same way as tiger balm.
7. Dimenhydrinate (Dramamine)
If I am really feeling it bad I hit up the Dramamine, which is an antihistamine.
I am not a big fan of pharmaceuticals but sometimes you just want something with a little more kick. I usually only have to do this if my travel is coupled with a hang-over, which used to happen more 5 or so years ago, but pretty much never these days.
Side effects: Blurred vision (rare), drowsiness, dry mouth (rare), headache (rare), loss of coordination (rare).
Adult dose: 50 to 100 mg every 4 to 6 hours, maximum of 400 mg in 24 hours. The first dose should be taken 30 to 60 minutes before starting activity.
8. Benadryl
Benadryl is also an antihistamine. I’m no medical profesional but it seems to me that Dramamine is geared more towards motion sickness where-as Benadryl will fight any abnormal allergic over-reactions your body has, e.g., stung by a bee.
In any case, Benadryl is the one I carry. It works for motion sickness also which in my book makes it more useful.
Side effects: Depleted co-ordination, difficulty urinating, dizziness, dry mouth, drowsiness, headache.
Adult dose: 25 to 50 mg every six to eight hours. Administer first dose 30 minutes before exposure to motion and repeat before meals and upon retiring for the duration of the journey.
Note: Nausea may be accompanied with vomiting. If vomiting does not cease within 24 hours it may lead to volume shock. If you are vomiting too much go see a doctor. It may not be motion sickness that is causing it.
The information in this post has been sourced from Sam Fury’s book Wilderness and Travel Medicine.
What ways to cure motion sickness do you use? Share your thoughts in the comments
August 20, 2016
3 Methods of Earthing While Traveling
This post gives a basic explanation of what earthing (also known as grounding) is, why we should do it and explains ways of earthing while traveling.
Earthing, also known as grounding, is about connecting electrically with the earth.
Just as our electrical appliances need to be grounded, so do us humans. The problem is that in these modern times most of us are rarely ever grounded.
Featured Image: Screenshot from the video used in this post. Using aluminium foil to ground anything.
Right Image: Hiking in nature is ideal for wearing earthed footwear.
Why do we Need to be Earthed?
I’m no scientist but from what I understand our bodies are full of electrons. With all the technology we use today we have an excess of positive charge. By grounding we can collect negatively charged electrons from the earth which balances our charge and at the same time we use the earth as a shield against EMF.
Another reason which is easier for me get get on board with but probably less agreed upon by the scientific community, is that this planet and all its living creatures are part of a big system. By connecting directly to the earth we align with this system.
In short, we should ground ourselves as much as possible because it is good for our health and well-being.
What are the Health Benefits of Earthing?
People that earth themselves regularly report that they just generally feel better, but there are many specific benefits also. Here are some of them:
Earthing While Traveling Improves:
Adrenal health
Blood circulation
Blood pressure
Digestion
Energy
Healing of injuries (including general recovery from physical activity, e.g., sore muscles)
Immune system
Sleep
Earthing also reduces and possibly eliminates the following:
Anxiety/Irritability
Chronic pain
Electro-sensitivity
Headache
Inflammation
Jet-lag
Menstrual and female hormone symptoms
Muscle tension
Snoring
Stress
Here’s some scientific proof on the benefits of earthing.
And if you want you can read a whole book about it.
3 Methods of Earthing While Traveling
Now that we’ve covered why we should be earthed let’s talk about how to actually go about earthing while traveling and more importantly for readers of a travel blog, how to apply the methods of grounding or earthing while traveling.
Method One – Direct Connection
The first method of earthing while traveling is to just go touch the earth!
It has to be direct contact with rock, dirt or water, which has direct contact with our planet earth, i.e., putting your hand in a bathtub full of water or in the soil of your indoor plant does not count, but lying in a field or climbing a tree does.
Going to the beach is a great way of earthing while traveling as sand and salt water are awesome conductors.
Method Two – Earthing Footwear
When I travel I walk around a lot so wearing grounded footwear makes sense. Unfortunately buying earthed shoes is expensive, especially since I do not live in the United States (shipping cost extra). I’m not paying $100usd for a pair of sandals. If I were to by some these would be it (earth runners) as they are earthed and minimalist.
Also, even if your footwear is earthed, most of the time we are still not connected to the ground being with all the concrete around.
I still did want to earth my shoes because I like hiking in nature so I did it myself following these instructions.
I did this both with my softstar shoes and my amuri sandals, however, if the landscape permits I prefer to go fully barefoot.
Another thing about grounding shoes is that you need to wear conductive socks also, like silver lined (not as expensive as it sounds).
Note: The more of your body that is grounded the more beneficial it will be. You can do this by touching more parts, or larger areas of your body to any grounded material, for example, wearing x-static socks will turn your whole foot into a conductor, or using an earthing bed-sheet will make most of you body grounded while you sleep.
Method Three – Earthing While Indoors
Note: I do not actually use this method whilst traveling, i.e., if I’m not staying in one a single residence for at least two weeks I think it is too much hassle, but you may disagree. Also, I did all the research and writing, and I do use it when not traveling, so I decided to publish it anyway.
Since most of us sleep for at least a quarter of our lives it is a good time to reconnect with the earth, especially if you have trouble sleeping.
Power Socket
Earthing bedding such as sheets and pillow cases are available on-line and (in my opinion) are a really good idea. They are made out of some sort of conductive material and then you plug it into the power socket. Don’t worry, they have made them so you wont get electrocuted should something be wrong with the wiring, although I would not use it during a lightening storm.
Unfortunately carrying around these things is not practical for the minimalist traveler (although travel earthing kits are available). Also, in some countries (such as the Philippines, where I am currently living for a few months) and/or in old buildings they don’t even use a grounding pin in their sockets. Testers are available and as I mentioned before you won’t get electrocuted, but you wont be grounded either.
Copper Rod
Luckily there are ways to do it without using electrical sockets. One way is to bury a cooper rod into the ground and then run a wire from it to you. Obviously not practical for the traveler, especially when in hotel rooms higher than ground level and/or with nothing but concrete outside.
Cold Water Pipe
The other way is to attach a wire from the the cold water pipe of the bathroom sink to yourself. The cold water pipe usually runs into the ground. Here are my short instructions of how to do it. The basis of these instructions are from NaturesPlatform.com/earthing.html which also tells how to DIY the other ways.
First acquire for yourself some wire (length depends on how much you are willing to carry around), at least two alligator clips and some aluminium foil (optional).
Strip about 5cm of the wire on one end. This is the end you attach to the pipe in the bathroom. Do so by tying the wire around the pipe first so the connection wont be lost if the wire gets tugged. Make sure the stripped section of the wire is secured onto a metal part of the pipe or cut-off valve otherwise it wont work. You can secure it with tape or an alligator clip.
Connect the other side of the wire to an alligator clip, or, if you want something “more sturdy” use a 1/2 inch copper coupling. Follow the instructions on NaturesPlatform.com/earthing.html for your to do this.
If you are the only one being earthed then you can at attach the alligator clip directly to yourself, e.g., clip it to your sock.
If you want multiple grounding points then get some aluminum foil (or any other conductive material) and attach the alligator clip to it, then run as many wires as you want from the aluminum.
Aluminium Foil
Using aluminium foil is a cheap way to ground anything. Just connect the wire from the copper pipe to the aluminium foil and place the foil on anything while touching it, e.g., on your seat, in your bed, turn it into a braclet, etc.
Here’s a video on the matter.
Note: Aluminum foil is a good conductor and cheap to acquire, but copper is better and still relatively cheap. Silver and gold are the best conductors.
If you are on the computer, according to NaturesPlatform.com, you can easily earth yourself by running the wire from the computer chassis (a metal part of the tower) to yourself. This assumes the computer is plugged into a socket that is grounded.
How to Test if Something is Earthed
You can test if your grounding is working with a simple circuit tester.
For ANY of the three methods, insert one probe of the tester (either color) in the small slot of the top receptacle.
Touch the other probe to the flattened coupling. If the tester lights up, you’ve got good grounding and good continuity.
You could get a more accurate reading using a voltmeter but the above way is more portable.
Here a video using a voltmeter to test.
Don’t want to DIY ground yourself? Get any earthing product you need here.
Well that’s it. Everything I do to ground myself while traveling, and even when not traveling.
How do you go about earthing yourself while traveling? Or perhaps you just want to share your experiences and thoughts about earthing and it benefits. Let us know in the comments
August 17, 2016
Life in Baybay, Leyte, Philippines. Part 2.

This post is part two of my experience of life in Baybay. Baybay is a small city on the island of Leyte in the Philippines. It is about an hour van ride south of Ormoc. Ormoc is about a three hour ferry ride from Cebu City.
See part one about living in Baybay here.
Featured Picture: They cleared my backyard. Uncovered lots of moringa trees which I’m very happy about.
Right Picture: Some of the trees in my backyard.
I was going to write this life in Baybay post after getting my third visa but as it turns out I have a cousins wedding to attend. I’ll be leaving Baybay at the end of this month instead. Luckily I held out on buying plane tickets so no harm done. Actually, I’m kind of glad to have a good excuse to leave early. I started getting itchy feet a few weeks ago.
Life in Baybay
Anyway, about life in Baybay. Just after getting my second visa extention my Filipina friend moved out. Her sister went to Cebu to work so she had to move to the mountains to help take care of her sisters kids. I went from not knowing her, to living with her for a month, to having almost no contact at all.
When she moved out I came across a website called Freedocumentaries.org, so I started watching them, approximately one every two days. I learned a bunch of stuff, most importantly that the western world has pretty much screwed everyone else, and the earth, over. As a result I have:
Updated my bucket list. I feel very good about this
August 13, 2016
Most Useful Languages to Learn for Travelers
This post gives a list of the 13 most useful languages to learn for travelers. It also explains how I decided which languages go on the list, what order of importance they they appear in, and how I am going to apply the results to my personal life.
When I was a child watching Captain Planet I used to think, “if I could have any of those rings it would be the heart ring.” For those of you who are unfamiliar with Captain Planet, the heart rings allows the bearer to be able to speak to the animals. I assume that also includes all humans no matter what language they speak.
As an adult I realise that speaking to animals is impossible. Actually, I knew that as a child also, but being able to speak to the majority of humans in the world is something very achievable. Not only is it achievable, it is also something I have wanted to achieve since I started traveling. 10+ years later and I can barely speak anything other than English 
August 11, 2016
Preventing and Treating Friction Blisters
This post focuses on preventing and treating friction blisters. It also covers what a friction blister is, what a host-spot is, treatment for hot-spots, preventing friction blisters, treating friction blisters, and how to drain a blister.
I love walking. Once I walked for seven weeks (hiking the Bibbulmun Track), and whenever I am in a new place (and even when I’m not) I much prefer getting around on foot. As you might imagine, with all this walking I am pretty prone to friction blisters, especially in the tropics. Well over the years my feet have gotten pretty tough but this wasn’t always true, so in this post I will discuss how I go about preventing and treating friction blisters.
Featured Image: Sourced from Wikipedia.org.
Right Image: Taken from the book Wilderness and Travel Medicine by Sam Fury.
What is a Friction Blister?
First off, let’s clarify what a blister is.
A blister is typically a protective pocket of clear fluid (plasma) underneath the layers of the skin. If they are filled with blood they are called blood blisters, and if they become infected they will fill with puss.
Blisters can be caused by cold, exposure to chemicals, friction, heat, etc.
The most common, troublesome blisters are those found on the feet caused by friction and heat whilst hiking or engaging in similar activities.
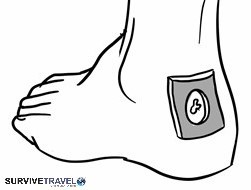
What’s a Hot Spot?
Before a blister forms the area will often get red and painful. This is known as a hot spot. Treat it before it becomes a blister.
Treatment for Hot Spots
A hot spot can simply be covered, e.g., Band-Aid.
Ideally, raise the area around it slightly and then cover it.
Preventing and Treating Friction Blisters
FYI. The treatment for friction blisters described below can also be applied to most other types of blisters.
Prevention of Friction Blisters
There are a number of things you can do to help prevent friction blisters and hot-spots.
Wear proper footwear.
Use sock liners.
Cover blister-prone areas, e.g., using fixamol or a Band-Aid.
Change wet/sweaty socks.
Use foot powders to keep your feet dry.
Treating Friction Blisters
Leave the blister intact when in a controlled environment. The skin will keep it protected from infection.
Pad it like a hotspot.
How to Drain a Blister
If there is a chance of the blister rupturing, it is often better to drain it manually so you can clean and dress it.
Clean the area around blister.
Sterilize a needle and pierce the side of the blister.
Let the fluid drain.
Apply antibiotic ointment.
Cover and monitor.
The information in this post has been sourced from Sam Fury’s book Wilderness and Travel Medicine.
Got anything else to say about preventing and treating friction blisters? Share your thoughts in the comments