
Ruth Soukup's Blog, page 94
December 5, 2014
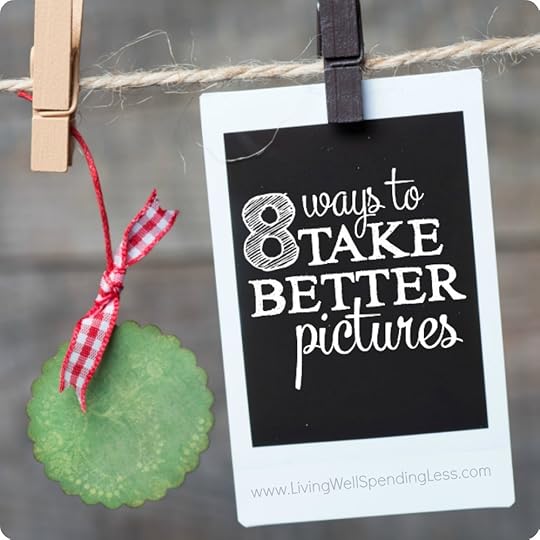
8 Ways to Take Better Pictures

When I first started blogging in 2010, I took terrible pictures. I had absolutely no idea what I was doing, and every image reflected as much. But I knew if I spent some time learning the basics I could do much better. Over the years I’ve read lots of books and tutorials, taken online classes, and practiced and practiced and practiced. A lot. In fact, I’m still practicing.
While I am nowhere close to being a professional photographer, over the years I have discovered a few basic tips everyone can keep in their hat, whether you shoot with your smartphone camera (which these days is often just as good as any point-and-shoot) or if you want to take your hobby to semi-pro.
1. Learn the difference between a photograph and a snapshot
Semantics aside, there’s a true difference between a simple snapshot and a photograph. Snapshots are used to capture a moment in time. They’re a quick way to capture something without attention to (or the necessity of) composition.
You may take a snapshot to remember your parking space or to record a receipt. You may use a quick snapshot to document the leak in your basement that only happens intermittently. You may even use a snapshot to capture something unexpected like action, but usually the best action shots still have an element of composition and thought.
Photographs, on the other hand, are composed with consideration to layout, lighting and subject. A good photograph is crafted with attention to lines, composition and clarity, so the subject stands out and pulls on the eye.
Today’s world leaves plenty of room for both snapshots and photographs. However, to truly capture memories, and to create something you’re proud of that’s worth sharing, you’ll want to put in the consideration and thought required to compose great photographs.

2. Shoot often, and be prepared
Simply HAVING your camera with you and getting in the habit of shooting can take your photography to the next level. Like any skill, photography takes practice. In the days of film, this could become an expensive hobby, but today, we can shoot as much as our hearts’ desire (or our memory cards will hold).
Try shooting multiple rapid-fire pictures of the same subject. You’ll decrease instances of ruined shots because someone blinked or looked away. You’ll also be amazed when you capture those perfect moments, like when ice cream drips on your daughter’s chin or when your little boy’s eyes light up when he sees Grandma and Grandpa walk in the door.
I used to bring my big camera everywhere but smartphone cameras have now improved to the point that there is almost no excuse for not taking pictures whenever you can. (I am literally counting the days until my 2 year contract is over so that I can upgrade to the iPhone 6–the camera is AMAZING!)
3. Be brave!
It may sound trivial and obvious, but many of us feel silly whipping out our cameras and snapping away. We might feel the need to explain or apologize—or maybe worry that it’s not an appropriate time. However, some of the best photographs are taken at impromptu moments. Don’t be afraid to snap those great shots when opportunities arise!
Being an amateur, beginner or even semi-professional photographer can make many of us feel like, “Oh, I have no idea what I’m doing—everyone else knows more about this than I do.” Yes, there’s a lot of photography terminology to learn and all those fancy lenses and accessories can be a little overwhelming.
Just remember: anyone can be a photographer and anyone can learn to take good pictures. Maybe everyone won’t make the cover of National Geographic or Time, but most of us can learn to take a decent-to-great family photo with a little practice and forethought.

4. Always find the light
For most of us, natural light works best for photographs. Pay attention to the way the light hits your subject; the right lighting can work wonders to draw the eye in, hide flaws and add highlights.
Sunlight and bright overhead light can be harsh and create deep shadows. For those bright and sunny midday shots, learn to work with shade and move your subjects as needed. Shoot in front of a bright window or look for overhangs and areas that are shaded but offer natural, indirect light.
Understanding ISO and shutter speed can really make a difference. Learn about the ISO setting on your camera. (Use higher numbers when light is low and lower numbers when it’s bright out.) Adjust your shutter speed when needed as well: slow it down to allow more light to enter the lens or use a faster speed when you don’t need the extra light.
5. Get steady
Consider using a tripod for clearer, less-grainy photos, especially when you’re using a slower shutter speed. A tripod is also a great tool for family photos. Set your camera’s timer and JOIN IN instead of hiding behind the lens. Tripods can come in handy when snapping pics of the kids, if you have a shaky hand, or if you’re easily distracted.
While tripods aren’t for everyone (sure, they can be a pain to lug around and you may feel ridiculous attaching one to your iPhone), they can really amp up your game in terms of clarity, allowing you to take pictures at slower speeds and in lower light.
If you truly hate the idea of a tripod, there are other options. Try a Gorillapod, a flexible tripod you can hook on to unconventional items, or try a monopod (a single pole that simply steadies your hand). At the very least, take a deep breath before shooting, prop your arm against a table or against your chest or your side, then exhale before shooting.

6. Pay attention to composition
If you’ve ever taken an art or photography course, you’ve already been introduced to the rule of thirds. This means you should visually divide any scene into threes, both vertically and horizontally, and aim to have your subject positioned slightly off center. This technique ensures your photos are more visually interesting.
Consider line and angle as well. Try to avoid lines that cut across the frame or lead the eye out of the picture. Try shooting things from a lower or higher angle. Humans often look better from above, shot from a downward angle, but architecture and other items can benefit when shot from below. So, to compose the perfect shot, you might need to move, consider your angle and change your position.
As you improve, don’t be afraid to play with different locations. Take your kids and camera to a park and snap pics on the playground equipment. You’ll find lots of fun and visually interesting lines and angles to play with and it’s a great way to practice.
7. Keep it simple
Be sure you keep photos as simple as possible, for the maximum visual impact. Does this mean moving your children from their bedroom to a stark white sheet or professional backdrop every time you want to take a photo? No, of course not…but give consideration to patterns, distracting items and other things that may detract from your photos. Try simply nudging unflattering items out of the frame with your foot. It also helps to dress your family in solid colors and simple patterns for photogenic events.
Always get a little closer than seems necessary too–make your subject the subject and eliminate distracting backgrounds as much as possible. In the same vein, keeping things simple also means not overthinking it. If your daughters look darling in their best dresses and they don’t quite coordinate, don’t sweat it. Take a fun black and white, add a filter, blur the background or focus on the foreground and you’ll still wind up with a shot you’ll love forever.

8. Take advantage of editing software
Photo editing software can improve the look of your photos, especially in terms of composition and lighting. I like Picmonkey but there are many other options, like Picasa and Photoshop, plus plenty of filter apps and downloadable pic enhancers. Some people feel that using photo editing software is “cheating,” but I look at it this way: editing won’t make a “bad” photograph great, but it will make a good photograph better.
Once you get a handle on the photo editing method of your choice, you can use it to brighten colors, soften backgrounds, and even to smooth blemishes or wrinkles. But, a word to the wise: do not expect miracles. There are lots of websites out there dedicated to Photoshop disasters—please don’t overdo it and damage your photos.
Think of editing as a way to enhance and bring out the best in your photos. I don’t like to over-crop (it lowers the resolution) or use extreme effects. Black and white can fade a busy background. Certain filters can add that special touch and allow you to add text to your images, fade the edges and make the photo look more “finished” overall.
The most important part of photography is simply capturing the moment. For some of us, the bug starts and we get a little addicted—but the real joy is in being able to capture the precious moments and look back on the memories. Photography is really a means to tell a story and a way to document our lives. Whether it’s on a blog, as a family card, or simply for your own personal scrapbook, using just a few of these photography techniques can elevate your photos from good to great.
* * *
Do you have anything to add? What are your secrets to the perfect shot?
Pin It
The post 8 Ways to Take Better Pictures appeared first on Living Well Spending Less®.


December 4, 2014
Thrifty Thursday {Week 88}

Happy Thursday! Welcome back and Happy December! I hope you all enjoyed a wonderful holiday weekend with family and friends! We had a whole house full of guests–12 of us all together in our little 3 bedroom house–and while it was a little crowded and chaotic at times, it was also SO much fun! The rest of my family lives 3,000 miles away and we unfortunately don’t get together very often, so having them here was incredibly meaningful to us and definitely worth the lack of privacy and bathroom time!
We are still trying to recover from such a busy weekend and haven’t even started putting up Christmas decorations–am I the only one who’s a little behind? I am trying to keep things low key this year & just do what I can, which, quite frankly, probably won’t be much! Honestly, I’m okay with that. I guess I’m really starting to take our 12 Days to a Stress Free Christmas Challenge to heart, because this is the first year in a long time I haven’t felt weighed down with expectations. If you haven’t joined yet, you can do so HERE–it’s completely free and a great way to get focused on what matters most this holiday season. The challenges come in the form of short but encouraging 3-5 minute videos sent straight to your inbox.
Here are the most clicked links from last week:

1. Retired by 40 { 21 Things Frugal People DON’T DO! }
2. Graceful Little Honey Bee { 10 Forgotten Money Saving Skills }
3. Family Balance Sheet { Debt Free Stories: Meet Amanda & Daniel }
4. The Penny Hoarder {Cheap Holiday Flights: 6 Tips to Get You Home for the Holidays}
5. Mums Make Lists { Mason Jar Home Organization }
6. Early Bird Mom {24 Time Saving Kitchen Hacks}
7. Intentionally Pursuing { Three Frugal Laundry Tips }
8. Save to Splurge { 3 Secrets to Paying Off Debt }
9. The Latina Homemaker{ 3 Steps You Can Take to Pay Cash for Your Next Car }
10. The Beautiful Useful Project {30 Minutes of Daily Exercise- How to Fit it In}
Never linked up before? Here’s how:
Scroll down, find the little blue “Add your Link” Button and click on that.
Follow the instructions on the next page – add a great image of your project and an interesting title. Make sure you link to the direct page of your budget friendly post – not the main page of your blog!
Try to visit at least a few other blogs at the party. Be sure to leave a comment to let them know you stopped by!
Please link back to this post somehow. There are badges available here; a simple text link is just fine too.
 Feel free to tweet about Thrifty Thursday so others can join the fun, and don’t forget to check back here Sunday morning to see which posts have been featured this week at Weekend Wandering!
If this is your first time here I also invite you to check out my blogging guide, How to Blog for Profit (Without Selling Your Soul). It is a fantastic resource if you are interested in building your blog, getting more traffic, or learning how to monetize, and the expanded 2nd edition is now available in paperback! Or, if you have read the book and are still looking to take your blog to the next level, I encourage you to check out Elite Blog Academy. Registration is open only through tomorrow and then won’t open again until the spring.
An InLinkz Link-up
Pin It
The post Thrifty Thursday {Week 88} appeared first on Living Well Spending Less®.
December 3, 2014
Easy Freezer Balsamic Roast Beef

This may sound a little odd coming from a vegetarian, but pot roast is hands down my favorite meal to make! Not only is it ridiculously easy and completely foolproof, not to mention a one-pot slow cooker meal that you can set and forget, but it always gets RAVE reviews. As in not just “oh this is yummy” good but “oh my gosh this is the best thing I’ve ever tasted” good. It is a great way to feed a crowd without much effort, and although it takes just a few minutes of hands-on time and makes the perfect weeknight meal, it also tastes special enough to serve for a holiday meal or Sunday dinner.
To make it as part of a freezer cooking day, just split the marinade & beef into multiple bags, then throw it right into the freezer–no cooking required! Making it ahead of time is not necessary, though, as it is equally delicious made the same day.
Here is what you need:
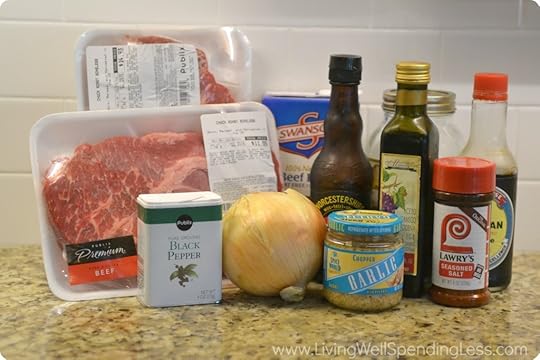
1 sweet onion
2 cups beef broth
1 cup balsamic vinegar
2 tablespoons Worcestershire sauce
2 tablespoon soy sauce
2 teaspoons chopped garlic
3 tablespoons honey
1/4 teaspoon cayenne pepper
1/2 teaspoon black pepper
1 teaspoon salt
2 3-4 pound chuck roast

Step 1: Chop onion and garlic; set aside.
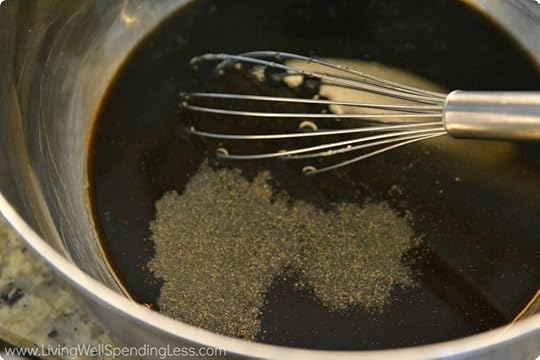
Step 2: In large bowl, whisk together beef broth, vinegar, Worcestershire, soy sauce, garlic, onion, honey, cayenne pepper, black pepper, and salt.

Step 3: Place each roast in a 1 gallon freezer bag. (Be sure to label freezer bag first!)
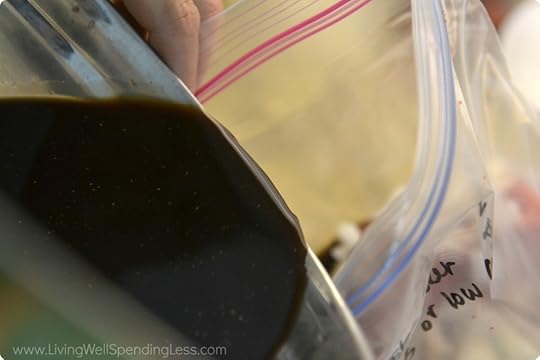
Step 4: Divide balsamic mixture over roasts; freeze until needed.

Step 5: Thaw overnight; place contents in slow cooker. If desired, add red potatoes and carrots. Cook on high for 4-6 hours or on low for 6-8 hours.

Print This!
Recipe: Easy Freezer Balsamic Beef
Summary: This hearty meal cooks slow and steady in the crockpot and serves up a super tender, flavorful dish your whole family will love!
Ingredients
1 sweet onion
2 cups beef broth
1 cup balsamic vinegar
2 tablespoons Worcestershire sauce
2 tablespoon soy sauce
2 teaspoons chopped garlic
3 tablespoons honey
1/4 teaspoon cayenne pepper
1/2 teaspoon black pepper
1 teaspoon salt
2 3-4 pound chuck roast
Instructions
Chop onion and garlic; set aside.
In large bowl, whisk together beef broth, vinegar, Worcestershire, soy sauce, garlic, onion, honey, cayenne pepper, black pepper, and salt.
Place each roast in a 1 gallon freezer bag. (Be sure to label freezer bag first!)
Divide balsamic mixture over roasts; freeze until needed.
Thaw overnight; place contents in slow cooker. If desired, add red potatoes and carrots. Cook on high for 4-6 hours or on low for 6-8 hours.
Preparation time: 5-7 minutes
Cooking time: In slow cooker on high for 4-6 hours or on low for 6-8 hours.
Number of servings (yield): 8-10
The post Easy Freezer Balsamic Roast Beef appeared first on Living Well Spending Less®.
December 1, 2014
Handmade Fizzing Bath Bombs


My girls love taking bubble baths and I have been wanting to make them some homemade bath bombs for years now, but quite honestly I was always a little scared that it would turn into a complete fiasco and they wouldn’t work.
I shouldn’t have worried!
Not only are they fun and easy to make, they work like a charm! My girls love watching them fizz in the bath, and I love that the olive oil and cornstarch helps soften & moisturize their skin while the calming lavender essential oil helps settle them down before bed. (To find out more about essential oils & how they work, check out this post.) They also make a great handmade gift idea!
I did find that the smaller molds worked a little better than the big size, as they dried faster and popped out easier. I also added a little too much liquid at the end and had a few that expanded into blobs while they were drying. They made little cow pie-shaped bath bombs but they still work great!
Here is what you need:

2 cups baking soda
1 cup citric acid
1 cup cornstarch
1 cup sea salt or Epsom salt
3 teaspoons olive oil
5-6 drops essential oil
Approximately 2 teaspoons witch hazel or water (I recommend witch hazel!)
empty spray bottle
silicone mold
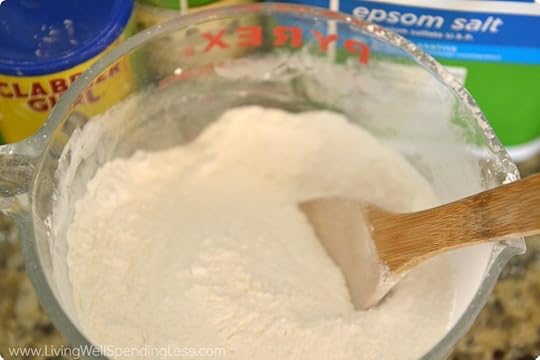
Step 1: In large bowl, mix together baking soda, citric acid, cornstarch, and salt until well blended with no lumps.

Step 2: Mix in olive oil and essential oil until well blended.
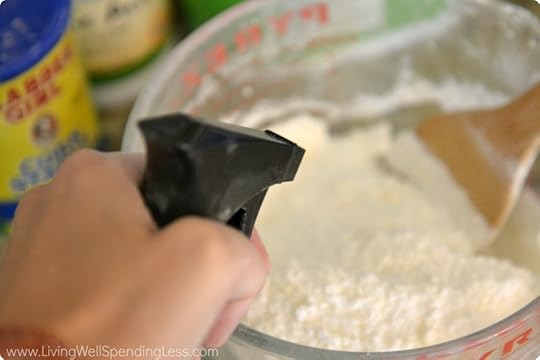
Step 3: Spray mixture with with witch hazel until just moist enough to form into shapes that hold. Be careful not to add too much moisture or the mixture will begin to fizz.
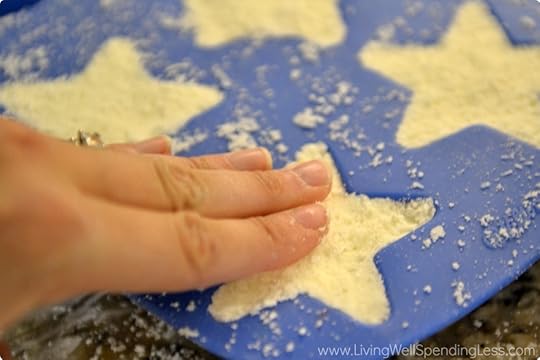
Step 4: Press mixture into molds; let sit for 5-10 minutes, then carefully remove from molds onto parchment paper and let dry for 24 hours.

Step 5: Package in cellophane or a mason jar to give as gifts, then finish with a pretty ribbon and the printable tags below; to use, simply drop 1 large or 2 small bath bombs into bath.

Print This!
Recipe: Homemade Bath Bombs
Summary: Create these homemade bath bombs with your favorite essential oil!
Ingredients
2 cups baking soda
1 cup citric acid
1 cup cornstarch
1 cup sea salt or Epsom salt
3 teaspoons olive oil
5-6 drops essential oil
Approximately 2 teaspoons witch hazel or water (I recommend witch hazel!)
empty spray bottle
silicone molds
Instructions
In large bowl, mix together baking soda, citric acid, cornstarch, and salt until well blended with no lumps.
Mix in olive oil and essential oil until well blended.
Spray mixture with with witch hazel until just moist enough to form into shapes that hold. Be careful not to add too much moisture or the mixture will begin to fizz.
Press mixture into molds; let sit for 5-10 minutes, then carefully remove from molds onto parchment paper and let dry for 24 hours.
Package in cellophane to give as gifts; to use, simply drop 1 large or 2 small bath bombs into bath.
Preparation time: 5-10 minutes
Drying time: 24 hours
Number of servings (yield): 16

Pin It
The post Handmade Fizzing Bath Bombs appeared first on Living Well Spending Less®.
November 28, 2014
My Favorite Black Friday & Cyber Monday Deals

Happy Black Friday! If you are anything like me you may busily trying trying to avoid the mall and all other retail stores at all costs and instead getting some power shopping done from the comfort of your own computer. Thus, I thought I’d share a few of the favorite deals I’ve found so far, and I will update it with any additional deals that I find! If you spot something great please feel free to share it in the comments below!
Here are my favorite Black Friday & Cyber Monday deals this year:

Elite Blog Academy
If you have a blog, this is one you will definitely not want to miss! My online blogging course launched in September and completely sold out. Now, for one week only, you will have the opportunity to enroll in the course at the original introductory rate of $299, before the tuition goes up to $399 in the spring. This comprehensive course walks you step by step through the process of refining your message, growing your audience, monetizing your platform, and building your business, and the feedback from the students who are currently enrolled has been incredible so far! The course also comes with an 100% money-back guarantee, so you literally have nothing to lose! Find out more and get enrolled HERE.

Dayspring
Dayspring is offering an additional 30% off everything in the entire store, including some awesome sale items when you use promo code 30FRIDAY14! They have a ton of cute gift ideas and there are some amazing deals to be had. For instance, this beautiful Faith, Hope, & Love Bracelet is normally $14.99 but today only you can get it for just $5.24 after discounts! Plus shipping is free on orders over $50!
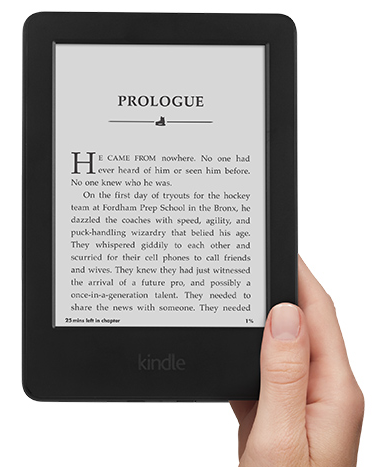
Amazon
Amazon has all their Kindles on sale this weekend, starting at just $49 for the basic version. (If you want to know all the reasons I love my Kindle, just check out this post.) They’ve also got some awesome lightning deals happening, but you’ve got to be FAST. You can watch the lighting deals come through HERE.
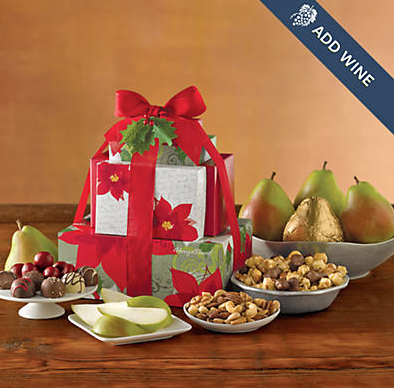
Harry & David
I am a huge fan of edible gifts, Harry & David gift boxes are always a hit with my friends and family! I always wait for Black Friday to order & this year I was not disappointed–they’ve got some great specials plus you can save up to an additional 20% off when you use promo code HOLIDAY. This tower of treats is normally $39.95 but right now you can get it as low as $23.96!

Target
Target is offering 10% off gift cards until 12pm CST. If you shop online, this is a great time to stock up!
* * *
What deals have you found today?
The post My Favorite Black Friday & Cyber Monday Deals appeared first on Living Well Spending Less®.
November 26, 2014
Cheesy Chicken & Rice Casserole

Chicken & rice casserole is one of our family staples, but in my quest to develop a whole binder full of no-cook freezer meals, I decided to take on the challenge of creating a freezer friendly version. I’ll be honest, it took a lot of trial and error to get it right, but the final version was one both my husband and kids couldn’t get enough of!
Quite frankly there is something just comforting about a hearty one-dish meal coming straight out of the oven after a long day. Between the frozen broccoli and canned soup, this one feels a little retro, but man is it delicious! While the recipe calls for using a cooked rotisserie chicken, you could easily substitute leftover Thanksgiving turkey as well!
Here is what you need:
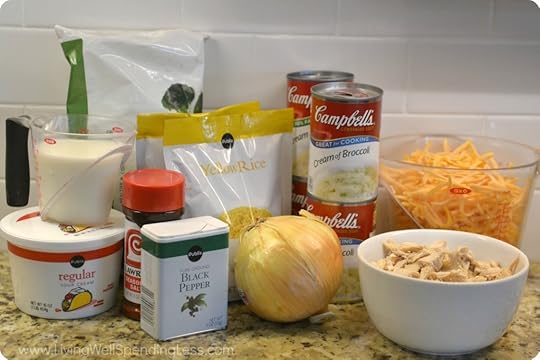
3-4 cups cooked chopped chicken (a deli rotisserie chicken works well)
1 sweet onion
4 cans condensed cream of broccoli soup
2 cups milk
2-1/2 cups water
1 16oz container sour cream
2 teaspoons seasoned salt
1/2 teaspoon black pepper
1 1/2 teaspoons garlic powder
2 10 oz packages yellow rice
1 16oz bag frozen broccoli
4 cups shredded cheddar cheese

Step 1: Chop onion; set aside.

Step 2: In large bowl whisk together soup, milk, water, sour cream, salt, pepper, and garlic powder until well blended.

Step 3: Mix in rice, chicken, broccoli, and cheddar cheese.

Step 4: Divide mixture into 2 gallon size freezer bags (be sure to label bags first); freeze until needed.

Step 5: Thaw; pour mixture into casserole dish and bake at 400 degrees for 30 minutes. Remove from oven and stir, being sure to scrape any rice that has collected along the sides and mix well. (DON’T SKIP THIS PART!! If desired, sprinkle with 1/2 cup crushed cracker crumbs and drizzle 2 tablespoons of melted butter over crumb mixture. Return to oven and bake at 400 degrees for additional 45-50 minutes.

Print This!
Recipe: Easy Freezer Chicken & Rice Casserole
Summary: This oh-so-easy one dish meal is sure to be a family favorite for young and old alike!
Ingredients
3-4 cups cooked chopped chicken (a deli rotisserie chicken works well)
1 sweet onion
4 cans condensed cream of broccoli soup
2 cups milk
2 1/2 cups water
1 16oz container sour cream
2 teaspoons seasoned salt
1/2 teaspoon black pepper
1 1/2 teaspoons garlic powder
2 10 oz packages yellow rice
1 16oz bag frozen broccoli
4 cups shredded cheddar cheese
Instructions
Chop onion; set aside.
In large bowl whisk together soup, milk, water, sour cream, salt, pepper, and garlic powder until well blended.
Mix in rice, chicken, broccoli, and cheddar cheese.
Divide mixture into 2 gallon size freezer bags (be sure to label bags first); freeze until needed.
Thaw; pour mixture into casserole dish and bake at 400 degrees for 30 minutes. Remove from oven and stir, being sure to scrape any rice that has collected along the sides and mix well. If desired, sprinkle with 1/2 cup crushed cracker crumbs and drizzle 2 tablespoons of melted butter over crumb mixture. Return to oven and bake at 400 degrees for additional 45-50 minutes.
Preparation time: 5-7 minutes
Cooking time: 40 minute(s)
Number of servings (yield): 8

Pin It
The post Cheesy Chicken & Rice Casserole appeared first on Living Well Spending Less®.
November 24, 2014
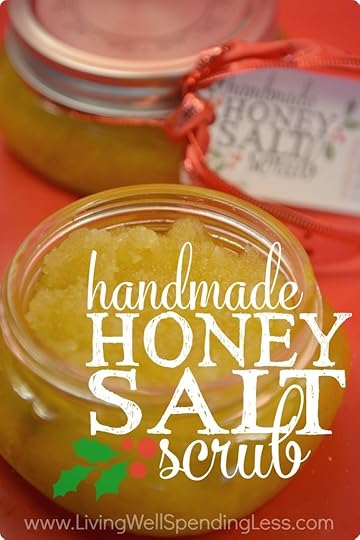
Handmade Honey Salt Scrub
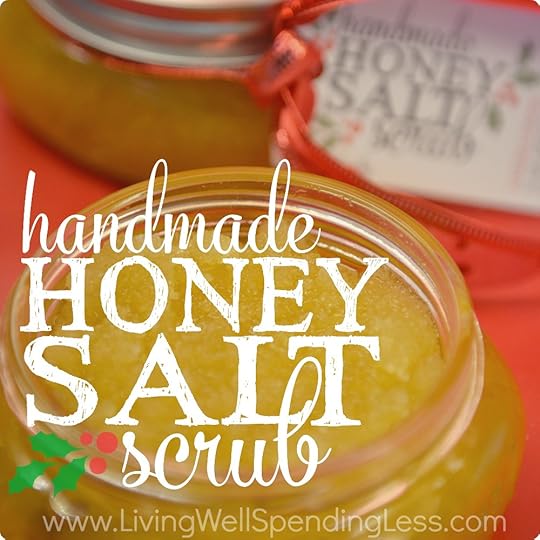
I first made this simple honey salt scrub about three years ago during our first ever 31 Days of Living Well & Spending Zero challenge. I loved it so much that I ended up making a huge bath and giving it away to all my friends and family that year. They have been asking for more ever since!
But don’t let the simplicity fool you–this easy-to-make scrub packs a powerful punch! It is the perfect solution to dry, flaky skin and leaves your skin feeling silky smooth and moisturized all day long. Better yet, it is way cheaper to make than all those expensive store-bought scrubs, and works just as well! You can use your favorite essential oil–I have tried it with bergamot, lavender, and ginger and they are all fabulous! (For more information about essential oils and where to buy them, check out this post.)
Here is what you need:

1/3 cup honey
1/2 cup olive oil
1 cup salt
5-6 drops essential oil

Step 1: Whisk together honey & olive oil.

Step 2: Slowly mix in salt.
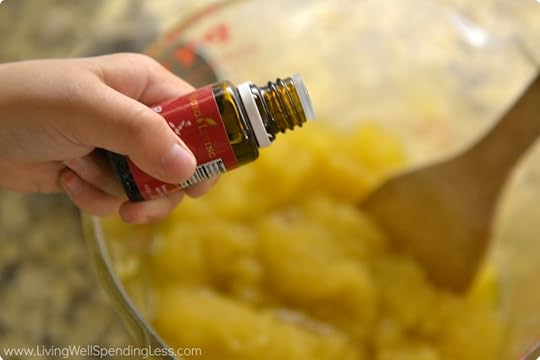
Step 3: Add essential oil and mix well.

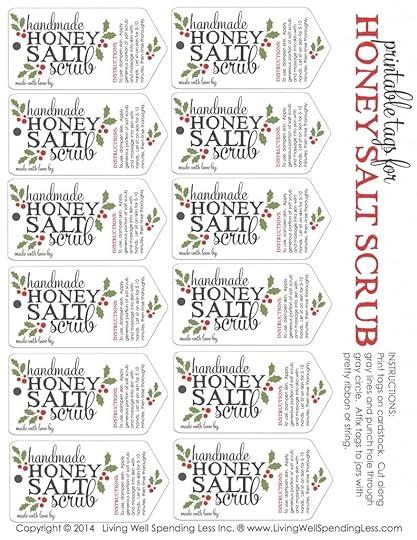
Step 4: Spoon mixture into wide mouth mason jar or container. Add a pretty tag to give as a gift.
Print This!
Recipe: Easy Homemade Salt Scrub
Summary: This homemade salt scrub is the perfect gift for teachers, babysitters, neighbors, friends, mail carrier. Okay it’s the perfect gift for everyone!
Ingredients
1/3 cup honey
1/2 cup olive oil
1 cup salt
5-6 drops essential oil
Instructions
Whisk together honey & olive oil.
Slowly mix in salt.
Add essential oil and mix well.
Spoon mixture into wide mouth mason jar or container. Add a pretty tag to give as a gift.
Preparation time:3-5 minutes
Number of servings (yield): 2 jars
Pin It
The post Handmade Honey Salt Scrub appeared first on Living Well Spending Less®.
November 23, 2014
Weekend Wandering


Happy Sunday! I hope you are all having a fabulous weekend (and staying warm if you are up north!) Don’t forget that there will be no Thrifty Thursday link party this coming week–I think we’ll all be a little busy on Thursday!
In other news, sure to register for our 12 Days to a Stress Free Holiday Challenge! Each day you’ll receive a 3-5 minute video & challenge straight to your inbox, and when you register you will also receive our 2014 Holiday Planning Guide. Both are fabulous resources for keeping your schedule and budget under control, and for staying focused on what matters most. Oh, and it’s all free!
But now on to the good stuff. Here is what I loved this week:
* * *
First of all, this Veggie Turkey Tray from How Do the Jones Do It? is so cute! My girls would love it!

This Homemade Cranberry Sauce with Zinfandel from the Savvy Saving Couple would add such a pretty splash of color to your turkey day meal and it sounds absolutely delicious!

Still need a veggie side dish to round off your menu? These Honey Glazed Carrots from Raining Hot Coupons sound divine!

Mmmm…..these Semi-homemade Garlic Cheese Bombs from Spending with Pennies would be a great recipe for the kids to help with!

Don’t forget the gravy! Ann’s Entitled Life shares 20 Delicious Homemade Gravy Recipes from the basic to the gourmet!

Home Made Interest has 10 Thanksgiving Leftover Recipes that won’t make you feel like you are eating leftovers.

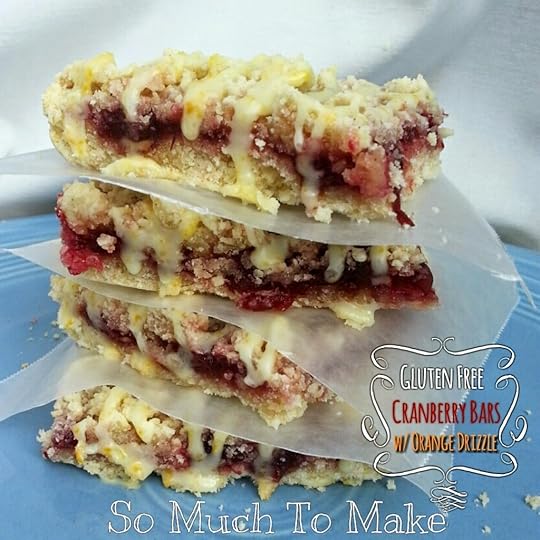
Need a pie alternative? These Gluten Free Cranberry Bars with Orange Glaze from So Much to Make comes together with less than 10 ingredients and in 5 easy steps!
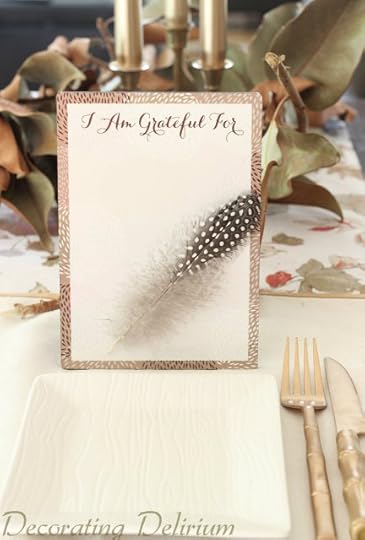
Looking for a way to transform your home decor for Thanksgiving on a budget? Decorating Delirium has several tips to a Frugal Thanksgiving Tablescape.
Our Simple Homestead shares 7 Old Fashion Thanksgiving traditions that have kept their holidays focused on the importance of family. I love the idea of number 3 & 7!

These 13 tips on How to Prepare Your First Thanksgiving Dinner and Enjoy it from Outside the Box Mom is a great resource to help keep you organized and sane!

Planning to get started on your gift list over the long weekend? Over The Apple Tree has 7 Gifts Kids Can Make that can be done by kids of all ages!

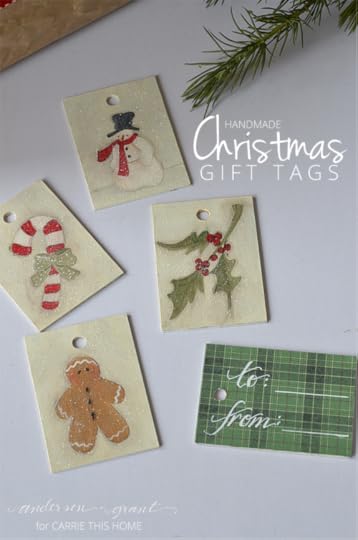
These Handmade Christmas Gift Tags from Carrie This Home up-cycle an unexpected material. So very clever!
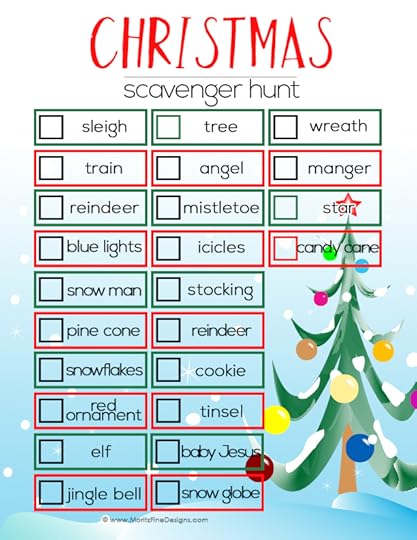
This Christmas Scavenger Hunt for Kids Printable from Mortiz Fine Designs are so much FUN!!
Mom Fabulous has the inside scoop on the 2015 Food Trends to Save You Time at the Grocery Store.

Finally, Six Figures Under asks the question Can You Be Thankful for Debt? The answer might surprise you!

* * *
What did you love this week?
Pin It
The post Weekend Wandering appeared first on Living Well Spending Less®.
November 21, 2014
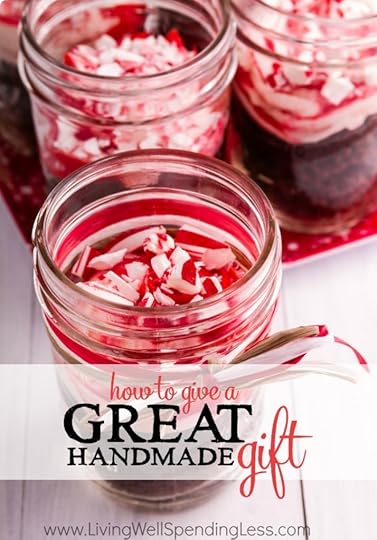
How to Give a Great Handmade Gift

This is a guest post from Kalyn Brooke of Creative Savings
DIY gifts are all the rage these days, no matter where you look — Pinterest, Facebook, even the cover of a glossy magazine. All proclaim to have the perfect gift that can be made cuter, cheaper, and faster, and everyone, including myself, can’t get their hands on another tutorial fast enough! (In fact, if you need some fantastic ideas for simple, easy, and thrifty gifts, you can start with Ruth’s list of 10 gifts you can make for $10 or less HERE.)
But have you thought about the fact that maybe not everyone wants a handmade gift? With our lives constantly on the move from one activity to the next, we rarely have any time to thoroughly enjoy, display, or dare I say, appreciate the effort that went into such a thoughtful piece of art.
Don’t misunderstand me — I’m all for handmade gifts! And sometimes, that’s really all we can afford. However, there are 3 important principles to keep in mind before you get buried underneath all those craft supplies to make sure your handmade gift is useful, needed, and top-notch.

1. Don’t Make it About You
I fear us crafty types love to “show off” our projects more than we love giving them. To have others ooh and ahh over our creation and ask, “You made this?”, while we try to stuff our beaming pride into more of a humble, “Oh, it was really nothing”.
Spending hours on a gift that we hope will be loved and cherished might make us feel good, but what about the other person? Will they truly love it or will it just become another item of clutter they feel guilty getting rid of or throwing away? Instead of whipping up something you think is cute, take some time to brainstorm creative ideas that they would appreciate.
When you turn the tables and focus on the other person’s wants and needs rather than yourself, you make the gift-giving experience more enjoyable for both of you — and that’s probably the most important principle to remember of them all!
So exactly how do you do that?

2. Know Your Recipient
Now that you’ve taken the focus off yourself, it’s time to dive into the nitty gritty of your recipient — their wants, needs, likes, and dislikes. I like to call this your brainstorming session.
This exercise might seem a little difficult to do at first, especially since modern social relationships often take place in status updates and Facebook messages rather than real life. But I encourage you to take a minute {or five}, and really think about the person you will be giving to. Maybe even invite them out for a coffee date!
Here are some good questions to ask:
What is their personality type? You don’t have to dive too deep into Myer’s-Briggs to get a general knowledge of whether they’re social or quiet, bold or cautious, organized or shall we say, free-spirited in where they place things. These characteristics will help you narrow down what sort of gifts they might enjoy.
What stage of life are they in? Are they just starting to decorate a new home? Are they a first-time mom? Maybe even a working mom? What about empty nesters who have extra freedom to travel and do other activities? Stage of life matters so you can pair them with the exact gift that fits their current lifestyle.
What do they talk about? Take a moment to really listen to the other person’s dreams and desires. What do they enjoy doing in their free time? How do they spend their days? When you’re shopping in the store together or chatting over lunch, what do they wish they had that would make their life easier for them? Make a mental note of this when brainstorming handmade gift ideas.
And finally, the last piece of the gift-giving puzzle…

3. Make it Practical
Although practical and handmade gifts might not seem like they go hand-in-hand, they actually do. No one {except maybe your grandmother} wants to simply display a gift just because you made it. You have to create an item of value, i.e. something they want, and something they can use.
I’ve seen personalized keychains, mugs, coasters, and all sorts of inspirational photo gifts and knick knacks that are gifted over and over again just because they are easy and convenient, but how often will your recipient actually use these? Or will they just add to the clutter and millions of odds and ends they already have? I know we personally have a ton of mugs, and we don’t even drink coffee!
It’s time to combine the practical side of gifting with the creative. Here are some ideas that almost always go over well:
Food – jar mixes, homemade extracts, fudge, granola, and other goodies
Beauty Products – homemade sugar scrubs, lip balm, and soaps
Themed Gift Baskets – movie night, gardening, or baking baskets
The difference between these fabulous items and just another handmade ornament is this: They’re consumable, and don’t require anything to be quickly displayed or worn before you come over for dinner. Because none of us have ever done that before. Ahem.
Filter each handmade gift idea through these 3 principles and you’ll be well on your way to giving a handmade creation that wows rather than disappoints. You might even enjoy the entire process a lot more too.
What are you waiting for? It’s time to get crafting!
* * *
What factors do you think about when giving a handmade gift?
Kalyn Brooke is a full-time writer and blogger at CreativeSavingsBlog.com, where she gives a fresh perspective on frugal
living, and the kick-in-the-pants you need to create a budget from scratch. She lives in beautiful Southwest Florida with her news-photographer husband and the most adorable bunny you’ve ever seen. She loves making to-do-lists, reading good books, eating chocolate peanut butter ice cream, and pursuing big big dreams… all carefully planned out, of course. You can download her Free Frugal Gift Guide HERE.
Pin It
The post How to Give a Great Handmade Gift appeared first on Living Well Spending Less®.
November 20, 2014
Thrifty Thursday {Week 87}
Happy Thursday! This morning I am in cold and snowy Michigan, furiously hoping that my flight home won’t be canceled! While travel delays are no fun, all this snow definitely has me in the holiday spirit! It is so pretty, and so peaceful! And so different from Florida!

Speaking of the holidays, be sure to join our 12 Days to a Stress Free Christmas Challenge. Each day you’ll receive a short but encouraging 5 minute video straight to your inbox, along with a simple daily challenge. It is the perfect way to start your season on the right foot and stay focused on what matters most this time of year. Oh, and it’s free! Be sure to grab yours HERE!
Here are the most clicked links from last week:
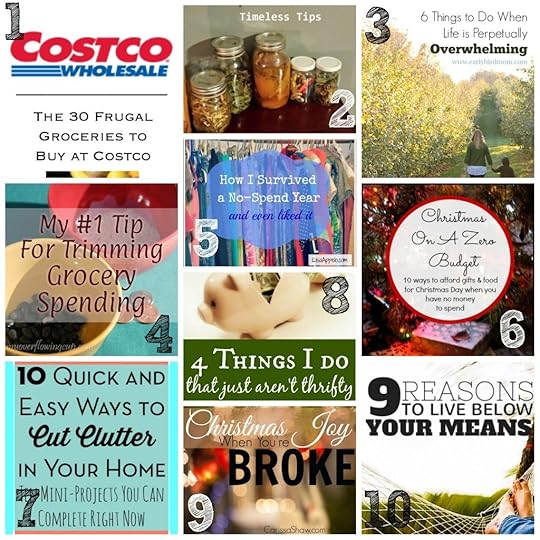
1. Practical Stewardship { What a Frugal Mom Buys at Costco }
2. Letters from Sunnybrook { Great Depression: Timeless Tips }
3. Early Bird Mom { 6 Things to Do When You’re Overwhelmed with Life }
4. Family Balance Sheet {My #1 Tip for Trimming Grocery Spending}
5. True & Faithful { How I Survived a No Spend Year and Even Liked It }
6. Snail Pace Transformations {Christmas on a Zero Budget}
7. The Beautiful Useful Project { 10 Quick and Easy Ways to Cut Clutter in Your Home }
8. Aspired Living { 4 Things I do That Just Aren’t Thrifty }
9. All in All { Christmas Joy When You are Broke }
10. Retired by 40 {9 Reasons to Live Below Your Means}
Never linked up before? Here’s how:
Scroll down, find the little blue “Add your Link” Button and click on that.
Follow the instructions on the next page – add a great image of your project and an interesting title. Make sure you link to the direct page of your budget friendly post – not the main page of your blog!
Try to visit at least a few other blogs at the party. Be sure to leave a comment to let them know you stopped by!
Please link back to this post somehow. There are badges available here; a simple text link is just fine too.
Feel free to tweet about Thrifty Thursday so others can join the fun, and don’t forget to check back here Sunday morning to see which posts have been featured this week at Weekend Wandering!
If this is your first time here I also invite you to check out my blogging guide, How to Blog for Profit (Without Selling Your Soul). It is a fantastic resource if you are interested in building your blog, getting more traffic, or learning how to monetize, and the expanded 2nd edition is now available in paperback! Or, if you have read the book and are still looking to take your blog to the next level, I encourage you to check out Elite Blog Academy.
An InLinkz Link-up
Pin It
The post Thrifty Thursday {Week 87} appeared first on Living Well Spending Less®.


