B.A. Fegles's Blog, page 24
March 28, 2016
How To’s & TutorialsPractical Guide: How To Boost Your WordPress Site’s Performance
The process of launching a website has many aspects that need to be considered: impeccable usability, top-notch SEO, intuitive interface, and many, many others!
WordPress is definitely a great choice for a content management system (CMS), but only at the extent of you being truly familiar with its features. This article was specifically crafted to ensure that you won’t sacrifice any critical functionality for some fancy feature overloads. You will start with the website optimization basics that will help you improve its performance.

Sounds tough? Don’t worry! With a little bit of willingness to learn, there will be nothing to blow hot and cold about. But before we proceed to the guide’s steps, you should know that having a 100 % score is not the main purpose of site’s optimization.
Your website may still have some elements, like fonts or high-resolution logos, that will slow down the loading speed. Yet, most of the times, these elements are key components of your site and you cannot remove them in exchange for obtaining a perfect score.
This is why you must keep in mind that the main scope of website optimizing is improving the user experience without damaging its main pieces. So let’s find out how you can achieve this!
The first two most important actions that you must undertake to significantly improve your website’s performance is to enable Gzip compression and leverage browser caching.
1. Enable Gzip compression

By replacing the original site with a compressed version the visitors will receive a product that is smaller in size and, therefore, works admirably faster. Through compression, the bandwidth of your pages will be reduced and this will reduce the HTTP response. It works the same one as compressing a file on your computer by significantly reducing its size and increasing your site speed as a result.
If the host offers this, you get to enable your Gzip compression directly from the cPanel, assuming that the server is also shared. Otherwise, you can achieve the same effect by inserting specific codes for resources’ compression in your .htaccess and Nginx files:
for .htaccess file:
# Compress HTML, CSS, JavaScript, Text, XML and fonts
AddOutputFilterByType DEFLATE application/javascript
AddOutputFilterByType DEFLATE application/rss xml
AddOutputFilterByType DEFLATE application/vnd.ms-fontobject
AddOutputFilterByType DEFLATE application/x-font
AddOutputFilterByType DEFLATE application/x-font-opentype
AddOutputFilterByType DEFLATE application/x-font-otf
AddOutputFilterByType DEFLATE application/x-font-truetype
AddOutputFilterByType DEFLATE application/x-font-ttf
AddOutputFilterByType DEFLATE application/x-javascript
AddOutputFilterByType DEFLATE application/xhtml xml
AddOutputFilterByType DEFLATE application/xml
AddOutputFilterByType DEFLATE font/opentype
AddOutputFilterByType DEFLATE font/otf
AddOutputFilterByType DEFLATE font/ttf
AddOutputFilterByType DEFLATE image/svg xml
AddOutputFilterByType DEFLATE image/x-icon
AddOutputFilterByType DEFLATE text/css
AddOutputFilterByType DEFLATE text/html
AddOutputFilterByType DEFLATE text/javascript
AddOutputFilterByType DEFLATE text/plain
AddOutputFilterByType DEFLATE text/xml
# Remove browser bugs (only needed for really old browsers)
BrowserMatch ^Mozilla/4 gzip-only-text/html
BrowserMatch ^Mozilla/4\.0[678] no-gzip
BrowserMatch \bMSIE !no-gzip !gzip-only-text/html
Header append Vary User-Agent
for nginx.conf file:
gzip on;
gzip_disable "msie6";
gzip_vary on;
gzip_proxied any;
gzip_comp_level 6;
gzip_buffers 16 8k;
gzip_http_version 1.1;
gzip_types text/plain text/css application/json application/x-javascript application/javascript text/xml application/xml application/xml rss text/javascript image/svg xml;
2. Leverage browser caching
Caching is used to store parts of your website on clients’ computers. Thanks to it, the next time they visit your site again or switch pages, there is no need to send another HTTP request, so the page loads quickly.
Enabling caching for your website it’s the second most important action that you should perform in order to significantly boost your site’s speed. You can install one of the available caching plugins, like WP Super Cache Plugin and WP Fastest Cache Plugin, or insert the following codes in the corresponding files:
for .htaccess file:
## EXPIRES CACHING ##
ExpiresActive On
ExpiresByType image/jpg "access plus 1 year"
ExpiresByType image/jpeg "access plus 1 year"
ExpiresByType image/gif "access plus 1 year"
ExpiresByType image/png "access plus 1 year"
ExpiresByType text/css "access plus 1 month"
ExpiresByType application/pdf "access plus 1 month"
ExpiresByType text/x-javascript "access plus 1 month"
ExpiresByType application/x-shockwave-flash "access plus 1 month"
ExpiresByType image/x-icon "access plus 1 year"
ExpiresDefault "access plus 2 days"
## EXPIRES CACHING ##
for nginx file (usually /etc/nginx/sites-enabled/default):
location ~* \.(asf|asx|wax|wmv|wmx|avi|bmp|class|divx|doc|docx|eot|exe|gif|gz|gzip|ico|jpg|jpeg|jpe|css|js|mdb|mid|midi|mov|qt|mp3|m4a|mp4|m4v|mpeg|mpg|mpe|mpp|otf|odb|odc|odf|odg|odp|ods|odt|ogg|pdf|png|pot|pps|ppt|pptx|ra|ram|svg|svgz|swf|tar|tif|tiff|ttf|ttc|wav|wma|wri|xla|xls|xlsx|xlt|xlw|zip)$ {
expires 365d;
}
Keep in mind that you’ll be able to use ‘location’ only in a server block, not http block, either directly or through a separate file. Also, after inserting the code, you must restart nginx through this command:
$ service nginx restart
3. Clean the Database
Don’t take WordPress’s default configuration for granted! There is plenty of useless information that needs to be removed, such as excessive revisions, trash records, or spam comments.
Excessive post revisions, for instance, are the biggest enemies of your database’s size. Since these happen all the time, the revisions are saved automatically.
Many people perceive them as necessary and store them for years while losing Internet connections. However, the truth is that each time you’re saving an article, a new draft appears in the database, and this process will keep cluttering your storage until it affects the site’s entire performance.
Luckily for you, there is a solution to this problem you can use the WP-Optimize plugin, which will keep your database clean and efficient.

4. Pay attention to the images files’ formats

This is something you shouldn’t neglect, and we are going to explain why:
.JPEG (.JPG) – This is an image file extension that provides plenty of details and has no transparent areas;
.PNG – This is a file extension for images with several semi-transparent areas and plenty of details. Still, remember that this is a heavyweight, lossless format, and you shouldn’t use it very often;
.GIF – This is a file extension for simple images with only a few colors, and no semi-transparent areas at all. Most of the time, the format is applied for logos.
Make sure you use each of your images in their corresponding formats to avoid slowing down your website.
5. Optimizing images
How many times did you try to go around the built-in editor’s request to rescale/modify an image you’re trying to update?
You should know that the image will, either way, be changed prior to posting or it will change in a way that is absolutely out of your control.

Even if WordPress is doing its own modification of the image it still saves the original, non-configured version in its database. This may turn into a serious problem.
Thus, we recommend you to compress your images without hurting their quality by using this tool TinyPNG – for png and jpeg images. Simply upload your images, run the tool and you will get the optimized images which you can use on your website and still keep its loading speed up.
6. Remove useless plugins
Yes, we all know how awesome WordPress plugins can be, and we hardly resist the temptation to implement them all in places where they don’t even fit. As a beginner, you can’t expect to handle them all equally good. This is why we recommend you to install only those that are irreplaceable.

Besides, plugins don’t always perform the way you expect them to and not all of them are fast and well-optimized.
It’s quite common for an irresponsive plugin to deduct total website responsiveness, or to have a serious impact on loading speed. You should track their performance after implementation, by using free software like GTmetrix, Pingdom or Google PageSpeed Insights, or similar alternatives.
This is the reason why certain WordPress sites are fast and optimized: they resist the temptation of adding extra plugins. WordPress is an impressively powerful within its basic version, and dozens of fancy additions won’t make it a lot better.
7. Serve static content

As a website owner (or a future one), you are probably familiar with the operations that take place while your site’s page is loading. It usually involves running PHP functions or queering MySQL databases, because those are the processes that sort out content to be displayed in front of the visitor.
You have to use queries that are less intense or to avoid queries in general. But, you can also think about static versions and a cache plugin that will open the website almost instantly. The effect on the speed and overload will be obvious, especially when it comes to the server’s CPU, HD, and Memory. There are many cache plugins that meet these criteria, but the most popular one which you can use is W3 Super Cache.
8. Divide large posts into multiple pages
If your idea is to make a mega resource where you will list approximately 100 resources with an equal number of images, consider diving that post into several pages. This way the information will be clearly displayed and there will be no unnecessary loading time. The ultimate result of doing it is an increased number of views.
Sounds like a complicated thing to do, but the core is very simple. You can do it from the admin page, by entering a single code to the post:
You have to check whether you actually have a theme/template that supports post division.
9. Use a CDN

CDN stands for Content Delivery Network and is, in fact, a server network which clones the site on all location nodes. You need a CDN because it refers visitors to the closest server locations, rather than letting them request access through the main datacenter that your host is providing.
CDN is possible via few plugins or custom solutions, such as Coral CDN and Max CDN.
10. Update WordPress regularly

You can either choose to ignore pop-up notifications informing you that you’re running an outdated version/plugin, or to respond accordingly and make use of the suggested performance update.
Improvement is a never-stopping process, which means that you don’t have to download every plugin, but you should definitely consider those that can boost your site’s performance. An additional benefit is that you get access to important security updates that you should never miss.
11. Optimize video usage
Today, decent websites are almost obliged to offer video content, since it’s perceived to be a facilitating mean of delivering content to the audience.
But uploading videos doesn’t have to be a double-edged knife: you can keep customers engaged in your quality video content without making your website slow or SEO irresponsive.
The trick here is to use image thumbnails for users to click, instead of embedding the video on the actual page where it’s located. Together with great speed and SEO benefits, you will also get a stylish design since we are discussing videos with a considerably professional appearance. The feature you should definitely use is the Video Thumbnails.
Once you will perform the above steps, your website will surely load faster and will create a delightful experience for your visitors. In the era of informational overloading, it’s extremely important to deliver your services fast and efficient. So try to avoid by any means annoying your customers with a lazy loading website. If you have some personal tips on optimizing your website, please feel free to share them with us through a comment.


March 24, 2016
RememberThings To Pay Attention When Choosing Your WordPress Theme
Personalizing your WordPress account may sound easy having so many amazing themes available at your disposal. But the truth is that unlimited choices can do more harm than good.
Quite often, users opt for a beautiful and eye-appealing theme, without considering the fact that it may not suit their specific needs.
Or even worse – they can end up choosing an inactive and low-quality one, discovering this only when it’s too late. With so many options involved, the first thing you should think about is not what you want or like, but what your website really needs.
You may question yourself:
‘What am I supposed to pay attention at?’

If you can answer this question, it’s great! It means that you can save your precious time and efforts which, otherwise, may end up being wasting on fixing an unresponsive theme in the future.
If you can’t, let’s see the key points on which you should focus when choosing the right theme:
Responsiveness

Responsiveness and responsive design are not desirable – they are indispensable! Responsive design will help you stand out from the old fashioned websites and gain your customers’ interest and loyalty. But most of all, having a responsive design shows your visitors that you use the most up-to-date tools and functionalities. Through this, you can gain their trust and build a successful relationship.
Since users tend to abandon traditional desktop devices and shift to handheld ones, offering an ultimate mobile experience is essential.
Luckily for you, today’s most reputable themes usually guarantee both mobile and tablet responsiveness. But before making your final decision, check if the theme you’ve chosen really has a responsive design. The best way to do it is to run a demo version of the theme through Google’s Mobile-Friendly test tool.
The theme should be suitable for the type of website you intend to build
The idea of a successful online presence is not merely about building a unique and breathtaking website. Some users have the tendency to ‘fall’ for seductive and stunning solutions, even when they’re not completely sure if the themes are compatible with the website they want to build.
Do you prefer tall headers? Are you going to display lots of photos? Do you need wide or narrow columns?
For example, food websites need themes that must display bigger homepage thumbnails through which they can draw attention towards their main dishes.
In many cases, clients won’t hit the ideal theme at their first attempt. Shoehorning your web portfolio into a beautiful and functional template can be very tricky, and may require additional off-shell repurposing of your theme.
The hazard in the case is that by doing modifications, you risk losing some benefits you could get after purchasing the theme that doesn’t need custom work.
The theme should match your brand image
The main reason why you’re building a website is that you need to expand your brand. Users continue their shifting to online shopping, and you should remember that your website will be the first encounter between them and your brand.
This encounter is essential for making a great impression. This means that you must select a theme that will best represent your brand and your unique value proposition.
The connection between usability, speed, and SEO

Web design should be created for website’s visitors and their user experience. This means that you should think about choosing a theme that is functional, rather than beautiful.
The connection between usability and SEO (Search Engine Optimization) is very strong. A better user experience will make your visitors return to your website or share your content, thus, will help it improve its ranking on search results page.
Speed and loading time shouldn’t be neglected either. Sometimes, speed may be the single factor that determines whether a theme is usable or not. Even though the loading time of your site mainly depends on your hosting provider, you should also think about choosing a reputable theme with clean codes which will ensure quick loading of your website.
SEO

One of the main theme features you should pay attention to is ‘SEO ready’ or ‘SEO optimized’. Even if you find such mentions on the theme’s landing page, don’t take it this feature for granted. Sometimes, this is only a trick designers use to sell their themes. You should check whether they’ve actually considered SEO ready before investing your money in that theme.
Support and automatic upgrades

You can have the most stunning website ever, but if you won’t be able to rely on a 24/7 customer support, your experience will certainly be ruined. This is why it’s very important to choose a company that provides you a dedicated and professional customer service. You can look up some open support forums or customer service communities to get a real insight about how that company deals with queries and support requests.
Integration with social media

You should not surpass the social media presence trend, especially if you intend to run blogs or complex corporate websites that require many users and social mentions. The more people get on board to participate in your discussions, to like, share, or comment your posts, the more popular your brand will become.
Luckily, that can be easily achieved if your theme has effective social media integration and social buttons. These features will help you increase your page views and sharing repetitiveness.
Compatibility and 3rd party plugin support

In an ideal world, your WordPress theme and your 3rd party plugin will work perfectly together and you wouldn’t have to worry about their integration ever again. But unfortunately, you must take care of this issue in advance, by choosing a theme that’s compatible with the plugins you intend to use.
Plugin compatibility may not always be clearly displayed on the theme’s features list. Thus, before buying the theme, contact support and check if you can count on this compatibility.
Customization options
One of the most appreciated characteristics of a high rated website is its wide customization options, that allow you to modify site elements the way you like. The ability to adjust basic main items, like logos, colors, fonts, buttons etc, is quite enough. You shouldn’t spend a fortune on overwhelming options you’ll probably never use or complex themes that don’t allow you to easily make simple changes.
Navigation
Neither your stunning layout nor your high-quality content won’t substitute the lack of easy navigation on your website.
You need to structure your content to make it easily recognizable and intuitive to find, with accessible social buttons. Your website should create an overall non-cluttered feeling from the very first moment a user visits it.
Easy navigation is the best way to make your online presence productive, so make sure you’re actually providing it on your website.
A futuristic approach
This is not something many customers consider: ‘Is the theme I want to buy capable of following my website’s evolution?’. Usually, customers start with small sites and few simple pages, but as their businesses grow, they need to shift towards a more robust theme.
The best way to choose a theme that will follow your development flow is to check if it has a simple navigation structure and well-organized layouts. It’s much better to purchase this type of theme in advance, instead of losing months in maintenance or making radical changes once your brand will be on the market.
Choose a well-known supplier
Shopping from reputable and large brands is the best way to get quality, support, and protection. Deciding to buy a theme from unknown developers sounds like a unique idea, but it’s risky and hazardous. By doing real-time shopping in design agencies you can overlook some key features, so make sure you do proper online research before the purchase. Forums with feedback, ratings, and reviews will help you check whether the theme is good and fits your business.
By focusing on these key factors when choosing your WordPress theme, you will lower the risk of incompatibility. It will save you both time and money by preventing future adjustments or changes. If you’ve encountered some other specific particularities or difficulties when selecting the best WordPress theme for your business, feel free to share it with us through a comment.

March 23, 2016
Important UpdatePhilanthropy 2.0 is here
We’ve made an important update to our popular Philanthropy WordPress theme. Being one of our top themes we’ve decided to update the theme on our Unyson framework. If you’ve purchased Philanthropy before 23 March 2016 continue reading to find out what this means for you. This article doesn’t concern the new Philanthropy clients that have purchased the theme after the 2.0 release.
Features added in 2.0
Donations Ready: Want to accept donations on your website? The Give plugin will empower your cause, You can start accepting donations today.
Drag & Drop Page Builder: Only drag & drop the design elements you want on the canvas and create complex pages at a drop of a dime. It is as easy as it sounds.
Woo Commerce Ready: Start selling your products today, using the popular WooCommerce plugin! We have customized everything, making the plugin perfectly integrated.
Page Load Animations: A great theme is not complete without some pizzazz, that’s why we have implemented a very easy way to add animations to any element within the theme.
Contact Form Builder: Use the contact form builder to create any contact form you need. Just drag & drop the fields you want and you are ready to go.
Backup Module: It takes a couple of seconds to set your backup schedule and then all the backups happen automatically.
BuddyPress Ready: BuddyPress helps you run any kind of social network on your WordPress, with member profiles, activity streams, user groups and more.
bbPress Ready: bbPress is basically forum software, made the WordPress way. It’s lean, mean, and ready to take on any job you throw at it.
Auto update from 1.0 to 2.0 is not possible
Although the themes look exactly the same, because Philanthropy 2.0 was built on an entirely different framework, an easy auto update is not possible. So if you already purchased and have a website integrated on the Philanthropy 1.0 you can’t upgrade to 2.0. You’ll need to start implementing your website from scratch.
We’ve replaced the theme in your account
Starting March 23, 2016, we’ve replaced your Philanthropy 1.0 theme in your account with Philanthropy 2.0. Starting with this date Philanthropy 1.0 will not be available for download anymore.
Updates & Support for Philanthropy 1.0
Even if we removed the 1.0 theme from your ThemeFuse account, we will continue to release updates for it (WordPress compatibility, bug fixes, etc) and they will be available directly from your WordPress update page. Moreover, you can contact us with any questions regarding Philanthropy 1.0 since we’ll continue offering support for it.
Conclusion
Basically, not much is changing for the clients of Philanthropy 1.0, you’ll continue to get updates for the theme, we’ll answer and give support on our helpdesk if you have any questions or encounter any issues, the only thing changing is that you can’t download the 1.0 theme anymore. If you plan to develop another website on Philanthropy just login into your account and download the 2.0 version and you’ll get all the features and benefits listed above.
Live Preview: http://demo.themefuse.com/?theme=philanthropy&device=desktop
Theme Details: http://themefuse.com/wp-themes-shop/nonprofit-wordpress-theme/
Buy Link: http://account.themefuse.com/product/philanthropystandard
Of course, you can test the new features added to Philanthropy 2.0 in our Test Labs (14 days free): http://testlabs.themefuse.com/. Let us know what you think about it. Cheers.

March 21, 2016
How To’s & TutorialsA Useful Guide to WordPress SEO
WordPress can be considered the most reasonable option for building SEO optimized websites. The platform’s great performance inspired Matt Cutts, former head of the Webspam Team in Google, to name it the ‘Great Option’ for website building.

However, most of us still question ourselves about ‘How can we improve the SEO of our WordPress website, in order to reach the top results on search engines?’ You can find some hints below that may answer your question.
Headlines, titles, and descriptions
The most important keywords are the ones included in headlines, titles, and descriptions on your website.
Your website’s ranking on Google depends almost entirely on these keywords. This is why you have to make sure that these words are the ones that will draw attention to your website.
To adjust titles and descriptions just click on ‘Settings’ > ‘General’, and insert the optimized ones.
Permalinks
Permalinks are the endings of your web pages’ URLs. You can increase their effectiveness by including relevant information about your content. This could guide users towards a particular post or page they want to see. In order to adjust permalinks, you have to log into the Dashboard, and choose ‘Settings’ and then ‘Permalinks’.
The next step is to click on ‘Post Name’
When selecting ‘Post name’, the permalink will appear in the following form: ‘http://www.yourwebsite.com/your-slug’. The SEO structure is very interesting because it allows you to choose a separate slug for every page you have, or even for blog posts or other elements of your website.
In case you don’t really know how to choose the right slug, there are some SEO tips that can help you. For instance:
The perfect length for a slug is from 3 to 5 words;
You can make slugs more content-relevant by including some of the SEO keywords;
Divide words with hyphens.
Yet, an important thing you must remember is that you should change slugs only before a page goes viral, because otherwise you could make it unreachable for the audience.
Meta tags
The primary purpose of Meta tags is to determine what is the main use of your website’s content. But meta tags, like some other website elements, have been abused by overambitious companies, which led to the decrease of their importance in today’s website building process.
Adding them is not necessary. In fact, failing to add them may help you stand out from your competitors because you will know which keywords they are using.
Meta descriptions
Meta descriptions are in fact Meta tags which are connected with the content. They are supposed to give information to search engines about a page’s main topic. Ranking doesn’t really depend on them, but they can improve your click-through rates within SERPs.
Meta descriptions should be short, but compelling, and they should provide a summary of the overall information displayed on your website. Knowing that Meta descriptions can’t affect ranking, you can do the trick and include keywords to help you tickle readers’ interest and attract them to click on your page. As usual, try to be as concise as possible, and don’t overdo the description.
Content is the most successful optimization tool
Optimization can (and will) be successful only when it’s associated with relevant, high-quality content. That means that your text should contain keywords, and should highlight the post’s topic. Of course, content should also be readable and understandable. For this reason, you have to choose words wisely, and write them in a user-friendly manner, for readers rather than for search engines.
Your headers should be marked as h1, h2, h3, etc., and should refer to separate sections and paragraphs. The most important thing to consider here is to let leading keywords appear in the h1 header.
Formatting headers with a header tag will allow you to underline important heading text sequences, to convert them, and to format them with some of the options displayed in the bar’s drop-down menu.
Leave keyword density aside

Keyword density will come automatically when you have good, naturally-written content. Write for your users, and put keywords only where they are really relevant.
Opt for recent and unique content, because Google will detect even the smallest copy-pasted sentence. It may not discard you at once, but it will certainly not give you the credit of an innovative and responsible content provider.
In fact, Google may even deny indexing your content if it has been artificially generated (especially by using scraping software). Another thing to consider is the number of words you are using: the minimum is 500, without the title.
Research before choosing your keywords

It’s good to be intuitive and to try guessing what people will look for, but there is a Keyword Research Tool that can do this more easily and efficiently.
Google also has a tool that can help you find out which are the most popular keywords. The tool is called Keyword Planner, similar to Google Trends and WordTracker which are also amazing for this purpose.
Adjusting tags and descriptions
The thing that most WordPress themes do is to generate tags by default, usually ones that contain the name of your website. For example, if you have a website titled ‘Premium WordPress themes’, the tag on your brand’s new page will look something like:
New Page | Premium WordPress themes
Tags are critical for Google to relate your website with particular content, and it may happen that Google will perceive two pages with the same tags as duplicated content. This is probably one of the biggest threats for the overall ranking of your website on search engines. So pay attention to the tags and descriptions you choose for your pages.

You can fix this problem by downloading Yoast’s WordPress SEO plugin or All in one SEO pack, an extension that gives you the opportunity to rewrite tags and descriptions, and to minimize title tags redundancy.
Optimized images
If you’re already using images on your website, you need to make sure they are optimized. The rule refers especially to unique images. By optimizing their titles, you can make them visible on search engines, and on Google Images in particular.

If your images are not optimized, you can use the ‘alt’ tag to help users understand what a certain image stands for, or, at least, to ‘push’ it a step further in the ranking performed by search engine robots.
To adjust the title and description of your image, go to the publisher screen, click on the image, and select the ‘Edit Image’ button. A small screen will pop up, and you can use it to edit the information you want.
Sharing on social networks

Search engines are becoming more and more responsive to social signaling, which means that few sharing plugins for Facebook, Twitter, or a similar network will help you rank much higher.
The tactic may not be successful at the beginning, but with a bit of patience, it can lead you towards amazing results.
Reciprocal linking
Reciprocal linking is a very good strategy, assuming you’ve carried it out in the proper way. For instance, links will look naturally embodied into your text, which is not something we could say about sidebars. Secondly, the link should be obviously relevant to the content, for instance when one financial site is referring to another.
With your links published on ‘Links’ or ‘Partner’ pages, you’re giving your entire domain a chance to appear in the search list. Buying or exchanging links, however, should be avoided at every price.
Google knows well what you’re doing, and it will spot every link that is not really yours. The mere suspicion of you using exchange sites and software, or referring to excessive backlinks belonging to other domains, will take you to the bottom of their result list or can even ban your website.
By optimizing these simple site elements, you will increase your content’s effectiveness and will deliver useful information for Google’s search engine. If you have some more tips about SEO contribution, please feel free to comment and share them with us.

March 17, 2016
How To’s & TutorialsHow to install your WordPress theme: Easy 5 Step – Guides
So you’ve finally purchased your WordPress theme, but you can’t find out how to properly upload it? There is no .zip file with the theme’s name or its file size is too big that it leads to uploading errors?
If this sounds familiar to you, then this article is what you need. Also, if you’re one of those who like making their online presence more personal by using a premium theme, then follow this tutorial about the WordPress install process.
WordPress is an open source platform made for blogging, which can be downloaded from their official site (WordPress.org). To clear things from the beginning, downloading WordPress from the original site (WordPress.com) won’t allow you to upload custom themes. You can find more detailed description of the differences between them by following this link.
WordPress installs usually come with default sets of premade templates. Since these designs stay the same for every buyer, it’s common that many clients don’t like them. As a matter of fact, almost 80% of WordPress users change their free themes to premium themes as soon as they install the platform.
Downloading the blogging software, and making a self-hosted website is the only way to use third-party themes.
A new WordPress theme can be installed in these three ways:
- Semi-manual installation: You have to go to the WP Admin Panel, and use their upload method;
– Manual installation: By installing a theme using an FTP client;
– Through the hosting Control Panel.
Before you start, let us tell you that there is nothing complicated about it. The only thing to be concerned about is choosing a theme that will match the looks and functionality you want your website to have.
Semi-manual installation method
This method is great for premium theme users. If you want to upload a theme using this particular method, you have to download the .zip file directly from the source.
Step 1: Login into the WordPress dashboard. Open the menu on the left side, and choose ‘Appearances’ > ‘Themes’. You will see a page with different options from which you’re supposed to choose ‘Install theme’ to continue with the process.

Step 2: This page is, in fact, your WordPress theme manager, which also provides a wide range of free themes. Since you already chose a specific theme, move to the next step of the installation process.
Step 3: With this phase begins your setup process. You should select ‘Choose file’, and navigate to the folder which contains the .zip file of the theme. Click on the theme you want to install and press ‘Enter’. The next step is to click on ‘Install now’, and the theme will start installing.

Step 4: Until the theme will be completely installed, you’ll get to a specific preview page. You need to click on ‘Live preview’ to see how the theme would look before you’ll confirm your choice. Sure that’s the one? Then click on ‘Activate’ and install it!
Step 5: Assuming that you’ve chosen your premium theme based on its demo, at this step you should upload the demo content and install the necessary plugins. For most of the available themes, this process may require several steps, starting with the import of the corresponding ‘.xml’ file and following certain instructions.
Since this process may be quite tedious, we decided to ease it us much as possible in our latest WordPress theme The Core. Once you finish uploading the theme, you’ll be redirected to the ‘Auto Setup’ page, where you can choose one of the three installation options: Plugins & Demo Content, Plugins Only or Skip Auto Setup. We recommend you to choose the first option in order to complete the full theme installation and get access to the demo content.

After the theme is installed, you can easily choose the demo for your site by following this menu path: ‘Tools’ > ‘Demo Content Install’> ‘Install’. Quick and easy!

Yet, keep in mind that if your server hasn’t enough resources or you use a shared hosting service, these facts may slow down your installation process. Make sure to choose one of the most reliable hosting providers before installing your theme and its demos.
More than that, The Core gives you the possibility to create and import your own demo by using the backup feature. Through this method, you can design your demo layout on the local host and migrate it, by creating a backup file, and export the file within The Core.
Remember: Semi-manual installation may not always succeed, because:
Reason 1: The .zip doesn’t contain a direct theme folder. This issue can be easily solved. Use WinRar (or any other file archive tool) to extract the .zip folder. Assuming that the .zip is correct, there will be a single folder with the theme name, which must contain a file called ‘style.css’. If you see anything else except this ‘style.css’ file, or you get the ‘The package could not be installed. The theme is missing the style.css stylesheet’ error then it means that your zip isn’t suitable for any uploads. You can find more detailed guidelines on how to fix this error on this article from Envato market.
But you don’t have to give up! Go inside the folder, and look for any other folder that has the name of your theme and contains this file. This folder can be easily compressed into .zip format. Once you’ve compressed it, upload it and check if it works. It’s the best shot you’ve got on checking if the theme works.
Reason 2: Your file exceeds maximum upload size. Your file exceeds maximum upload size. Another problem that could encounter is to receive the following alert: ‘The uploaded file exceeds the upload_max_filesize directive in php.ini’ or ‘File_name exceeds the maximum upload size for this site’. It means that you should either go for a smaller file or resize the one that you already have, using the PHP.ini settings. In most of the times, the error appears when adding files that are larger than 2 MB, because many hosts haven’t updated their size limits up to at least 8 MB.

This is also the case for our latest WordPress theme. The theme is based on high-quality items that make its size is slightly more than 2 MB. So, keep in mind to check your host upload limit before installing our theme to avoid this issue. If you don’t want to do this manually, (contact both the hosting provider and the theme manager, and ask them to increase the file size limit.
Reason 3: Your site isn’t new. You’ve already launched your site based on another WordPress theme. Nowadays, WordPress themes are complex structures, with distinct features and layouts. Don’t expect that if you will change your theme, it will automatically adjust the layouts of your previous theme. This is process is like trying to fit a European plug intro a USA socket – it won’t fit without an adapter. The same principle applies to your theme migration – you’ll have to work on adjusting your theme.
The installation process is quite easy and straightforward, but it’s not always 100% effective. There might be glitches that will cause the installation to fail, but you don’t have to worry about that. You can always upload your themes through the Control Panel File Manager or the FTP. Keep reading to see how you can do it.
Manual installation method: The FTP manager
Compared to the semi-manual process, manual installation is really slow. This happens because it requires access to numerous options that many hosts don’t have (in particular those that are running the sites on VPS/Dedicated services). In order to use this method, you have to install an FTP client on your device (use Transmit for Mac OSX, FileZilla for Windows).
There are a few details related to your service/hosting account that you should keep in mind before initiating the installation:
• The server address/domain name;
• The FTP username;
• The FTP password;
• The exact location of the WordPress installation within the hosting account (most of the time it’s the public_html folder or a smaller folder inside it).
The structure of the folder can differ from host to host. This is why the installation steps are rather similar than equal for all hosts:
Step 1: Start with extracting the theme archive. You should find a folder named after the theme, which contains different files inside it (the style.css and functions.php are a must).
Step 2: Use the login details provided by the hosting service to connect to the FTP server.
Step 3: Once you’ve connected to the hosting server, look for the following directory: ‘yourwebsite.com/wp-content/themes/’, and open it.
Step 4: Upload your chosen theme inside the theme folder of your FTP server. The upload process usually takes few minutes.
Step 5: After your theme is uploaded, login into your WordPress dashboard and select themes clicking on ‘Appearances’. If everything succeeded, then the chosen theme should appear there. You also have the chance for some real-time preview on its looks. That’s what you were looking for? Then apply it!
It may sound complicated at first, but this is definitely the way to go for installing any theme that you like.
You can check this video about how to install our WordPress themes using FTP to see a clear walkthrough of the installation process.
Installing WordPress themes through the Control Panel

This installation type is usually required by older WordPress versions that don’t support single-click installation performed directly from the admin page. Installing a theme to your web hosting account using Control Panel is very easy.
The simplicity consists in the fact that you don’t need a third-party program to do it, and there is no unzipping of any theme archives. Even a person that doesn’t know much about FTP can quickly do it by following these steps:
Check whether your ‘Theme Files’ are in a .gz or .zip archive. Open the Control Panel’s ‘File Manager’, and look for the ‘Themes folder’. Assuming that WordPress is installed within the server’s document root folder, click on “public_html/wp-content/themes”. If WordPress is installed within a sub-folder named ‘wordpress’, click on “public_html/wordpress/wp-content/themes” and follow these steps:
Step 1: Download your theme from the marketplace on your computer. No unzipping is necessary.
Step 2: Look for the ‘Upload’ icon within the ‘File Manager’.
Step 3: Upload your theme straight to the themes directory.
Step 4: Select ‘Extract’, and unzip the theme’s archive.
Step 5: Go back to the WordPress admin zone to find the recently installed theme inside. A single click on it will be enough to activate it.
Also, you can follow this link to watch how to install our premium WordPress themes using the most popular auto-installers.
If all the above methods fail to do the job, it probably means that you’re experiencing problems with improper or outdated themes. This issue has nothing to do with WordPress, so you have to ask the theme’s author for the theme’s up-to-date version.
Installing WordPress themes isn’t difficult. You should only keep in mind these essential steps and choose a good hosting service. Moreover, with themes like The Core, you have the opportunity to quickly and easily install the demo content. Once your stunning theme is installed, you can customize it the way you like.
If you have your personal tips on how to make the WordPress theme installation process more effective, please share with us!

March 14, 2016
How To’s & Tutorials 10 Best Tips on Mastering Your WordPress Visual Editor
If you are a WordPress user, you probably spend most of your time in the admin visual editor, writing posts and sharing your content.
The visual editor gives you the possibility to create ‘What You See Is What You Get’ content. Its environment is quite intuitive even for the newest WordPress users.
But why not to make it more useful?
Since you’re already spending so much time in it, you could get more familiarized with some of the ‘hidden gems’ of visual editing.
This article shows you specific visual editing tricks that will improve your WordPress experience. Try them and watch how your productivity is increasing.
1. The Kitchen Sink button

Usually, users tend to neglect this button most of the time. What they don’t know is that by clicking this button you will open a very rich set of additional hints and buttons.
In the opened row, you can find all the necessary tools to do text formatting. In order to know what is the function of each button, hover the mouse pointer over it and check the usage signal that pops automatically.
2. The ‘Mysterious’ buttons
‘Mysterious buttons’ are those options that haven’t been incorporated in the kitchen sink but are still necessary for you to easily perform visual editing.
Rely on the stalwart horizontal rule form ’90 web design, for instance. In order to have your personal button, you should go to functions.php and paste this code:
functionenable_more_buttons($buttons) {
$buttons[] = 'hr';
return $buttons;
}
add_filter("mce_buttons", "enable_more_buttons");
You are the one in charge of choosing buttons or selecting areas where a specific visual editing action should be performed.
Here comes a full list of buttons that can be added: bold, italic, underline, strikethrough, justifyleft, justifycenter, justifyright, justifyfull, bullist, numlist, outdent, indent, cut, copy, paste, undo, redo, link, unlink, image, cleanup, help, code, hr, removeformat, formatselect, fontselect, fontsizeselect, styleselect, sub, sup, forecolor, backcolor, charmap, visualaid, anchor, newdocument, and separator.
3. Managing typography
Typography is a significant aspect of your web content because it can ‘make or break’ the way readers perceive your style. You need to explore between different styles and sizes, to attract attention and create a visual hierarchy of your content.
Within the visual editor, you’re allowed to adjust the font size of the first six paragraphs or headings. The same text can be formatted into bold, italic, or underlined sentences, or aligned as you wish. To change the size, you have to highlight the text you want to adjust select the option you need from the drop-down menu.
4. Managing links
Another important thing that every WordPress user should know is how to add/remove hyperlinks from his posts. In order to add one, you should click on Insert > Edit link and insert the hyperlink. The same option is used to modify or replace the existing links.

Once you’ve clicked the button, a screen will appear in which you’ll have to enter both the title of the page (assuming that you know what the link is about), and its URL.
An additional benefit of the process is that you can provide readers with more options (opening the link in a new window, for instance). An important thing to remember is that the hyperlink is not a part of your content, but an external source of additional information.

For adding internal hyperlinks, you have to click on the “Or link to existing content”. The tool is mostly used to relate the existing text to your another page or someone else’s WordPress blog post.
The platform will assist you by populating recent links/titles for you to choose from. But keep in mind that WordPress will take time to locate even the latest post connected to your content, so you have to be patient.
5. Leaving the text unformatted
One of the things that can certainly be perceived as WordPress’s weakness is the difficulty of handling pre-formatted texts brought on it from another text editor. As dull as it sounds, working with plain text is the best option for WordPress. The button that you could use to remove all formation from an imported text is ‘Clear Formatting’.

First of all, highlight the specific text then click on the button. But remember that the best way to do this is to import the text unformatted. Keep in mind that this WordPress feature doesn’t deal with headers or block quotes. Also, there are other formatting buttons in WordPress, but they are much more complicated.
6. Single and double line spacing
The eternal struggle for beginners (even in MS Office Word) is to learn how to divide textual content into paragraphs, or how to use line breaks. WordPress developers tried to simplify this for us: a new paragraph with double line spacing can be created by only pressing the Enter tab.
On the opposite, a line break with single line spacing, can be added by pressing ‘Shift’ and ‘Enter’ keys simultaneously.
7. Shortcuts
WordPress visual editor allows you to use almost every formatting shortcut you may know from MS office. The reason why people use them is to save time. Most of them are associated with the Ctrl tab (or Command for Mac users):
Ctrl + b = Bold
Ctrl + i = Italic
Ctrl + c = Copy
Ctrl + v = Paste
Ctrl + x = Cut
Ctrl + a = Select All
Ctrl + z = Undo
Ctrl + y = Redo
Ctrl + [number] = Insert heading sizes, e.g. CTRL+1 = , CTRL+2 = .
Alt + Shift + n = Check Spelling
Alt + Shift + l = Align Left
Alt + Shift + j = Justify Text
Alt + Shift + c = Align Center
Alt + Shift + d = Strikethrough
Alt + Shift + r = Align Right
Alt + Shift + u = Unordered List
Alt + Shift + a = Insert link
Alt + Shift + o = Numeric List
Alt + Shift + s = Remove link
Alt + Shift + q = Quote
Alt + Shift + m = Insert Image
Alt + Shift + w = Full screen distraction free writing mode
Alt + Shift + t = Insert More Tag
Alt + Shift + p = Insert Page Break tag
Alt + Shift + h = Rich text editor help
8. Enabling the ‘Distraction-Free’ mode

Isn’t it really annoying to deal with so many menu items disposed around your writing board? You can always simplify your interface by hiding these options from the page where you’re writing your posts. You have to click on the ‘Distraction-Free writing mode’, and all choices will simply disappear. It’s a great way to reduce stress and increase focus.
9. Using special characters
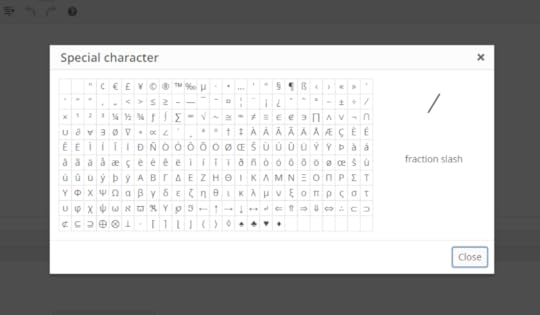
Special character is a specific WordPress button that allows you to add specific symbols, like registration signs, trademarks or copyright indicators in your posts. All you have to do is to click this toolbar icon, and you’ll see a popup with special characters to choose from. Select the one you like, and it will instantly appear in the editor.
10. Adding media content
Another thing that makes WordPress visual editor a great deal is the easiness of uploading media content (images, videos) to your posts. All you have to do is to select the Add Media button, open the Media Library, and choose your file.

It can either be a file that is already there, then you don’t need to look for it in specific folders in order to attach it to our post. Or, if it’s a file you’ve never used before, click on the ‘Upload files’ tab, get the file, and click ‘Insert’. Also, WordPress allows you to ‘attach’ metadata on your file, like titles or alt text, used for SEO purposes.
The file you’re inserting will be placed on the last location of your cursor, but this is something you could change. In order to do it, you should click on the file (the image, for instance), and check the horizontal bar with editing and alignment options that will appear next to it. WordPress also supports the drag-and-drop technique to help you position files exactly where you want them to be.
These tips will definitely help you improve your blog posting experience. If you have other hacks about working with the WordPress admin area, please share them through a comment below.

March 10, 2016
Discover Why Premium WordPress Themes Are Better Than Free WordPress Themes
Companies at the dawn of their business will be more likely to opt for a free theme because money is always an issue for a startup. Yet, they still have one dilemma: Will a premium theme guarantee more traffic? What is it that makes premium themes better than their unpaid counterparts?
Most WordPress users are impressed by the number of free themes available. This is why they believe there is no reason for starters to burn money on expensive themes. Even though this may seem a reasonable solution, choosing a premium theme will bring you many advantages.
But what does the term “Premium theme” stand for?
It means that it’s a beautiful theme that costs top dollars, mostly designed by a well-known team and available only on a limited number of platforms.
Why should you choose one?
Because it brings you the following benefits:
The quality

If you don’t know what is good, ask for what is expensive. The greatest things will always come with a price. This is also the case of exceptional coding and high quality. There are many factors that make premium themes highly qualitative:
You can be sure that the theme comes without bugs because designers have to make it pitch-perfect to ensure that buyers won’t ask for refunds;
You can relax and forget about troubleshooting because sellers will fix every issue and will constantly update the theme even after you’ve bought it;
Sellers must maintain their reputation, which is why they can’t risk selling low-quality themes.
Therefore, you can expect the theme to comply with your software instantly. One thing is for sure: premium themes are designed according to the contemporary standards and it’s likely that they will change with the same tempo as the web browsing software.
Responsiveness comes by default. WordPress themes are used by people of all ages and interests, meaning that they will access their websites from many different devices. That’s why designers ensure that a theme is functional on any platform.
The design

Premium themes are seen as being elegant and sophisticated. As a matter of fact, quality can also be considered a visual category. Purchasing a premium theme is a serious investment. That’s why it’s reasonable to expect a unique appearance to overshadow the majority of free themes.
Once again, we don’t underestimate the good design of free themes, but rather exposing a situation where this design is compulsory.
As a blogger or a site owner that is concerned about the uniqueness of your brand, you should have no second thoughts on whether to go premium or not. Designers make great efforts to turn awesome premium themes into your visitor magnets.
The experience
The lack of user experience is an issue for many free themes (both for site owners and visitors). This is very obvious on the backend, which causes many customers to change their mind about visiting your website again. On the other hand, premium themes are designed to make users’ journey on your website really enjoyable.
The functionality

Adjusting and amending a WordPress theme can be a nightmare even for an experienced tech-user. It usually requires intermediate or advanced knowledge of HTML, PHP, and CSS.
Premium themes solved this issue, too. They are designed to be easily editable even for savvy users, meaning that functionality is always their priority. Designers are proud to offer an intuitive user interface that lets you change and format their designs with a single click.
The security aspect
If you will choose a free theme, you’re the one who has to stay on track with all author’s updates.
Unfortunately, it can even mean that an older WordPress theme can’t be synced with new releases. This can easily become the Achilles heel of your website and reduce its security.
Even if free themes are released with the best intentions, their real background is to give you something you will like, but not good enough for you to stay below the payment threshold. Eventually, you will start worrying about security, and you will switch on premium ones that come with reliable support.
You can also check here how to improve the security of your WordPress theme.
The updates
A thing that WordPress is really famous for is its responsiveness. It means that updates are made with care, tight and are responsive to changes and to external factors. Designers consider everything, from insignificant bugs to huge security concerns when they regularly update themes (which makes premium themes highly appreciated).
A free theme, for instance, will always depend on the effort you will invest to convert it into what you need. After a while, there will be a new version of WordPress, and you’ll be the one to bother about adapting it, choosing from:
Not upgrading WordPress – Missing out the fancy features is nothing compared to the security threats you will be exposed to;
Upgrading it, and taking a brand new theme. This will take you time…over and over again.
As you can see, none of the above options will work perfectly. In fact, you can check the Directory to see how many themes are currently outdated. You can take the newest one if you want, but that won’t save you from having to modify it in few months.
The support

There is customer support for every premium theme, and most of them work as a forum. This is a very important thing to know because nobody bothers to advise you on free themes.
Premium themes, on the other hand, have many active users who are ready to provide helpful information. Knowing this, their purchasing price won’t seem surprising for you anymore. The money you’re paying compensates the effort of developing and running an active forum.
Free theme designers aren’t motivated to provide support because they don’t make money out of it. Most of the time, questions related to free themes remain unanswered.
The SEO

What you probably didn’t know is that the theme you’re using has a great impact on your website’s SEO. Free themes may have issues with the search engine ranking, mostly because they don’t have integrated SEO options. You should consider SEO, not just because it’s clean and less stressful, but because SEO optimized websites and their faster loading time is the future of your online presence.
Better chance for uniqueness
Considering how popular free themes are, there is almost no chance to choose one and to customize it in a totally unique way. Everything you’ll come up with must have been already applied. Your business may seem familiar to some of your visitors. Certain paid themes are also common, but they come with a variety of customization options that can help you stay unique.
Carefully choose premium themes
If a theme is tagged as ‘premium’ and it’s pretty expensive, it doesn’t mean that it’s a good one. In fact, there are many paid themes that are less functional than a free one. That’s why you should choose premium themes with care, purchasing them only from reputable theme shops.
Choosing a premium theme instead of a free one will bring you large benefits and will definitely put your mind at ease. You can check our latest premium theme, The Core, that comes with multiple WordPress demo websites and many customization options.

March 7, 2016
How To’s & Tutorial How To Customize Your WordPress Login Page
Indeed, the most famous type of the WordPress Admin Page is the WordPress Login Page. At first glance, this page seems clean and straightforward, but the truth is that there are many hidden gems you should consider. It’s not exactly a piece of cake for new users, especially if you’re trying to get to the bottom of the underlying software. Yet, we are here to show you how it works:
Change The Login Page Logo

First of all, we’ll teach you a trick for changing the logo on the main login screen:
All that you have to do is to copy-paste the following code in the functions.php section and to replace the existent image with the one you would like to use. As simple as that!
function custom_login_logo() {
echo '
h1 a { background-image:url('. get_bloginfo( 'template_directory' ) .'/images/logo.jpg) !important; }
';
}
add_action('login_head', 'custom_login_logo');
There is also the WordPress login head option, that attaches a tiny CSS option to the unit of the screen’s HTML. This is how you can change the H1 tag’s background image with a personal custom logo. Don’t forget to add an “!important” flag in the CSS in order to overwrite the default logo image.
Once you’ve added the code, your logo will appear on the page, placed above the login form. See? It’s not rocket science!
How to change the logo image URL
The logo image will remain linked to http://wordpress.org by default. Sometimes, you’d expect to direct the link towards a different location, either the homepage of your site or some document.
You can change this link by adding a few code lines in the bottom section of your functions.php file:
function my_login_logo_url() {
return get_bloginfo( 'url' );
}
add_filter( 'login_headerurl', 'my_login_logo_url' );
function my_login_logo_url_title() {
return 'Your Site Name and Info';
}
add_filter( 'login_headertitle', 'my_login_logo_url_title' );
How to change the logo title?
The last part of the process is to change the logo title, namely the attribute of the link, to something different than ‘Powered by WordPress’. Through this you can personalize the logo:
/*Change the "Powered by WordPress!" title*/
function custom_login_title(){
return get_bloginfo('name');
}
add_filter('login_headertitle','custom_login_title');
How to add a custom background?

Your login page will become much more interesting and personal if you will add a custom background. It can be both: a plain and gradient color, all you have to do is to choose the one you fancy the most.
Add the following code to the custom-login-styles.css file:
body.login {
background-image: url(‘plain.jpg');
background-repeat: no-repeat;
background-attachment: fixed;
background-position: center;
}
Don’t forget to put the name of your personal image instead of the file name mentioned second line (plain.png).
How to customize the appearance of the login form?
This section is the best place for improvisations and creative ideas. They can improve the visual aspect of your login form and turn it into something you like the most. You’re just an attempt away from creating a site that looks and feels just the way you want it to.
The first task is to style labels (darken the text) so that the input boxes will immediately look rounded and friendlier.
.login label {
font-size: 12px;
color: #555555;
}
.login input[type="text"]{
background-color: #ffffff;
border-color:#dddddd;
-webkit-border-radius: 4px;
}
.login input[type="password"]{
background-color: #ffffff;
border-color:#dddddd;
-webkit-border-radius: 4px;
}
The button may also need some styling. You can use a lighter shade of blue for it.
.login .button-primary {
width: 120px;
float:right;
background-color:#17a8e3 !important;
background: -webkit-gradient(linear, left top, left bottom, from(#17a8e3), to(#17a8e3));
background: -webkit-linear-gradient(top, #17a8e3, #17a8e3);
background: -moz-linear-gradient(top, #17a8e3, #17a8e3);
background: -ms-linear-gradient(top, #17a8e3, #17a8e3);
background: -o-linear-gradient(top, #17a8e3, #17a8e3);
background-image: -ms-linear-gradient(top, #17a8e3 0%, #17a8e3 100%);
color: #ffffff;
-webkit-border-radius: 4px;
border: 1px solid #0d9ed9;
}
.login .button-primary:hover {
background-color:#17a8e3 !important;
background: -webkit-gradient(linear, left top, left bottom, from(#17a8e3), to(#0d9ed9 ));
background: -webkit-linear-gradient(top, #17a8e3, #0d9ed9 );
background: -moz-linear-gradient(top, #17a8e3, #0d9ed9 );
background: -ms-linear-gradient(top, #17a8e3, #0d9ed9 );
background: -o-linear-gradient(top, #17a8e3, #0d9ed9 );
background-image: -ms-linear-gradient(top, #0b436e 0%, #0d9ed9 100%);
color: #fff;
-webkit-border-radius: 4px;
border: 1px solid #0d9ed9;
}
.login .button-primary:active {
background-color:#17a8e3 !important;
background: -webkit-gradient(linear, left top, left bottom, from(#0d9ed9), to(#17a8e3));
background: -webkit-linear-gradient(top, #0d9ed9, #17a8e3);
background: -moz-linear-gradient(top, #0d9ed9, #17a8e3);
background: -ms-linear-gradient(top, #0d9ed9, #17a8e3);
background: -o-linear-gradient(top, #0d9ed9, #17a8e3);
background-image: -ms-linear-gradient(top, #0d9ed9 0%, #17a8e3 100%);
color: #fff;
-webkit-border-radius: 4px;
border: 1px solid #0d9ed9;
}
How to redirect users after they’ve logged in?

Traditionally, logged users are automatically redirected to the admin page. But what you may want is to redirect users to a specific area, a site you want them to see or to register at. That’s why you need to trigger the login_redirect filter, and the filter will take them exactly where you want them to ‘land’.
function my_loginredrect( $redirect_to, $request, $user ) {
if ( isset( $user->roles ) &&is_array( $user->roles ) ) {
if( in_array('administrator', $user->roles)) {
return admin_url();
} else {
return site_url();
}
} else {
return site_url();
}
}
add_filter('login_redirect', 'my_loginredrect', 10, 3);
Don’t hesitate about it, it’s not as complicated as it looks like. The only thing we added is the redirection condition: The filter checks the role of each user, meaning that admin users will arrive at the admin page (admin_url()) as usual, but everybody else will be redirected to the primary homepage (site_url()). A precaution to have in mind is that administrators need access to the homepage too, just in case if the admin redirection fails. The best side of the process is flexibility, as you’re allowed to change both URLs and to direct users to every page you want. The replacement can be done directly through WordPress shortcuts, or by doing some hard coding of the links.
How to remove the lost/forgotten password link?
Users don’t like it, but it is another matter of precaution that you may really need. Think about it: what if someone hacks your email, gets access to your login information, and resets the password to misuse or even shut down your WordPress site?
Below you have another snippet, that shows how you could remove a lost/forgotten password link from the login screen. All you have to do is to add the following code to the functions.php file:
function remove_lostpassword_text ( $text ) {
if ($text == 'Lost your password?'){$text = '';}
return $text;
}
add_filter( 'gettext', 'remove_lostpassword_text' );
How to modify the login error message?
The login error message is the small text box that appears on the login screen whenever someone tries to access the system using void data. The message is usually simple (Invalid username, for instance), because it alerts users of what is most probably a spelling mistake. However, this could alert hackers too, and will unluckily provide them an accurate explanation of what they need to correct.
The best way to deal with this issue is to replace the unified text with our own, using the following code in the functions.php file:
function login_error_override() {
return ‘Sorry Charlie, those are the incorrect login details.';
}
add_filter('login_errors', 'login_error_override');
How to remove the login page shake?
Sometimes, mistaking the username/password makes the login form shake in order to inform you that your information is wrong. It is a clear signal that something has to be changed.
The feature is fairly functional, but some people find it annoying. If you’re one of them and you want to get rid of this shake option, ‘attach’ this snippet to the functions.php file:
function my_login_head() {
remove_action('login_head', 'wp_shake_js', 12);
}
add_action('login_head', 'my_login_head');
But first…check the ‘Remember Me’ box!
This should be done at least manually because the site will never remember your data without permission. You may want to check it for new passwords, but if you have the same password for all platforms, you won’t even need it.
The good thing is that there is a code that can check the box by default:
function login_checked_remember_me() {
add_filter( 'login_footer', 'rememberme_checked' );
}
add_action( 'init', 'login_checked_remember_me' );
function rememberme_checked() {
echo "";
}
Logging in with your email address

We all know from personal experience that usernames are ‘forgettable material’. We could always benefit from an alternative login option.
In order to enable users to log in with their email (instead of their username), you’d need the following code snippet:
add_action( 'wp_authenticate', 'email_address_login' );
function email_address_login( &$username, &$password )
{
$user = get_user_by( 'email', $username );
if( !empty( $user->user_login ) )
{
$username = $user->user_login;
}
}
Following these simple tips will allow you to fully customize your WordPress from the scratch. Try and enjoy these great options for improving your experience! Also, if you have any suggestions, please feel free to share them through comments!

How To’s & TutorialHow To Customize Your WordPress Login Page
Indeed, the most famous type of the WordPress Admin Page is the WordPress Login Page. At first glance, this page seems clean and straightforward, but the truth is that there are many hidden gems you should consider. It’s not exactly a piece of cake for new users, especially if you’re trying to get to the bottom of the underlying software. Yet, we are here to show you how it works:
Change The Login Page Logo
First of all, we’ll teach you a trick for changing the logo on the main login screen:
All that you have to do is to copy-paste the following code in the functions.php section and to replace the existent image with the one you would like to use. As simple as that!
function custom_login_logo() {
echo '
h1 a { background-image:url('. get_bloginfo( 'template_directory' ) .'/images/logo.jpg) !important; }
';
}
add_action('login_head', 'custom_login_logo');
There is also the WordPress login head option, that attaches a tiny CSS option to the unit of the screen’s HTML. This is how you can change the H1 tag’s background image with a personal custom logo. Don’t forget to add an “!important” flag in the CSS in order to overwrite the default logo image.
Once you’ve added the code, your logo will appear on the page, placed above the login form. See? It’s not rocket science!
How to change the logo image URL
The logo image will remain linked to http://wordpress.org by default. Sometimes, you’d expect to direct the link towards a different location, either the homepage of your site or some document.
You can change this link by adding a few code lines in the bottom section of your functions.php file:
function my_login_logo_url() {
return get_bloginfo( 'url' );
}
add_filter( 'login_headerurl', 'my_login_logo_url' );
function my_login_logo_url_title() {
return 'Your Site Name and Info';
}
add_filter( 'login_headertitle', 'my_login_logo_url_title' );
How to change the logo title?
The last part of the process is to change the logo title, namely the attribute of the link, to something different than ‘Powered by WordPress’. Through this you can personalize the logo:
/*Change the "Powered by WordPress!" title*/
function custom_login_title(){
return get_bloginfo('name');
}
add_filter('login_headertitle','custom_login_title');
How to add a custom background?
Your login page will become much more interesting and personal if you will add a custom background. It can be both: a plain and gradient color, all you have to do is to choose the one you fancy the most.
Add the following code to the custom-login-styles.css file:
body.login {
background-image: url(‘plain.jpg');
background-repeat: no-repeat;
background-attachment: fixed;
background-position: center;
}
Don’t forget to put the name of your personal image instead of the file name mentioned second line (plain.png).
How to customize the appearance of the login form?
This section is the best place for improvisations and creative ideas. They can improve the visual aspect of your login form and turn it into something you like the most. You’re just an attempt away from creating a site that looks and feels just the way you want it to.
The first task is to style labels (darken the text) so that the input boxes will immediately look rounded and friendlier.
.login label {
font-size: 12px;
color: #555555;
}
.login input[type="text"]{
background-color: #ffffff;
border-color:#dddddd;
-webkit-border-radius: 4px;
}
.login input[type="password"]{
background-color: #ffffff;
border-color:#dddddd;
-webkit-border-radius: 4px;
}
The button may also need some styling. You can use a lighter shade of blue for it.
.login .button-primary {
width: 120px;
float:right;
background-color:#17a8e3 !important;
background: -webkit-gradient(linear, left top, left bottom, from(#17a8e3), to(#17a8e3));
background: -webkit-linear-gradient(top, #17a8e3, #17a8e3);
background: -moz-linear-gradient(top, #17a8e3, #17a8e3);
background: -ms-linear-gradient(top, #17a8e3, #17a8e3);
background: -o-linear-gradient(top, #17a8e3, #17a8e3);
background-image: -ms-linear-gradient(top, #17a8e3 0%, #17a8e3 100%);
color: #ffffff;
-webkit-border-radius: 4px;
border: 1px solid #0d9ed9;
}
.login .button-primary:hover {
background-color:#17a8e3 !important;
background: -webkit-gradient(linear, left top, left bottom, from(#17a8e3), to(#0d9ed9 ));
background: -webkit-linear-gradient(top, #17a8e3, #0d9ed9 );
background: -moz-linear-gradient(top, #17a8e3, #0d9ed9 );
background: -ms-linear-gradient(top, #17a8e3, #0d9ed9 );
background: -o-linear-gradient(top, #17a8e3, #0d9ed9 );
background-image: -ms-linear-gradient(top, #0b436e 0%, #0d9ed9 100%);
color: #fff;
-webkit-border-radius: 4px;
border: 1px solid #0d9ed9;
}
.login .button-primary:active {
background-color:#17a8e3 !important;
background: -webkit-gradient(linear, left top, left bottom, from(#0d9ed9), to(#17a8e3));
background: -webkit-linear-gradient(top, #0d9ed9, #17a8e3);
background: -moz-linear-gradient(top, #0d9ed9, #17a8e3);
background: -ms-linear-gradient(top, #0d9ed9, #17a8e3);
background: -o-linear-gradient(top, #0d9ed9, #17a8e3);
background-image: -ms-linear-gradient(top, #0d9ed9 0%, #17a8e3 100%);
color: #fff;
-webkit-border-radius: 4px;
border: 1px solid #0d9ed9;
}
How to redirect users after they’ve logged in?
Traditionally, logged users are automatically redirected to the admin page. But what you may want is to redirect users to a specific area, a site you want them to see or to register at. That’s why you need to trigger the login_redirect filter, and the filter will take them exactly where you want them to ‘land’.
function my_loginredrect( $redirect_to, $request, $user ) {
if ( isset( $user->roles ) &&is_array( $user->roles ) ) {
if( in_array('administrator', $user->roles)) {
return admin_url();
} else {
return site_url();
}
} else {
return site_url();
}
}
add_filter('login_redirect', 'my_loginredrect', 10, 3);
Don’t hesitate about it, it’s not as complicated as it looks like. The only thing we added is the redirection condition: The filter checks the role of each user, meaning that admin users will arrive at the admin page (admin_url()) as usual, but everybody else will be redirected to the primary homepage (site_url()). A precaution to have in mind is that administrators need access to the homepage too, just in case if the admin redirection fails. The best side of the process is flexibility, as you’re allowed to change both URLs and to direct users to every page you want. The replacement can be done directly through WordPress shortcuts, or by doing some hard coding of the links.
How to remove the lost/forgotten password link?
Users don’t like it, but it is another matter of precaution that you may really need. Think about it: what if someone hacks your email, gets access to your login information, and resets the password to misuse or even shut down your WordPress site?
Below you have another snippet, that shows how you could remove a lost/forgotten password link from the login screen. All you have to do is to add the following code to the functions.php file:
function remove_lostpassword_text ( $text ) {
if ($text == 'Lost your password?'){$text = '';}
return $text;
}
add_filter( 'gettext', 'remove_lostpassword_text' );
How to modify the login error message?
The login error message is the small text box that appears on the login screen whenever someone tries to access the system using void data. The message is usually simple (Invalid username, for instance), because it alerts users of what is most probably a spelling mistake. However, this could alert hackers too, and will unluckily provide them an accurate explanation of what they need to correct.
The best way to deal with this issue is to replace the unified text with our own, using the following code in the functions.php file:
function login_error_override() {
return ‘Sorry Charlie, those are the incorrect login details.';
}
add_filter('login_errors', 'login_error_override');
How to remove the login page shake?
Sometimes, mistaking the username/password makes the login form shake in order to inform you that your information is wrong. It is a clear signal that something has to be changed.
The feature is fairly functional, but some people find it annoying. If you’re one of them and you want to get rid of this shake option, ‘attach’ this snippet to the functions.php file:
function my_login_head() {
remove_action('login_head', 'wp_shake_js', 12);
}
add_action('login_head', 'my_login_head');
But first…check the ‘Remember Me’ box!
This should be done at least manually because the site will never remember your data without permission. You may want to check it for new passwords, but if you have the same password for all platforms, you won’t even need it.
The good thing is that there is a code that can check the box by default:
function login_checked_remember_me() {
add_filter( 'login_footer', 'rememberme_checked' );
}
add_action( 'init', 'login_checked_remember_me' );
function rememberme_checked() {
echo "";
}
Logging in with your email address
We all know from personal experience that usernames are ‘forgettable material’. We could always benefit from an alternative login option.
In order to enable users to log in with their email (instead of their username), you’d need the following code snippet:
add_action( 'wp_authenticate', 'email_address_login' );
function email_address_login( &$username, &$password )
{
$user = get_user_by( 'email', $username );
if( !empty( $user->user_login ) )
{
$username = $user->user_login;
}
}
Following these simple tips will allow you to fully customize your WordPress from the scratch. Try and enjoy these great options for improving your experience! Also, if you have any suggestions, please feel free to share them through comments!
March 3, 2016
Infographic Unyson – The Best WordPress Framework for Developers
Designing a WordPress theme can be a real challenge and a very time-consuming process. Every WordPress developer is searching for a powerful, free and flexible framework that allows him/her to easily build amazing websites. By using the Unyson framework, you can create and launch a website in only a few hours. Imagine what returns you may have from such opportunity?
Will you spend fewer efforts on delivering more professional results?
Maybe you will earn more by completing several projects in less time?
Or you will finally be able to design that theme you’ve started last year?
Regardless of what you aim to achieve, the possibility of quickly building a website will definitely save you two of the most important resources: time and money.
This idea stood at the basis of our Unyson framework. We wanted to build a solid ground for our future themes and an open source framework that anyone could benefit from. Since Unyson is created by us, ThemeFuse, the web studio that develops integrated WP products since 2009, we focused all our efforts to make it a perfect solution to easily customize websites.
See it in action
Our over 100 000 customers motivated us to create this framework through which you can quickly develop stunning websites. Moreover, if your clients require complex and individual solutions, you can simply build and add your own specific extensions as plugins and easily integrated them with Unyson framework. Just look at this beautiful theme from Alkaweb: Woffice. The guys did a wonderful job customizing the framework with lots of personalized extensions that you can find here.
Unyson Framework is also the key element of our latest theme The Core, which showcases the true power of Unyson’s possibilities:
Quick – Unyson is a plugin. Download, Install and Enjoy;
Easy – Drag & Drop shortcodes makes designing a piece of cake;
Powerful – Impress your clients with your outstanding complex and multi-purpose websites.
Check the below infographic based on Unyson’s customers survey results and the framework’s statistics from 24th of February 2016.
Without any doubts, Unyson framework is beloved not only by us, but also by all the developers that created their great themes based on it. It’s the absolute best choice for creative freelance developers. Enjoy Unyson by downloading it from the Github repository or take a look at the Developer manual and begin to built amazing WordPress themes.