
Mark Sisson's Blog, page 23
June 14, 2022
Backpacking Essentials: Gear, Skills, and More
 Continuing the celebration of National Get Outdoors Month, today we’re covering some essential backpacking gear, skills, and preparations that will help ensure you return from your adventure happy, healthy, and in one piece.
Preparing for a backpacking trip can be intimidating—there’s so much to think about! What will you eat? How much water do you need? What animals might you encounter? Should you go into your local REI and grab one of everything, or can you get away with just a shower curtain for shelter and a change of clothes like the famed Appalachian Trail hiker Grandma Gatewood?
Really, all these questions boil down to: What might kill you out in nature, and how can you successfully avoid those things?
First and foremost, the work you do ahead of time is aimed at staying alive. Beyond that, you want to pack smart and carry no more weight than necessary. Comfort is a consideration, too. Given a choice, even the heartiest among us would prefer not to be too hot, cold, hungry, thirsty, tired, itchy, sunburned, chafed, or blistered. Backpacking is plenty strenuous enough without extra discomforts.
This isn’t meant to scare you off! Backpacking can be truly transformative—a chance to disconnect from the rigors of everyday modern life, explore places you can’t get to by car, test your physical and mental mettle, and reconnect with nature on a soul-deep level. Backpacking is all the more rewarding because it’s challenging. The right groundwork prevents unnecessary suffering.
Backpacking Checklist: What Gear to BringYou can (and probably will) spend months researching the best ultralight gear, drooling over the priciest options, and overthinking everything. It’s terrifically fun and often overwhelming. The following is an overview of what you need.
Protection from the elementsShelter and sleeping arrangementsA way to make fireSun protectionClothing for all possible weather (Opt for breathable, wicking fabrics. Wool is a great option. It comes in different weights for hot and cold temps, and you can wear it for multiple days before it gets smelly.)Protection from wildlifeBug sprayWhistleBear spray, bear canisterFood and hydrationWater and ways to make potable water (filter, iodine tablets)FoodCooking gear (stove, pan, utensils)ElectrolytesNavigationPhysical map of area (not just on your phone)CompassGPS unit (optional but recommended, especially in the deep wilderness)Injury and illnessFirst aid kitMedicinesHygieneToiletries (soap, toothbrush, etc.)Bathroom accommodations (shovel, toilet paper, wag bags if required)MiscellanyHeadlampKnife, multitoolDuct tape, repair kitsBatteries, chargersCash, credit card (in case you need to pop back into civilization and buy food, gear, or a ride back to your car)Tips for BackpackingThere’s much more to backpacking than dropping mega-bucks on gear, lacing up your boots, and heading out.
First, give yourself plenty of time to train. As I said in last week’s training post, backpacking is an endurance event. As with any kind of endurance feat, you need to ready your body (and mind) to tackle the physical (and mental) challenge. Tailor your training to the conditions you are going to face.
Learn how to use your gear. Practice putting up and taking down your tent. Make campfires. Try out your water filter, and learn how to take it apart and clean it. Figure out which of your gear has batteries or requires a charge, and make sure you’ll have enough power for the trip.
Start small and work your way up. Go out for two or three nights before attempting an epic 10-day through hike on the Pacific Crest Trail. If possible, buddy up with a more experienced backpacker who can help troubleshoot these first outings.
Essential Outdoor Skills to MasterDon’t set out without a working knowledge of these skills that can save your life on the trail:
Survival skills: How to build a fire (more than one way, ideally), how to construct a basic shelter.Wildlife encounters: Might you run into snakes, bears, mountain lions, scorpions, moose? Know what to do.Navigation: Be able to read an old school paper map and use a compass. Don’t rely solely on GPS.First aid: Know how to deal with cuts, sprains, burns, broken bones, and stings until you can get to a doctor or hospital if necessary.Plan Your Camping Meals and Trail FoodBringing the right amount of food takes a fair deal of planning, plus some trial and error (another good reason to start with shorter outings). The goal is to bring enough to sustain yourself without carrying more than you need. The typical recommendation is 25 calories per pound of body weight per day, plus or minus 5 calories depending on how strenuous your trip will be.
Of course, if you’re dedicated to a low-carb Primal and keto way of eating, the conventional fueling advice doesn’t exactly apply to you. Whether you hope to stick to your typical foods or add carbs strategically to provide extra oomph, it’s a good idea to practice fueling during your training hikes and shorter backpacking trips. Endurance athletes have a saying: “Nothing new on race day.” In other words, don’t eat anything during a race that you haven’t used in training. That applies here, too. Remember, your favorite at-home snacks won’t necessarily sit well when you’re eight miles into a hot uphill hike with a heavy pack. Experiment with hydration and electrolytes while you’re at it.
Try out a few meal options before you go, too. It’s such a bummer to sit down to a much-anticipated dinner at the end of a long day only to discover that you absolutely detest the dehydrated meals you brought.
Here are some backpacking meal and snack ideas to get you started.
Get Excited!Adventure awaits! And yes, there are a lot of details to nail down before you go, but the planning can be fun. Enlist the help of more seasoned backpackers. Avail yourself of their wisdom. Learn from their mistakes. Maybe you can even borrow some gear to try before you buy.
Be prepared, but try to not overthink every decision. Don’t get so bogged down in the minutia (“Should I get the trekking poles that weigh one ounce less but are only rated 3.5 stars?”) that you’re a hot mess of stress by the time your trip rolls around. Remember, this is supposed to be fun.
Anyway, overthinking won’t help. Every trip will be a learning experience. You’ll discover things you like and things you wish you had done differently. No matter how prepared you are, there will be surprises. Expecting the unexpected is part of the adventure. Resolve here and now to roll with the punches, and you’ll have a much better experience.
Now get out there and do something epic!
Backpacking newbies – what are your most burning questions?
Backpacking veterans – what’s your best piece of advice?
(function($) { $("#dfSK90c").load("https://www.marksdailyapple.com/wp-ad..." ); })( jQuery ); 
The post Backpacking Essentials: Gear, Skills, and More appeared first on Mark's Daily Apple.


June 10, 2022
New and Noteworthy: What I Read This Week—Edition 181

Research of the Week
84% diabetes remission using an app.
The vast majority of “grains” fed to livestock are inedible to humans.
Fasting is well-tolerated and helpful in type 2 diabetics.
Could low-dose arsenic exposure be hormetic?
The combo of high fat and high fructose is particularly bad for glucose tolerance.
New Primal Kitchen PodcastsPrimal Kitchen Podcast: Becoming Unstoppable with Bethany Hamilton
Primal Health Coach Radio: Kayleigh Christina and Danielle Gronich
Media, SchmediaNew Zealand plans on counting (and charging farmers for) cow and sheep burps.
Nice coverage of a different path to weight loss than counting calories.
Interesting Blog PostsWhy wasn’t the steam engine invented earlier?
What’s American cheese, really?
Social NotesSame.
It’s true.
Everything ElseIs Beyond Meat even more of a scam than we already knew?
Avoiding artificial fragrances is a no-brainer.
Things I’m Up to and Interested InThe son also rises: Despite being discriminated against and having their estates taken, the grandchildren of China’s pre-revolution elite are doing very well for themselves.
I believe it: School shooting drills do little to increase safety but increase depression and mental unwellness.
Interesting study underway: What effect will exogenous ketones have in colon cancer patients?
Love the language here: Plant-based food stocks lack sustainable finance.
Interesting research: The origin of the chicken.
Question I’m AskingHow is inflation treating you?
Recipe CornerAir fryer salmon with sriracha honey glaze.Meatballs in creamy tomato sauce.Time CapsuleOne year ago (Jun 4 – Jun 10)
Sprinting, Jumping, Losing Body Fat, and Cultivating Gratitude —What it’s all about.Revisiting Sunscreen —All about sunblock.Comment of the Week
“Re: dealing with food price rises… buying fewer of the “treats” that we really don’t need. Otherwise, doing what we’ve been doing. Eating up the cow we bought in November. Eating the eggs that our ducks lay. Eating greens most of the year from the garden or our attached greenhouse. Saving money elsewhere by heating with wood that we cut and split and powering the AC with solar panels on hot days. Yes, we are lucky but we made some of our luck.”
-“We made some of our luck”: exactly!
(function($) { $("#dfqGS74").load("https://www.marksdailyapple.com/wp-ad..." ); })( jQuery ); 
The post New and Noteworthy: What I Read This Week—Edition 181 appeared first on Mark's Daily Apple.

June 9, 2022
Three Animal Movements for Strength and Mobility
Today my pal Ryan from GMB Fitness is back with part 2 of his strength and mobility series. Check out part 1 here.
 What if you could spend a few minutes per day using nothing but your body weight to build functional upper body strength, train your core, and improve your hip mobility? No equipment necessary, and no gym membership, either.
It might sound too good to be true, but you can. We’ll show you the exact animal movements you need and how to do them. We’ll cover three specific exercises: the Bear, Monkey, and Frogger. They’re all similar in that they contribute to full body strength, control, and mobility, but they serve you in different ways.
Try These Three Animal Movements for Strong Shoulders, a Stable Core, and Flexible HipsWhy should you walk around on your hands and feet like an animal? To start, it’s surprisingly good for you.
This form of movement is called locomotion because you’re moving your body through space. Walking is a good example of locomotion. We use animal movements due to the stimulus it provides for the entire body and because it’s way different from anything else you do during your day.
For most of the day, you’re in the typical upright position with your head on top of the body. When you get down on all fours, you’re actively getting out of this posture and into a novel one where you’re inverted and your head is hanging down toward the ground.
For instance, look at Ryan’s head position here doing the Bear:

Inverting yourself helps load your shoulders and provides traction for the spine. That allows for some decompression of the spine and neck. When you start to move around with intention, you will notice some relief in tension that we all tend to hold in our back and neck.
Another positive aspect of getting inverted is the shift in body position allows for a change in circulation and respiratory responses, counteracting a lot of the sitting we’re doing on a daily basis.
When you do these movements regularly, you’ll build a strong upper back and shoulders, which carries over to activities that require any amount of upper body strength. You’ll also strengthen your core and improve your stability as you’re forced to balance yourself while you work through these exercises.
Here’s exactly how to do each animal movement.
Getting Started with Bear Walks

The Bear loads your shoulders and upper back, allowing you to build strength as you get comfortable with the movement. It also gets you into spinal extension and allows for some decompression of the spine in the inverted position.
Another benefit is the hamstring and calf flexibility that will come from doing the movement more regularly. As you walk back and forth, you’ll work on core stabilization to maintain balance and keep from falling over.
The next movement that makes sense to move onto from here is the Frogger.
Stronger, More Mobile Hips with the Frogger

The Frogger, similar to the Bear, is good for the shoulders and upper back because you’re stabilizing your bodyweight with your hands. But because it has you in the deep squat position, you’re simultaneously working on your hip strength and mobility.
Once you’re comfortable with the Frogger, the Monkey is another good one to try.
Test Your Core and Upper Body Strength with the Monkey

Repeat the movement in the opposite direction. Like the Bear and Frogger, the Monkey is strengthening your spine and encouraging core stability as you move from side to side. It’s also good for your shoulder and wrists as you balance yourself with your hands throughout the movement. Due to the squat position, you’ll also be working on hip strength and mobility as well.
See the full movements on YouTube
The best way to do these movements is to set a timer for anywhere from 2 to 5 minutes each and work through them doing as many reps as you can safely and with good form. You’re free to take as many breaks as you want. We really want you to focus on getting comfortable with the movements and doing them as best you can. We are more concerned with quality reps as opposed to breaking form and doing as much as you can in the time period.
Animal Movements Make You Strong, Mobile, and AthleticDepending on your primary form of training, the way you use animal movements might differ. You can use them as part of your warmup before starting your gym sessions, or you can do them as a stand-alone workout at home.
At GMB, we use these animal movements as a way to create strength, mobility, and to build full body control for more athletic movement.
To get more animal-based movement in, check out GMB’s free 15-minute Mobility Boost. You can use it as a warm-up, or a way to destress and loosen up after a long day.
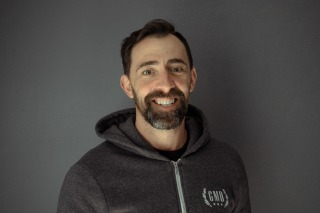 After a training accident ended his competitive gymnastics career, Ryan moved to Japan and competed in various martial arts until another injury made him reevaluate his priorities in life. As Head Coach at GMB Fitness, his mission is to show everyone that you can define your own fitness as a sustainable and enjoyable part of your life. You can follow GMB Fitness on Facebook, Twitter, Instagram, and YouTube.
(function($) { $("#dfpYEaM").load("https://www.marksdailyapple.com/wp-ad..." ); })( jQuery );

The post Three Animal Movements for Strength and Mobility appeared first on Mark's Daily Apple.

June 8, 2022
How and Why To Start Rucking
 I’ve often said that walking is the human condition, but I’d like to amend that to be more accurate: loaded walking—or rucking—is the human condition. Normal unloaded walking is an important part of being an active, able human and lays the ideal foundation for a healthy fitness level. However, it can and should be elevated with occasional (or regular) walking while bearing weight.
For example, when hunting-gathering hominids walked the 12 miles back from a successful hunt, they carried the 40-pound haunch of the antelope on their shoulders—or the woven basket full of tubers, fruits, and honeycomb. When Roman legionnaires marched 18.5 miles in a day they also carried a pack weighing 45 pounds. Then they proceeded to build a defensive fort for two hours. When kids walked to school (before the ubiquity of miles-long SUV-laden drop off lines), they wore bags full of books.
Hell, the entire premise of obligate bipedalism is that it lets you walk while carrying things–tools, building materials, shelter materials, weapons, food, meat, foraged plants, and roots. These are all essential objects to be carried by bipedal humans, all increasing the pull of gravity that you must then resist.
Why You Should RuckToday we load our food into car trunks and drive it home—or, worse, we have it delivered to our doorstep. We drop our kids off at school and pick them up. We drive to manicured trailheads, walk for miles, and have our air-conditioned car waiting to take us back home with a smoothie stop along the way. We park at campsites and complain about the 100-yard walk in.
Now, these aren’t “bad,” but they are novel environments to the human genome that make us weaker and more vulnerable to stressors in general. As with everything, if we want to get better, stronger, and healthier despite modern comforts, we have to impose arbitrary and artificial boundaries on ourselves. One great way to do that and replicate the ancestral loaded walking environment, is to go rucking. Rucking is wearing a weighted backpack while going for walks and hikes. That’s it. And when you ruck, you’ll start seeing some real benefits.
Rucking builds grit.It’s a total body workout that makes you stronger, fitter, faster, and everything else, but lots of exercises do that. Heck, almost all of them do. Rucking builds that intangible quality I can only describe as grit or toughness. Because rucking is hard.
Rucking makes you stronger.You are moving under added weight—the oldest recipe in the book for getting stronger.
A rucking workout is a great way to enhance cardio without increasing speed.It’s sort of a low/high intensity workout. It’s high intensity because you’re bearing more weight. It’s low intensity because you’re moving at walking pace. Particularly uphill/downhill rucking is a fantastic cardio workout and, if you do it carefully, easier on the joints than you might think.
How to RuckIf you stopped reading right now and just went out wearing a heavy backpack on walks and hikes, you’d probably be okay. But there are some extra details and tips I can give that you might find helpful.
1. Get a rucksackYou can ruck with any sturdy backpack filled with rocks, sandbags, books, or weights. But if you’re really serious about it, I’d recommend a devoted rucking bag. These are solid backpacks called rucksacks designed to handle and distribute heavy loads across the body. They usually have proprietary weights that fit perfectly in the rucksack, so that the load is balanced and even.
The best-regarded brand is Go Ruck. It’s the only one I can recommend because it’s the only one I’ve ever tried, but I’m sure there are others you can use.
2. Start small—5-10 pounds less than you think you can handleYou can always add more weight the next time, but if you get in deep water with too much weight, you’ll have a bad time making it back.
3. Choose the right routeA good rule is to start rucking on a walking or hiking route you could do in your sleep. Choose one that’s already easy for you unweighted and that you enjoy doing. Don’t consider it to be a “workout.” Afterward, you can make it harder.
4. Perfect your gait and walking techniqueAny small perturbations to your walking technique or gait will be magnified by the added weight, as will any damage to your joints or strains to your muscles.
Remember, rucking is loaded walking. Don’t run. Regular running with 30-40 pounds on your back is a recipe for injuries. It won’t happen to everyone, but it happens to enough people that it’s not worthy testing your luck. It’s far better to walk with weight and save the running for unweighted outings.
5. Don’t overdo itRucking is training; it’s not an event. When you train for anything, you don’t want to go to failure. You don’t want to leave everything on the field. Going all out like that is for competition (or life and death situations). Training is to make you stronger so when those serious situations occur, you can handle them. Leave some in the tank.
6. Gradually increase your weightRemember to start small and once you feel comfortable, increase your weight.
Beginners: 10-15 pound ruck along a route that you’ve done many times before comfortablyIntermediate: 20-30 pound ruck along a route that you’ve done many times before comfortablyAdvanced: 30-50 pound ruck along a route that you’ve done many times before comfortably7. Tackle hillsI find that rucking uphill (and then downhill) is an incredible workout. Surprisingly, it feels better and more productive than rucking on flat ground.
Rucking AlternativesYou don’t necessarily have to buy a rucking backpack, or even wear a backpack at all. There are other options for loaded walking:
Carry a large tree branch or log across your shoulder: The best part of this is that they’re usually free for the taking on hikes and you don’t have to bring it back home with you. Just find a suitable branch or log and carry it as long as you like and then dump it on the ground when you’re done. This also works with large rocks.Take a friend and a kettlebell with you: When one of you gets tired, hand it off. When the other person gets tired, it’s your turn again. Continue on until the walk is over.Wear a weighted vest: This is a difference type of weight distribution, placing some of the weight across the front of your body, which brings its own challenges.Load a sandbag or duffel bag: You can fill it with sand or gravel and carry it on your walks. Switch from shoulder to shoulder, hug it to your body, carry it like you’re carrying a bride across the threshold, or drape it over both shoulders. Just keep it up there, however you can, and walk with it.Use a normal backpack loaded with weights: This isn’t going to be nearly as comfortable as a rucksack. The straps will dig into your shoulders, there won’t be as much load distributed to the hips, and the bag itself might break. But it does work if you’re in a pinch.If you want to step it up a notch load a loosely-packed sandbag on top of your ruck to take your workout to the next level.
There are dozens of ways to load your walks with weight, the rucksack being the most comfortable and approachable. But the point is: incorporate loaded walks into your schedule and see your fitness skyrocket and your connection to our ancestral past solidify.
Take care, everyone. I’d love to hear about your experiences with loaded walks or rucks.
(function($) { $("#dfuPnyX").load("https://www.marksdailyapple.com/wp-ad..." ); })( jQuery ); 
The post How and Why To Start Rucking appeared first on Mark's Daily Apple.
June 7, 2022
Alternate-day Fasting – Worth Trying?
 The question at hand today is whether alternate-day fasting is a viable, perhaps even preferable, option for folks who want to experiment with intermittent fasting. I’ve written about fasting many times here on the blog because it’s one of my favorite tools for managing insulin, blood sugar, appetite, and (possibly) promoting longevity, but I’ve never dedicated a post to alternate-day fasting per se. Time to remedy that.
I call it a tool, but fasting—having regular, distinct periods of little or no food—is the natural human condition. Or at least it should be. As I like to say, physiologically speaking, some of the best stuff happens when we aren’t eating. Fasting triggers desirable hormonal responses, reduces oxidative damage, promotes autophagy, and offers a mental challenge.https://pubmed.ncbi.nlm.nih.gov/16011... Of course, in today’s food-rich environment, most people eat regularly for upwards of 16 or 18 hours every day. Eating in a 6- or 8-hour window, much less going 24 hours or more without food, is rare.
For the most part, I’m agnostic about the optimal fasting schedule. Whether someone prefers time-restricted eating like the popular 16:8 or 18:6 protocols, a weekly 24-hour fast, semi-annual prolonged fasting of three days or longer, or eating WHEN (when hunger ensues naturally) is a matter of personal taste. They each have pros and cons, but none so compelling that I’d say one is clearly best for everyone. Since a lot of people seem inclined to try alternate-day fasting, it deserves a closer look here.
What Is Alternate-day Fasting Exactly?There are two broad categories of alternate-day fasting (ADF):
True ADF is where you skip entire days of eating. Eat one day, don’t eat the next. Simple, not necessarily easy. With this kind of ADF, you’ll be doing 36-hour fasts (dinner one day to breakfast two days later) every other day. Maybe even longer.
Modified ADF is where you eat every day but alternate between days where you eat normally and days where you significantly restrict calories. The general rule is to consume 25 percent of your typical daily calories. If you usually eat 2,400 calories, your week would look like this:
Day 1: 2,400 calories
Day 2: 600 calories
Day 3: 2,400 calories
Day 4: 600 calories
Day 5: 2,400 calories
Day 6: 600 calories
Day 7: 2,400 calories
Beyond that, anything goes. You can pair ADF with any way of eating—Primal, keto, vegan, carnivore, even SAD (though I wouldn’t recommend it for obvious reasons). There aren’t any rules about when or how often you eat on your regular eating days, but the idea is to consume the same number of calories you’d eat for weight maintenance, perhaps a bit more. Assuming you don’t go hog-wild, you’ll end up in a pretty hefty caloric deficit even while eating normally half the time.
There are also a few specific variations in ADF:5:2 fasting is probably the most well-known. This is akin to modified ADF, but instead of eating in a deficit every other day, you pick two days per week, usually non-consecutive, to restrict calories.Eat Stop Eat, the brainchild of Brad Pilon, is a type of modified ADF where you do one or two 24-hour fasts per week. Once or twice per week, you eat dinner one day and then not again until dinner the next day (or breakfast to breakfast, lunch to lunch, whatever you prefer).The Every Other Day Diet was devised by Krista Varady, PhD, currently a Professor of Kinesiology and Nutrition at the University of Illinois, Chicago, and the author of dozens of scientific papers on the topic of fasting, plus a popular book of the same name. This is your typical modified ADF approach with one notable difference: you’re allowed to eat ad libitum (as much as you want) on the eating days. According to Varady, most people still end up in a caloric deficit and lose weight even with “feast days.” Some readers of her book, The Every Other Day Diet, beg to differ. However, she’s had proven success with this method in her academic work.Benefits of Alternate-day FastingPossible benefits of ADF include:
Lower fasting insulinhttps://pubmed.ncbi.nlm.nih.gov/29419... https://pubmed.ncbi.nlm.nih.gov/34494... (but inconsistent effects on insulin sensitivity)Lower triglycerides (plus LDL and total cholesterol if you go for that)https://www.ncbi.nlm.nih.gov/pmc/arti... blood pressurehttps://www.frontiersin.org/articles/... in adipokines involved in systemic inflammation and cardiovascular diseasehttps://link.springer.com/article/10.... ketosisIf it sounds like I’m hedging my bets here, that’s because there’s no standardization with how researchers use the term “alternate-day fasting.” There’s a lot of promising data, but it’s hard to generalize from one study to the next when one uses an Eat Stop Eat design and the other uses 5:2 with two consecutive fasting days. The metabolic effects may not be the same.
Researchers are also still trying to tease out whether any benefits are unique to fasting or if they’re mostly due to the caloric restriction inherent in these types of fasting protocols. It’s very much an open question at this point, although I suspect there’s more to fasting than mere calorie restriction.
What about weight loss? Can alternate-day fasting help you lose weight?Yes. This has been demonstrated in multiple studies using different styles of ADF and different populations. Not to mention all the anecdotal evidence.
The more interesting question is whether you’re likely to lose more weight—or lose weight more easily—with ADF. The available studies seem to suggest that while you might lose more weight with ADF in the short term,https://pubmed.ncbi.nlm.nih.gov/34494... fasting and regular calorie-restriction dieting (aka “continuous calorie restriction”) eventually even out when calories are matched.https://www.ncbi.nlm.nih.gov/pmc/arti... As for ADF compared to other types of fasting like daily time-restricted eating, there aren’t enough head-to-head studies to draw conclusions one way or another.
“But wait,” you say, “I couldn’t lose any weight when I tried to diet until I started fasting.” I hear this a lot. Just because ADF might not have a strong weight-loss advantage on average doesn’t mean it wasn’t advantageous for you. When it comes to losing weight, dietary adherence plays a big role.https://www.ncbi.nlm.nih.gov/pmc/arti... Many people find it easier to stick to a schedule where they don’t have to restrict food every single day.
Downsides of Alternate-day Fasting?To do ADF right, you have to track your food, which can be onerous. Folks who don’t want to weigh and measure every bite can try the Eat Stop Eat approach, which doesn’t limit what you can eat on your fasting days (or, more precisely, at the end of your 24-hour fasts).
It’s also not easy to only eat 500 or 600 calories, especially if you want to break it up into multiple meals or snacks. You’ll want to limit fat intake since fat is the most calorically dense macronutrient at nine calories per gram. Once you factor in adequate protein, there’s little room for anything else. I’d suggest eating just one or two meals on fasting days and loading up on low-calorie, non-starchy vegetables like leafy greens. Sipping on bone broth can help stave off hunger too, but there will be hunger, especially at the beginning.
One potential concern is the preservation of lean mass. Across four studies with overweight/obese adults, dieters lost more lean mass on average with ADF than with continuous calorie restriction (regular dieting).https://pubmed.ncbi.nlm.nih.gov/30206... These studies ranged from 12 to 30 weeks in duration, and participants ate a decent amount of protein. However, none of the studies provided exercise instructions, and it’s not clear whether any of the participants engaged in resistance training.
Bottom Line: Alternate-Day Fasting Yay or Nay?Overall, the benefits of ADF seem to be in line with the benefits of fasting more generally. From what I can tell, the biggest advantage of ADF compared to daily time-restricted eating or calorie-restriction diets is that some people find it easier to stick with.
The findings regarding lean mass give me pause, but not enough to write off ADF at this point. While the four studies were fairly consistent, there was also a lot of variability between participants. Whenever you’re eating in an energy deficit, you want to make sure to eat plenty of protein and lift heavy things to protect your muscles. That’s just best practice no matter what type of fasting you’re doing. That said, the strict ADF I outlined above lands you in a 33 percent energy deficit, which is pretty big—perhaps too big to be safely sustained long term. We could use more human studies here to tease all this out.
And speaking of best practices, what you eat during your non-fasting days does matter. Even though ADF doesn’t strictly require it, eating the same nutrient-rich, whole foods whether or not you’re practicing ADF just makes sense.
Finally, the same rules also apply regarding who shouldn’t fast: people who are already overstressed and those with high energy needs like competitive athletes, kids and teens, and people who are pregnant or breastfeeding.
All right, what do you think? Yes or no, are you interested in alternate-day fasting? If you’ve already tried it, how did it go?
Related Posts from Mark’s Daily AppleHow to Intermittent Fast and Which Type of Fasting Is Right For You
The Myriad Benefits of Intermittent Fasting
Fasting versus Carb Restriction: Which Works Better for What Scenarios
7 Tips and Considerations for Eating One Meal a Day
(function($) { $("#df8yxPZ").load("https://www.marksdailyapple.com/wp-ad..." ); })( jQuery ); 
References https://pubmed.ncbi.nlm.nih.gov/16011467/https://pubmed.ncbi.nlm.nih.gov/29419624/https://pubmed.ncbi.nlm.nih.gov/34494373/https://www.ncbi.nlm.nih.gov/pmc/articles/PMC8683964/https://www.frontiersin.org/articles/10.3389/fnut.2020.586036/fullhttps://link.springer.com/article/10.1186/1743-7075-9-98https://pubmed.ncbi.nlm.nih.gov/34494373/https://www.ncbi.nlm.nih.gov/pmc/articles/PMC4924195/https://www.ncbi.nlm.nih.gov/pmc/articles/PMC7183822/https://pubmed.ncbi.nlm.nih.gov/30206335/
The post Alternate-day Fasting – Worth Trying? appeared first on Mark's Daily Apple.

June 6, 2022
Air Fryer Pickles Recipe (Primal, Paleo, and Keto)
 Last week we gave you a recipe for air fried green beans, and today we’re back again with another fun and oh-so-easy way to use your air fryer: fried pickles!
That’s right, you can “fry” pickles for a crunchy, salty snack in minutes. This particular fried pickle recipe skips the questionable fry oil and batter in favor of a breading made with Primal-friendly ingredients. Whip up a batch of these, get out the Trivial Pursuit, and host an at-home pub quiz with gluten-free beer or these Primal mocktails for the abstainers.
Here’s the recipe:
How to Make Fried Pickles in the Air FryerServes: 4
Time in the Kitchen: 20 minutes
Ingredients1 cup sliced pickles (see Tips below)1 egg1/4 cup almond flour2 Tbsp tapioca starch3/4 tsp onion powder1/2 tsp garlic powder1/2 tsp paprika1/2 tsp black pepper1/4 tsp salt1/4 tsp turmericAvocado oil sprayDipping ideas: Primal Kitchen Ketchup, Mayo, Ranch Dip, Buffalo Ranch Dip Directions
In a small bowl, mix together the tapioca starch and spices. Add half of this mixture to the almond flour in another bowl. In a third bowl or dish, whisk together the egg.
Dry the pickles well on a towel to remove any excess moisture. Spray your air fryer basket with avocado oil.
Toss the pickles in the tapioca starch mixture. One at a time, use a fork to dip each pickle slice into the beaten egg, then dredge the slice in the almond flour mixture. Place the breaded pickle in the basket.

Repeat with the remaining pickles. Lightly mist the tops of the pickles with avocado oil spray.
Place the basket into an air fryer set to 375 degrees Fahrenheit (190 degrees Celsius) for about 10 minutes, or until the outside is golden brown. If needed, air fry for an additional 1 to 2 minutes more to achieve a nice golden brown exterior. Allow them to cool slightly before removing them from the basket.

Serve with your favorite Primal Kitchen dips and condiments!

(function($) { $("#dfaB93R").load("https://www.marksdailyapple.com/wp-ad..." ); })( jQuery ); 
 Air Fryer Pickles Recipe (Primal, Paleo, and Keto) Author: Mark's Daily Apple
  Total Time: 20 minutes
  Yield: 4 servings [image error] Print Recipe [image error] Pin Recipe Description
 Air fried pickles are a crunchy, salty snack or side dish. This version skips the questionable fry oil and batter in favor of a breading made with paleo- and Primal-friendly ingredients.
Ingredients1 cup sliced pickles (see Notes)
1 egg
1/4 cup almond flour
2 Tbsp tapioca starch
3/4 tsp onion powder
1/2 tsp garlic powder
1/2 tsp paprika
1/2 tsp black pepper
1/4 teaspoon salt
1/4 teaspoon turmeric
Dipping ideas: Primal Kitchen Ketchup, Mayo, Ranch Dip, Buffalo Ranch Dip
InstructionsIn a small bowl, mix together the tapioca starch and spices. Add half of this mixture to the almond flour in another bowl. In a third bowl or dish, whisk together the egg.
Dry the pickles well on a towel to remove any excess moisture. Spray your air fryer basket with avocado oil.
Toss the pickles in the tapioca starch mixture. One at a time, use a fork to dip each pickle slice into the beaten egg, then dredge the slice in the almond flour mixture. Place the breaded pickle in the basket. Repeat with the remaining pickles. Lightly mist the tops of the pickles with avocado oil spray.
Place the basket into an air fryer set to 375 degrees Fahrenheit (190 degrees Celsius) for about 10 minutes, or until the outside is golden brown. If needed, air fry for an additional 1 to 2 minutes more to achieve a nice golden brown exterior. Allow them to cool slightly before removing them from the basket.
Serve with your favorite Primal Kitchen dips and condiments!
Every air fryer is different and therefore cooks slightly differently. Refer to your manual for details.
Use savory vinegar-based pickles for this recipe. Avoid pickles with sugar in the brine as it will negatively affect their overall taste.
Prep Time: 10 minutesCook Time: 10 minutes Category: Side dish
 Method: Air fryer Nutrition Serving Size: 1/4 of recipe Calories: 84 Sugar: <1g Sodium: 389mg Fat: 4g Saturated Fat: <1g Trans Fat: 0g Carbohydrates: 7g Fiber: 1g Protein: 4g Cholesterol: 47mg Net Carbs: 6g
 Keywords: Air fryer, Air fried pickles
 Did you make this recipe?
 Share a photo and tag Mark's Daily Apple — we can't wait to see what you've made!
The post Air Fryer Pickles Recipe (Primal, Paleo, and Keto) appeared first on Mark's Daily Apple.

June 3, 2022
New and Noteworthy: What I Read This Week—Edition 180
Research of the Week
Controlling glucotoxicity might not be enough in diabetes.
To spike brain derived neurotrophic factor, intense exercise wins.
Imagine this prehistoric giraffe relative with a helmet for a skull and a neck joint morphology explicitly adapted to high velocity movement swinging its thirty pound bowling ball of a head at you.
Resveratrol has no effect on metabolic health in overweight type 2 diabetics.
The difference between exogenous and endogenous ketosis.
Seems that masks didn’t do much good in schools.
Sweat protects against Lyme disease.
New Primal Kitchen PodcastsPrimal Health Coach Radio: Kathleen Trotter
Media, SchmediaI support moccasins’ status as formal wear.
Wait, are people not doing this to identify their friends?
Interesting Blog PostsA double-edged sword? As a society increases focus on equality and individual self-determination, it suffers from higher rates of mental illness.
Social NotesI appeared on the Health Coach Conversations podcast.
Everything ElseNice little symbiotic relationship.
Things I’m Up to and Interested InUncharted territory: The labor situation at US ports might get a little interesting next month.
A true classic: The Oiling of America.
Interesting news: Spanish celebrities, business leaders (and even a pharma exec) in trouble for buying fake vaccine cards.
More of this, please: Luring predatory birds to farms to take care of pests.
Great potential here: Personalized diet based on insulin phenotype.
Question I’m AskingHow are you getting ahead of potential food price hikes?
Recipe CornerGolden cauliflower fried rice.Authentic jerk chicken.Time CapsuleOne year ago (May 28 – Jun 3)
The Definitive Guide to FODMAPs—All about them.Three Breathing Exercises to Improve Vagal Tone and Reduce Stress in a Flash —Try them.Comment of the Week
“Mark,
Thank you for you latest Sunday Post. This post hit close to home.
I have always been a bit of an empath and years ago after another major tragedy, I found myself physically and chronically ill after I was unable to separate myself from this event. After years of therapy and alternative medical intervention I realized I needed to find ways to distance myself from what what going on around me.
While my husband can listen to and read the news all day, every day without any ill effects, I cannot, and I am now able to advocate for myself acknowledging this difference.
Disconnecting has been incredibly healing. I now have more time to spend with my family and do things that help improve my resilience, mentally and physically, which is what I need in order to continue my career as an educator to young children, and as a mother.”
-Glad to hear you’ve figured out what works for and helps you, Katie.
(function($) { $("#dfhnKNe").load("https://www.marksdailyapple.com/wp-ad..." ); })( jQuery );
The post New and Noteworthy: What I Read This Week—Edition 180 appeared first on Mark's Daily Apple.

June 2, 2022
Ask a Health Coach: Emotional Eating and Food Guilt
Hey folks, Board-Certified Health Coach Erin Power is here to answer your questions about comfort eating and eating when stressed. If you’re struggling with this, you’re not alone! We’re here with tips and support for cultivating a healthy relationship with food during stressful times. Have a question you’d like to ask our health coaches? Leave it below in the comments or over in the Mark’s Daily Apple Facebook group.
Michele asked:
“I always end up comfort eating when worried or stressed, and I’m always worried or stressed! After a hard day, I overeat pizza or other food that makes me feel like crap and gain weight. Then I feel guilty, can’t sleep, and worry more! How do I stop doing this?”
 The pull towards soothing ourselves with food during stressful times is real. So, unfortunately, are the consequences of eating food that makes us feel worse rather than better.
Chronic stress itself can contribute to cravings and unwanted weight gain because it deregulates and taxes the nervous and endocrine systems, including through overstimulation of stress hormones such as cortisol and adrenaline. To make matters worse, people who are chronically stressed are more likely to reach for foods high in sugar, carbs, and saturated fat.https://pubmed.ncbi.nlm.nih.gov/24123...
To be clear, high-quality, whole-food-based saturated fat is not unhealthy! But combining it with sugar, a large carb load, and excess caloric intake overall can lead to unwanted weight gain, overburden the digestive system, and promote systemic inflammation.
What’s more, food that makes us “feel like crap” is generally not high quality or whole-food-based. It’s far more common for people struggling with comfort eating or emotional eating to reach for highly processed food or fast food full of unhealthy trans fats and highly refined, inflammatory seed oils.
And, as you noted, overeating and eating food that makes us feel physically and emotionally unwell absolutely causes additional stress and interferes with sound sleep. This exacerbates chronic stress, systemic inflammation, and unwanted weight gain. Ironically, it also makes us far more likely to engage in more emotional eating the next day—literally feeding an unhelpful cycle.
Asking for HelpFirst, take a deep breath and to know that you’re not alone. Increasing numbers of people are suffering from stress, anxiety, depression, and other forms of mental-emotional challenges. In an effort to cope, many turn to foods and emotional eating habits that make them feel worse.https://www.apa.org/news/press/releas... People with a history of disordered eating are even more vulnerable to falling into this sort of pattern during periods of anxiety and uncertainty.https://www.ncbi.nlm.nih.gov/pmc/arti...
I do want to mention here—for anyone reading—that when eating patterns start to feel out of control to the point of a potential eating disorder, you may want to meet with a licensed therapist or other mental health professional. Same goes for anyone suffering from clinical depression, anxiety, or other serious mental health concerns.
That said, as a Primal Health Coach, I work with many clients who struggle with emotional eating. As a coach, I can assure you that there is hope for stepping out of unhelpful cycles and changing your relationship with food.
By recognizing your pattern around eating and asking for help, you’ve already taken a huge, courageous first step. I’ll share a few others below!
Strategies and Tips for Emotional Eating1. Reframe comfort eating.
One of the first things I suggest is reframing “comfort eating.” Rather than making it synonymous with “emotional eating,” or what some call “eating their feelings,” let’s put a new and improved definition in place.
What if comfort eating means eating food that makes you feel better after eating it? In other words, choosing foods and eating in a way that brings you true comfort!
Part of this is food choice. For that, I recommend stocking your home with healthy, Primal options. It just makes it easier when your environment is set up to help you. And, on the flip side, an easy way to avoid food that makes you feel bad is to not keep it around.
2. Pause and play the tape forward.
This is a great one to do in the moment—either before you’ve “gone too far” or when you catch yourself in the midst of it. This moves the emotional eating moment into the “present tense.” Many times we reflect back on our diet “indiscretions” afterward, awash in disappointment and guilt, which… isn’t often productive.
In these situations, picture yourself overdoing it—whatever that means for you—and notice what happens after. See yourself 10 minutes from now, later as you’re trying to fall asleep, and tomorrow morning. Really take in how your present actions will impact your future self. How do you feel physically, emotionally?
Now picture an alternate scenario—one in which you choose differently and perhaps set food aside for now. Where will that choice lead?
Practice making choices in the moment that you know your future self will feel better about.
3. Breathe and move!
Rather than telling yourself that you can’t have a thing, try saying: “Maybe later, after 10 deep breaths or a 10-minute walk.”
In themselves, walking and deep, slow breathing are excellent strategies for regulating the nervous system and reducing stress and anxiety. You’ll be distracting yourself with calming, grounding activities that connect you to how you feel in your body and mind. This is an excellent way to ride out urges and help cravings move along.
4. Write it out.
Numerous studies have shown the beneficial impact of journaling or “expressive writing” for alleviating physical and mental-emotional symptoms.https://www.cambridge.org/core/journa... Some people also find it helpful to keep a food log as form of personal accountability and adhering to eating goals.
This is more of a long-term strategy, since journaling is most effective when done consistently over a period of weeks or months. Don’t let that dissuade you! Set aside time each morning or evening (even 10 minutes) to put pen to paper or fingers to keyboard.
You can write about how you want to feel and about eating specifically… or just see what wants to come out onto the page. The key thing is to (1) not censor or judge yourself, and (2) offer yourself an outlet to reflect on where you are and where you want to be.
The very act of writing things down can help you shift your relationship with eating over time.
5. Cultivate excitement.
Rather than focus solely on what you want to change or avoid, identify something you can look forward to and even get excited about!
This doesn’t have to be a big thing, and ideally it should be something you can turn to regularly—especially whenever you tend to engage in emotional eating. Perhaps there’s an activity or project you enjoy, a book you’d like to read, or a television show you like to watch. Choose something that you can look forward to AND that will make you feel a sense of comfort and relaxation—both in the moment and afterwards.
6. Get support.
While the above steps offer a solid starting point, I can’t emphasize enough the value of getting support and working with a mental health professional or coach one-on-one.
External accountability truly is a game changer, and we can help you navigate your specific circumstances and challenges. As part of this, we can provide “tough love” when needed but will also answer questions, offer individualized guidance, and above all empower you to take on the most supportive actions for your health and happiness goals. Working with a coach for even a month or two can help you recalibrate, reset, and put a framework for success in place. Visit myprimalcoach.com to learn more and get started.
Do you struggle with emotional eating? Have any tips to share? Drop them and other questions for me in the comments!

(function($) { $("#dfQPa9u").load("https://www.marksdailyapple.com/wp-ad..." ); })( jQuery );
References https://pubmed.ncbi.nlm.nih.gov/24123563/https://www.apa.org/news/press/releases/stress/2013/eatinghttps://www.ncbi.nlm.nih.gov/pmc/articles/PMC7795972/https://www.cambridge.org/core/journals/advances-in-psychiatric-treatment/article/emotional-and-physical-health-benefits-of-expressive-writing/ED2976A61F5DE56B46F07A1CE9EA9F9F
The post Ask a Health Coach: Emotional Eating and Food Guilt appeared first on Mark's Daily Apple.

June 1, 2022
Hiking First Aid: What to Bring, Do, and Know to Stay Safe on the Trail
 There are different degrees of hiking. There’s the kind of “hiking” you do through Golden Gate Park in San Francisco, Central Park in NYC, or Runyon Canyon in Hollywood. You’re outdoors and amidst the trees and foliage and physically active, but it’s not quite roughin’ in. You still have cell coverage, and you can procure an iced coffee within twenty minutes if you have to. For those hikes, you don’t need first aid. You don’t need any special skills other than the ability to ambulate across the landscape.
But there’s real hiking. Hiking more than five miles. Multi-day hiking. Overnight hiking. Backpacking. Hiking in a place where the trail might not be so well-maintained, where you might run into an aggressive animal, where you have to keep your wits about you. For this type of hiking, which is what most people imagine when they think of “hiking,” it’s a good idea to come prepared with first aid: with physical medical supplies and skills and knowledge that will help you enjoy the great outdoors without staying helpless. Because the true allure of hiking is getting out into the wilderness where the niceties and comforts of the modern world no longer apply. We all want a bit of adventure, but we also want to make it back in one piece.
So let’s dig into hiking first aid. I won’t tell you to “bring water” or “snacks” because, well, you’re an intelligent adult who doesn’t need to be told the absolute basics.
Hiking First AidTweezersTweezers are a godsend, but you need both needle tip and broad tip. Needle tip tweezers are excellent for removing ticks—just get as close to the skin as possible and pull straight out—while broad tips are good for removing splinters and thorns.
Adhesive bandages of all sizesAdhesive bandages (or bandaids) of varying sizes are essential for covering up cuts and wounds. Butterfly bandages are also nice for binding wounds that would otherwise need stitches.
BetadineBetadine is an iodine-based antiseptic that cleans wounds and kills germs. A little bottle is great to have on hand so you can spray your cuts and wounds.
Antiseptic wipesClean wounds, sterilize skin and hands and tools. These are just handy to have around.
Medical scissorsIn case you need to cut a bandage or some fabric/clothing, these are indispensable.
Surgical tapeYou never know what you’ll need to tape to your skin.
GauzeUsed to stop bleeding, protect wounds, improve healing, and all that good stuff that helps you overcome bad luck on the trail.
MultitoolGives you just about everything you might need to handle the occurrences that you can’t quite anticipate.
Good knifeA good sturdy knife is always a wise choice on the trail, even if you only use it to whittle a stick to pass the time. You’ll never regret having a knife. This one has a fire starter attached.
Voodoo floss bandsVoodoo floss bands can be used to compress injured limbs, like ankles, wrists, or knees. They provide stability and keep down swelling. Normally used in training, they can be quite handy on the trail as well.
Magnesium oilIn my experience, topical magnesium chloride oil is great for reducing joint pain and inhibiting inflammation. Very helpful in a pinch. Great for cramps.
Make your own by filling a spray bottle with magnesium chloride flakes and adding water, or buy it.
ElectrolytesStaying hydrated requires more than just water. You also need electrolytes, especially if you’re hiking. LMNT is a great powdered electrolyte supplement to keep on hand. Just add to water, shake, and drink to stay hydrated. Snake Juice is another option.
Mustard packetsCramps are debilitating on hikes. They can even be deadly. One of the best cures for cramps is pickle juice, which works, but not because of electrolyte repletion.https://www.ncbi.nlm.nih.gov/pubmed/1... It actually has no real impact on hydration or electrolyte status, and drinking it resolves muscle cramps faster than the gut can absorb it. TRP ion channels in the oropharyngeal region (tongue/mouth/throat) react to something in the pickle juice—probably the vinegar—and short-circuit the excitation of the muscle, blocking the cramp immediately.
Other TRP ion channel activators are found in cayenne pepper, ginger, and cinnamon, and researchers have created a blend of extracts from all three plants that shows efficacy against muscle cramps.https://www.medpagetoday.com/meetingc... It’s called Hot Shot.
Basic yellow mustard also works. To really kick it up a notch you can add cayenne pepper and ginger to the mustard. The combo of mustard and spicy/gingery can be an instant fix for muscle cramps.
Skills and Best PracticesHave a map.Most places I find aren’t giving out paper maps anymore of the hiking area. If they’re not, you can buy maps of the area or take a picture of the map at the trailhead with your phone before starting so you always have something to refer to.
Take a compass (or have a compass on your phone) and know how to read a map.A compass and a map go very well together. If you need it, this is a comprehensive explanation of how to use the two together to orient yourself.
Charge your phone.Go into the hike with a fully-charged phone. Keep it charged by keeping the phone on airplane mode.
Walking downhill correctly.Don’t walk downhill with your pelvis tucked and all the weight on the balls of your feet, knees and quads. Instead, keep the weight on your entire foot/heel. Break at the hips slightly to accept the bulk of the load on your glutes, hamstrings, and hips.
Walking uphill correctly.Take shorter strides and, again, accept the load onto your glutes and hamstrings. The posterior chain is far stronger than the quads and lasts longer without cramping.
Most hikers don’t need to carry a big first aid kit with them all the time. Going for a few miles? You don’t need much of anything. Going for a few hours? Take some bandaids and betadine. Doing a half day hike? Throw in some tweezers and mustard packets. Going overnight? Add some more from the list. This isn’t a definitive list of things you must have on your person at all times once you leave city limits. It represents as complete a list as I could muster for serious hiking.
And remember: this is all “just in case” stuff. For most of your hikes, even the long, intense ones, you won’t dip into the kit at all. It’s just good to be prepared.
(function($) { $("#df514RL").load("https://www.marksdailyapple.com/wp-ad..." ); })( jQuery ); 
References https://www.ncbi.nlm.nih.gov/pubmed/19997012https://www.medpagetoday.com/meetingcoverage/aan/50084
The post Hiking First Aid: What to Bring, Do, and Know to Stay Safe on the Trail appeared first on Mark's Daily Apple.

May 31, 2022
How to Train for Backpacking
June is National Get Outdoors Month. Here at MDA, we’re spending the next couple weeks teeing you up to have your best summer yet in the great outdoors with posts to inspire you to get into nature.
 Today we’re talking about how to train for backpacking. Let’s start with the most obvious question: what IS backpacking? Backpacking is simply multi-day hiking where you carry all your gear on your back.
Say you’re going out for a day hike carrying water, food, and basic survival gear, but you return to your car the same day you set out. That’s not backpacking.
If you’re trekking across the country, but someone else is sherpaing your gear from one sleeping spot to the next, that’s not backpacking either.
In a nutshell, backpacking is essentially a long hike with more gear and more details to think about because you’ll be spending at least one night—but possibly many more—camping out. I think of backpacking as a kind of endurance sport. As with any endurance sport, you want to train for your event. You probably wouldn’t enter a half-marathon this coming weekend with minimal or no training. You could, but it would hurt a lot less, and your chance of success would be significantly greater, if you took the time to train. Same goes for backpacking.
The good news is, if you already have a solid fitness base, you are well on your way. Now you just need to tailor your training to get ready for your backpacking expedition. The particulars depend on how long you’ll be out there, how much weight you’ll be carrying, your current fitness level, and the type of terrain you’ll encounter. Still, the general principles remain the same. You’ll need to prepare for:
Time on your feetCarrying weightWalking over uneven groundClimbing (going up and down hills, stepping over logs, etc.)Lower body strength is key, of course, but so are core, upper back, and shoulder strength, ankle and hip strength and mobility, balance, and, of course, stamina. Here’s how to begin.
Training for Backpacking: Getting StartedLet’s start with some general advice before moving on to some specific exercises you can use to prep your body for the adventure ahead.
First and foremost, give yourself enough time to prepare. Make a training plan commensurate with the demands of your trip. Experienced, fit hikers can probably set out on a short one- or two-night outing with minimal training. If you’re mostly sedentary and planning a seven-night thru-hike (point-to-point backpacking trip), you’ll need considerably more lead time—several months or more.
Don’t just focus on strength or endurance. I said it already, but it bears repeating: proper training covers strength, endurance, mobility, and balance. Think about stepping up onto a rock or fallen tree, crossing a river by hopping from one wobbly stone to the next, walking uphill over loose shale. That’s a lot of balancing on one foot and keeping yourself upright as nature and gravity conspire to pull you down. Single-leg exercises, BOSU balls, wobble boards, and the like can be invaluable training tools.
Do at least some of your training in the same gear you plan to use on your trip. Make sure your shoes don’t cause blisters and your sports bra doesn’t chafe. Wear your backpack on shorter hikes.
Try to replicate the environment you’ll encounter. You probably can’t do all your outdoor training in the exact same conditions you’ll encounter during your adventure, especially if you’re traveling to a different part of the world. That’s fine, but do your best to anticipate factors that are likely to impact your experience. If your trip will take you up the side of a mountain, find hills to train on, or plan to do a ton of step-ups at the gym. Do you need to train for hot or cold weather? High altitude? Humidity? The more extreme the environment, the more important it is to prepare accordingly.
Think of yourself as an athlete! It’s easy to get caught up in searching for the best ultralight gear, weighing the pros and cons of various tents and sleeping pads, but your most important piece of equipment is your engine—that’s you! (Part II of this series will talk more about the gear and other considerations.) Remember to test out fueling and hydration during training hikes.
Exercises to Get Ready for BackpackingThe following are a sampling of the types of exercises you can use to get ready for backpacking, but it’s by no means an exhaustive list.
Walking, hiking, ruckingAs a dedicated Mark’s Daily Apple reader, I’m sure I don’t need to convince you that walking is awesome, full stop. Spending lots of time on your feet is also one of the most important things you can do to prepare for backpacking. If you haven’t already made a concerted effort to minimize your sitting and incorporate frequent movement and walking throughout the day, now’s the time to start!
You’ll also want to take some of those walks into nature. Voila, now you’re hiking! Carry a weighted pack, and you’re rucking. Rucking in the woods is fantastic, but also throw on the rucksack to stroll around the block or walk your kids to school. (Mark has a dedicated post on rucking coming soon.)
Gradually increase time, distance, and how much weight you carry. Try to hit different terrains—rocky, sandy, muddy, level, steep. These challenge your body in different ways and can be great for strengthening feet and ankles.
Go super Primal during hikes: pick up logs and rocks along the trail, carry them for a while, then put them down. Check out the ideas here.
Primal Essential MovementsThis isn’t just a shameless plug, I swear! The Primal Essential Movements, plus variations, are perfect for getting ready for your big backpacking adventure.
SquatsAfter walking and hiking, squats are probably going to be your biggest ally. Do as many—and as many different types—as you can. Mix in sets of barbell squats, resistance band squats, and goblet squats, to name a few.
Split squats, where one foot is in front of the other in a lunge position, also challenge your balance, so make these a priority, too. Even better, do Bulgarian split squats where your back foot is elevated.
To further challenge your balance, try one-legged pistol squats or squats with one or both feet on an unstable surface like a BOSU.
Push-ups and Pull-upsWalking for hours at a time carrying a heavy backpack is no joke. Your shoulders, chest, and upper back need to be up to the task.
Working at a computer all day causes tight pecs, rounded shoulders, and forward head posture (aka tech neck). Carrying a pack can exacerbate these issues. This post and this post offer some solutions.
PlanksCore strength is critical for balance and keeping your pelvis and spine in proper alignment. In addition to traditional planks, do side planks and the exercises in this Primal At-home Core workout.
Let me put in a plug here for Pilates, as well. It’s not only great for core strength and mobility, but many of the moves also target various muscles in the upper and lower body. For example, glute bridges are a classic pilates move that is super useful for backpackers.
Step-upsThis is just what it sounds like: stepping up on things. Step up on boxes at the gym or stumps in your backyard. Climb stairs or hit the stairclimber at the gym (just watch your heart rate if you want to keep it aerobic). For some high-intensity work, try Mark’s favorite, the versaclimber.
Once you are ready to add weight, wear a weighted backpack during step-ups for a fantastic workout.
If your expedition involves serious elevation gain, you can use this handy stair elevation calculator to plan some workouts that approximate the feet/meters you need to traverse.
JumpingPlyometric exercises are incredibly effective and efficient for building strength and stamina, and they’re great for those feet and ankles.
These can include:
Box jumps where you use both feet to jump up on an elevated platformSki jumps where you jump laterally (sideways) from one foot to the otherBurpees with a jump at the topSquat jumps where you lower into a squat and explode upward as you standOr any number of alternatives. These videos from the Mark’s Daily Apple YouTube Channel offer tons of ideas:
DeadliftsThere’s arguably no better way to target the hamstrings. Make sure you use proper form to avoid straining your back. Avail yourself of the many deadlift variations to keep things interesting—Romanian, sumo, hex bar, kettlebell—and include one-legged deadlifts to once again work on balance and foot and ankle strength.
Hill sprintsWe’re obviously huge fans of sprinting around these parts. Sprinting uphill has two distinct advantages for backpacking training: (1) lower risk of injury compared to regular (flat) sprints and (2) extra hill work.
Ok, that’s more than enough to get you started. There’s a good chance you’re already including a number of these moves in your regular workouts, which means you have a good foundation on which to build. I’ll end by mentioning ancestral rest positions. They aren’t exercises per se, but they complement your workouts by building ankle and hip mobility, stretching and strengthening the lower body, and getting you out of that chair, which is doing your body no favors.
That’s it for today. Stay tuned for part II in which we talk gear and more. This post is your sign to get outside today! And let us know in the comments where you like to go hiking and backpacking.
Related posts from Mark’s Daily Apple14 Primal Tips for Better Hiking
Keto on the Trail: What Food to Pack for Primal and Keto Camping, Hiking, and Backpacking
(function($) { $("#dfYa4W3").load("https://www.marksdailyapple.com/wp-ad..." ); })( jQuery ); 
The post How to Train for Backpacking appeared first on Mark's Daily Apple.

Mark Sisson's Blog

- Mark Sisson's profile
- 199 followers

