
Brian Francis's Blog, page 9
December 17, 2014
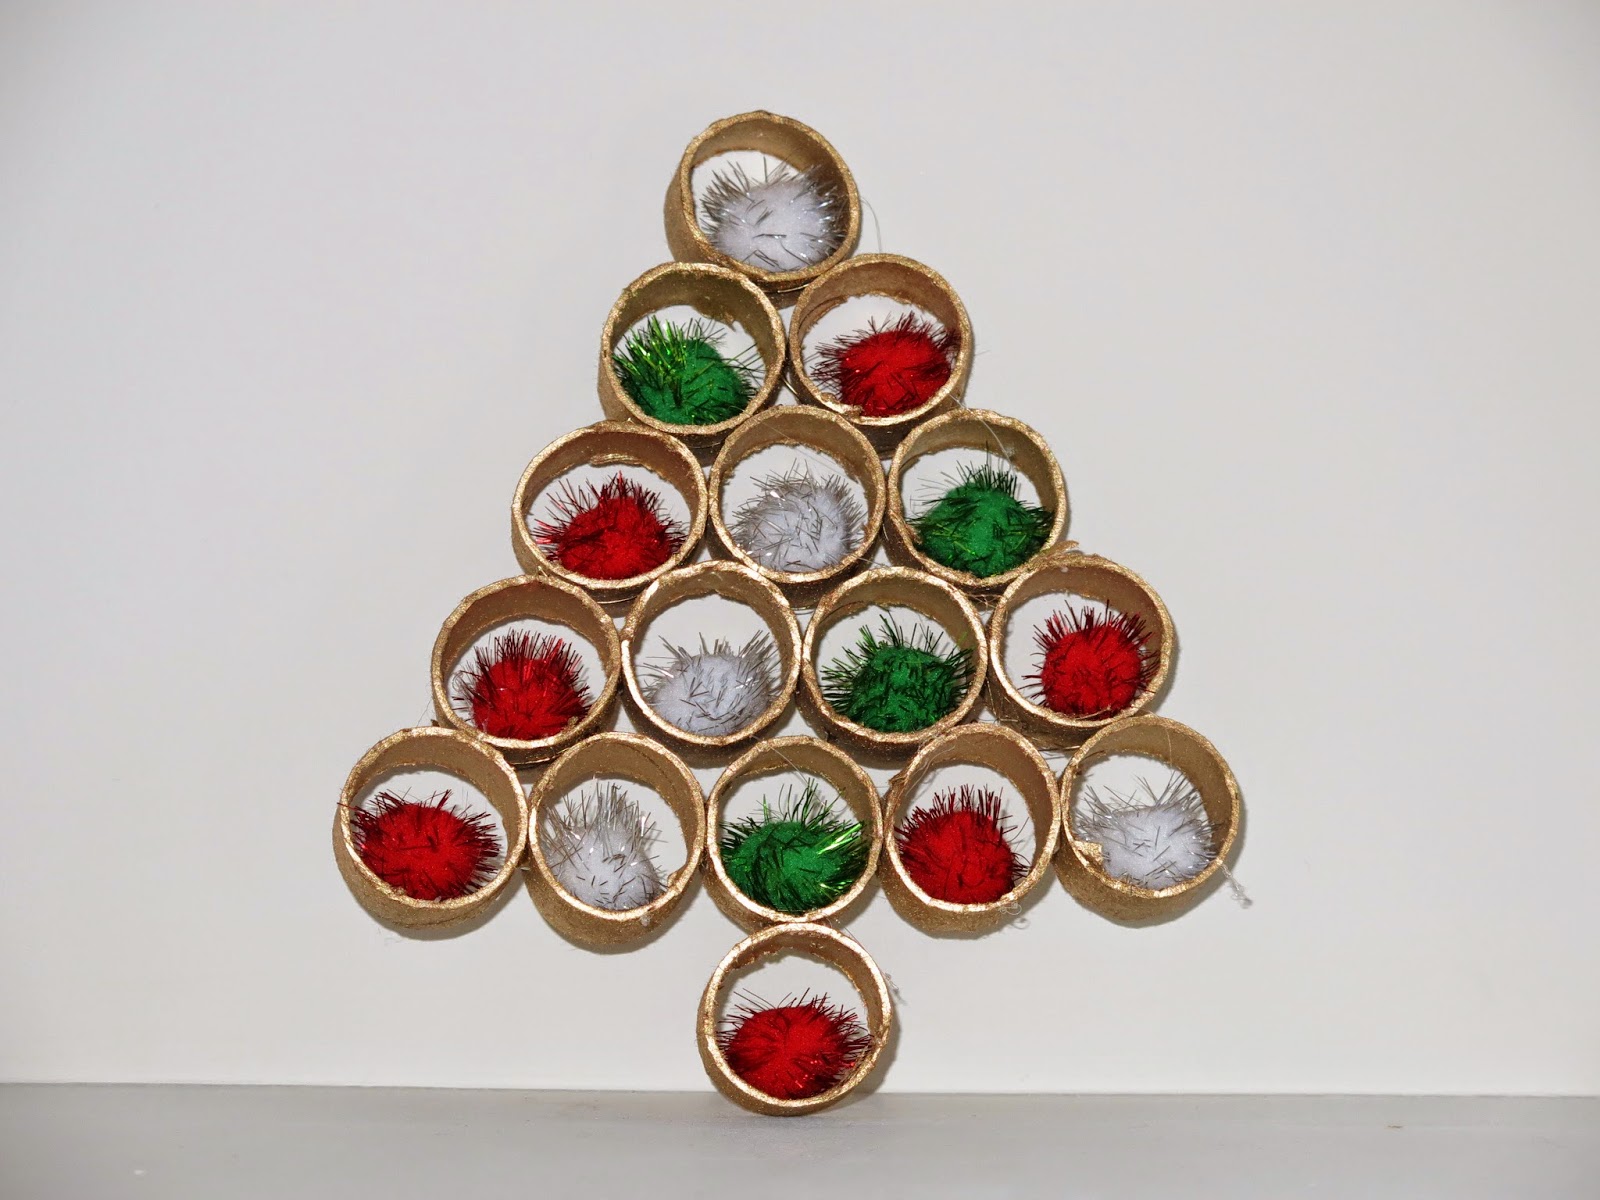
Cardboard Tube Christmas Tree
 It’s a fact. I can’t wrap presents to save my life. I cut the paper all crooked, the scotch tape always gets stuck in my hair (that's after using it on my nose like a Biore strip) and just try writing out someone’s name on one of those teeny-tiny gift tags. Especially if that person’s name is Mephistopheles.
The upside to wrapping presents? You’re left with all those cardboard tubes. And when you have cardboard tubes, you have the makings for another wonderful caker Christmas craft. We don’t let anything go to waste. Cakers are the original recyclers.
Why, just look at this majestic Christmas tree. I bet you'd pay close to $20 for this at Sears. But I made it for mere pennies. You can decorate it any way you want. Just be careful when using the X-Acto knife. If you think wrapping presents with ten fingers is hard, just try wrapping them with nine.
Come back Friday for my final holiday recipe. Then it's my Caker Christmas party round-up on Monday!
Instructions:
 1) Cut the cardboard tube into 1-inch pieces.
 2) Watch your fingers or else you'll end up like this!
 3) Glue the pieces together in the shape of a tree, spray paint the crap out of it and decorate with balls, ornaments, hair, whatever you fancy!

December 15, 2014
Heavenly Angel Cake
 Do you hear what I hear? Is it my imagination or is it the heavenly sounds of a church senior choir in rehearsal for Christmas Eve service? I just hope they don’t sing that “Hark are the bells merrymerrymerrymerry Christmas” song because it’s very difficult to master and the only time I’ve heard it done right was when barking cats covered it.
Speaking of heavenly things, put down your Suzy Shier bags and take a break from holiday shopping with this Heavenly Angel Cake. Talk about simple pleasures! You’re only a box and a can away from making it. If you manage to screw this up, there’s little hope for you in this world, my caker friend.
True, it’s a little on the chewy side, but it's moist and what more can you expect from a two-ingredient cake? I got a little Martha Stewartson with mine and put a poinsettia in the middle. If you do the same, make sure you tell your guests not to eat the poinsettia. They may look good, but they leave an awful aftertaste. Trust me on this one.
Hey! Are you ready for another caker Christmas craft? Get out your cardboard tubes and meet me back here on Wednesday.
340 g pkg angel food cake mix
540 ml can crushed pineapple
1 large angel food cake pan, ungreased
Set oven to 350°. Disregard directions on cake mix box! Pour cake mix and pineapple into large bowl. Stir together until all cake mix is moistened. Pour into large angel food pan. Bake 1 hour or until tester comes out of cake dry. (See note) Invert on rack until cool.
You can either ice cake or serve plain with ice cream. Berries on the side are good also.
Note: Mine was done around the 50-minute mark.
 Source: 75th Anniversary Cookbook, Paterson Memorial Presbyterian Church, Sarnia, Ontario
(This was the church where my mom got married. Mad props to The Caker Queen!)
December 12, 2014
Crustless Pumpkin Pie
 Next Saturday night, I’m hosting my annual Caker Christmas party. I invite Eye-talians over and everyone brings a caker dish. I usually assign the recipes but this year, I’m throwing caker caution to the wind. “Bring whatever you want,” I said to them. “So long as it's caker.”
Why do I have a feeling I’m going to regret this? I’ll post all the gory details on Monday, December 22. If I survive.
Until then, help yourself to a big wedge of this Crustless Pumpkin Pie. I was hoping it would turn out like Impossible Pie, where all the layers separate to create a top layer, middle section and crust. It didn’t work out that way. I guess the crust was in there. Somewhere. I brought this to my work potluck and got a mixed reaction. Some people liked it. Others felt crust-robbed.
But, as Mother always says, “You can please some people most of the time, but you can’t make friends none of the time.” She’s wise beyond her years, that one. Anyways, don’t forget to serve this under an avalanche of Cool Whip.
¾ cup sugar
½ cup Bisquick
2 tablespoons butter
1 large can evaporated milk
16 ounce can pumpkin (see note)
2 ½ teaspoons pumpkin pie spice
2 teaspoons vanilla
Beat together until smooth. Pour into greased 10-inch pie plate. Bake 50-55 minutes at 350°.
Note: The can I bought wasn’t 16 ounces, so make sure you measure it out. If you care about accuracy. If not, toss the whole thing in there.
 Source: St. Mary’s C.W.L. Crafton Cookbook, St. Mary’s, Ontario
[image error]
December 10, 2014
Egg Carton Christmas Ornaments
I was shopping for holiday ornaments on the weekend and was shocked by the prices. Good lord! What are decorations made of these days – eighteen carrot gold? There’s no reason to spend that kind of money on objects that will only come crashing to the floor when your uncle puts on the felt reindeer antlers and stumbles into the Christmas tree after one too many rum and eggnogs.
These egg carton ornaments are great because they’re cheap and give you free reign to express your creativity to its fullest.
Sort of.
I bought a package of letter beads at the dollar store, thinking I’d spell, “Best Wishes for Eternal Peace and Everlasting Hope to You, Mother.” But I was shortchanged on letters! There were no r's, s’s or t’s! There were four c’s, but what word has four c’s in it? Honestly, I was so mad.
Anyways, the best I could come up with was “May Xmay” which I’m sure means something. To someone. In another part of the world. I don’t have my Christmas tree up yet, so I had to go outside with my camera and take photos in my neighbour’s bushes. I had a lot of explaining to do when the cops showed up. LOL!
Instructions:
 1. Get an egg carton.
 2. Cut two of the pockets out and trim them. If you want to paint the inside, do it at this stage.
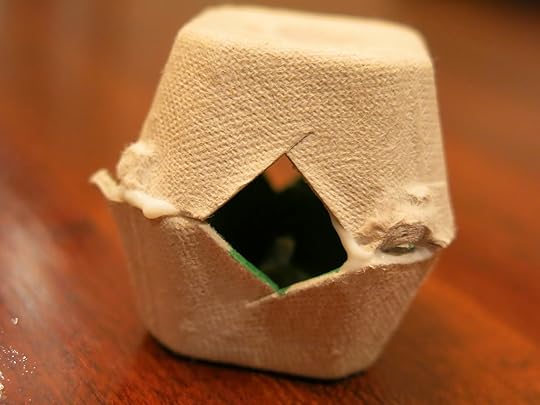 3. Cut triangles into the sides and glue together. Then decorate! You can paint them, put things inside the cups and hang beads off them. The sky’s the limit! (Unless you buy alphabet beads from the dollar store.)
December 8, 2014
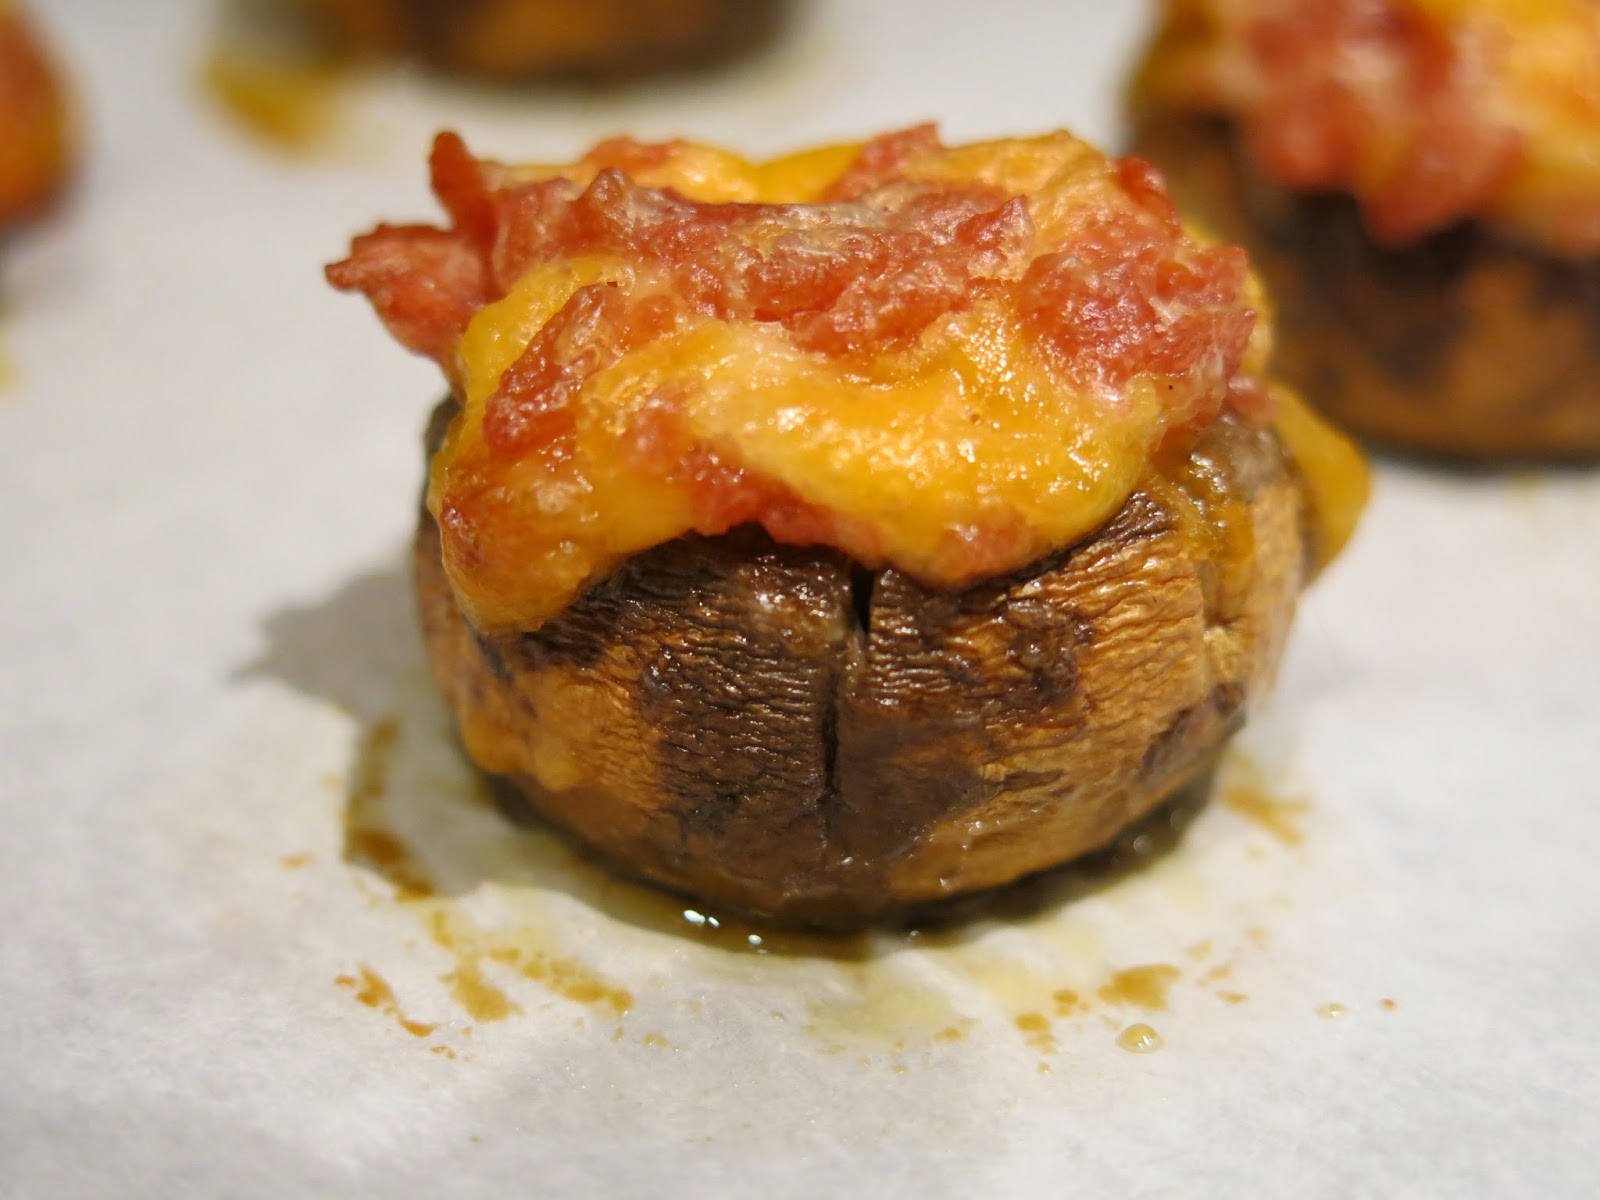
Stuffed Mushrooms
 If you’re like me, you’re in the throes of planning your holiday party. Lucky for me, I’m a caker. And that means I take Easy Street and have a potluck. Just think – people show up to your party and bring you food. You don’t have to do anything except answer the door. And maybe sprinkle some Love My Carpet around.
If you’re feeling generous, put out a few appetizers. Usually, I set out a bowl of Ruffles and Lipton Onion Soup mixed with sour cream (still in the container, of course!) And, if my allowance cheque from Mother doesn’t bounce, I might opt for a shrimp ring. But only one. I’m not responsible for feeding the entire neighborhood, for heaven’s sake! LOL!
I came across these Stuffed Mushrooms and thought they’d make great appetizers. Mushrooms are cheap and you don’t even have to use real bacon. I bought the simulated soy kind which tastes more like bacon than bacon, in my caker opinion. As far as quantities, if you’re having 20 people over, make five of these and quarter them. People are always watching their calories over the holidays. They’ll thank you.
Save your egg cartons and come back Wednesday for a timeless holiday craft!
Whole mushrooms
Bacon bits
Shredded cheddar cheese
Mayonnaise
Wash and remove stems from the mushrooms. Mix equal amounts of bacon bits, cheese and mayonnaise. Place cleaned mushrooms on a cookie sheet. Fill with the mixture of bacon bits/cheese/mayonnaise. Bake at 350° for 20 minutes approximately.
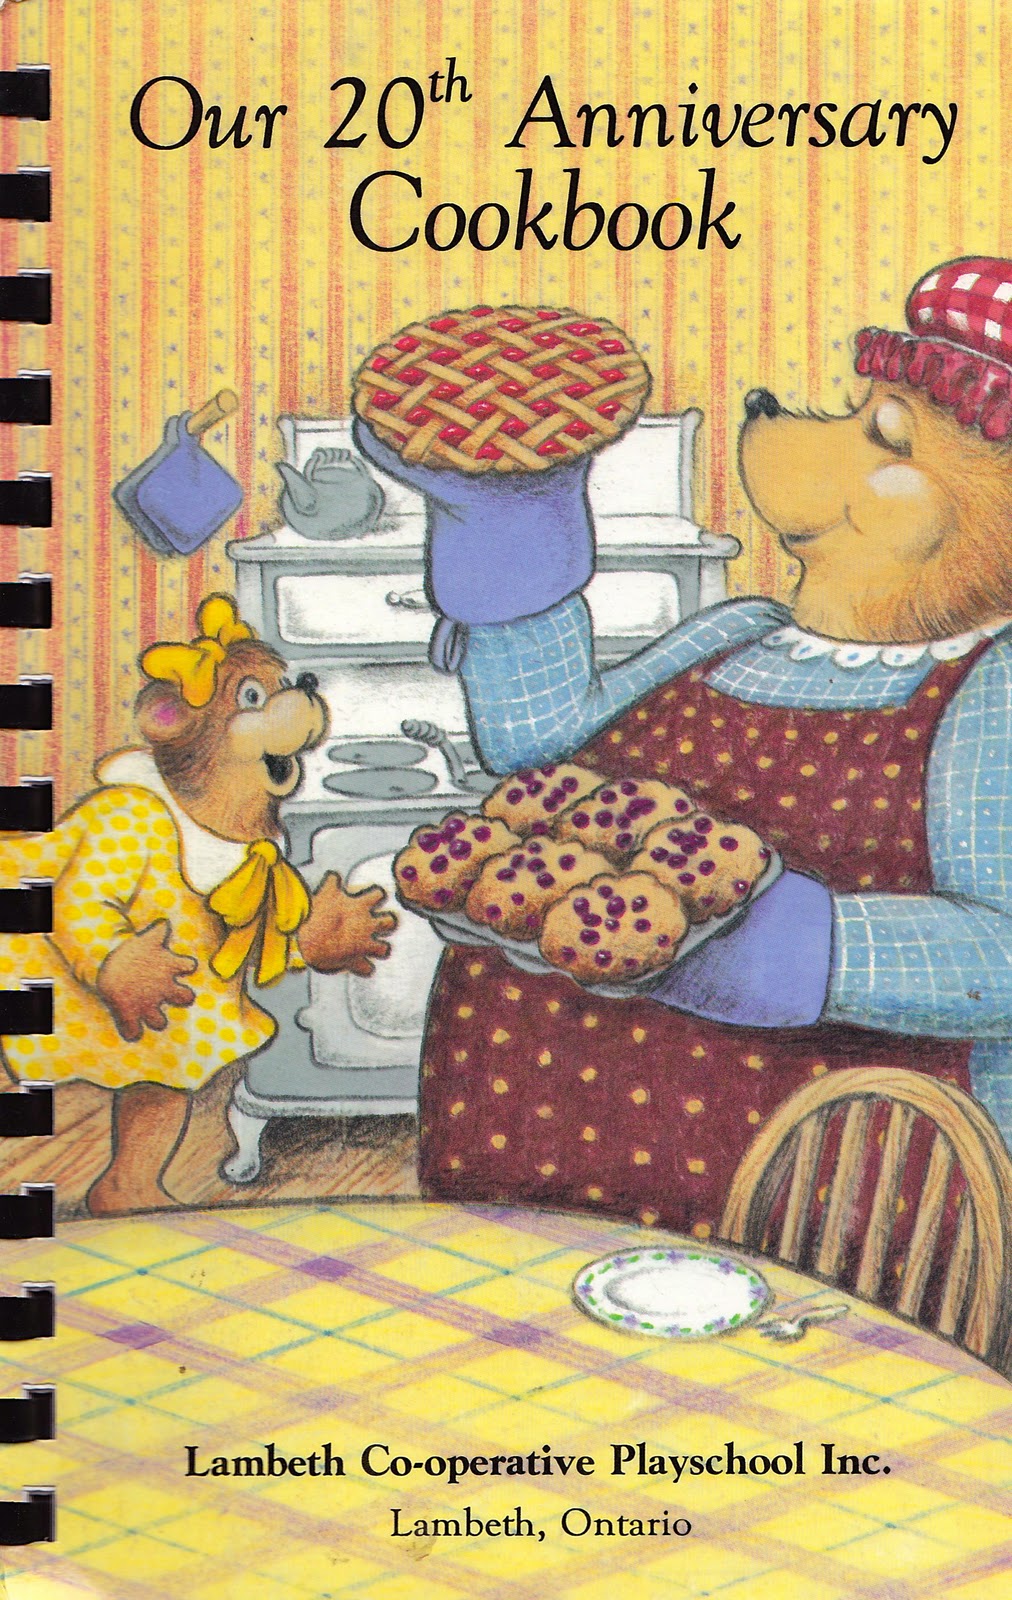 Source: Our 20th Anniversary Cookbook, Lambeth, Ontario
[image error]
December 5, 2014
Five Minute Fudge
 The holidays don’t officially start until I’m in my Snuggie, watching The Fireplace Channel and trying to figure out where the loop happens. I’m usually eating fudge while I do this. For those cakers who have yet to make it, fudge can be tricky because most recipes tell you to take its temperature. The first time I made it, I grabbed the thermometer out of the medicine cabinet. The bad news? The thermometer exploded. The good news? Mercury fudge soon became a family favourite.
You don’t need a thermometer for this Five Minute Fudge but you do need time. It took me 19 minutes and 22 seconds to make it! That’s not counting the time it took me to put on pants and lipstick, get in the Chevette, drive to the No Frills, buy the ingredients, stop for a double-double and a Boston Cream and come back home. Needless to say, I was tempted to send a letter of complaint to the Lambeth Co-operative Playschool for false advertising.
But then I tasted the fudge and I did a 360. Or is that a 180? Anyways, it’s good. Leave this out on the table for Santa on Christmas Eve and I bet he leaves you an extra present. Mainly his teeth. Sadly, fudge has its side effects.
2/3 cup Carnation milk, undiluted
1 2/3 cups sugar
2 cups (4 oz) miniature marshmallows (16 medium diced marshmallows)
1 teaspoon vanilla
½ cup chopped nuts
1 ½ cups semi-sweet chocolate chips
¼ teaspoon salt
Mix milk, sugar and salt in saucepan over medium heat. Heat to boiling. Boil for 5 minutes longer, stirring constantly. Remove from heat. Add marshmallows, chocolate chips, vanilla and nuts. Stir 1 to 2 minutes, until marshmallows are melted. Pour into buttered 9-inch pan. Cool and cut into squares.
Source: Our 20th Anniversary Cookbook, Lambeth, Ontario[image error]
December 3, 2014
Old-Fashioned Salt Dough Ornaments
My Caker Cooking Christmas Extravaganza continues with a timeless holiday craft bound to give you minutes of enjoyment!
If you’re not talented, not to worry. So long as you can roll dough and pour salt, you can make these heartsome old-fashioned salt dough ornaments. Salt dough, like most caker foods, will last for years and years. Imagine the wonder that your grandchildren’s grandchildren will feel as they gently unwrap these handcrafted legacies of dough from their nests of yellowed paper towel and hang them on the tree. (Or whatever they’ll use for trees in the future. LOL!)
A word of caution: don’t eat the dough. You’ll be tempted, believe me. You’ll be rolling it out and using the cookie cutters and they’ll get all browned up in the oven and when you take them out, you’ll think to yourself, “Maybe just one.” Folks, don’t. It’s not worth it. They don’t taste good. Especially after they’ve been painted. Trust me on this one.
See you back here on Friday for a classic caker holiday recipe. Stock up on the sugar and put the dentist on speed-dial.
2 cups flour
1 cup salt
1 cup water
Mix ingredients until dough forms. Use assorted cookie cutters to cut out shapes. Use a toothpick to form a hole near the top of the ornament before baking. Bake at 350°. (See note 1) Let ornaments cool completely. The ornaments can be painted or stained with tea.
I like to add scarves, cut from scrap material, to my Gingerbread men and Snowman. I use fishing line to string my ornaments from the tree. (See note 2)
Note 1: I let mine bake for about a half-hour. Just keep an eye on them.
Note 2: That’s the lady who submitted the recipe talking, not me. I don’t use fishing line. I use folded-out paper clips. They're classier.
 Source: National Mfg. Co., 1901-2001, Centennial Cookbook
December 1, 2014
Homemade Stove Top Stuffing
 Welcome to Caker Cooking’s Caker Christmas Extravaganza!
I’ll post questionable scrumptious caker holiday recipes throughout the month. In addition, I'll also post craft ideas. Don't worry if you're not Michael Angelo. Caker crafts are super-easy and make great gifts for co-workers and other people you sort of care about.
In the three and a half years I’ve been doing this blog, I’ve learned a few things about my fellow cakers. Mainly, that we like man-made fibres and consider Hee Haw high art. Another thing I've learned about cakers? We're perplexing creatures. When I saw this recipe for homemade Stove Top Stuffing, I took my Tilley hat off and gave my head a scratch. I mean, why? Why would cakers go through all the trouble of making something when they could just buy a box?
The answer? Pride. Cakers like nothing more than boasting that processed food isn't limited to the supermarket. You can also make it in the comfort of your own wallpaper-bordered kitchen.
Now, I consider myself a stuffing connoisseur, so I was doubtful about this recipe. But it was delicious and tasted just like the real thing. If you can consider something that's fake real. (Ouch, that thought just hurt my head!) It was salty and savoury and, best of all, I didn’t have to buy a turkey to cook it in. Or even a pigeon, which, in my family, was all we could afford at Christmas.
Yours truly,
Tiny Tim
P.S. Come back Wednesday for a special – and salty! – caker Christmas craft!
1 envelope Lipton Onion Soup Mix
1 cup water
8 cups bread crumbs (cut into ¼” pieces)
1 teaspoon poultry season
½ cup butter
In medium saucepan, add Lipton Onion soup mix to water; bring to boil and simmer 5 min. Stir in poultry seasoning and butter and set aside. Toast bread cubes lightly in moderate over till cubes are dry. In large bowl, add seasoned onion mix gradually to bread cubes, tossing lightly till coated. Return stuffing to saucepan, cover and let stand in warm for 5 min., stirring occasionally.

Source: Madoc Centennial Cookbook - 1978
[image error]
November 28, 2014
Bazaar-o-Rama Week 3
 It's time for my third and final instalment of Bazaar-o-Rama, my annual tour of church holiday bazaars.
What in heaven's sake did I find this time around? Click here to find out!
November 24, 2014
Lazy Perogie Casserole
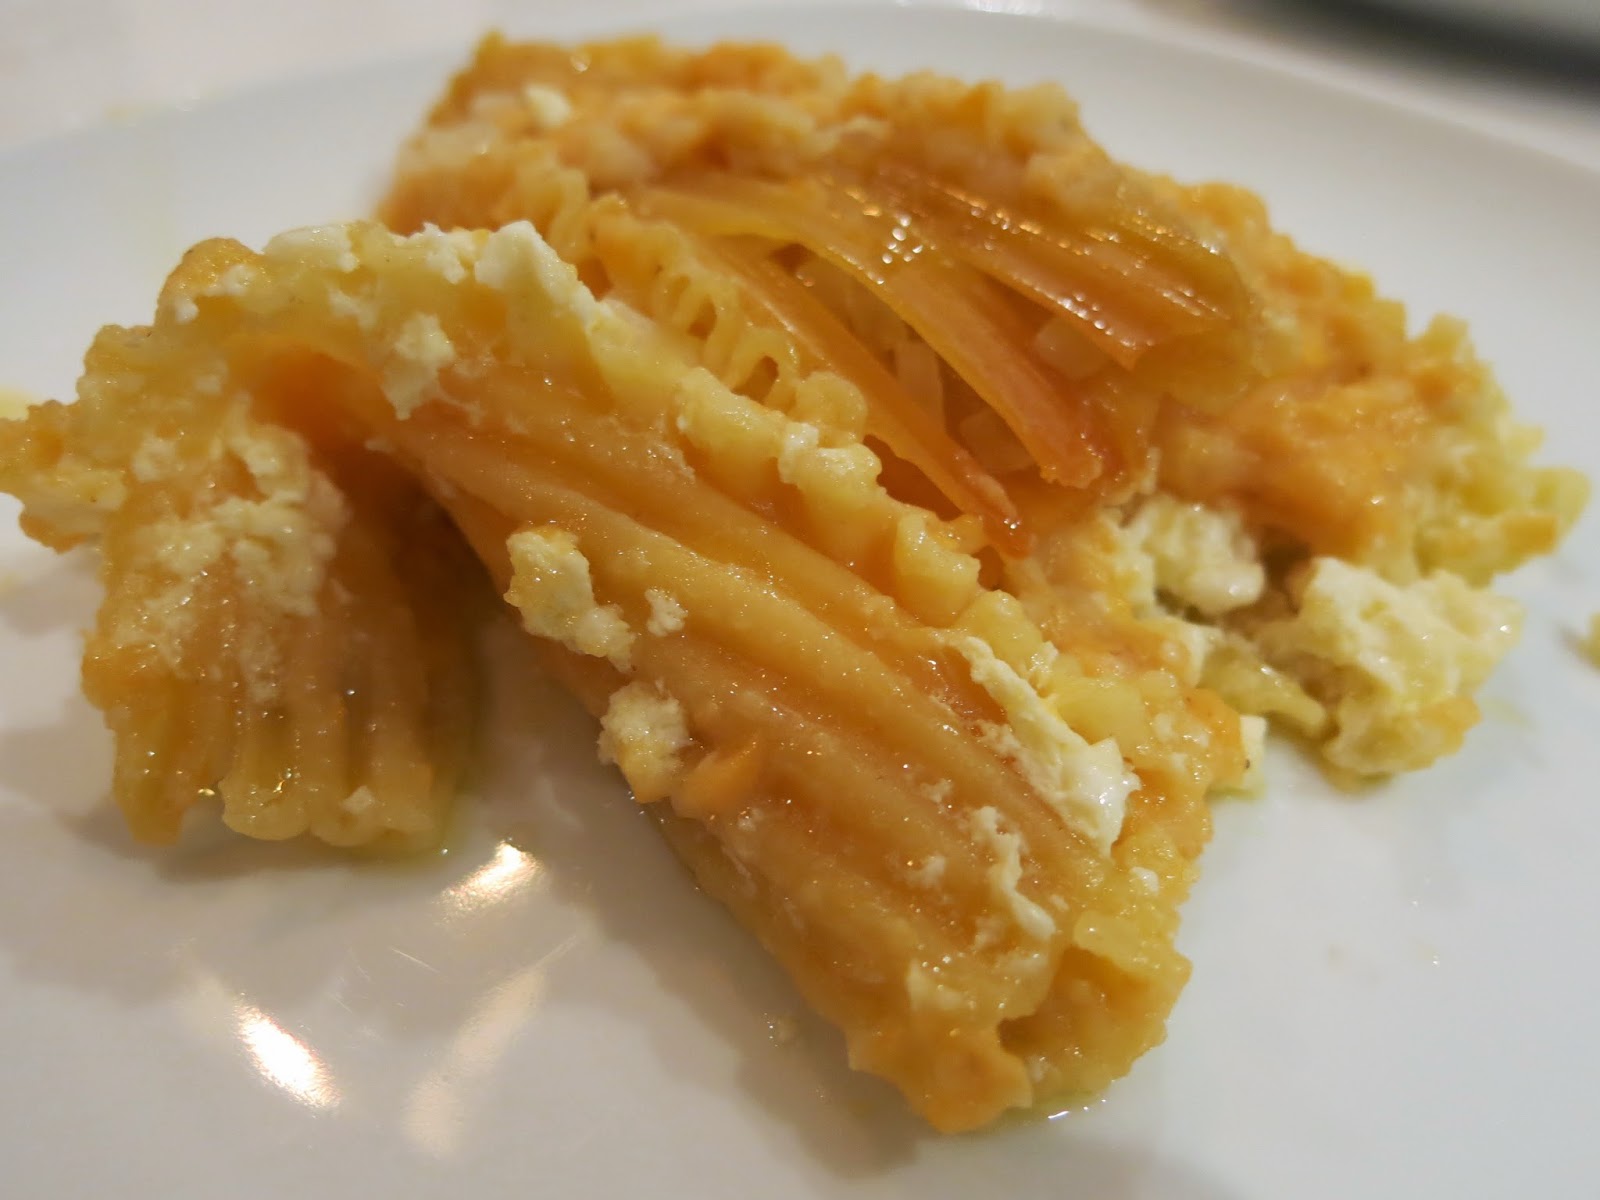 I don’t care what anyone says – cakers are pretty intelligent. I often think of us as kitchen technologists. There’s nothing we love more than taking something apart and figuring out how to put it back together in half the time. Just look at Cabbage Roll Casserole. You get all the taste in just minutes. (Unfortunately, you still get all of the stink. Make sure your Wizard gel stick is close by.)
Another great example of caker ingenuity is this Lazy Perogie Casserole. Do you know how long it takes to make actual perogies? Like, a long time. Just ask my Ukrainian uncle. But with this casserole, you get to eat and enjoy your life. You’re welcome, Uncle Orest!
Lazy Perogie Casserole tastes just like the real thing. The only thing it lacks is bacon. Or should I say, artificial bacon bits. You know the ones I mean. They’re the colour of bricks and look like fish food. But they taste good and you don't even have to cook them. Thanks, caker kitchen technologists!
Come back Friday for the final Bazaar-o-Rama round-up, my tour of church holiday bazaars. Then, on Monday, December 1, Caker Christmas season officially gets underway! I’ll post holiday recipes and crafts three times a week leading up to my Caker Christmas party, my annual shindig where I force invite Eyetalians to make – and eat – caker food.
12 to 15 lasagna noodles
2 cups cottage cheese
1 egg
¼ teaspoon onion salt (optional)
1 cup shredded cheddar cheese
2 cups mashed potatoes
¼ teaspoon salt
½ teaspoon pepper
1 cup butter or margarine
1 cup chopped onions
Line 9 x 13 inch casserole dish with cooked noodles. Mix cottage cheese, egg and onion salt; spread over noodles. Add another layer of noodles. Mix cheese, potatoes, salt and pepper; spread over noodles. Cover with remaining layer of noodles. Melt butter; add onions and sauté. Pour over noodles. Cover with foil. Bake at 350°F for 30 minutes. Let stand 10 minutes and serve with sour cream.
 Source: This Legion is Still Cooking, Royal Canadian Legion Cowichan Branch 53, Duncan, British Columbia


![[image error]](https://www.pinterest.com/pin/create/button/?url=http%3A%2F%2Fcakercooking.blogspot.ca%2F2014%2F12%2Fcrustless-pumpkin-pie.html&media=http%3A%2F%2F4.bp.blogspot.com%2F-Y4K1TPEIpO4%2FVIpDNcbugyI%2FAAAAAAAADMY%2F9CMVfL-50S8%2Fs1600%2FCrustless%2BPumpkin%2BPie.JPG&description=Crustless%20Pumpkin%20Pie)
![[image error]](https://www.pinterest.com/pin/create/button/?url=http%3A%2F%2Fcakercooking.blogspot.ca%2F2014%2F12%2Ffive-minute-fudge.html&media=http%3A%2F%2F1.bp.blogspot.com%2F-e8DwoUBoD7U%2FVIEaLmeNPQI%2FAAAAAAAADLA%2FBzF5fKVSFdc%2Fs1600%2FFive%2BMinute%2BFudge.JPG&description=Five%20Minute%20Fudge)