
Ali Edwards's Blog, page 51
April 11, 2023
Week In The Life™ 2023 | Images Of Ali's Design Plan + Prep Day + Storytelling With Week In The Life™ Workshop
A couple weeks ago I shared a quick look at my initial design plan for Week In The Life™ via video here.
As we get closer to the documenting week (coming up April 24th) I wanted to share a look at that plan via images.
Also,our $5 Week In The Life™ Prep Day is happening this Saturday, April 15th! Here's a look at the schedule:
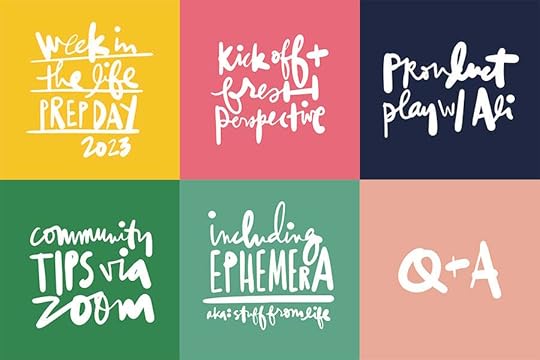
Each hour will have either live or recorded content and a free download. Can't make it this Saturday? No problem! All content is recorded and archived for you to refer to on your own time.
We wanted to try something new with this Prep Day by having a community zoom. We are allocating two hours for this and would love for you to bring your favorite tip to share with the group. The zoom details will be included in the classroom on Saturday.
The classroom will open at 6:30am Pacific with the first lesson live happening at 7am Pacific. Sign up here.
Setting up a design plan + story plan in advance of the documenting week is a great way to get organized and ready for this project.
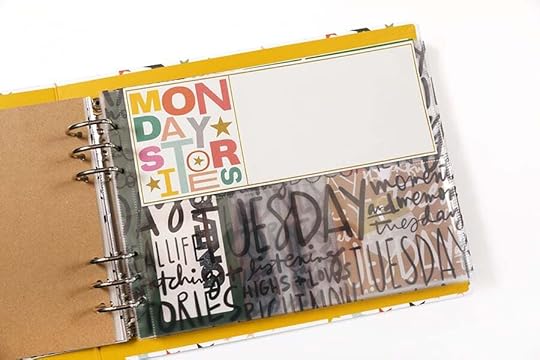
Here's a look at how I'm setting up my 10x8 album for 2023:
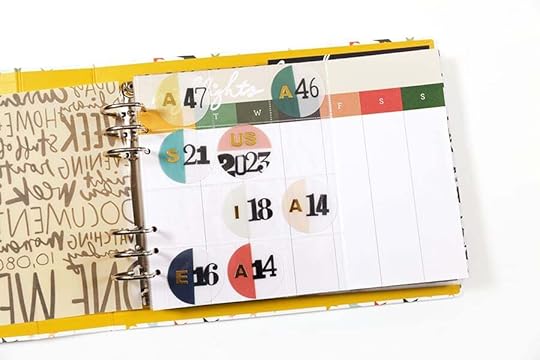
I'm starting off my album this year with the plastic circles and alpha stickers inside a 2x2 page protector. My plan is to take photos of each of my people and add them here (most likely punched into circles). I love incorporating details like our ages each time I embark on this project.
I'll be sharing my reason why during the Prep Day!
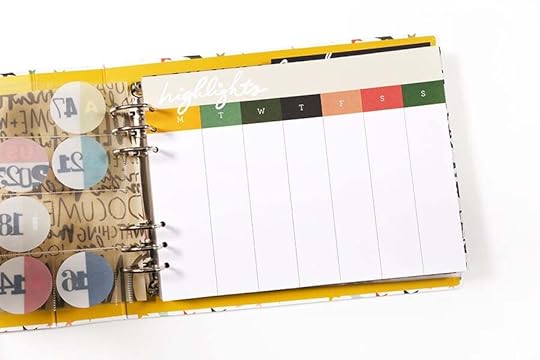
The next page is the Highlights page from the Main Kit (the Main Kit is sold out but we do have the digital option available if you like this design). I'll be working on this page after I've experienced the week.
Now let's take a look at my Daily Design Plan:
I always come up with some kind of daily design formula for Week In The Life™ which helps me both plan and organize my content. When I set up a Design Plan like this I'm able to estimate how many photos I'll actually have space for (knowing that I often add some in adhered back to back and/or often create photo collages on some of the bigger pages to incorporate more photos).
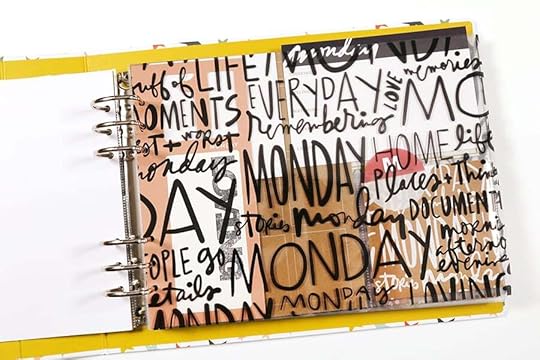
Each day of the week will start with a transparency.
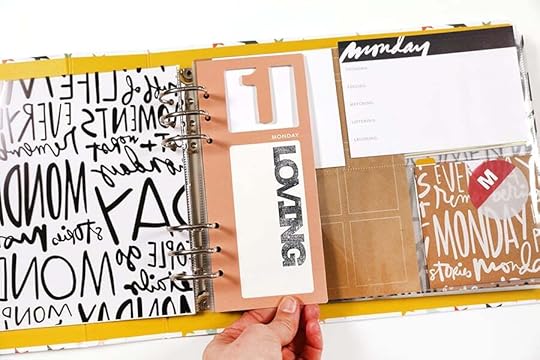
The next piece in my Design Plan are the die cut number cards. I stamped "loving" on each of the cards and will write on there each day. This year I'm planning to handwrite on a few of the journal cards during the week vs. corralling all my journaling together and printing it out on one page as I've done in some past years. I will also likely add in some typed journaling (you'll see more about that below).
I like having a Design Plan and then also leaving some space to be inspired when I'm bringing all my content into the album.
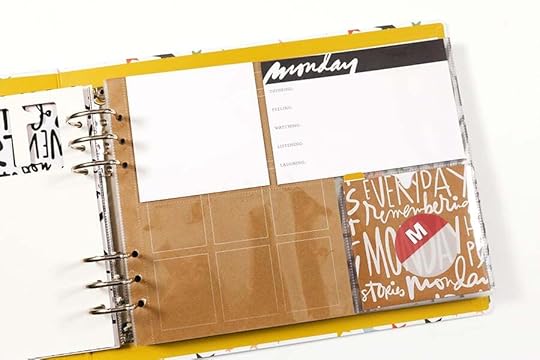
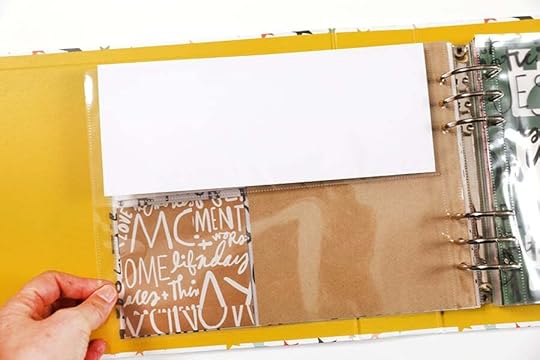
Next up is the four pocket page protector. I'll be using the 4x6 card each day as part of my Story Plan and will be handwriting directly onto that card.
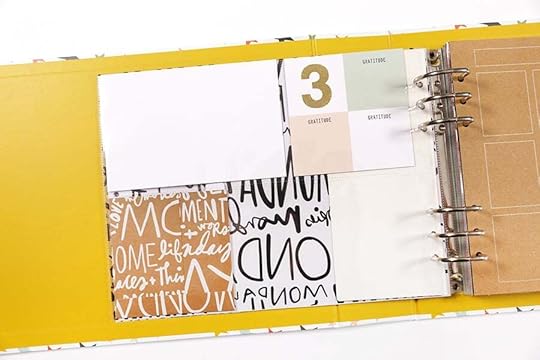
Flipping the page over reveals one of the 4x4 cards from the Main Kit. Each day I'll be documenting three things I'm thankful for as part of my Story Plan. The other pockets will hold 4x6 photos.
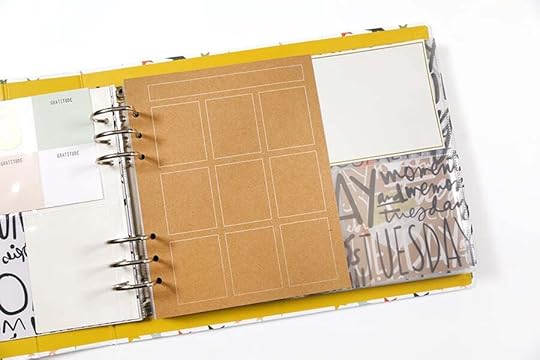
Next up in my Design Plan is one of these grid Kraft pages (these are sold out but we have a digital option here). I'm planning to collect and cut up ephemera (things from the mail, packaging, handwritten notes, etc) and add that here. During the documenting week I'll just be collecting and will work on bringing it all together after the week is finished.
Don't want to include ephemera but still want to include this page? Be the boss of your project and designate this page for something you want to highlight each day.
In addition to the Repeated Story Lenses shown here (the journal cards I'll be writing on directly) I'm thinking that I'll do Monday's are for.../Tuesday's are for../Wednesday's are for... for my typed journaling each day (which will either be added directly to my photos and/or typed up and added to one of these pockets).
Love those 10x4 journal cards.
Followed by the full page protector. Most likely I'll be adding either a full page photo or a collage of photos.
I also wanted to share a cool idea from Kelly for using the pockets + plastic circles + chipboard from the Main Kit. I'm thinking I might do this too! This is a great example of a way to organize a story in advance of the documenting week:
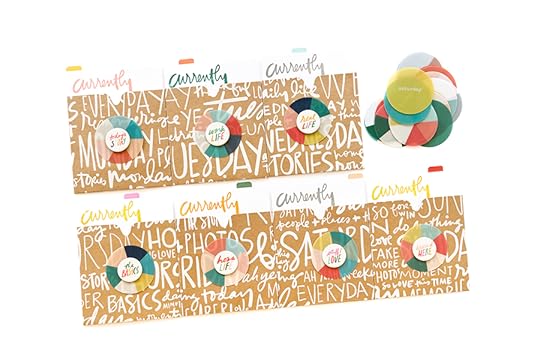
She used this Basic Prompts Stamp to stamp onto the journal cards inside the pockets.

Want to go deeper into the history and thought behind Week In The Life™? Looking to be re-inspired and remember why you started embarking on this project in the first place? Are you brand new to this project and have no idea where to start?
I've been working hard behind the scenes on a brand new workshop Storytelling With Week In The Life™. Modeled after Storytelling With December Daily® and Storytelling With Project Life®, this workshop is designed to be a comprehensive look at our Week In The Life™ project.
Registration will open for this on Saturday, April 15th during Prep Day. People who are participating in Prep Day will be given a promo code for $5 off Storytelling With Week In The Life™.
The first two lessons will be live in the workshop on Saturday. Lesson Three will be live on Wednesday, April 19th. Lesson Four will be live on Wednesday, April 26th.
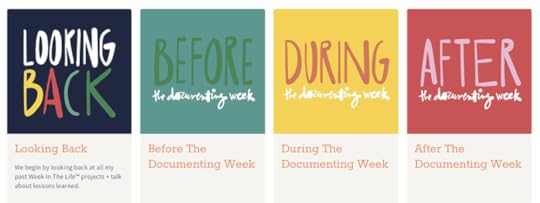
Here's the lesson break down:
LESSON ONE | Looking Back: Video walk-throughs of all my past Week In The Life™ albums along with thoughts on what I've learned over the years
LESSON TWO | Before Documenting: Establishing your mindset, setting up your Design + Story Plans (based on what's most important to you to document in any given season)
LESSON THREE | During Documenting: Tips and ideas for capturing your words + photos during the actual week
LESSON FOUR | After Documenting: Bringing your words + photos into your album (basically how to tackle completing the project after you've collected all your content)
This workshop isn't specific to any documenting year and is meant to be a more comprehensive and evergreen look at the project as a whole. My hope is that you'll be encouraged, inspired and empowered to approach telling the story of your week based on your own season of life.


Quarterly Scrapbook Kit Show + Share | Special Guest Krystal Iduñate
Hi Friends! Krystal here! I’m excited to share how my planned layouts using the Labels Quarterly Scrapbook Kit came together today! On Thursday, April 6th, I shared the process of putting these layouts together LIVE with the Craft the Story Facebook community. It was so fun to chat and bounce ideas with everyone while working through page designs live. If you are a Facebook user and are looking for an awesome craft community to join, I can’t recommend this space enough.
If you missed out on the live video (or are not a Facebook user), you can check out the replay below:.
Let’s take a closer look at the layouts I created with the Labels Quarterly Scrapbook Kit:
1. Love This Memory

Here is the first sketch I worked with to create a layout. I had previously cut down the 12x12 label paper to use in the 7x8.25 format I’m creating this year.

For the story I chose, I decided to document a really ordinary (but also out of the ordinary) moment I had last month with my husband, Aaron. I normally go to the grocery store every week by myself to do the shopping, and this week he joined me! We had so much fun!

I carry a foldable tripod in my purse. While in the store, I quickly pulled it out, popped my phone in, and snapped a photo of us staring at the food shelves. I then printed this photo at the full size and added a large embellishment to the bottom.

For the right side, I used the digital version of the paper to type out my journaling - fitting it into the various label spaces. I wanted the whole page to read like a full story BUT you could also add little facts/feelings/details into each one instead too. Since some of the black plastic phrase strips fit perfectly over a few labels, I added those as well - for a pop of dimension and a different texture. Love how bold this page turned out!
2. So Darn Good

My next sketch features the die cut label 7x8.25 page. I knew as soon as I saw this page that I wanted to cut it up and reassemble a fun grid below a large photo.
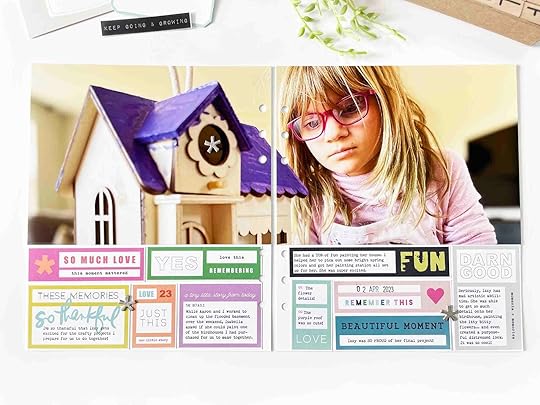
My story took shape when I snapped this photo of my daughter painting a wooden birdhouse. I loved the angle of the photo and that I could get a really wide crop of the photo without loosing anything too important.

I printed the photo at 14”x5.25”, cut it in half, and added it to the separate 7x8.25 pages. This left me three inches at the bottom to add a bunch of the die cut labels.

To help me figure out exactly which ones I could use and where to place them, I played around with the digital version of the kit first. Once I found the perfect combination, I printed my journaling onto the labels I would use, fussy cut them out, and reassembled/adhered them to my page below the photo. Finishing touch on this page were the three silver asterisk stickers for a little hint of shine.
3. Everyday Life

My final layout design was based on the LOVE 12x12 pattern paper (which I cut down to a 7x8.25 piece) and the die cut labels. To me, the labels reminded me of frames and I knew I wanted to create a collage page using a whole bunch of them!
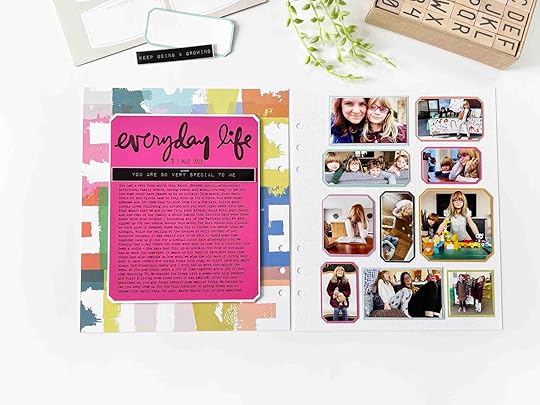
Each month, I like to add one story to each of my kids’ story albums - either a recap on the month or a story from a major event that happened in the month. Since there wasn’t anything major in March for my daughter, I decided to make a full monthly recap of all the small things. The small stories make up the big picture, after all!
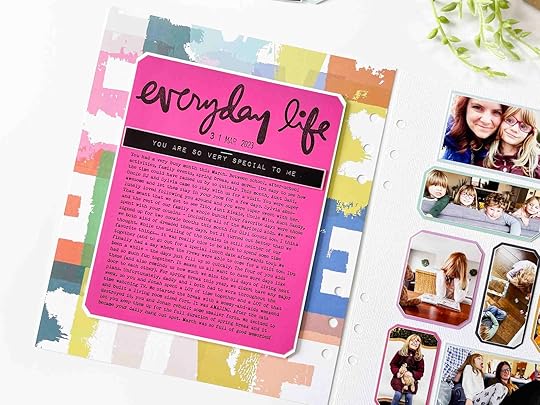
On the left side, I typed up journaling that told the story of Isabella’s month (from my perspective) and added the text onto a hot pink background - using the color from the hot pink die cut label. Then, I clipped the corners to imitate the die cut labels, matted the journaling on white cardstock, and added this to the patterned paper (propped up on foam tape).

The right side is the home for my photo/die cut label collage. I used the digitals + photoshop to create a template for getting my photos to just the right size/shape. That made it easier for me to simply cut them out and add them to the appropriate label. I added each photo/label onto a 7x8.25 piece of textured white cardstock to complete the look. This is a new favorite layout - I just love all that color and all those memories!
Friends, thanks for stopping by and checking out how these pages came together. I hope seeing these layouts helps to inspire you to create with this kit as well. If you plan (or already have) to tell a story with the Labels Scrapbook Kit, tell me in the comments about the story/page you created! Until next time!
April 10, 2023
Quarterly Scrapbook Kit Show + Share | Special Guest Linda Jordan
Hi! This is Linda and I’m back to share with you my process for putting together a project using the labels quarterly scrapbook kit. If you missed it, I shared my planning process for this project and the entire kit in an earlier blog post that can be found here.
In the video, I share with you my thoughts and process as I put together this project.
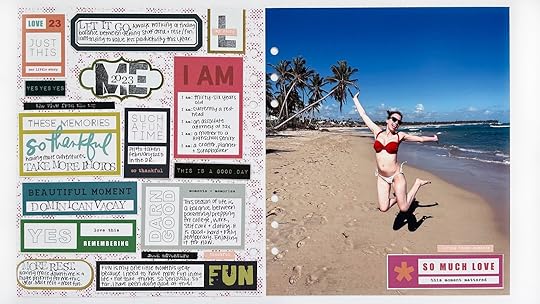
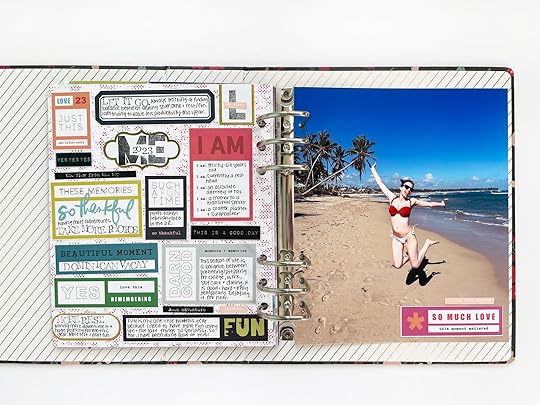
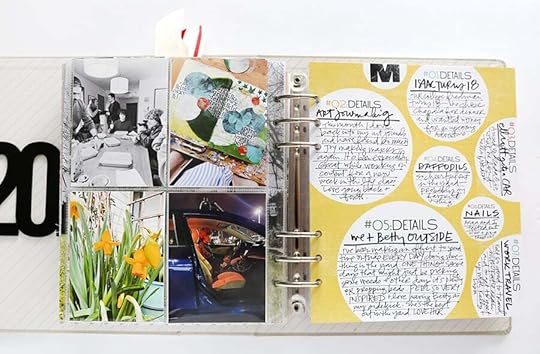
For my project today I decided to do a two page 6x8 spread outside the page protector. When I create double paged spreads of this size one of my go-to techniques is to pair a full page photo with a full page of paper/journaling so that’s what I decided to go with here.
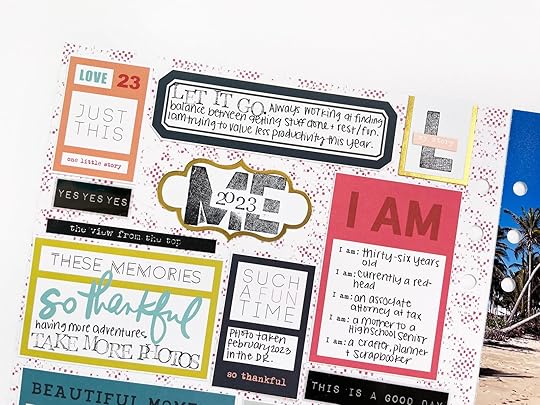
I loved the 6x8 label paper with all the labels laid out in a fun pattern and thought it would be super fun to cut out the labels and make my own pattern to hold a collection of little stories about me right now.
My favorite label was the one that says “ME” in the top center of the page. I used a piece of a sticky note to mask out part of the label when stamping the word “ME” so that I could stamp the year.
This year I am keeping a 6x8 album that holds stories about me and this was perfect for it. I really enjoyed the opportunity to capture a lot of little stories about who I am + what my life looks like right now.
I hope this has inspired you to pull out your label kit and get creating!
I also often share my projects & bits of my process over on my instagram and on my YouTube. Hope to see you guys there!
Now Story Kit + May 2023 Stories By The Month™ Kit
Today's the 10th of the month and that means a new
Story Kit, Story Stamp, and Stories By The Month kit.
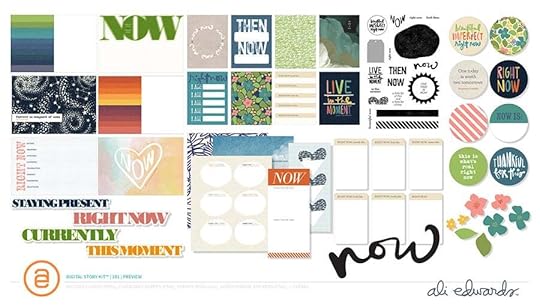
This month we are focusing on stories related to the theme of Now.
Documenting what's happening in real time is one of my favorite ways to tell the story of my life. Themes like currently, around here, and right now invite us to look around and capture the lives we are living in the moment vs. waiting for a future time when we try to remember (we all now how hard that can be). This month we are coming together to tell some stories of own personal now.
Initial story ideas for this theme include:
Make a list of what's happening in your life right now. A simple list is a great way to capture little bits of what's real for you in this season. Right now what are you loving/listening/watching/eating/reading/going? Using those -ing words is a great entry point into capturing life right now. Tell the story of now by contrasting what's easy and what's hard. STORY KIT
The
Story Kit™ includes:
Here's a video overview of the
Story Kit™ and Add-On options this month:
The Stamp Set:

Here's a video overview of the Story Stamp:
Here's a look at what's included in the Digital Story Kit™:
Your digital kit and the classroom and any Add-Ons purchased will be available to you on the 12th once your card has been charged for the month.
This kit is also available to physical kit subscribers as an Add On each month.
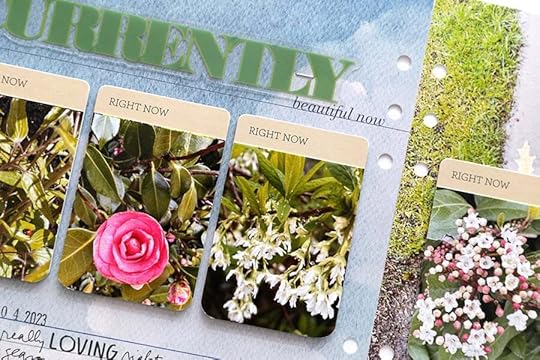
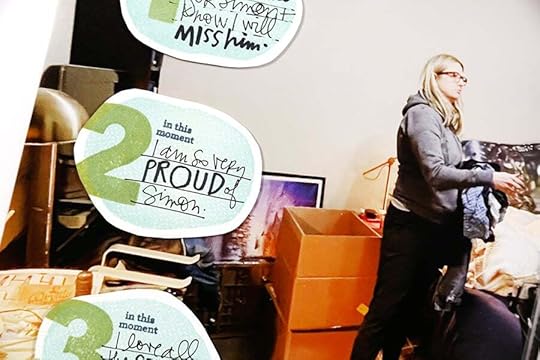
Here are a few sneak peeks at projects you'll find in the classroom this month from Ali:

Again, thanks so much for subscribing and/or considering our
Story Subscription program! If you have any questions about this program please let us know below in the comments.
First and foremost we are excited to begin offering a classroom included with this subscription (called
Inspiration By The Month™). Each month Lisa Varshine, Krystal Iduante, and Jen Wong will share inspiration in a classroom using pieces from the Stories By The Month™ kit.
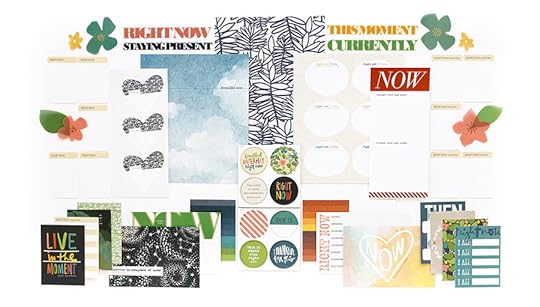
Here is a full look at the kit this month:
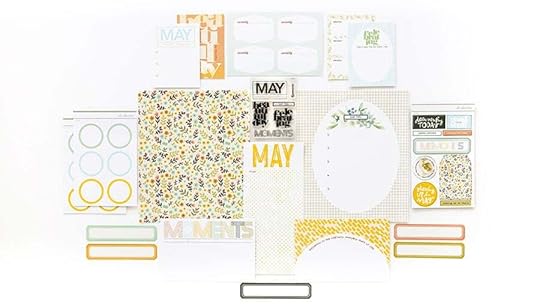
The kit now includes a sheet of vellum or transparency (sized outside the page protector in a 6 inch x 8 inch album), a pattern paper, a 3 inch x 8 inch (outside the page protector) journal card with the month at the top which will be repeated each month, a 3 inch x 4 inch stamp set, chipboard, 4, 3 inch x 4 inch journal cards, 3, 4 inch x 6 inch journal cards and an embellishment.
And a video overview:
This subscription is a great option for those who are looking to tell more calendar/everyday life sorts of stories.

Our Digital Stories By The Month™ kit is now called Inspiration By The Month™. With this subscription you receive access to the Inspiration By The Month™ classroom and the digital kit.
This kit is also available to physical Stories By The Month™ kit subscribers as an Add On each month.
Add On options are available to all Story Kit™, Story Stamp™, and Stories By The Month™ physical subscribers (this excludes Digital Story Kit/Story Class subscribers since you don't have any part of your subscription shipped already). Current and new subscribers can select + purchase Add-On's via your new drop-down menu access under your user name in the top right corner of the site: you need to do this before the 11th of the month in order for them to ship with your kit.
Depending on product availability subscribers may be able to purchase the Add-On's after the Add-On period has ended and regular shop shipping rates will apply because they will ship separately from the kit.

This stamp set is available to subscribers to add to their box during the Add On period and also offered in the shop for anyone else!
I'm super excited about these as alphas are my favorite kind of stamps!
April 4, 2023
Story Play | Day In The Life™ | Show + Tell From Ali
Welcome to Show + Tell day for Day In The Life™ 2023!
It was so fun to see all the photos shared last Saturday on the documenting day. If you missed our community documenting day you can embark on this project any time.

Here's a video overview of how I bought my words + photos together:
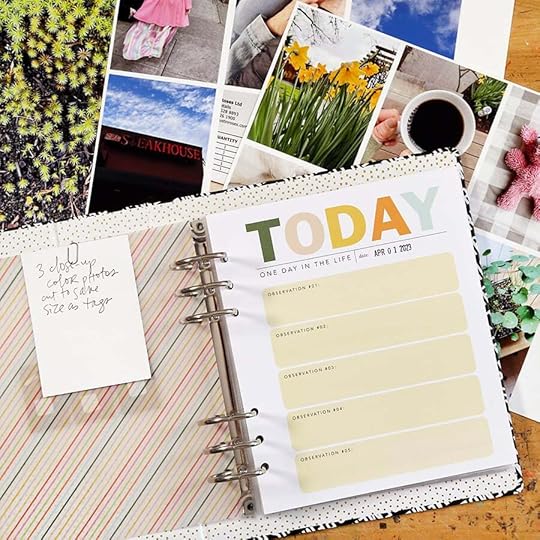
And here are still images of my project in my Story Play album:
I added journaling directly to the "today" prompt paper using both a thick and a thin pen. Love the contrast between the two.
My journaling is prompted by the notes I took on the documenting day combined with any other thoughts and memories as I reflected on the day.
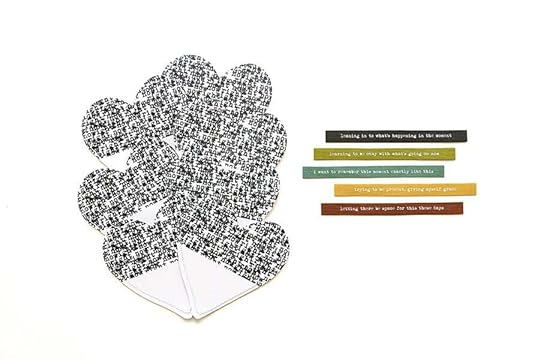
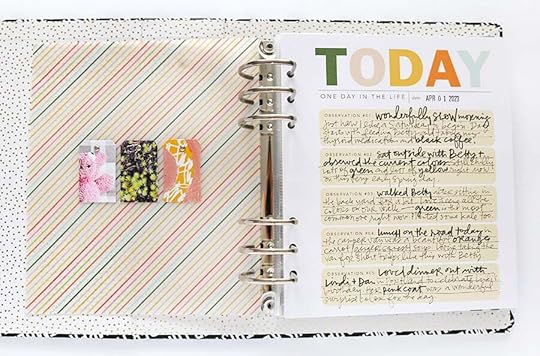
I used one of the chipboard tags as a template to cut out three photos. I added small silver brads to each one and then adhered with rolling adhesives.
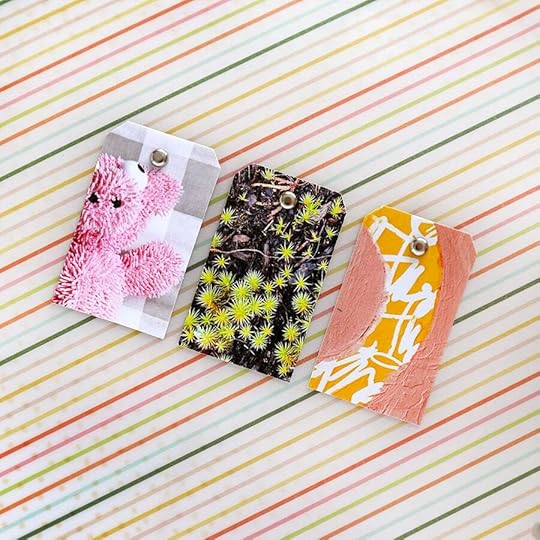
I love those little close ups when it becomes more about shape vs. the actual thing itself.
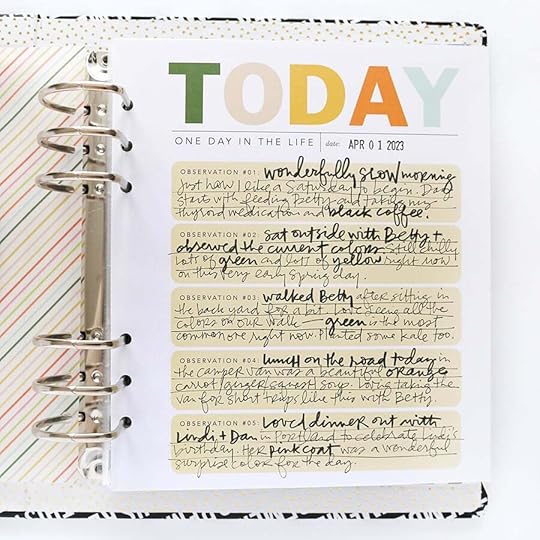
I used the brush pen to highlight one color color within each observation.
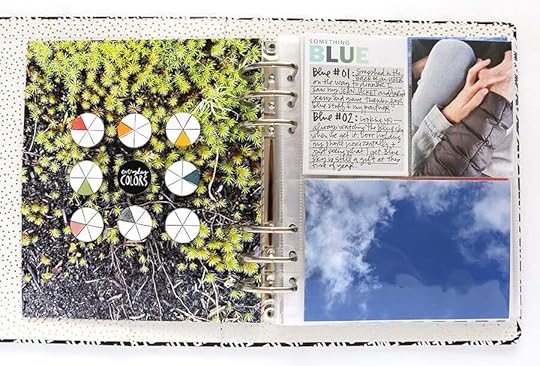
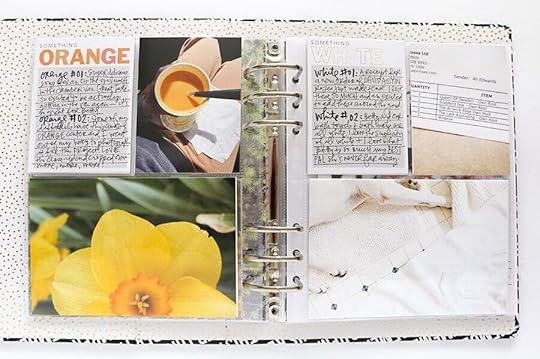
On the back of the prompt page I added a full page photo (a favorite of mine from our morning walk).
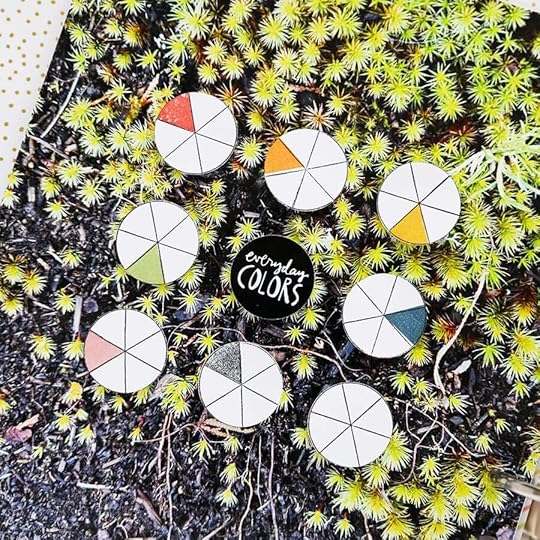
On top of the photo I used the 3x4 stamp set and inks to identify the colors I used as me lens for documenting. These are adhered with foam adhesive.
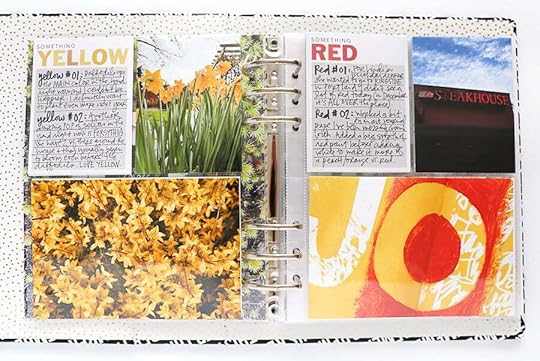
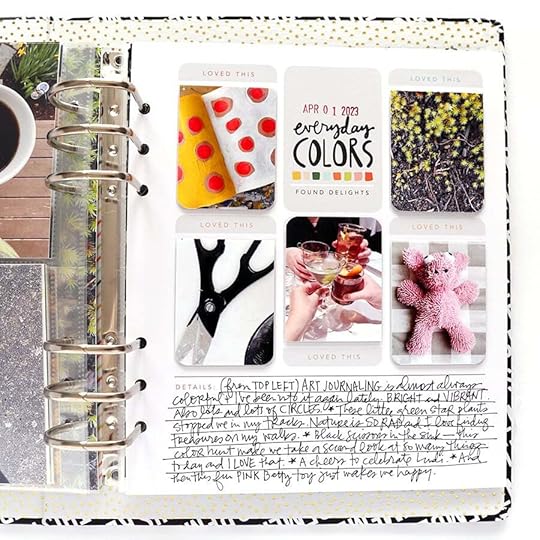
After looking at my photos from the documenting day I decided to have one 4x6 photo and one 3x4 photo for each color. If you have more photos you can totally create a grid of photos of add in more page protectors if needed. I love the simplicity of this formula keeping the focus on the words + photos.
On each journal card I used a brush pen to write "color #01" and "color #02" and then added my story of each photo.
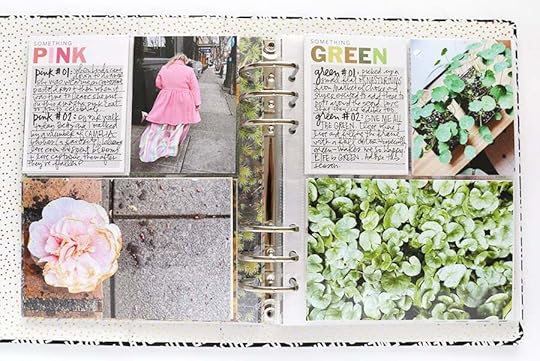
Simple journaling + reflections on the day.
I loved this lens! It was such a fun way to switch things up.
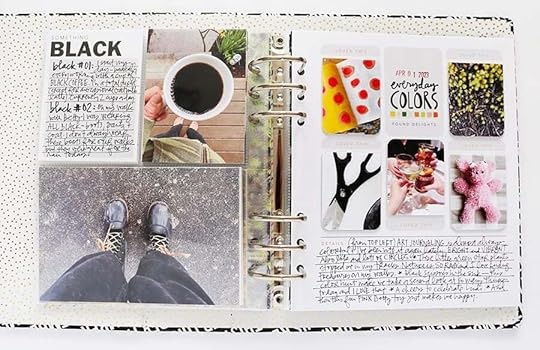
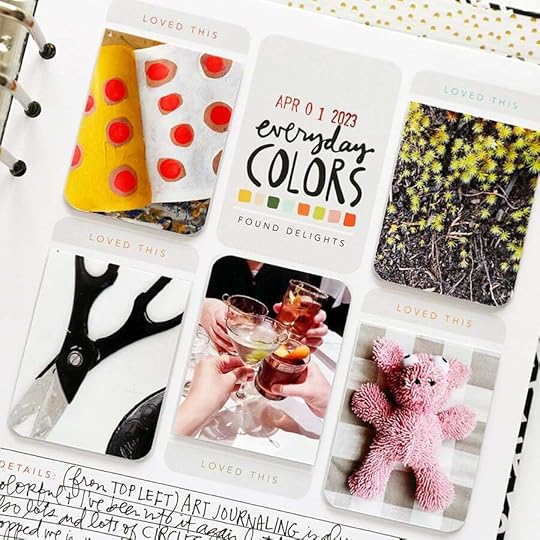
After each of the color pages I finished up this project with some additional photos and words added to the "everyday colors" prompt page. I used additional photos from the day showcasing a few things I wanted to include/capture from our day (regardless of the colors shown).
Thank you so much for joining me for this Story Play adventure! We have three more adventures to embark on this year: photography, facts + feelings, and little moments. We'll share an updated schedule for that soon.
SUPPLIESDay In The Life™ Story Play Kit (digital available)
Day In The Life™ 3x4 Stamp
Remember This Album
Inks: Redwoods, Tillamook, Honeyman, Willamette, Deschutes, Rose Garden
Epson PictureMate PM400
Epson XP15000
1 Inch Circle Punch
We R Memory Keepers Hole Punch
Silver Mini Brads
Corner Rounder
Foam Adhesive Squares
Micron 03 Pen
Pentel Brush Pen6 Hole Punch
April 3, 2023
Ali's March Documenting | Embracing The Season You Are In
This past month I decided I wanted to simply fill some pockets in my 6x8 2023 album with some March stories.
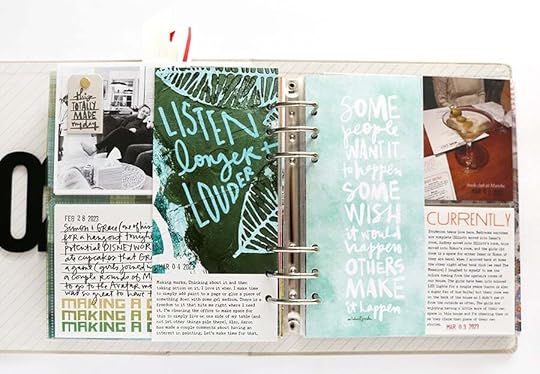
I'm finding myself in a re-newed creative season that's encompassing a variety of things in my life right now including art journaling/mark making, getting outside in my yard (I sometimes forget in the winter months how much this fills me up), working on content for my Week In The Life™ workshop, etc. I'm so thankful to be riding this wave + I never take these seasons for granted.
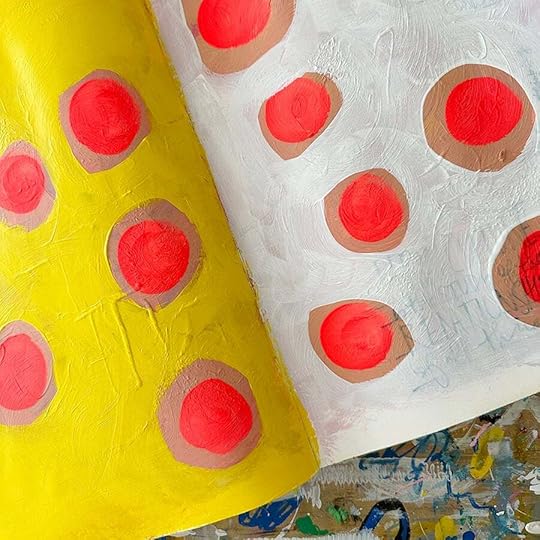
Early in the month I found myself inspired that I had some stories to tell - little stories about life around here - and I shared a few on Instagram. I've long loved using Instagram as a holding place for stories I might scrapbook at another time but I've gotten away from that some as I've struggled with my own issues with social media. I decided to take action on those stories and printed them out during the month (sometimes on the day I created the IG post) either as 3x4 or 4x6 images with corresponding journaling cards and just slipped them into pockets in my album.
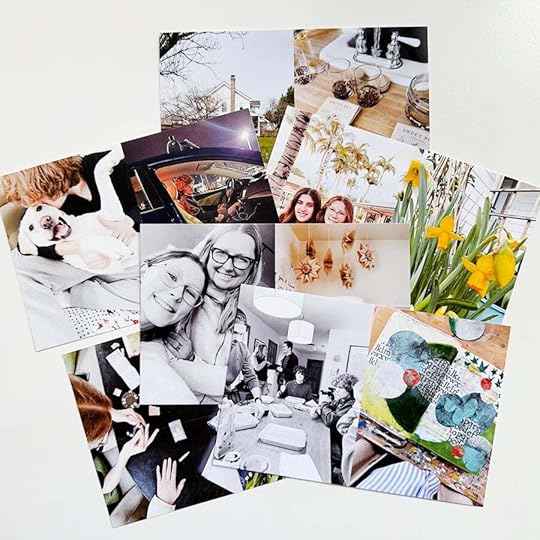
As the month went on I was so excited that I'd filled a few pockets and knew that I wanted to come back to that album and add more. At the end of the month I went through my photos and printed out about 12 more (sized 3x4) along with some typed journaling on journaling cards and had the best time with this simple approach.
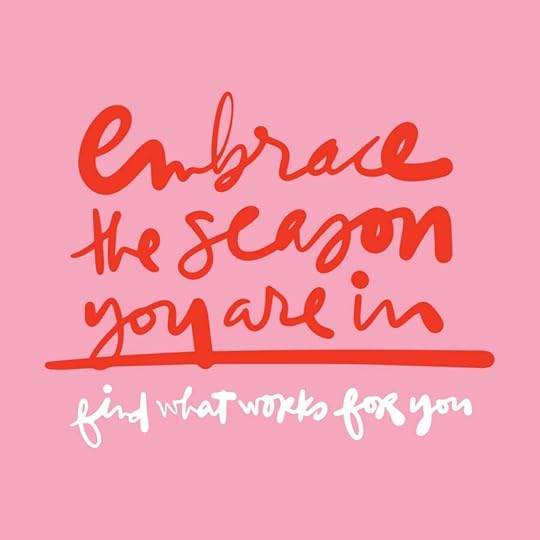
I am embracing the season I'm in by giving myself permission to keep it really simple with these kinds of stories: words + photos.
A couple things I know after memory keeping for over 20 years that feel relevant to share today:
Embracing the season we are in helps in maintaining a lifestyle that values storytelling. Currently I don't want to do any structured weekly documenting but I like the idea of capturing everyday life stories over the course of the month + then simply adding them to a 6x8 album. No embellishments required unless I really want to add them.
This doesn't have to take a lot of time. I spent an hour or so selecting + printing my photos (printing done here at home on my Epson PictureMate PM400), typing up some journaling using digital journal cards (and printing them with that same printer), and then simply slipping them into the pockets.
I always have the option to make it more designed + more crafty + can add more embellishments if I want! Options are awesome.
Albums are just holding places for stories. Check out a video I did on that here.
I can change my mind from month to month how I'm telling stories based on what makes sense for me and my own life right now.
Ride the wave. Ride the wave. Ride the wave.
Here's a video where I'm filling the pockets + wrapping up my March stories:
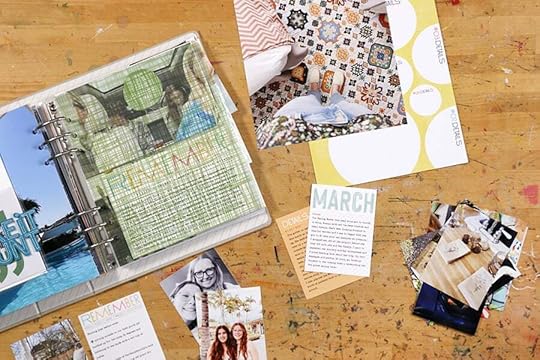
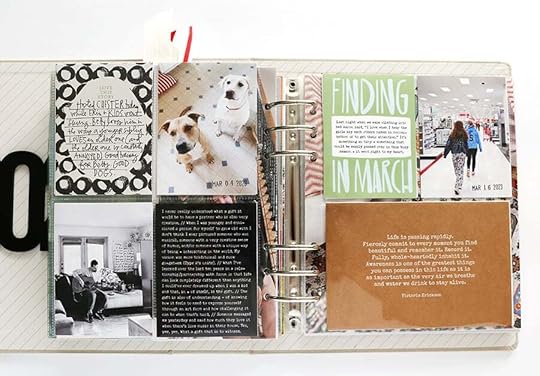
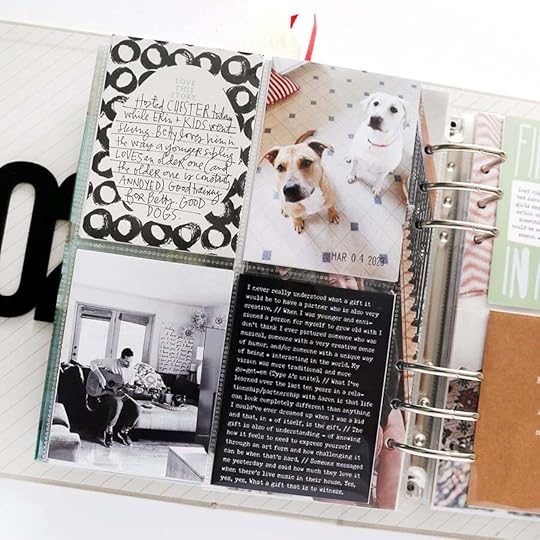
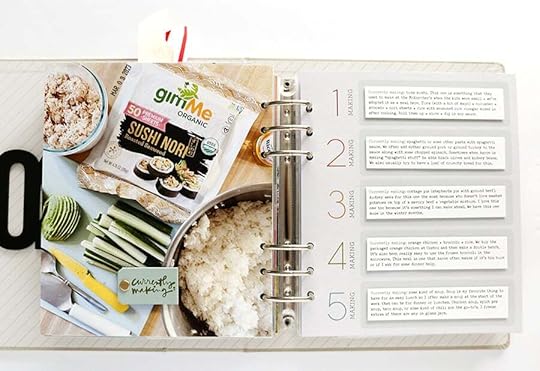
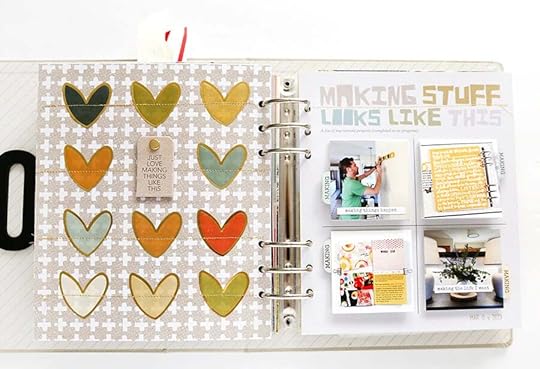
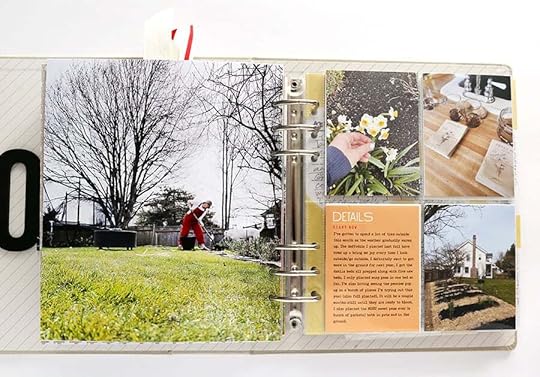
Here's what March looks like in my 6x8 album:
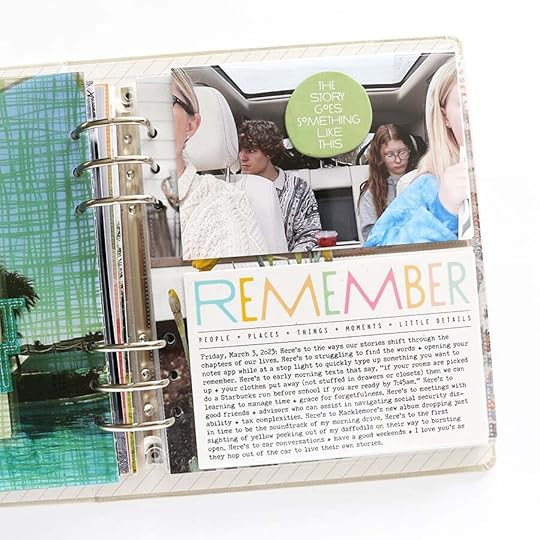
The basic stuff is the stuff of life.
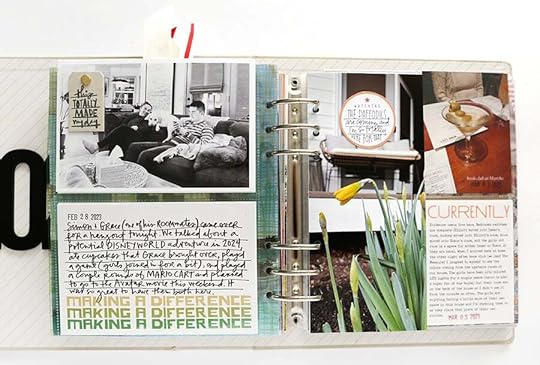
Sometimes I'm typing and sometimes I'm handwriting.
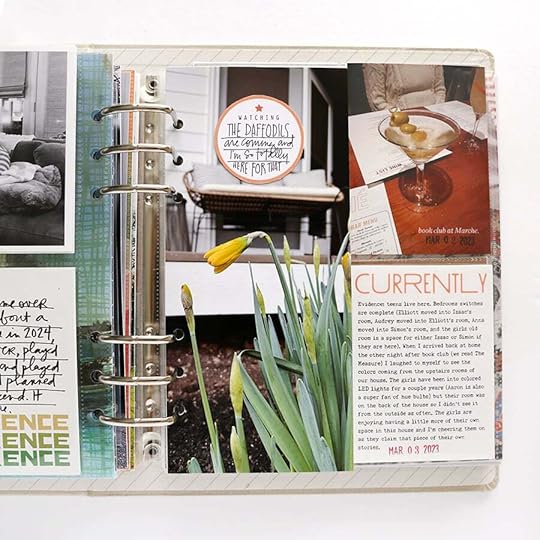
I loved adding in a 3x8 image of daffodils at the beginning of the month.
From the Make Story Kit classroom.

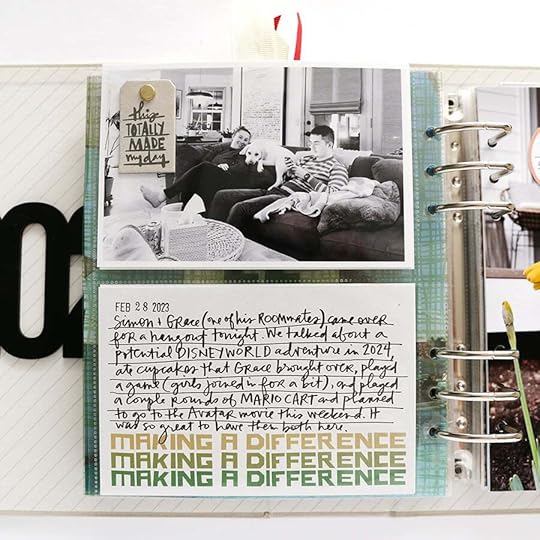
Love these kids and love having a photo like this of them in here.
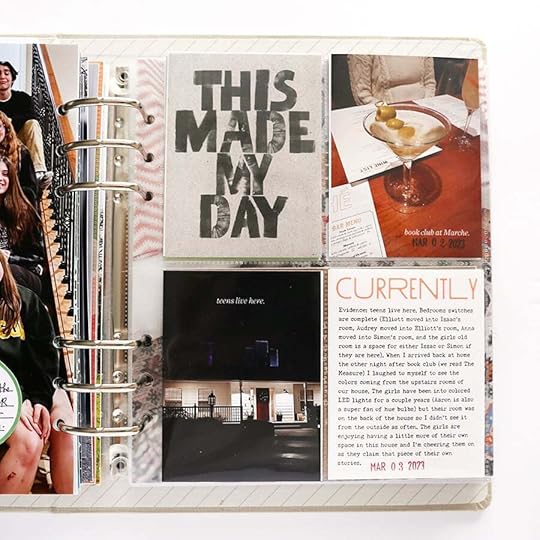
A perfect example of a micro story is that one at the top where I paired the "this made my day" card with a photo of my drink at book club.
Often times when I'm printing these I put both the photo + the digital journal card on the same 6x4 canvas for easy printing (and then cut with my trimmer before .
Here's a tutorial on putting two 3x4's on a 4x6.
Simple + more simple. Grab a journaling card + write the story or type up your story and print it on a 3x4 background.
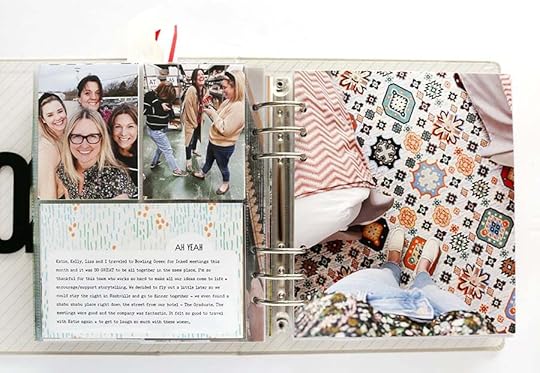
I loved pairing a couple 3x4 photos of our team with one big full page photo of the awesome Graduate Hotel in Nashville.
From the Make Story Kit classroom.
From the Make Story Kit classroom.
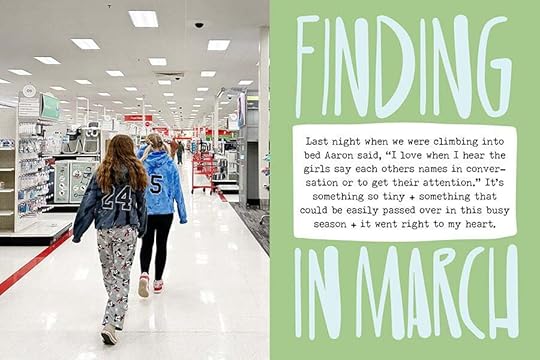
Simple scenes of stuff I'm into here at home (and the work I love to do outside).
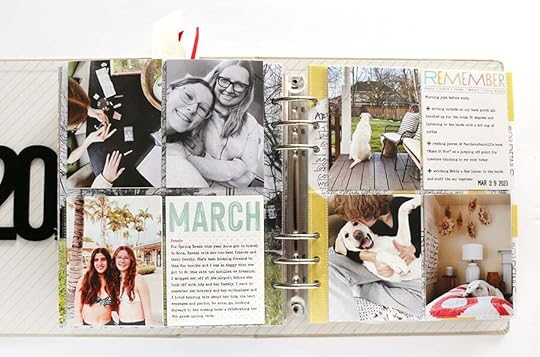
I also loved being able to grab this 6x8 prompt page from the March Stories By The Month kit to include a few more reflections/stories related to the photos I was simply slipping in the pocket.
Be in the season you are in.
Let's celebrate and flow with where we are at vs. fighting against it for some version of ourselves we think we should be/how we should document.
SUPPLIES
March 2023 Stories By The Month Physical + Digital Kits
Make Story Kit
6x8 Alpha Stamp Set
Brush Pen
6x8 Linen Album
March 31, 2023
In Case You Missed It | March 31
Happy Friday, friends! Welcome to the latest
In Case You Missed It. Just a reminder that this is a quick post that will happen every Friday afternoon with all the updates and links that have happened throughout the week. So, let's get to it:
YOU HAVEN'T MISSED IT YET | DAY IN THE LIFE™
Tomorrow is our first Day In The Life™ project of the year. Every day this week Ali has shared a video on YouTube and the blog with some ideas and inspiration related to Day In The Life™. This year we are using the lens of color as a way to tell the story of our day. Here are her posts from this week:
Monday | Kick Off + Reason Why
2023 WEEK IN THE LIFE™ PRODUCTS AVAILABLE
The all new Week In The Life™ products for 2023 are now available! We have two new albums, our journal, a gorgeous main kit, an incredibly fun themed mini kit, and a collection of coordinating Week in the Life™ products. All of the products are in the warehouse and ready to ship! Shop the collection here.
WEEK IN THE LIFE™ DOCUMENTING WEEK
Ai will be documenting her week beginning Monday, April 24th. Consider yourself invited! Stay tuned for more content around documenting coming soon!
WEEK IN THE LIFE™ PREP DAY
Week In The Life™ Prep Day is also available for registration, happening April 15th. We'll have more details for your soon! Register here.
WEEK IN THE LIFE™ DIGITALS
Our collection digitals for Week In The Life™ will be available on Friday, April 7th. Layered templates will be coming to the shop closer to the documenting day. We will have 10x8 and 6x8 layered templates again this year. Layered templates are .PSD files. Main kit journal cards and papers will be available as separate file. The kraft pages will be available with a white and transparent background and we will also have album art available. SVG files, which can more easily be manipulated in CANVA, will be included when possible, consistent with previous digital releases.
LAST CHANCE FOR 40% OFF SELECT DIGITALS + CLASSES
Use promo code SPRING40 to get 40% off select digitals and classes all month long!
IMPORTANT SUBSCRIPTION UPDATES
Since January, we’ve seen incredible growth in our subscriptions! As always, we are extremely grateful for your support and thrilled by your enthusiastic response to the changes we’ve implemented. As a result, we are currently on a waitlist for both new Stories By The Month™ and Story Kit™ subscribers. Now is the time to subscribe or jump on the waitlist if you’ve been considering a subscription to either of these products. If you are interested in receiving one of these subscriptions when they become available, it’s important to sign-up for our waitlist now as it helps our team anticipate future quantities.
As always, we’re so grateful to have you all as members of this community! Thanks for joining me today and have a great weekend!
Story Play | Day In The LIfe™ | Live Q+A Replay

Big thanks to those who were able to join for our Live Q+A on YouTube!
Here's the replay of that conversation:
Tomorrow (Saturday, April 1) I'll be sharing my images throughout the day on Instagram. I'll have my completed project ready to share here on the blog by the end of next week (that will be the "show + tell" post).
If you are sharing on Instagram on Saturday we invite you to use the following hashtags for each color to inspire our community:
#aeditlred#aeditlorange#aeditlyellow#aeditlgreen#aeditlblue#aeditlpink#aeditlblack#aeditlwhite
Let's have some fun with this one! Color treasure hunt here we come!
March 30, 2023
Story Play | Day In The LIfe™ | Tips For Photos

Welcome back to Story Play | Day In The Life™ 2023!
Today's post features a couple tips/things to think about as you look through the lens of your camera on the documenting day.
Don't forget to join me for a live YouTube Q+A tomorrow (Friday, March 31) at 11am Pacific. Click notify me via this link to be reminded when the live video begins! I'll put up a blog post with the recorded video after the live has concluded.
Let's dive into the video:
Here's an outline of the tips from the above video:
BE DELIBERATE
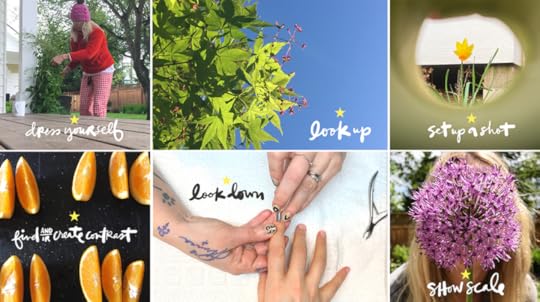
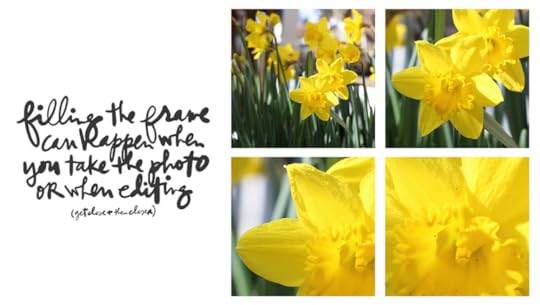

Simple tips help you stay focused on the project! Try one or more of the above tips when you are documenting your day using color as your story lens.
March 29, 2023
Story Play | Day In The LIfe™ | Tips For Words
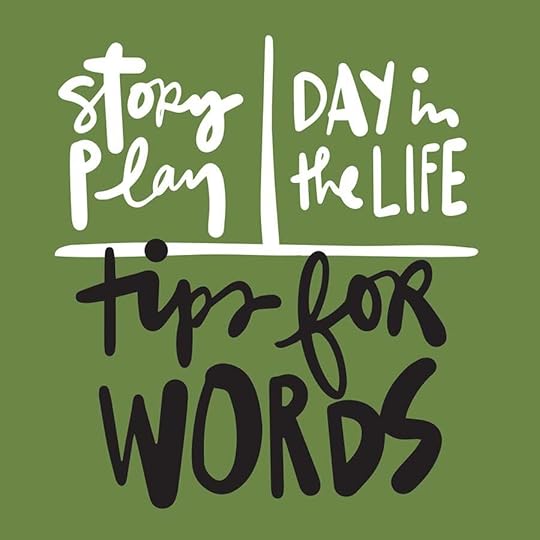
Welcome back to Story Play | Day In The Life™ 2023.
Today's video is focused on a few tips + ideas for approaching the words in this documenting project. Remember the community documenting day is coming up this Saturday but this a project you could embark on at any time!
Let's dive into the video:
Here are a few highlights from the video:
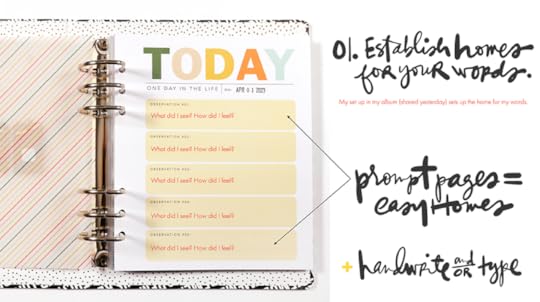


Love keeping it simple + focusing on a few ways to get my story of this day told.


