
Ali Edwards's Blog, page 171
November 16, 2016
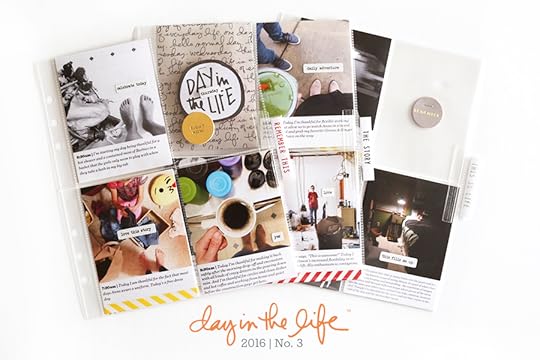
Day In The Life™ | October 2016
Today I'm sharing my last Day In The Life™ documentation for 2016.
This process - doing the project three times this year all inside my Project Life® album - worked really well so we are going to plan three new mini kits for 2017. The timelines for the documentation days will likely be similar to what it was this year - every couple of months.
You can check out my two other days for 2016 here: March and July. And check out my Day In The Life™ archives of past years here.
For this round of the project I used the Day In The Life™ Mini Kit No. 3 along with other products from my shop including the Word Phrase Sticker Bundle, the Phrases Roller Stamp, and 6x8 page protectors.
If you are a digital/hybrid memory keeper you can also grad this kit digitally here.
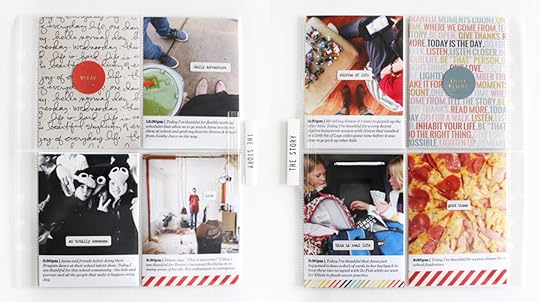
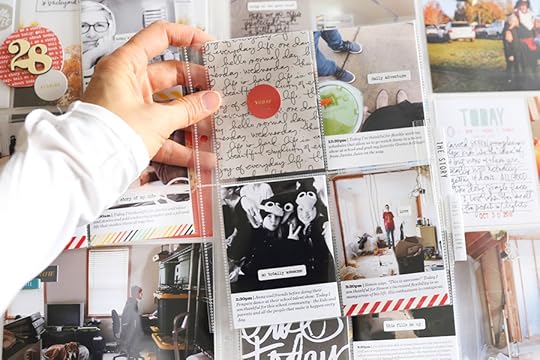
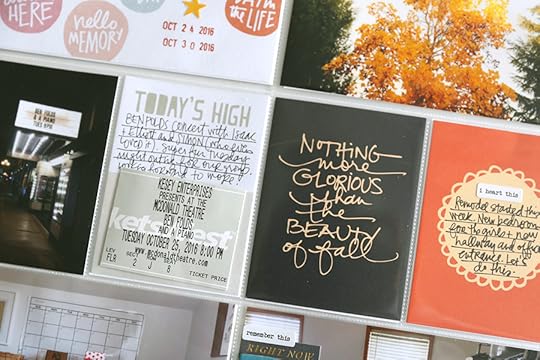
This Day In The Life™ project fits as an insert within my Week 43 of Project Life®:
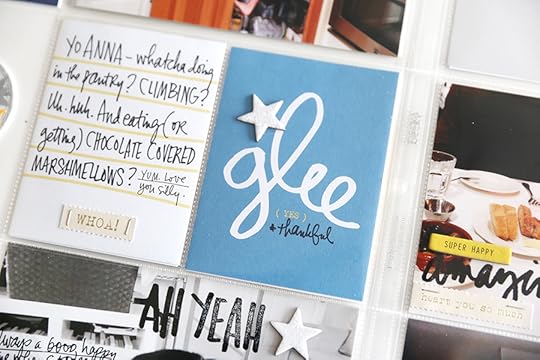
My focus for this round was to document something I was thankful for each hour. It was a really nice lens through which to approach my documentation for the day - loved having a specific theme to focus on and a limited number of photos to take based on the hours I was awake.
This time I decided to use three 6x8 page protectors to hold my photos and stories. I also decided to print out all my photos with the journaling along the bottom and cropped to 3x4. I used Photoshop to maintain consistency of size and type. My photos ended up being 3x3 with a 1-inch white section on the bottom for my words - all posted on Instagram on the actual day - and simply copied and pasted into Photoshop before printing.
Here's a look at those 6x8 page protectors outside the album (front and back):
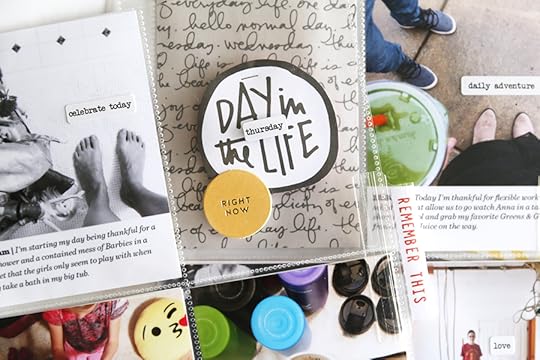
On each photo for my inserts I added a phase from the white sheet in the Word Phrase Sticker Bundle. If there was very much white space underneath my text I added some folded over washi tape. These tapes have been in my drawer for a long time so I don't have a specific source for where they came from. I like diagonal stripes.
Along the edge of each page I added an Avery Index Tab with a stamp on the inside paper using the Phrases Roller Stamp. Ink colors used are Pendleton, Black Butte, and Olympia.
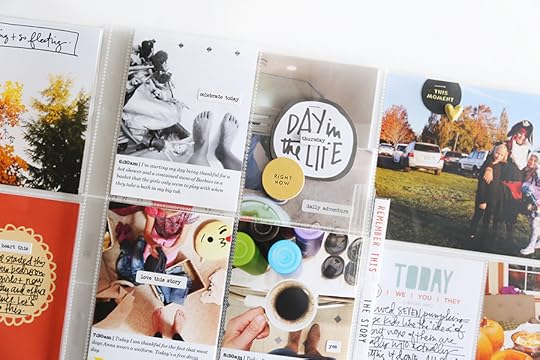
The variable for each page (front and back) was my "filler" content.
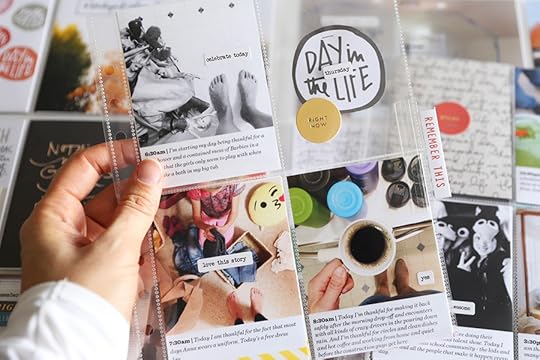
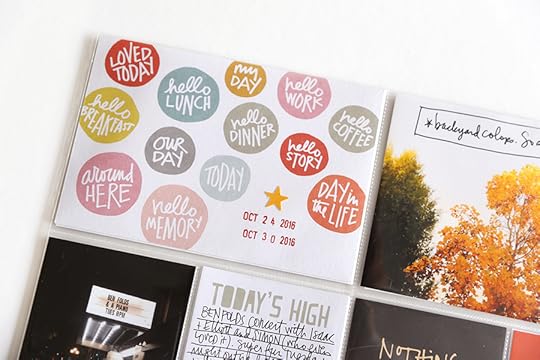
For the first page I hand-cut the "Day In The Life™" circle from one of the 3x4 cards from the kit. I paired that with one of the small gold foil circles and a "thursday" sticker from the Word Phrase Sticker Bundle.
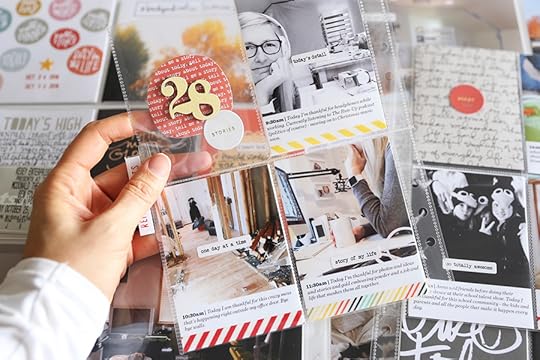
On the back of those pieces I cut out a second matching circle from one of the pattern cards and added the "stories" gold foil circle. In my stash I had an old wood veneer number 28 from a past December Daily® kit. I embossed that using Zing Butter Embossing Powder.
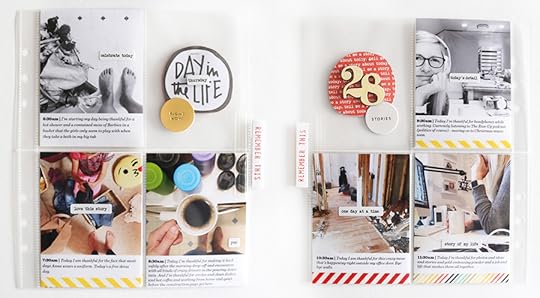
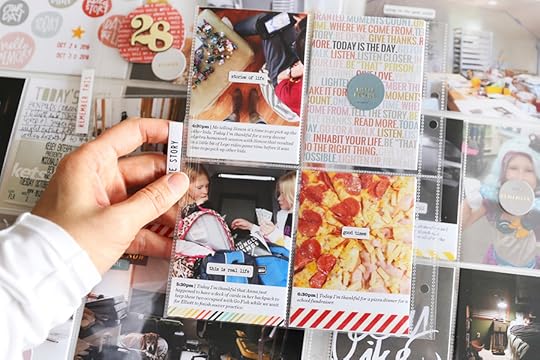
For the second insert I simply added - in addition to my photos + words - 3x4 pattern cards from the kit (one is cut down from a 4x6) + one of the small circles with gold foil text.
For the third insert I adhere two of the circles back to back and stapled them to the page protector from the outside using a Tiny Attacher.
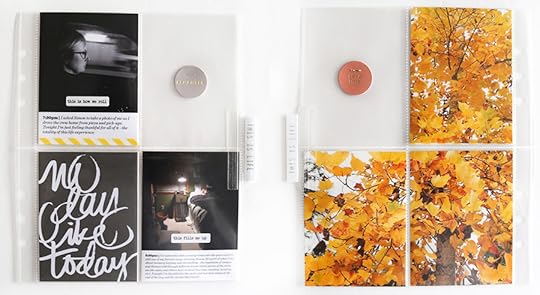
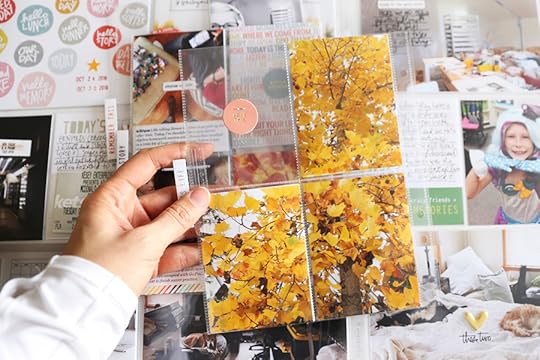
On the last page, since I was out of photos from the day itself - I printed out a 6x8 photo of a tree in my backyard and cut it into 3x4 pieces and slipped it into the pockets.
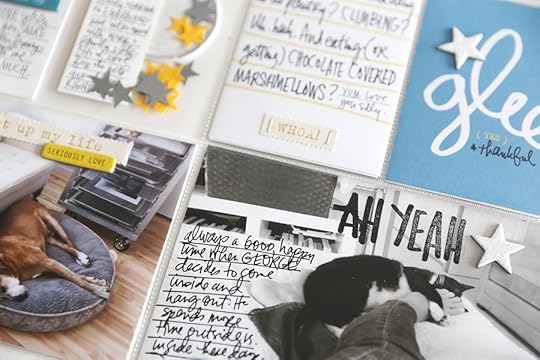
Here's a look at each side of the page protectors individually along with the album:
I love see-through stuff.
The font I used for my journaling is Sentinel. I love simply using the bold version of the typeface for the hours.
I really liked the addition of the washi tape along the bottom - just a nice pop of color.
When I'm putting together a project like this I like to set myself up for success by following some kind of a formula. In this case the formula was made up of the same sized photos + journaling + a white phrase sticker + sometimes washi tape. Not having to reinvent the wheel with each photo made the process easier.
Loving how it turned out.

Another see-through pocket.
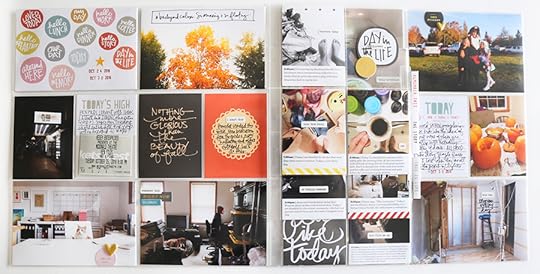
And a few shots of Project Life® Week 43:
I used cards from the No. 3 kit mixed into my week.
I also used some more of my Fall Favorites Journal Cards.
Thanks for playing along with this project in 2016! Looking forward to telling more stories with you in 2017!


November 15, 2016
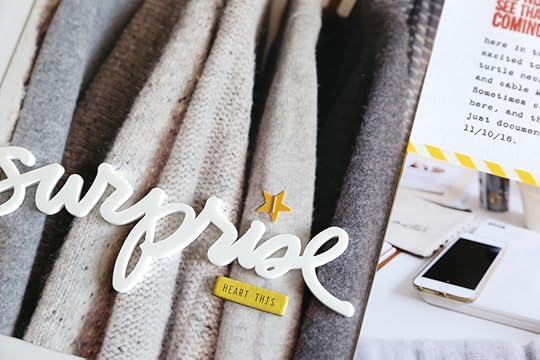
Story Kit™ & Story Stamp™ | Surprise
Today I'm excited to introduce you to the next story theme:
Surprise.
Throughout our lives we are all surprised at one point or another by a person or a place or a thing or a thought. Sometimes those surprises are awesome and other times they take our breath away. This month we are telling stories of surprise - both the awesome and the challenging ones. When was the last time you were surprised?
Also, I feel compelled as I set up this post to mention that this kit was designed and planned over 6 months ago. It has ended up being ironically timely in light of the US election but was not designed with politics in mind. That said, my intent with my all Story Kits™ is to give you thoughtful products to help you tell a variety of different stories that align with the theme of the month.
If you are already a subscriber to you can now access the content in the classroom (
make sure you are logged in to your account).
If you are new to the Story Subscription program, check out all the details
here.
Here's a look at the Story Kit™ contents for
Surprise:
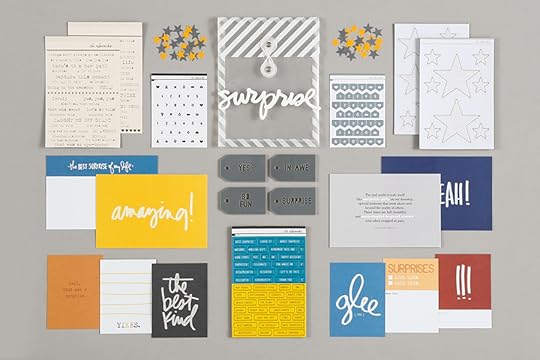
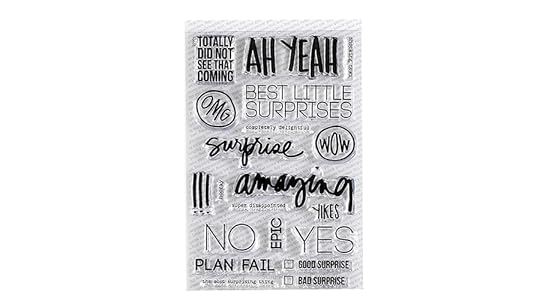
And the Surprise Story Stamp™:
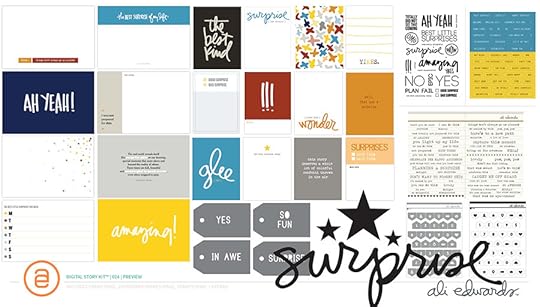
We also have a
Digital Story Kit™ subscription available that includes access to the classroom content. Here's a look at what's included for Surprise (which also shows all the designs for the journal cards included in the printed version of the kit): Here's a video overview of the products included in the kits this month:
Here's a video overview of the products included in the kits this month:
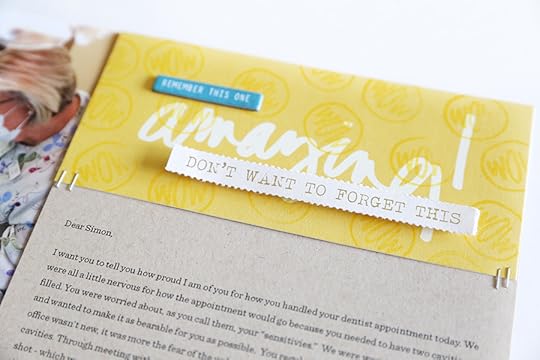
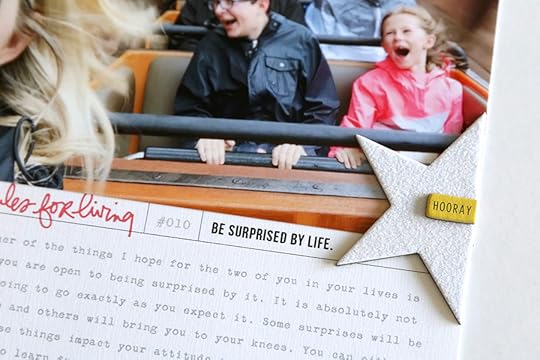
And a couple peeks at the layouts I created with the kits this month in addition to the one featured at the top of this post (
full details, including process videos and how-to handout, are included with subscription):
Again, thanks so much for subscribing and/or considering my
Story Subscription program!

November 10, 2016
December Daily® 2016 | My Hopes For You For

As we get closer to documenting December I've been thinking about what I'm hoping for you (and for me) this year. Here's what's been on my mind lately:
I hope you find a rhythm that works for you. This might be working on your project daily, or a couple times a week, or weekly, or after December. This looks different for each and every one of us based on all kinds of factors including time, lifestyle, motivation, illness, access to a printer, etc. There isn't a right or a wrong way to approach this project. The key is to establish your own rhythm that works for you and stick with it as best as you can (begin flexible when you need to and coming back to it when you can). There is no rule that says you have to be done by the time December is over. I choose that as my personal method because I want/need to be ready to move onto other projects by then.
I hope you know that this project is so much more about the stories you document than the products you use, purchase, or collect. I continue to maintain that the words and the photos are the most important thing - always has been, always will be. I create and sell products to help make the storytelling process easier and more intentional but the heart of all of it are the stories. I hope you will take this as an opportunity to look for and tell those stories that mean the most to you.
I hope you find, as I have over the years, that this project can absolutely be a source of joy in the midst of the chaos of life. One of the reasons I continue to come back to December Daily® again and again is that it's become a touchstone for me in terms of how I experience the season. It helps me keep the focus on the most important things and it helps me look for joy even when I might not be feeling it. When you actively look for joy with an open heart, for things to be thankful for, and for magic in the season you will absolutely find it. Magic is something we make. Remember that the season you are currently in may be different next holiday season - capture what "is" in your life right now with the knowledge that things can, and will, change.
I hope you find that this project is an opportunity to savor the season (and complement it) vs. causing additional stress for yourself. If you find this project is causing you stress I recommend evaluating the source (time, printing issues, motivation, comparison, attitude, etc) and doing something about it. Again, make it work for you. Making it work for you might mean stopping looking at everyone else's project and just getting yours done. It can be way too easy to spend your precious "creating" time watching YouTube videos or scrolling Instagram vs. actually telling your own stories. Making it work for you might mean simplifying your process and letting go of a vision of what you "think" it should be and making it what it needs to be for you instead. Making it work for you might mean working to establish your own version of enough. You don't need to go out and find a hundred extra things during your holiday season just so you have something to document. The small, quiet stories of days at home are beautiful and meaningful.
I hope you find that this project gives you an opportunity to be creative & play & have fun. To play with some products, to reflect on the stories, to find that awesome sweet spot between stories and stuff. Creativity can mean so many different things - from getting really messy with inks and paint to playing with digital products to enlarging photos to crafting your words in a way that tells your most authentic story.
I hope you will remember that it doesn't ever - never ever - need to be perfect. What in the heck does that even mean anyway? What's perfect is an effort: an effort to get down your stories of the season and an effort to create opportunities for yourself and your family to find greater meaning in the season (whatever that looks like for you). I have ten years of albums for a total of 250 stories (one story per day). If I had worried about all those stories and photos and stuff being perfect I never would have gotten any of those stories written down. When I look back through those albums now what I'm most thankful is that I took the time to do it - to experience each season with a focus on looking for and documenting joy and magic and love and collecting them together into something tangible that can be held in our hands. It's never been about creating something perfect - it's always been about creating something that celebrates the season.
I hope this project will connect you with a community of memory keepers who will cheer you on, lift you up, and value your story. One of the side benefits of this project is the community that has built up around sharing our December stories. People from all over the world looking for joy, taking photos, sharing ideas, and valuing their individual story. I also love reading about
I hope you remember that your story is valuable and worth telling no matter your current life situation. No matter what. Your story is worth telling.

November 7, 2016
Digital Shop Sale | 30% off
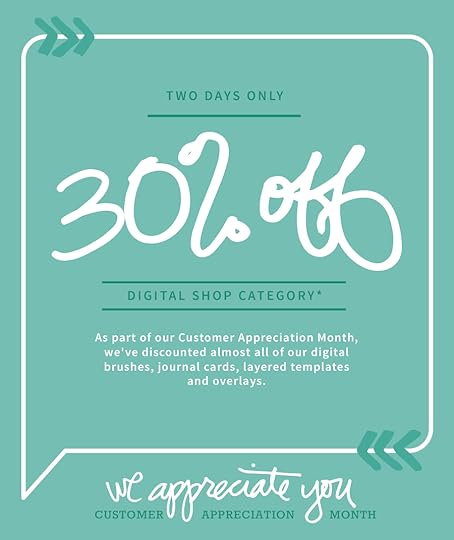
Happy Monday!
The majority of our digital shop is 30% today and tomorrow only (excluding 2016 December Daily® digital products). It's a great time to stock up! Offer good through 11/8/16 at 11:59pm EST.
PS | if you are a student in my Hybrid workshop you can get 40% off using the code HYBRID10.

We now have over 30 new holiday themed products available in our Classic AE section. These items were previously found at Designer Digitals, and are now available to you in the shop. Check them all out here.

November 1, 2016
Halloween 2016

All kinds of fun and celebration happened here last night. So much so that I didn't get as many photos as I usually do because I was in the middle of the fun. I was cooking and laughing and chatting and drinking and monitoring and encouraging and lighting and opening the door.
I love having friends over for Halloween and last night was our biggest gathering yet. It helps that we've had four more people move in to our home and that some of their friends decided to join us too. It was a crazy crew of kids and adults and various characters. We ate chili (I make the same thing every year) and corn bread (love you Kim) and passed out bag after bag of candy.
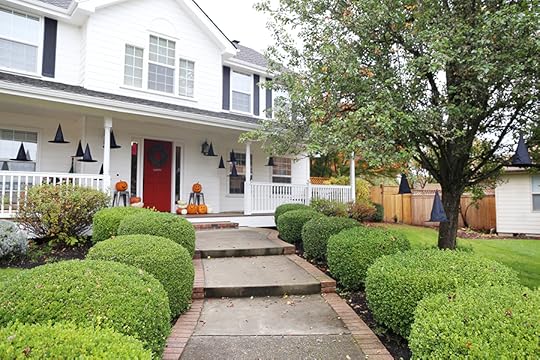
I continue to be a fan of carving pumpkins and none of my kids like it. Ha. Too messy and mooshy. This year I carved eight of them. I still have a dream to go really crazy and have them all lined up and down the pathway from the street to the house.
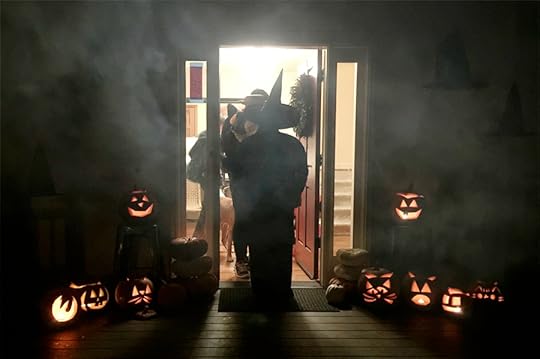
This year I also tried something new that I found on Pinterest: floating witches hats from polkadotchair.com. I ordered 15 simple black witches hats from Amazon and used glow sticks inside. Unfortunately the glow sticks weren't bright enough to see even any light in the darkness but the hats still looked super cool just hanging there. Next year I'll try the LED lights (mentioned in her blog post) or tea lights or something else and see if that works better.
The weather was awesome this year - especially compared to last year when it rained the whole night.
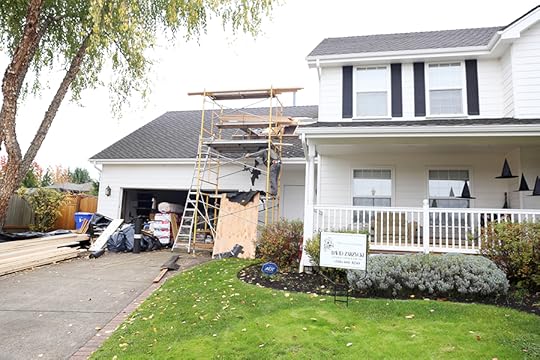
As you can see construction has started on my house to create an additional bedroom (out of existing space outside my office). Yesterday they broke through the roof to make room for a new dormer which will hold a new hallway into my office. We definitely joked about having something coming out of that hole in the roof for the evening.
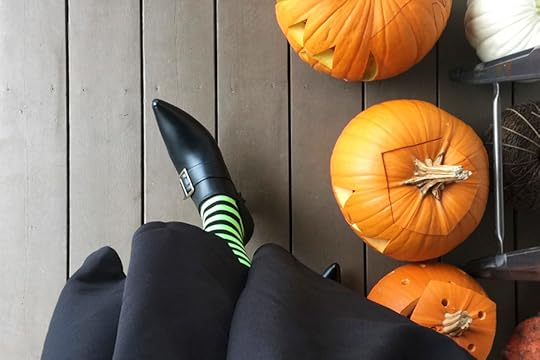
This year I decided to be a witch. Last year I was good and this year I was bad. Dressing up is fun.

The kids + friends loved the hanging witches hats.
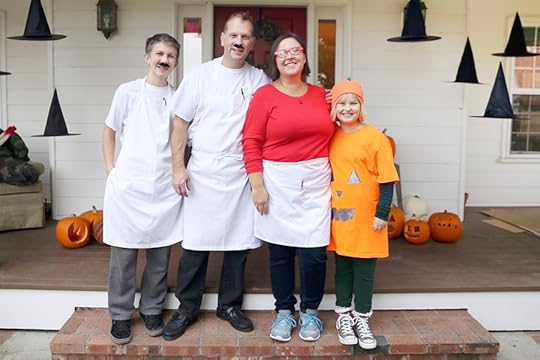
The Ackerman's were here again. Love that they keep showing up year after year.
Next year I want to make it a priority to get more group shots like this.
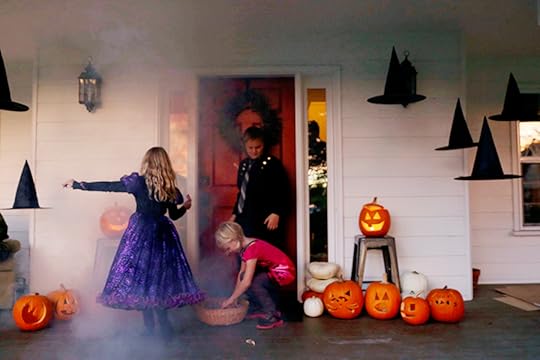
Aaron contributed his fog machine to our craziness. It definitely contributed to the ambiance of the evening.
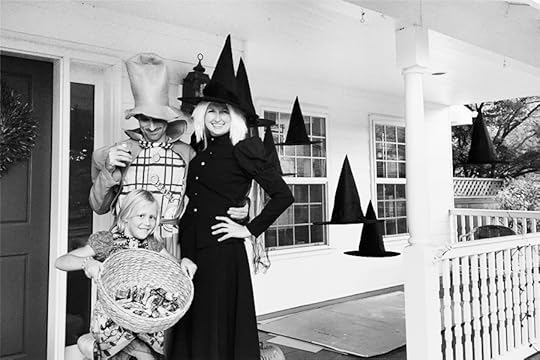
The witch and the mayor and a character from Ever After High and one of our baskets of candy. I wore the same wig that Simon wore last year for his Doc Brown costume. I considered the green face paint for a more authentic Witch Of The West but decided to keep it simple.
So many kids in the neighborhood last night. The girls all went out together with some of the adults and saw other friends along the way who joined the group. Isaac & Elliot and their friends went out on their own and were the first ones back to go through their stash and trade with each other (Elliott and Isaac were "scary" guys). Simon (who I didn't get a single photo of) was a "western guy" and went out with Chris and Tiffany (who had awesome Elf On The Shelf costumes). I stayed back at the house with my friend Kim and Katie to give out candy and chat and hold down the fort.
A busy day and night that definitely included falling into bed with tired feet at the end of the day after everyone was safe and sound in their beds.
Halloween Outline Banners word art used on the top image available here.

October 29, 2016
December Daily® 2016 | Foundation Pages + Video Overview
Tis the season to do some
December Daily® pre-planning in order to set yourself up for storytelling success.
The last couple of years I've gotten a lot looser with my foundation pages (
the work I do before December) vs. the prep work that I did in the past before working primarily with divided page protectors. These days my advance planning revolves more around setting my intention/reason why, thinking about stories I want to tell (and letting the products spark possible stories) and simply getting some things in the pockets before December begins. Over the years my approach for this project has changed a bit as I've narrowed my focus more towards the photos and the words.
All that said, here's my process for playing in my album before December begins (this is what I've been doing for the last week or so):
Turn on some Christmas music. This totally sets the tone and gets me in the mood when the weather outside still says Fall.
Pull out and look through your previous December Daily® projects. I just filmed a new walk-through of my 2015 album for the Storytelling With December Daily® workshop and it was so good to simply go back and see what stories I told and what techniques I used and to simply see the evolution of my story. Going back allows you to assess what worked and what didn't and make educated and intentional decisions as you move forward.
Organize your page protectors. I'm following the exact same design map as I did in 2015 - you can check that out and download it for yourself here (there are a couple more 6x8 pockets vs. 2, 4x6 pocket pages this year and I just substituted those). Look for other materials that can also be used as pages. Last year I used 17 page protectors in my album - the other days were a combination of different materials (vellum, large tags) or enlarged photos that are the same size as a full-page page protector. This is important to keep in mind as you are viewing these foundation pages - I definitely don't always use two-pages or a spread for each day.
Start with an intention or reason why. In 2014 I used the term "the reason why" and in 2015 I used "intentions" - either one works (click on either of those links to download the digital word art/PDF). This year I'm going back to "the reason why" and I've been thinking about this one a lot for the past week.
What do I want to focus on this season? What am I hoping for in terms of how I/we experience the season in our home? Why are you embarking on this project? What's different or the same in your home this year? Do you have different plans or are you starting new traditions? Read my reason why below.
Go through your products. One of the things I'm loving about the products in the main kit this year is that many of them are story sparks - specifically the cards. I'm loving that I can put in a card about gratitude and know that I can simply do a gratitude list on that day. This is also a great time - before December - to go through any other products you might have on hand in your stash that you might want to use in this product or that you aren't loving any longer that could be donated to others.
Start playing and putting things in the pockets and thinking about the stories you might want to tell that are sparked by the products. For now I'm keeping the white chipboard numbers white - I might stamp on them or emboss them later on similar to what I did last year. Remember that you don't have to glue anything down yet if you don't want to - there's nothing wrong with changing your mind along the way (the trap you want to stay out of is ending up not doing anything because you can't decide on which color or page protector or sticker to use).
Let's take a closer look at what I've got in the pockets so far (unless otherwise noted the cards/products below are included in my
December Daily® Main Kit). Scroll down to the bottom of this page for a video walk-through of what I've included up to this point and a second video that takes a closer look at what I've got in my red box on my desk:
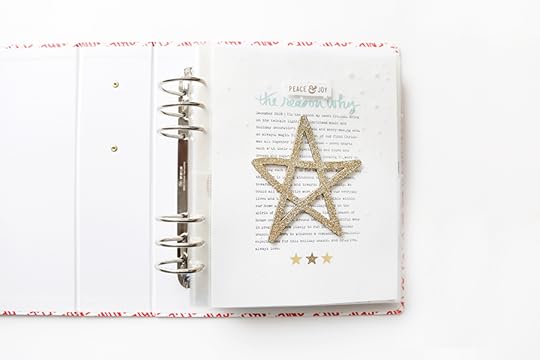
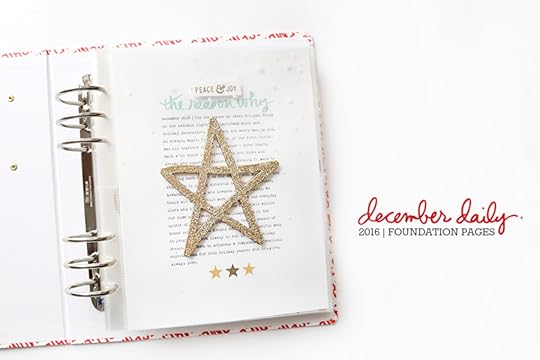
TRANSPARENT PAGE | I took the wood star from the kit and added
Zing Gold Glitter Finish Embossing Powder on top (it has more glitter "chunks" of glitter than the metallic finish powder). This is adhered/attached to the white star transparency with red line tape.
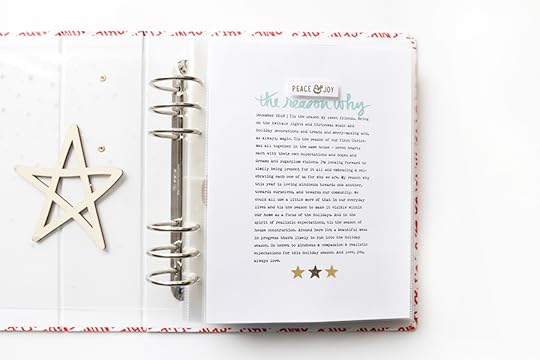
REASON WHY/INTENTIONS PAGE | Along the bottom of the page I stamped and embossed the star in the middle (using stamps from the
Christmas Star Set) and the two on the outside and from the package of stars in the main kit. The font I'm using this year is Remington Noiseless. You can download the Reason Why digital package here.
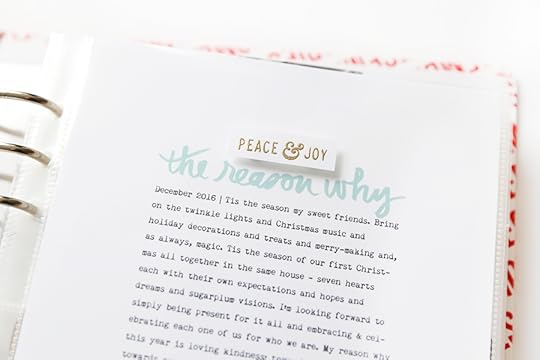
I stamped and embossed the
"peace & joy" with Zing Gold Metallic Finish Embossing Powder and then cut it out and adhered it to the page with foam dots.
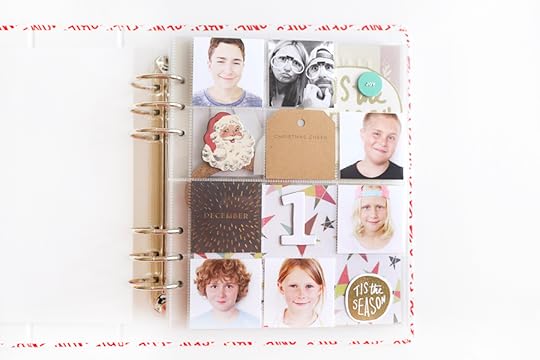
DAY 1 | I decided to start the album this year with the photos I took a couple months ago of each of the kids + a funny one of me and Aaron. I love that those kraft tags fit right into those 2x2 pockets (2 inches wide). I also, as you will see many times in this album, love to find opportunities to be able to "see through" to the next page.
The "December" card is from the
Jasmine Jones Mini Kit (cut down to 2 inch x 2 inch). The gold embossed "tis the season" circle is from the Christmas Messy Circles stamp set and was then hand-cut. The chipboard santa head is from the December Daily® Chipboard Shapes set.
I'll figure out what to put on the backs when we get to December 2.
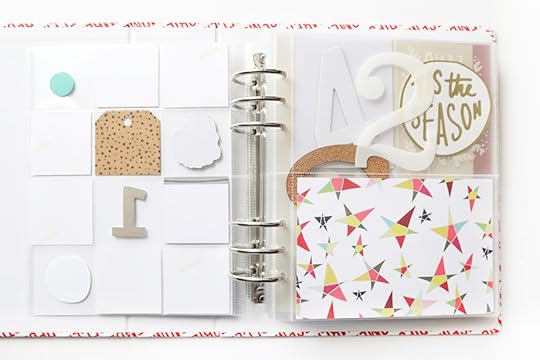
DAY 2 | Star patterned paper from
Pam Garrison's Mini Kit + plastic #2 from a previous Studio Calico kit.
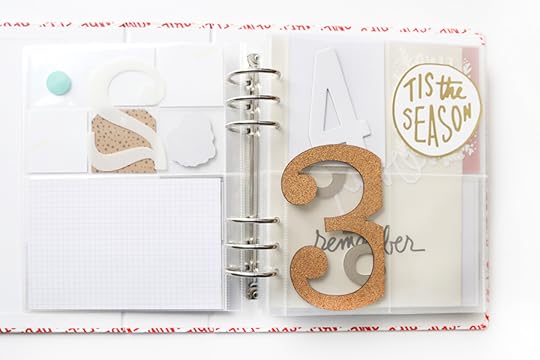
DAY 3 | As you might have seen in my previous
Beginning Preparations post, numbers are one of the things I look for in my stash. This very large cork number is from the Young At Heart Scrapbook Kit. To enable it to fit into the pocket I trimmed down along the edge and it's coming out of the top of the pocket. I paired the number 3 with one of the large messy circles from the Main Kit.
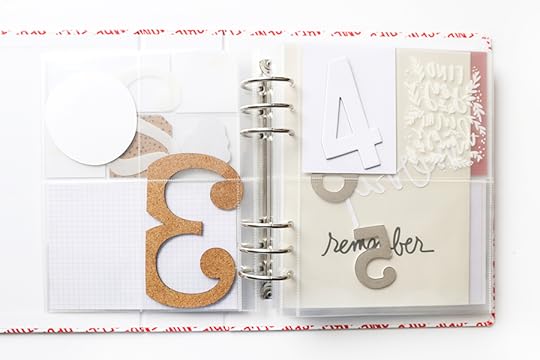
DAY 4 | I found a couple of these
white chipboard numbers in my stash and decided to add them in as well in a couple of places.
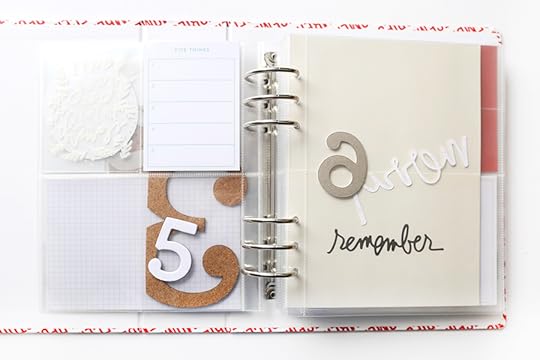
DAY 5 | This will likely be a day to document 5 things (again, loving that this simple card can be the spark for a specific story).
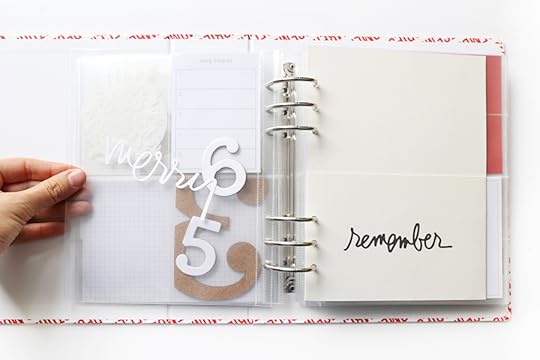
DAY 6 | I used the
Merry craft die and my Evolution machine to cut out the word "merry." I added in the "remember" pocket page here but might move it around depending on the story I end up telling.
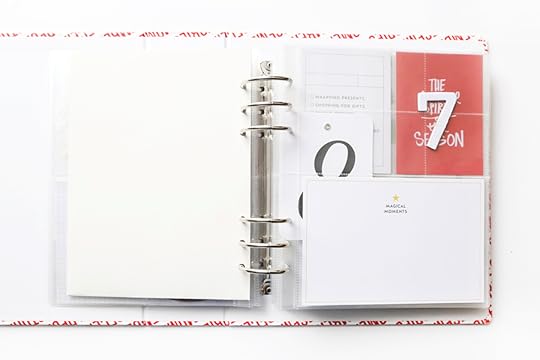
DAY 7 | Magical moments card + chipboard #7.
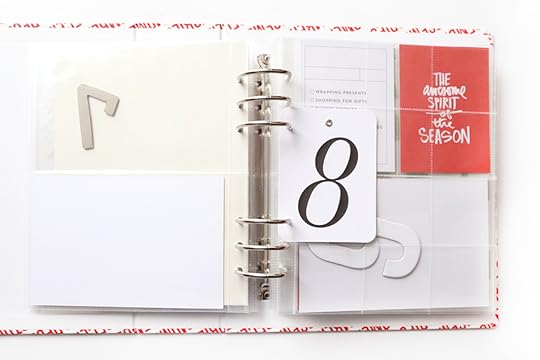
DAY 8 | I've had this number card forever. You could easily make this yourself by printing out an 8, rounding the corners and placing a grommet in the top.
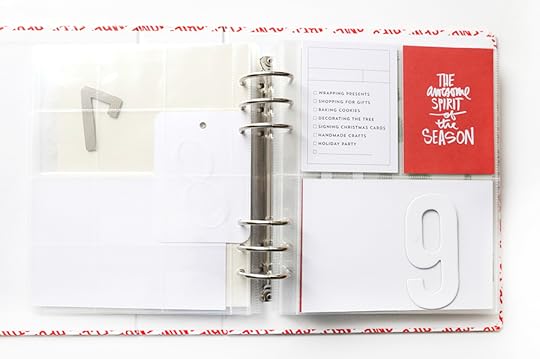
DAY 9 |
Cascade Chipboard Number + a checklist card + a sentiment card.
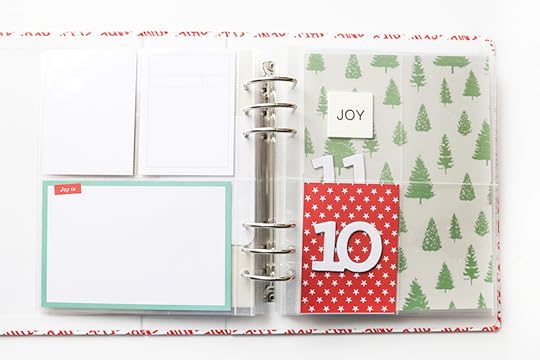
DAY 10 | The theme for this day will be "joy" using the "joy is" card from the main kit as the jumping off point. The white rubber "Joy" piece is from the
Paislee Press Mini Kit. The red star pattern is cut down from a 6x8 pattern paper in the main kit.
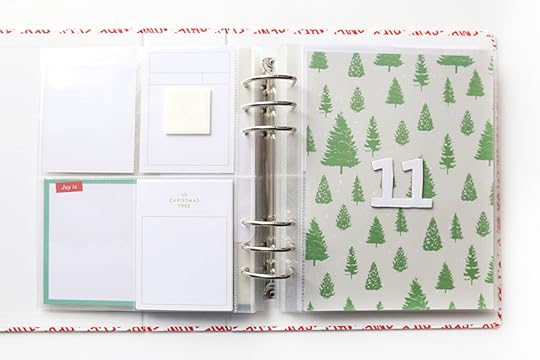
DAY 11 | Initially planning on Day 11 being the story of our tree this year.
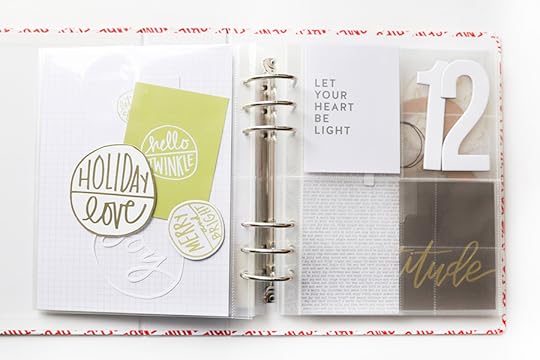
DAY 12 | Planing to play with circles for Day 12 - including cutting circles out of some of the journal cards + using the
"joy" craft die. Makes sense to me to just slip them into the pocket for now. Large chipboard numbers are from the Cascade Chipboard Set.
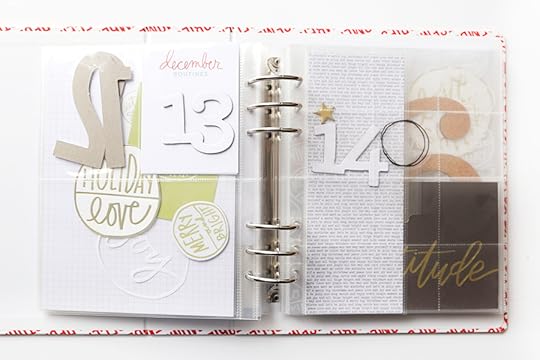
DAY 13 | I like the idea of identifying specific December routines so I'm going to document that on Day 13 (of course, the actual day is subject to change but I like the idea of this topic).
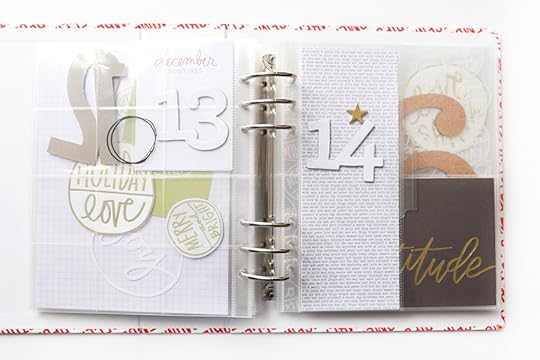
DAY 14 | I slipped in a
3x8 page protector + white chipboard number + gold chipboard star + cut pattern paper + Avery tab along the edge. Bring on the gratitude list.
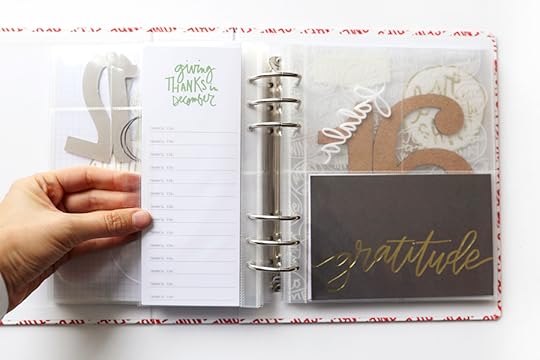
On the back I printed out one of my 3x8 layered templates from the
3x8 December Stories Layered Template Set and paired it with the gold foil "gratitude" card from Jasmine's kit.
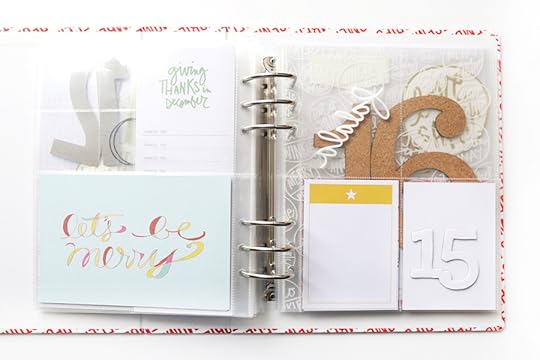
DAY 15 | "Let's Be Merry" card from
Pam Garrison's Mini Kit paired with the yellow star card and the "15" chipboard from the Main Kit.
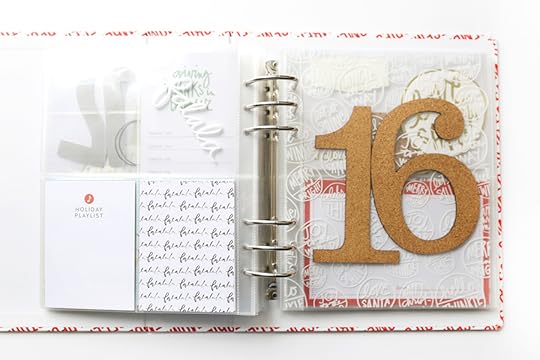
DAY 16 | I'm planning to document the music I'm listening to this year for this day. The large cork numbers from the
Young At Heart Scrapbook Kit are currently just sitting inside a 6x8 page protector.
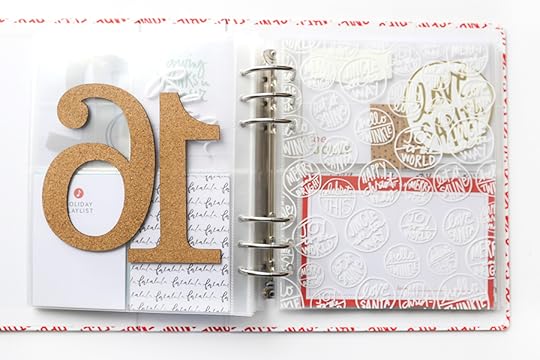
Next I put in the second pattern transparency page.
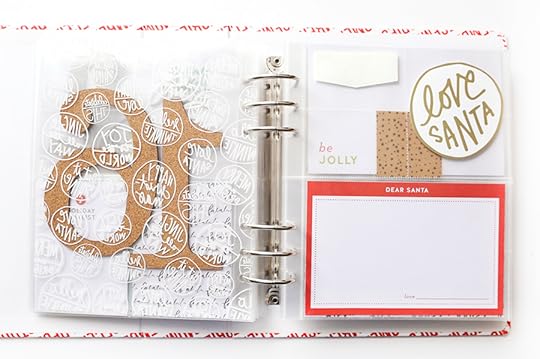
DAY 17 | I didn't put a number in here yet and it's likely I'll include some other things in here when the kids write their Santa letters. It's simply a starting place for a home for this story.
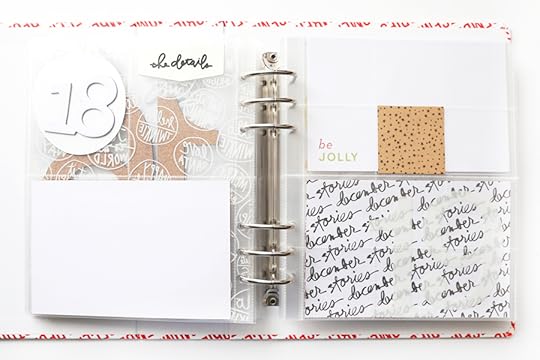
DAY 18 | The rubber "the details" piece is from the
Paislee Press Mini Kit. I love how the chipboard 18 can have a home behind one of those large messy circles.
Between Day 18 and Day 19 there's currently a 2x2 page protector with a bottom piece of one of the kraft tags slipped into the pocket.
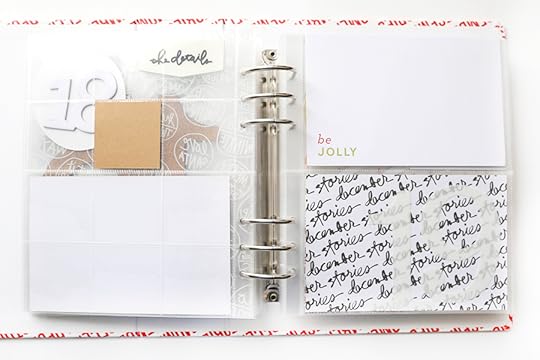 DAY 19 | Right now this day includes a "be jolly" card and 1/2 a sheet of the December Stories pattern paper from the Main Kit + a white plastic "1" and "9" from this kit.
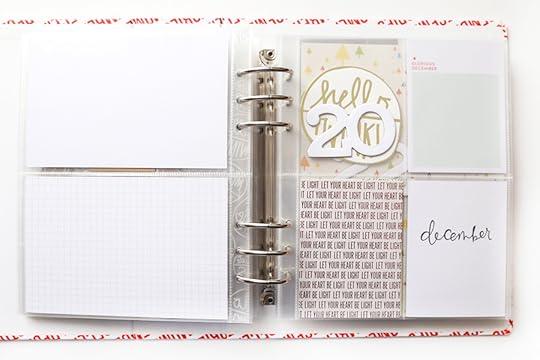
DAY 20 | For Day 20 I'm currently pairing the rose gold foil "Let Your Heart Be Light" card from the
Decor 8 Mini Kit + a white "December" card from the Paislee Press Kit (that will likely get covered up because I mainly put that in there for the other side as you'll see below).
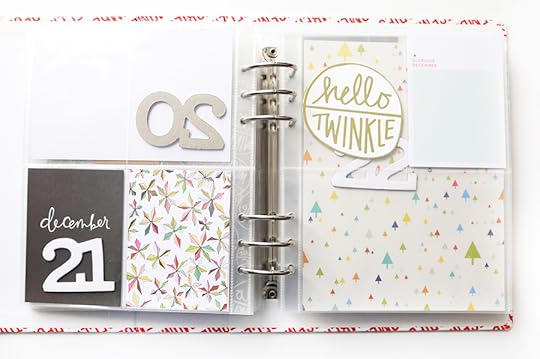
DAY 21 | "Glorious December" card + messy circle +
star card from Pam's Kit + 21.
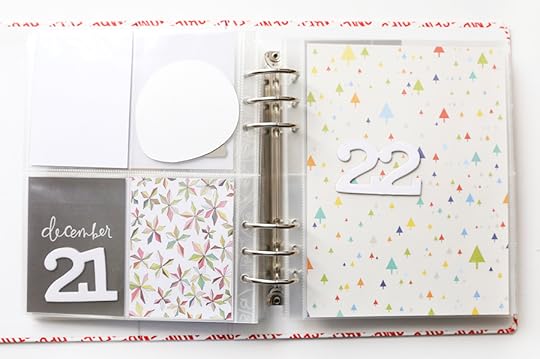
DAY 22 | As it gets later into the month my planning is usually even a little looser than the beginning. So many of my photos are led by the stories of what ends up happening at that time. Right now for Day 22 I'm just included the tree pattern paper and chipboard number from the Main Kit (again, nothing glued down).
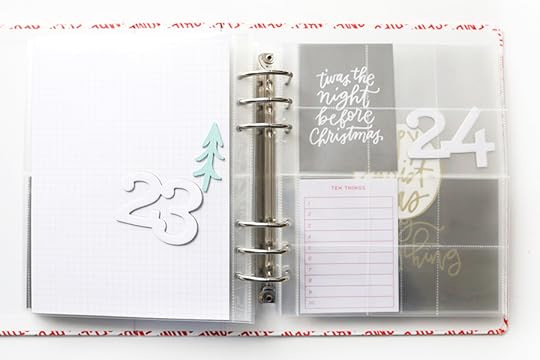
DAY 23 | I love those wood trees from the
Decor 8 kit so I'll likely include some story here and use the tree at the top. Love that color.
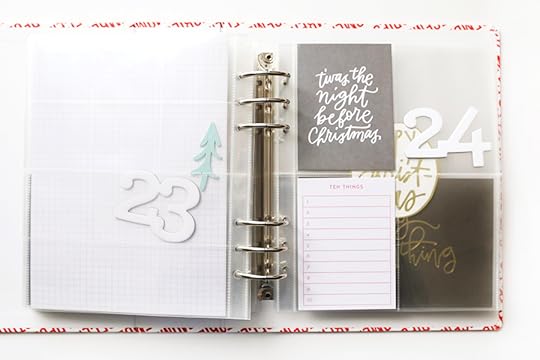
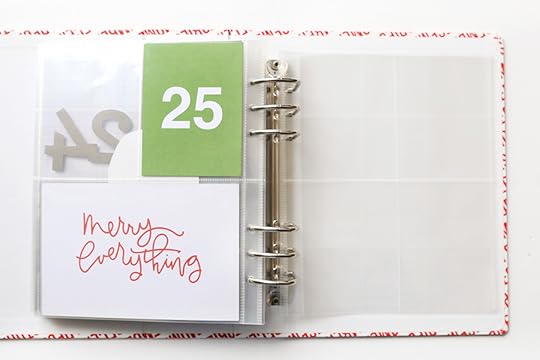
DAY 24 | I'm not sure yet what our plans are going to be for Christmas Eve and Christmas Day so I've just added in a few things I'll consider using when the time comes to tell those stories. I love that 10 Things list card from the Main Kit so that might get used on Christmas Day or Christmas Eve for my personal favorites.
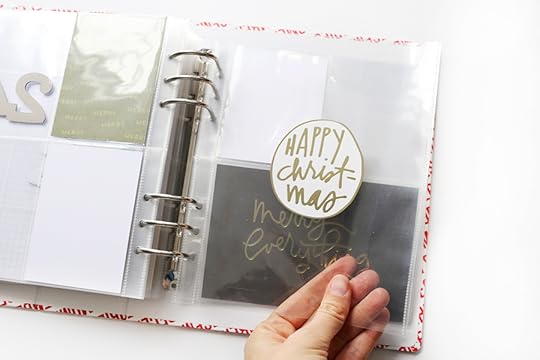
I love the idea
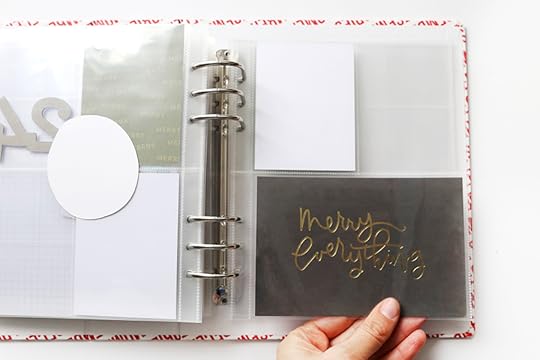
The "Merry Everything" card is from the
Paislee Press Mini Kit.
As always, things will look different once my stories start finding their homes in my album. You can see all my past December Daily® posts - including a video each day during my 2014 posts here.
2016 VIDEO OVERVIEWDESKTOP SUPPLY OVERVIEW
Here's a quick video of what's on my desktop this year as we get closer to December:
Check out my full collection of December Daily® products here.
I'm looking forward to telling stories with you this December!

October 26, 2016
Establishing Your Own "Enough" In Memory Keeping
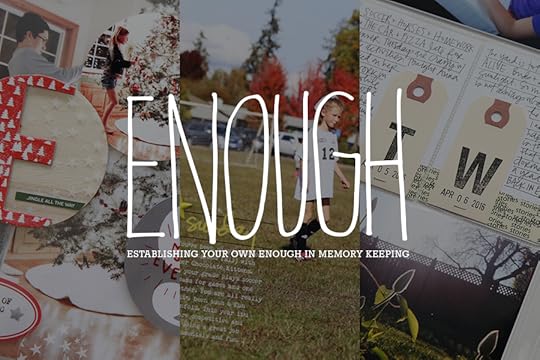
One of the discussions that has come up during recent workshops is the concept of "enough."
It's a word that has gained traction over the last few years in conversations and blog posts about how we feel about ourselves with the mantra "I am enough" resonating with so many of us for deep and valid reasons. For some people this is an easy concept to embrace and for some people it's really, really challenging - often because of the expectations we live with for ourselves or the stories we are telling ourselves about who we are supposed to be in this moment in time. Add in a hearty dose of Facebook + YouTube + Instagram + Pinterest "perfection" and finding your own enough can be a challenge.
"Enough" is a concept that can also easily be applied to memory keeping. It's a very personal, "one-size-does-not-fit-all" idea that can actually lead you towards a more meaningful relationship with this lifestyle/hobby. My enough might look totally different than your enough and that is a good thing.
Your own personal memory keeping "enough" is a fluid continuum. Seasons of life come into play here as they so often do in so many things. My "enough" right now might be "too much" or "not enough" next month or next year. It's okay to change your mind and adjust your level of enough. The key is to have it in mind in the first place and give yourself permission to let go of some of the extreme expectations you might be placing on yourself in this current season.
Knowing can your enough can open the doors to more joy in the process and more focused storytelling.
Here are some questions to ask yourself about your own memory keeping "enough" right now:

There are so many choices in memory keeping these days - which is awesome because it gives you choices (which can sometimes also not be awesome if you get overwhelmed with too many choices).
Maybe traditional sized layouts are just enough for you. Maybe monthly Project Life® documentation is enough for you. Maybe weekly Project Life® storytelling is enough for you (even if you aren't completing it weekly). Maybe just participating in Week In The Life™ and/or December Daily® is enough for you for the entire year. Maybe just typing up your stories and saving them in a folder or writing in a journal is enough for you right now. Maybe just participating in One Little Word® and focusing on your personal stories is enough for you. Maybe you want to do a little bit of everything and that makes you feel most satisfied. Or maybe you are simply in a dormant season where stories are being written in other ways (via the way you are living your life and the choices you are making for yourself) and a season will come again when it's time to document. There is simply no specific prescription for what you "should" be doing to get your stories told.
Own what is enough for you right now and know that you can change your mind.

Maybe you get one kit every month and use that to focus on a few specific stories and that is enough for you. Maybe you print all your own supplies from digital products and you're totally happy with that. Maybe you purchase new stuff regularly and simply love having access to lots of cool stuff. Maybe you are working through your hoarded stash of many years and enjoying it every step of the way. Maybe you don't buy products at all and just use words + photos.
Again, there isn't a right or a wrong, there's simply your own level of enough stuff.
Yeah, I know, I sell products. But I also absolutely believe that selling you a product that is just going to sit on a shelf or in a drawer is counter productive to my personal memory keeping values. I actually care that you use the stuff that you purchase from me because I know the absolute positive things that can come from telling your stories.
Remember that having more products at your disposal doesn't equate to getting more stories told or necessarily increase your creativity. In fact, I argue in many of my classes that having access to less products actually promotes more storytelling because the focus is less on the products you have to choose from and more on getting the stories told.
Own what is enough for you right now and know that you can change your mind.

Maybe you are choosing the super simple route of words + photos. Maybe you want to layer and layer and play and mix a whole bunch of things together and add a little paint on top. Maybe you are focusing on your photography skills and everything else is taking a backseat. Maybe you are practicing your writing skills and that's your current focus. Maybe you are super regimented in your documentation or maybe you fly by the seat of your pants and sometimes choose a super artsy path and other times keep it as simple as possible to just get the story told.
Figuring out what parts of memory keeping are most meaningful to you is an excellent place to begin on your journey to establishing your own enough. Maybe it's the photos, maybe it's the stories, maybe it's the combination of the two, maybe it's a finished project, maybe it's the opportunity to get messy & creative, etc.
Own what is enough for you right now and know that you can change your mind.

Maybe it's enough for you to focus on telling the everyday stories at this time in your life. Maybe it's enough for you to just focus on telling your own story right now vs. anyone else in your household. Maybe it's enough for you to focus on limited duration stories (think Week In The Life™ or December Daily® or Day In The Life™) vs. an open-ended album that collects stories here and there. Maybe it's enough for you to focus on your kids or your pets or your parents or your partner's stories.
To establish what stories are enough, think about the things you wish you knew about the people in your life who are important to you. What do you wish you knew about your Grandma? Consider telling those kinds of stories about yourself.
Own what is enough for you right now and know that you can change your mind.

Maybe it's enough for you to take a couple photos a month. Maybe everyday is more your style. Maybe your iPhone has become your absolute go-to or maybe you miss your DSLR camera. Maybe you take 100 photos of the same situation or maybe just two. Maybe you, like me, want to enlarge every photo you use in a layout or maybe you want to crop them all to 2 inch x 2 inch. Maybe the photos are your focus right now and you are in a season of practicing.
For me, memory keeping is a lifestyle - a way that I live in and experience the world. Maintaining and sustaining a lifestyle means being open to the ebb and flow of what is enough at any given time. It's something that you are going to have to figure out for yourself - trust me, it's worth it.
What's your own enough right now?

October 24, 2016
December Daily® 2016 | Beginning Preparations

Here are some of the things I'm doing right now as I get ready to begin working on my
December Daily® foundation pages (the way I like to get ahead a bit with my album before December):
This is generally the time of year that I want to do a full clean up and clean out of most of my supplies - not just for December Daily® but for
everything. Doing that helps me find things that I might have stashed away that would be great for my December Daily® album (you'll see a couple of those things below).
My November and December are going to be a little different this year because there will be a construction project happening here in my house in the room right outside my office (we are creating another bedroom from some of my office space + another room). That means that my office is going to be more of a mess than usual and things won't be where they normally would be. Keeping that in mind it's even more important for me to clean up and out before that starts.
I also like to create space on my table in my office just for working on my
December Daily® pages. Your set up might be a little different depending on the space you have available. I like to fit my main supplies into a small box/basket even if I'm keeping it out on my table - this makes it easy if I want to work on my album in another part of my house.

Take a look at your
inks + adhesives (including glue pens) + embossing powders + pens + paints + ink cartridges + printer paper. Are they in working order? Nothing is more annoying when you finally carve out time to work on your stories than finding out you are our of adhesive.
Scotch Dot Roller Adhesive | My favorite rolling adhesive. Martha Stewart Glue Pen | Great for small pieces including Silhouette cuts, die cuts, chipboard, etc. Versamark | Clear embossing ink for stamping. Use this and then use some embossing powder on top and heat with a heat gun. Zing Silver Metallic Embossing Powder | Love this. Ranger Super Fine Gold Embossing Powder | Love this one too. AED Slick Writer Pen | The bolder version of my favorite pen. AED Gold Metallic Marker | Great directly on your photos. AED Precision Pen | Favorite pen for journaling. AED Silver Metallic Marker | Awesome + smooth on photos.
Is there a new technique you might want to try this year and what do you need for that? Think embossing, think transparencies, think paint and silkscreens.

After I made up that list Katie added a few more things that she knows I like to use:
Avery Index Tabs | I love adding these to the edge of pages in my albums. Phrases Roller Stamp | These stamps fit right onto the Avery Index Tabs Time Roller Stamp | A staple that would be great for documenting holiday activities. Holiday Ink Colors | Black Butte, St. Helens, and Pendleton
Here's a look at how I used the Index Tabs in my album last year:


In addition to the products included in
my kits, I also usually have a few things I've stashed away over the course of the last year that I might end up including in my album. I also always like to check out other products available this season and see if there are any pieces I want to pick up for my own project. I definitely like to limit my supplies for this project so I don't have a ton of extra things - just a few things I know I would love to play with in my album.
Here are a few things I've purchased and set aside:
Tim Holtz Remnant Rubs Gilded Christmastime | Because I can never have enough word + phrase stickers. Includes one sheet of silver rub ons and one sheet of gold rub ons. Tim Holtz Metallic Stickers Holiday Talk | These ones come with two sheets of black (silver + gold type) and two sheets of white (silver + gold type). Tim Holtz Adornments Pinecones | Not sure exactly how I'll use these yet but I like the idea of them. Maybe hanging off a tag? Large numbers from a couple past Studio Calico kits. The large cork numbers from the Young At Heart kit and the white plastic numbers from the Young At Heart Documenter Kit. 04 | START THINKING ABOUT STORIES + DESIGN IDEAS + FOUNDATION PAGES
Stories are the heart of all my projects and
December Daily® is no exception.
Start thinking about your reason why/intentions for this year. You can see my own reasons why & intentions (and download printables for both) for 2014 and 2105. Start thinking of design ideas and ways to communicate your stories. I don't know every story I'll tell in advance (because I let life dictate a lot of that) but it's likely I'll tell the story of putting up our tree, of getting out the decorations, of Advent calendars, of twinkle lights, etc. While browsing around for ideas online, keep track of them when you come across ones that resonate with you and your intentions for this year. I usually just write these on yellow sticky notes or on a pad of paper. If you are new to December Daily® or if you've been doing it for awhile but are looking for a more intentional approach this year I recommend checking out my Storytelling With December Daily® Workshop (class begins November 1). The bonus stamp set is still available at the time of this posting. Full details on this popular class can be found here. Put your page protectors in order. I'm following essentially the same design map as last year (the only difference is that there are two more 6x8 full page protectors and two less of the three pocket design). As I got about documenting my stories some of the page protectors get moved around, but I like the process of thinking though the products + the stories in advance of the month. A flexible attitude with this project is totally the way to go. Start putting stuff in the pockets. That's where I'm at right now and plan to share more with you soon!

October 20, 2016
Project Life® 2016 | Week Nineteen (Week In The Life™)

Hey guys!
As I enter the busiest time of my working year I have this crazy thing happen where I want to work on all my projects even the ones without deadlines. Hence, a Project Life® spread to share with you. It's been awhile, I know. Thanks for being patient with me through my health issues, merging households, and lots of behind the blog work on product design/development and class content.
Today I'm sharing Week Nineteen which was the week I did Week In The Life™ this year (May 9th through the 15th).
As I stood at my work table and contemplated what I wanted to do for the 3x4 pockets (all my 4x6 photos with the Week In The Life™ Messy Circles Filled 2016 word art were printed out months ago) I decided to just add "filler" cards vs. specific journaling. I came to this conclusion after pulling my Week In The Life™ album off my shelf and seeing how detailed I was with that week already. I still want this week included in my chronological Project Life® album but I don't need to re-tell the entire story of the week. Obviously I could have printed out more photos for those pockets but again, I feel like I covered that in my main album. So I went with fun filler cards from my stash.
I think next year I'd like to try to remember to collect more "stuff" during my Week In The Life™ documentation that can be included in my Project Life® during that week (planning for sometime in the spring again). It would be cool to have all the pockets filled with receipts or things cut up from the stuff of life.
The lesson here is flexibility within whatever storytelling system you are working right now. And that some weeks are detailed and some are not and some are all photos and all these weeks add up to one big awesome story.
Another factor was that I also already had a 6x12 insert included in this week that told a good, long story from a past Story Kit™ theme (Read).
Here's how the spread turned out:

The circles on top of each 4x6 photo were added digitally to my photos before printing and came from this digital set: Week In The Life™ Messy Circles Filled 2016. I just picked photos I liked from that week - no other specific reason. Again, my goal is to fill up the pockets.

My title card is from my Hello Happy Journal Card Set (now retired). We hope to release this set digitally soon. The label sticker is from Freckled Fawn + a rolling date stamp.
The fun "Here We Go" card is a pad that was included in the Drive Story Kit™. On it I wrote how I felt like I covered this story in my Week In The Life™ album and referenced the insert for a longer story about what was happening in life during this time period.

"Here's to us" is from the Here's To Us Journal Card Set.
The "PS I Love You" and "Take A Picture" cards are from past Studio Calico kits.

Along the edge of the 6x12 insert I added an Avery Index Tab + stamped "this is life" using my new Phrases Roller Stamp.
"We were here" and the floral 3x4 card are both from past Studio Calico kits. "Every Day Looks Like This" is also from the retired Hello Happy Journal Card Set.

October 19, 2016
2017 Creative Team Call

2017 is fast approaching and with that comes time to select a new Creative Team.
We are super thankful for all the hard work the
2016 team put into their projects this year. We wish them all the best as they continue to craft the stories of their lives.
For 2017 we are looking for a small group of memory keepers who are interested in using my
new products on their projects to be part of my Creative Team. You can be digital or hybrid or traditional - or a mixture of all three - but the most important thing is that you have a passionate commitment to telling your story.
If you are competent, comfortable, and creative using digital/printable products as well as physical products and are interested in having your work seen on aliedwards.com in blog posts, as in-use product examples, and on the Ali Edwards Design Inc (AED) social media channels please email Katie (katie@aliedwards.com) the following:
2-3 project examples
Links to your blog and any social media outlets your currently use
A list of any other design teams you are currently on
Please put
"AE Creative Team" in the subject of the email.
Deadline to submit is Friday, November 4th, 2016
You can check out all my new digital products here.


