
Ali Edwards's Blog, page 116
March 6, 2020
Stamp Week | Mixed Media

Wrapping up
#aestampweek with a fun look at a couple ways you can use your stamps in mixed media play to create homes for your stories in memory keeping.
I seriously had so much fun playing with watercolors, paints, and a Gelli Plate for today's projects and ended up splitting my video into two separate videos. The first one covers playing with stamps with watercolor and with a Gelli Plate and acrylic paint and the second video is my process for creating a couple scrapbook layouts using things I'd created while I was playing in the first video.
This has been a truly inspiring week for me and I hope you've had fun as well. I will definitely do something like this again in the future!
A few things to keep in mind related to playing with paints + stamps that came to me as I was working on these projects:
Experimentation = joy. I hope that you can literally hear my enjoyment in the video as I work with the paints + stamps. I'm at a place right now where I'm feeling really into embracing not knowing the outcome with this kind of stuff and letting it be what it is and enjoying it for that. I need more shape-based stamps! I learned through experimentation that you can't use text based stamps with a Gelli Plate because they come out backwards. YouTube is my friend for learning as I go. So much inspiration and technique tips on there and I'm so happy I can always be learning something new. STAMP WEEK SHOP PROMOTIONS // ENDS 3/9/20
Try the Story Stamp Subscription for just $5. Use the code TRYSTORYSTAMP. Offer ends 3/9/2020 at 11:59pm EST. Sale on stamps in the shop (up to 60% off) - including some past Story Stamp + Stories By The Month designs! Sale ends ends 3/9/2020 at 11:59pm EST. Giveaways on the @aliedwardsdesigninc Instagram account.
Here's a look at how I played with stamps, watercolors, and acrylic paints today:

The first thing I played with today was using watercolors with stamps.
I paired the fun graphic stamp from the
My Stories Stamp Set with different watercolor colors and stamped them onto watercolor paper. What I learned is that it's all about the amount of water you add to the stamp and whether you want it really watery or more concentrated color. The cool thing with water colors is that you can always add more water directly to the paper if you need to adjust. I let this page dry and then cut out the squares for use on a project below.
Remember, this is all about play! I love the fact that I don't always know how things are going to turn out and that I learn through experimenting.
Here's how I ended up using those pieces in a layout:

After cutting out the watercolor squares I
rounded the corners and stamped "this is so you" from the You Story Stamp on top.
In the bottom right corner I added a bunch of plastic stars using a
Tiny Attacher stapler. When I cut off the edges of the plastic stars I used the cut off pieces both in that right corner and along the outside edge of my photo.

To finish off the page I added an "A'' for Anna alpha sticker and I stamped the date on top of the photo.
Watercolor Spiral Paper Pad Watercolor Paints My Stories Stamp Round Stamp Block 1/2 Corner Rounder You Story Stamp Precision Pen Gold Mirrored Stars Plastic Stars Tiny Attacher Stapler Small White Alpha Sticker Rolling Date Stamp StazOn Black InkSTAMPS + GELLI PLATE + ACRYLIC PAINT

Next up I played with a
6x6 Gelli Plate and acrylic paints.
I am super new to the world of printing with Gelli Plates.
Laura Wonsik was the first to tell me I needed to get one once I was expressing interest in playing with art journaling again. After I collected my supplies I learned a bit from Mou Saha in the Get Messy membership classroom and then today I watched a couple more videos on You Tube this morning. I also highly recommend checking out Julie Fei-Fan Balzer if you enjoy this kind of play.
I could seriously play with this stuff for hours.
The very basic technique I'm using here entails rolling paint onto a Gelli Plate, stamping into the paint, and then laying a piece of paper on top and pulling it up to reveal a "print" on the paper. Check out the video above to see this process in action.

My goal here was to create some backgrounds that could be paired with photos or a photo for another scrapbook page.

Ah, colors and textures and layers. Seriously just love.
Here's a look at how I used one of those backgrounds as a home for my story:

I paired the mixed media background with a 6x8 photo. On top of the Gelli Plate print I added "just this" using the
Sans Serif Alpha set (we found a few more of these in the warehouse and put them in the shop).
I typed out my journaling on the computer and then cut it into strips before adhering it on my custom background. I added an asterisk stamp (from the large December Daily® Number Stamp offered last year) to both sides of the title and to the far right edge of my photo.
6x6 Gelli Plate Deli Sheets Brayer Liquitex Paint Set Pieces Stamp Set Believe Stamp Set My Stories Stamp Set Wild Stamp Set Habit Stamp Set Waffle Flower Water Media Mat White Cardstock Sans Serif Uppercase Alpha Epson XP 15000 Printer


March 5, 2020
Stamp Week | Backgrounds/Patterns

Today for
#aestampweek I played with creating backgrounds and patterns.
I'm a big fan of creating backgrounds that become homes for my story. You'll see that happen below where I use a large tag stamp to create journaling blocks for my content. I'm also a fan of playing around to see what happens if I do this or do that and I did a bunch of that in today's video to create the projects below.
A few things to keep in mind related to pattern/background stamps that came to me as I was working on these projects:
I love creating backgrounds that are built with shapes. Might be circles or squares or rectangles (if you don't have the tag stamp you can totally create something similar by literally just placing the entire ink pad down on cardstock). Repeated shapes are high on my list of tools to use for storytelling. Don't discard the "extra" stuff. In one of my projects today I'm using a background that was essentially a "rolling off" piece of paper when I was playing around with some art journaling tools a few weeks ago. You also saw me use the paper I used to "stamp off" onto in a project earlier this week. I don't keep everything like this, but having a few things like this in your stash can be a fun thing to add to your projects. Stamps can be curved! This is something that I love that Laura Wonsik does pretty regularly - taking a sentiment stamp and curving it to fit a variety of different things. I used that technique today with a sentiment stamp and a world stamp. Don't be afraid to go off the edges with your stamping. In fact, do it on purpose. STAMP WEEK SHOP PROMOTIONS
Try the Story Stamp Subscription for just $5. Use the code TRYSTORYSTAMP. Offer ends 3/9/2020 at 11:59pm EST. Sale on stamps in the shop (up to 60% off) - including some past Story Stamp + Stories By The Month designs! Giveaways on the @aliedwardsdesigninc Instagram account.
Here's a look at how I played with some number stamps today:
And here's a closer look at those projects via images:

First up I continued adding pages to my
Art Of Noticing notebook telling the story of a recent Las Vegas adventure.
The first idea I wanted to play with here was using all the stamps on a 3x4 travel icon stamp set at the same time. As you'll see in the video above, what I ended up doing was using tape to adhere the entire stamp to a stamp block. I had originally tried to stamp the entire stamp without a block and it did work, but it seemed to work better when I taped the whole set to the block.
I stamped onto white cardstock and used the three colors that I've used in previous days in this notebook:
Tillamook, Willamette, and Olympia. I varied the placement just a bit on purpose so that everything wasn't all lined up in specific rows.
On top of a couple of the stamps I added small circle stickers from the
Travel Collection Sticker Bundle. I liked how those added just a little something to the overall background pattern and is a great reminder that simple is awesome.

My goal for this second page was to platy with taking a sentiment stamp and curving it around another stamp and repeating those two together to create an asymmetrical pattern background. I considered a couple sheets of pattern paper before finding this painted background on my table from some recent art journaling experimentation.
I curved the "long live experiences" stamp around the world circle stamp and repeated that seven times on top of my painted cardstock.
Art Of Noticing Notebook Past Travel Collection Stamp Sets Travel Collection Sticker Bundle Stamp Block StazOn Ink Inks: Tillamook, Willamette, Olympia 1/2 Inch Corner Rounder One Little Word Mini Kit (small star stamp)

A couple days ago Audrey + Anna were playing around with my camera and taking selfies. Audrey took this one and a few others that were really, really great and I used that photo here as a jumping off point as an opportunity to create a "Dear Audrey" layout. I wrote "Dear Audrey" with my iPad, added it to my photo in Photoshop, and printed out the photo (6x8) on my
Epson XP15000 printer.

I also knew that I wanted to use a stamp to create a background/home for the story I wanted to tell. A past
Travel Collection stamp included this large tag and I chose to add it onto a pattern paper from Heidi Swapp. I started my stamping at the bottom and then created three rows using a variety of colors (linked below).

For my storytelling I chose to use stamps from the
Believe Stamp Set and some numbers from a past December Daily® stamp set that includes numbers 1-31. The Believe Stamp Set is a really good one for telling stories of encouragement and support.

On top of four of the stamped tags I added "yes you can" + "I totally believe in you" + "what I know to be true" (I used that last one on #3 because the other sentiment was too long). I stamped the numbers in red as a nice contrast to the black ink. Red is almost always my go-to as a supplemental color. After stamping I hand wrote my journaling using a Precision Pen.
To finish off the page I added three chipboard asterisks. One above the title and two on top of the partial tags on the second page.
Believe Stamp Set Past Travel Collection Stamp Sets December Daily® Number Stamp Set Chipboard Asterisks Inks: Rose Garden, Honeyman, Pendleton, Olympia, St. Helens Memento Black Ink Heidi Swapp Color Fresh Fine Line Pattern Paper Epson XP 15000 Printer Precision Pen

March 4, 2020
Stamp Week | Numbers

Alongside alphabets, numbers are one of my most favorite ways to include stamping in my projects.
Numbers can be used to organize your content/story (
such as by creating lists) and are also an awesome story lens/way of identifying stories - think counting the number of times you do something or the number of dolls a child has, etc. Number stamps are one of those products that I love having in my stash because they are super universal and can be used again and again.
We've offered a variety of number stamp designs with past product collections and will offer more again in the future. We've got a fun outline number set coming up with the Week In The Life™ collection later this month.
A few things to keep in mind related to number stamps that came to me as I was working on these projects:
I love creating contrast by using a combination of large and small number stamps. You really can't go wrong with big numbers on a page.
It's okay to change your mind. This is actually one of the awesome things about stamping - in the case of today's main project I changed my mind on the colors I wanted to stamp and it was easy to simply re-stamp them using new colors.
Embossing is a fun option to create additional texture. I generally pull out my embossing stuff in December for December Daily® but it was fun to get it out today and play with embossing on vellum. If you've never embossed before make sure to check out my process video for a quick how-to towards the end of the video. STAMP WEEK SHOP PROMOTIONS
Try the Story Stamp Subscription for just $5. Use the code TRYSTORYSTAMP. Offer ends 3/9/2020 at 11:59pm EST.
Sale on stamps in the shop (up to 60% off) - including some past Story Stamp + Stories By The Month designs!
Giveaways on the @aliedwardsdesigninc Instagram account.
Here's a look at how I played with some number stamps today:
And here's a look at images of those projects:

This bright and colorful 2-page spread (12x12 + 6x12) includes a page for photos and a page for journaling.
In today's video you'll see me change my mind a number of times while bringing this story together. That's what's real when I'm working on any project around here.

I started off by printing out 7, 4x4 photos of Anna from the last month and arranging them onto a 12x12 piece of white cardstock. I cut a second piece of white cardstock in half to use as a page to hold large number stamps and my journaling. I love having one page for my photos + embellishments alongside one page for my story - it helps me to make sure my story gets told (vs. waiting until the last moment and adding just a tiny bit of words onto a project).
Next up I used a small number stamp set and a 1 inch circle punch. Those circle punched numbers were added onto metal rimmed circle tags that were adhered on each photo. Originally I did them all in red and then went back in and changed them to follow the numbers I stamped along the left edge of the 6x12 piece of cardstock. In addition to the small number stamping on the photo page I also stamped a large 11 and used a 3 inch circle punch to punch that out as a title.

I ended up re-doing the stamping on that (as you'll see in the video) and added the "currently" and "closing my eyes and giving thanks" on top. The background circle is from my "stamp off" extra page and was punched using a 3.5 inch circle punch. Foam adhesive pops it up a bit off the page.

For my journaling I paired stamped numbers (in a fun rainbow of colors) with two other stamps: "currently" and "adore this season." I used a Precision Pen to add my journaling.
My final addition included three stickers from an emoji sticker sheet (I think that was an add on for the Tech kit).
This totally reminds me of one of my favorite layouts of Anna from a number of years ago now:

I'm really not kidding when I tell you I'm a fan of repetition. And I will always love using full page photos as a foundation for my projects.
White Cardstock
Metal Rimmed Circle Tags
1 Inch Circle Punch
Inks: Rose Garden, Pendleton, Tillamook, Honeyman, Olympia, Willamette, Deschutes,
StazOn Black Ink
3 Inch Circle Punch
3.5 Inch Circle Punch
Number Stamps
Just Thankful Stamp Set (digital version here)
Pattern Paper Options
Seasons Stamp Set
Prompt Stamp Set (digital version available here)
Tim Holtz Scissors
Precision Pen
White Dot Vellum

For the next entry into my Art of Noticing Las Vegas notebook I decided to create a "shaker pocket" using a piece of vellum and an older pattern paper from Studio Calico. Before stitching the vellum to the pattern paper on my sewing machine I used a large number stamp + Versamark ink + Ranger White Embossing Powder + a heat gun to create the embossed number 2 on top of the vellum. Check out the video for that process.
I stitched three of the sides (don't adhere to the notebook until the end) and then added some star sequins and wood veneer stars before stitching the fourth side to close it up.
On top of the embossed 2 I added a word phrase sticker from a past kit.
Art Of Noticing Notebook
White Dot Vellum
Versmark Embossing Ink
Ranger White Embossing Powder
Heat Gun
Snappy Tray (similar)
Brother Sewing Machine
Orange Thread
Mini White Wood Stars
Mini Star Sequins
Red Line Tape
1/2 Inch Corner Rounder

March 3, 2020
Stamp Week | Prompts

Bring on the story prompt stamps!
Prompt-based stamps are at the heart of the stamps we offer. Designed to both spark and support your stories, prompt stamps give you an opportunity to focus more on the story you are telling and less on adding a whole bunch of other stuff.
A few things to keep in mind related to prompt stamps that came to me as I was working on these projects:
Stop making stuff super complicated. I get it, I do it too. Pick three stamps to use together to create a series of journaling cards for Project Life on white cardstock. Simple, easy, and cohesive. You don't have to do this every week but it's an awesome design formula to return to again and again.
Start with story. This is my memory keeping mantra. It's pretty simple and can be very effective and it's one of the reasons we make stamps that literally encourage, invite and support your stories. Let the prompt stamps be the story spark for your journaling. They are designed to help you get your stories told and are just waiting for you to use them that way!
Repetition is one of the design concepts I come back to again and again when I'm telling stories. I use it to organize my content and to eliminate way too many choices (I'm a fan of less choice because it helps me get stuff done). STAMP WEEK SHOP PROMOTIONS
Try the Story Stamp Subscription for just $5. Use the code TRYSTORYSTAMP. Offer ends 3/9/2020 at 11:59pm EST.
Sale on stamps in the shop (up to 60% off) - including some past Story Stamp + Stories By The Month designs!
Giveaways on the @aliedwardsdesigninc Instagram account.
Here's a look at how I played with some prompt stamps today:
Here is a closer look at the projects:

From 2010 through 2018 I did weekly
Project Life in a 12x12 album. In 2019 I switched things up and am now doing monthly storytelling in a 9x12 album. As you can see, I'm still working on stories in my 2018 album and I'm totally okay with that 100%. In the Story Classroom I include a Project Life weekly spread with the content each month and that's helping me get more of these stories told.
One of my favorite ways to use prompt stamps is on 3x4 journal cards in
Project Life. My most loved spreads are often those that have a consistent stamped design on each of the journal cards (whether there are three or more). The consistency of the stamped designs bring the whole spread together.
For this spread I created three journal cards using stamps from the following sets:
Seasons, Pieces, and One Little Word Hearts using Pendleton, Tillamook, and Honeyman inks.
As an embellishment for my 4x6 photos I used a Week In The Life Banner stamp (similar digital version available
here) with Memento Black Ink and cut out each of the banners and stapled them onto the photos.

DESIGN IDEA: Think title ("loving this") + subhead ("pieces of my heart") + accent (heart/shape/number) when creating titles for your journal cards.
Project Life 12x12 Page Protectors
Seasons Story Stamp
Pieces Story Stamp
Heart 4x6 Stamp
Banner Days Of The Week Stamp (similar digital version available here)
Inks: Tillamook, Pendleton, Honeyman
Momento Black Ink
Label Stickers
Epson PictureMate PM400 Printer
Rolling Date Stamp
StazOn Ink
Chipboard Asterisk
Precision Pen

Next up I'm continuing working on my Art Of Noticing Las Vegas notebook.
In the video you'll see me work through a couple more spreads, including this one that uses the "love you because" stamp from the You Story Stamp.
For this one I cut a piece of Vicki Boutin pattern paper to 4.25 x 8.25 and rounded the outside corners. Using three different stamps I organized my story into five reasons why I love Aaron - using the "love you because" stamp as my story starter. Along with the prompt stamp I added a number using Willamette ink and a star inside a circle using Tillamook ink. The color combination refers back to the alphabet stamping I did in this notebook yesterday.
Seriously love how this turned out.
Art Of Noticing Notebook
You Story Stamp (start your subscription for just $5 this week during Stamp Week)
Inks: Willamette, Tillamook
Magic Story Stamp
Believe Story Stamp
Numbers Stamp
Vicki Boutin Kaleidoscope Look Up Pattern Paper
1/2 Inch Corner Rounder
Rolling Date Stamp
StazOn Ink
Precision Pen

March 2, 2020
Stamp Week | Alphabets

To kick off Stamp Week 2020 I'm sharing a video showing how I used alpha stamps on two different projects.
Alphabet stamps have long been one of my favorites because they make WORDS. And, as you might guess, I love words for a million different reasons.
In memory keeping I love being able to create words that directly apply to my project. Alphabet stamps allow me to create custom words vs. only using the words that might be available on a sentiment stamp. Being able to stamp custom words helps me to get my stories told in the way I want to tell them.
A few things to keep in mind related to alphabet stamps that came up as I was working on these projects:
Mix + match your alpha stamps to create mix + match words. Choose to add all the stamps onto one block OR go letter by letter. This is going to depend on what you are wanting to say/create on your project. For these two projects I laid out the words I wanted to use and stamped them all at once (vs. going one letter at a time) - I was able to do that because I was "repeat" stamping the word/phrase to create a background/pattern. Alphabet stamps are great for creating titles and then select a sentiment stamp for your "subhead" (the words below your title). Play around with the contrast in size + color for your title and subheading. Words are embellishments. I've long been a fan of typography in general and it definitely fuels the choices I make in lots of my memory keeping adventures. Always have a practice piece of paper nearby when stamping. This helps me avoid mistakes and allows me to test the stamp + ink before using it directly on my project.
Here's a look at how I played with alphabet stamps today:
Here's a closer look at the two projects shown in the video:

First up I created a 2-page, 6x8 project that includes a photo taken by Tara Whitney and words I wrote for an Instagram post last month.
I started by printing the photo to 6x8 and then copying and pasting my journaling from my Instagram post onto a 3x4 card, making the background red and the type white in Photoshop, and then printing it out on photo paper using my Epson PictureMate PM400. I used a 1/2 inch corner rounder before adhering the journal card with foam adhesive.
To create my stamped background I used an upper case alpha stamp set and three ink colors. Because there was only one "E" in the set I was able to stamp "THE ON" and then I had to stamp the "E" separately onto the kraft cardstock. While stamping I used a technique called "stamping off" to remove the excess ink from my stamps - "stamping off" can create really cool texture patterns and I ended up using that piece of paper to punch out my heart.
On top of the heart I used this stamp set to add "love you good" before adding two metal brads and adhering the heart with foam adhesives to my enlarged photo.
To finish off my spread I pulled out my heart embellishment box and selected a bunch of plastic hearts. Those were added as a banner across both pages using a Tiny Attacher to staple them in place.
Large Sans Serif Alphabet Stamp Small Alpha Stamp from the 31 More Things Classroom Kit (super deal at just $3.49) Inks: Tillamook, Pendleton, Rose Garden 1/2 Inch Corner Rounder StazOn Ink Plastic Hearts Tiny Attacher Mini Brads Kraft Cardstock Epson PictureMate PM400 Adhesive Foam Squares Heart Punch

Aaron and I spent some time in Las Vegas last week to see Dave Matthews Band and I took along one of my Art Of Noticing notebooks to document the getaway. I loved this for travel as I was able to make notes in the box for the photo and then write in real time when I had a few moments while we were in Vegas.
Over the course of this week I'll be working on finishing up the documenting from this adventure using different stamp ideas each day.
Today what I decided to do for the first page of this section of the notebook (basically an "opener" for this trip) was to use my alphabet stamps to stamp "Vegas" over and over again on top of cardstock. I cut a piece of cardstock to 4.25 x 8.25 and then used a Mixed Alpha stamp set and three different ink colors. In addition to those I added a sentiment from a past travel stamp in black to fill in that hole. I also used a 1/2 inch corner rounder on the two outside edges.
Once I'd completed the stamping I adhered the cardstock to the page in the notebook using rolling adhesive.
Art Of Noticing Notebook Ink: Tillamook, Willamette, Olympia 1/2 Inch Corner Rounder Travel Stamp Set Rolling Date Stamp StazOn Ink Epson PictureMate PM400 Scotch Rolling Adhesive

Stamp Week | Intro + Basics

Welcome to Stamp Week 2020!
My simple goal this week is to get you using + enjoying your stamps to get your stories told.
I view stamps as a tool in my storytelling toolbox. Most of the stamps we offer are word/sentiment based stamps to help support or spark stories. I love adding a stamp here or there on my projects as well as using sentiments on the stamps as jumping off points/prompts for my stories.
Here's the initial schedule for this week (posts won't necessarily be up first thing in the morning):
Monday: Alphas Tuesday: Prompts Wednesday: Numbers Thursday: Backgrounds + Patterns Friday: Mixed Media + Art Journaling
If you share your own awesome stamping ideas please use the hashtag #aestampweek on Instagram.
SHOP PROMOTIONS
Try the Story Stamp Subscription for just $5. Use the code TRYSTORYSTAMP. Offer ends 3/9/2020 at 11:59pm EST. Sale on stamps in the shop (up to 60% off) - including some past Story Stamp + Stories By The Month designs! Giveaways on the @aliedwardsdesigninc Instagram account.
STAMP BASICS
To kick off this week I put together a video showing you how I currently organize my stamps and a few basics about what you need to get started with stamps.
I'll be back with another video later today focusing on using alphabet stamps.
GOALS THIS WEEK
This week is an awesome opportunity to work with the stamps you have in your stash or get started with stamping. Here are a few things you might consider for your own goals this week:
Organize your stamps. The act of going through the stamps you already have in your possession can be awesome inspiration to start using them. Just flipping through some of the ones I haven't seen in awhile started giving me ideas. Start with stamps. Rather than starting with other embellishments this week, start with your stamps and see what you can use to be the foundation of your story. Play + have fun! Don't worry about the mess or imperfection - to me this is just a part of stamping generally - just have fun experimenting with your stamps. Be the boss of your stamps. Make them work for you - they are there to help support your stories!Get some stories told. This is always, always, always the goal.SUPPLIES
Acrylic Block Crafters Inks OLW Heart Stamp Set You Story Stamp Black StazOn Ink

February 27, 2020
AE Creative Team | February 2020 Stories By The Month™ Digital Kit
This month has been all about love and life, and today we are delighted to bring you some creative inspiration from our awesome Creative Team using the February 2020 Stories by the Month™ Digital Kit.


As always, we are so grateful to our Creative Team for sharing their projects and the stories of their lives with us!

February 24, 2020
Fly, She Hears

Sometime last year I ordered this little notebook from The Sketchbook Project. I didn't register it in time to participate in one of their permanent collections at the Brooklyn Art Library but I did add it to my pile of future things to play around with or use for something or other.
Right now I'm playing in a bunch of different sketch books/art journals of varying sizes. I'm trying to keep it as low key and non-project like as possible since so much of what I do with memory keeping is more "project" based.
SUPPLIESTim Holtz Star StencilRanger Texture PastePOSCA White PenThe Sketchbook Project notebook

February 21, 2020
Pieces Of Us | How I Documented My Stories

Today I wanted to share how I worked with the content from the Pieces Of Us self portrait adventure last week.
I've been loving seeing what people are creating with these stories (keep sharing + using the #aepiecesofus hashtag). I'll be featuring some of the ideas here on my blog over the coming weeks.
I had a whole lot of fun putting this together. I loved working outside of the page protectors and I loved getting messy with some paints and I loved handwriting my journaling.
And yep, as you'll see my date is wrong on here! It happens. I'm going to re-do the background piece of cardstock with the correct date.
Here's a look at what I did for this adventure:

I decided I wanted to put this project into my "Me" 6x8 album that holds stories about me.
Here's a basic overview of my process - check out the video below for the full step by step as it was happening.
I used a piece of cardstock that was cut to the same as the divided page protectors for my foundation.
I printed my photos 6 inch x 6 inch and then created a cascade of images.
I cut out 7, 6x6 pieces of white cardstock and painted them using yellow paints (sources listed at the bottom of this post) + a gelli plate. Big thanks to Mou Saha in the Get Messy classroom for the tutorial that showed me how to play around with those.
After those painted pages dried I adhered them to the back of the photos and then arranged them in place.
I used washi tape to hold my pages in place. I left a bit of "space" between the top page + the following page so that the washi sticks to the background piece of cardstock.
I used a brush pen to add my journaling for this project.
I used my sewing machine to create messy stitches around the printed + circle punched title and to keep my yellow trim in place.
Here's a look at how it all turned out.


Here's a process video to show you how this all came together:
6x8 Greige Album
White Cardstock
Epson XP 15000 Printer
Rolling Date Stamp
Yellow Trim
Seek Knowledge Pattern Paper
Pieces Of Us/Pieces Of Me Digital File
Brother Sewing Machine
Kuretake Brush Pen
Golden Titante Yellow Paint
Golden Primary Yellow Fluid Acrylic
Liquitex Gesso
Golden Titan Buff Paint
6x6 Gelli Plate
Brayer
Black Stripe Washi Tape
Large Yellow + White Washi Tape
3 inch Circle Punch

February 20, 2020
The Art Of Noticing

At one of our team meetings last year I talked about wanting to do a simple project that was rooted in the idea of paying attention to our lives. Most of my projects have that as a piece of the overall approach but I wanted to do something a little different that might encourage more people to try out documenting for themselves.
The result of that conversation is what you see here: The Art Of Noticing.
The concept is simple: open your eyes to things in your life that you might otherwise miss.
The format is simple: a travelers notebook with pre-printed pages that include a spot for a photo, drawing, etc and a lines to hold your words.
The invitation is simple: join me in opening our eyes even wider to the beauty and awesomeness that surrounds us.

This release includes three things: a notebook with preprinted pages, a stamp set, and a set of binder clips.


Here are some different ways you may choose to use this notebook:
As part of a community project. My plan is to do this a few times a year for a week at a time and post about it on my Instagram account using the prompt "today I noticed." I'll be doing my first week starting on March 16th. If you start using your notebook before then please use the hashtag #aeartofnoticing.Whenever the inspiration strikes. Store this in your bag as a reminder to take photos of things you notice that make your heart skip a beat (or just cool stuff that makes you happy). As a monthly adventure. Pick a month and notice things daily as you practice slowing down and paying attention. Choose to make it a book about someone and you tell the story of them right now via the lens of noticing. As a way to document a vacation or other travel.
I love that there are a variety of ways you can approach this as a home for your stories.

What should you put in that pre-designed box on the page?
A photo. I'm cropping my photos for this to 3.25 inch x 3.25 inch. Maybe you'll take photos of people or patterns or flowers or cracks in the sidewalk. Consider this notebook your home for those kinds of images that you simply find beautiful for one reason or another. Draw a picture. Create a mixed media or painted square and add it in place. A daily quote or words of inspiration (and then write about why you loved them in the section below). Found pieces of paper or other ephemera (think packaging).

I can't wait to see how you guys end up using these notebooks. My hope is that it gives us all an opportunity to slow down and pay attention to the beauty of our lives.
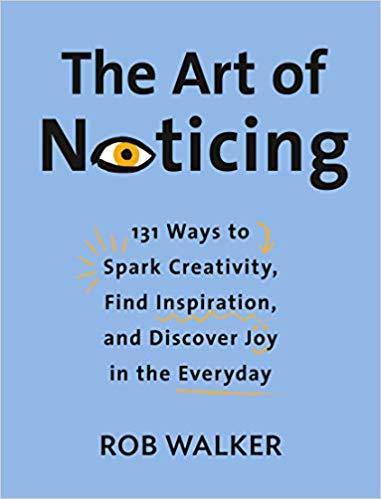
If you'd like a deeper dive into the topic of "noticing," check out Rob Walker's book The Art Of Noticing: 131 Ways To Spark Creativity, Find Inspiration, and Discover Joy In The Everyday. I bought this book last summer after we'd been talking about this concept and I love all the ideas Rob includes for each of us to practice the art of paying attention. Maybe you'll use the notebook to document your take on his "noticing" prompts.


