
Heather Solos's Blog, page 27
March 22, 2016
Fighting Back Against That Lived-In Look
Hi Home-Ec 101,
I admit, I am a terrible housekeeper, but I am trying to improve, and I long for a house I can be proud of.
We have lived in our 1957 Cape Cod home for 8 years. It probably came with a certain amount of wear and tear, but our 3 kids, 2 dogs and poor housekeeping skills have taken a toll. I’m doing better at regular maintenance cleaning, but there are YEARS of dirt and grime that have built up in some places and maintenance just isn’t cutting it. Not to mention how discouraging it is to spend time cleaning only to have it not look clean.
The biggest areas I struggle with are:
1) The linoleum (vinyl? –the cheap stick-the-tile-down kind) kitchen floor. There is gunk in the corners and along the edges and seams that won’t budge. Dried food and spills plus regular dirt. I’ve mopped– even on my hands and knees– with unimpressive results. The grime is still there and once the floor dries it looks dull and sad.
2) My carpets. Is there a way to freshen up a carpet that’s been under-vacuumed over the years? Even after vacuuming now it looks kind of beaten down.
3) The toilets. Even though I clean them more regularly my “dark years” have left stains in the bowl, under the rim and a gross-looking black stain all over the main “exit pipe” (is this rust?). I tried donning gloves and a pumice stone to clean the latter but didn’t have a lot of luck. (BTW, I had no idea toilet water was so cold!)
Any advice would be so helpful. Cleaning does not come naturally to me and I’m pretty ashamed of myself for letting it get this bad. And it’s all made worse because since I don’t see the results I’d like I’m even less motivated to do it.
Sincerely,
Recovering Slob
 Heather says:
First things first, work on letting go of before. When the what ifs, or should haves start up and get loud, take a deep breath and identify that voice for exactly what it is, completely unhelpful.
Mentally respond with something along the lines of: Thanks, I’ve got it from here.
Will that ever shut the annoying voice up? Maybe not, but with practice it’ll get easier to make it pipe down. Yes, I’ve gone to therapy and yes, I really like Brene Brown. If you’ve never seen her TED talk take a moment to watch it and she’s got a great book on imperfection and shame.
The good news is you’re not in crisis mode like Feeling Desperate, Completely Overwhelmed, or My Daughter is Desperate.
You’re not behind, you’re just where you are.
Grab the chore chart and print it out. Remember, you don’t have to do these things on the day I assigned, you can shuffle it around to meet your schedule and needs. The important part is to do each of these things on a regular basis, especially as you complete each of the projects below. The good part is regular cleaning is a way to be able to really postpone the big projects.
Let’s start with the kitchen:
The good news is that you can restore some shine to your flooring, but it will not be like new. The goal with this project is let’s make it look better. No one eats off your floor except the dogs and well, they’re dogs.
Also, if the flooring is truly vinyl tiling, the seams are not fully your fault either. Vinyl tiles shrink over time. The seams that were tight previously will expand leaving a gap of adhesive that is a dirt and grime magnet. You aren’t going to be able to fix this completely, but it can be improved.
You’re going to need to do a deep clean followed by a coat of acrylic sealer compatible with vinyl floor tiles. Read the label and the manufacturer’s direction.
The sealer will give the dull flooring a bit of shine and as a bonus, it’ll fill the tiny crevices to keep dirt from getting ground in. While you’re doing the deep clean of the linoleum, give the baseboards a good cleaning, too. Give some thought to repainting and then laugh and return to reality —unless you have that kind of time and energy.
Go to the hardware store and buy a tube of caulk, get a tube close the color of your baseboards (I’m assuming white or ecru). After the floor polish has fully dried, run a thin bead of caulk along the edge of the baseboard where it meets the floor. If you have quarter round edging, you can run it along the top, too.
Sometimes it is okay to cover up things that aren’t perfect.
To keep the flooring looking as nice as possible between deep cleans and polishes, invest in doormats, and sweep often.
Damp mop, don’t wet mop to help prevent water from saturating the spaces between the tiles as the sealer is worn away.
2) The carpeting.
You will likely not be able to undo years of damage to the carpeting, especially if it is what is referred to as builder’s grade. This kind of carpet has a very limited lifespan and cheap padding underneath the carpeting itself contributes to the relatively short lifespan.
Padding helps prevent what is referred to as crush damage by absorbing some of the impact of foot traffic. When the padding breaks down, the fibers are next. Throw in the damage from sharp edges of grit and carpet gets worn over time. When you are ready to replace your carpeting, do not skimp on the padding.
You can try steam cleaning the carpet, but know going in that carpet has a lifespan and it sounds like you’re reaching the end of yours.
Things wear out when they get used. Think back to high school economics where they taught about the law of diminishing returns. At some point the return on extended lifespan is offset by the energy put into making it last longer. For each person and each thing that point will vary based on everything else going on in their lives.
Could your carpet have lasted longer if everyone took off their shoes in reverence and you sacrificed your time vacuuming at the alter of carpet care? Probably.
Does it really matter?
Only if you choose new carpet over necessities.
3. Finally, we’ll address the toilets.
I checked with Recovering and she lives in an area with water of medium hardness. You can find out your water hardness by looking at your annual water quality reports that are required by federal law.
In recovering’s case, some of the staining can be partly attributed to the water itself. Minerals deposit on the vitreous china, which gives organic matter a place to cling, and the process becomes a cycle.
Recovering was on track with the pumice stone, but there are a couple of things to try first.
Best of luck, Recovering, and don’t let the inner critic get you down. If she’s anything like mine, she’s definitely not worth your time and energy.
Submit your questions to helpme@home-ec101.com


Comments*surprisingly big by Karen LIt can take a little elbow grease, but replacing the caulking ... by Karen LHello Heather Thank you for the first three paragraphs! They ... by Shelley


March 21, 2016
Menu Monday Week 12 of 2016
Heather says
Last week’s lentil patty melts were changed into black bean patty melts, but they worked really well. Same concept as the lentil patties, I just forgot to check the pantry before writing the menu. (Yep, more proof that we’re all human around here). I also managed to reshoot the sausage peppers and onions. If you’re a Pinterest user, here you go.

I think my recipe experiment for this week will be falafel. My boss and I have a couple of work trip traditions and one of those includes finding the best curry we can near our venue. Last month we ended up in Salt Lake City and I spotted a hole in the wall where I had a falafel plate that I’ve been thinking about ever since. (I get to go back to Salt Lake next month and yes, I’ll make sure I get more falafel.) It was the first time I’d ever had falafel over salad and it just makes sense. If I can sell the minions on the concept it is going into regular rotation.
What’s on your menu this week? Here’s a printable to make planning a little easier.
Monday – Broccoli Chicken and Cashew Stir Fry, Cucumber salad
Tuesday – Chili, Tater Tots, Raw Vegetables with Ranch or Blue Cheese
Wednesday – Falafel and Salad
Thursday – Clean Out Refrigerator Night
Friday – Fish Tacos, Refried Beans, Spanish Rice
Saturday – Corn Chowder, Chopped Salad
Sunday – Ham, Macaroni and Cheese, Roasted Broccoli, and maybe a coconut cake I’m still trying to figure out if we’re having company or not, so this menu is subject to change.


March 20, 2016
Organizational Sunday Challenge #12: Medicine Cabinet Clean-Out
Heather says:
Well, today marks the first day of Spring. The trees, in my neck of the woods, have burst into flower, showering us in that glorious coating of pollen. I promise, your neighborhood isn’t being invaded by zombies, it’s just the Benadryl struggle.
If you can see between sneezes, today is the day to clean out your medicine cabinet.
Don’t just flush the expired medication unless it is on this list. If there is no information about a drug take-back program in your area, you can dispose of unused medications by following these guidelines.
Remove them from their original containers and mix them with an undesirable substance, such as used coffee grounds, dirt or kitty litter (this makes the drug less appealing to children and pets, and unrecognizable to people who may intentionally go through the trash seeking drugs).
Place the mixture in a sealable bag, empty can or other container to prevent the drug from leaking or breaking out of a garbage bag.
Make a list of over the counter medications you are running low on and stock up the next time you’re out.


March 18, 2016
Help, My Cleaning Solution Dulled My Hardwood
Hi,
I have hardwood parquet flooring. When we moved into the house the previous owners told us to use Johnson’s One Step No Buff Wax liquid on it. I have used it every few months (especially on the kitchen floor) since 2000. The kitchen floor now looks terrible — darker with grime and dirt kind of stuck in/on it. We are having company in May and I want the floor to look a bit nicer than it does now. I am not sure, but I don’t think the floor is sealed because at Christmas time i spritz our Christmas tree with water every night and it seems to take the finish off of the floor — with it looking like bare wood. I put the Johnsons on it after Christmas and it perks back up. Looks OK for company. But the kitchen looks bad. Do I spritz water all over the floor to take the old off in the kitchen? Use mineral spirits? Other ideas? Take off the Johnson’s and put on a different kind of wax?
Signed,
Shiny Happy Wannabe
Heather says:
Unfortunately I couldn’t find a mash-up of Shiny Happy People and Wannabe, the two songs running through my head this morning…
Today I am the bearer of bad news.
Your cleaning residue built up over a long time and unfortunately, it is going to take time and energy to undo. If you stuck to the one cleaning product over the years, you’ll be in better shape than if you were switching between several varieties as the different chemical recipes could have reacted with one another making a more difficult problem than simple build-up.
Today we’re all about the disclaimer, as flooring is expensive and Home-Ec101.com is not liable for any damage caused by improper use or removal of cleaning products. Defer to your manufacturer’s recommendations. Got it?
Before we get started, you’ll need to take the Home-Ec 101 Safety Oath:
I solemnly swear to always read the label, consult the manufacturer, test in an inconspicuous area, never feed the mogwai after midnight, and to never, ever mix chemicals without lots of research and coffee.
I did a search on SC Johnson’s site to see how they suggest to strip the old build-up of SC Johnson One Step No Buff Wax and you’re going to love this:
You can remove the old wax by washing it with a liberal amount of SC Johnson® One Step No Buff Wax.

Woah, wait a minute! Actually don’t. Just take a deep breath, they aren’t actually being shady even though the first thought is probably, “Wait, they want me to use more of their product to remove their product?”
The reasoning behind the methodology is this, the solution is designed to not dry instantly when it is applied. The next application of the liquid brings some of the old coat into solution. If you’ve lurked here for a while, we’ve talked about like dissolving like before –usually in articles on stain removal. You’ll need to work quickly and have several rags to work with as you use this method remove the buildup on your flooring. If the No Buff Wax has time to dry, you’re just going to make the problem worse.
Work in small sections, apply generously, remove. Step to the next section and repeat. It’s going to be tedious, so queueing up that audio book might not be the worst idea ever. You’ll probably also want to fold an old towel for under your knees.
If this is not the option for you, the next recommendation comes with a little disclaimer:
YOU HAVE TO BE CAREFUL WITH AMMONIA
especially on hardwood flooring as you can damage the finish.
Orange Glo recommends using dilute ammonia (1/2 cup to 1 gallon of warm water) to strip the residue of their product.
Do not slop the water on the floor.
Do not let water pool on your flooring.
Do not wander off with dilute ammonia on any section of your flooring, even the inconspicuous one, it could become quite conspicuous.
Work in sections, apply as little of the solution as possible and remove; Channel your inner Daniel-san, wipe on, wipe off.
To be very clear:
I am not recommending using dilute ammonia as a regular cleaning solution for hardwood flooring. I am saying that dilute ammonia can be used to remove the buildup of other one step waxes that have created a dull layer on top of the flooring’s finish. As soon as you get to the actual finish, STOP and wipe with a clean rag, that is dampened with plain water to remove any cleaner before it damages the finish.
When you have finished removing the dull build-up, you may use the product recommended by the manufacturer to shine and protect your hardwood flooring.
Submit your questions to helpme@home-ec101.com


March 16, 2016
How to Clean a Standard Oven
Dear Home-Ec 101,
I’ve scoured your site and haven’t found a post about cleaning an oven.
Can you give me some pointers. I am 30 years old and NEVER cleaned an oven a day in my life…. I am nervous.
Signed,
It’s Gotten Smoky in Here
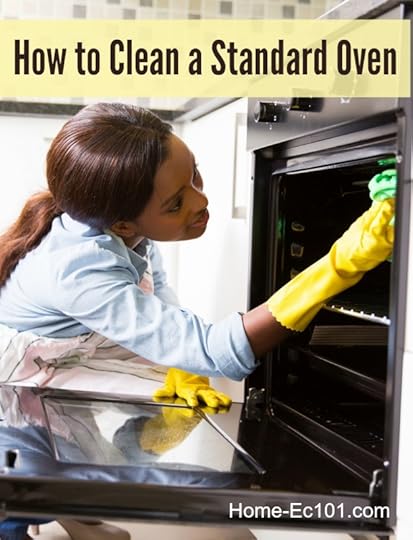
Heather says
Cleaning an oven takes energy, the food particles -polymerized grease splatters and baked on spills are difficult to remove. The longer you go between cleanings, the worse the situation will be.
We’ve talked about the different kinds of energy as it relates to laundry, the same principle applies here. Energy, for this purpose, comes in three forms: thermal (heat), chemical, and physical. Since your oven doesn’t have a self-cleaning option, you’re stuck with chemical and physical, more likely a combination of the two.
Self-cleaning ovens work by getting so hot they reduce food particles to ash that can be easily wiped away (after the unit has cooled completely, please!). If your oven racks are stainless steel, they must be removed prior to starting the cycle. The oven heats to about 880°F, which you’re right is not hot enough to melt stainless steel, but depending on how they were made, it might weaken the filler metal holding the rack together.
If you’re going to be running the self-clean cycle, you’ll probably want to do it on a day you don’t mind having the windows open and running a fan. Maybe I definitely allow too much time to pass between cleanings, but the “slight” odor is usually “significant”. Before starting the cycle, look at the bottom of the oven and remove (or scrape out) any significant build-up from spills.
If heat energy isn’t an option, you’re stuck with chemical and physical energy.

Click this picture to learn more about cleaners!
Household ammonia is a solid choice and has other cleaning uses. Remember, the fumes aren’t pleasant and if you don’t use it appropriately, this chemical can be harmful. Always use ammonia in a well-ventilated area and keep away from children.
To use ammonia to clean your oven, allow the oven to cool COMPLETELY, pour 1/2 cup of ammonia in a shallow glass or ceramic dish and place on the bottom rack in the oven and close the door. Leave this overnight. The ammonia fumes will go to work on the burned on grease, reducing the amount of physical energy it will take to remove the residue.
In the morning, wear gloves and use a rag dampened with dish soap and water to wipe out any residue. If there is still significant residue on the glass, you’ll need to do a little more to finish the job. Give the oven a few more wipes with soap and water to remove any trace of ammonia. Remember kids, chemistry is fun, but unintended reactions are not.
 After you are absolutely sure that the ammonia has been removed fully, you can switch to a cleaner like Bar Keeper’s Friend to work on the grease spatters on the glass.
If you have very young children at home and do not want to risk having ammonia or oven cleaner in the home you can certainly use only physical energy to clean your oven. Keep in mind, that you’ll be scrubbing for quite a while. You might want to break this chore into several sessions instead of one long scrub.
Wiping out the COOL oven with a damp rag after cooking items that spatter will allow you to go longer between deep cleanings.

Click the picture for more tips!
Good luck!
Submit your questions to helpme@home-ec101.com.


CommentsThank you Thank you for this post!! I really Appreciate it!!! ... by Elizabeth
March 14, 2016
Menu Monday Week 11 of 2016
Heather says:
So, let’s pretend last week didn’t happen, as it felt like herding cats more than anything. As an aside, is the site loading any faster for you? I’ve made some changes and I’m hoping they’ve helped, but I think some of the image changes made them look less sharp. ¯\_(ツ)_/¯
Have you tried any new recipes lately? I finally made a red curry that met my expectations. I’ll need to play around with it a little more to get it to the point I feel comfortable sharing the technique, but I finally have a map and that’s a big step. I do add lots more vegetables to it than my favorite restaurant, but that way I can pretend it’s good for me. That’s my rationale, this week. With the longer evening light, I’m hoping to shoot more recipes, too.
What are you planning to make this week? Here’s a printable to make your weekly menu planning easier.
Monday – Lentil Patty Melts (using the lentil burgers) and salads
Tuesday – Chopped Salad with Roast Chicken
Wednesday – Chicken Salad, Fruit and Vegetables

Thursday – Chorizo Meatloaf – I make my usual meatloaf, but sub chorizo (Mexican, not Spanish) for the Italian Sausage, and use salsa instead of the milk, with a little bit of cotija cheese, too. It was an experiment that went very well last week. Fajita Style Vegetables, Refried Beans
Friday – Tuna Cakes, Tartar Sauce, Cheese Grits, Collard Greens

Saturday – To be determined, based on this week’s leftovers, maybe a mustgo soup, Albondigas style if there are any leftovers from Thursday

Sunday – Pulled Pork Chipotle Style Burrito Bowls


March 13, 2016
Organizational Sunday #11: Change Your Clocks (Even in the Car)
Heather says;
This week’s organizational challenge may arrive just a little too late to prevent some hassle. Was there a scramble this morning? Today go through your home and change all of your clocks to the correct time. No, you don’t have to play along if you’re in Arizona or another country that doesn’t participate in the insanity.
Don’t forget to change the clock in your car. If you aren’t sure how to do this, go to YouTube and search for “Change clock in [model of your car] [year your car was made]”. I guarantee you, someone has made a video for this, no matter how obvious it turns out to be.
While you’re at it, take a look at any calendar apps or To Do apps you may use and make sure they made the transition to Daylight Saving’s Time*.
Performing this check will make tomorrow morning much smoother. Try to go to bed a little earlier, too, don’t be one of the extra stressed people tomorrow morning —be one of the obnoxiously perky ones.
Hang in there, it’ll feel normal in a few days. In the meantime be on the lookout while driving, there are significantly more traffic accidents in the first few days after the change.
Pro-Tip if you’re a stay at home parent of very young children and don’t have early morning obligations, don’t try to do the time change all in one go. Tonight move the kids bedtime routines by 15 minutes, repeat over the next few nights.
*Yes, I did have to look up which part of the year was which. All I know is I hate the headache it causes.


March 10, 2016
My Daughter Is Feeling Desperate and I Need Help
Dear Home Ec 101,
I just read your desperate help post. I see some great things with it. I need help badly. It is my daughter. She is 21 and has 2 children ages 3 and 7 months. Her husband left them about 2 months ago. She is struggling so badly with everything.
She is depressed and has tried medication before but it hasn’t been too helpful for her. She depends on me a lot.
I have tried helping her but when I have spent the day making her apartment look nice. Within 2 days it has gone right back to being horrible. She has had CPS involved and she did what she was supposed to but it continually goes back to being messy and cluttered.
The apt complex where she lives has been threatening to evict her if it’s not clean.
I’m just desperate to help and have her maintain. We just don’t have alot of resources in our area. If you could give me any advice that would help I would appreciate it. She needs one less stress in her life.
Signed,
Worried in Walterboro
Heather says:
You’re in a heart breaking position. Thank you for being there for her.
It sounds like she’s been through a lot in a short time and your daughter is facing a lot of overwhelming things right now.
21 is an adult, but she doesn’t have the perspective you do. When you’re in your very early twenties, seasons of change feel endless and for her, right now, probably hopeless.
Please do your best to ensure she is seen by a professional, we lose too many lives. Just because one medication or therapist wasn’t helpful doesn’t mean another won’t be. Your grandchildren will be affected by how she gets through this. They will learn resilience, but it’d be a much happier story if it is by her example. . .
I’m currently overwhelmed at work, it’s okay, it’s a good busy, but it’s still just exhausting. I picked up a book to try to see if I could figure out how to prioritize my days and reduce some of that fatigue. I’m not very far into it but the it explains a lot about how energy-sucking decision making is and that’s for people in a healthy place.
In all likelihood the choices your daughter has are paralyzing her with indecision and leaving her with very little energy to do the things that seem so obvious to you– like keeping the place neat after it was cleaned. Then on top of that, she may also be embarrassed that she’s failing after not doing so.
Things you can do:
By all means, follow the household triage that I sent to Feeling Desperate, but remember she had a partner. Your daughter just lost hers and no matter what the relationship was, she’s grieving as she lets go of the dream of what it could have been.
Don’t ask open-ended questions like, “What are you going to do?” There’s an overwhelming world of possibilities that include awful things like having the children taken by the estranged spouse or the authorities. Once those images flash through a parent’s mind, it’s really hard to let them go and think calmly and rationally.
If you can help with the process of figuring out what to do next, that will likely go further than reducing clutter.
Does she need to find childcare? Is she able to pay her bills? Will she be able to afford to stay in her current home?
She needs a plan and it needs to be broken down into simple steps.
As her mother you’re in one of those awkward positions where your help may seem intrusive, if she has a close friend, you may want to bring her into the loop. There may be some resentment and potentially a lot of defensiveness, but figuring out the what next questions as a team will help her find the energy to begin picking up the pieces of the day-to-day.
Your daughter is drowning, not failing, and I hope you can explain to her that it’s okay to reach for help.


CommentsIf I can offer a bit of hope-I was 22 with 2 boys aged 1 and 2 ... by Holly
March 6, 2016
Organizational Sunday #10: The Junk or Catch-All Drawer
Heather says
How are those counters looking after last week? Do they need a quick re-visit? It’s absolute okay if they do. Getting your home organized is a process and it takes time.
I forgot to announce the winner of the bamboo cutting boards. An email has been sent, if your email address is martha******@gmail.com, please check your inbox for an email from me.
March’s random drawing from newsletter subscribers will be 3 Method Cleaning Products of the winner’s choice from a list of options, some restrictions apply*.
This week we’re diving into the junk or catch-all drawer.
I like to browse Reddit when I’ve got a little buffer time**. A while ago, I saw a great thread, I can’t remember what started it, but people from all over the world submitted pictures of their junk drawers. Yes the names were a little different, but everyone knew what was meant. It’s that drawer, usually in the kitchen, that catches the odds and ends, the odd sized battery, the rubber bands, and receipts, etc. It’s not just us, nearly everyone has this somewhere in their home.
Your mission today is to dive into your drawer(s). I don’t expect perfection. If you want to be super organized (and think others in the house will cooperate) you can use a divider to wrangle the odds and ends into a sort of order.
There are at least two tactics you can take, but whatever you do, check your pens to see if they actually work before putting them back:
Remove the drawer from its rails and take it to your work area, preferably one that can be vacuumed, trust me. Dump the contents. Return the drawer to its rightful place and sort through the contents without easy access to the drawer.
Drag the trash can near your drawer and go through the contents, try to be ruthless in your decision to toss things.
Have fun and don’t be scared to toss the bent paperclips.
Receipts can be put into a dated envelope.
Appliance manuals are online, unless your appliance is vintage, you don’t have to hang onto the paper clutter. If you’ve been keeping a binder of family recipes, add a divider tab and write down the appliances / model numbers on another sheet of paper. It’ll make searching for repair information easier.
See you next week!
*Restrictions include:
1. The shipping address must be in the continental United States. (This restriction is due to shipping charges)
2. You must be at least 18 years of age.
3. Void where prohibited by law.
4. The prize is intended to allow the person to choose 3 scents of their choice, not to allow the selection of multiple bulk orders. This is supposed to be a fun, token prize, not something to make Heather’s children go hungry. Capiche?
**Buffer time is the extra fifteen or so minutes I try to give myself to cover traffic, lost keys (which I’ve gotten much better about), and acts of God. I used to keep a paperback or three in the car to entertain myself. Now I’ve got the entire world in my hands via a smartphone. I’m not sure this is necessarily an improvement.


CommentsAnother good thing to keep in that binder is a list of details ... by Kate Nolan
March 4, 2016
The Difference Between Boiling and Simmering
Dear Home Ec 101,
I’m embarrassed to actually ask this, but what is the difference between boiling and simmering? A lot of your recipes say bring to a boil and reduce the heat to a simmer. What does that mean and why does it matter?
Signed,
Baffled Beginner
Heather says:
Basic questions like this are encouraged here. If you’re asking, I guarantee there are plenty of other people out there who don’t know either.
Do you remember high school chemistry and surface tension? Water molecules have an attraction to one another caused by the polar nature of each molecule. If you were able to see an individual water molecule it would have a bent shape, something like a V. The point of the V is the oxygen molecule which hogs the electrons and the arms of the V would be the slightly positive hydrogen atoms. As you may remember opposites attract, the hydrogen atoms of one molecule are attracted to the negative oxygen atom of another and this creates the phenomenon of surface tension. All this means is that water molecules like to stick together and it takes energy to break them apart.
That energy is heat. At sea level water boils at 212°F, it’s a very convenient and observable benchmark when it comes to cooking. When water reaches its boiling point, which slowly drops with altitude the bubbles break the surface. Once the boiling point is reached, even if you turn up the burner, the liquid will not increase in temperature. It may boil more vigorously as more liquid turns to gas, but it won’t get any hotter.
Here’s a handy reference for those of you who don’t live at sea level:
Altitude, m
Boiling point of water, °C
0 (0ft)
100 (212°F)
300 (984.25ft)
99.1 (210.3°F)
600 (1968.5ft)
98.1 (208.5°F)
1000 (3280.8ft)
96.8 (206.2°F)
2000 (6561.68ft)
93.3 (199.9°F)
4000 (13123.36ft)
87.3 (189.1°F)
6000 (19685.04ft)
81.3 (178.3°F)
8000 (26246.72ft)
75.5 (167.9°F)
Most of the time recipes will call for a liquid to be brought to a boil first, this is to compensate for the drop in temperature when food is added to the cooking liquid.
The boiling point is too hot for cooking many foods. Turn the burner down.
There are exceptions for starches and vegetables.
Simmering is the stage before the bubbles have enough energy to break the surface tension and the temperature range is from 185°F – 205°F or 85°C – 96°C. Not only does simmering require less energy from your appliance, it also keeps many proteins from becoming tough. This is why soups and stews are simmered rather than boiled, additionally the vigorous bubbling action of boiling can break apart some items like fish.
Most of the time crock pots or slow cookers are designed to cook in the simmering range, but you should test out your appliance by filling it partway with water and allowing it to reach temperature at both the high and low settings before leaving an item unattended for an extended period of time.
Not all stoves or ranges make simmering easy, in fact simmering on some gas stoves can be quite difficult, it may be necessary to move the pot so it is not centered over the flame. Be careful to ensure the pot is still balanced and won’t tip easily.
Just to throw this out there, poaching* is another way to cook with hot water and it’s temperature is even lower than simmering and it covers the range 160°F – 180°F or 72°C – 82°C. Poaching is often reserved for delicate items like eggs and fish.
Last tidbit, sometimes menus at restaurants will refer to meat as boiled. It’s not, it’s just an inaccurate description.
*Am I the only weirdo who can be merrily writing along and brought to a standstill by a word? Poach. It’s just fun to say, which is weird since roach is just nasty. Moving along*
Send your domestic questions, no matter how basic, to helpme@home-ec101.com.


CommentsWhen boiling anything, place a wooden spoon across the top of ... by JDYea! Im 63 years old and a pretty darn good cook but I looked ... by Connie RollingsI have a gas range as well and I usually use a larger pot when ... by Angela EnglandMy SIL boils her pasta, but she does not drain it when it's ... by carolineIt's not you, it's the flame, seriously. With electric burners ... by HeatherSolosPlus 10 more...
Heather Solos's Blog

- Heather Solos's profile
- 12 followers

