
Margot Note's Blog, page 49
July 30, 2017
How to Thrive in Self-Employment
Working for yourself is an exciting, fulfilling, and (at times) terrifying experience.
Most of us have spent careers working for someone else, which makes the transition to solo work difficult. Here’s what I’ve discovered so far to help me survive and thrive while running my consulting business.
Schedule EverythingWhen you aren’t accountable to a time clock or a standard 9-to-5 day, it is easy to get sloppy with your time. To be as productive as possible, I plan my week on Sundays. I write a weekly to do list, and then block out my Google calendar.
My typical schedule cuts the day in half. I work on personal things from 7 am to noon. These activities include working out, getting myself ready, performing household chores, and running errands in the neighborhood. If there are any critical calls to make or emails to send, I’ll do that as well.
My professional life starts from after lunch to about 7-10 pm (or, frankly, whenever my husband gets home from work). I find that I get on a roll at about 4:30 pm. I write a daily to do list, and use a Miracle Cube Timer to keep track of my time.
I work from home most days, unless I’m traveling. I schedule appointments in the city all on one day to maximize my time.
I also try to schedule my calls for the week on one day. As an introvert, calls tire me, so I schedule them back to back. Each call gets easier as I find my groove.
Be PresentableEven during my busiest periods, I make sure to look nice even if no one is there to see it. The stereotype of freelancers working in sweatpants is true! (I’m wearing them as I write this). But they’re fresh sweatpants I put on after a shower and before I did my hair and makeup. When I’m battling the craziest deadlines, I take care of myself because it sets the mood for the day.
I look forward to meetings with clients now because I get to dress up in Brooks Brothers and Fendi!
Relieve StressWhen I used to work for other people, my tension derived from toxic colleagues and dysfunctional workplaces. Now I feel the stress of having too much to do and knowing that I’m the only one to do the work.
To combat this, I work out every day. It’s primarily for the mental relief, but a fit body is a nice result. I do Crossfit, SoulCycle, and Aaptiv workouts.
I started incorporating meditation and deep breathing exercises into my daily practice. This body scan meditation is more refreshing than a nap. I use an accupressure mat, which is painful until the endorphins kick in.
I also use natural stress relievers like Tulsi tea and Calm.
Before, when I worked at a “normal” office job, I felt like I had to contain my feelings until I left work. Self-employment has given me the freedom to address my stress and anxiety as it occurs. Doing so has significantly improved my life.
Manage EmotionsAlong similar lines to relieving stress, I also manage my emotions. I strive to be happy and calm and avoid things that anger or annoy me.
Recently, I was feeling upset about something that I couldn’t figure out, and I had an important call with a client approching. Rather than trying to intellectualize my feelings, suppress my emotions, or otherwise try to be a stoic professional, I made myself cry. It was cathartic and I had 15 minutes before the call so I let it all out. I’m glad I did because I no longer felt bad, and I could talk with my client without having to push down my feelings.
Music is a great way to maintain a mood. Sixties-era ska/rocksteady/reggae and 70s/80s punk and hardcore pushes the happiness button in my head. I also have certain songs I listen to to get me hyped including “Accept Yourself,” “Bam Bam,” and “Sucker MCs.” No one will harsh my mellow!
Celebrate the SabbathSelf-employment, at least initially, means that you work all the time. It’s important to take a mental and physical break so that you don’t burn out. I celebrate the Sabbath from Friday night to Sunday at noon every week. The time allows me to reconnect with family and friends, have fun, and give myself a break so that I’m fresh for the next week. Being a workaholic or a martyr is no way to live.
Travel WellI’m still perfecting my travel experiences, but I’ve done several things to make my life easier. I’ve enrolled in TSA Pre-Check, created a travel packing list, and joined the loyalty programs of my favorite airline, hotel chain, and car rental company so I rack up points each time I travel. I keep my Dopp kit packed with beauty samples and my favorite masks. Each time I travel for business, I think of new ways to make my experience more enjoyable.
Listen to Your GutWhen talking to potential clients or partners, I listen to my intuition. There’s been several times where I felt a bad feeling about an organization or an individual. The feeling cannot be justified. You just know on a primary level that there’s something not right there. In situations like this, I use the rest of the conversation to figure out what the red flags are. If possible, I usually wait for the other party to turn me down before I turn them down. If needed, I will say no to moving forward. I never “ghost” people professionally because it’s not right. I found it far more compassionate to let people know in a timely manner that working together is not possible.
Treat Yourself Like a Lamborghini, Not a JalopyI take care of myself more than I did before. I recently treated a chronic pain condition I had for over twenty years by finding a wonderful physical therapist. I also found a doctor that treated me for an asthma-like condition that landed me urgent care several times in the past couple years. I eat healthy, drink in moderation, exercise, practice self-care, and sleep well. When I don’t do these things, I get sick and then I can’t work.
Be Comfortable Being UncomfortableAlmost every day, I’m doing something outside of my comfort zone—meeting new people, starting projects, or pitching ideas. In the past, that twinge of dread before an unnerving event used to paralyze me, but now I just feel it. Soon enough it passes, the task is done, and I move on to the next uncomfortable thing. I realize that every experience allows me to learn and perfect my craft. Sometimes I’m just awkward and uneasy. I accept that my feelings are temporary, and I move on.
Be AuthenticAt a recent Society of American Archivists conference in a session about radical empathy in archival practice, Holly Smith, College Archivist at Spellman College, said, “If I can’t be my authentic self in a space, I don’t want to be in that space.” That statement is something that I’ve felt for a long time, but couldn’t articulate. (Holly is one of the most beautiful people inside and out, by the way).
The most important and challenging part of self-employment is being able to accept myself fully. I’ve removed myself from toxic environments, and the only critical voice left is inside my head. How cruel this self-talk can be! I wouldn’t let a boss talk to me this way, but I’ve lived with this voice unknowingly my whole life.
I have to practice radical self-acceptance because I must depend on my brain and my body to do the work to support myself. Being an entrepreneur has built my confidence with each client I get and project I complete. I am forced to love myself because that’s the only way to survive.
I have learned to stop hiding and be more myself. In high school, I won “Most Unique” as a senior superlative.
[image error]
I ripped this off the wall and kept it with my personal archives all these years. "Egg" was my boyfriend.
But the freak flag I proudly let fly has been suppressed. I conformed my personality and my presentation for so long because I felt that I had to to survive in the working world. In the past year, I’ve slowly crept out of my shell and have expressed myself more. I want to get back to being the shame-free and fearless teenager I used to be.

Wearing thrift store and military surplus. I understood the importance of metadata even back then!
Clients pay for ME; all of me—my expertise and my experience. I no longer have to put on an act to protect myself. My clients have problems that I solve. We align forces to fix something together. I show up in a way that I never have before. It feels good to do the work that I love while being my true, best self.
A Self-Employment Shopping ListFollow me on Pinterest | Instagram | Twitter | LinkedIn | Facebook


July 29, 2017
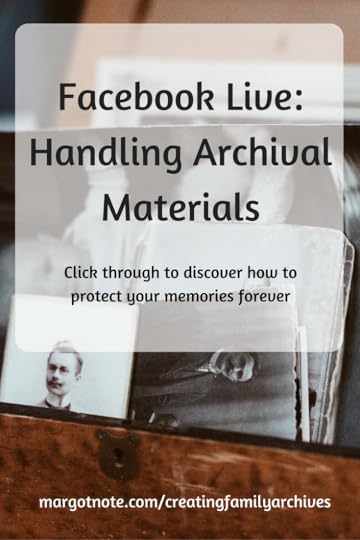
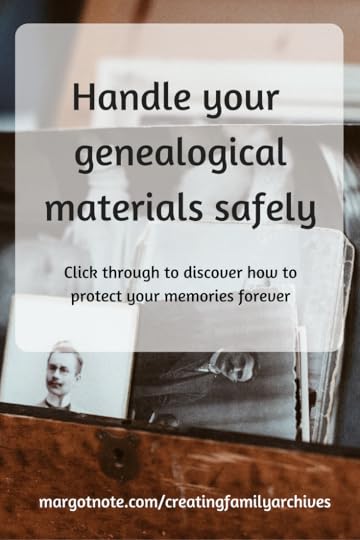
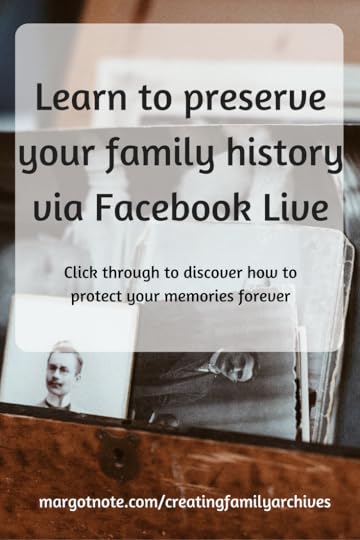
Facebook Live: Handling Archival Materials
Get hands on with your archives! What's the proper way to handle these precious family treasures? Join me this Monday, July 31st at 2 pm EST via Facebook Live on my Creating Family Archives group page. If you're not already a member, come join the fun!
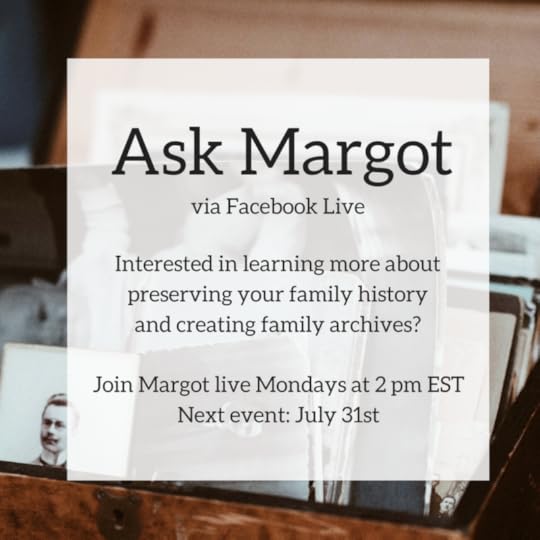
All you need to do to join me is click this link and watch the video on Facebook at 2 pm EST. (Don't live in the Eastern time zone? Convert your time zone here).
We'll be chatting about proper handling so your heirlooms are not further damaged!
To participate, please join my group, Creating Family Archives here: https://www.facebook.com/groups/CreatingFamilyArchives/
The video will be shared on my website for viewing after the live event, so even if you don't have Facebook you won't miss out.
To learn the preservation secrets used by libraries, archives, and museums to protect their priceless materials (that you can also use for your family heritage items) read my book:
Creating Family Archives: How to Preserve Your Papers and Photographs
By Margot Note
Like this post? Never miss an update when you sign up for my newsletter:
Follow me on Pinterest | Instagram | Twitter | LinkedIn | Facebook
July 20, 2017
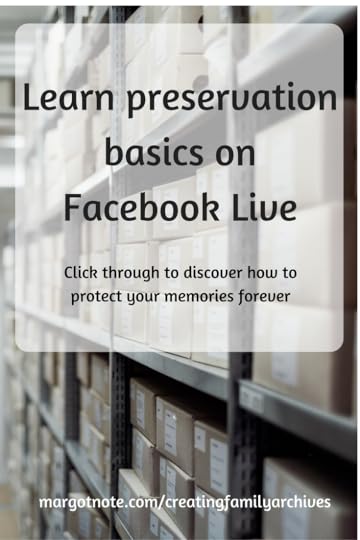
Facebook Live: Learn Preservation Basics
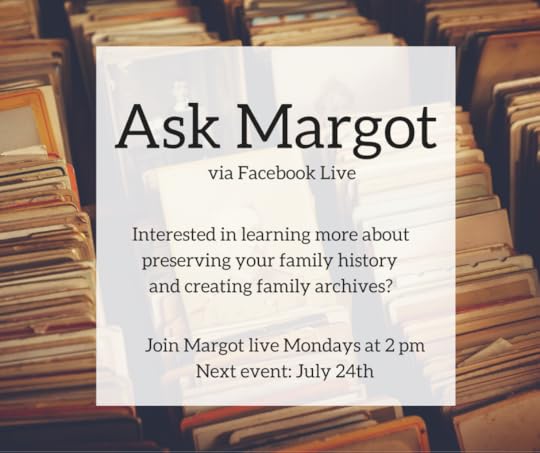
Join me on Monday, July 24th at 2 pm EST via Facebook Live on my Creating Family Archives group page. If you're not already a member, come join the fun!
All you need to do to join me is click this link and watch the video on Facebook at 2 pm EST. (Don't live in the Eastern time zone? Convert your time zone here).
Our focus during this session will be on learning preservation basics, including the proper enclosures and environment that will protect your precious family heirlooms.
To participate, please join my group, Creating Family Archives here: https://www.facebook.com/groups/CreatingFamilyArchives/
The video will be shared on my website for viewing after the live event, so even if you don't have Facebook you won't miss out.
To learn the preservation secrets used by libraries, archives, and museums to protect their priceless materials (that you can also use for your family heritage items) read my book:
Creating Family Archives: How to Preserve Your Papers and Photographs
By Margot Note
Like this post? Never miss an update when you sign up for my newsletter:
Follow me on Pinterest | Instagram | Twitter | LinkedIn | Facebook


July 19, 2017
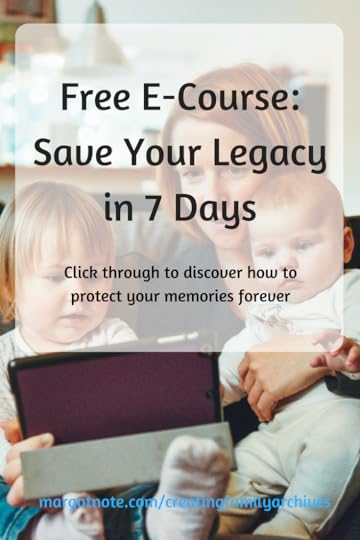
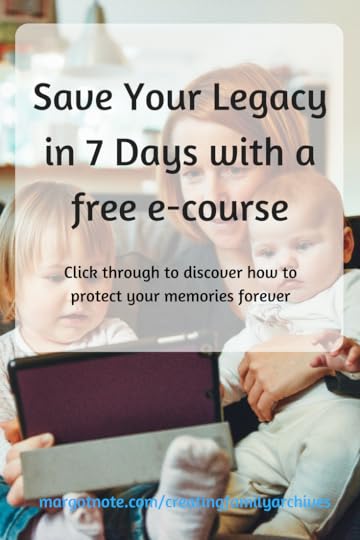
Free E-Course: Save Your Legacy in 7 Days
Would you like to know how to untangle the stories hiding in your family documents, letters, and photographs?
Do you ask yourself:
What should I do first?Should I keep everything?What should I throw away?How should I organize these materials?What archival storage materials should I use?Once you know some archival basics, you can adapt professional methods to your family's archives. As a result, you can confidently sort through your family treasures and discover the stories they hold. You can more comfortably make decisions about items worth preserving, and you can wisely invest the resources you have available for the project. You will be in charge of your history instead of the other way around.
If you'd like to learn more, sign up for my free e-course: Save Your Legacy in 7 Days. You will receive an email every day for a week that will teach you about archival best practices and inspire you to take action. You will also be subscribed to my e-newsletter, so you never miss an update.
To learn the preservation secrets used by libraries, archives, and museums to protect their priceless materials (that you can also use for your family heritage items) read my book:
Creating Family Archives: How to Preserve Your Papers and Photographs
By Margot Note
Follow me on Pinterest | Instagram | Twitter | LinkedIn | Facebook

July 14, 2017
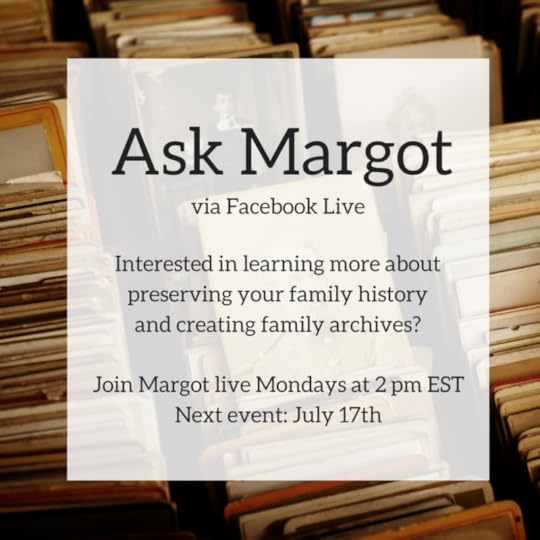
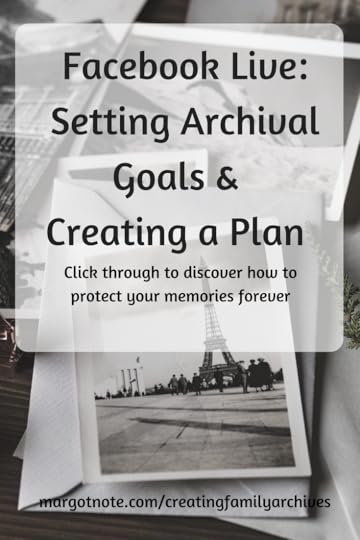
Facebook Live: Setting Archival Goals and Creating a Plan
I'm starting a series of Facebook Live events discussing how to create your family archives. The premiere episode will be this Monday, July 17th at 2 pm EST via Facebook Live on my Creating Family Archives group page. If you're not already a member, come join the fun!
All you need to do to join me is click this link and watch the video on Facebook at 2 pm EST. (Don't live in the Eastern time zone? Convert your time zone here).
Our focus during this session will be on establishing your archival goals and creating a plan to organize your papers and photographs.
To participate, please join my group, Creating Family Archives here: https://www.facebook.com/groups/CreatingFamilyArchives/
The video will be shared on my website for viewing after the live event, so even if you don't have Facebook you won't miss out.
To learn the preservation secrets used by libraries, archives, and museums to protect their priceless materials (that you can also use for your family heritage items) read my book:
Creating Family Archives: How to Preserve Your Papers and Photographs
By Margot Note
Like this post? Never miss an update when you sign up for my newsletter:
Follow me on Pinterest | Instagram | Twitter | LinkedIn | Facebook
July 10, 2017
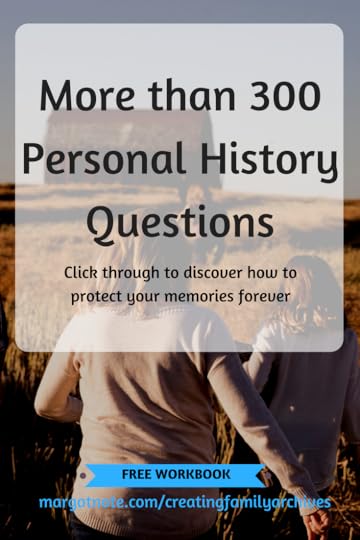
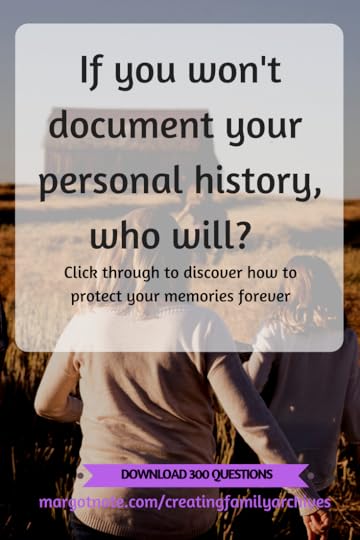
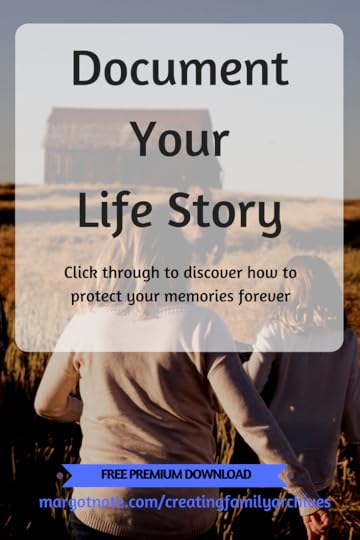
Write Your Life Story with 300 Personal History Questions
The creation of personal histories preserves our lives, making the specifics of our life available to our descendants forever. Whether written, spoken into a voice recorder, or recounted to the lens of a video camera, your stories are awaited by the most appreciative audience of all—your family. Far into the future, your family will read your words or listen to your voice and be grateful you took this time to put this gift together for them. I've compiled a list of over 300 personal history questions to get you started.
Your story will resonate with your children and grandchildren better than any famous person’s autobiography. Older people often leave an inheritance behind for their descendants, but memories don’t usually get passed along.
If you are older, you can write down most of your story. Get help from your loved ones to remember special moments.
If you are one or two generations younger, you can still start the story, since your early years are now behind you and the memories are still fresh in your mind. If there is a family member or friend whose life you are interested in, ask him or her to fill out these questions for you, or use it to interview the person and record his or her answers.
If you are young, you can start the story and fill it out as you go. By searching ahead for experiences yet to come, you may recognize them as they appear.
The most important thing for you to keep in mind is that recording your history is meant to be a pleasure to do, not a task to be completed. When you first flip through my download, it will seem as if there are a million questions. You don’t have to answer each one. In fact, if you chose just one question and answered it in the form of a note to your family, that in itself would surely please them. There are no correct or incorrect answers. The pages are complete then you say they are. Fill in only what you want.
If you plan to give your children your memories as a gift for a holiday, allow yourself plenty of time to do the project to your satisfaction. Perhaps you may want to make appointments with yourself to work on it. Don’t rush—allow yourself time to savor the process. Look through old family papers and photographs. They will jog your memory.
Don’t ever worry whether your writing is interesting enough. It is. Think about how much you would have cherished it had your parents or grandparents answered a list of questions like these for you.
Most of all, enjoy the stories. Read, reflect, and rejoice in the wonder of life’s experiences.
Enter your name and email address to gain access to the 300+ Personal History Questions Workbook, as well as a subscription to my newsletter:
To learn the preservation secrets used by libraries, archives, and museums to protect their priceless materials (that you can also use for your family heritage items) read my book:
Creating Family Archives: How to Preserve Your Papers and Photographs
By Margot Note
Follow me on Pinterest | Instagram | Twitter | LinkedIn | Facebook
July 3, 2017
Leading and Managing Teams
This article is the second part of a series on project management for records managers, published in ProfessioNotes, the newsletter of the Institute of Certified Records Managers (ICRM). The series focuses on six key areas of project management: selection and prioritization, leading and managing teams, planning and scheduling, budgeting and performance, communication and documentation, and completion and review.
Project managers conducting records management assignments must be committed to leading their team to success. Frequently, they work without high-level support, at times with active resistance, and occasionally in the absence of any evidence that the project is possible! Courageous leadership in the face of obstacles is required.
Project managers are expected to be both good managers and leaders to be effective. An ability to lead is one of the most critical competencies a project manager should have. The project manager’s leadership ability is usually expressed by influencing the behavior and attitudes of the project team. The effectiveness of a leader is, therefore, dependent to some extent on their power.
One of the biggest challenges for project managers is to be a working project manager, or one who performs work while managing the project. For small teams, a project manager can do some of the work. As team size increases, it becomes impossible to work and manage simultaneously because the tasks distract from the needs of team members. When a conflict between managing and working exists, performing tasks takes priority, and management is neglected. The project manager should always focus on controlling the project, not on performing the work.
Projects are often undertaken in environments where the project manager has little formal authority. Even for project managers who do have authority, contributors who work for other managers do portions of project work. Project leaders must assume control whether they possess the authority or not. Managing without authority takes charisma, flexibility, patience, and persistence.
Stakeholders can make or break the project. Some people may have concerns but have no power to change anything in the project. Others may be supportive but lack rank. The opposite is also true: some important individuals may be the champions or neigh sayers for the project at hand.
Project sponsors are senior executives responsible for shepherding projects to a successful conclusion. The sponsor must defend the benefits of the project, accept responsibility for funding and budget statuses, concur with project and charter requirements, and be knowledgeable about planned and actual results. They assist their project teams in resolving organizational impediments to project success. Project managers should aim to ensure executive involvement throughout their project’s life cycle by forging solid relationships with their sponsors.
The relationships between stakeholder roles are functional rather than hierarchical. Although the sponsor will usually be the most senior member of the project team and will be higher-ranking than the manager, little else can be assumed about the seniority of other team members. Subject matter experts or technical specialists frequently have skills based on years of experience and are often senior to the project manager.
The most advantageous size for a project team depends on the project’s goals and tasks. The ideal team size depends on its application. A project manager should strive to have just enough people to do the job. Having too few people slows down work and members may lack requisite skills. Having too many will also impede progress by shifting time and energy to communication and coordination efforts. Commitment may also be a problem, as dedication to the team and its goals diminish as more people are added. Recruit as many people as needed to get the job done.
Project teams are a way of managing projects where efficiency performs the work well; effectiveness acts upon the right work. Brainstorming and discussions are good examples of interactive teamwork to generate ideas and solve problems. A small team can produce many options and alternatives; a suggestion from one person can stimulate ideas from the others. The selected option should then have the support and commitment of the team who will collectively share the risk of the decision. Teams tend to make better decisions than the team members would make individually with the same information.
A problem for team members is that they become torn between the conflicting demands of their functional manager and their project manager. This situation arises if there is a lack of clarity in their work in their everyday duties and their project assignments. The best way of ensuring that it does not occur is for the team members to start their work by clarifying the needs of the project and agreeing on boundaries.
Motivating team members on a project can be tricky. For the most part, project managers lack the authority to hire, fire, or reprimand team members. In most cases, they do not even have the luxury of selecting team members. However, they are still accountable for managing them to achieve the project objectives. Since they do not have much position power, they need to rely on motivation and influence. Recognizing good performance confirms the value of his or her work to the team member.
Working with people can be one of the most rewarding aspects of project management. Successful project managers develop leadership skills, build teams, and work with stakeholders. Leading and managing teams is a skill set that is never quite finished; refining your abilities takes times but is well worth the investment in yourself and your record management career.
Project Management for Information Professionals
By Margot Note
Follow me on Pinterest | Instagram | Twitter | LinkedIn | Facebook
Get access to my free project management resource library, delivered to your inbox:
June 21, 2017
Supercharge Your LIS Career
Earlier this week, my friend Tom Nielsen and I presented a session, You and Your Career, at the Special Libraries Association annual conference in Phoenix, Arizona. In the workshop, we discussed the myriad of ways in which LIS students and early career professionals can take their careers to the next level. The goal of the interactive class is to prepare current and future information professionals by:
increasing their self-awareness and their understanding of their working preferencesimproving their knowledge of professional workplace skillsdeveloping an understanding of the many ways that they can engage professionally within the field.It was my first time attending an SLA conference, and I met great people and learned a lot that I can bring back to my consulting business. I also survived multiple days of almost 120-degree heat! The two-block walk from the hotel to conference center was eye-searing!
Tom and I divided the session into three modules that examined participants as individuals, employees, and professionals. Imagine a Russian nesting doll. At your core, you are yourself with all of the insights and experiences that make you "you." The next layer is who you are as an employee, working at your current position within the culture of an organization. The very last layer is who you are as a professional: how you navigate, pivot, and flow through your career and the story it tells about you as a knowledge worker.
Attendees explored how a deeper understanding of themselves allows them to perform at their best level workwise. Then they shifted their focus to workplace best practices that they can employ throughout the lifecycle of a job. Also reviewed are ways in which librarians and archivists can become more involved in their field through professional development opportunities that play to their strengths.
We had originally planned to do small group activities and full class brainstorms to facilitate the discussions. Instead, given the small class size, we were able to have a much deeper and targeted discussion with the participants.
It was our first time facilitating the workshop, and I'm thankful that we received great feedback to make the class even better. For example, when we originally created the workshop, we focused on library science students and early career professionals. Of course, career changers would benefit from the workshop as well; many people become librarians and archivists as a second career. I'm looking forward to improving the class and teaching it again soon!
To provide some resources beyond the session, I created a list of further readings, divided into three sections:
You as an IndividualThe Best Jobs for Every Personality Type
This infographic from Business Insider shows each of the 16 Myers-Briggs personality types and the jobs recommended for each type.
Career Assessment Tools & Tests: Assessments for Students, Job-Seekers, Career-Changers:
From career development and job-hunting site Quintessential Careers, this site provides a good starting point for finding a multitude of personal and career assessments.
An extensive collection of information resources related to the Keirsey temperaments, such as artisans, guardians, idealists, and rationales, plus role variants within temperaments.
Motivational Appraisal of Personal Potential (MAPP)
The MAPP assessment measures your potential and motivation for various types of work while profiling your temperament, aptitude, and possible career matches.
A comprehensive collection of information about the Myers-Briggs personality type test, including the assessment tools, results interpretations, and information on how to use your results.
Personal SWOT Analysis: Making the Most of Your Talents and Opportunities
This article and accompanying worksheet will help you identify the key questions to ask yourself to unearth the information most useful for making career decisions.
A site that provides information about the multitude of personality assessments and types, describing the lingo used by the most popular assessments to help you understand both your outcomes and those of others.
“Personality Types and Librarians” (Part 1) and (Part 2)
A terrific overview of librarians’ MBTI statistics and the impact of those stats on potential career choices.
You as an EmployeeCareer Q&A with the Library Career People
A monthly career question-and-answer session with Tiffany Allen (director of Library HR, University of North Carolina, Chapel Hill University Library) and Susanne Markgren (digital services librarian, Purchase College, State University of New York).
Emerging Career Trends for Information Professionals
This annual recap from the San Jose State University School of Information provides not only job titles but also job trends for the current information career universe. The report also identifies many of the requisite job skills for specific LIS roles and the skills hiring managers are currently emphasizing based on an analysis of LIS and general job posting sites. Especially valuable for those considering nontraditional career paths.
How to Become a 21st Century Librarian
A resource for those considering traditional librarianship, but also a great reminder of why library work can be so rewarding.
A LinkedIn group focused on every possible aspect of LIS career options, whose members include students, practitioners, those considering librarianship, LIS recruiters, and vendors.
Making the Shift: Using Transferable Skills to Change Career Paths
An overview of how to use transferable skills to create career path options.
Navigating the Salary Question
Excellent source of specific language to use when attempting to navigate the salary question during the initial interview.
An Open Letter to New Librarians
An honest response from technologist and LIS thought leader Roy Tennant on dealing with the frustrations facing many recent graduates and others new to the library profession.
You as a ProfessionalAsking to Connect on LinkedIn—Words to Use
One of the important aspects of networking on LinkedIn is reaching out and establishing links to others. This blog post gives examples of wording you can adapt to tailor your request for the individual you’re reaching out to.
Creating a Positive Professional Image
Discussion of the most important elements of creating a strong professional brand, building credibility, and maintaining authenticity.
How to Be a Leader in Your Field: A Guide for Students in Professional Schools
Thoughtful and practical advice during graduate school tenure and subsequent career
How to Build a Meaningful Career
A practical exploration of purpose as it relates to the work we choose to do, how we do it, and how it supports our human need for meaning in our lives.
This article, written by Brian Uzzi and Shannon Dunlap, is an exploration of how information and connects flow based on the nature of those connections.
A methodically, well-organized overview of how to think strategically about the various aspects of your network and how to gain the most benefit from each of those aspects
This post addresses a phenomenon often experienced by individuals who are promoted to positions of leadership and authority. This is an especially significant concern if you are trying to build confidence and courage.
An article on why “weak ties” or connections of people outside your normal sphere of influence and engagement can provide to be a highly effective way of opening up additional career opportunities as well as extending your access to knowledge and insights outside your immediate professional community.
What's NextWhat career resources have you found helpful?
If you're interested in having Tom and I facilitate this workshop at your institution, contact me at margotnote@gmail.com.
Follow me on Pinterest | Instagram | Twitter | LinkedIn | Facebook
June 10, 2017
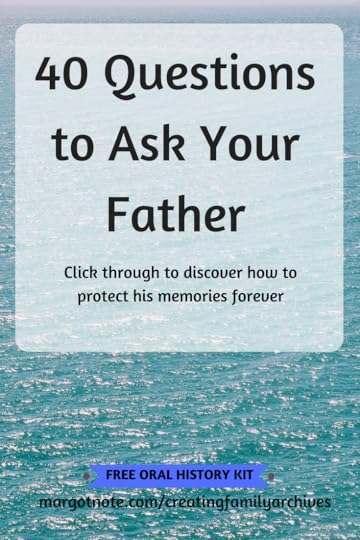
Detailing Dad’s Life Story
“I wish I'd asked Dad while he was around.”
Far too often, my clients tell me that they regret not interviewing their father about his life story as they create their family archives.
For this Father’s Day, why not conduct an oral history interview of your father? You’ll not only create a memory, but you will capture stories for the next generation. Here some tips to help with your interview:
Do not think of the interview as an occasion to do family research. Rather, see it as an opportunity to spend time with Dad and let him talk about his life. The family stories will follow.
Your father may become frustrated if you interrogate him about names and dates he does not remember. Instead, get him talking and ask a few specific questions where appropriate.
Prepare a list of questions, but use it as a guide. The conversation should naturally lead to topics not on the list. If the interview goes too off-course, redirect it.
Looking at photos can spark memories, so bring along the ones you most want to know about. If you wish, you can use the photographs to guide your interview. Take notes on any details that arise.
Jot down notes during the interview, but writing the whole time can be distracting. Ask permission to record the conversation, assuring that the interview will only be shared with family members, if at all.
Transcribe the interview while it is fresh in your mind. Write out the whole thing, or use it to flesh out the notes you have already taken.
I’ve created a list of 40 questions to ask your father to celebrate his life. They are crafted to give you more than a yes or no answer and tailored to uncover information about the most important man in your life.
Interested in interviewing your mother as well? Check out the list of questions I created to start a conversation with her HERE.
Enter your name and email address to gain access to the Family History for Fathers Kit, as well as a subscription to my newsletter:
To learn the preservation secrets used by libraries, archives, and museums to protect their priceless materials (that you can also use for your family heritage items) read my book:
Creating Family Archives: How to Preserve Your Papers and Photographs
By Margot Note
Follow me on Pinterest | Instagram | Twitter | LinkedIn | Facebook

June 6, 2017
How to Win Grants with 20/20 Vision (with a List of 100+ Grants)
Given the current political climate, many of us in the archives, library, and museum worlds are worried about the possible reduction of support from the National Endowment for the Arts (NEA), the National Endowment for the Humanities (NEH), and other government programs. While I won’t get into politics here, I believe that the NEA and NEH may be temporarily reduced but will not be shut down. Even if they are, there are a number of grants offered by individual foundations and little-known organizations that are more than willing to support your projects.
Having been an information professional for many years, I’ve dealt with all sides of the grant-making process. My graduate work in archives and records management was paid for by grant money, and I’ve led or participated in countless grant-supported projects. I’ve written, contributed, edited, and given feedback on proposals, and have served as a grant reviewer for the National Historical Publications and Records Commission (NHPRC) and other organizations.
When I talk to clients, the most difficult aspect of proposal writing they experience is being too nearsighted and too farsighted. The archives, library, and museum staff know their collections so well and in such detail that they have difficulty explaining their projects in the most compelling way possible to outside audiences. They are myopic. On the other hand, members of the fundraising team of the home institution are challenged because they lack the insight and subject matter expertise to develop a strong and detailed proposal. They are hyperopic. Some development team members write proposals without consulting the information professionals on their staff and vice versa; I've seen this far too often than you'd imagine.
Wouldn’t it be wonderful to have 20/20 vision for your proposals? I can help craft a proposition that will give you your best shot at winning the grant. I bring almost 20 years of nonprofit experience to reviewing and editing grant proposals for cultural institutions, offering comprehensive feedback as to what grant makers need to hear in order to say “yes.”
Interested in learning more? Email me at margotnote@gmail.com. The small investment you make in my services will have 40 to 100 times the return when you get that grant!
Over the past few months, I’ve gathered a collection of American-based grants that support information-based projects in the cultural heritage sector. I've focused on national, nonprofit funders; there are numerous state, regional, corporate, and civic-based organizations that aren't listed here. These listings are provided as a service to my readers. Please verify all submission deadlines and other information with the respective granting offices or agencies. All links are working as of 6/6/17.
Access to Historical Records: Archival Projects
Access to Historical Records: Major Initiatives
American Alliance of Museums Grants
Association for Recorded Sound Collections Research Grants Program
Awards for Faculty at Hispanic-Serving Institutions
Awards for Faculty at Historically Black Colleges and Universities
Awards for Faculty at Tribal Colleges and Universities
Collections Assessment for Preservation Program (CAP)
Creating Humanities Communities
Dialogues on the Experience of War
Digital Dissemination of Archival Collections
Digital Edition Publishing Cooperatives
Digital Humanities Advancement Grants
Digital Projects for the Public
Digitizing Hidden Special Collections and Archives
Documenting Democracy: Access to Historical Records Projects
Documenting Endangered Languages
Electronic Records Projects Grants
Emerging Crises Oral History Research Fund
Fellowship Programs at Independent Research Institutions
Fellowships (NEH)
Fellowships for Advanced Social Science Research on Japan
Gladys Brooks Foundation Grants for Education
Gladys Krieble Delmas Foundation Humanities Program and Research Library Program
GRAMMY Foundation Preservation Assistance Grants
GRAMMY Foundation Preservation Implementation Grants
Grants to State Library Administrative Agencies
Henry Luce Foundation Responsive Grants
Humanities Collections and Reference Resources
Humanities Initiatives at Community Colleges
Humanities Initiatives at Hispanic-Serving Institutions
Humanities Initiatives at Historically Black Colleges and Universities
Humanities Initiatives at Tribal Colleges and Universities
Innovation in Archives and Documentary Editing
The Institute of Turkish Studies Research Grants: Library Grants
Institutes for Advanced Topics in the Digital Humanities
International Institute for Jewish Genealogy Research Grants
Landmarks of American History and Culture: Workshops for School Teachers
Laura Bush 21st Century Librarian Program
LSTA Competitive Grants for the Pacific Region and U.S. Virgin Islands
Media Projects: Development Grants
Media Projects: Production Grants
Museum Assessment Program (MAP)
Museums Empowered: Professional Development and Capacity Building Opportunities for Museums
Museum Grants for African American History and Culture
National Arts and Humanities Youth Program Awards
National Digital Newspaper Program
National Film Preservation Foundation Grants
National Leadership Grants for Libraries
National Leadership Grants for Museums
National Medal for Museum and Library Service
Native American Library Services: Basic Grants
Native American Library Services: Enhancement Grants
Native American/Native Hawaiian Museum Services Program
Native Hawaiian Library Services
NEH-Mellon Fellowships for Digital Publication
Next Generation Humanities PhD Implementation Grants
Next Generation Humanities PhD Planning Grants
Preservation and Access Education and Training
Preservation Assistance Grants for Smaller Institutions
Preservation of Classical Music Historical Recordings Grants
·Public Engagement with Historical Records
Publishing Historical Records in Documentary Editions
Publishing Historical Records Grants
Scholarly Editions and Translations Grants
The Society of American Archivists Philip M. Hamer and Elizabeth Hamer Kegan Award
Sparks! Ignition Grants for Libraries
State and National Archival Partnership Grants
State Board Programming Grants
State Humanities Councils General Operating Support Grants
STEM Expert Facilitation of Family Learning in Libraries and Museums (STEMeX)
Summer Seminars and Institutes
Sustaining Cultural Heritage Collections
Swedish Council of America (SCA) Grants
Visual Resources Association Foundation Grants
Wenner-Gren Foundation's Historical Archives Program
Young Adult Library Services Association Grants


