
Christine Hansen's Blog, page 4
July 29, 2011
Results for Anniversary Giveaway!
First, many thanks to EVERYONE who entered this giveaway - it was a delight to read your comments and see that I'm not the only person on the planet enchanted with art charms!
There were 39 separate comments (wow!!!) on the giveaway post (not including my own comment), and I used the sequence generator at Random.org to select today's winners.
If you did not win this time, I do encourage you to follow my blog and enter my next giveaway. The easiest way to follow my blog is by subscribing through FeedBurner, so that my posts will be delivered to your email in-box. (Look for "subscribe via email" in the right column of this blog.)
If you're interested in learning more about art charms, I invite you to join the Art Charms Yahoo group Peg & I created - we have regular swaps, contests, and we chat every Thursday night! (You don't have to buy the book to join the group.)
And now, without further ado, I present the winners. Congratulations! I will be contacting you for your mailing addresses.
Comment #26, Ruth, won the signed copy of Making Mixed Media Art Charms & Jewelry
Comment #2, Icarus, won the Under the Sea art charm
Comment #21, Elizabeth, won the Spring Flowers art charm
Comment #9, Fire & Ice, won the Winged Jewels art charm
Again, thank you to everyone who entered the giveaway - I really appreciate it!
xoxo, c


July 27, 2011
Basic Wire Jewelry Techniques Class (Shipwreck Beads, Lacey, WA)
EDIT: See revised class description (we're now focusing on techniques, instead of projects). Supply list is at the bottom of this post.
I'm excited to announce that I am again teaching at Shipwreck Beads in Lacey, WA!
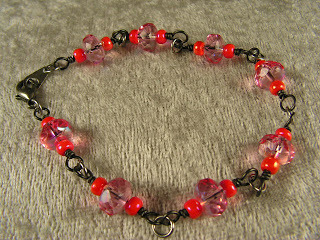
you'll be able to make this bracelet
using the techniques learned in this class
This class will offer beginning jewelry designers a solid grounding in ten elemental jewelry-making techniques, including working with wire and jump rings, and making plain loops and wrapped loops. Students will also learn how to create a bead dangle, a wire spiral, a bead link, and a wire-wrapped bead.
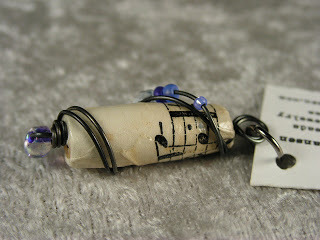
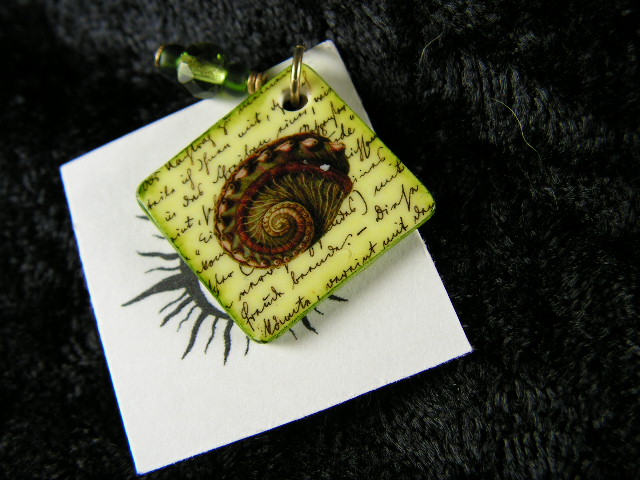
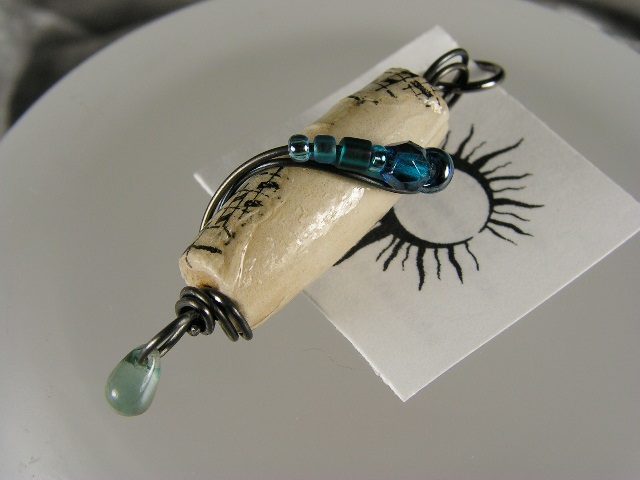
in this class, students will learn how to wire-wrap a bead like this one
(we won't be doing the collage on the bead itself - just the wire work)
With home practice, the skills learned in this class will enable students to create a wide variety of jewelry, including earrings, pendants, bracelets, necklaces and more.
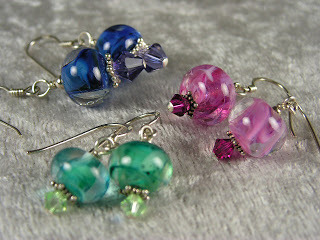
you'll be able to make these earrings
using the techniques you've learned in this class
During class, we'll be focusing mostly on techniques rather than completed projects; each student will receive a handout containing notes on the information presented, as well as "recipes" for creating jewelry at home, based on the techniques learned in class.
Instructor Christine Hansen is a glass bead artist, veteran jewelry designer, and co-author of the best-selling book, Making Mixed Media Art Charms & Jewelry.
Registration fee: $40
Class dates:
Saturday, 9/10/11 - 1pm-5pm (7CS0911
Saturday, 10/15/11 - 1pm-5pm (7CS1011)
Saturday, 11/19/11 - 1pm-5pm (7CS1111)
Sunday, 12/4/11 - 1pm-5pm (7CS1211)
How to sign up: Call Shipwreck Beads to register: (360) 754-2323, or at (800) 950-4232.
with the skills you learn in this class, you'll be able to make this bracelet and...
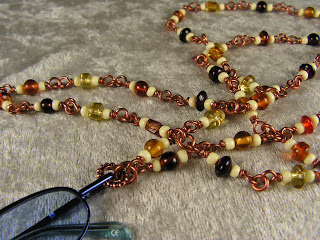
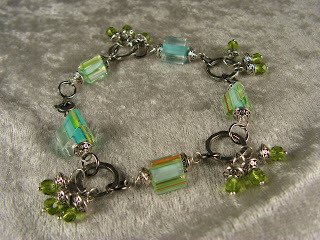
this beaded necklace/eyeglass holder/badge lanyard
Supplies needed for class:It's a great idea to make sure your supplies coordinate (ex. copper jump rings, copper wire, copper head pins, etc.). Listed below is the detailed supply list, including Shipwreck's item numbers and quantities needed.
Jump rings: 7 gramsFI208-anyHead pins: 7 grams2FI61-any OR FI61-anyWire: 1 spool each of two gauges (sizes) of bare round wire (don't get anything with a coating on it).copper: 18 gauge – 18CW856 20 gauge - 20CW856-1OR stainless steel: 20 gauge - 20CW813-RD 22 gauge - 22CW813-RDBeads: You'll need a few beads in coordinating colors, along with some spacer beads.1 - Limited Czech Mix 125 Gram Box, CZ5130-anyAND EITHER1 strand - Czech Rondelle 4mm, 4RL-anyOR1 strand - Czech Seed Bead 6/0, 6SB-any
Tools Needed:The following tools are required for this class. If you already have any of these items, please bring them to class. A limited amount of tools will be available for student use.0000 steel wool
wire cutters – such as FI496-7
chain nose pliers – such as FI432
bent chain nose pliers – such as FI433
round nose pliers – such as FI431
flat diamond needle file – such as FI501
bead mat or an old kitchen towel to work on
ruler
To complete projects at home, you'll want the following:
For earrings:· ear wires - FI44-any OR FI46-any OR FI52-any OR FI54-any
For bracelets and necklaces:· clasp - try a lobster clasp (05x10mm or larger) OR toggle clasp (15mm or larger)· solid rings, similar to PW2099-any – for linking with bead links and adding dangles to
I'm excited to announce that I am again teaching at Shipwreck Beads in Lacey, WA!

you'll be able to make this bracelet
using the techniques learned in this class
This class will offer beginning jewelry designers a solid grounding in ten elemental jewelry-making techniques, including working with wire and jump rings, and making plain loops and wrapped loops. Students will also learn how to create a bead dangle, a wire spiral, a bead link, and a wire-wrapped bead.

in this class, students will learn how to wire-wrap a bead like this one
(we won't be doing the collage on the bead itself - just the wire work)
With home practice, the skills learned in this class will enable students to create a wide variety of jewelry, including earrings, pendants, bracelets, necklaces and more.

you'll be able to make these earrings
using the techniques you've learned in this class
During class, we'll be focusing mostly on techniques rather than completed projects; each student will receive a handout containing notes on the information presented, as well as "recipes" for creating jewelry at home, based on the techniques learned in class.
Instructor Christine Hansen is a glass bead artist, veteran jewelry designer, and co-author of the best-selling book, Making Mixed Media Art Charms & Jewelry.
Registration fee: $40
Class dates:
Saturday, 9/10/11 - 1pm-5pm (7CS0911
Saturday, 10/15/11 - 1pm-5pm (7CS1011)
Saturday, 11/19/11 - 1pm-5pm (7CS1111)
Sunday, 12/4/11 - 1pm-5pm (7CS1211)
How to sign up: Call Shipwreck Beads to register: (360) 754-2323, or at (800) 950-4232.

with the skills you learn in this class, you'll be able to make this bracelet and...

this beaded necklace/eyeglass holder/badge lanyard
Supplies needed for class:It's a great idea to make sure your supplies coordinate (ex. copper jump rings, copper wire, copper head pins, etc.). Listed below is the detailed supply list, including Shipwreck's item numbers and quantities needed.
Jump rings: 7 gramsFI208-anyHead pins: 7 grams2FI61-any OR FI61-anyWire: 1 spool each of two gauges (sizes) of bare round wire (don't get anything with a coating on it).copper: 18 gauge – 18CW856 20 gauge - 20CW856-1OR stainless steel: 20 gauge - 20CW813-RD 22 gauge - 22CW813-RDBeads: You'll need a few beads in coordinating colors, along with some spacer beads.1 - Limited Czech Mix 125 Gram Box, CZ5130-anyAND EITHER1 strand - Czech Rondelle 4mm, 4RL-anyOR1 strand - Czech Seed Bead 6/0, 6SB-any
Tools Needed:The following tools are required for this class. If you already have any of these items, please bring them to class. A limited amount of tools will be available for student use.0000 steel wool
wire cutters – such as FI496-7
chain nose pliers – such as FI432
bent chain nose pliers – such as FI433
round nose pliers – such as FI431
flat diamond needle file – such as FI501
bead mat or an old kitchen towel to work on
ruler
To complete projects at home, you'll want the following:
For earrings:· ear wires - FI44-any OR FI46-any OR FI52-any OR FI54-any
For bracelets and necklaces:· clasp - try a lobster clasp (05x10mm or larger) OR toggle clasp (15mm or larger)· solid rings, similar to PW2099-any – for linking with bead links and adding dangles to
Basic Wire Jewelry Techniques Class
I'm excited to announce that I am again teaching at Shipwreck Beads in Lacey, WA!
finished sample of bracelet we will be working on in this class
(bracelet may need to be completed at home)
This class will offer beginning jewelry designers a solid grounding in ten elemental jewelry-making techniques, including working with wire and jump rings, and making plain loops and wrapped loops. Students will also learn how to create a bead dangle, a wire spiral, a bead link, and a wire-wrapped bead.
finished sample of wire-wrapped bead we will work on in class
(we won't be doing the collage on the bead itself - just the wire work)
With home practice, the skills learned in this class will enable students to create a wide variety of jewelry, including earrings, pendants, bracelets, necklaces and more.
finished samples of earrings we will make during this class
(we'll only try to finish one pair in class, but you can bring supplies to make more if you like)
Class projects will include a pair of earrings, a wire-wrapped bead pendant, and components for a bead link bracelet (students may need to complete bracelet at home).
Registration fee: $40
Class dates:
Saturday, 8/13/11 1pm-5pm (7CS0811)
Saturday, 9/10/11 1pm-5pm (7CS0911)
How to sign up: Call Shipwreck Beads to register: (360) 754-2323, or at (800) 950-4232
with the skills you learn in this class, you'll be able to make this bracelet and...
this beaded necklace/eyeglass holder/badge lanyard
July 25, 2011
Delicious (and easy peasy) Daikon Salad

I've been promising this recipe to the nice gentleman who works at Hong Phat, my favorite local Asian market. I find the most wonderful food at Hong Phat – a ton of wheat- & corn-free noodles to choose from, scads of tasty fresh produce like snow peas, jicama, green onions, basil, AND daikon radishes.
For those of us who were brought up on cute little round red radishes, the daikon radish is the Godzilla of radishes, but not in a nuclear catastrophe-inspired demolition kind of way. The daikon radish is just plain big. Real big. Godzilla-type big, if you get my meaning.
There are a couple different varieties I've found in our local Asian markets – Hong Phat carries the long cylindrical daikons, maybe 3-4 inches in diameter, and anywhere from 1 to 3 feet (!!!) long sometimes, while Arirang carries a shorter, chunkier version, maybe 6-8 inches in diameter, and 10-12 inches long. Daikon radishes at both stores have white skin, and usually a small amount of green at the top.
Daikon radish is great peeled and cut into chunks for snacking (just ask Oofie – he LOVES him some daikon, lol), and is also terrific in stir-fries and soups. Daikon is also delicious in salads – the easy recipe below features daikon as the main ingredient, but I also make an Asian coleslaw, with shredded cabbage, carrots, daikon, and chopped green onions, topped with Moosewood's Ginger Miso Dressing.
This recipe is from Moosewood Restaurant Daily Special, a book which I highly recommend to everyone who likes food, especially soups & salads. Daily Special is packed with fabulous and tasty recipes, and is one of my most-referred-to cookbooks.
Don't be tempted to take a short cut and omit pouring the hot oil over the scallions/green onions- that's what really makes this dish so yummy!
Pilwun's Daikon Salad, p. 282, Moosewood Restaurant Daily SpecialServes: 6-8Prep time: 10 minutesDraining time: 30 minutes
2 pounds daikon1-1/2 teaspoons salt1 carrot1 tablespoon sugar1 tablespoon white vinegardash of dark sesame oil3 scallions or green onions2 tablespoons canola or other vegetable oil
Trim the ends of the daikon, peel, and coarsely grate it. (A food processor makes this go so much faster!)
In a colander set into a larger bowl, toss the grated daikon with the salt. Set aside to drain for 20-30 minutes, until about a cup of liquid has collected in the bowl. (Squeezing some of the liquid out of the daikon from time to time will speed up the process.)
Meanwhile, peel and coarsely grate the carrot and place it in a serving bowl. In a small bowl, mix together the sugar, vinegar, and sesame oil and set aside. When the daikon is well drained, stir it into the carrots. Add the vinegar mixture and toss well.
Slice the scallions thinly on the diagonal and mound them on top of the salad. Heat the vegetable oil until smoking and immediately pour it over the scallions – this will make a sizzling sound. Toss well.
Serve at room temperature or chilled.

July 22, 2011
Anniversary Giveaway!

It's been a year since the book I wrote with Peggy Krzyzewski, Making Mixed Media Art Charms & Jewelry, was published by Kalmbach, and THAT means it's time for a little celebration giveaway!
I'm giving away one signed (by me) copy of Making Mixed Media Art Charms & Jewelry, and three of my original limited edition mixed media art charms.
Under the Sea Art Charm
How to enter?
You have two chances to win.
Chance No. 1: Leave a comment below this post telling me why art charms appeal to you.
Chance No. 2: "Like" my page on Facebook AND leave a second comment under this post telling me you did so.
Christine Hansen
Spring Flowers Art Charm
Details:
PLEASE include a way for me to contact you in case you win.
EACH entry must be in its OWN comment, and maximum of two entries per person please!
Comments must be received no later than midnight Pacific standard time, 7.28.11, in order to be eligible.

Winged Jewels Art Charm
Next Friday, July 29, 2011, I will use the random number generator thingie to select four winners - Prize No. 1 is the signed copy of Mixed Media Art Charms & Jewelry, Prizes 2-4 are my own mixed media, as pictured in this post.
I will announce the winners here on my blog next Friday, and will contact winners for mailing addresses. If I do not hear back from a winner by August 5, 2011, I will re-do the random number generator thingie and give that prize to another commenter.
Good luck and best wishes for a charming day!

June 2, 2011
Love Drop for June: helping the Aubin family
The Love Drop team is at it again! Last month we gave over $9,200 worth of cash, goods and services to the Stalnaker family, who had been going through a financially hard time due to the effects of the BP oil spill on the Louisiana economy. The family was in need of a car and the Love Drop team was able to surprise them with one, making it one of the most exciting Love Drops ever. You can watch how it all went down here.
This month we rally behind the Aubins - a Michigan mother and her three children who are mourning the death of Keith, husband and father, after his lengthy battle with multiple health problems. Our goal is to raise at least $3,600 to pay the family's rent for three months, which will allow them to focus on what they need to during this time, without fear of losing their home. Additionally, since Keith was an organ donor, he leaves a powerful legacy and the Love Drop team hopes to raise awareness of organ donation this month to honor Keith's memory. Help us make this month special for the Aubins!
Want to help? Here are three ways you can participate:
Give $25 towards rent - Click this link to contribute $25 towards their rent for the next three months - it will relieve so much stress for them.
Give a gift card or service - Gift cards are always helpful. Places like Target, Wal-mart, restaurants, etc. would definitely help them out. Services too - especially those you can offer yourselves, or from your company.
Organ donation - We're giving the Aubins the gift of knowing that the people on our team are organ donors. If you are one now, or pledge to be soon, please tell us so, and we'll relay the total number as a gift at the Drop.,

May 31, 2011
Gluten-free Naan - easy AND tasty!!!
Waaaay back in January, I posted a recipe for the flour mix we use to make pizza. I have great news, especially if you're a fan of Indian food. This flour mix works REALLY well for making naan, a tender, very tasty leavened flat bread.
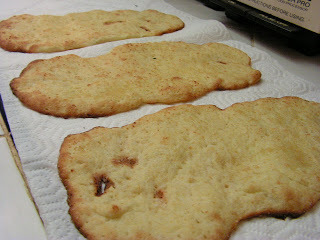
finished naan, ready for devouring!
Here's how we did it, loosely based on Bette Hagman's Pita Bread recipe found on page 193 of The Gluten-free Gourmet Bakes Bread.
The following makes about 20 individual naan breads - enough for two adults, two teenagers, and a hungry naan-crazed 8 year old boy.
You'll need 1-2 cookie sheets, butter or margarine, waxed paper, and a sheet or two of baker's parchment paper if your cookie sheets are aluminum like mine. Use the butter or margarine to grease the cookie sheets. You will also need a pastry brush, about 1/2 cup of butter/margarine mixed with 1-2 Tbsp. minced or pressed garlic if you want garlic naan, or no garlic if you want plain naan, and a shaker of salt.
Dry ingredients - combine in bowl of heavy-duty mixer using paddle:
6 cups French bread/pizza mix <--I've been making mine without the egg replacer, and just upping the egg content in the wet ingredients - it's working well for us. 1/4 cup + 2 Tbsp. Almond meal or coconut flour
1-1/2 tsp. salt
4-1/2 Tbsp. sugar
Wet ingredients:
5 eggs
In a bowl, combine and set aside to foam:
2-1/1 Tbsp. dry yeast granules
1-1/2 cups warm (not hot) water
2 tsp. sugar
In another bowl, combine to melt shortening/coconut oil:
3/8 cup shortening or virgin coconut oil
3/4 cup hot water
----
Add eggs, foamed yeast mixture, and melted shortening/coconut oil/water mixture to dry ingredients and blend. Set mixer on high speed and beat for 3-1/2 minutes.
While you're waiting for the naan dough to mix up, tear off a few sheets of waxed paper and grease them, using the butter or margarine. You'll want the waxed paper sheets to be about 20-24" long - big enough for you to lay on 3-4 naans to rise.
Once the dough is thoroughly mixed, grab 2 tsp. of butter/margarine and rub it all over your hands. The dough is very soft and sticky, which makes for a tender finished bread, but it's a mess to work with if your hands aren't adequately greased. I found that I needed to re-grease my hands before I started working with each new piece of dough.
Use a rubber spatula to scoop out a small handful of dough, about the size of a duck egg, and form it into a thick cylinder, about 5-6 inches long. Lay the dough cylinder onto a cookie sheet (or one of the pieces of greased waxed paper, once you fill up your cookie sheets) and gently pat it into a flat, elongated teardrop shape, about 10-12 inches long, and about 5-6 inches at the widest point. Continue forming individual naan breads until all the dough is used up. Allow naan to rise for about an hour.
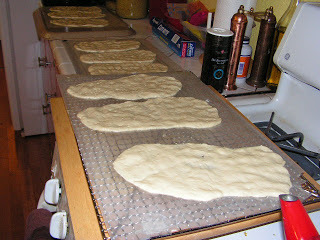
naan, rising
Preheat oven to 450-500 degrees Fahrenheit.
Use the pastry brush to brush a thin layer of garlic butter over the top of each naan, and then sprinkle a bit of salt over the top of that. Bake naan for 5-7 minutes, watching carefully near the end of the baking period. You want the tops to be golden brown. Use a spatula to remove naan from cookie sheet to a piece of paper towel to cool.
I found that the greased waxed paper worked great for the rising naan - and you should be able to re-use the parchment paper for the whole batch - just (very carefully) flip the waxed paper over and the naan should come away from the waxed paper easily. You might also try picking up each individual naan bread and laying it onto the cookie sheet. Whichever method you use, don't forget to brush on the (garlic) butter and sprinkle the salt!
This naan is best enjoyed immediately (preferably with a big plate of rice & veggies masala) but can also be re-heated using a toaster set to the lowest setting.
May 26, 2011
May 2011 Art Bead Scene Monthly Challenge
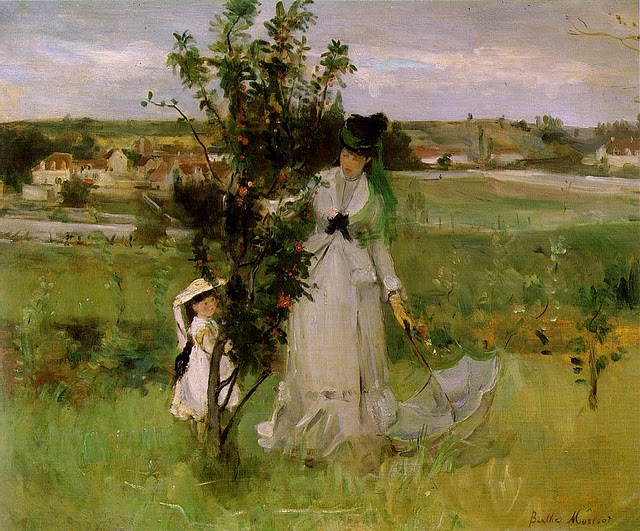
I'm hoping to become a bit more regular at designing pieces for the monthly challenge over at Art Bead Scene. Each month, the ABS editors post an image of a painting or other work of art, and jewelry designers are invited to interpret that image in a piece of jewelry, using art beads.
In reviewing the May inspiration piece, Cache-cache (Hide-and-Seek), 1873, by Berthe Morisot, I realized that I've already got a necklace that echoes the lovely greens and browns in Morisot's painting.

This is a mixed media art charm cluster necklace/eyeglass holder/badge lanyard, featuring a bunch of my lampwork beads and six mixed media art charms.
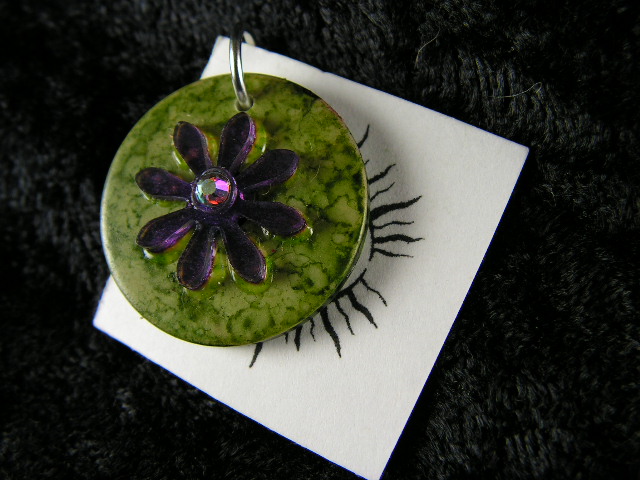
My co-author, Peg Krzyzewski made the bullet casing/mini-light charm, and I made the others, including the very cool wire-wrapped vintage sheet music bead. (Special thanks to my dear friend Ceu Ratliffe for sharing her awesome stash of vintage sheet music with me!) Other art charms include a faux Asian coin with a tiny green stone dangle, my steampunk-themed art charm in brass with tiny watch parts, my shrink plastic vintage travel-themed charm, and a lucite leaf with one of my swirly green beads as a dangle.
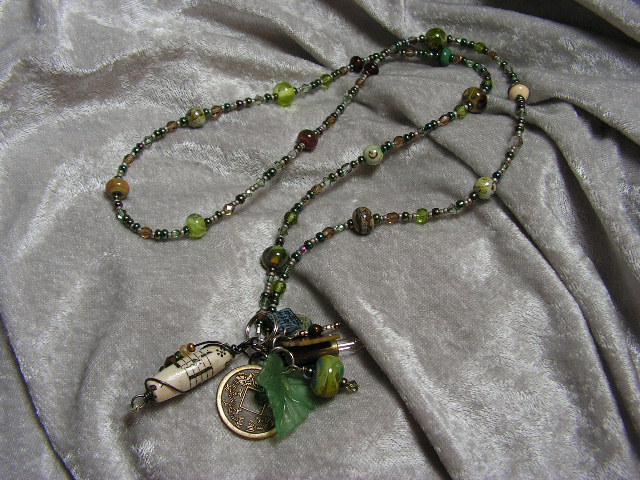
The necklace includes a 1/2-inch split ring with the charm cluster, which enables the wearer to stash a pair of eyeglasses or add a badge for work.
All of the designers entering the challenge post pictures of their work on Flickr's Art Bead Scene page. Please take a few minutes to visit and view the amazing work posted by my colleagues!
You may view more of my work at my ArtFire studio.

April 29, 2011
Ginger Wasabi Kale Chips (easy, raw, vegan, tasty!)
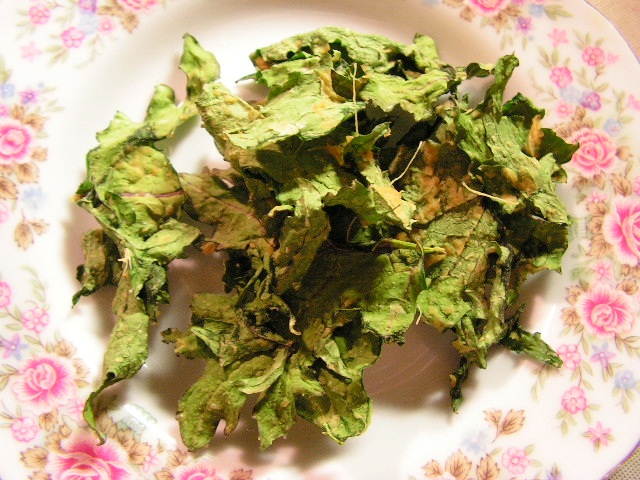 I am a complete potato chip junkie...something about that crisp salty tasty snacky goodness gets me every time...but at 150 calories and 10 grams of fat per serving of Lay's Classic Potato Chips, and knowing how easy it is (at least for me. ACK!!!) to scarf down about 8 servings at a time, regular potato chips are something I need to avoid. Imagine my delight when I found that kale chips satisfy that urge for a salty munchie!
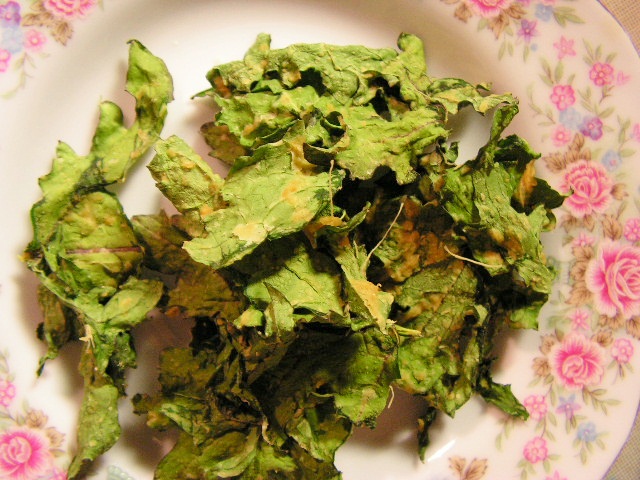 This recipe is really easy - all you need is:
a dehydrator (I love my 9-tray Excalibur)
a bunch of fresh kale
1/4 - 1/2 tsp. wasabi powder
fresh ginger, about 1" knob, washed and peeled
1/4-1/3 cup miso
 Wash the kale and shake it dry.
Pull the leaves off the kale stems and tear leaves into bite-sized pieces (about 2-3" diameter or so)
Place torn kale leaves into a large bowl.
Grate ginger over kale leaves.
Sprinkle a small amount of wasabi powder over kale leaves.
Scoop miso onto kale leaves.
Use your hands to mush the miso onto all of the kale leaves, mixing well and distributing ginger and wasabi as evenly as possible.
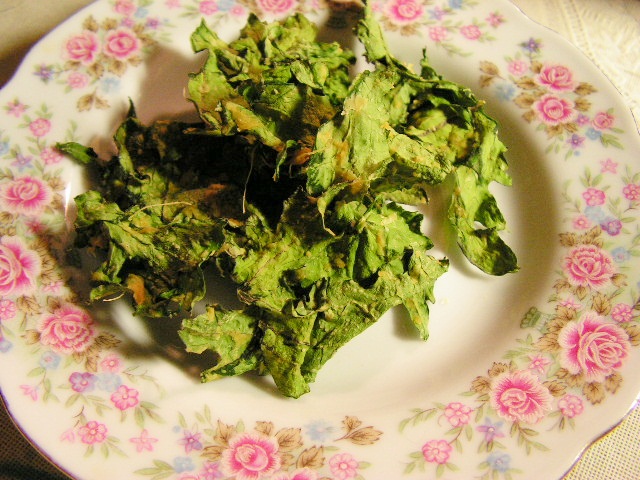
Lay seasoned kale leaves onto mesh dehydrator trays, spreading apart in a single layer (you'll probably need 2-3 dehydrator trays to dry all of the leaves).
Dehydrate at 105 degrees Fahrenheit for 3-5 hours, or until completely dry.
Store in an airtight container.
Leftover crumbs can be sprinkled onto a salad for extra flavor.
I will be experimenting with different flavors, and will post here the results.
Have fun, and bon appetit!

April 28, 2011
Happy International Charm Day!

Giveaway Prize No. 1 - music charm by c. hansen
I love Art Charms...partly because there is such a wonderful potential in each one, like a tiny present, from the Art Charm artist to the ultimate recipient/owner. Art Charms are a fun and unique way to make, trade, and enjoy original works of art. While methods and materials for creating Art Charms are unlimited, one rule defines an Art Charm: Art Charms are made by hand, one at a time. True Art Charms are never mass-produced in a factory (but an artist might use mass-production techniques). This is something that can only be created by an artist's hands, therefore it is precious and unique. Art Charms are a completely inclusive art form – anyone can make an Art Charm!

Giveaway Prize No. 2 - Asian-themed "don't panic" charm by c. hansen
Top Ten Reasons Why Chris Loves ArtCharms (in no particular order):
1. Making Art Charms helps me to practice and refine my skills.
2. Art Charms are individually handcrafted, never made by a factory.
3. When I collect Art Charms, I'm collecting original mixed media art and supporting other artists.
4. The small size and format of Art Charms makes them easy to display and collect.
5. Art Charms have a variety of end-uses above and beyond the basic charm bracelet.
6. Art Charms hold great potential for fundraisers or benefits – just have everyone participating in the swap make and send in an extra charm for a bracelet or necklace.
7. Swapping Art Charms builds connections between people, creates community, and invites the interest of non-swappers.
8. I LOVE the design challenge of creating an original Art Charm while honoring the swap theme.
9. I love getting my swaps back and seeing how the other artists interpreted the swap theme!
10. Making Art Charms is an easy, affordable, and portable hobby. Many materials for Art Charms can be gleaned from discarded items, available as near as the local thrift shop or garage sale...or even in the junk drawer!

Giveaway Prize No. 3 - music charm by c. hansen
In celebration of International Charm Day 2011, I have five of my own mixed media art charms to share with my readers. They're the eye candy for this post. Just leave a comment on this post before midnight Saturday April 30, 2011, with your email addy or some way in which to contact you, and Sunday morning I will use a random number generator to select the five winners. I'll post the winners here, and will contact you to get your mailing address.
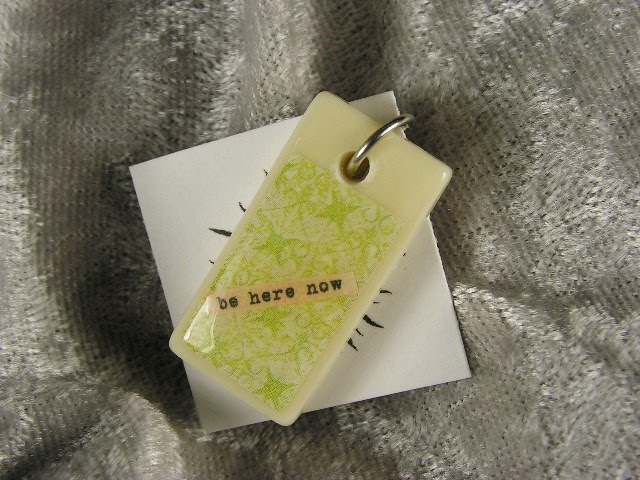
Giveaway Prize No. 4 - "be here now" mini-domino charm by c. hansen
Want more chances to win awesome stuff? Head on over to my friend Amber Dawn's International Charm Day blog – she's giving away a signed copy of Making Mixed Media Art Charms & Jewelry (the book my friend Peg Krzyzewski and I wrote on how to make mixed media art charms). Amber's got more giveaways and interviews on her blog, as well as some tasty eye candy and links to other blogs celebrating International Charm Day.
Can't get enough of Art Charms? Please consider joining our Art Charms Yahoo group - we're doing swaps, challenges, contests, and weekly online chats.
Here's hoping your International Charm Day is filled with art and charms,
Chris
Giveaway Prize No. 5 - music charm by c. hansen

Christine Hansen's Blog

Christine Hansen isn't a Goodreads Author
(yet),
but they
do have a blog,
so here are some recent posts imported from
their feed.

