Richela Fabian Morgan's Blog, page 4
July 16, 2014
Filipino Food: Adobo Ribs
 Chicken or pork adobo is the quintessential Filipino food. The basic sauce is made with white vinegar, soy sauce, and garlic, which are kitchen staples in most homes. But I can almost guarantee that every Filipino family has their own spin to this dish. I've eaten it with copious amounts of chili peppers thrown in, coconut milk, or olives. Sometimes there is a medley of different meats; sometimes there are tofu chunks floating around. And you know what? Lahat mabuti: it's all good!
Because baby back pork ribs are the only meat on the bone that my kids will eat, my version is made with ribs. I also bake them in the oven because it's less messy.
ADOBO RIBS
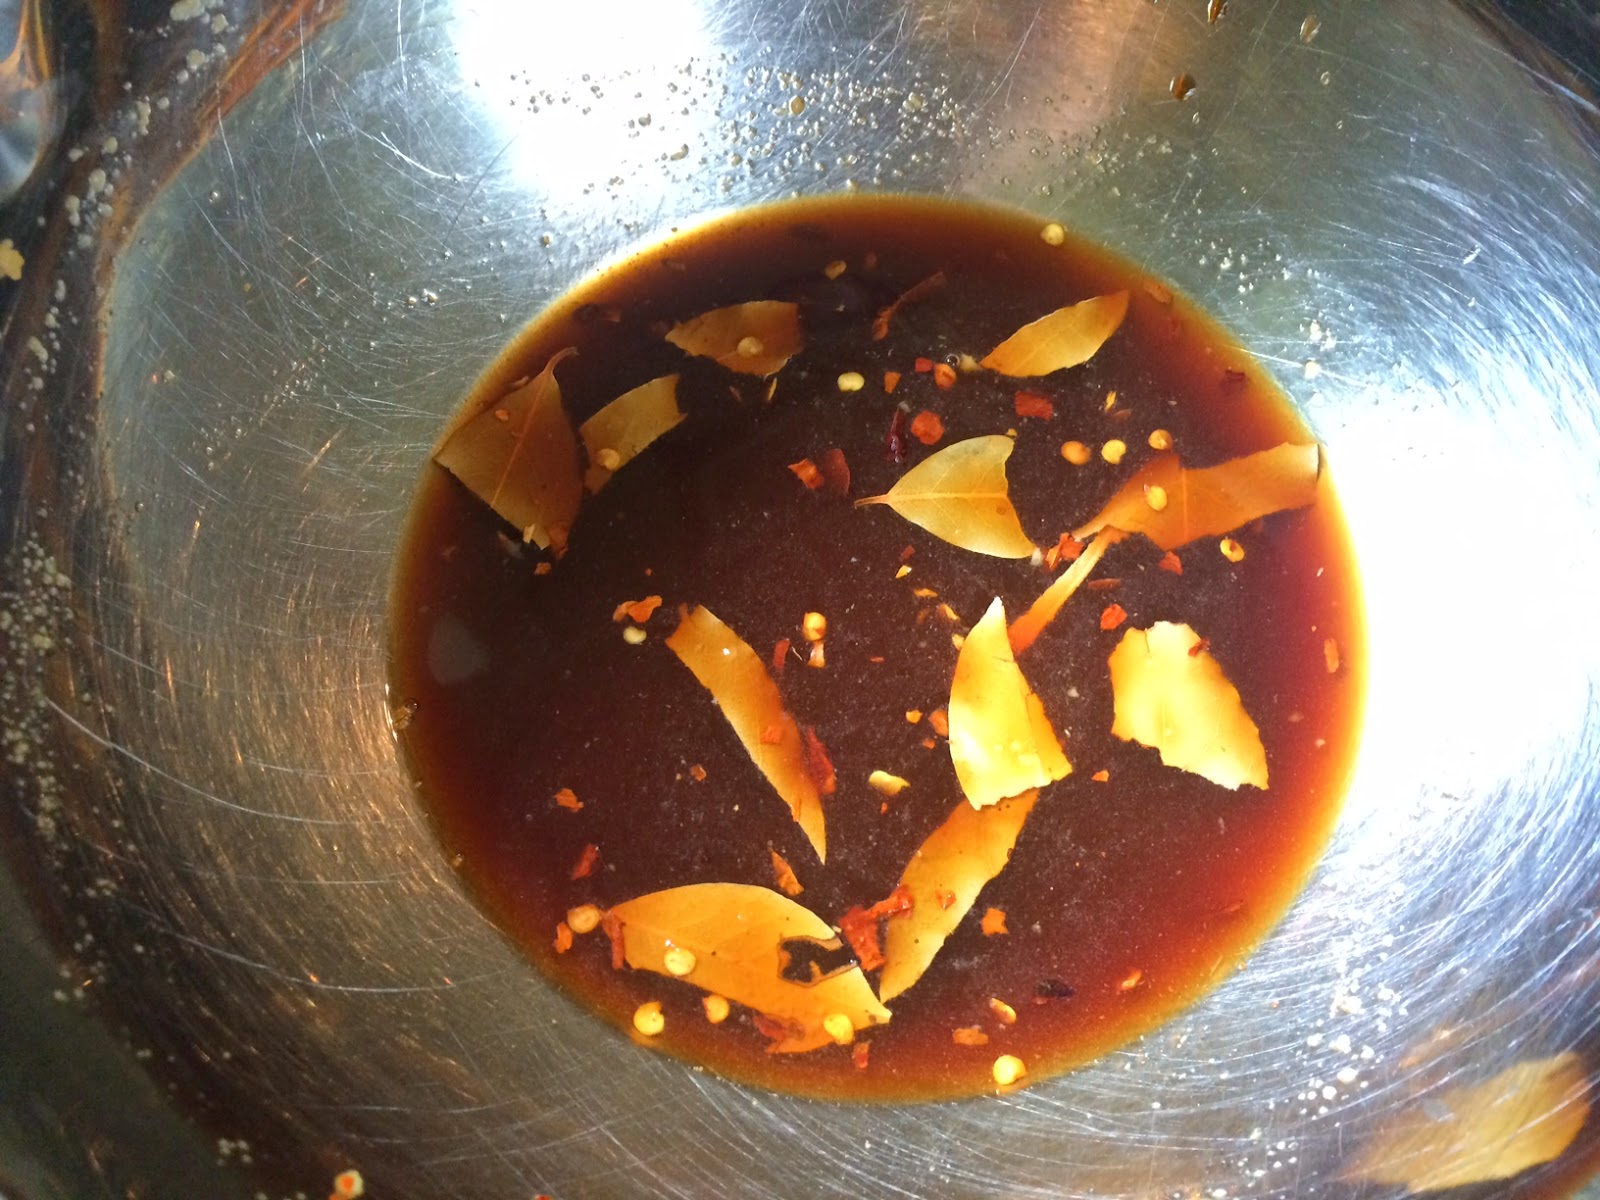 Ingredients1/2 cup soy sauce1/2 cup rice wine vinegar4 cloves garlic, minced 1 teaspoon crushed red pepper flakes4 bay leaves
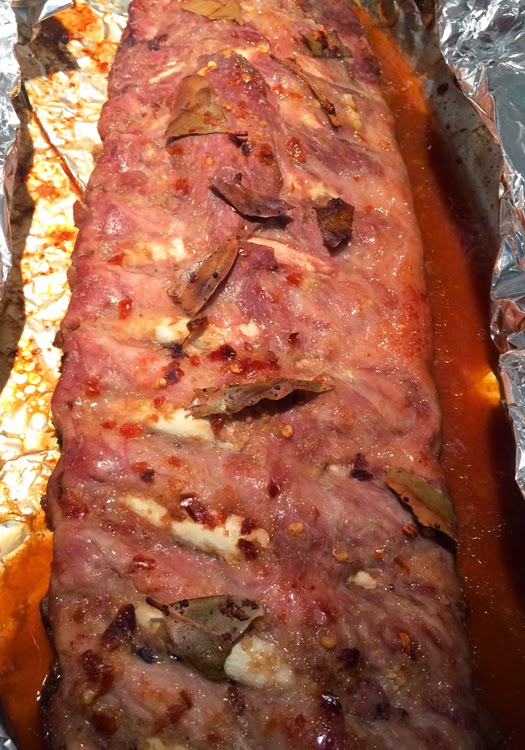
1 rack of pork baby back ribs
Preheat oven to 300 degrees. Mix ingredients in a medium size bowl. Place an oversized sheet of foil on top of a baking sheet. Place ribs on top of the foil. Slowly pour the soy sauce mixture over the ribs. Then seal up the ribs with the foil. Place tray in the oven and bake for 2 hours. Then open up the foil and switch setting on oven to broil. Broil for 5-10 minutes to brown the top of the ribs.


Enjoy!
Richela


July 13, 2014
Manhattanhenge And The Super Moon
 Despite dabbling in photography (ie owning an SLR camera) for many years, I've never taken any "good" pictures of a sunset or the moon. There have been pretty ones of a sunrise at the beach or moody ones of the clouds after a rainstorm. But of the sun melting into the horizon, or the moon illuminating the night sky? Nyet.
Last night seemed like the opportunity of a lifetime: Manhattanhenge and the Supermoon would occur within minutes of each other! How could I not try to kill two birds with one stone, right? But despite my planning, I couldn't find that perfect spot to observe both astrological phenomena. And my efforts were also foiled by clouds hovering close to the horizon, so I lingered at my Manhattanhenge spot longer than I should have. (I was hoping that perhaps the second sunset would prove better than the first nonexistent one. I researched staying for a second sunset, which occurs about 20 minutes after the sun dips below the horizon; however, since I couldn't see the sun behind the clouds, I kept staring at the spot where I thought the sunset should be and hoping there would be some sort of sunset miracle.)
Anyway, here are some of my Manhattanhenge shots:
 At this point, the chances of seeing a Manhattanhenge sunset were 50/50.
 Panic started to set in and onlookers started snapping their cameras at anything in the western sky.
 At this point, the sunset was taking place behind these clouds and onlookers crazily took photos of anything, and mumbling how they were going to fix their shots in Photoshop.
After I left my Manhattanhenge spot on 42nd Street, I ran around until I could find a secluded spot to take pictures of the Supermoon. I forgot to change the white balance on my camera, and this is the only decent shot I took.
 It looks like the sun. Oh, no!
I have another opportunity to take pictures of the Supermoon on August 10. Let's hope I don't forget to change my camera settings!
To make myself feel a little better, I went to Grand Central Station and took some photos of the Grand Hall. Here is one that I like:
 Saturday night ghosts of Grand Central.
 I hope that my luck changes on August 10 and I can get some decent shots of the Supermoon. As for Manhattanhenge, I hear the sunrises are also worth a photo shoot. They occur in the winter, so I'll have to bundle up--what a strange thought to have on a hot, humid summer day!
xoRichela
July 9, 2014
Filipino Food: Pork BBQ
 When I was a kid growing up in Brooklyn, my family belonged to a Filipino club. Every few months our club had parties that were more like pageants or shows. All the kids were taught dances and songs, which we were expected to perform at these parties. And the reward for our hard work was the food. Oh, the food!
 I enjoyed performing the songs and dances--except for one. The photo to the left shows me in full costume while dancing the Tinikling, a choreographed nightmare that still haunts me thirty plus years later. In addition to wearing an ankle length dress, I had to hold the hand of my male counterpart while stepping in and out of a set of bamboo sticks. Sounds easy, right? Well, the catch was this: every third beat the bamboo sticks would slam (and I mean SLAM!) shut. So if you didn't keep track of the beats, your foot would get caught between the bamboo sticks. While I survived the dance, I'm not sure if I will ever stop dreaming of getting my foot caught. Sometimes this particular dream is more frequent than the one about being in high school and not being able to get my locker open. Horrible, horrible...
FILIPINO BBQIngredients:
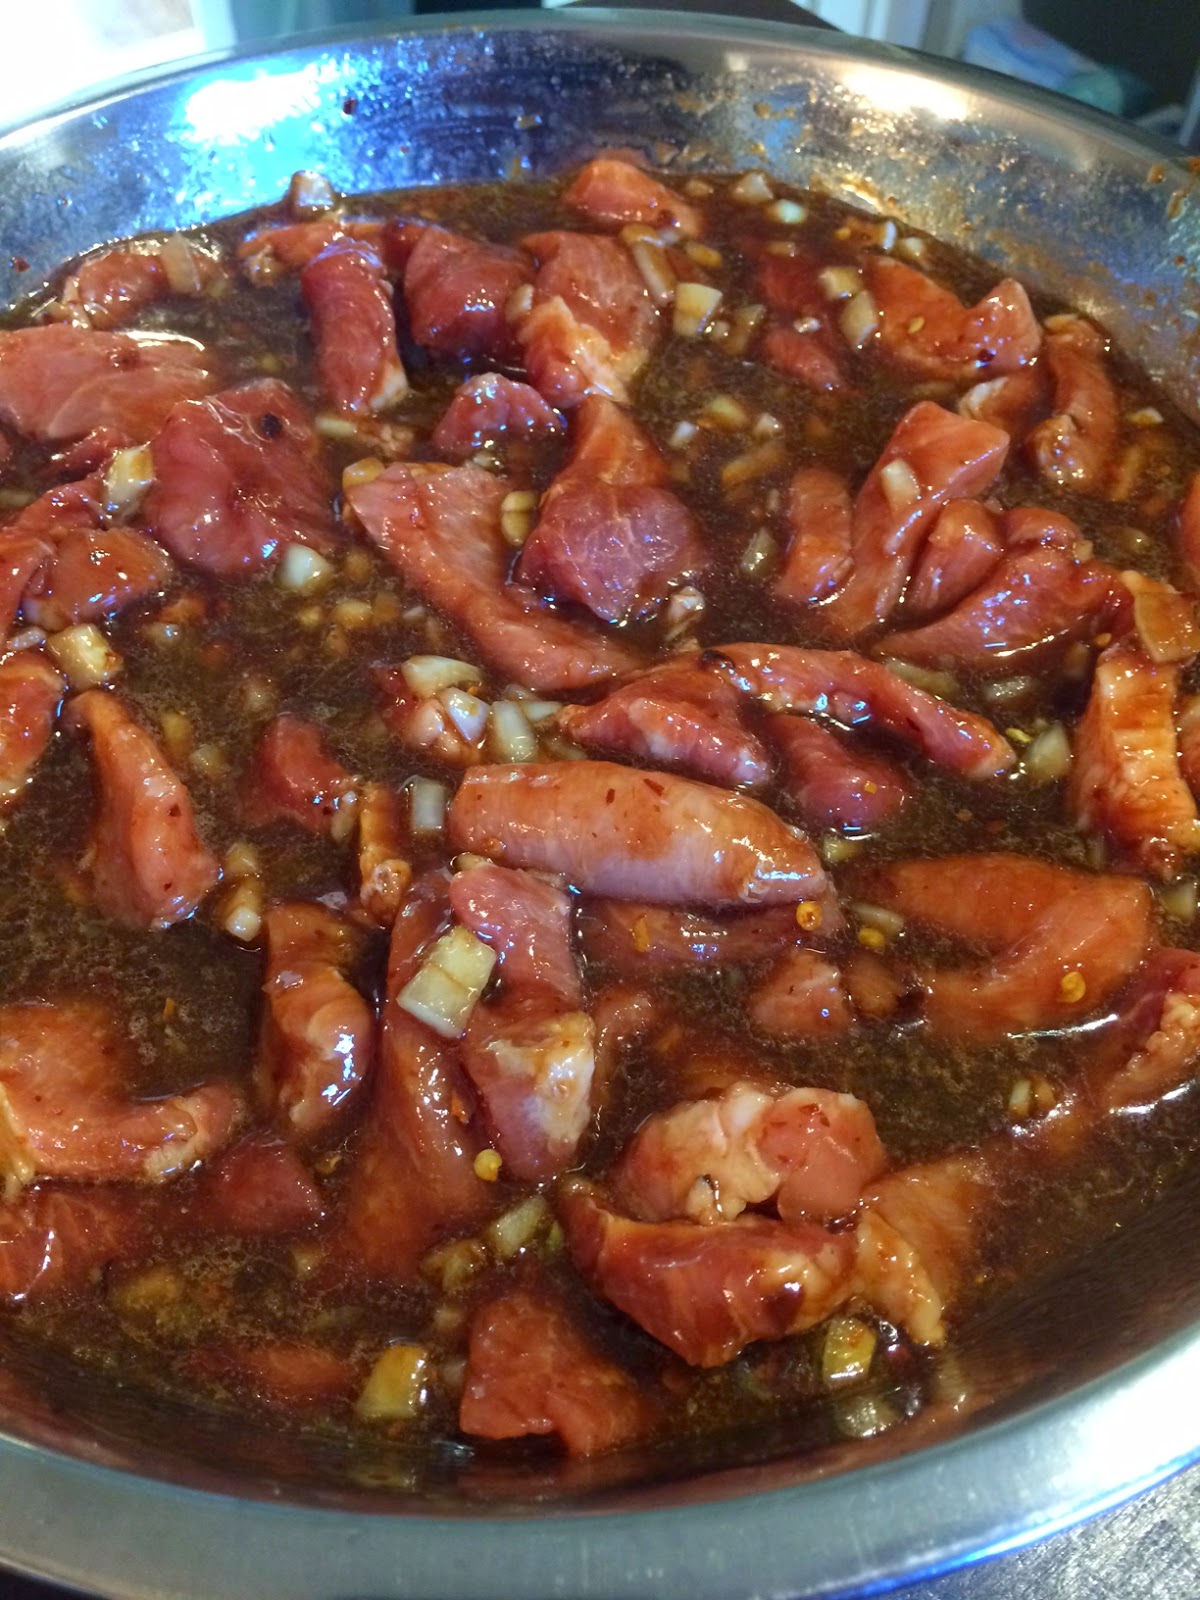
4 lbs pork shoulder, cut into pieces (1/2 inch thick, approximately 2 inch square pieces)for the marinade:1 cup soy sauce
1 cup ketchup1/4 cup canola oil1/4 cup sesame oil1 large yellow onion, diced1 tablespoon crushed red pepper flakes1/2 cup brown sugarjuice from 4 limes2 tablespoons baking soda
Bamboo skewers
Put the all the ingredients for the marinade in a large mixing bowl. The marinade will bubble, which is fun to watch. The following is a video my daughter and I took of the marinade.
Add the cut up meat and mix it around in the marinade. Tightly cover the bowl with plastic wrap and place in the refrigerator overnight. Also, soak bamboo skewers overnight.
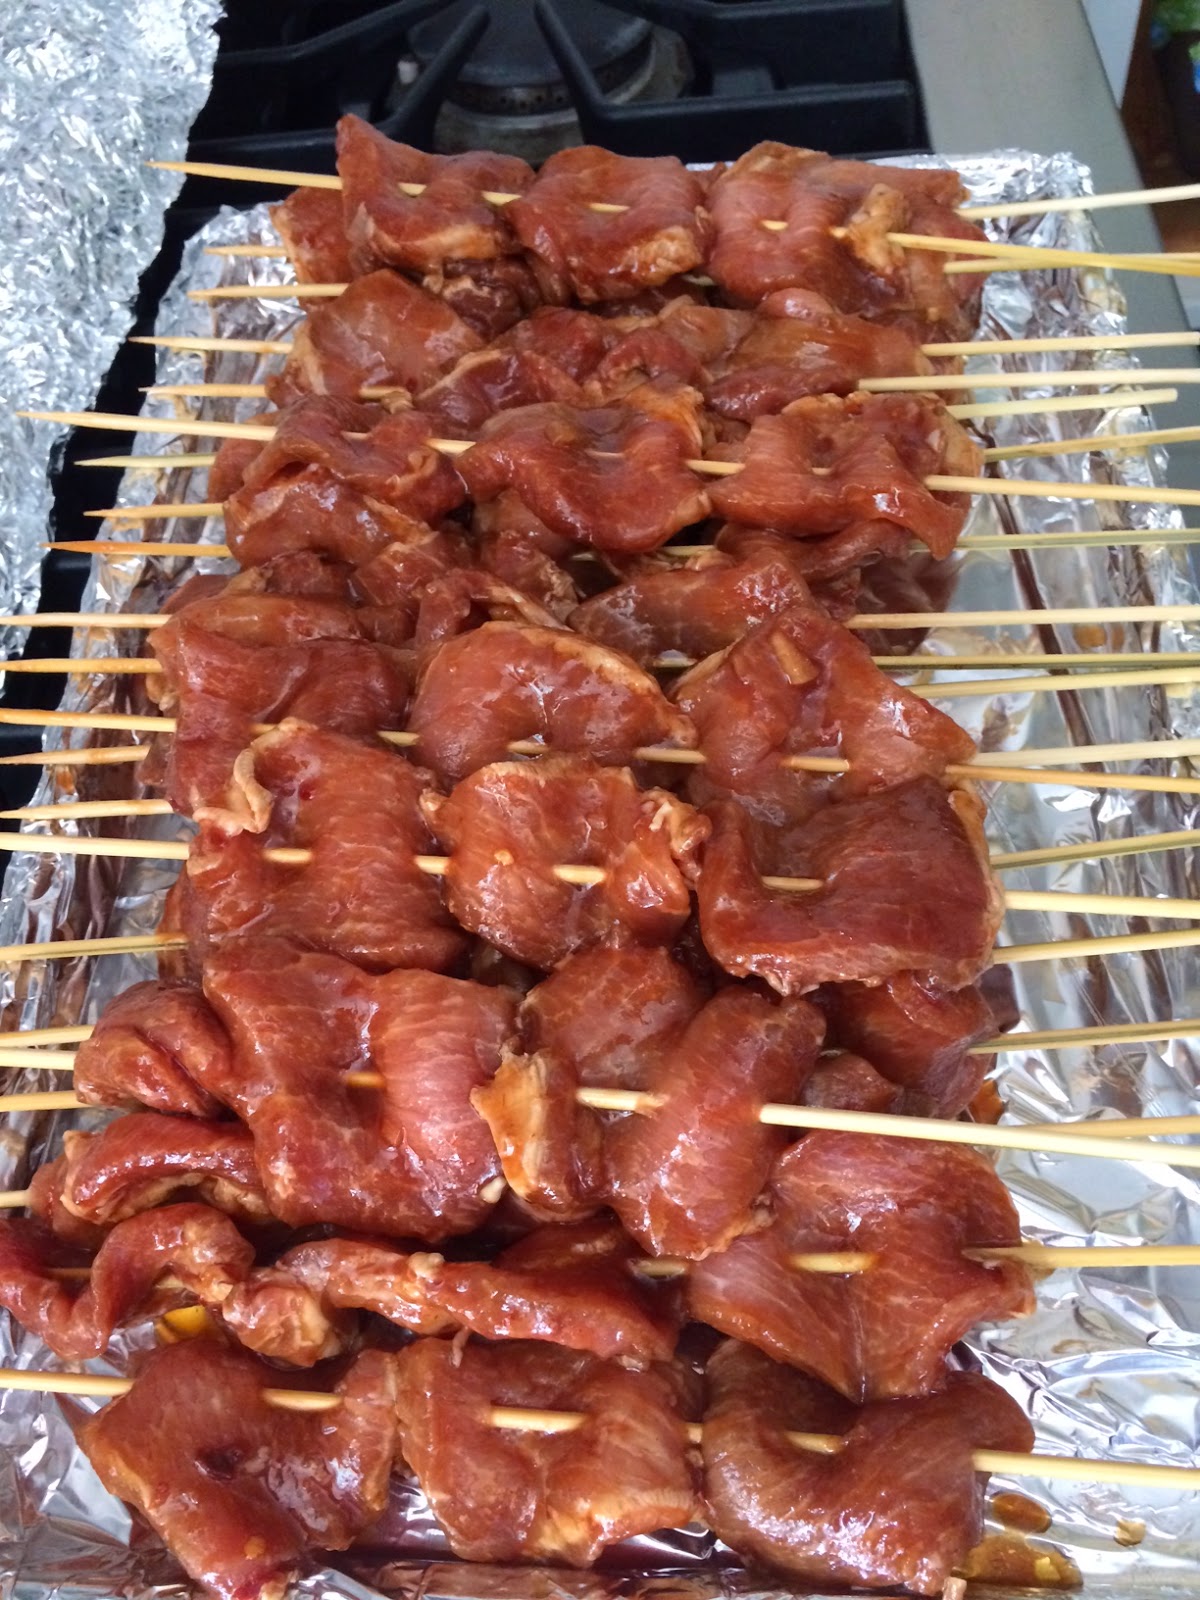
Take the bowl out of the refrigerator and wait at least one hour before putting the meat on the skewers. Each skewer should have 3 to 4 pieces of meat. Save the marinade and use it to baste the meat while it cooks on the grill.

Enjoy!
xoRichela
July 5, 2014
A Different Display of Lights In The NYC Sky
 Happy Independence Day! (Okay, I'm a day late, but I was busy yesterday.)
This is a quick post about a different display of lights in the NYC sky.
 Earlier this year, a trio of like-minded artists (Tim Bartlett, George Del Barrio, and Karl Mehrer) figured out a way to light up the defunct Kentile Floors sign near the Smith-9th St. train station in Brooklyn. (To read about how they actually accomplished it as well as a little background on the Kentile Floors sign, read here.) On May 3rd, I was lucky enough to be there, camera and tripod in hand, for this one-night-only event.
 I recently heard that the sign is being taken down. And although I understand that the sign is being salvaged, it still makes me sad that a piece of the old Brooklyn landscape will be altered (yet again). When I was growing up in Brooklyn, I never thought much of the Kentile Floors sign. It hasn't worked since before I was born, so I was not full of rage or entitlement upon hearing the news. Change happens. I just feel lucky that I was there to see the sign lit up for a final time, and in its original place amid a backdrop of brick warehouse buildings and an urban canal. The Macy's 4th of July fireworks may dominate the imaginations of many New Yorkers, but I'll always remember the night of May 3rd. It made more of an impression on me than all the whistling, rocketing, and exploding lights over the East River could ever do.
July 1, 2014
Filipino Food: Pancit Bihon
 Because Filipino cuisine has finally taken its rightful place on the NYC food stage, I frequently find myself sharing thoughts about it with friends and family. Admittedly, I am not a trained chef nor have I actually been to the Philippines. But there are a few undeniable facts that give me license to open my mouth on the topic:
1. My parents were born in the Philippines, which means that I have Filipino blood running through my veins;
2. In addition to my very Filipina mother, I grew up in a house overflowing with Filipino "titas" and one invariably irritable grandmother, and they all were great cooks;
3. I was raised on a steady diet of white rice, fish sauce, and banana ketchup; and
4. My ideal salty snack is a bag of shrimp chips--if that ain't Filipino then I don't know what is.
Since my Mom passed away 4 years ago, I've been trying to recreate some of the food that made me dance around the dinner table as a kid. Some dishes have proved harder than others, but only because I think that my Mom was part alchemist. The easiest dish that I've made--and comes close to the version my Mom served--is Pancit Bihon.
Pancit Bihon is a staple at Filipino gatherings, whether it's a small dinner party at a friend's house or a large wedding with all the bells and whistles. It is a noodle dish made with chopped carrots, cabbage, garlic, and onions, flavored with soy and fish sauces, and has pork and/or shrimp.
IngredientsRice bean noodles (one 8 oz package or five small bundles in an eight bundle package)4 tablespoons butter1 teaspoon crushed red pepper flakes1 large yellow onion, diced2 medium carrots, julienned2 cups shredded cabbage (can use store bought/precut cole slaw cabbage)4 cloves minced garlic (can use frozen cubes; 1 cube = 1 clove)2 tablespoons soy sauce 1 tablespoon fish sauce (aka patis)12 large cooked shrimp, head and shell removed, and chopped (optional)1/4 lb cooked pork shoulder, shredded or chopped (optional)
Garnishlime slices*chopped fresh cilantrochopped onion or garlic chives
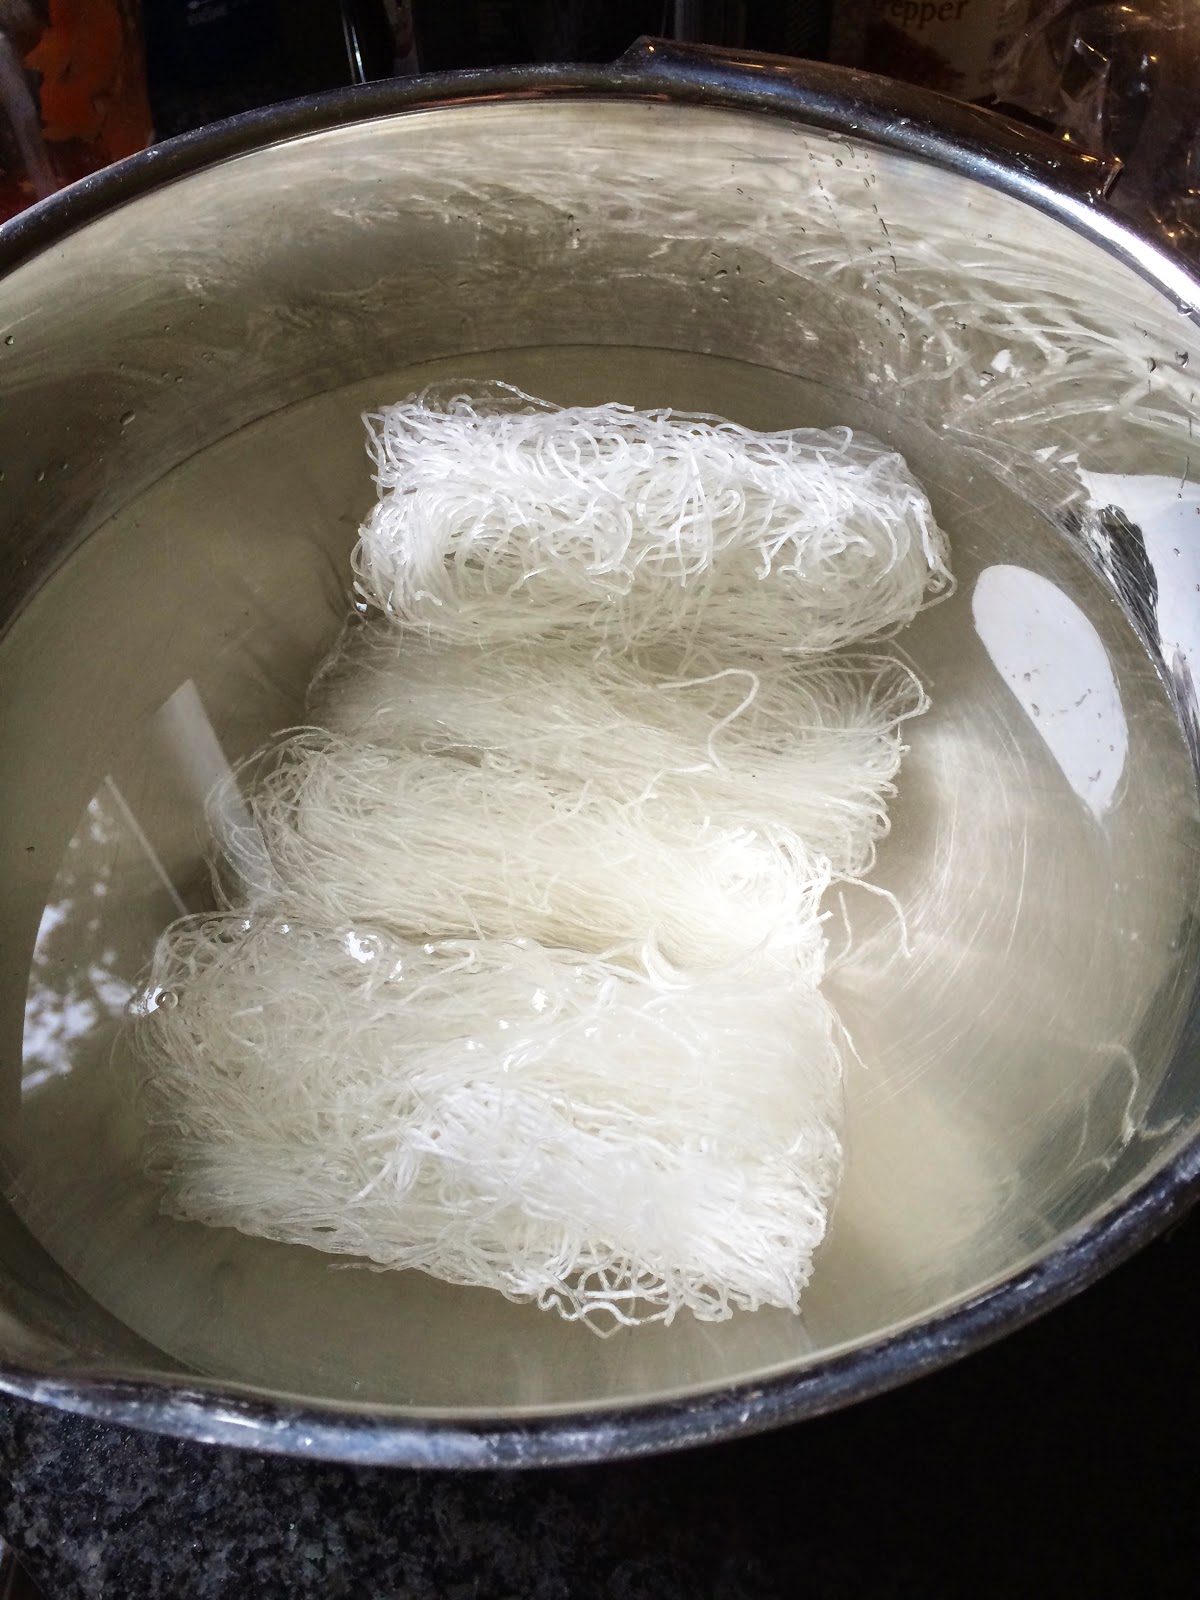 Soak rice bean noodles for at least 20 minutes. With scissors cut up noodles while soaking in bowl. Drain and set aside.
Heat up butter in a wok or or large simmering pan over a medium to high flame. Add red pepper flakes. Add carrots and saute for 1-3 minutes. Then add onions, cabbage, and garlic. Saute for about 5 minutes. Remove about 2/3 of the pan's contents and place in a bowl. Heat up the soy and fish sauces in the pan, then add the noodles. Toss the noodles in the pan to evenly flavor them. Add the cooked vegetables back to the pan and toss around evenly.
Serve with lime slices, chopped cilantro, and chopped onion or garlic chives.
*Calamansi is a fruit that is similar to lime but not readily available in the U.S. I substituted it with lime in this recipe, but if you are lucky enough to find some near you, please use the real thing!
Enjoy!
xoRichela
June 16, 2014
Friday the 13th: Meeting Duck-minded Folk And Riding The Dog
 Trust E. Duck and me.Friday the 13th. The clouds were giving way to the sun, and despite my frizzed-out hair I was pretty happy. Why? Because I was on my way to Duck Brand Duct Tape Company headquarters in Avon, OH, where I would meet Trust E. Duck and see (touch?) the giant rolls of duct tape that infuses my crafty dreams.
  My name in lights!

As a person who crafts with, writes about, and makes art using duct tape, there are 3 things that I appreciate:
 @ducktapecreationsbycarlee1. Young enterprising crafters. When I asked a gentleman sitting next to me who was the crafter among them, this young lady popped her head out and shook my hand. When I asked what she made, she showed me a well-crafted wallet and then gave me her business card! She goes by "Duck Tape Creations By Carlee" and can be found on Instagram: @ducktapecreationsbycarlee.
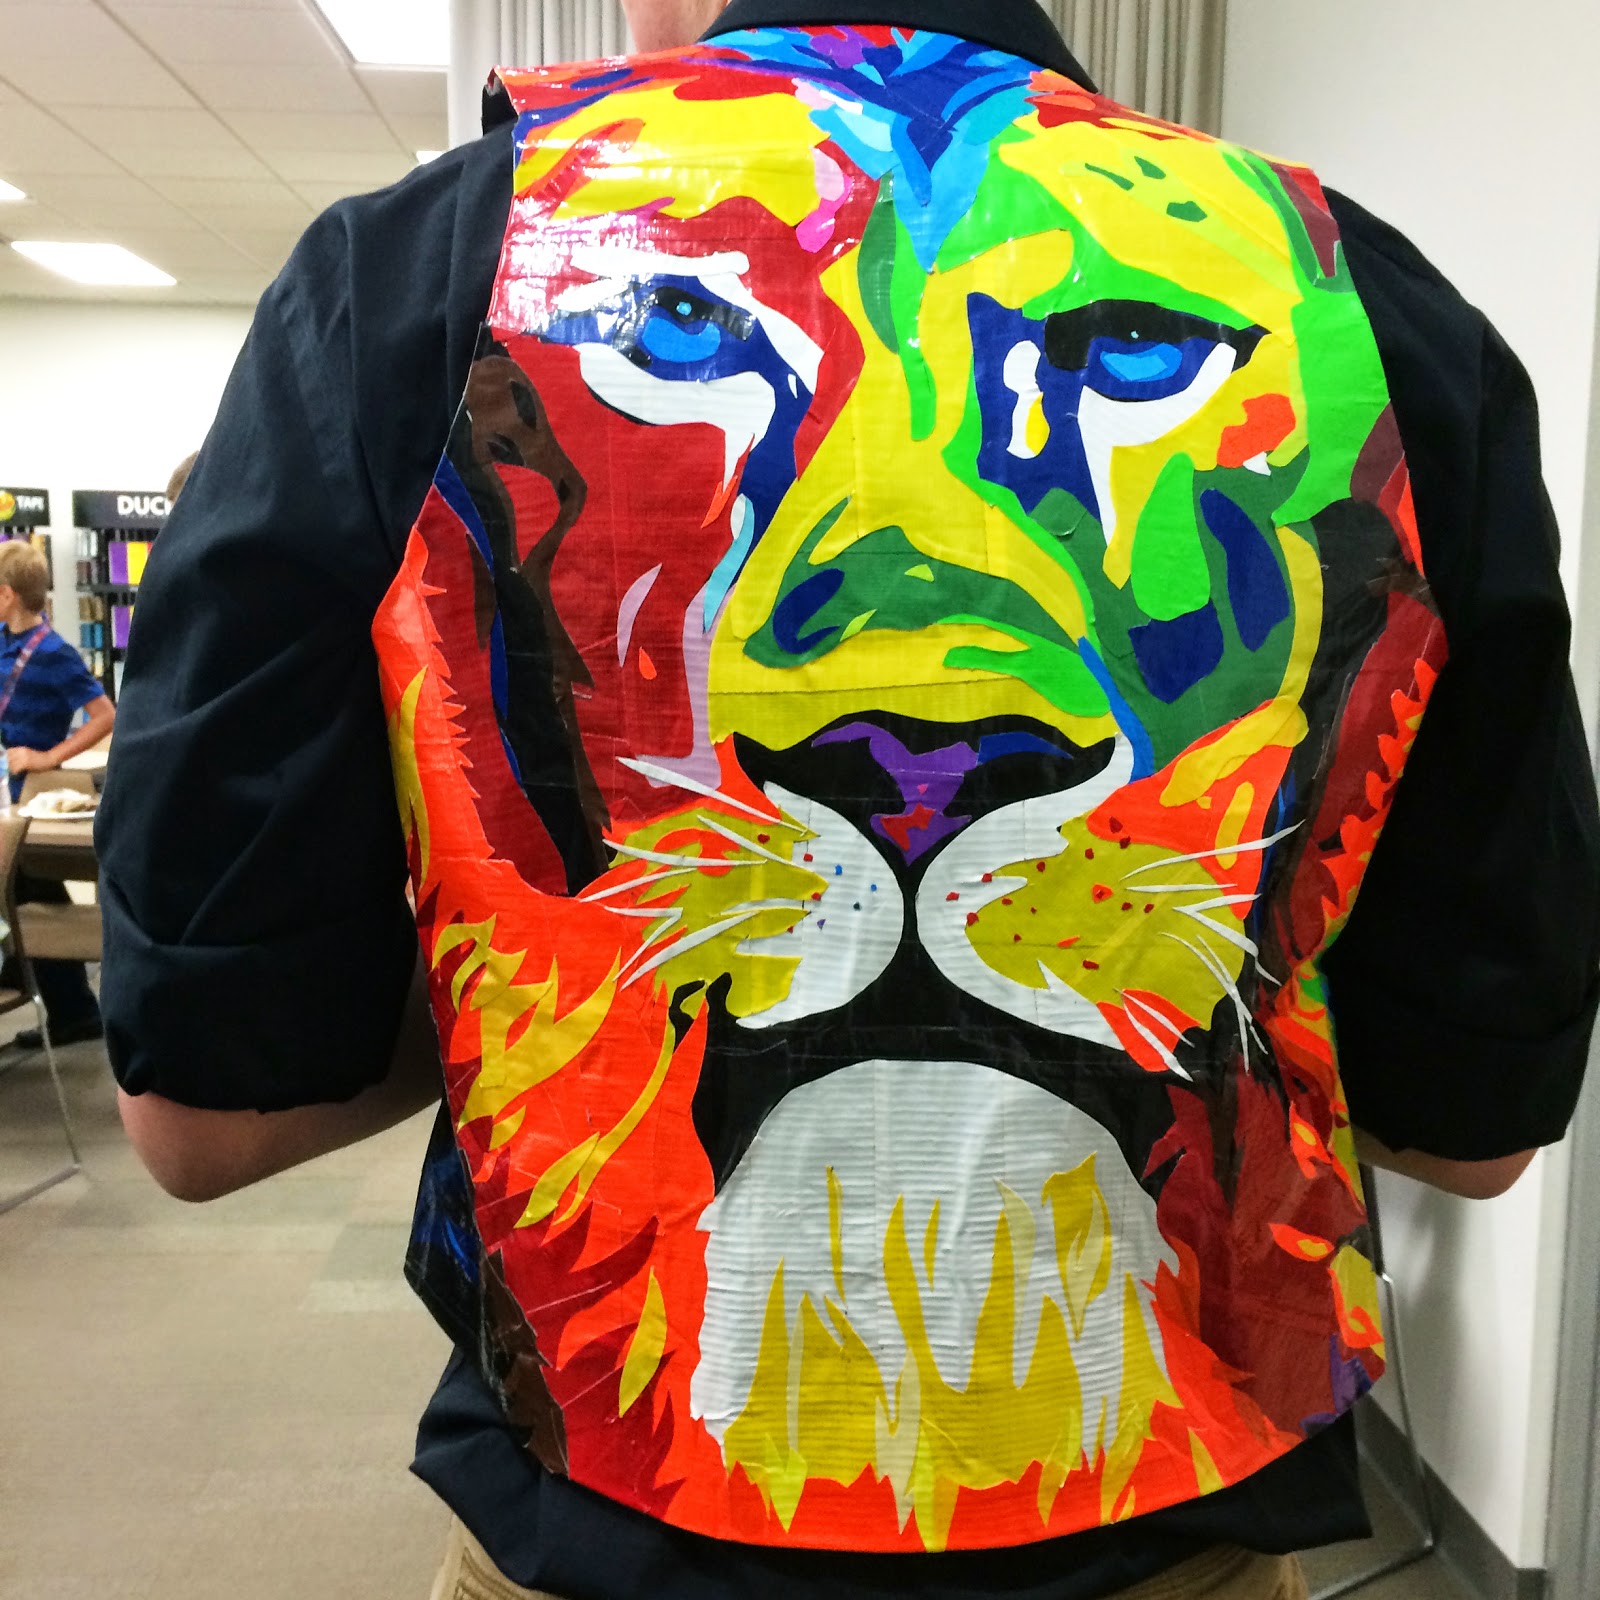 Derek Ross, crafty artist2. High school kids that combine art and craft. A young man named Derek Ross wore his duct tape vest with a portrait of a lion on the back. He made me wish that I took art class in high school instead of waiting 20 years to pursue an art degree. I hope to see more of his work in the years to come.
 3. Young artists that use traditional formats to shake up the art scene. Anna Dominquez, aka the queen of tape, is a duct tape painter. She creates paintings on stretched canvas using duct tape instead of paint. From afar you can't tell that her paintings are made with duct tape. And I think that's the difference: she creates with rather making something out of. And that subtle difference had me the moment I saw "The Joker" (her painting below). I am now stalking her (and so should you) on Instagram: @queenoftape.
 By Anna Dominquez (@queenoftape)
And now, just a quick story about my journey back home. I left the Duck Brand headquarters before 3 PM so I could drive back to Pittsburgh, PA. I was flying out of the Pittsburgh International Airport to go back to NYC, which sounds confusing since the Cleveland, OH airport is much, much closer. But I had my reasons, so I won't digress further from my story...I reached the airport in less than 2 hours and had plenty of time to make a 6:10 PM flight. The only problem was that the weather in NYC was not cooperating (according to my family and friends, it was "biblical") and all flights on all airlines were cancelled. I called a friend who was patient enough to check Amtrak and Greyhound for a train or bus to NYC. (Again, I had my reasons to get home immediately instead of staying the night, but I won't bother with the long and boring details.) I missed the last train of the day (5 PM?? Really, Amtrak??), but there was a 7:15 PM Greyhound bus. I jumped in a cab and raced to the downtown bus station. Within 35 minutes I was waiting at gate 8 for the bus to NYC.This was my first time "riding the dog" so I'm hoping that my experience is not typical of bus travel. Within the first hour we encountered a horrific highway accident that the bus driver had to tell us about ("A woman died, people. That's a fatality. We should all pray for her family..."). During the second hour, a child who gorged himself on White Castles burgers tried to run to the bathroom in the back of the bus. He made it past me, thank goodness, but never made it to the bathroom. I heard a wretch and a splatter, then spectators groaning. Needless to say, we had to get to a rest area for a little post-vomit cleaning.Between the rest area and Philadelphia a young woman locked herself in the bathroom for 4 hours. There were multiple requests to "open the door" and "can I use the bathroom, too" and "I really have to pee". But the door remained shut until we reached Philly, where she ran off the bus and never looked back. Someone explained it to me because I was clueless: she was a meth addict and doing drugs in the bathroom. Since I have never done (nor have any intention to do) meth, I found this whole scenario quite shocking.In the two remaining hours of my trip, I sat in my seat and waited for something to smack me in the head. Nothing did, however. The time passed without incident. But I am forever scarred!
At least I have my goodies from Duck Brand. It was well worth the trip, dog-riding and all.

June 12, 2014
May 30, 2014
How To Make A Duct Tape Cloche Hat
My latest how-to video:
May 19, 2014
How To Make A Duct Tape Hair Flower…Or Maybe Corsage??
The petal stencil is provided after the jump.

May 8, 2014
How To Make A Clutch Bag on HLN TV
Hey there! Here is a video of a clutch bag I made for HLNtv.com. Written instructions are provided after the jump.
Enjoy!
materials
sheet of parchment paper
black duct tape
kiss print duct tape
white duct tape
tools
craft knife
scissors
some type of oil on a paper towel, stored in a sealable baggie
Place sheet of parchment paper on your worktable.
Cut six strips of black duct tape and 1 strip of kiss print duct tape. Use strips to cover parchment paper, placing them horizontally and overlapping at the edges by approximately 1/4 inch, creating a larger duct tape "fabric."
Starting from one of the lower corners, pull fabric up at a diagonal and flip over.
Remove the parchment paper from the sticky side.
Cover the sticky side of the fabric with strips of white duct tape.
Trim all four sides of the fabric so the edges are straight and the corners are 90 degree angles.
Place the fabric on your worktable so the white side is facing up. Bring up the bottom edge and fold up. Secure left and right sides with strips of black duct tape. This is the pocket of the bag.
Pinch the corners of the bottom of the bag pocket and fold inward about 1 inch. Secure folded corners in place with a strips of black duct tape.
Take the top, or the flap of the bag, and bring the corners together. Cut off the corners in a curved line.
Cut a strip of kiss print duct tape at least 16 inches long. Fold strip in thirds to create a strap.
In the middle of the bag flap, near the edge, cut a slit approximately 3/4 inch long. Slip the strap through the slit so approximately 1/2 inch of it is on the white side (inside) of the flap. Secure the 1/2 inch piece of the strap in place with a piece of white duct tape.
On the black side (outside) of the flap, cut off the remaining part of the strap, leaving approximately leaving 1 1/2 inches attached to the flap. This is the top part of the bag closure. Set aside the remaining strap.
Along the bottom of the front side if the bag pocket, cut two 3/4 inch long slits, one on top of the other. This is the bottom part of the bag closure.
Fold a piece of black duct tape along the bottom edge of the top bag closure. Trim down so that it looks like an anchor.
Take the remaining part of the strap and fold in half. This is the handle. Cut a slit into one of the side seams of the bag pocket and insert the open end of the handle. Secure the end of the handle inside the bag pocket with strips of white duct tape.