
Beth Cato's Blog, page 26
September 24, 2021
Book Blog: Under the Whispering Door by T.J. Klune
I review everything I read and post reviews on Goodreads and LibraryThing. That’s not enough. Good books are meant to be shared. Therefore, I’m spotlighting some of my favorite reads here on my site.

Under the Whispering Door by T.J. Klune
out now in print and ebook; BookShop, B&N, and Amazon [affiliate link]
I received an advance copy of this book via NetGalley.
The skin around my eyes remains stiff from tears because this book made me SOB, but in the best of ways. This is a beautiful, extraordinary book that will crush your heart and put it back together, too.
Wallace is a jerk. He’s like Scrooge brought into the modern-day–a high-powered lawyer who is callous, cold, and not the slightest bit loved. When he keels over dead, he attends his own funeral and rages, unseen, at the way his ex-wife and law firm partners disrespect him. A reaper arrives–a young woman, Mei, who can see and hear him, and takes him to a strange tea house in the middle of nowhere. It’s a waypoint for the recently dead to come to grips with their new state of being before they move on through a door set in the fourth-floor ceiling. The purveyor is Hugo, a man with a knack to choose the right tea for anyone–and also, a ferryman, a person with a genuine, empathetic heart. He helps the recently-dead move on.
But Wallace doesn’t want to move on. He stays. He rages, he grieves, and slowly, he starts to change. And fall in love.
I fell in love, too, with every character. The deep feels of this book remind me of Becky Chambers’s novels–stories that truly capture the complexity and the goodness of people and somehow manage to reaffirm your belief in humanity. I like that this took the Scrooge trope and made it more realistic–there’s no overnight change. It’s gradual, it’s painful, it’s full of regret. Ultimately, it’s a queer love story, too, and again, one that feels realistic (because honestly, anyone and everyone can and will fall in love with Hugo).
This will be one of the best books I’ve read this year, and probably an all-time favorite.


September 22, 2021
Bready or Not Original: Thin Mint Cake
Oh hey, it’s time for cake. A Thin Mint Cake that is neither too big or too small, something that keeps well stashed in the fridge, and looks as amazing as it tastes.
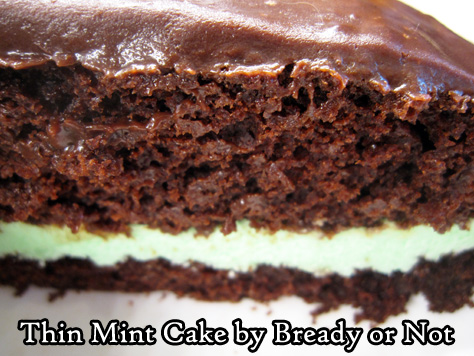
If you love chocolate and mint, this is the cake for you. The cake is loaded with chocolate flavor, and a ganache adds a shiny finishing touch.
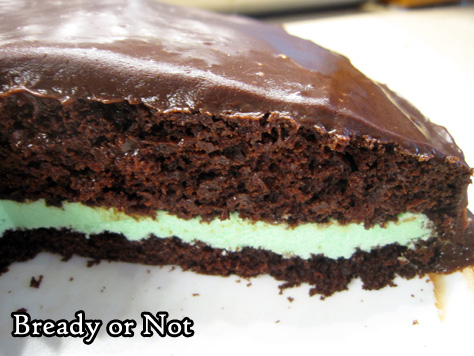
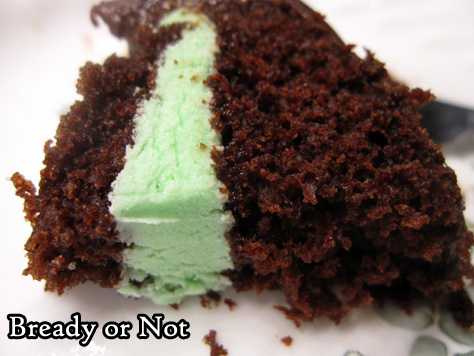
The middle layer of the cake is essentially a peppermint or mint-flavored buttercream. Sweet but not too sweet, it gives good contrast to balance the prevalent chocolate flavor.

I used this cake to try out a technique I’ve only read about and seen on TV before–I used four toothpicks to measure the halfway point on the sides of the cake, then tugged a piece of floss to cut the cake evenly in half! It worked out well.

Of course, you can still use a knife to cut through. The toothpicks will still be a helpful guide.
This is an ideal birthday or special occasion cake for a small group!
Greatly modified from Eating Well Magazine May 2020.
PrintBready or Not Original: Thin Mint CakeThis Thin Mint Cake is a glorious, not-too-big-or-small layer cake loaded with chocolate and mint goodness. It’s not hard to make, either. Cutting the cake in half is the trickiest bit, and a piece of floss makes that easy!Course DessertKeyword cake, chocolate, layer cake, mintAuthor Beth CatoEquipment9-inch cake panrulertoothpicksunwaxed flossparchment paperIngredientsCake1 cup all-purpose flour1/2 cup white whole-wheat flour3/4 cup white sugar1/4 cup unsweetened cocoa powder sifted1 teaspoon baking soda1/2 teaspoon salt1 cup water1/3 cup canola oil1 Tablespoon apple cider vinegar or other cider vinegar1/2 teaspoon almond extract1/2 teaspoon vanilla extractMint Filling1/2 cup unsalted butter (1 stick), room temperature1 1/2 cups confectioners' sugar sifted, more as needed for consistency1/4 teaspoon peppermint extract or mint extract1/4 teaspoon vanilla extract1/4 teaspoon salt1-2 drops green food coloring2 Tablespoons half and half or milkGlaze1/2 cup half and half1 1/4 cups semisweet chocolate chipspinch saltInstructionsTo prepare the cakePreheat an oven at 350-degrees. Cut a piece of parchment paper to fit inside a 9-inch cake pan. Apply nonstick spray inside pan, place parchment inside, and spray it again.Stir together all-purpose flour, white whole wheat flour, sugar, cocoa, baking soda, and salt.In another bowl, whisk together water, oil, vinegar, and both extracts. Gradually mix the wet ingredients into the dry until the batter is smooth. Pour into the prepared pan. Tap and thump it gently on the counter to knock out as many bubbles as possible.Bake 25 to 30 minutes, until a toothpick in the middle emerges with few crumbs attached. Let the pan cool on a rack for 10 minutes, then invert cake onto the rack to cool completely.Make the fillingBeat the butter until it is creamy and light. Add the confectioners' sugar, 1/2 cup at a time, to fully incorporate; if the mixture is still too soft and loose, add more sugar. Add mint and vanilla extract, followed by the salt. Add a few drops of food coloring to achieve the desired tint. Add the half and half and beat to make the filling fluffy and light.Slice the cake and fillStick a toothpick into the halfway point at each side of the cake; four toothpick markers work well. Use a knife to barely slice into the cake above each toothpick. Continue to use a long-bladed knife to slice all the way through, or use a long piece of unwaxed floss with the toothpicks as a guide to divide the cake evenly in half.Place the base of the cake on a serving plate. Spread the filling over the cake. Place the top of the cake over it, cut side down.Make the glazeMicrowave the half & half in a microwave-safe bowl for about a minute, until hot. Stir in the chocolate chips and salt. Stir, stir, stir until the chocolate is smooth and glossy. Let cool about 5 minutes to thicken, then slowly pour and spread glaze over the cake. Let sit at room temperature or in fridge to set, then slice in and enjoy!Store cake in fridge. Exposed sides of the cake will dry out more, but it will still be tasty. Keeps for at least 4 days.OM NOM NOM!September 15, 2021
Bready or Not: Swedish-Style Cardamom Buns
These Swedish-Style Cardamom Buns are as delicious as they are beautiful, and that’s saying a lot.

This enriched dough is light and luscious, and almost melts in the mouth. It’s also somewhat tricky to work with as the dough warms quickly as the rolls are formed. I was dismayed as the dough became tacky as I did the final rolls, but you know what?
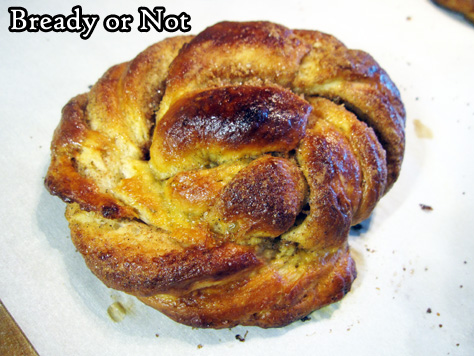
These rolls are beautiful as they are. Sure, Paul Hollywood would criticize them for not all being the exact same, but I’m not on Great British Bake Off–and neither are you. Embrace the wabi-sabi of these rolls, the perfection in imperfection.

Plus, when it comes down to it, the flavor and texture are fantastic. The buttery crumb is perfect with a likewise buttery center swirl that’s packed with cardamom and cinnamon.

These buns taste best when slightly warm. Eat them fresh, and after that, give them a quick toast in the oven to wake up the flavor.

The buns will keep for up to 3 days at room temperature, but be sure they are in a sealed container. They can also be frozen and thawed later, no problem.

Make these buns to really impress guests–and yourself. Like me, I bet you’ll find this recipe to be a keeper.
Modified from Saveur Magazine Volume 4 2018.
PrintBready or Not: Swedish-Style Cardamom BunsThese incredible buns take a day of wait and effort, but are so worth it! The bread is light, buttery, and luscious, gently warmed by spice.Course Breakfast, DessertKeyword yeast breadServings 10 bunsAuthor Beth CatoEquipmentstand mixerparchment paperkitchen brushIngredientsDough1/2 cup cold milk or half & half1 Tablespoon instant yeast3 large eggs room temperature1 teaspoon pure vanilla extract or vanilla bean paste3 1/4 cups all-purpose flour plus more as needed1/4 cup white sugar1 1/4 teaspoons kosher salt2 sticks unsalted butter (16 Tablespoons) cold, cut into cubesFilling1/4 cup white sugar1/4 cup light brown sugar packed1 Tablespoon ground cardamom1 teaspoon ground cinnamon1/2 stick unsalted butter (4 Tablespoons) softenedInstructionsIn a small bowl, whisk together the milk, 2 of the eggs, and the vanilla. Set aside.In the bowl of a stand mixer with a paddle attachment affixed, mix together the flour, sugar, and salt. Mix in the chilled butter cubes until they are broken down to the size of peas, which will take a minute or two. Keep the mixer running as the milk mixture is drizzled in. Everything should come together as dough.Turn out dough onto a lightly floured surface. Knead it into a ball and wrap it tightly in plastic wrap. Chill it in fridge for at least 6 hours, or a full day.About 2 1/2 hours before the buns are to be served, prepare to shape them. Line 2 baking sheets with parchment paper. In a small bowl, mix together the filling’s two sugars, cardamom, and cinnamon. In another bowl, beat the remaining egg with a splash of water and set it aside.Lightly flour a large, clean work surface and a rolling pin. [Note for bakers who have hot kitchens: you may need to move fast here, as high-butter content dough can be finicky as it warms.] Roll out the dough into a 12×16 rectangle. Use an uneven spatula or the back of a spoon to evenly spread the softened butter over the surface, leaving a 1-inch border along the top and bottom edges.Sprinkle the sugar and spice mixture over the butter. Brush the edges with the beaten egg; set aside the egg to use again for a wash in a short while. Fold the dough in half so that the two egg-washed edges meet. Then use a knife, pizza cutter, or bench knife to make ten even slices perpendicular to the fold.One at a time, pick up a strip at the two short ends and twist them each in opposite directions while pulling and stretching gently. Coil the strand to make a bun, tucking the outermost end underneath the round. Set on prepared sheet and continue to form more with several inches of space between them.Cover formed buns with plastic wrap and set aside to rise until puffed, about 1 1/2 hours.Preheat oven at 400-degrees and situate racks inside to have five inches of space between them.Remove the plastic wrap and brush the buns with the remaining egg wash. Bake for 12 minutes, then swap the pan positions in the oven, then bake another 8 to 12 minutes. Buns should be a consistent brown, and a digital thermometer discreetly plunged into a center roll should be over 190-degrees.Let rolls cool slightly before indulging. Rolls will keep for up to 3 days in a sealed container at room temperature, and will taste best warmed slightly in an oven or toaster oven. Rolls can also be frozen for later enjoyment.OM NOM NOM!September 14, 2021
Come to the Online Book Club Meeting this Sunday!

On Sunday September 19th, my collection Red Dust and Dancing Horses will be discussed in a virtual book club meeting on Facebook that is conducted by the wonderful Madame Askew. The event will happen at 4:30 MST. Buy the book ahead of time (if you don’t have it already) and join in on the discussion! I’ll be there to answer questions.
#SFWAPro
September 8, 2021
Bready or Not Original: Easy Italian Meatballs
Everyone probably has their own take on classic Italian Meatballs. This is mine!

What I love about the recipe is that it, 1) tastes good, and 2) is convenient. I can mix the meatballs up ahead of time and stash them in the fridge or even the freezer. They can be cooked straight from the freezer, too! Just cook them a little longer.

I always go with 93% lean ground beef, but use whatever kind you want–even do a meat of beef and pork or ground sausage. Consider this recipe a template. Mix it up, switch out or increase seasonings, whatever.

These are great with all kinds of dishes, too. Use them with the standard spaghetti or other Italian pasts, or on zoodles, or with sauce on some submarine sandwich bread. They are even good heated up, eaten by themselves!
PrintBready or Not Original: Easy Italian MeatballsThese gigantic meatballs are easy to make. If you want, form them early in the day and stash them in the fridge. Meatballs can also be frozen, cooked or cooked, and heated up later–and they can be taken straight from the freezer, too; just add a few more minutes to the cook time. This is also a great recipe to double to feed a crowd.Course Main CourseCuisine American, ItalianKeyword beef, cheeseServings 8 meatballsAuthor Beth CatoEquipmentfood scale9×13 dish or large rimmed baking panIngredients2 Tablespoons extra-virgin olive oil plus extra for pan and hands2 large eggs1 1/2 cups panko1/2 cup milk or water3/4 teaspoon kosher salt1/4 teaspoon black pepper1/2 teaspoon dried Italian seasoning1 teaspoon garlic powder1 ounce Parmesan or Grana Padano, freshly grated, roughly 1/2 cup1 pound ground beefInstructionsMove rack to top third of oven and start to preheat at 425-degrees. Rub or brush a 9×13 casserole pan or rimmed baking sheet with oil.In a large bowl, use a big spoon to mash together the 2 Tablespoons oil, eggs, panko, liquid, salt, pepper, seasoning, garlic powder, and cheese. The goal is to create a smooth paste. Add a handful of meat. Mix in, and gradually drop in the rest of the meat to thoroughly combine.Use a food scale to weigh the meat, then divide that total by 8 (or any other desired increment). With oiled hands, press together meatballs, weighing each to create ones of equal size.Bake meatballs for 20 minutes. Use a metal spatula to carefully flip over each for the browned-bottom is on top. Bake for another 6 to 10 minutes, until meatballs are fully browned. An instant read thermometer plunged into one should read over 160-degrees.Serve as desired. Leftovers are great to refrigerate or freeze.OM NOM NOM!September 1, 2021
Bready or Not Original: Chewy Cookie Butter Chocolate Chip Cookies
These Chewy Cookie Butter Chocolate Chip Cookies are embodied with extra cookie dough flavor thanks to the miracle of cookie butter.

It always seems someone is always discovering cookie butter for the first time, so I shall repeat: this stuff is basically ground-down cookies blended with oil, giving it the same consistency as peanut butter, but without the health benefits. And oh yeah, it’s delicious.
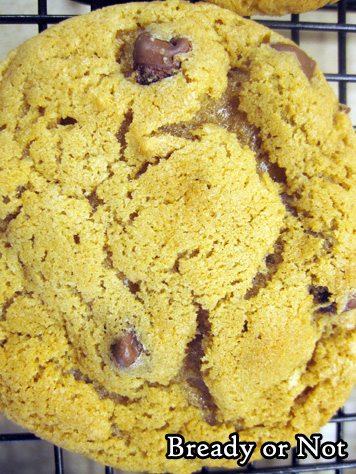
Ccookie butter can be found under the Biscoff brand at many grocery stores (and sometimes in a store generic brand) and at Trader Joe’s as Speculoos. You can use it just as you would peanut butter for sandwiches or for baked goods.

It’s fantastic stuff paired with chocolate, as in this recipe. It makes cookies taste more… cookie. Once you try it, you’ll know what I mean.

This recipe makes a nice, big batch of crispy, chewy cookies. Use any kind of chocolate chips that you want–or use a mix! It’ll all be good.
PrintBready or Not Original: Chewy Cookie Butter Chocolate Chip CookiesThese firm, chewy cookies have amped-up cookie dough flavor thanks to cookie butter, the fantastic jarred concoction found near nuts butters in the grocery store. Using a tablespoon scoop, this makes about 44 cookies.Course Dessert, SnackCuisine AmericanKeyword chocolate, cookie butter, cookiesAuthor Beth CatoEquipmenttablespoon scoopIngredients2 1/2 cups all-purpose flour1 teaspoon baking soda1/2 teaspoon salt1/2 cup unsalted butter (1 cube), room temperature1/2 cup creamy cookie butter1 cup brown sugar packed1/2 cup white sugar2 eggs room temperature2 Tablespoons light corn syrup2 Tablespoons water3 teaspoons vanilla extract1 bag milk chocolate chips or semisweet chips, about 1 3/4 cupsInstructionsPreheat oven at 375-degrees.In a medium bowl, sift together flour, baking soda, and salt. Set aside.In a big mixing bowl, beat butter and cookie butter until completely blended. Add the two sugars. Beat in the eggs, one at a time, followed by the corn syrup, water, and vanilla. Gradually mix in the dry ingredients. Fold in the chocolate chips.Use a tablespoon scoop to dole out dough onto a cookie sheet, giving each one room to spread while baking. Bake for 10 to 11 minutes, until golden, then let them sit on the sheet another 5 to 10 minutes to set. Transfer to rack to completely cool.Store in a sealed container at room temperature. They will keep well for up to 3 days.*OM NOM NOM!*August 30, 2021
My Virtual CoKoCon Schedule for September 4th through 6th
CoKoCon is September 3rd through 6th! The convention is online and totally free. To attend, you must register and use their Discord server. Find out all about that on their website. Please also check out the charity book auction, which will benefit a great local group, the Joshua Tree Feeding Program.
Here’s my final schedule. I say final, but of course, things may change and the internet may choose to be fickle at the worst possible time. Find the full schedule for the weekend here. All times are Pacific time.
Saturday, September 4
2:00pm – 3:00pm Steampunk in the Round
What is it that makes steampunk a lasting trend? We’ll discuss: The evolution of steampunk, how do you see it in a few years? The literary and media side of steampunk. The commercial side of steampunk. The splinter divisions of Steampunk. Q&A with audience.
3:15pm – 4:15pm The Wonderful World of Cheese
Join author Beth Cato and friends as she leads a lively discussion on the world of cheese, from its early history to modern day.
5:45pm – 6:45pm From the Paddock to Pern
Judith Tarr. Tamora Pierce. Robin McKinley. Mercedes Lackey. Our panelists discuss the impact of “horse girl” fantasy.
Sunday, September 5
10:15am – 11:15am Book Discussion: The Calculating Stars
Join avid reader and sometime blogger Michael Senft, and Nebula and Dragon award nominee Beth Cato (The Clockwork Dagger, Breath of Earth) as they discuss Mary Robinette Kowal’s award-winning “Lady Astronaut” alternate history.
2:00pm – 3:00pm Author Self-Care: COVID Edition
Surviving the past year has been an ordeal for everyone. Our authors talk about how COVID affected them, and what they did (and are still doing) to cope with pandemic, lockdown and deadlines.
4:30pm – 5:30pm Writing Speculative Poetry
Join our panelists as they discuss writing speculative poetry, as well as share their own works.
Monday, September 6
2:00pm – 3:00pm From Tabletop to Text and Vice Versa
Whether Dungeons & Dragons or Final Fantasy, our panelists discuss how gaming influenced their writing, and how their writing influences their gaming.
#SFWAPro
August 25, 2021
Bready or Not Original: Food Processor Brioche Rolls
My no-fuss Food Processor Brioche Rolls recipe will dazzle your mind because they are SO EASY. Enriched doughs like this have a reputation (that is well-earned) to be time-consuming and aggravating. Not anymore.

The food processor is what makes this easy-peasey. It mixes the dough in no-time, and aerates the butter and eggs into the flour and develops that all-important gluten.

These rolls are good for any variety of uses, as they can be eaten with things sweet and savory. As the bread is nice and durable, we found they worked well for shredded pork sandwiches, with barbecue sauce and all.

Once these are baked-up, they are fantastic to freeze and thaw, too. They really are best eaten within a day–I suppose they still had to be fussy in at least one way!
 PrintBready or Not Original: Food Processor Brioche RollsThis brioche dough takes minutes to make but needs 24-hours to develop in the fridge. Two versions are supplied below so that the amount of rolls can be customized. A 1-pound batch makes 4 rolls, wherein the 2-pound batch makes 8.Course BreadCuisine FrenchKeyword yeast breadAuthor Beth CatoEquipmentfood processorfood scaleIngredients1-lb batch1/4 cup warm water no hotter than 130-degrees2 1/4 teaspoon dry yeast 1 packet1 3/4 cups all-purpose flour3 Tablespoons white sugar1/4 teaspoon salt2 large eggs room temperature6 Tablespoons unsalted butter melted2-lb batch1/2 cup warm water no hotter than 130-degrees4 1/2 teaspoons dry yeast 2 packets3 1/2 cups all-purpose flour6 Tablespoons white sugar1/2 teaspoon salt4 large eggs room temperature12 Tablespoons unsalted butter melted (1 1/2 sticks)For egg wash1 large egg room temperature1 Tablespoon milk or half & halfInstructionsFollow these same directions, regardless of the batch size.Affix steel S-blade inside food processor.In a cup, stir together the dry yeast and water. Place the flour in the work bowl, followed by the yeast-water, sugar, and salt. Pulse a few times. Add the eggs and spin until they are mixed in, no more than 10 or 15 seconds.Start the processor on low and pour in the melted butter in a solid stream. Stop mixing after about 20 seconds. The dough will be very sticky and fluid.Apply nonstick spray or butter in a big mixing bowl. Pour in the dough. Cover with plastic wrap and let the dough rise at room temperature until it has tripled in size, no more than 3 hours. Keep an eye on it, because it can expand fast.Flour hands and punch down dough.Cover bowl with plastic wrap again, and stash the bowl in the fridge. Keep it there overnight, at minimum, or up to a day. It will rise a bit but nowhere near as much as the initial rise.To make rolls, prepare a baking sheet with parchment or nonstick spray.Prepare egg wash. Crack egg into a bowl. Beat in milk. In addition, add water to a small saucer and set it within reach.Grab small handfuls of dough. To get amounts even, use a kitchen scale to measure out 4-ounces worth. Working fast, pat into a ball. Dip fingers in water then stroke dough to smooth out rough spots. Set rounds on prepared sheet, spaced out. If the dough gets too sticky to work with, place in fridge briefly to chill again.Once rolls are formed, brush them with the egg wash. Let them rise for an hour, until nicely puffed.Preheat oven at 400-degrees.Gently brush on more egg wash. Place in oven and bake for 12 to 15 minutes, until browned and set. Doneness can be double-checked by jabbing a thermometer into a subtle spot along the bottom to ensure the middle is over 190-degrees.Rolls are best eaten within a day, but they keep very well frozen. Eat them warm or at room temperature. OM NOM NOM!
August 21, 2021
CLOCKWORK DAGGER ebook on sale for $1.99!
My novel The Clockwork Dagger is currently on sale for $1.99! I have no idea how long it will be at that price. This is the first book in my series that’s been described as Agatha Christie meets Final Fantasy.
Please, if you haven’t read it yet, grab it while you can! And please spread the word, too.
#SFWAPro

August 18, 2021
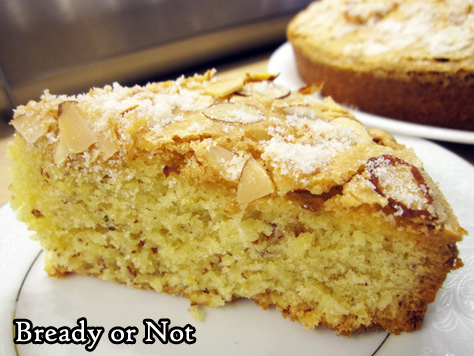
Bready or Not: Almond Cake
This Almond Cake tastes fancy, but thanks to a handy-dandy food processor, it’s actually quite straightforward to make. I’m all about fancy without major effort!
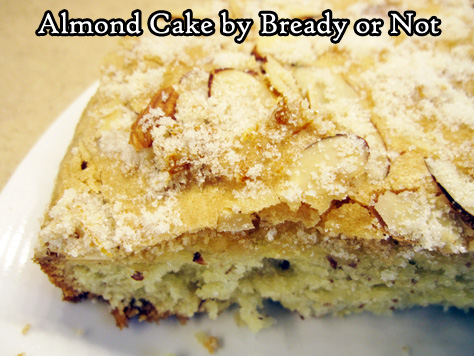
The food processor isn’t just there to streamline the process, though. Those blades really shred into the eggs and sugar, creating a cake that lusciously dense, not light from being gently blended.
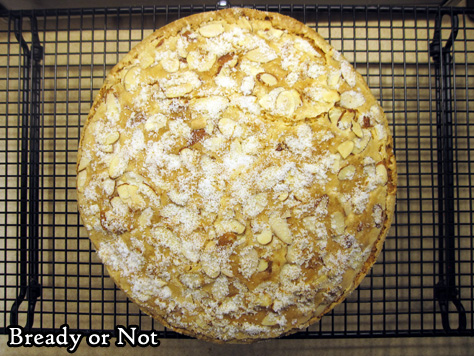
This cake bakes up into a soft, almond-fragrant pillow with a tender crumb and a golden, crunchy top. It’s one of those cakes that is as delicious as it is beautiful.

To make this even better, unlike many other cakes, it keeps well! Wrap up individual slices, and they are fine at room temperature for up to 3 days. They can also keep in the freezer for weeks!
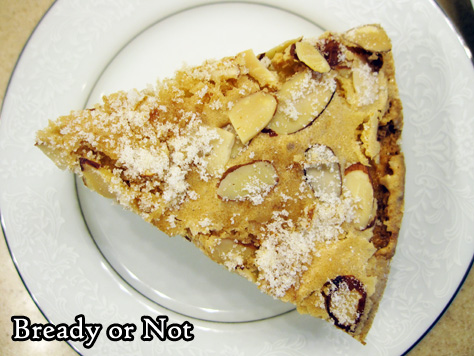
This cake would be wonderful for breakfast, brunch, or dessert. It’s great by itself, but would also be lovely with some fresh fruit.
Modified from America’s Test Kitchen.
PrintBready or Not: Almond CakeThis Almond Cake, modified from The Best of America’s Test Kitchen 2015, is very much a luxurious European-style cake to make at home. It is lofty, luscious, and sweet, with the top crust of almonds providing a pleasant crunch.Course Breakfast, Dessert, SnackKeyword almond, cake, food processor, springform panAuthor Beth CatoEquipment9-inch springform panparchment paperlarge food processorIngredientsCake:1 1/2 cups sliced almonds3/4 cup all-purpose flour3/4 teaspoon salt1/4 teaspoon baking powder1/8 teaspoon baking soda4 large eggs room temperature1 1/4 cups white sugar2 lemons zested3/4 teaspoon almond extract5 Tablespoons unsalted butter melted1/3 cup vegetable oilTopping:2 Tablespoons white sugar1/2 teaspoon lemon zest1/3 cup sliced almondsInstructionsPreheat oven at 300-degrees.. Cut a piece of parchment to fit in the bottom of the springform pan. Grease pan, place parchment inside, then grease that as well. Set aside.In food processor, pulse sliced almonds, flour, salt, baking powder, and baking soda until the almonds are finely ground. This will be 5 to 10 pulses. Move mixture to another bowl.Into the now-empty processor, place the eggs, white sugar, 1 Tablespoon of lemon zest (reserve rest for topping), and almond extract. Process for about 2 minutes, until everything turns pale yellow. Pour in the melted butter and oil until they are blended in. Add the almond mixture with a series of pulses.Pour batter into the prepared pan.Start preparing the topping by using fingertips to mix the lemon zest into the white sugar, dispersing the zest throughout. Sprinkle the almonds all over the top of the cake. Follow that up with the lemon-sugar.Bake cake until the middle is set and bounces back when gently pressed, about 55 minutes to an hour. The middle should also pass the toothpick test. Let the cake cool for about 15 minutes. Run a plastic knife or toothpick around the sides of the cake to make sure it is loose. Set a plate on top of the cake and tip it out to invert it. Then set cake back onto a cooling rack, almonds up.Let cake cool at least 2 hours at room temperature, or speed the process by chilling it in the fridge. Cake tastes best at room temperature. Cut into wedges and serve.Individual wedges of cake can be wrapped in plastic to keep at room temperature for up to 3 days, or can be frozen for later enjoyment.*OM NOM NOM!*

