
Beth Cato's Blog, page 23
March 2, 2022
Bready or Not: Irish Apple Cake
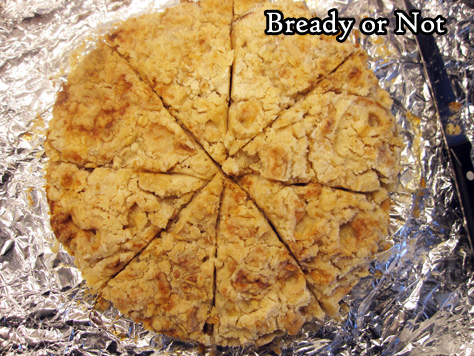
I’ve posted many different recipes for apple cake. This Irish Apple Cake uses a 9-inch round cake pan with layers of cake, apple, and streusel.
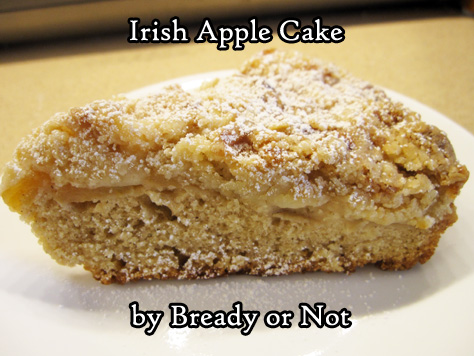
This isn’t a light, airy cake. It’s dense and moist. It’s a cake that is ideally paired with tea, coffee, or hot cider.
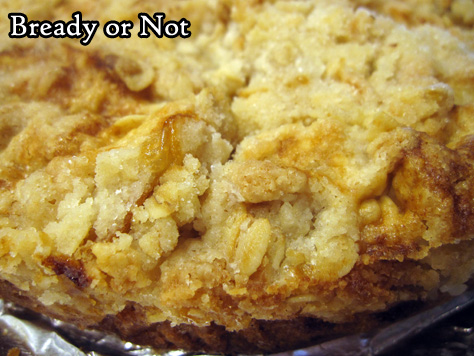
It’s not heavily sweet, either, but the sweetness that is there arises from the apple and that wonderful crumble topping.
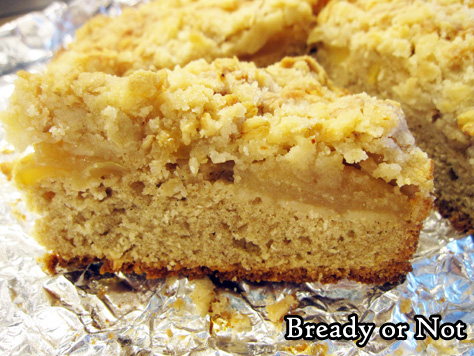
The big thing that sets this cake apart from other recipes is that you do experience the textural variations between the layers. It really reminds me of my family favorite Caramel Apple Pie in that regard.
This cake is best eaten fresh, but fear not! If you freeze it when it’s fresh, it will be wonderfully preserved for later on. Just eat it right after it’s thawed.
Modified from a Gemma Stafford recipe in Food Network Magazine, March 2021.
PrintBready or Not: Irish Apple CakeThis crumble-topped round apple cake is fragrant with spices. Enjoy this cake the day it’s made, or freeze pieces right away to enjoy later! This would be great for dessert or breakfast.Course Breakfast, DessertCuisine irishKeyword apple, cakeServings 8 slicesAuthor Beth CatoEquipment9-inch cake panIngredientsStreusel6 Tablespoons cold butter3/4 cups all-purpose flour1/4 cup rolled oats1/2 cup white sugarpinch saltCake1/2 cup salted butter 1 stick1/2 cup white sugar2 teaspoons pure vanilla extract2 large eggs1 1/4 cups all-purpose flour1 teaspoon baking powder1 teaspoon ground cinnamonpinch salt3 Tablespoons milk3 medium baking apples such as Fuji or Granny Smith, peeled and thinly slicedconfectioners' sugar for servingInstructionsPreheat oven at 350-degrees. Line a 9-inch cake pan with foil and apply nonstick spray or butter.Make the streusel first. Dice up the butter in a medium bowl. Add the flour, oats, sugar, and salt. Using fingers, compress and break apart the butter into small crumbs distributed throughout the dry mix. Set the bowl in fridge to chill while assembling the cake.Cream the butter and white sugar until light and fluffy. Add the vanilla and eggs.In a separate bowl, sift together the flour, baking powder, cinnamon, and salt. Gradually fold the dry ingredients into the wet along with the milk. Once everything is just mixed, pour it into the prepared pan. Place the apple slices one at a time to form an even layer. Sprinkle the streusel on top and even it out.Bake the cake until the top is golden, about 60 to 70 minutes. The middle should pass the toothpick test. Let cool at room temperature, eventually placing in fridge to speed the process, if desired.Cut into 1/8ths. Top pieces with sprinkled confectioners’ sugar to make it even more pretty. The cake is best eaten fresh, but pieces can also be individually frozen the day of baking for a delicious treat later.OM NOM NOM!

March 1, 2022
Rhysling Nominated Poems from 2021
Each year, members of SFPA (Science Fiction & Fantasy Poetry Association) nominate what they consider to be the best poems of the past year. Works are divided into two categories, short (under 50 lines) and long (above 50 lines). I’m honored this year to have FOUR nominated poems, two in each category, and all of them can be read online!
Within a few months, they’ll also be published in the SFPA Rhysling Anthology that members read before voting for their top poems (I actually won in 2019!). This will also be available for the public to buy from sites such as Amazon.
Here are my nominated poems:
SHORT
“Field Trip to See the Mermaid” in Mermaids Monthly
“How to Find Yourself Again” in Fantasy Magazine
LONG
“The Bookstore” in New Myths
“Follow the Meandering Path” in Abyss & Apex
Best of luck to all nominees!
#SFWAPro
February 23, 2022
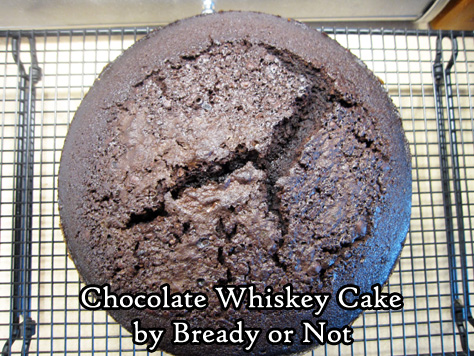
Bready or Not: Chocolate Whiskey Cake
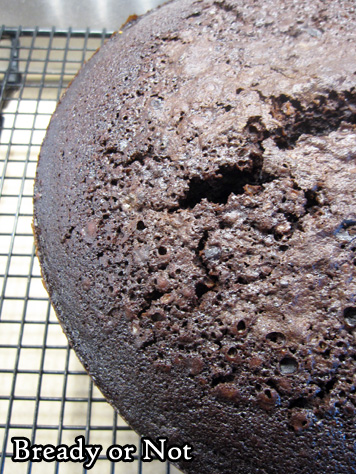
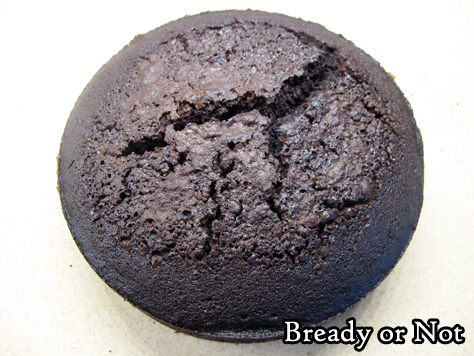
This Chocolate Whiskey Cake is dense, moist, and delicious–the perfect cake for chocoholics.
This is the first entry in a special sequence of deliciousness, too–three weeks in a row with Ireland-inspired recipes. Look for Irish Apple Cake and Irish Coffee Coffee Cake in the coming weeks!
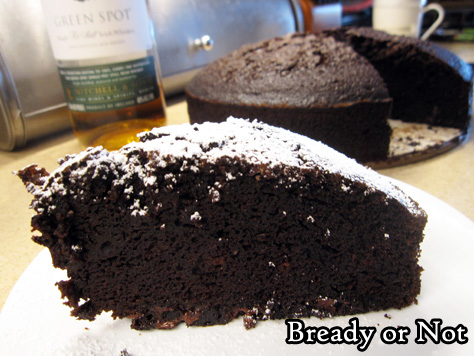
This is the kind of cake that doesn’t need frosting; that would actually be overkill. If desired, add a sprinkle of confectioners’ sugar on top, but that’s more about adding some color contrast than flavor.
So, what IS the flavor here? Chocolate. Coffee. And yes, whiskey–that adds a refreshing waft. I used Green Spot Irish Whiskey, my favorite, and one I’m fortunate enough to find sometimes at Costco around St. Patrick’s Day! Total Wine carries it year-round, too.
Eat this cake within a day or two, or wrap up pieces and freeze for later! It thaws, no problem at all.
I modified this a lot from an original take at NYT Cooking.
PrintBready or Not: Chocolate Whiskey CakeThis is a cake for chocoholics! The crumb is moist and dense, with chocolate, coffee, and whiskey melded to endow every bite with deep flavor. Modified from NYT Cooking.Course DessertCuisine irishKeyword alcohol, cake, chocolate, coffee, springform panAuthor Beth CatoEquipment9-inch springform panparchment paperfood scaleIngredients12 Tablespoons unsalted butter3/4 cup cocoa powder sifted1 1/2 cups brewed strong coffee1/2 cup Irish whiskey1 cup white sugar156 grams light brown sugar note this is weighed, not packed2 Tablespoons cocoa powder sifted2 cups all-purpose flour1 1/2 teaspoons baking soda3/4 cup fine sea salt1/4 teaspoon black pepper1/8 teaspoon ground cloves3 large eggs room temperature2 teaspoons vanilla extract1 cup chopped dark chocolate or chocolate chipsConfectioners' sugar for serving, optionalInstructionsIn a large pot on low heat, warm the butter, 3/4 cup cocoa powder, coffee, and Irish whiskey. Once the butter is melted, stir in the sugars until they are dissolved. Remove from heat to cool, 30 minutes at minimum.Preheat oven at 325-degrees. Cut a piece of parchment to fit the bottom of the springform pan. Apply nonstick spray to pan, place parchment inside, then spray again. Dust the interior with the remaining 2 Tablespoons cocoa powder to coat.In a big bowl, combine flour, baking soda, salt, pepper, and cloves. In a different bowl, whisk together eggs and vanilla. Gradually stir the egg mixture into the butter-cocoa pot. Add the dry ingredients to just combine, then fold in the chopped chocolate.Pour batter into the prepared pan. Bake cake for 65 to 70 minutes, until the middle just passes the toothpick test. Let cool for about 20 minutes, then release sides of pan to let the cake cool completely.Slice into wedges to serve. Add confectioners’ sugar sprinkled on top, if desired. Keep cake covered at room temperature up to 2 days. Remaining pieces can be sliced and individually wrapped and frozen for later enjoyment.OM NOM NOM!February 22, 2022
OUT TODAY: Chicken Soup for the Soul: Grieving, Loss and Healing
I’ve had stories in almost 20 Chicken Soup for the Soul anthologies, and I’m starting off 2022 with another publication! Chicken Soup for the Soul: Grieving, Loss and Healing is guaranteed to be a cathartic tear jerker (though their regular cat books can do that to me, too). My story is “Joy Amidst the Sorrow.” It’s about the emotional turmoil I endured as my grandma died in 2018. I wasn’t able to travel home to be with my family, which delivered a painful edge to my grief, but I found a small measure of comfort by writing about her character–love for the Muppets and all–for her memorial.
You can buy the book everywhere that books are sold.
Grandma would be very happy to be memorialized even more through this book. Here’s one of her most beloved songs, one that addresses this very subject of loss and comfort.
February 16, 2022
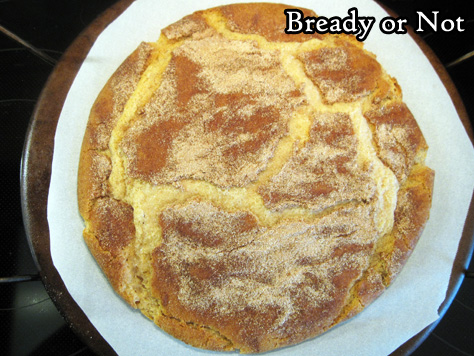
Bready or Not: Giant Snickerdoodle
I have recipes for various kinds of Snickertdoodle Cookies, but this one is for a single Giant Snickerdoodle!
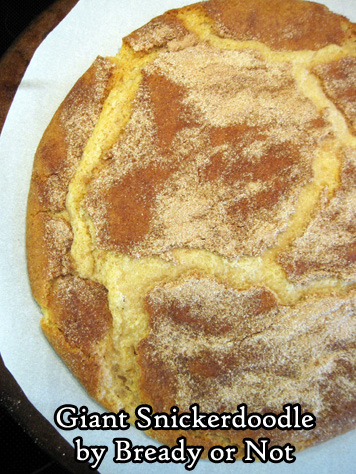
When I say this thing is big, I mean that it is BIG. I baked it on my stoneware pizza pan! I measured the cookie, too–after baking, it was a full 10 inches across.
This is a great cookie for one person to enjoy over a week, or for a small party to dig into together. Really, I can see this being perfect as a substitute birthday or other celebration cake.
The dough is really easy to work with. It comes together fast because you’re not having to shape and roll some thirty or forty cookies and bake multiple batches. One roll, one bake, done!
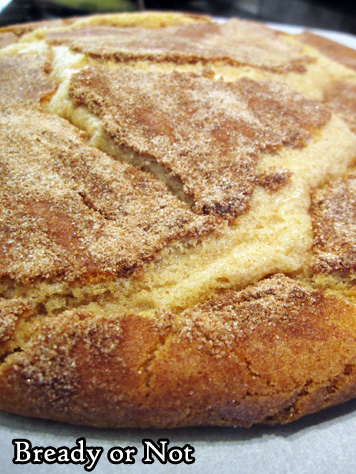
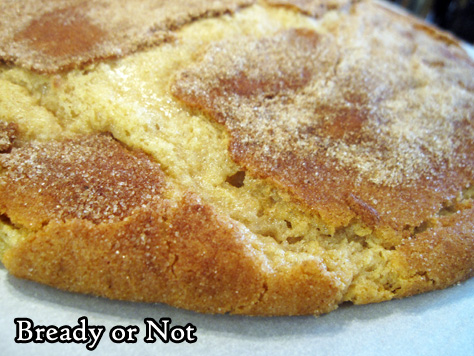
This tastes exactly as you expect a Snickerdoodle to taste, too. The signature cream of tartar flavor is there. The cinnamon and sugar form a lovely crackled top. The interior is sweet and chewy.

Leftovers aren’t a problem, either. Wrap up any remaining wedges, and they’ll keep for at least four days, dependent on your personal fortitude.
Here is a sampling of the Snickerdoodle recipes on Bready or Not. If you want more, hit the search box in the upper right corner.
PrintBready or Not: Giant SnickerdoodleThis Giant Snickerdoodle is perfect for a small group of people–or for one person’s big treat, as the cookie slices also keep well for days if well-wrapped! Note that the dough can be made ahead of time and stashed in the fridge for hours or a day prior to baking; just let it warm up at room temperature for about 20 minutes before shaping it.Course Dessert, SnackCuisine AmericanKeyword cookies, snickerdoodleAuthor Beth CatoEquipmentlarge flat baking sheet or pizza pan/ stoneparchment paperIngredientsDough7 Tablespoons unsalted butter room temperature1/2 cup white sugar2 Tablespoons brown sugar packed1 large egg room temperature1/2 teaspoon pure vanilla extract1 cup + 2 Tablespoons all-purpose flour1/2 teaspoon ground cinnamon3/4 teaspoon cream of tartar1/2 teaspoon baking soda1/4 teaspoon saltTopping3 Tablespoons white sugar1 teaspoon cinnamonInstructionsPreheat oven at 400-degrees. Line a baking sheet or pizza pan/stone with parchment paper.Beat together butter, white sugar, and brown sugar until light and fluffy, about 3 minutes in a stand mixer. Add egg and vanilla. Gradually beat in the dry ingredients until just combined.In a small bowl, mix together topping ingredients.Pat the dough to form a cohesive ball. Roll it in the topping. Set dough in middle of pan and press into about a 8-inch round. Sprinkle remaining topping all over, pressing it into dough.Bake for 12 to 15 minutes. The edges should be set, with some of the crackles in the cookie still showing some moisture (the cookie will finish baking as it sets).Let cool for at least 30 minutes. Use a knife or pizza cutter to cut cookie into triangular wedges. Cookie is great fresh, but individually-wrapped pieces also keep wonderfully at room temperature for up to 4 days.OM NOM NOM!February 9, 2022
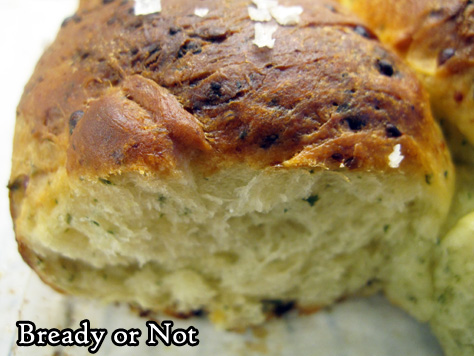
Bready or Not Original: Comte Pull-Apart Rolls
Bread is awesome. Cheese is awesome. Combine them to achieve a special kind of awesome, especially in the case of these Comte Pull-Apart Rolls.
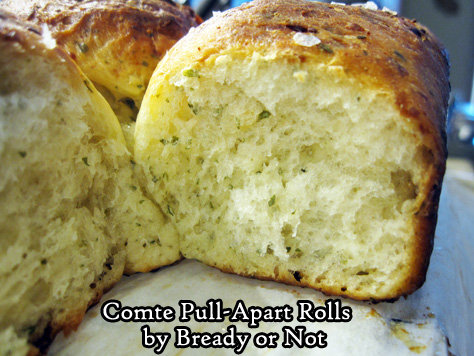
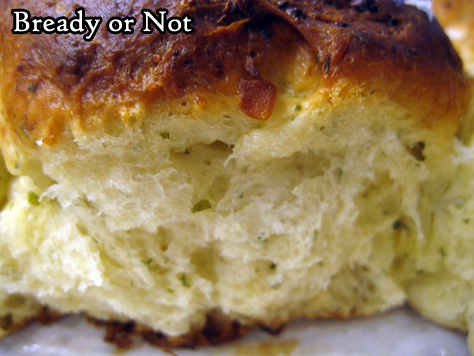
These rolls are tender, soft, and inherently savory. They are perfect to go along with roasts.
First of all, the cheese. If you live in a cheese-deprived area as I do, Comte may not be available (or is only available at Christmas, sigh) or is prohibitively expensive. Really, you can use any cheese you like here, but I advise using one with a savory note. Another alpine cheese or a bandage-wrapped cheddar would do the trick.

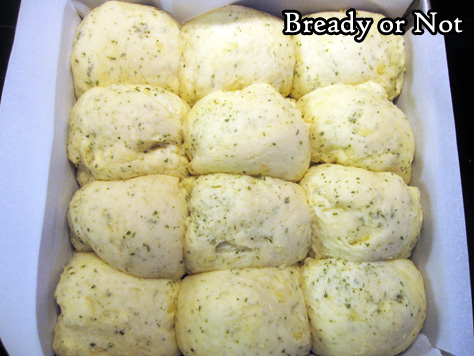
My recipe is based on one featured in the Nov/Dec 2018 issue of Bake from Scratch. I made significant modifications, the foremost being that I halved the recipe so that it would only produce 12 rolls.
This recipe isn’t as fussy as some homemade rolls, but it still takes some time and effort. I was very worried because my first rise was so low, but my rolls rose beautifully once they were formed. That’s the rise that really matters!
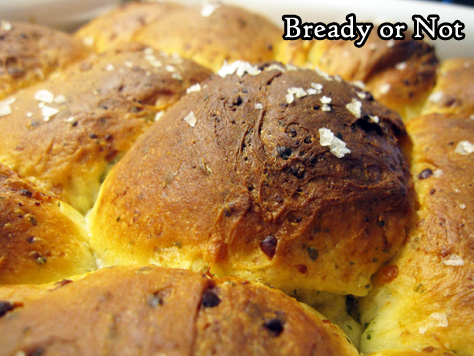
If you want to give your second rise a boost, use this trick: preheat your oven at 200-degrees. Shape your rolls or bread. Stick the dough in the oven without any plastic wrap or cover. Immediately turn the oven OFF. Set a timer for 30 to 40 minutes or longer; this will depend on the oven, so experiment. Once the bread has nicely puffed from the heat, remove it from the oven, then preheat it again for the full bake.
These rolls can be eaten at room temperature or warm, but for me, they really are far better hot. I want them to melt butter!
PrintBready or Not Original: Comte Pull-Apart RollsThis recipe makes 12 hearty, soft rolls that are perfect to go along with a special meal! If you can’t find Comte, substitute with another alpine cheese or bandage-wrapped cheddar to achieve that same kind of savory depth.Course Bread, Side DishKeyword cheese, yeast breadServings 12 rollsAuthor Beth CatoEquipment9×9 panparchment paperkitchen scalepastry brushIngredients1/2 cup warm milk (105-110 degrees F), can substitute half & half1/2 cup warm water (105-110 degrees F)1/2 Tablespoon active dry yeast1 large egg room temperature2 Tablespoons white sugar1/4 cup unsalted butter melted and divided1/2 Tablespoon kosher salt2 3/4 cup bread flour2 Tablespoons dried parsley or other dried herbs4 ounces grated Comte cheese 100 gramsflaked salt for garnish, optionalInstructionsIn a stand mixer, place the warm liquids and yeast. Let stand for about 10 minutes, until the yeast is nice and foamy. Add the eggs, sugar, 2 Tablespoons of melted butter, and salt. Gradually beat in the flour, cheese, and parsley, until everything is well combined.Cover the bowl to let the dough rise for about an hour.Line a 9×9 pan with parchment paper cut to crisscross and extend up all four sides. Apply nonstick spray.Lightly flour a surface. Turn out the dough onto it. Use the kitchen scale to weigh the dough. Divide it into 12 equal portions, forming each into a tidy ball. Place in rows within the prepared pan, each roll touching. Cover the pan to let rolls rise for another 40 minutes to an hour.Preheat oven at 375-degrees. Brush rolls with remaining 2 Tablespoons butter and add a sprinkle of flaked salt, if desired.Bake rolls for 13 minutes. Check them. If they are getting quite brown, cover the pan with foil. Bake for another 13 to 15 minutes.Serve rolls at room temperature or warm.OM NOM NOM!February 2, 2022
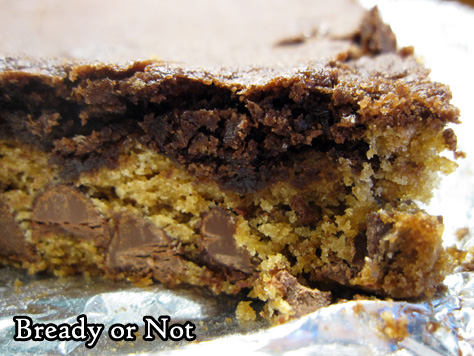
Bready or Not: Brookies
No need to deliberate whether to make chocolate chip cookies or brownies–this recipe for Brookies combines these goodies together in a delicious way.
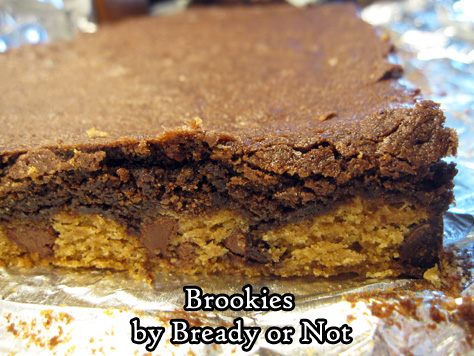
This recipe excels at chocolate distribution. It’s not super-chocolaty, but every bite has some brownie and chocolate chips. If you add in cacao nibs, it’s even better; the nibs enhance the other chocolate flavors and adds a pleasant crunch at the same time.
On that note, this is a great recipe for people who don’t like nuts. There’s lots of flavor here without them. Could you add nuts? Sure. Is it necessary? Nope.
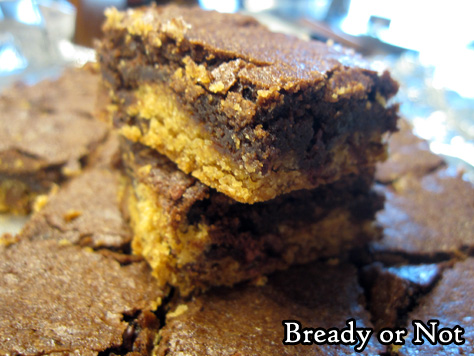
These bars are dense and nicely portable. Wrap them up individually, and they are great for a school lunch, road trip, or picnic. Plus, they freeze well, so you can even save some for later!
Modified from AllRecipes Magazine August/September 2020.
PrintBready or Not: BrookiesThese Brookies combine chocolate chip cookies and brownies in one convenient dish!Course Dessert, SnackCuisine AmericanKeyword bars, brownies, chocolateAuthor Beth CatoEquipment9×13 panIngredientsCookie layer1/2 cup unsalted butter (1 stick) room temperature1/2 cup light brown sugar packed1/4 cup white sugar1/2 teaspoon vanilla extract1 large egg room temperature1 1/4 cups all-purpose flour1/2 teaspoon salt1/2 teaspoon baking soda1 cup semisweet chocolate chipsBrownie layer1/2 cup unsalted butter (1 stick) melted1 cup white sugar1 teaspoon vanilla extract2 large eggs1/3 cup cocoa powder sifted1/2 cup all-purpose flour1/4 teaspoon baking powder1/8 teaspoon salt1/4 cup cacao nibs optionalInstructionsMake cookie layerPreheat oven at 350-degrees. Line a 9×13 pan with aluminum foil and apply nonstick spray.In a large bowl, beat together butter, sugars, and vanilla until light and creamy. Add egg, scraping bottom of bowl, then beat another two minutes.In another bowl, combine flour, salt, and baking soda. Gradually mix the dry ingredients into the wet. Fold in chocolate chips. Dough will be very thick and sticky. Drop into pan in clumps and press into a level layer, covering the bottom completely.Make brownie layerUsing the same big bowl (leave it unwashed or wash it, baker’s preference), beat together butter, sugar, and vanilla. Follow with the egg. Stir in the cocoa powder, flour, baking powder, and salt. Fold in the cacao nibs, if using.Pour over the cookie layer, spreading it into an even layer.Bake until the middle passes the toothpick test, 20 to 25 minutes. Cool completely–chilling in fridge, if desired–before slicing into bars.Brookies will keep in a sealed container at room temperature for 3 days, and can also be frozen for layer enjoyment.OM NOM NOM!January 26, 2022
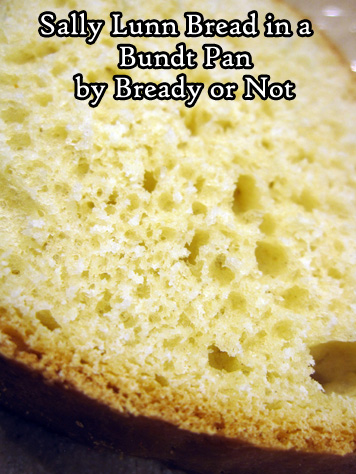
Bready or Not: Sally Lunn Bread in a Bundt Cake Pan
When I had the opportunity to visit the city of Bath in England in 2019, I knew the absolutely necessary stop for lunch was Sally Lunn Eating House, known for centuries for the Sally Lunn bun. I first learned of it from a history spot on the Great British Bake Off.
The bun has some mystery and history to it, but what is certain is that it is rather brioche-like and delicious. Upon coming home, I set about trying several recipes for a homemade version. The results were meh–until this one, which is odd because this bread is also very different.
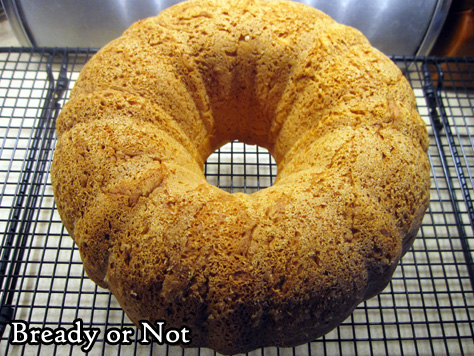
The true Sally Lunn bun is a bun, made in a specialized bun mold. This recipe makes an enriched bread, mixed in a food processor, and risen and baked in a bundt pan. The result is a lush, sweet bread. The flavor and feel is right, even if the shape is radically different.

Though it has a browned crust, the bread itself is still somewhat delicate. It requires thick slices, which isn’t a bad thing at all, because it’s so soft and delicious.
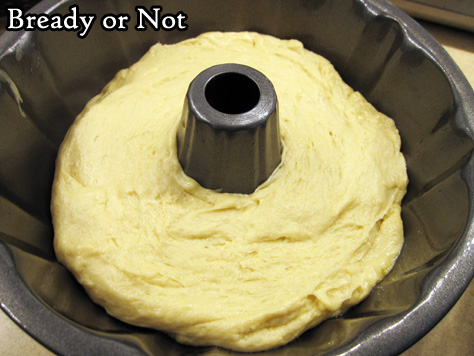
[image error]I don’t often share process photos on Bready or Not, but I think for this recipe, they will help. First of all, here’s what the bread looked like with the batter just placed in the bundt pan.
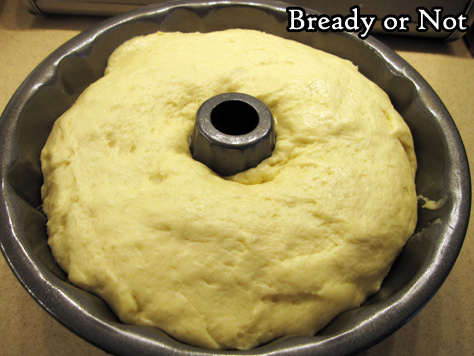
Here it is after the second rise!
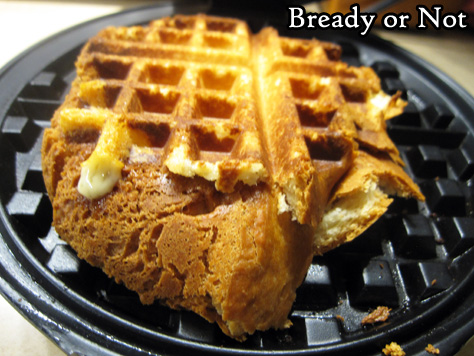
We found that the bread needed to be eaten hot, with toasted being the best. Since the pan made a big loaf–18 thick slices–I had plenty of bread to experiment with. I hit on the idea of using it for grilled cheese sandwiches using the waffle iron. This is THE BEST way to make grilled cheese, by the way.
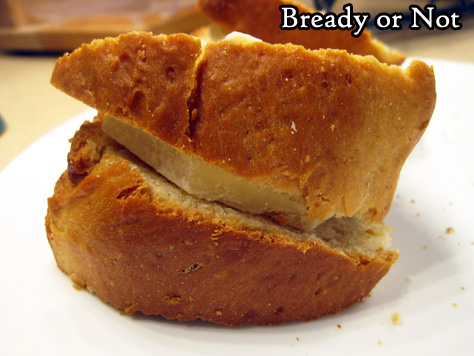
This shot shows how thick the bread was. I was still able to compress it in the waffle iron just fine, where in a matter of minutes, I created a no-fuss crispy, buttery masterpiece.
 PrintBready or Not: Sally Lunn Bread in a Bundt Cake PanThis is an enriched yeast bread, inspired by the famous bread made in Bath, England. This version is mixed in a food processor, then rises and bakes in a bundt cake. The result is great to eat in combinations that are savory or sweet–it tastes best toasted in some way, whether with butter and jam or even as a lush grilled cheese sandwich, pressed flat in a waffle maker! The bread results in about 18 thick, angled slices.Course Appetizer, Bread, Dessert, Main CourseCuisine BritishKeyword yeast breadAuthor Beth CatoEquipmentlarge food processorlarge bundt panIngredients1/2 cup milk1/2 cup water3 1/2 to 4 cups all-purpose flour1/3 cup white sugar1 teaspoon salt2 1/4 teaspoon instant yeast1/2 cup unsalted butter 1 stick, room temperature3 large eggs room temperatureInstructionsWarm the milk and water together, by microwave or stovetop, to about 100-degrees.Fit a plastic dough blade inside the food processor. Add 2 cups flour, the sugar, salt, and yeast. Pulse a few times. Add the milk-water, butter, and eggs, and pulse more. Add 1/2 cup more flour. Pulse again. Add the rest of the flour, pulsing until the dough becomes stiff.Cover mixer bowl with lid or plastic wrap and let dough rise at room temperature for about an hour. It should double.Remove plastic wrap, if using, and affix lid. Pulse a few times to beat down again–but be warned, the dough is so thick, the processor might jump around. Stay right there. The dough only needs a few seconds of pulses.Thoroughly grease the bundt pan. Pour in the batter and smooth it out to an even level. Cover pan with plastic wrap or a towel and let the dough rise until it has doubled again, about 50 minutes.Preheat oven at 325-degrees.Bake for 50 minutes. The loaf should look golden brown on top, and a digital thermometer plunged into the middle of the bread should read at least 190-degrees.Let loaf cool in pan about 20 minutes, then invert onto a rack to cool more. The bread is fragile to cut and requires thick slices. This Sally Lunn loaf is best eaten warm, especially toasted. It can also be cut into individual slices and frozen for later enjoyment.OM NOM NOM!
January 19, 2022
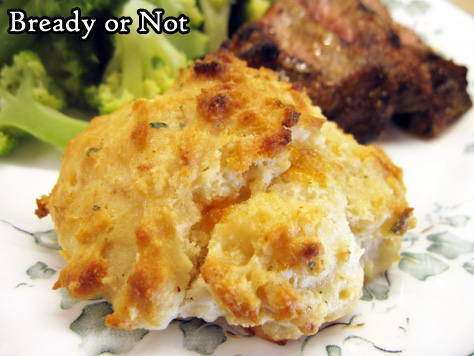
Bready or Not: Cheddar Bay Biscuits
Let’s state a truth up front: a visit to Red Lobster isn’t about the seafood. It’s about those Cheddar Bay Biscuits they bring out as an appetizer.

I’ve used this recipe for about 10 years now. I posted it on my LiveJournal in the earlier iteration of Bready or Not, but now it’s time to share again with new photos and an easy-to-print format.

These biscuits are incredible. Cheesy, crisp, tender. Buttery. I mean, you baste them in butter and seasonings for the final step. You know they will be good.

Plus, these keep well in the fridge for days! In a pinch, you can heat them in the microwave, but they are far better warmed in an oven or toaster oven. That way the outside stays crisp and the interior texture stays just right.
I bet if you give these a try, they’ll be a reliable side dish bread in your recipe repertoire, too!
PrintBready or Not: Cheddar Bay BiscuitsThese biscuits are a copycat of the famous biscuits served at Red Lobster restaurants! Makes 9 big biscuits using a 1/3 measuring cup.Course Side DishCuisine AmericanKeyword cheese, quick breadServings 9 biscuitsAuthor Beth CatoEquipmentparchment paperpastry brushIngredientsBiscuits2 cups all-purpose flour2 teaspoons baking powder1/2 teaspoon baking soda1 teaspoon white sugar1/2 teaspoon garlic powder1/4 teaspoon cayenne pepper6 ounces sharp cheddar cheese shredded1 cup buttermilk or soured milk*1/2 cup unsalted butter 1 stick, melted and cooledTopping3 Tablespoons unsalted butter melted1/2 teaspoon garlic powder1/4 teaspoon dried parsleyInstructionsPreheat oven at 475-degrees. Line a big baking sheet with parchment.In a big bowl, combine the flour, baking powder, baking soda, sugar, salt, garlic powder, and cayenne. Fold in the cheddar cheese.Fold the buttermilk into the dry ingredients, followed by the melted butter, scraping the bottom of the bowl well to make sure everything is mixed in. Grease a 1/3 cup and use that to scoop up portions of dough to place spaced out on the baking sheet.As the biscuits bake for 11 to 13 minutes, until golden brown, prepare the topping. Melt the butter and stir in the garlic powder and parsley. As soon as the biscuits are out of the oven, brush on the topping to cover the nooks and crannies of every biscuit on the pan.Eat right away. Leftovers will keep in a sealed container in the fridge for days. They can be microwaved, but are best warmed in an oven or toaster oven.OM NOM NOM!Notes*To make soured milk, place a few teaspoons of lemon juice or white vinegar in a cup, and pour in dairy milk or half & half to reach the 1 cup amount. Let sit for about 10 minutes at room temperature so that the mixture curdles, then use in recipe.January 12, 2022
Bready or Not Original: Apple-Almond Olive Oil Cake
This Apple-Almond Cake is an absolute showstopper of a cake, and it’s not difficult to make!
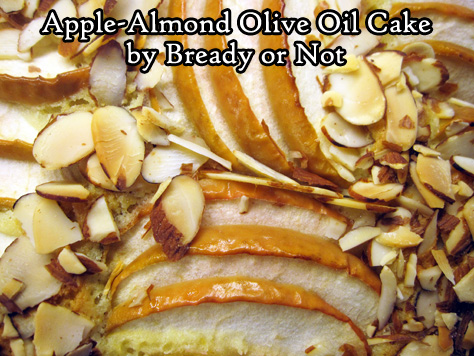
Really, I found cutting the apple into thin, mostly-equal pieces and placing them on the cake to be the most piddly part of the whole process. However, it was all well worth the effort!
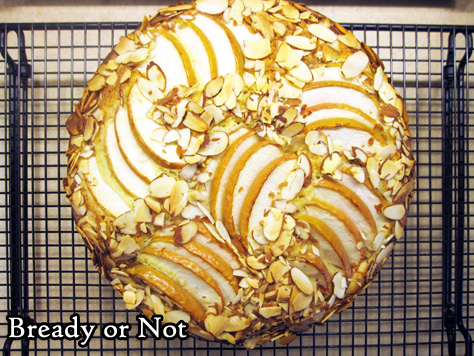
The taste of the cake isn’t super-sweet. The cake really tastes of lemon and almond, a fabulous pairing, with the apple providing a touch of flavor and sweetness.
[image error]It’s not a thick or heavy cake, either. This would be fantastic to serve for a breakfast, brunch, or dessert–it can really do all the things!

I modified this recipe greatly from one that was in Bake from Scratch’s September-October 2020 issue, which used a pear instead of an apple. It’s a fantastic issue–you’ll see my takes on several other recipes in the future!
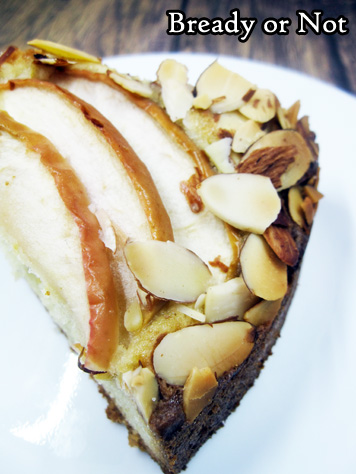 PrintBready or Not Original: Apple-Almond Olive Oil CakeThis stunning cake is fairly straightforward to make, and wow, is it gorgeous to behold!Course Breakfast, Dessert, SnackKeyword almond, apple, cake, lemon, springform panAuthor Beth CatoEquipment9-inch springform panparchment paperIngredients2 large eggs room temperature1 cup white sugar1/2 cup extra-virgin olive oil2/3 cup almond flour sifted to remove clumps1/3 cup half & half or milk1 lemon zested and juiced1 teaspoon vanilla extract1/4 teaspoon almond extract1 1/3 cup all-purpose flour1 1/2 teaspoons baking powder3/4 teaspoon kosher salt1 large Pink Lady apple or other firm baking apple1/2 cup sliced almondsInstructionsPreheat oven at 350-degrees. Cut parchment paper to fit the bottom of a 9-inch springform pan. Apply nonstick spray to pan; place parchment round inside, then spray to coat that as well.In a stand mixer with a whisk attachment. whip the eggs at high speed until they are foamy, about a minute. Reduce the speed to medium to add the white sugar. Continue to beat until it becomes thick and pale, about 2 minutes.With the mixer going, pour in olive oil. Pause to scrape sides of bowl. Add the almond flour, half & half, all of the lemon zest, and both extracts, mixing until combined.In another bowl, stir together flour, baking powder, and salt. Fold the dry ingredients into the moist mix. Pour batter into the prepared pan.Prep the apple. Core it, leaving the peel intact. Cut into thin slices of equal size. Pour reserved lemon juice over the apples, tossing them to coat.Place apple slices on top of batter in fanned-out groups of about five, having them face different angles all around the top. NOTE: as the batter is very sticky, the apples will be nigh impossible to move after they are placed, so make careful decisions. Sprinkle the sliced almonds around the edges and in the gaps between the apples.Bake for about 50 minutes, until the middle passes the toothpick test. Set on rack for 15 minutes before removing the ring from the pan. Serve warm, or cool completely, keeping the cake on the round base. When slicing the cake, be aware that the peel is pretty but may resist the blade–it’s easier to snip through with a pair of kitchen shears.Cake can be sliced and frozen for later, but it will taste best at room temperature or warmed.OM NOM NOM!


![[image error]](https://www.bethcato.com/blog/wp-content/uploads/2022/01/Chicken-Soup-Grief-In-This-Book_sm.png)
![[image error]](https://www.bethcato.com/blog/wp-content/uploads/2021/10/Sally-Lunn-Bundt-Cake14_sm.jpg)
![[image error]](https://www.bethcato.com/blog/wp-content/uploads/2021/10/Apple-Almond-Olive-Oil-Cake11_sm.jpg)