
Beth Cato's Blog, page 154
December 21, 2012
BONUS Bready or Not: Lessons Learned from Ninjabread
You can read all the writing books in the world, but it won't make you a good writer. That's true of most things--study does a lot, but practice is what matters. This is certainly true of using royal icing for cookies.
To back things up a bit: I first tried royal icing two years ago. I didn't have any tips or fancy stuff--I just used a quart-size freezer bag with a corner cut off. It worked okay, though my lines were coarse and unsteady. I didn't try using any colors. I didn't try flooding. All that was too intimidating.
This year, I decided to be brave. Or stupid.

Fortunately, food bloggers exist. Real, hardcore food bloggers, who get publishing deals because of the awesomeness of their l33t cooking skillz. One such blogger is Bridget at Bake at 350, where she goes into immense detail on how to decorate cookies. She even recommends meringue and color brands. And, to the great comfort of scaredy-cats like me, she and others have videos at the University of Cookie depicting how to fill a piping bag and what the perfect consistency for flooding-icing looks like.
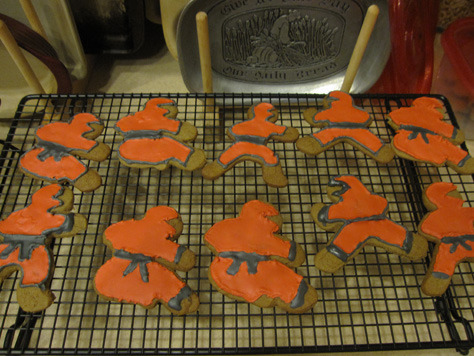
With all this data scrunched in my head, I set about making ninjabread men.
I used a brand new gingerbread recipe from Martha Stewart that was featured in the latest Reader's Digest. The dough tasted great, but the recipe described the dough as being very wet at the point it's formed into disc; mine was very... normal. This should have told me Something is Wrong. Because after I chilled the dough for four hours, my attempt to roll out the dough was an utter failure. It cracked and crumbled.
PANIC.
So I did what any panicking person does these days--I turned to Google. Google told me to add water by the teaspoon until the dough was malleable. Google is wise. The dough was saved. I chilled it and began my slicing and dicing ninja action. Martha Stewart advised that I chill the cookies after cutting them, and that enabled them to keep their shape while baking. I did several batches like that, and then had to let them cool completely before proceeding to the icing. Oh, the icing.
I bought my first Wilton tips, couplings, and disposable bags for this. I started out using the smallest tip for my outlining. MISTAKE. By the second cookie, my hand was already cramped and I was struggling to get the icing out. Fortunately, I bought couplings, so it was very easy to switch to a #4 tip. Much better! Even so, by the time I finished the outlining, my poor hand was tired, and I was very glad to continue with the flooding the next day.
This is where I discovered several cool things:
1) The directions at University of Cookie were excellent. It was easy to get the right consistency for flooding.
2) I LOVED flooding. It was very meditative, and reminded me of when I used to paint crafts. Really, it IS painting, just with icing and a toothpick.
Not cool thing:
1) My plastic squeeze bottle leaked out the top where it fastened on.
Cooler thing:
2) Instead of using the bottle, I just dipped the toothpick right in the bowl, palette-style. Worked even better! Less stuff to clean, too.
In all, I'm afraid to know how many hours I spent making this one batch of cookies. However, I still have about half a batch of icing left because I'm preparing to make more cookies this weekend--including some Portal cookies for Santa. I'm not looking forward to the outlining, but I am eager to do the flooding again.
Hrm. Sounds kind of like the rough draft and revision process, actually...
To back things up a bit: I first tried royal icing two years ago. I didn't have any tips or fancy stuff--I just used a quart-size freezer bag with a corner cut off. It worked okay, though my lines were coarse and unsteady. I didn't try using any colors. I didn't try flooding. All that was too intimidating.
This year, I decided to be brave. Or stupid.
Fortunately, food bloggers exist. Real, hardcore food bloggers, who get publishing deals because of the awesomeness of their l33t cooking skillz. One such blogger is Bridget at Bake at 350, where she goes into immense detail on how to decorate cookies. She even recommends meringue and color brands. And, to the great comfort of scaredy-cats like me, she and others have videos at the University of Cookie depicting how to fill a piping bag and what the perfect consistency for flooding-icing looks like.
With all this data scrunched in my head, I set about making ninjabread men.
I used a brand new gingerbread recipe from Martha Stewart that was featured in the latest Reader's Digest. The dough tasted great, but the recipe described the dough as being very wet at the point it's formed into disc; mine was very... normal. This should have told me Something is Wrong. Because after I chilled the dough for four hours, my attempt to roll out the dough was an utter failure. It cracked and crumbled.
PANIC.
So I did what any panicking person does these days--I turned to Google. Google told me to add water by the teaspoon until the dough was malleable. Google is wise. The dough was saved. I chilled it and began my slicing and dicing ninja action. Martha Stewart advised that I chill the cookies after cutting them, and that enabled them to keep their shape while baking. I did several batches like that, and then had to let them cool completely before proceeding to the icing. Oh, the icing.
I bought my first Wilton tips, couplings, and disposable bags for this. I started out using the smallest tip for my outlining. MISTAKE. By the second cookie, my hand was already cramped and I was struggling to get the icing out. Fortunately, I bought couplings, so it was very easy to switch to a #4 tip. Much better! Even so, by the time I finished the outlining, my poor hand was tired, and I was very glad to continue with the flooding the next day.
This is where I discovered several cool things:
1) The directions at University of Cookie were excellent. It was easy to get the right consistency for flooding.
2) I LOVED flooding. It was very meditative, and reminded me of when I used to paint crafts. Really, it IS painting, just with icing and a toothpick.
Not cool thing:
1) My plastic squeeze bottle leaked out the top where it fastened on.
Cooler thing:
2) Instead of using the bottle, I just dipped the toothpick right in the bowl, palette-style. Worked even better! Less stuff to clean, too.
In all, I'm afraid to know how many hours I spent making this one batch of cookies. However, I still have about half a batch of icing left because I'm preparing to make more cookies this weekend--including some Portal cookies for Santa. I'm not looking forward to the outlining, but I am eager to do the flooding again.
Hrm. Sounds kind of like the rough draft and revision process, actually...


December 19, 2012
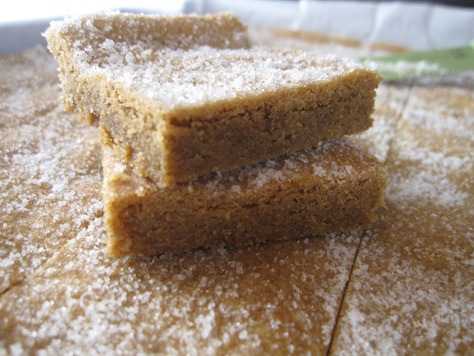
Bready or Not: Gingerbread Bars
Some desserts are just plain dangerous because you want to EAT IT ALL.
This is one of those recipes. Consider yourself warned.
I first found this recipe back in 2003, featured on the inside of a Land O Lakes butter box. I had never been a big gingerbread fan because I associated the type with cut-out cookies, which tend to be hard. However, I gave this recipe a shot and discovered a legal, sugary equivalent to crack cocaine.
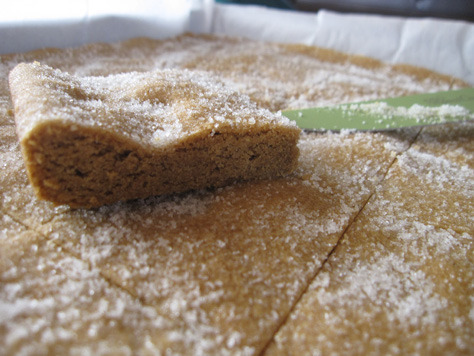
Since then, this has been a holiday favorite in my household. While this recipe can be cut into fancier shapes, I always slice it into bars. The result is a soft, luscious piece of gingerbread; the smell of it is simply divine. It's the scent of Christmas itself. Plus, it's the perfect recipe when you're low on time--it mixes together quickly and bakes in under 20 minutes. No standing around the oven for an hour, waiting for batch after batch of cookies to be done.
As soft as these bars are, they are surprisingly durable. When my husband was deployed in the Navy, I even mailed some to him overseas. I had them packed in Gladware with napkins for padding, and they survived the journey, intact and tasty.
Easy Gingerbread Bars
original recipe from Land O Lakes Butter
Ingredidents:
1 1/4 cups sugar
1 cup butter, softened
1 egg
3 tablespoons molasses
3 cups all-purpose flour
1 teaspoon baking soda
2 teaspoons ground cinnamon
2 teaspoons ground ginger
2-3 tablespoons granulated sugar
Directions:
1)Preheat oven to 350-degrees.
2) Combine the 1 1/4 cups sugar, butter, egg, and molasses in a large mixer bowl and combine until creamy. Add the next four ingredients and beat until well incorporated.

3) Line a jelly roll or large bar pan with parchment paper. Press the dough evenly into pan and sprinkle granulated sugar across the top. It helps to dust it in with your fingers to make sure you get most of the nooks and crannies.
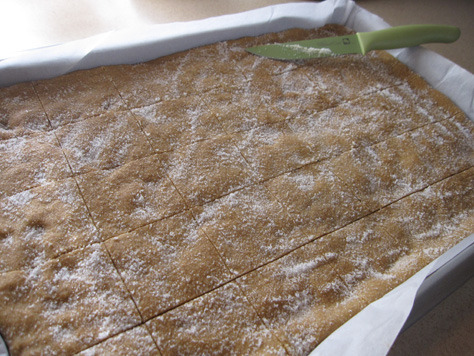
4) Bake for 16 to 20 minutes, or until very lightly browned around the edges. Cool completely. Cut into bars or other shapes. Try to resist eating them all.

OM NOM NOM.
This is one of those recipes. Consider yourself warned.
I first found this recipe back in 2003, featured on the inside of a Land O Lakes butter box. I had never been a big gingerbread fan because I associated the type with cut-out cookies, which tend to be hard. However, I gave this recipe a shot and discovered a legal, sugary equivalent to crack cocaine.
Since then, this has been a holiday favorite in my household. While this recipe can be cut into fancier shapes, I always slice it into bars. The result is a soft, luscious piece of gingerbread; the smell of it is simply divine. It's the scent of Christmas itself. Plus, it's the perfect recipe when you're low on time--it mixes together quickly and bakes in under 20 minutes. No standing around the oven for an hour, waiting for batch after batch of cookies to be done.
As soft as these bars are, they are surprisingly durable. When my husband was deployed in the Navy, I even mailed some to him overseas. I had them packed in Gladware with napkins for padding, and they survived the journey, intact and tasty.
Easy Gingerbread Bars
original recipe from Land O Lakes Butter
Ingredidents:
1 1/4 cups sugar
1 cup butter, softened
1 egg
3 tablespoons molasses
3 cups all-purpose flour
1 teaspoon baking soda
2 teaspoons ground cinnamon
2 teaspoons ground ginger
2-3 tablespoons granulated sugar
Directions:
1)Preheat oven to 350-degrees.
2) Combine the 1 1/4 cups sugar, butter, egg, and molasses in a large mixer bowl and combine until creamy. Add the next four ingredients and beat until well incorporated.
3) Line a jelly roll or large bar pan with parchment paper. Press the dough evenly into pan and sprinkle granulated sugar across the top. It helps to dust it in with your fingers to make sure you get most of the nooks and crannies.
4) Bake for 16 to 20 minutes, or until very lightly browned around the edges. Cool completely. Cut into bars or other shapes. Try to resist eating them all.
OM NOM NOM.
December 17, 2012
A Guest Post
My story behind the story of "Red Dust and Dancing Horses" has been re-published over at
 msstacy13
's blog.
msstacy13
's blog.
Dreams, Horses, and the Little Story That Could
If you're feeling down because of rejection and stubborn words, give it a read.
msstacy13
's blog.Dreams, Horses, and the Little Story That Could
If you're feeling down because of rejection and stubborn words, give it a read.
December 16, 2012
Sunday Quote knows the fickle nature of cats
"Happiness is sometimes like a cat. If you try to coax it or call it, it will avoid you; it will never come. But if you pay not attention to it and go about your business, you might just find it rubbing against your legs and jumping into your lap." ~ William Bennett
December 14, 2012
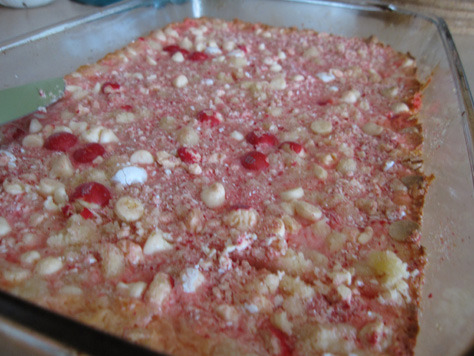
BONUS Bready or Not: Peppermint Bars
In the spirit of giving, I'm going to provide some bonus recipes over the next week and a half! These are all seasonal goodies that just plain demand to be posted now.
I saw these Peppermint Crumble Bars over at Something Swanky and knew I had to make them. My husband loves peppermint!

My problem: I didn't have massive quantities of candy canes or peppermints. What I did have was a bag of white chocolate peppermint M&Ms, a seasonal blend I found at Target. In my blender I coarsely chopped a whole bag's worth of M&Ms, and then I added white chocolate chips so that the total amount equaled 2 cups.
The original blog also posted a modified version of the recipe that had more crumble: 3 cups flour, 1 1/2 cups butter, and 3/4 cup sugar. When I make this again, I think I'll follow her advice and increase to those amounts (more cake coverage top and bottom), but I'm posting the original version below.

Peppermint Bars
Ingredients
- 2 cups flour
- 1 cup butter, softened
- 1/2 cup sugar
- 2 cups combined chopped mints and white chocolate (peppermint M&Ms, Andes, chocolate chips, etc)
- 1 - 14 oz can sweetened condensed milk
Instructions
Preheat oven to 350-degrees.
Use a pastry cutter or a fork to cut the butter, sugar, and flour together until crumbly. (Using a mixer is really overkill.)
Press a little more than half of the crumble mixture into the bottom of a greased 9x13 lined baking dish.
In a medium saucepan over low heat, mix 1 cup of the white chocolate peppermint candy and the sweetened condensed milk until smooth. Pour over the crumb crust in the dish.
Sprinkle the remaining crumble and white chocolate peppermint mix evenly over top.
Bake for 20 minutes or until edges begin to just barely brown.
Let cool completely before cutting into squares. [Note: I live in Arizona where it's warm, so I had to keep these refrigerated to stay set.]
OM NOM NOM.
I saw these Peppermint Crumble Bars over at Something Swanky and knew I had to make them. My husband loves peppermint!
My problem: I didn't have massive quantities of candy canes or peppermints. What I did have was a bag of white chocolate peppermint M&Ms, a seasonal blend I found at Target. In my blender I coarsely chopped a whole bag's worth of M&Ms, and then I added white chocolate chips so that the total amount equaled 2 cups.
The original blog also posted a modified version of the recipe that had more crumble: 3 cups flour, 1 1/2 cups butter, and 3/4 cup sugar. When I make this again, I think I'll follow her advice and increase to those amounts (more cake coverage top and bottom), but I'm posting the original version below.
Peppermint Bars
Ingredients
- 2 cups flour
- 1 cup butter, softened
- 1/2 cup sugar
- 2 cups combined chopped mints and white chocolate (peppermint M&Ms, Andes, chocolate chips, etc)
- 1 - 14 oz can sweetened condensed milk
Instructions
Preheat oven to 350-degrees.
Use a pastry cutter or a fork to cut the butter, sugar, and flour together until crumbly. (Using a mixer is really overkill.)
Press a little more than half of the crumble mixture into the bottom of a greased 9x13 lined baking dish.
In a medium saucepan over low heat, mix 1 cup of the white chocolate peppermint candy and the sweetened condensed milk until smooth. Pour over the crumb crust in the dish.
Sprinkle the remaining crumble and white chocolate peppermint mix evenly over top.
Bake for 20 minutes or until edges begin to just barely brown.
Let cool completely before cutting into squares. [Note: I live in Arizona where it's warm, so I had to keep these refrigerated to stay set.]
OM NOM NOM.
December 12, 2012
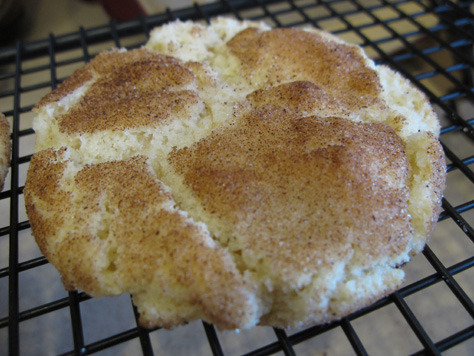
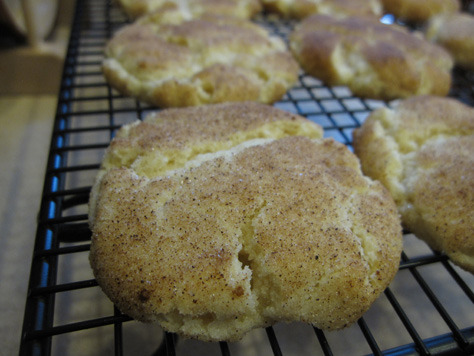
Bready or Not: Snickerdoodles
Cookie Month continues with a recipe that's both sentimental and delicious.
When I was eight or nine, I went along with my grandma on a visit to an old friend of hers, Ruby. They jabbered and talked and I lurked around the table. Ruby had a plate of cookies out on the table, and they were the most amazing, magical cookies--rolled in cinnamon and sugar, soft and chewy all at once. I was awed.
A few weeks later, Grandma presented me with a special gift. "Ruby sent you the recipe for those cookies," she said, handing me a paper clipped from a Gold Medal Flour bag.
This was my first recipe.
I didn't attempt making it until years later, when I was fourteen, and then I struggled with it for a few years after that. I was dreadfully afraid of under-baking the cookies, so I baked too long to compensate. Basically, I created cinnamon and sugar-dusted hockey pucks. It took me time to realize that I should let the cookies sit on the sheet for five or ten minutes--that they are still cooking at that point--and then they will be firm enough to move to a rack.
Snickerdoodles taught me how to bake. Now, maybe you can share in some cinnamon-sweet joy this holiday season.
Snickerdoodles
Recipe from Gold Medal Flour, from the late 1980s.
Ingredients:
1 ½ cups sugar
½ cup margarine or butter, softened
½ cup shortening
2 eggs
2 ¾ cups all-purpose flour
2 teaspoons cream of tartar
1 teaspoon baking soda
¼ teaspoon salt
--
3 tablespoons sugar
3 teaspoons ground cinnamon
Directions:
Heat oven to 400-degrees.
Mix the 1 ½ cups sugar, butter or margarine, shortening and eggs in a large bowl. Stir in flour, cream of tartar, baking soda and salt. Shape dough by rounded teaspoonfuls into balls.
Combine 3 tablespoons sugar and the cinnamon; roll balls in mixture. Place about 2 inches apart on an ungreased cookie sheet. Bake 8 to 10 minutes; when they are done, the tops will have cracks. If they are turning golden at the edges, take them out fast--they are over-baked! Let them sit on the cookie sheet about 5-10 minutes to set before moving to a rack.
OM NOM NOM.
December 11, 2012
Awards Season
It's that time of year when candy canes are stacked in every store, and fantasy and science fiction writers look to 2013 and the Nebula and Hugo Awards. This is the first year I'm really making a full effort to promote my work. In particular, I am sending out "Red Dust and Dancing Horses" and "Overlap."
If you're reading for either award, please feel free to email me at beth.l.cato at gmail dot com, and I can send you the files directly; or, they can be downloaded in the SFWA forums or on Codex Writers in the docs section.
- "Overlap," Cucurbital 3; doc, rtf, and pdf for SFWA members
- "Blue Tag Sale,"; Buzzy Mag
- "Cartographer's Ink," Daily Science Fiction
- "Red Dust and Dancing Horses," Stupefying Stories Issue 1.5 (March 2012); available in epub, mobi, and pdf for SFWA members
December 9, 2012
Sunday Quote gets advice from a hockey great
"You've got to love what you're doing. If you love it, you can overcome any handicap or the soreness or all the aches and pains, and continue to play for a long, long time." ~Gordie Howe
December 7, 2012
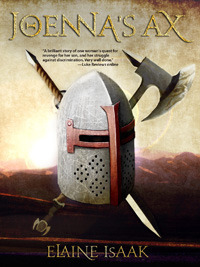
Guest Post from Elaine Isaak: Good News/Bad News: The Writer is In
Today I welcome author Elaine Isaak to the blog. Her post made me nod and laugh because it's so true. The Writer is in, and here to stay.
Good News/Bad News: The Writer is In
I think one of the surprises for many new writers, after they first become indoctrinated into the craft, is the degree to which the Writer Brain takes over. It happens most after the first Odyssey, Clarion or MFA workshop where your wannabe mind is flooded with information about writing techniques and given a critical perspective on the work of others, with the intent that these things should then be applied to your own writing.
It is, in fact, a special sort of brainwashing intended to make of you, a Writer. And once it has begun, it does not end. You will increasingly find that the Writer is In. You will be sitting in a quiet movie theater, for a film you've been looking forward to all year (especially since graduating that tough writers' workshop) when a giant plot hole looms up before you. "That doesn’t make any sense! It violates the worldbuilding established in the first scene!" Yep, the Writer is In.
Films begin to unravel before your disenchanted eyes. So you turn, instead to a new book by a favorite author, only to find it rife with said-bookisms and crammed with adjectives—things you barely recognized before you became a writer. The Writer is In. By this point, you're thinking you kinda want the Writer Out, so you can enjoy the narratives of others again. Good luck with that.
But the Writer Brain is not altogether a bad thing. The Writer Brain also gathers ideas while you're scanning a news magazine and it generates fresh characters while you people-watch at the Laundromat. The Writer is vigilant: it wants your work to get better, so it's always on the job, pointing out the motes in the eyes of others so that you might recognize the beam in your own. The Writer is at work while you are asleep, coming up with a great solution to that tricky plot problem you couldn't solve before bed.
Then you'll be walking your child home from school, hearing about this girl, Mercedes, and how she. . . Mercedes. That's an interesting name. Maybe you could use it for a character? No, it would make people think of the car. Wait! What if all the characters were named for cars? It could be a post-apocalyptic setting in which people name their children for the things they used to have. What other implications would that have for the society?—Mom?—Ooh, the kids in the story might research what their names imply, they might establish a hierarchy based on who is named for a luxury car versus—Mom!! Oh. Sorry. Your mother is Out right now. . . and the Writer is In!
----
Elaine Isaak is the author of traditional fantasy novel The Singer's Crown and its sequels, and the "Tales of Bladesend" epic novella series. A mother of two, Elaine also enjoys rock climbing, taiko (Japanese drumming), weaving and exotic cooking. Visit www.ElaineIsaak.com to read sample chapters and find out why you do not want to be her hero.
December 5, 2012
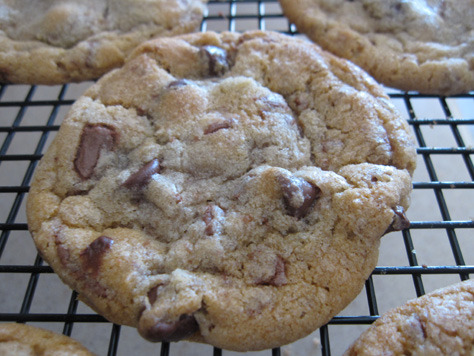
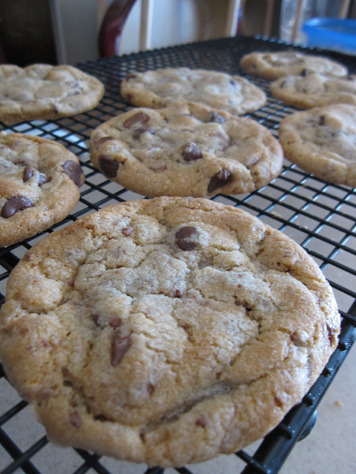
Bready or Not: Heath Cookies
Welcome to my first installment of Cookie Month! That's right, December is all about my favorite traditional cookie recipes. I'm bringing in a dose of sentimentality along with the calories.
Back in 2008, when I was still newly settled in Arizona, LiveJournal selected bakebakebake
for its spotlight feature. I joined up. My world changed. Mind you, I had been an enthusiastic baker for years, but I tended to stick with my traditional recipes plus whatever I clipped out of newspapers or magazines.
bakebakebake
for its spotlight feature. I joined up. My world changed. Mind you, I had been an enthusiastic baker for years, but I tended to stick with my traditional recipes plus whatever I clipped out of newspapers or magazines.
However, at that juncture in my life I had a new reason to bake more: my husband.
Oh, we'd been married for eight years, but most all that time he had been in the Navy. He had either been working odd hours or gone for months at a stretch. We made that transition to civilian life in August 2007, and suddenly he was home every day. Weird. It also meant I needed to figure out a lot more supper recipes or we'd be having the same thing every week.
Of course, me being the way I am, I did find new meal recipes on Bakebakebake, but most of my discoveries tended to be on the sweet side, like these amazing Heath cookies. I made these and I knew that this recipe was a keeper. It's been one of my holiday standbys ever since.
Note that there are a few ways you can handle the Heath bits. Stores like Wal-mart sell pre-chopped bags of Heath bits with milk chocolate, and that's certainly the most convenient way to go. Or you can buy full-size bars or the holiday fun-sized sort and chop them up on your own; if you go that route, you may want to add some extra chocolate chips to balance with the toffee.
I mean, we wouldn't want unbalanced cookies, now would we?
Heath Cookies
modified from Lovin' in the Oven
2 ½ cups all-purpose flour
1 teaspoon salt
1 teaspoon baking soda
1 cup (2 sticks) butter, softened
¾ cup white sugar
¾ cup brown sugar
2 eggs, room temperature
1 teaspoon vanilla
2 cups Heath pieces (either a bag of chips or approx 11 ounces chopped bite-sized candy bars)
[optional] more chocolate chips
1. Sift together the flour, salt, and baking soda. Set aside.
2. Cream butter until fluffy, then add the sugars and continue beating until it’s fluffy again. Beat in the eggs and vanilla. Take turns adding the Heath bits and flour to sugar mixture until it’s all well blended. Chill the dough for an hour; this creates a chewier, thicker cookie.
4. Preheat the oven to 350-degrees. Shape the dough into 1-inch balls and set on the cookie sheet.
5. Bake for 10-12 minutes, until the edges begin to brown. Remove from oven and let cool for several minutes before transferring them to a wire rack. Try not to stuff too many in your face at once.
OM NOM NOM.
Back in 2008, when I was still newly settled in Arizona, LiveJournal selected
bakebakebake
for its spotlight feature. I joined up. My world changed. Mind you, I had been an enthusiastic baker for years, but I tended to stick with my traditional recipes plus whatever I clipped out of newspapers or magazines.However, at that juncture in my life I had a new reason to bake more: my husband.
Oh, we'd been married for eight years, but most all that time he had been in the Navy. He had either been working odd hours or gone for months at a stretch. We made that transition to civilian life in August 2007, and suddenly he was home every day. Weird. It also meant I needed to figure out a lot more supper recipes or we'd be having the same thing every week.
Of course, me being the way I am, I did find new meal recipes on Bakebakebake, but most of my discoveries tended to be on the sweet side, like these amazing Heath cookies. I made these and I knew that this recipe was a keeper. It's been one of my holiday standbys ever since.
Note that there are a few ways you can handle the Heath bits. Stores like Wal-mart sell pre-chopped bags of Heath bits with milk chocolate, and that's certainly the most convenient way to go. Or you can buy full-size bars or the holiday fun-sized sort and chop them up on your own; if you go that route, you may want to add some extra chocolate chips to balance with the toffee.
I mean, we wouldn't want unbalanced cookies, now would we?
Heath Cookies
modified from Lovin' in the Oven
2 ½ cups all-purpose flour
1 teaspoon salt
1 teaspoon baking soda
1 cup (2 sticks) butter, softened
¾ cup white sugar
¾ cup brown sugar
2 eggs, room temperature
1 teaspoon vanilla
2 cups Heath pieces (either a bag of chips or approx 11 ounces chopped bite-sized candy bars)
[optional] more chocolate chips
1. Sift together the flour, salt, and baking soda. Set aside.
2. Cream butter until fluffy, then add the sugars and continue beating until it’s fluffy again. Beat in the eggs and vanilla. Take turns adding the Heath bits and flour to sugar mixture until it’s all well blended. Chill the dough for an hour; this creates a chewier, thicker cookie.
4. Preheat the oven to 350-degrees. Shape the dough into 1-inch balls and set on the cookie sheet.
5. Bake for 10-12 minutes, until the edges begin to brown. Remove from oven and let cool for several minutes before transferring them to a wire rack. Try not to stuff too many in your face at once.
OM NOM NOM.


