
Michael E. Shea's Blog, page 30
July 26, 2020
1d100 Forgotten Realms Factions
In previous articles on Sly Flourish I wrote about the value of randomness in our D&D games and offered random tables to help inspire your own adventures such as those in the Lazy DM's Workbook, Random Lists for Adventure Inspiration, and 1d100 Eberron Factions. This last one is intended to fuel other random tables you find either in the links above or in the Dungeon Master's Guide. With a 1d100 faction table you can tie in-world lore to the objects and locations directly in front of the characters. Each object in the world can teach them a little bit of lore or tie together major world plotlines one dirt-covered coin at a time.
Today we have 1d100 factions for the Forgotten Realms. The Forgotten Realms is vast. There's probably more like 1,000 factions. This list, however, covers much of what you'd find in the Sword Coast Adventurer's Guide, this edition's slimmed down sourcebook for the Forgotten Realms.
Like other 1d100 tables, you can use the items on this list to build your own more refined list that fits the campaign you're telling and what information helps push that campaign forward. A Tyranny of Dragons campaign may benefit from a refined 1d20 list that includes more factions focused on and around that campaign. As the characters dig around they find clues that point to other elements tangential to the campaign.
Each faction includes a symbol that the characters might find while uncovering the secret and clue about this faction.
Without further ado, here are 1d100 Forgotten Realms factions. You can also download a PDF of 1d100 Forgotten Realms factions to add to your DM kit.
1d100FactionDescription (Symbol)
1AkadiGoddess of air. (Cloud)
2AmaunatorGod of the sun. (Golden sun)
3AsmodeusGod of indulgence. (Three inverted triangles arranged in a long triangle)
4AurilGoddess of winter. (Six-pointed snowflake)
5AzuthGod of wizardry. (Left hand pointing upward, outlined in fire)
6BaneGod of tyranny. (Upright black hand, thumb and fingers together)
7BeshabaGoddess of misfortune. (Black antlers)
8BhaalGod of murder. (Skull surrounded by ring of bloody droplets)
9ChaunteaGoddess of agriculture. (Sheaf of grain or a blooming rose over grain)
10CyricGod of lies. (White jawless skull on black or purple sunburst)
11DeneirGod of writing. (Lit candle above an open eye)
12EldathGoddess of peace. (Waterfall plunging into a still pool)
13GondGod of craft. (Toothed cog with four spokes)
14GrumbarGod of earth. (Mountain)
15Gwaeron WindstromGod of tracking. (Paw print with a five-pointed star in its center)
16HelmGod of watchfulness. (Staring eye on upright left gauntlet)
17HoarGod of revenge and retribution. (A coin with a two-faced head)
18IlmaterGod of endurance. (Hands bound at the wrist with red cord)
19IstishiaGod of water. (Wave)
20JergalScribe of the dead. (A skull biting a scroll)
21KelemvorGod of the dead. (Upright skeletal arm holding balanced scales)
22KossuthGod of fire. (Flame)
23LathanderGod of dawn and renewal. (Road traveling into a sunrise)
24LeiraGoddess of illusion. (Point-down triangle containing a swirl of mist)
25LliiraGoddess of joy. (Triangle of three six-pointed stars)
26LoviatarGoddess of pain. (Nine-tailed barbed scourge)
27MalarGod of the hunt. (Clawed paw)
28MaskGod of thieves. (Black mask)
29MielikkiGoddess of forests. (Unicorn's head)
30MililGod of poetry and song. (Five-stringed harp made of leaves)
31MyrkulGod of death. (White human skull)
32MystraGoddess of magic. (Circle of seven stars, nine stars encircling a flowing red mist, or a single star)
33OghmaGod of knowledge. (Blank scroll)
34The Red KnightGoddess of strategy. (Red knight lanceboard piece with stars for eyes)
35SavrasGod of divination and fate. (Crystal ball containing many kinds of eyes)
36SeluneGoddess of the moon. (Pair of eyes surrounded by seven stars)
37SharGoddess of darkness and loss. (Black disk encircled with a purple border)
38SilvanusGod of wild nature. (Oak leaf)
39SuneGoddess of love and beauty. (Face of a beautiful red-haired woman)
40TalonaGoddess of poison and disease. (Three teardrops in a triangle)
41TalosGod of storms. (Three lightning bolts radiating from a point)
42TempusGod of war. (Upright flaming sword)
43TormGod of courage and self-sacrifice. (White right gauntlet)
44TymoraGoddess of good fortune. (Face-up coin)
45TyrGod of justice. (Balanced scales resting on a warhammer)
46UmberleeGoddess of the sea. (Wave curling left and right)
47ValkurNorthlander god of sailors. (A cloud and three lightning bolts)
48WaukeenGoddess of trade. (Upright coin with Waukeen's profile facing left)
49HarpersNetwork of spies who advocate equality and covertly oppose the abuse of power. (Silver harp)
50Order of the GauntletClerics and paladins sworn to destroy evil in the world. (Iron gauntlet holding a sword)
51Zhentarim (new)Mercenary company known as the black network. (Winged serpent)
52Emerald EnclaveDruids and others who believe in nature's preservation Horned stag over green.
53Lord's AllianceOrganization of leaders of the Sword Coast. (A crown over gold and orange)
54Cult of the Dragon (original)Cult aiming to transform dragons into dracolichs. (Eyes within flame above a bone dragon claw)
55Cult fo the Dragon (new)Cult aiming to return Tiamat to Faerun. (Five slashes across a dragon's profile)
56NetherilAncient human magocracy of great power. (Floating city)
57Abolethic SovereigntyAboleths who resided in Faerun for millions of years. (Black swirling glyphs within a circle)
58NeverwinterCity of corruption in the northern Sword Coast. (Eye with three droplets below)
59Waterdeeplargest city in Faerun on the Sword Coast. (Crescent moon over water on blue)
60Baldur's GateCorrupt city of southern Faerun. (Ship and castle on blue)
61SilverymoonJewel of the North and capital of Silver Marches. (Crescent moon and star on blue)
62GauntlgrymAncient dwarven city and capital of the Delzoun dwarves. (Stern dwarven face)
63Mithral HallNorthern dwarven city. (Tankard)
64DelzounAncient dwarves of the sword coast and the north. (Stern dwarven face)
65Myth DrannorAncient elven city of central Faerun.
66ShadowdaleSmall town in the center of the Dalelands and home to Elminster. (Moon over a white tower)
67MenzoberranzanCity of the drow and throne of the spider queen in Faerun. (Spider over a diamond)
68EvermeetIsland paradise of the elves.
69Many-arrowsEmpire of orcs in the north. (Five arrows pointed up)
70MoonshaesIslands with the Ffolk and an elf offshoot known as the Llewyr. (A silver bear on its hind legs)
71Mantol-DerithTrading post between the surface and the underdark.
72AmnA city of wealthy dynasties and trade. (Lady's profile over gold)
73ThayMagocracy of the Red Wizards. (Eight orbeting orbs over a bolting spark)
74CalimshanCity of former slaves under genie masters. (Diagnal stripes across a golden sphere)
75HalruaaReturned magocracy of skyships and earthmotes. (Three rings of silver on red)
76Zhentil KeepPowerful city of the Zhentarim (old). (Black dragon holding a golden sphere)
77Zhentarim (old)Army led by the Manshoon and Fzoul Chembryl. (Black dragon behind golden sphere)
78DarkholdFormer giant citadel of the Zhentarim (old). (Tower on a mountain)
79Iqua'Tel'QuessirThe creator races; reptilian, avian, and amphibian rulers of Faerun 10,000+ years ago.
80AryvandaarSun elf kingdom that fell during the Fifth Crown War.
81BeselmirDwarven realm in hills of the valley of the��River Dessarin 6,000 years ago. (Wheel over a plow)
82Miyeritar��Drow empire in northwestern Faerun, destroyed 13K years ago. (Dancing drow over full moon)
83IllefarnElven city-state that was founded during the First Flowering in -22,900 DR .
84AelinthaldaarCapital of Illefarn, ancient elven civilization in northwest Faerun where Waterdeep stands now.
85EaerlannElven kingdom in the valley of the Delimbiyr River. (Green tree with golden leaves)
86AbbathorGod of greed. (Jeweled dagger, point-down)
87Clangeddin SilverbeardGod of war. (Crossed silver battleaxes)
88Deep DuerraDuergar goddess of conquest and psionics. (Mind flayer skull)
89DumathoinGod of buried secrets. (Mountain silhouette with a central gemstone)
90MoradinGod of creation. (Hammer and anvil)
91Corellon LarethianGod of art and magic. (Crescent moon)
92Sehanine MoonbowGoddess of divination. (Full moon under a moonbow)
93GruumshGod of storms and war. (Unblinking eye)
94YondallaGoddess of fertility and protection. (Cornucopia on a shield)
95EilistraeeGoddess of song and moonlight. (Dancing drow female silhouetted against the full moon)
96LolthGoddess of spiders. (Spider)
97TiamatGoddess of dragons. (Five-headed dragon)
98UthgardtBarbarian tribes of the Sword Coast.
99ReghedBarbarian tribes of the north.
100AscalhornFormer citadel of the Eaerlann elves, now known as Hellgate Keep.
New to Sly Flourish? Start here, subscribe to the weekly newsletter, or support Sly Flourish on Patreon!
Check out Mike's books including Return of the Lazy Dungeon Master, the Lazy DM's Workbook, Fantastic Adventures, and Fantastic Adventures: Ruins of the Grendleroot.
Support Sly Flourish by using these links to purchase the D&D Essentials Kit, Players Handbook, Monster Manual, Dungeon Master's Guide, or dice from Easy Roller Dice.
Send feedback to @slyflourish on Twitter or email mike@mikeshea.net.
This article is copyright 2020 by Mike Shea of Sly Flourish.


July 19, 2020
Text-based Combat Tracking for D&D on Discord
Since all of my in-person games have moved online in 2020 I've become fascinated with the best practices for playing D&D online. While there are many solutions out there, I've found that playing D&D over Discord offered the easiest setup for players and the easiest prep and play time for me as the dungeon master.
I've been running combat almost exclusively in the theater of the mind while playing online. Online programs like Roll 20 and Fantasy Grounds offer excellent virtual tabletops for online play and many groups love and swear by these tools. I find they take more work than I'm willing to put in as a lazy dungeon master. I like things simple. I'll take screen captures of Dyson maps and paste them into the text chat of Discord instead of using a virtual tabletop. This style isn't for everyone but it works well for me.
In pure theater of the mind combat it's easy for players to lose track of what's going on. Who is where? Who is next to who? How many are left? Who is grouped up? How many can I hit with grease? Can I reach them with a move action? These questions must be constantly and continually addressed by the players and the DM during theater of the mind combat. It removes agency from the players and that can be frustrating.
Abstract maps are an excellent way to handle these questions and still keep the flexibility and fluidity of theater of the mind combat. There isn't a great way to do this in my Discord-only style of online play however.
Until my wife and I came up with the following idea: text-based battle maps.
What if you could visualize combat in D&D using only text? What would that look like? How could it work? It works if we think about combat not on a 2d grid but in a one dimensional line. For a great example of one-dimensional combat, take a look at the excellent computer RPG Darkest Dungeon. Here's what combat in Darkest Dungeon looks like.

Combat is all in a line with front-line combatants and back-line combatants. We can simulate this style of combat in a simple text list that we paste into Discord's text channel so people can get a general idea where they're positioned.
We can also use Fate-style zones to identify specific locations if there are more than one in a single battle. Let's look at an example.
A Quick Example of Text-based Combat
When we write out a one-dimensional battle map in text, it looks like this:
**Eastern Doorway**
Iron Mohawk Animated Armor 12
_Sabre_
Brass Animated Armor 16
_Banner_
---
**Northern Hallway**
One-eye Gnoll 4
Purple Fur Gnoll 4
_Shane_
---
**Southern Doorway**
_Arwin_
_Zarantyr_
_Shift_
When this Markdown text is rendered in Discord, it looks like this:
Eastern Doorway
Iron Mohawk Animated Armor 12
Sabre
Brass Animated Armor 16
Banner
---
Northern Hallway
One-eye Gnoll 4
Purple Fur Gnoll 4
Shane
---
Southern Doorway
Arwin
Zarantyr
Shift
Our Markdown text lets us bold locations and italicizing characters. We separate "zones" with a "---" which represents a distance of about 20 to 30 feet or so, about a move action. Characters grouped up in a single location are considered within 5 to 10 feet of one another and can generally move around within that zone without taking an opportunity attack. Areas of effect can hit some number of creatures within a zone depending on the size and the situation.
DMs can keep this text-based battle map in a text editor outside of Discord and use it to track damage and status effects. As the battle moves on they update it and re-paste it into Discord so everyone can see the current situation.
Here's another example with a whole ton of crawling claws. We can group up a lot of monsters into a single group with a "Nx" where N is the number of monsters.
Dark Doorway
Royce
Alder
Hiccup
50x Crawling Claws
---
Charnel Pit
25x Crawling Claws
Kraul
25x Crawling Claws
We can use some simplified horde rules to run a battle like this. For example, we can assume about one in five crawling claws hit when they attack or save when hit with an area of effect.
Here's a battle in which the characters are surrounded by trolls.
Western Embankment
3x Trolls
---
Central Island
Lux
Hadrian
Odelle
Coratash
---
Eastern Embankment
3x Trolls
We can use the character positioning to determine who's in the middle of the group (Hadrian and Odelle) and who's outside waiting to face the oncoming trolls (Lux and Cratash).
Markdown Map Syntax
These one-dimensional text-based battle maps use the following Markdown-based syntax:
Player characters are italicized by wrapping them in underscores "_".
Locations are bolded with a pair of asterisks "**".
Three dashes (---) represent distance between groups or locations. Each set of dashes represents a distance of around 15 to 30 feet; generally the distance a character can move on a turn. Each additional set of dashes is another 15 to 30 feet, another move.
Creatures within one location are generally considered within 5 to 10 feet of one another. They can generally move around within the location without taking an opportunity attack but may take an opportunity attack if moving to another location.
Groups of monsters can be represented with "Nx" before their name where N is the number of monsters (example 6x Kobolds).
Damage inflicted to one monster or a group can be denoted with a number at the end of the monster's name (One-eyed gnoll 7). We can account for hordes this way by removing one monster from the group when the damage is equal to the hit points of a single monster in the group (14x skeletons 7).
Status effects can be put at the front of a creature's name like "S" for sleep, "P" for prone, or "H" for hypnotized. You don't need a full key for this, just use the first letter of the effect and people will figure it out. You can also just write out the effect like "(Sleep)" or "(Hypnotized)".
The Character Marching Order
Our simplest group representation can represent the marching order of the characters. Here's the example marching order for a group of characters.
Banner
Sabre
Shane
Xi
Shift
Zarantier
We can keep this in our text editor and paste it and pin it in Discord so everyone knows who is where while exploring. When the characters get attacked, we add monster names to the top of the list. Here our group ran into a pair of ogres.
Ogre
Ogre
Banner
Sabre
Shane
Xi
Shift
Zarantier
Understanding Groups
If the characters split up into multiple groups with distance between them, we can split up the group and note the locations of the area. Here's a single-room example where the party is all together.
Vault Gallery
Animated Armor
Animated Armor
Banner
Sabre
Shane
Xi
Shift
Zarantier
We can assume that any character directly above or below a creature is considered within 5 feet. It's likely that the second one down is also within 5 feet. Thus either animated armor can attack either Banner or Sabre but not Shane, Xi, Shift, or Zarantier. Characters can move around to offer more attacks. We can assume that creatures can move around in the list to surround their foes. If they move two slots away from an enemy, they likely take an opportunity attack. Here the animated armors have waded in to get to the middle line:
Vault Gallery
Banner
Animated Armor
Sabre
Animated Armor
Shane
Xi
Shift
Zarantier
Now the second animated armor can likely hit Xi and Shane. Perhaps the back-line characters wanted to get away from the animated armors. We can represent this with distance by separating groups with "---". We assume this represents roughly 25 feet; enough to traverse with a move.
Vault Gallery
Banner
Animated Armor
Sabre
Animated Armor
Shane
---
Xi
Shift
Zarantier
This sets up a second group of characters with distance between them and the first group. The animated armors can't get to Xi, Shift, or Zarantier without taking opportunity attacks from Banner, Sabre, and Shane.
Using Locations as "Zones"
With this style of combat representation we can separate specific locations in an area. Each location is its own "zone", a roughly 25 foot square area. Some battle areas will have multiple locations. Generally, while moving, characters can move around within a zone or move from one zone to another. We use location names to give players an in-game representation of the location of their characters. Here's an example of a situation with three zones:
Flying Discs
Gnoll
---
Aerial Docks
Gnoll
Gnoll
---
Northern Vault Doorway
Banner
Sabre
Shane
Xi
Shift
Zarantier
One gnoll is flying about 60 feet away from the northern door on a flying disc. Two other gnolls left their discs and are on the docks about 25 feet away from the northern door. The characters are all at the northern door in their marching order.
As combat moves forward, characters and creatures will move from one zone to another. Some characters will move up and engage the gnolls on the docks. The gnoll on the disc is hit with a blast that knocks him off his disc and down onto the towers of Sharn a thousand feet below. Now the battle looks like this:
Aerial Docks
Gnoll
Banner
Gnoll
Sabre
Shane
---
Northern Vault Doorway
Xi
Shift
Zarantier
As the battle moves on we edit our text version of the markdown map in a text editor and paste it back into Discord to show the current situation. Copying and pasting from our text editor to Discord is fast and easy.
We can use a series of "---"s to represent even longer distances. Let's say a gnoll sniper on a flying disc is purposefully staying away from the group:
Flying Disc
Gnoll
---
---
Aerial Docks
Gnoll
Banner
Gnoll
Sabre
Shane
---
Northern Vault Doorway
Xi
Shift
Zarantier
The gnoll on the further flying disc is 50 to 60 feet way or so in this representation. Hard to reach, particularly when flying through the air.
Player-Identified Monster Characteristics
When we first start out we can define monsters by their generic name like "shadowfey skeleton". When a character first inflicts damage to them we can ask the player to define a notable physical characteristic of that enemy to define them better within the context of the game. This is a great way to get the players into the fiction of the game and better define targets for other players. When the player identifies such a characteristic we can rename the monster in our text-based battle map and paste it into the text chat so everyone can see it. After a few rounds of combat, our map might look like this:
Aerial Docks
Manticore 14
Loop-Earring Gnoll 7
Banner
One-eyed Gnoll 11
Sabre
Shane
---
Northern Vault Doorway
Xi
Shift
Zarantier
Tracking Damage
As a DM, we already need some way to track monster damage. We can use this same text-based battle map to track damage and can let our players know how much has been inflicted. The example above shows that the loop-earring gnoll has taken 7 damage and the one-eyed gnoll has taken 11.
If we want to get fancy and run large numbers of monsters, we can group monsters together in a single line of text and track damage done to the whole group. Every time the group takes enough damage to kill a single monster, we remove one of the monsters. Here the characters are getting attacked by a horde of skeletons:
Dark Doorway
16x Skeletons 7
Royce
Alder
Hiccup
---
Charnel Pit
25x Crawling Claws
Kraul
25x Crawling Claws
Instead of rolling dice for all of these monster hordes, we can use our horde rules and assume that one-in-four of them succeeds on an attack or saving throw. If they're particularly weak, this might be one-in-five to one-in-ten instead.
Adjudicating Areas of Effect
We can use the representation of zones and groups to help adjudicate areas of effect. In this example, two gnolls are grouped up at the aerial dock:
Aerial Dock
Gnoll
Gnoll
---
Northern Doorway
Shane Husk
Xi
Shift
Zarantier
Shane Husk moves up to the aerial dock and targets the two gnolls with thunder wave, potentially sending them off the edge and into the night air above Sharn. One of them fails and is sent soaring. The other held his ground but took six damage. Now it looks like this:
Aerial Dock
Gnoll 6
Shane Husk
---
Northern Doorway
Xi
Shift
Zarantier
Hang On with a Loose Grip
This text-based battle map isn't intended to be a perfect representation of what is going on. It's a loose and general representation. Both you and your players need to hang onto this with a loose grip. Keep it flexible, use your verbal descriptions to clarify the situation, and change it as needed. Don't get too wrapped around the "rules" for this battle map. It's imperfect. Treat it thusly.
A Quick, Flexible, and Imperfect Tactical Solution
For players seeking the full tactical experience that 5e can offer with a two-dimensional grid, this isn't going to give it to them. You can mimic some level of tactics with this system. Who is within 5 feet of who, who is grouped up, who is in what location, how far away is someone; that sort of thing can be generally represented but that's not the same as seeing how many skeletons you can hit with a fireball template on a 2d grid.
The intent of this simplified text-based combat map is to help players get a general feel for the situation in a battle while running narrative theater-of-the-mind-style combat. It's meant to be fast, simple, easy, and usable in just about any text-chat (although the Markdown rendering in Discord helps). It doesn't solve every solution for representing combat but it serves well where it serves.
Try it out and see what you think.
New to Sly Flourish? Start here, subscribe to the weekly newsletter, or support Sly Flourish on Patreon!
Check out Mike's books including Return of the Lazy Dungeon Master, the Lazy DM's Workbook, Fantastic Adventures, and Fantastic Adventures: Ruins of the Grendleroot.
Support Sly Flourish by using these links to purchase the D&D Essentials Kit, Players Handbook, Monster Manual, Dungeon Master's Guide, or dice from Easy Roller Dice.
Send feedback to @slyflourish on Twitter or email mike@mikeshea.net.
This article is copyright 2020 by Mike Shea of Sly Flourish.
July 12, 2020
1d20 D&D Adventure Hooks from Movies
Few movies work as well as models for D&D games than we think. This is usually for one big reason: the movie's story depends on how the characters act and we can't count on that in D&D. Instead, the movies that work well as models for D&D games are ones built upon a situation in which the characters choose their course. I recently wrote a list of movies with situations I felt work well as the hook for a D&D adventure. Here's the list:
Raiders of the Lost Ark. Find the thing before an evil larger force finds it first.
Seven Samurai / Magnificent Seven. Defend a town from an overwhelming force.
Jaws. Hunt down a powerful beast.
The Hobbit. Rout a villain and restore a location to its rightful owner.
The Good, the Bad, and the Ugly. You and two other groups seek the same treasure.
Yojimbo. Defend a town from two different competing factions.
Oceans 11 / Inception. Break into a vault and steal something.
Apocalypse Now. Hunt down a former hero who became a cult fanatic.
Aliens. Find out what happened to a location that stopped responding.
The Thing. Uncover enemies among us.
Mad Max Fury Road. Rescue people from tyrannical villains.
Kill Bill. Hunt down a squad of master assassins.
Escape From New York. Rescue someone from a prison ruled by the inmates.
The Princess Bride. Save someone from a fixed marraige and bring them to their true love.
Saving Private Ryan. Recover a soldier behind enemy lines during a war.
Jurassic Park. Escape a park of monsters gone wild.
Star Wars / Rogue One. Acquire secret information and get it into the right hands.
Children of Men / Willow. Save a child from a world trying to destroy it.
Die Hard / Dredd. Escape from a building overtaken by villains.
The Warriors. Villains and heroes alike hunt you for a crime you didn't commit.
Inspiration
Twitter discussion of best D&D movies
22 Panels that Always Work
If you enjoyed this article please support Sly Flourish on Patreon and take a look at Return of the Lazy Dungeon Master, the Lazy DM's Workbook, and Fantastic Adventures: Ruins of the Grendleroot.
This article is copyright 2020 by Mike Shea of Sly Flourish.
July 5, 2020
Using Notion.so for Lazy D&D Campaign Planning
For the last few years, while using the steps from Return of the Lazy Dungeon Master to prepare for my game, I'd write my prep notes in a text file using markdown and saved my files to a campaign directory. This all worked well. I could pull up the notes on any device when I needed to and use them to run my game.
View and duplicate the Lazy D&D Notion Campaign Template.
A few months ago, my friend Juliet told me about a program called Notion.so. Notion is "notebook" app, a lot like Microsoft OneNote or Evernote if you're familiar with them. OneNote, in particular, is very popular with many DMs for organizing their game notes and it works quite well. This article isn't intending to convince you to switch from a system you love to Notion. Use what you dig. OneNote is a great program for a lot of DMs and if it works for you, stick with it.
Like OneNote, Notion has clients for Windows, Mac, iOS, Android, and a web-based client so you can access your notebooks anywhere. All of these clients look and feel like the others. It does, unfortunately, require that you are online to view your notes — a major drawback.
I'm not going to offer a general tutorial for Notion. If you want to learn more about how it works, you can learn more about some of the features I'm using here:
Notion Pages
Notion Views
Notion Databases
Notion Gallery Databases
I also have this Notion D&D Campaign Notebook Youtube video if you prefer a video walkthrough for using my Notion campaign notebook for D&D.
The Lazy DM's Notion Notebook Template
For this article I've created a Lazy DM's Campaign Notebook Template for Notion. To use this notebook do the following:
Ensure you're logged into Notion.so.
Right click on the top-level notebook and "duplicate".
Make any modifications to this duplicated template that you want.
Duplicate that notebook to create a notebook for your own campaign.
This way you have your own custom template you can modify and use for each of your campaigns. As you figure out improvements, you can make them to the template so your next campaign will have all of those changes.
This campaign notebook template has everything set up to jot down NPCs, villains, items, locations, characters, and session notes.
Let's break down this notebook to show you how it all works.
Breaking Down the Lazy DM Notion Notebook
Currently the lazy D&D campaign notebook has the following components:
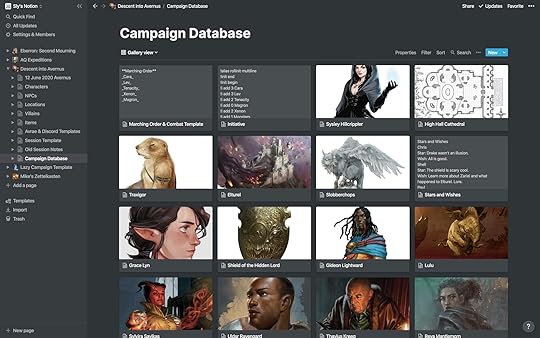
Character Database. A database that holds character information including character names, player names, trained skills, and passive scores. You can use this as a small DM screen to keep track of trained skills and passive scores to help you smooth out storytelling during the game. In the body of each character record you can put detailed information, links to other notes, and a picture of the character.
Campaign Database. This database holds just about everything else. It has cards for NPCs, items, locations, villains, and scratchpads. Each of these card types are tags you can apply to any card in the campaign database.
Session Template. This page outlines the eight steps from Return of the Lazy Dungeon Master . You'll want to duplicate this page each time you have a session and go through the steps within it. You can link to individual cards in the character or campaign database by typing "@" and then the name of the card. This pulls up a small search that lets you link to that card.
Session Zero Notes. This is a page to help you organize your session zero notes.
Characters. This page links to the character database with two views: a gallery view so you can see the portraits of each of the characters and a table view that lets you see the names, trained skills, and passive scores for each character. This way you can streamline your narrative as you call for particular characters to make trained skill checks or tell certain characters they notice things based on their passive scores.
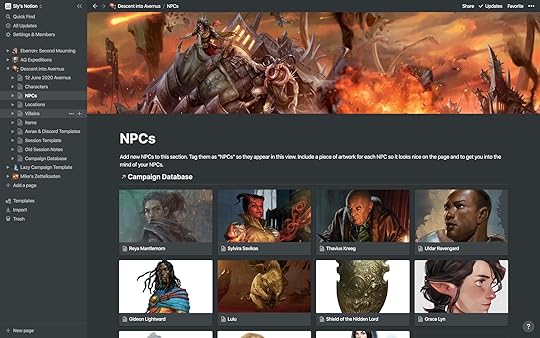
NPCs, Locations, Villains, and Items. Each of these pages is a filtered gallery view into the campaign database. This way you have a nice gallery of each of these types of cards from the campaign database.
Stars and Wishes. This is an optional dedicated database that lets you record the stars and wishes for your players. This is a great way to get feedback on what characters enjoy and what they want to see more of in your campaign. If you don't want this complexity, you can store this as notes in each character pages.
Scratchpads. This page shows a filtered gallery view of scratchpad cards in the campaign database. You can use these to write down any notes during the game, keep track of initiative, track monster damage, or write down any other temporary notes. I use it a lot for Avrae templates for online games.
Old Session Notes. This is a top-level page intended to let you drop in older session notes so you can keep them but keep them out of the way.
Creating New Notes
You can add new NPCs, villains, locations, items, scratchpads, to the campaign database or right on the filtered view pages by clicking the big plus sign. Write in your notes and add the right tag. If you don't tag it, it won't show up on the views.
You can link internally between cards or pages by typing the "@" sign and starting to type the name of the page or card you want to link. This opens up a small search window of titles. Select the right one and it links in place. This helps you link between your characters, NPCs, locations, villains, and items like a wiki would. It's very handy.
The Importance of Images
I've found it useful and enjoyable to add images to just about everything in the notebook. Every character, NPC, villain, item, or location has an image which makes the gallery views look great and also helps pull my imagination into the game.
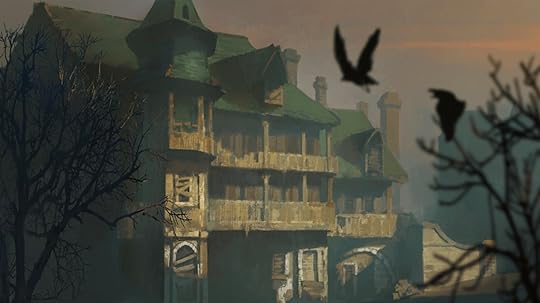
I also love adding artwork for the cover of each page to match the campaign I'm running. The default notebook uses artwork from my books but you can customize it for your own campaign. These covers help pull me into the fiction and gets my head into the game. Here's an example from my Descent into Avernus notebook.
When you build a new campaign notebook, add some evocative images to the pages, cards, and covers. You'll enjoy working with the notebook more and it gives you some great images to share with your players.
Notion's Major Drawback: No Offline Mode
Notion's major drawback is that it has no offline mode. While it has clients for just about every platform, including the web, it has no support for running offline. You can export your notes, including your entire campaign, into a variety of formats including HTML and Markdown + CSV but these don't work particularly well for offline play. It's a good way to preserve your notes into a standard format but you lose filtered views and a few other features when you export out of Notion.
Notion has had the request for offline support for a long time. The fact that they don't have it yet means it's not likely something we're going to see in the near future. This will be a game-breaker for some people and I can sympathize.
One of Many Possible Tools
I've come to love Notion as a way to keep track of my D&D campaigns. If you're looking for something, give it a look. There are many outstanding tools out there, all of them loved by many DMs. This one likely isn't for everyone and if you have one you already love, go with the gods. If you're on the look for a new one, though, give Notion a go and see how it works for you.
If you enjoyed this article please support Sly Flourish on Patreon and take a look at Return of the Lazy Dungeon Master, the Lazy DM's Workbook, and Fantastic Adventures: Ruins of the Grendleroot.
This article is copyright 2020 by Mike Shea of Sly Flourish.
June 28, 2020
Building Situations in D&D
Our D&D games can become more fluid, flexible, and easier to improvise when we DMs focus on larger situations and less on specific scenes and encounters.
At it's core, D&D can be broken down into the following steps:
The DM describes the situation.
The players describe what they want to do.
If needed, dice are rolled.
The DM describes the results.
This cycle is what makes our D&D games run. If we look at the biggest or smallest moments in 1st level adventures or 20th level campaign conclusions, it comes down to the DM describing the situation, players describing what they want to do, everyone rolling some dice, and the DM describing the results.
Many times DMs prepare static situations encounter by encounter. There's a dungeon. It has rooms. There are monsters in those rooms. The characters go room to room fighting those monsters. Many DMs break down their adventures into a series of encounters, each like a scene block, with its own introduction and conclusion built-in. Some of them are combat encounters, some exploration encounters, and some roleplay encounters. If these are combat encounters, there are a number of combatants in these rooms waiting for the characters to show up before they begin to act.
The 3rd and 4th editions of D&D focused heavily on these sort of combat encounters. In published adventures they had two-page spreads with carefully balanced battles against a number of foes in various tactical positions. Each battle became its own small board game. Lots of people loved it.
The 5th edition of D&D has largely let go of these static combat encounters. Instead, it, and many DMs who run it, step back and look at the whole situation. Instead of a series of balanced combat encounters, we might look at a whole hobgoblin fort, decide which hobgoblins are there, what their behaviors are, and how they will react depending on the actions the characters will take. In this style, gameplay is much more dynamic and heavily improvised. We don't know how many hobgoblin guards will be at the front gates because it changes depending on the time and other situations around the fort. We don't know if there are any hobgoblins guarding that old well in the back, the one connected to the ancient cistern said to be the home of an ancient and hungry beast.
Instead of having a series of carefully balanced combat encounters, we pull back and look at the whole situation. When the characters confront the situation, spying on the hobgoblin fort from a cliff overlook, we describe the situation and they decide on their plans.
We can call this style of DMing, "building situations" instead of building encounters. Will the characters sneak in through the well, bluff the guards, cause a distraction, or start lobbing fireballs from the cliff? We don't know. That's up to them. How the fort reacts to it is up to us.
We can think of this as though we're widening our aperture when looking at the world. Instead of considering our games as a series of tactical combat encounters, we're looking at the bigger picture.
Ignoring the Boundaries of Exploration, Roleplaying, and Combat
As our aperture widens and we look at the whole situation instead of a series of encounters, we can also let go of the borders between exploration, roleplay, and combat scenes. We likely want to ensure there are opportunities for all three pillars within the overall situation. Some hobgoblins might hate working at the fort and are eager to leave or have the hobgoblin captain displaced. Maybe there are some prisoners. Perhaps the whole fort sits within the ruins of an ancient Netherese castle with a nest of secret laboratories underneath. We can drop in elements of all three pillars into our situation without defining how they will come up during the game itself. We don't define each scene, we just define the situation, and we let the players choose the pillars.
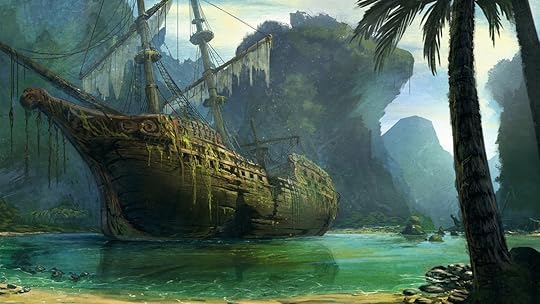
An Example: The Howling Fiend in Legacy of the Crystal Shard
In the D&D Next adventure Legacy of the Crystal Shard, our heroes have an opportunity to deal with a pirate ship from Luskan called the Howling Fiend. In our old way of designing adventures, we might set up a series of well-balanced encounters where the characters fight groups of pirates, pirate veterans, and the pirate captain along with her personal guard. We might have a scene where the characters meet with some drunken pirates who aren't happy with this whole situation in Icewind Dale and might be willing to negotiate. The characters might also explore nearby caves that the villainous wizard Vaelish Gant had used to hold his hostage—the speaker of Bryn Shander.
Instead of breaking this down by scene and encounter, we can look at the whole situation. The Howling Fiend is docked in a huge glacial overhang along Lac Dinneshere. There's a crack in the glacier overhang that leads up to the surface and a couple of pirate guards posted there who can collapse the ice above and seal off this entryway if need be. There are a bunch of ramshackle huts built on an iceflow down by the water's edge and a winding path to an overlook near the crack that leads up to the surface.
Our pirates include two dozen bandits, a bandit captain, a gladiator, and a mage. The captain and her barbarian gladiator bodyguard often oversee repairs to the ship and shipments being moved from the iceflow to the ship. At any given time there are a half dozen pirates on the iceflow, another half dozen working on the ship, another half dozen up along the overlook and the guard post, and a half dozen sleeping one off either on the ship or in the huts.
There are no defined encounters for this situation. There's only the situation. It's up to the players to choose how their characters deal with this situation. They might use stealth to sneak in and assassinate as many pirates as they can. They might negotiate their way in disguised as pirates or barbarian mercenaries. They might decide to go in with swords drawn and hope for the best. They might sneak in through the crack in the glacial wall or come in on a boat painted black.
We don't know how the players will decide to deal with this. We set up the situation and let them choose their course. When we build situations, it's far easier for us to react when the players go in an unexpected direction.
Situations as Heists
We can think of these situations as "heists". Each heist has a location, inhabitants, and an objective. We DMs set up the situation and the objectives, the players choose how their characters engage in the heist, and we DMs adjudicate the results.
Waterdeep: Dragon Heist has two such situations. Waterdeep Dragon Heist Chapter 3 has the characters infiltrate Gralhund Villa to chase down an assassin who has stole an artifact that had been intercepted before it could be given to the characters. The DM sets up the situation at the villa, the characters choose their course of action, and the DM determines the results. Later on, depending on how it plays out, the characters may infiltrate the lair of one of the main villains in Waterdeep Dragon Heist. In my own game it was Cassalanter Villa. The devil-worshipping Cassalanters have the Stone of Golorr hidden away in their hidden temple to Azmodeus while conducting a large garden party for the city's elite in their manor. The DM sets up the situation, the players choose their approach, the DM adjudicates the results. The same is true for the infiltration of the Vanthampur estate in Descent into Avernus.
These situations work well. There's a single large location, a faction of enemies at that location, and an objective for the characters to achieve. The rest plays out during the game.
Avoiding the Single Roll Failure
When we build situations like this, we have to be careful not to let a single roll completely ruin the situation or, by default, drop it right into combat. We don't want a single bad roll to ruin the whole plan the players spent an hour putting together. Things may go bad, but it shouldn't be a single bad roll that takes it there. It should come from a series of complications.
We need to keep the idea of "failing forward" always in mind. Just as no single attack roll determines the success or failure of an entire battle, no single skill roll should determine the entire outcome for a heist. Instead, a series of skill checks moves the needle one way or another or steers the path that the scene takes.
A single bad deception roll shouldn't ruin an entire negotiation with the guards in the front. Instead, it might make them more suspicious or greedy.
A single bad stealth check won't cause the entire hobgoblin fort to come down on the characters but it might start to alert one of the sentries. A second bad stealth check might make them come over to investigate but it might take three before the hobgoblin even draws a weapon in concern.
We have to remember that when we're describing a situation, players are only understanding about half of what we're talking about. They don't see it as clearly as we do. Adjudicate the results in their favor, recognizing that they don't have a full grasp of the situation, so things aren't always against them. The bad guys don't have to be fully alert. Their hearing may not be that good. They may choose to ignore or avoid confrontation instead of facing it head on.
Don't let the outcome hang on a single die roll. Instead let each roll move the story slightly more in favor or against the goals of the characters. It's hard to do but it builds wonderfully rewarding and dynamic scenes we could never have anticipated.
Likewise, if things do turn to combat, we don't have to play it that every hobgoblin in the fort comes running. Battles are chaotic. People get lost. They get scared. It's fine to run waves of combatants but give the characters a break in the story to choose their next action. Give them a chance to run or sneak around. Let the gameplay types shift as the situation evolves.
When Situations Don't Make Sense
Developing larger situations doesn't always make sense for the type of adventure we're running. In many cases, particularly dungeon crawls, it works fine if you have scenes from room to room. The dungeon of the dead three in Descent into Avernus is a good example. There's still a situation going on down there but in general, the characters are crawling room to room hunting down cultists. Traditional D&D dungeon crawls can still work well as a series of connected encounters rather than larger situations but even in these series of chambers, there's still an overall situation and the characters may still find a different way to deal with it. For every group that crawled through the caves of chaos cutting down foes, there was another that figured out how to officiate a wedding ceremony between the kobolds and the goblins.
Breaking Away From Assumptions
Building situations helps us hang on tightly to the idea that we're playing D&D to see what happens. We DMs have no idea how the story will go. All we do is set up the pieces and see how the game goes.
If you enjoyed this article please support Sly Flourish on Patreon and take a look at Return of the Lazy Dungeon Master, the Lazy DM's Workbook, and Fantastic Adventures: Ruins of the Grendleroot.
This article is copyright 2020 by Mike Shea of Sly Flourish.
June 21, 2020
Running Chapter 1 of Descent into Avernus
Note: this article contains spoilers for the hardback campaign adventure Descent into Avernus*.
If you take nothing else from this article, heed these words: the biggest improvement you can make to your Descent into Avernus game is to ensure the characters are tied to Reya Mantlemourn, the Hellriders, and Eltruel from the beginning. Do so during your session zero and all of the motivations for the rest of the campaign flow right in. Your players will never state something like "why would we be the ones to go into hell?" or "why do we have to save Elturel?". When tied to Elturel and Reya, these motivations wire them into the whole rest of the campaign.
I covered this topic in-depth in Running Descent into Avernus: the Fall of Elturel but I believe it's worth stating again because of the huge impact it has when running this campaign. You can use this one-page Avernus session zero sheet to help get the characters connected to the adventure.
In today's article we'll look at some tips for making the most out of chapter 1 of Descent into Avernus.
Ignore the Flaming Fist
As written, Descent into Avernus begins when the Flaming Fist mercenaries recruit the characters to clear out the Cult of the Dead Three. Without their leader, High Duke Ulder Ravengard, the Flaming Fists are nearly out of control. They're brutal, threatening, unforgiving, and inconsequential to the plot.
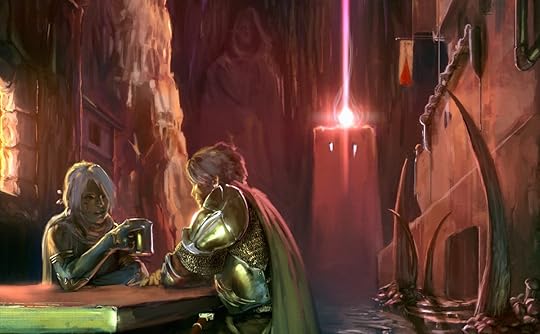
Consider skipping the entire Flaming Fist angle to this chapter and instead have Reya Mantlemorn, the young refugee captain of the Hellriders, ask the characters to hunt down the Cult of the Dead Three. Reya is currently in hiding in the Elfsong Tavern since the disappearance of Elturel.
You can begin the first chapter with the characters meeting Reya Mantlemorn at the Elfsong Tavern along with her seedy contact, Tarina, who knows the hidden location of the Cult of the Dead Three.
Reya believes the Cult of the Dead Three is responsible for the destruction of Elturel and wants revenge. She's only partially right. The cult did help the Vanthampur family dig up the Shield of the Hidden Lord and hide Thavius Kreeg who gave up Elturel to Zariel. But Eltrurel isn't destroyed and the cult wasn't directly responsible, Kreeg was.
The characters can learn of these things as they hunt down the cult underneath the bathhouse. They can learn that Duke Thalamra Vanthampur herself has hidden Kreeg and is using him to perform a ritual using the Shield of the Hidden Lord to do the same thing to Baldur's Gate, giving her full power over the city until it too descends into hell.
Lore of the Shield of the Hidden Lord
One fun story to weave into this section is the excavation of the Shield of the Hidden Lord from the Hhune crypts beneath Baldur's Gate. As the characters question NPCs and cult members, they can learn that the Vanthampur family hired the cult of the dead three to break into the cavernous tombs of the Hhune family, the family that formed the backbone of the Knights of the Hidden Lord, and recovered the shield. Baldur's Gate's crimes and murders grew exponentially when the shield was lifted from the strange sarcophagus from which it was lifted. The sarcophagus, the characters may learn, was lined with some sort of strange warm metal that burned those who touched it and prevented the entity within the shield from telepathically reaching out. Now that it is free, the shield is like a poisoned seed in Baldur's Gate.
This whole story can be given out in a series of secrets and clues the characters discover during their investigation of the cults under the bathhouse. If you wanted to extend this section, you might look at Shield of the Hidden Lord by MT Black on the DM's Guild. Personally, I recommend moving quickly through the events of Baldur's Gate so you can get to the fun meat of this adventure in Avernus. Still, the story of this ancient shield is a fun one to weave into their exploration. Here are some secrets and clues you can weave into the adventure as the characters hunt down the cult of the dead three:
The Cult of the Dead Three excavated the Shield of the Hidden Lord six months ago by the Cult of the Dead Three under orders of Thalamra Vanthampur. Since then Baldur's Gate has fallen into blood and deception.
The Knights of the Shield were supposedly an honorable order of knights but actually committed terrible atrocities under the guidance of the entity within the shield.
The shield gave the knights information about future tyrants and threats years before they came into power. The knights would murder children and destroy villages because the shield told them they were preventing much greater evils.
The shield had been entombed with the last of the line of Hhune in a sarcophagus lined with a metal that burned when touched. Such metal prevents telepathic invasion.
Thalamra Vanthampur gave the shield to Thavius Kreeg and both are sequestered away in Vanthampur's vaults beneath her manor.
These secrets are enough to keep the story moving towards the Vanthampur villa.
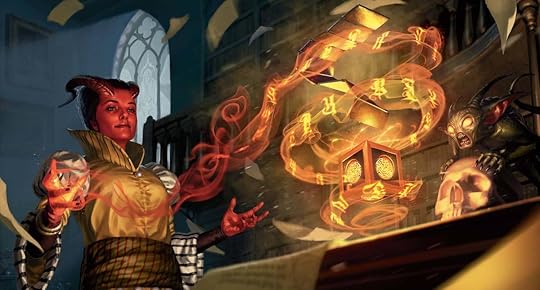
The Shield, the Puzzlebox, and Kreeg
Once the cult of the dead three has been dealt with, the characters should have three main leads to follow, all of which point towards Vanthampur villa. They should learn that Thavius Kreeg, the engineer of the fall of Eltruel, is sequestered away underneath Vanthampur villa along with a strange puzzlebox he brought with him and the Shield of the Hidden Lord excavated from the Hhune crypt beneath Baldur's Gate.
With Reya Mantlemourn as their primary quest giver, the young Hellrider will send the characters to the villa with the intent to kill Kreeg (whom she believes betrayed and destroyed Elturel), acquiring this strange puzzlebox, and recovering the Shield of the Hidden Lord to remove it from Baldur's Gate. She tells the characters that she has a friend in Candlekeep, a sage of the occult, who can tell them more of the shield and the puzzlebox once they acquire it.
Laying out this primary quest so clearly helps move the whole story forward to chapter 2 but still gives the players some agency by deciding how they want to infiltrate Vanthampur Villa.
Skipping the Low Lantern and other Side Treks
If you want to move the story forward, you can skip the section on the Low Lantern and any other side treks in Baldur's Gate. If, however, you enjoyed spending time in Baldur's Gate, there are ways to extend it as well such as the Baldur's Gate: City Encounters supplement by Justice Arman, Anthony Joyce, Anne Gregersen, and Gordon McAlpin.
Otherwise we can skip a lot of what's going on in the rest of Baldur's Gate and head straight to Vanthampur Villa.
Vanthampur Villa
Running infiltrations of villas is a great way to enjoy the bounded sandbox playstyle of D&D. The motivations are clear: find Kreeg, find the Shield of the Hidden Lord, and find Kreeg's puzzlebox. If they saved Mortlock Vanthampur in the dungeon of the Dead Three, the estranged son of the Vanthampurs can give the characters a map of the upper villa to help them plan their caper. How the characters go about infiltrating the villa and accomplishing these goals is up to them.
Good manor heists are awesome to run. We DMs don't know what's going to happen. We set up the situation and help the characters accomplish their goals. Manor staff walk in at just the wrong time. Brothers betray brothers. All sorts of fun things can happen.
The characters will end up in the sewers and chambers below the villa and face Kreeg, Thalamra Vanthampur, or both. It's imperative that the characters deal with Kreeg, get the shield, and get the puzzlebox. If the characters aren't headed to the right place, move the maguffins.
To Candlekeep and Hell
With the puzzlebox and shield in hand, the characters and Reya Mantlemorn make their way to Candlekeep. If you want to expand Candlekeep, even if in just your description, check out the excellent Elminister's Candlekeep Companion, a supplement by Anthony Joyce, Justice Arman, Ed Greenwood, M.T. Black, Jeremy Forbing, Trevor Armstrong, and Laura Hirsbrunner. This book gives an excellent history of Candlekeep, describes locations, offers adventure ideas, and even includes a director's cut of Descent into Avernus worth checking out.
If your goal is to get the characters into chapter 2 quickly, you need not worry about filling it out too much but Candlekeep is a truly unique location in the Forgotten Realms and worth the time to describe to your players.
Sylvira's opening of the puzzlebox can be a bit passive when it comes to the characters. From the time they leave Baldur's Gate to the time they show up in Elturel in Avernus, the players don't really have many choices or many actions to take. One way to give them something to do is to have some demonic ichor drip from the cube and cause spined devils to burst fourth and attack while the cube is opening. They demand Kreeg and, when they do not get him, they attack.
Before they leave Candlekeep, it's likely time for a quick shopping expedition. Give the characters the opportunity to explore Candlekeep, look up lore, and shop for whatever they think they'll need in Avernus. Scented soaps, clean handkerchiefs, chocolate, fine wine; things people in Avernus are going to love.
Convincing the wonderfully strange Traxigor to teleport them into Avernus could also be a fun roleplay scene, even if the foregone conclusion is that he does it. Once he teleports the characters to Elturel and Avernus, he teleports right back out again.
Introducing Gargauth
One big question to consider is how to introduce the true voice in the Shield of the Hidden Lord, the demon lord / demigod Gargauth. You could have Sylvira herself note the fiendish nature of the shield or you could let this burn out slowly, giving the characters useful information and useful help enough so that they continue to stay with the shield. A fiendish nature to the shield can offer some foreshadowing though. Once they learn the true nature of the shield is the time when it should become indispensable to them. That's one of the first times the characters have to make bad choices for a greater good and it won't be the last.
If you enjoyed this article please support Sly Flourish on Patreon and take a look at Return of the Lazy Dungeon Master, the Lazy DM's Workbook, and Fantastic Adventures: Ruins of the Grendleroot.
This article is copyright 2020 by Mike Shea of Sly Flourish.
June 14, 2020
West Marches Campaigns in Grendleroot
A west marches campaign is a particular style of RPG campaign, easily transported to D&D, that has some of the following criteria:
There's no regular scheduled time.
There's no fixed group of players; players can drop in and out each session.
The players determine the direction of the game.
The DM sets out potential challenges and the players choose which ones to follow.
There's no overarching storyline; the game is about exploration, discovery, and treasure.
These characteristics are, of course, argued about on the internet but those are the ones I took from it based on this excellent StackExchange thread on West Marches style games. This article isn't going to delve into the criteria of scheduling that makes West Marches style games so unique and instead the types of adventures a DM would put together when running Grendleroot games that focus more on open discovery instead of an overarching story.
This style of game fits perfectly with Deepdelver's Enclave and Blackclaw Mountain in Fantastic Adventures: Ruins of the Grendleroot. In this article we'll look at how to change up Ruins of the Grendleroot to fit a more open player-driven exploration game instead of the more situation and hook-driven style of the adventures as written.
Deepdelver's Enclave—Your Adventure Hub
The adventures and locations in Ruins of the Grendleroot center around a hub of exploration called Deepdelver's Enclave. This outpost sits on the edge of the ruins of dozens of civilizations and hundreds of monstrous dwellings. The people of Deepdelver's Enclave are varied and yet all hold the thrill of adventure and exploration deep in their hearts.
Deepdelver's Enclave fits perfectly in a loose campaign of exploration and discovery. Characters can receive information about new areas to discover from many in the Enclave, even rival exploration groups they may want to outwit. Baelon the Beardless, the unofficial town elder of Deepdelver's Enclave may invite them to join his adventuring guild and learn of new places to discover from the guild and its fellow members. For an even simpler beginning we can steal the quest driver from Dragon of Icespire Peak and have a simple quest board outside of the Dragon's Fangs, Baelon's common house for adventurers.
Each location in Deepdelver's Enclave includes a small story hook that the characters can discover and explore beyond the major adventure quests in the book.
Deepdelver's Enclave is a perfect central hub for a West Marches style campaign.
Removing the Hooks from the Main Adventures
Each adventure in Ruins of the Grendleroot has a strong start; an event that drives the characters into the rest of the adventure. This is intended to help the DM dive right into the adventure and get the characters thrown into the action and on their way. These strong starts do not fit a West Marches style game particularly well. There's little choice once the strong start begins as to which direction the characters will take. The obvious choice is to follow the lead.
In our West Marches style game we'll remove these strong starts and, instead, set each adventure out as an optional area for exploration. We'll pull out the urgency of each adventure and replace it with a seed of discovery; an item the characters can acquire, information they can learn, problems they can solve.
Removing the urgency doesn't mean we have to change the storylines. We might drop a quest that a mysterious priest has gone missing in the Forest of Iron and his apprentice seeks his safe return. When they find him, they discover that he is trying to destroy the Grendleroot and must decide whether to capture him or put him down.
Other times we may want to remove the urgency completely from a location. Instead of the White Queen saving the mountain from the destruction of the Grendleroot, the characters might find a quest to receive a bit of valuable information or historical lore from the vampiric queen near Redstone. This lore may be a powerful spell scroll or a piece of history but if the characters never acquire it, that's perfectly fine.

Converting the Adventures into West Marches Quests
Here's a list of quests you can drop in front of your players that convert the adventure seeds in Ruins of the Grendleroot into quests from which the players can choose. It also includes some DM notes to show you how to change the adventure to fit the more passive exploration style of a West Marches style game. These quests are designed to remove the urgency from the location and focus more on open exploration of locations instead of solving problems.
Quest: Restore Starsong Tower. The orb above Starsong Tower has begun filling the minds of the people of Deepdelver's Enclave with nightmares. Enter the tower and restore the light that once flowed from the orb above.
DM Notes. This adventure can be run as-written. It already avoids the urgency found in some of the other adventures. This makes for a good introductory adventure for 1st level characters and you may want to make this the first quest they can complete before expanding out into other quests.
Quest: Explore the Temple of the Forgotten God. A series of tunnels has recently opened exposing a temple to gods long forgotten. Explore these tunnels and acquire the artifacts and knowledge of elven religions long dead.
DM Notes. We can remove the Sophie Wyndrunner hook of this adventure and simply let the characters explore the temple. They may find rivals or enemies among the cultists who have already entered the lost chambers. The characters may still face the dying god and can choose to become disciples or let the god's power die.
Quest: Explore Violet Falls. The lost gnomish city of Violet Falls has been discovered! Travel into the surrounding tunnels, find a way in, and explore the wonders of the gnomes of Violet Falls.
DM Notes. We can remove the attack from the gnome zombies at the start of this adventure or move them to an encounter along the journey when the players decide to take on this undertaking. We can leave Gemtooth and his delusions of grandeur in place if we wish or make him a simple powerful villain who leads the undead of Violet Falls.
Quest: Fistful of Copper? Two local bands of orcs and hobgoblins have been causing trouble for Deepdelver's Enclave. Find a way to get rid of these groups or stop them from harassing our explorers.
DM Notes. We remove the omnipresent threat of the orcs and hobgoblins from this adventure and thus give our players the choice of ignoring the threat completely. The orcs and hobgoblins aren't going to attack Deepdelver's Enclave so we can remove that entire side of the adventure. The characters can still work one group against the other or simply wipe them both out but imminent attack isn't an issue.
Quest: Find the Lost Priest. A blind priest of light named Ardus Fane has gone missing in the Forest of Iron. Please return the beloved priest to his apprentice, Cava Suntouched.
DM Notes. For this adventure we can remove the immediate threat that Fane will blow up the mountain. He may actually be trying to do so when the characters confront him in the Forest of Iron but we can remove the immediate threat so players don't feel like they're forced to deal with it.
Quest: Explore the Sunken Temple of the Aboleths. Deep delvers have found a sunken temple once belonging to the aboleths! Explore this vast temple and return with tales of the mysteries you find within.
DM Notes. We can remove the whole mind-bending strong start of this adventure and simply let the characters know that the place has been discovered. People may go missing down there and Abrim Hesh may still be operating there along with the grimlocks. The overall threat to Deepdelver's removed the players are free to explore the location or not.
Quest: Explore the Cell of the White Sun. Explorers have located a strange vault to the Order of the White Sun deep in the mountain. Rumors speak of a powerful sun sword once belonging to a legendary White Sun knight still held within the cell.
DM Notes. This can be a fun treasure hunt with the twist that the being trapped by the knight in question is still inside. We can keep Dalmus Spiritheart and the Blades of Dawn in the adventure, with the characters discovering them at the site and maybe learning a little bit about them in town before they go. The urgency of the strong start can be removed and the rest can stay much the same.
Quest: Learn the lost lore held by the White Queen. A being of great and terrible power sleeps in a vault near Redstone Village. Someone able to treat with this being could learn magic and lore lost for centuries.
DM Notes. The threat of the Grendleroot needs to be removed from this adventure to make it more laid-back for a West Marches style quest. The whole main motivation for this adventure can be replaced with spells for any wizards in your party, a powerful magic item, or valuable lore. The motivation needs to be strong enough that the characters are willing to face a vampire to complete their quest.
Quest: Explore the Den of Bones. Deep in the Den of Bones, a lair where the monsters of the mountain travel to die, lies a pool of green liquid. This liquid is very dangerous but fetches a great price for the right buyer. Travel to the den and acquire a bottle of this liquid and your future is set!
DM Notes. For this version of the adventure we remove the entire storyline of Ruth Willowmane's hunters. We might keep the assassins in the adventure, however, as rivals who seek the poison of the worm for their own murderous use. The characters may learn that the assassins are heading to the liquid themselves and follow the same tower-defense style game once they arrive at the Den of Bones. The urgency to get there, however, is removed when the assassins' motivation to kill Ruth is removed.
Quest: Delve into the Black Cathedral. We have found it! Hidden in chambers deep within the mountain is the Black Cathedral, the alien fortress built to contain the mysterious Grendleroot. Travel to the cathedral and be the first to lay eyes on the mysterious Grendleroot.
DM Notes. In this modification we remove Alvana's murderous rampage and let the characters choose if they want to find the Grendleroot themselves. We might keep Alvana in the adventure as a rival explorer or villain who still plans to use the Grendleroot for evil but such an event doesn't come into the story until the characters arrive at the location and discover her dark deeds.
Additional Locations in Blackclaw Mountain
Beyond the adventures above, Ruins of the Grendleroot has numerous other locations you can expand into full-fledged adventures. Appendix C, the Rise of the Black Star, includes locations for high-level adventures and, at the end of the appendix, are twelve additional adventure locations perfect for filling out into a full adventure. In a West Marches style game you can drop in these location seeds into whatever vehicle you use to let the players know about other locations. Jobs on a quest board, rumors at the local tavern, or old journals or maps found in other explored locations are great ways to drop these potential locations in front of the players.
Building Your Own Grendleroot Adventures
If you're seeking more potential adventure locations for a West Marches style Grendleroot campaign, you can use the following tips and tools to quickly build further locations to explore. Each location likely needs the following criteria:
An evocative location.
A motivation to go there.
A map of the location.
Monsters and denizens who inhabit the location.
An optional boss.
Potential NPC with which to interact.
Ten secrets and clues to discover in the location.
An optional complication.
A treasure or reward.
You'll notice that many of these steps follow the steps from Return of the Lazy Dungeon Master. There are some exceptions. In particular, we aren't worried about a strong start here because such adventures are driven from the players' desires to travel there more than some event that pushes them there. Likewise outlining potential scenes isn't important because such scenes happen as the characters explore. Secrets and clues, monsters, NPCs, locations, and treasure all have as much value when building these adventures as they do for any adventure we run in D&D.
Here are the steps we might take when building a West Marches style Grendleroot adventure location.
Generate locations. Locations can be generated from two lists: an origin (who created the location) and a structure type (what was it physically built to do). You can use the tables in appendix B in Ruins of the Grendleroot, the random monuments tables in the Lazy DM's Workbook, or the dungeon tables in chapter 5 of the Dungeon Master's Guide to generate ideas for adventure and dungeon locations. Mix in the origin table for relics from either appendix B of Ruins of the Gendleroot or the Lazy DM's Workbook to wrap the location in an origin such as elvish, infernal, or undead.
Develop motivations. Motivations for adventures in West Marches are generally looser and less urgent than you'd have for a more story-focused game. In general, any motivation you create should be interesting enough to get a player's attention but not so critical that they can't pass on it. Here are ten example motivations you can use or modify to suit your adventure.
The location has a valuable treasure.
The location has some valuable lore.
Someone or something went missing at this location.
Monsters at this location have become dangerous to the region.
Local miners, explorers, or historians want to get into the location but cannot due to the danger there.
A powerful boss monster uses this location as their lair.
This location houses a gateway that should be closed.
An NPC wants to visit this location.
Something must be returned to the location.
A dangerous artifact must be acquired before it falls into the wrong hands.
Choose maps. Good locations need great maps. I'm a huge fan of Dyson Logos maps and suggest poking through his nearly 900 maps to find ones for your locations. Here are ten potential maps that work well for various locations:
Church of the Oracles in Onyx
The Lost Temple of Aphosh the Haunted
Pits of the Fallen Legion
Vault of Skushuut, the Baleblight Ravager
Bloodied Axe Shrine
Royal Catacombs of Adrih
Shrine of the Emperor of Bones
Hall of the Patrons
Red Talon's Lair
Oubliette of the Forgotten Magus
Choose monsters. There are numerous ways to choose monsters for any given adventure. Though designed for on-the-road encounters, the random encounter list in appendix B of Ruins of the Grendleroot may help you choose monsters to populate a location. You can also use the random dungeon monster tables in the Lazy DM's Workbook or the random underdark encounters from Xanathar's Guide to Everything to randomly select some monsters. You can also use the list below to choose a monster type and then fill in the details with specific monsters based on that theme:
Aberration
Beast
Celestial
Construct
Dragon
Elemental
Fey
Fiend
Giant
Humans
Elves
Dwarves
Goblinoid
Orc
Gith
Gnoll
Kobold
Monstrosity
Ooze
Undead
Select an optional boss. Your location may have an optional boss. This could be a more powerful member of a particular group of monsters or it might be a more powerful type of monster. You can use the same tables to randomly select monsters and see what inspires you if you can't easily think one up.
Add one or more NPCs. Good adventures include options for all three pillars of play: exploration, roleplaying, and combat. The locations we've built so far have good options for exploration and combat but not so much for NPC interaction. We can fix this by dropping in one or two NPCs intended more likely to be talked to than killed. Some monster groups have this built-in but in other cases we'll want to add in some NPCs. For a quick NPC, consider rolling on the Donjon NPC generator and adding them to your adventure list. Maybe they're a prisoner, maybe they're a rival, maybe they're a spy for another group. You choose how this NPC came to the location and let your players choose how to interact with them.
Consider your secrets and clues. Secrets and lore can be their own rewards in such games of exploration. Once you have an idea what your location is about and who is there you can jot down ten secrets that the characters might uncover while exploring the location. This might be further locations the characters might travel to. It might be pieces of a scavenger hunt to a powerful magic item. It might be ancient lore about the location and how it fits into the world.
Add an optional complication. Some adventures benefit from having an added complication to shake things up. You certainly don't need a complication but if any of the ideas in the following list spice things up, you may consider them. Here's a list of potential complications:
A rival adventuring group has come here.
Another monstrous band is battling the first.
The caves are soon to quake and swallow up the location.
A terrible power grows here and threatens to overtake the location.
A thief has made off with something of great value here.
The whole location is not what it seems.
A gateway or huge beast is slowly devouring the location.
The location is filled with pockets of wild magic.
Add treasure or a reward. All good locations need treasure. You may even want to telegraph this treasure to the characters (and the players) before they bother to head out to the location. The treasure itself can be the primary motivation to go to a location in the first place and this might make the strongest adventure of all. A magical sword is said to rest in the tomb of an evil dead king. That's all the adventure most characters need. Grab a map, some skeletons, specters, and a wight, and you're off to the races.
To choose treasure, you can roll on the treasure tables in the Dungeon Master's Guide. Tables F, G, H, and I all have powerful magic items that are sure to grab the attention of your players. You can also use the magic item and relic generation tables in the Lazy DM's Workbook to add more treasure. To roll up treasure quickly, consider the Donjon treasure generator.
Limitless Adventure in Blackclaw Mountain
Running a player-driven campaign fits perfectly well with the atmosphere of high adventure and exploration of Ruins of the Grendleroot. Blackclaw Mountain was designed to be a nearly infinite realm of chambers, tunnels, ruins, and caverns filled with ancient mystery and tales of high fantasy. Even in a story-driven campaign offering up alternative paths for such exploration can expand your campaign in new directions and give your players greater control over the types of adventures they want to have. Hopefully this article gave you the tools and inspiration you need to run your own open-ended adventures in the depths of Blackclaw Mountain.
If you enjoyed this article please support Sly Flourish on Patreon and take a look at Return of the Lazy Dungeon Master, the Lazy DM's Workbook, and Fantastic Adventures: Ruins of the Grendleroot.
This article is copyright 2020 by Mike Shea of Sly Flourish.
June 7, 2020
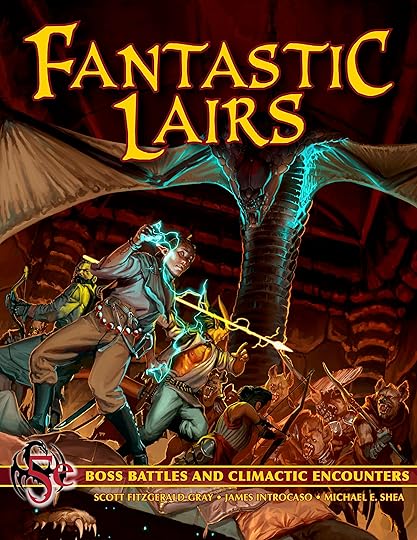
Fantastic Lairs Kickstarter is Live!
Boss battles are hard. That's the first four words in Fantastic Lairs: Boss battles and Villainous Encounters for 5e. While we can build solid tools to improvise a lot of our D&D games as the stories of those games evolve at the table, building good boss battles takes time and effort. Fantastic Lairs is designed to help with that heavy lift.
Heard enough? Back Fantastic Lairs on Kickstarter right now!
Scott Fitzgerald Gray, James Introcaso, and I partnered up to make this book. Scott Gray and I have worked together now for years. Scott has been editing official D&D works since the 3rd edition of D&D with hundreds of credits including editing the three core books for D&D 5e and writing credits on Acquisitions Incorporated. Scott edited all of my recent books including Fantastic Locations, Fantastic Adventures, Return of the Lazy Dungeon Master, The Lazy DM's Workbook, and Fantastic Adventures: Ruins of the Grendleroot.
James Introcaso has been a freelance writer for many RPG companies and has writing credits on nearly all of the recent hardcover books from Wizards of the Coast including Waterdeep: Dragon Heist, Dungeon of the Mad Mage, Ghosts of Saltmarsh, Descent into Avernus, Eberron: Rising from the Last War, and Explorer's Guide to Wildemount. Needless to say I couldn't be happier with the company on this project and already we've greatly enjoyed working together on this book and the book will be that much better for the partnership.
Fantastic Lairs will have between ten and twenty lairs, each with a well-tuned boss monster, designed so you can drop them right into your own campaign. If we meet all of our stretch goals you'll have lairs for all tiers of play from the 1st level shadow-touched cockatrice to the 20th level demon-touched ancient gold dragon. Every lair will have beautiful artwork and a full-color map ready to drop into your VTT of choice.
If you like the work I do here on Sly Flourish and have enjoyed my previous books, you won't want to miss backing Fantastic Lairs and helping to make it the best book we can make.
If you enjoyed this article please support Sly Flourish on Patreon and take a look at Return of the Lazy Dungeon Master, the Lazy DM's Workbook, and Fantastic Adventures: Ruins of the Grendleroot.
This article is copyright 2020 by Mike Shea of Sly Flourish.
May 31, 2020
1d100 Eberron Factions
Below is a list of 1d100 Eberron factions. Use these factions in combination with other random lists of monuments, relics, items, locations, or any other useful random lists to generate Eberron-specific details you might never have otherwise considered. You can copy elements of the list below to build your own more specific random lists or download a PDF of these 1d100 Eberron factions and print it out for your own DM Kit.
d100FactionDescription (Symbol)
1AerenalAncient kingdom of the elves. (Golden skull with blue glowing eyes)
2ArawaiSovereign of Life and Love. (Sheaf of bound wheat)
3ArgonnessenContinent of the civilization of dragons.
4AundairNation of arcane might. (Feathers surrounding a griffin on blue)
5AureonSorverign of law and knowledge. (Open book)
6Avassh, the Twister of RootsDaelkyr of unnatural and deadly vegitation.
7BalinorSoverign of beasts and the hunt. (Green antlers)
8Belashyrra, Lord of EyesDaelkyr of all-seeing.
9Blood of VolFaith of immortality. (Fanged skull surrounding a drop of blood)
10BoldreiSoverign of community and home. (Fire in a stone hearth)
11Boromar ClanPowerful criminal organization of halflings.
12BrelandNation of pragmatism and independence. (Two gold dragons flanking a bear's roaring head)
13Clifftop Adventurer's Guild150 year old adventurer's guild.
14Cul'SirArcane titan of Xen'drik.
15Cult of the Dragon BelowFaith of madness. (Grotseque mass of tentacles)
16CyreFallen nation of wealth and royalty. (Crown over a bell on a green shield)
17DaaskMonsterous criminal guild loyal to Droaam.
18DaelkyrThe unfathomable evil of Khyber.
19DarguunLand of goblins.
20Demon WastesFormer seat of the archfiends and home of the Carrion Tribes.
21DhakaanFallen empire of the goblinoids. (Wheel of blades)
22Dol ArrahSoverign of sunlight. (Rising sun over a blue field)
23Dol DornSoverign of strength of arms. (Longsword crossed over a shield)
24Draconic ProphecyEver-evolving prophecy of the dragons.
25DragonbornChildren of Argonessen.
26Dreaming DarkAgency of the Dal Quor Quori to control the nations of the world.
27DroaamNation of monsters led by the Daughters of Sora Kell.
28Dyrrn, the Stealer of ThoughtsDaelkyr of corruption and the slithering lord.
29Eberron (dragon)Progenitor dragon of the world.
30Eldeen ReachesNation of farmland and vast untaimed forests.
31Finder's GuildLoose collection of independent inquisitive agencies tied to house Tharashk.
32GalifarFallen kingdom of Khorvaire. (Gold crown bearing five jewels on green field)
33Ghaal���dar tribesHobgoblin tribes rising from the remnants of the Dhakaani Empire.
34Heirs of DhakaanGoblinoid lineage back to Dhakaan.
35House CannithDragonmarked house of making and manufacturing. (Bull's head beneath a hammer and anvil)
36House DeneithDragonmarked house of sentinels, bodyguards, mercenaries. (The three heads of a chimera: lion, ram, and green dragon)
37House GhallandaDragonmarked house of hospitality. (Wolf's head with human eyes)
38House JorascoDragonmarked house of healing. (Noble griffin within a laruel wreath)
39House KundarakDragonmarked house of warding. (Yellow manticore wreathed in flame)
40House LyrandarDragonmarked house of storm. (Three writing tentacles wracked by lightning)
41House MedaniDragonmarked house of finding. (Basilisk atop a pile of treasure, surrounded by tentacled eyestalks)
42House OrienDragonmarked house of passage and transportation. (Silver unicorn with a golden horn)
43House PhiarlanDragonmarked house of entertainment and espionage. (Five headed hyrda beneath a oak leaf)
44House SivisDragonmarked house of scribing and communication. (Cockatrice beneath a candle)
45House TarkananHouse of aberrent dragonmarks. (Beholder over a red shield)
46House TharashkDragonmarked house of finding, hunting, investigation. (Golden dragon surrounded by thorns)
47House ThuranniDragonmarked house of entertainment and assassination. (Displacer beast with steel claws)
48House VadalisDragonmarked house of animal handling. (Hippogryph beneath an elm tree)
49KalashtarJoint people of humanity and spirits of dreams.
50KarrnathNation of hardship and military tradition. (A red wolf on black)
51KhoravarCulture of Khorvaire's half-elves.
52Khyber (dragon below)Progenitor dragon, slayer of Siberys. (Black dragon skull formed of tentacles)
53Khyber (place)Underworld demiplanes.
54King's Dark LanternsSpies and assassins of Breland.
55Kol KorranSoverign of trade and travel. (Nine-sided gold coin)
56Kyrzin, the Prince of SlimeDaelkyr of gibbering beasts and sentient slimes.
57Lord of BladesWarlord establishing independence for Warforged and slaughter for the rest. (Bladed gauntlet)
58Lords of DustFiends born in the beginning of time with a dream of restoring their primordial dominion. (Fanged crown atop a skull crumbling to dust)
59MarguulInfamous bugbear raiders of the Seawall Mountains.
60Morgrave UniversitySharn university of lore and wisdom.
61Mror HoldsLoose confederation of dwarven clans.
62OlladraSoverign of good fortune. (Domino)
63OnatarSoverign of artifice and the forge. (Crossed hammer and tongs)
64Order of the Emerald ClawNecromatic warriors and spies cast out from Karrnath in service to Lady Illmarrow. (green flame-styled claw)
65Orlassk, the Master of StoneDaelkyr of petrifying beasts.
66Prince OargevLeader of New Cyre. (Crown over a bell on a green shield)
67Q'barraUntaimed nation of danger and opportunity.
68Redcloak BatallionElite unit of Brelish warriors. (Two gold dragons flanking a bear's roaring head)
69SarlonaContinent of the Inspired; spirits and psionists. (Crystal on a yellow oval)
70Shadow MarchesDesolate land of swamps and moores, homeland of the orcs.
71ShiftersThe weretouched.
72SiberysProgenitor dragon, killed by Khyber, ring of shards surrounding Eberron.
73Sora KellFounding hag leader of the Droaam.
74Sulatar DrowShapers of the elements dating back to the Age of Giants.
75Tairnadal ElvesElves dedicated to the art of war. (Cross glaives over a red arrowhead)
76Talentra PlainsSpiritual plains of halflings and dinosaurs.
77The AurumExclusive society of the rich and influential. (Crown surrounded by a linked chain on gold)
78The DevourerDark six diety of nature's wrath. (Bundle of five sharpened bones)
79The FuryDark six diety of passion and revenge. (Winged wyrm with woman���s head and upper body)
80The GatekeepersDruidic orcs protecting Eberron from aberrations.
81The KeeperDark six diety of death and greed. (Dragonshard stone in the shape of a fang)
82The MockeryDark six diety of betrayal and bloodshed. (Five blood-spattered tools)
83The OverlordsRuling fiends of Eberron in the first days of the world bound by the Silver Flame.
84The Path of LightFaith of light and self-improvement. (Cracked white crystal)
85The ShadowDark six diety of ambition and dark magic. (Obsidian tower)
86The Silver FlameFaith of good and protection. (Flame on a silver arrowhead)
87The Spirits of the PastSpiritual anchors of the greatest champions of the Tairnadal elves.
88The TravelerDark six diety of change and chaos. (Four crossed, rune-inscribed bones)
89The TyrantsCriminal organization of grifters and con-artists.
90The Undying CourtFaith of elven ancestors. (Golden death mask with sapphire eyes)
91ThelanisPlane of the faerie court.
92ThraneNation of faith in the silver flame. (Flame on a silver arrowhead)
93Umbragen DrowDeepdelving magefueled drow who battle the daelkyr.
94Valaara, the Crawling QueenDaelkyr of insects and arachnids.
95ValenarElven nation steeped in the art of war. (Cross glaives over a red arrowhead)
96Vulkoori DrowGiant hunters of the scorpion god Vulkoor.
97WarforgedRace of constructs. (Mechanical hand clutching a smith's hammer)
98WynarnRoyal bloodline of the Galafar empire.
99Xen'drikJungle continent of the fallen arcane giants.
100XoriatThe realm of madness. (Fleshy ball of gnashing, monstrous teeth)
The Creative Advantage of Random Lists
Random lists help push our creative minds in new and interesting directions. The Lazy DM's Workbook is full of random lists for this reason and products Waterdeep: City Enounters showcase their value as well. Random lists and a creative brain together are a D&D superweapon. We don't use random lists on their own, we use these lists to push our brains out of a groove and explore ideas we never before considered.
As we run a campaign in a particular world, it helps bring the players into the world when we wrap pieces of our adventures in lore so our players can learn about the world as they explore it.
Random tables for monuments, items, and villages in the Lazy DM's Workbook don't have any particular world's flavor or lore to them. We have to add that. If, however, we're playing in a world like Ebrron, we can use a list like the one above so we can combine our other random tables with world-specific lore.
Use this list along with your other random lists to make the world come alive.
If you enjoyed this article please support Sly Flourish on Patreon and take a look at Return of the Lazy Dungeon Master, the Lazy DM's Workbook, and Fantastic Adventures: Ruins of the Grendleroot.
This article is copyright 2020 by Mike Shea of Sly Flourish.
May 25, 2020
Running Hordes: The Lazy Way to Run Lots of D&D Monsters
The heroes stand atop a mountain of bones with one hundred skeletons swarming in. The cleric holds her holy symbol aloft and waves of radiant energy tear through the skeletons, shattering dozens of the creatures before the rest roar in.
Our heroes stand atop the ruins of an elven watchtower, blades and spells ready as forty orcs charge in. The stout warrior cleaves into them, slicing off four heads in two vicious cuts.
Our heroes stand atop a cliff of ice, a thousand foot drop behind them and twenty five wights in front, their eyes blazing blue and their black blades ready.
These are the tales of high adventure we know and love. We all remember Aragorn standing alone atop the ruined tower facing a horde of urukai in Lord of the Rings. We all remember John Wick facing off against a whole club of eastern European thugs. And we all remember the seven samurai facing off against fifty town-ravaging bandits.
The mechanics of D&D combat generally presumes the characters will face somewhere between three and twelve bad guys in any given battle. This is why characters have a huge advantage against a single opponent.
Our stories need not be limited by these mechanics. We can, with a little work, run any number of monsters against the characters. Ten? Twenty? Two hundred? Ten thousand?
There are many imperfect ways to run huge hordes of monsters in D&D—situations in which the characters face twenty or more monsters in a single battle. They all require some level of abstraction from our standard combat rules. Some are simpler than others. Some use tables, others you can do in your head. You may have your own preference while other DMs have theirs.
In this article we focus on one particular method for running hordes. I selected this one for a few reasons:
You can do the math mostly in your head.
It doesn't take much more time than running smaller numbers of monsters.
It scales to any number of monsters we can imagine.
It still treats members of a horde as separate monsters when it matters to the players.
It focuses on the fiction of the situation instead of getting bogged down in mechanics.
Summary Guidelines for Running Hordes
Here's a summary of my preferred techniques for running hordes. It breaks down into three large parts: tracking the damage done to the horde, tracking the horde's attacks and damage, and adjudicating areas of effect.
Tracking Damage Done to the Horde
Track damage inflicted to the horde instead of individual monsters in a single damage tally.
Write down the hit points of a single monster in the horde to keep track of it. Round it to the nearest 5 or 10 to make the math easier.
When the damage tally takes enough to kill one or more monsters in the horde, remove those monsters, reset the tally to zero, and carry over extra damage.
Tracking Horde Attacks and Damage Output
Determine how many monsters in the horde attack a given character based on the circumstances of the battle. When in doubt, divide attacks equally among those characters the horde can reasonably attack.
When the horde attacks, assume one in four attacks succeed. If the horde has advantage, assume half succeed. If they have disadvantage, assume they all fail. Adjust this up or down depending on circumstances. If someone casts shield or has a crazy high AC, remove a couple of successful attacks.
Adjudicating Areas of Effect
When the horde is hit with an area of effect like turn undead, hypnotic pattern, or fireball, adjudicate the results with these guidelines:
Determine how many creatures are in the area of effect. Assume it's a lot of them.
Assume one in four creatures in the horde succeed on their saving throws. Adjust this up or down depending on the circumstances. For a truly heroic moment or to make your life easier, assume they all fail.
If the horde takes damage high enough to kill a single creature, remove all affected creatures. Extra damage doesn't carry over.
If monsters in the horde are incapacitated, separate them from the main horde and remove them from play.
Add up any remaining damage done to creatures who survive and add it to the current tally for the horde. If this kills more creatures, remove them, reset the damage to zero, and roll over remaining damage.
Other Tips for Running Hordes
Use evocative narration to describe the characters' heroic battle against huge hordes of enemies. Hordes are there to show off the might and heroism of the characters.
Use only one type of creature in the horde. Don't mix up multiple horde types in a single battle. Use the same stat block and create variance in your descriptions.
As desired, mix in normal monsters with your hordes. A horde of forty creatures might be led by four lieutenants and a boss. Run these extra monsters as you normally would.
The rest of this article dives deeper into each of these ideas.
A Variety of Systems
This system for handling hordes is just one method of many. Other methods include:
The "Handling Mobs" section in chapter 8 of the Dungeon Master's Guide .
The "Running Large Numbers of Monsters" section of the Lazy DM's Workbook .
4e-Style "minion" rules in which each monster in a horde only has one hit point but a successful save never kills them.
The Mob Damage Calculator.
Reskinning bigger monsters as a horde of smaller ones.
It's possible you will prefer one of these other systems to the one proposed in this article. That's fine. What works well for you and your group is the one that matters. The end of this article describes the advantages and disadvantages of these alternate systems.
The Basics of Running Hordes
When we're running large hordes of monsters in our D&D games, we generally skip the use of miniatures and we worry less about any individual creature in our battle.
We run these huge battles mostly in our descriptions augmented by some quick sketches of the situation. The players may want to find choke points where they can't be attacked by the whole horde all at once. We can use miniatures for the characters and then draw large blobs to represent the hordes and the groups they form up into. If the characters are defending a tower from a horde of orcs and there are three ways into the tower, we can represent the tower and place the characters' miniatures so that they can clearly see where the choke points are. We don't need forty orc miniatures, a big handdrawn blob with "orcs" in the center works just as well. People will get the idea.
Our goal in these battles is to adjudicate the situation. What makes sense given the current story and situation?
Tracking Damage: Tallying Damage Against the Whole Horde
When we begin a battle against a horde, we write down the number of creatures in the horde and the hit points of one creature within the horde. Round their average hit points to the nearest 5 or 10 to make life easier.
When the characters attack the horde, they still attack versus the AC of a single monster in that horde. When they damage the monster, add the damage to the single damage tally for the whole horde. If the tally goes above the hit points of a single creature, we remove the last creature damaged from the horde, reset the tally, and roll over any remaining damage. This is similar to the "Cleaving through Creatures" description in chapter 9 of the Dungeon Master's Guide. A single powerful blow might kill multiple creatures which, of course, is awesome.
For example, a fighter faces off against a horde of skeletons and hits them with three attacks, inflicting 36 damage. We remove three of the skeletons (10 hp each) and add 6 damage to our tally. Next turn a rogue backstabs a skeleton for 19 damage. We add 19 to the 6 (25), remove two more skeletons and roll over 5 to the damage tally.
If a bunch of monsters in a horde are damaged with an area attack spell, we first figure out how many monsters in the horde it hits and then apply the damage to those who would be hit. If the damage is higher than the hit points of a single monster, we remove them all and don't worry about rolling over excess damage. If they don't take enough damage to kill them, we add it all up on the tally and see how many monsters it might kill.
For example, a wizard casts fireball on a horde of zombies and we adjudicate that it can hit sixteen zombies (20 hp each). The wizard rolls 27 damage for the fireball. Three quarters of the zombies fail their saving throw, taking 27 fire damage each, and are instantly killed. The remaining four take 13 damage each or 52 total added to the tally. This is enough to kill two more and leave 12 damage on the tally. Two zombies remain, one badly scorched.
This tally idea seems complicated but it scales well for any number of monsters. You can run a dozen orcs this way, or one hundred skeletons, or five hundred goblins and the same system applies.
Track damage done to the whole group in a damage tally and remove monsters as the group takes enough damage to kill a single monster.
Adjudicating Which Characters Get Attacked
It's possible, given the size of the horde, to just use the damage tally idea above and still roll monster attacks normally. If you're running around twenty creatures with single attacks, rolling individual attacks isn't so bad. If you're running a LOT of monsters, though, you may want to abstract the attacks to speed up gameplay.
First, you need to decide who's getting attacked by the horde and how many monsters within the horde are attacking them. Start by looking at the situation. Does the horde have ranged attacks? Are any of the characters up front and likely to take on more than everyone else? Our base assumption should be that the monsters attack the characters equally. If there are fifty orcs and five characters, ten orcs will attack each character. If one character manages to hide from the orcs, the orcs divide their attacks among the rest. If a circumstance means that the monsters simply can't attack, for example if there's a choke point and they don't have ranged attacks, they miss out.
Determine based on the circumstances how many within a horde attack each character. Begin by assuming they divide their attacks equally.
About One in Four Attacks Succeed
In any given match up between weak monsters and strong characters—the likely situation when a horde attacks the characters—we can assume that about one in four monsters in the horde will hit when they all attack.
This is a loose approximation and we can adjust it based on circumstances. Such circumstances might include:
The characters have extraordinarily high ACs, like the use of a shield spell or some other big boost to AC.
A character has a particularly low AC and might get hit more often.
In these circumstances we can either choose to round up or down when determining how many creatures succeed or, if its a big enough bonus, we can change it from one in four succeeding to one in eight or one in ten if things are going against them or one in two if they have advantage.
Start with one in four and then slide the gauge up or down depending on the situation. This is a nearly math-less way of determining how many monsters succeed or fail that we can do in our heads without the use of a table or tool. Thus, it's the lazy way.
If the horde has advantage, such as those having pack tactics, we might increase this to half of them succeeding. Likewise, if they are at disadvantage, we might lower it to one in ten succeeding, or even less.
When the creatures in a horde have multiple attacks, we pool all of those attacks together to decide how many total attacks hit. If eight thugs attack a single character with their multitattack, we begin by assuming two of them hit with both attacks (one out of four of them) but remembering that the thugs have pack tactics, we might increase that to four successful thugs and eight total attacks hitting for 5 damage each (40 damage). Thugs make dangerous hordes.
Assume one in four monsters succeed on their attacks and adjust accordingly.
Adjudicating Areas of Effect
When the characters face off against a large number of monsters, they're almost certainly going to fall back to area of effect spells like fireball, cone of cold, shatter, turn undead, or hypnotic pattern. Adjudicating areas of effect against large numbers of monsters takes a few steps but once these steps are wired in, it isn't too hard.
First, figure out how many creatures are in the area of effect based on the situation. Are the monsters all packed up together? Are they spread out? Consider the size of the area and how many you would think would be piled in there. Lean towards lots of monsters being within the area of effect. It's cooler that way.
Assume one in four monsters succeed on their saving throws and adjust to suit the situation. For a more heroic situation, assume they all fail the saving throw and describe the awesome results. Don't nitpick the details, round in favor of the characters and focus the description on their success.
If the damage of the area of effect inflicts enough to kill a single creature, those creatures die and are removed from the horde. If it's close (like a 14 point fireball against skeletons with 15 points), make your life easy and kill them anyway.
Add up the remaining damage that didn't kill the creatures and add it to your horde damage tally. This may kill additional creatures so remove them too.
If the effect includes a status effect of some sort; three out of four of the creatures will have failed and are under that status effect. You might remove them from play and describe their impotent attacks in the narrative instead of tracking things.
These steps might seem complicated but most of the time it will work out well. Areas of effect should be very useful against huge hordes of enemies.
When hit with an area of effect, determine how many creatures are in the area, roll damage, remove those who die, carry over any remaining damage to the horde and remove additional dead creatures.
Many areas of effect abilities, such as turn undead, don't inflict damage but inflict some other status effect. In this case, we can assume that one in four succeeds while the others fail. We can keep track of these incapacitated enemies separate from the rest of the horde or simply remove them from play. When a character wants to target one of the creatures who are under the status; like a skeleton restrained by an Evard's black tentacles spell, they can simply state it and we adjust accordingly.
Calculating Challenge Ratings
I've talked here at length about the flaws of D&D's encounter building rules and offered numerous solutions. Many times when facing huge hordes of monsters, the encounter is very likely deadly. This goes up significantly if the challenge rating of the monsters in the horde are higher than CR 1/4 or 1/2.
You can still use my simple encounter building guidelines to determine this however, and get an idea how many monsters in a horde are on that edge of deadly. Here's a summary of my simplified encounter building rules:
An encounter is potentially deadly if the sum total of monster challenge ratings is greater than half of the sum total of character levels, or one quarter if the characters are below 5th level.
Thus, if we have five 10th level characters, we know that more than 100 skeletons in a horde is potentially deadly. If we have five 7th level characters, more than 34 thugs is potentially deadly.
These battles against hordes can swing one way or another easily, though, given the sheer number of them and the potential to get wiped out with big areas of effect so, of course, your mileage will vary.
Don't hang on too tight to encounter building rules when running hordes.
Other Guidelines for Running Hordes
That covers the basics of running monster hordes. Here are a few tips to make running huge battles easy and memorable.
Go big with descriptions. These battles are all about epic storytelling. Don't focus on the mechanics in your descriptions. Instead, focus on the story. Describe the screaming hordes of orcs charging the characters only to be blown away by a fireball. Describe the hordes of skeletons charging up the hill or the silent wights marching forward. Focus on the fiction first and last. Let the mechanics help shape the story.
Use the same type of monster for the horde. Don't try to run multiple monster types in a single horde. Trying to track two different hordes is really difficult and gods help you if those hordes get mix up together.
Reflavor for variance. If the story dictates that the horde has different kinds of creatures in them, use a single stat block and reflavor the creature in your descriptions. If the characters are getting attacked by both pirates and sea spawns; use a single stat block to represent them. In your description you describe some of them as more humanoid looking pirates and others as more twisted sea creatures. Yet, for you, the stat block is still the same. No one will be the wiser.
Use three groups or fewer. When you split up your hordes into separate horde groups, keep them around three or fewer. One is best and easiest to work with. More than three and life gets complicated.
Mix hordes with normal creatures. While running multiple types hordes can be difficult, a single horde can work well when mixed with normal single creatures. A horde of fifty orcs might be led by an orc war chief and four armored ogres. You can run the war chief and the ogres as individual creatures like normal and the horde using the guidelines above. It will make for a complicated fight but it isn't out of the question.
Now let's take a brief look at some alternate systems for running monster hordes.
Alternate System: The Dungeon Master's Guide Mob Rules
Page 250 of the Dungeon Master's Guide includes a brief section called "Handling Mobs" with instructions and a table to help adjudicate hits when lots of monsters are attacking a single character. The general idea is that, instead of rolling dice, you figure out how many monsters are likely to hit given their attack bonus and the AC of their victim. We can use the same table in reverse to determine how many creatures make their save against a characters' spell or ability.
The guidelines in the DMG are solid. If you have the table on hand, it's a fine way to adjudicate how many monsters succeed in an attack. You can also reverse-engineer this table to also determine how many monsters would succeed on a saving throw.
Unfortunately, these guidelines don't tell us how to easily track hit points for a large number of monsters so we need some other system for tracking hit points. The horde damage tally can work well for this.
Alternate System: The Lazy DM Workbook Table
Page 7 of the Lazy DM's Workbook includes a table similar to the one in the Dungeon Master's Guide and offers a way to track hit points by building a huge hit point pool for all of the monsters and then every time that pool takes damage equal to the hit points of a single monster, removing that monster. This latter part is actually difficult when used at the table and I now prefer the solution in this article. The table itself, however, continues to serve in the same way the one in the DMG serves.
Alternate System: 4e-Style Minion Rules
If we want a simpler system for tracking damage done to monsters, we can steal the idea of "minions" from the 4th edition of D&D. In this system, every creature in the horde has only one hit point. If they take damage, they die. They take no damage if they succeed on a saving throw, however, so you can't just wipe them out with a single fireball unless they all fail their saving throw. Damage, in this case, does not carry over.
This system works well by requiring no bookkeeping. Monsters are either alive or dead. They don't actually have hit points. If they are hit, they die. If they are missed, they survive. It's a deviation from the core rules but a clean system none the less.
Alternate System: The Mob Damage Calculator
A while back I wrote a mob damage calculator intended to help DMs determine how many monsters succeed on attacks or saving throws. You plug in the data and it spits out the results. This script works well enough but requiring a script to figure this out isn't ideal. Thus, I recommend easier systems for determining success. If you prefer this to other systems, go with the gods.
Alternate System: Reskinning Bigger Monsters into Swarms
Likewise, I wrote another article on reskinning big monsters into swarms. This system seems elegant but it fails as soon as the characters try to hit the "swarm" with an area of effect spell. A fireball should be very effective against a swarm yet does nothing special to a single big monster treated as a swarm. The same is true with spells like hypnotic pattern or abilities like turn undead. Against a big monster swarm, its either all on or all off. That isn't ideal. Thus, I prefer systems that still treat monsters in a horde individually.
Another Tool for Fantastic Stories
This article outlines a simple system for running large numbers of creatures against your characters. As lazy dungeon masters, we let the story take us where it will and use the tools we have on hand to make them as exciting and fantastic as possible. Now when our epic heroes are standing on a mountain of bones in the undead world of Thanatos surrounded by two hundred ghouls, you have the tools on hand to let the story flow into this epic situation.
If you enjoyed this article please support Sly Flourish on Patreon and take a look at Return of the Lazy Dungeon Master, the Lazy DM's Workbook, and Fantastic Adventures: Ruins of the Grendleroot.
This article is copyright 2020 by Mike Shea of Sly Flourish.
Michael E. Shea's Blog

- Michael E. Shea's profile
- 39 followers


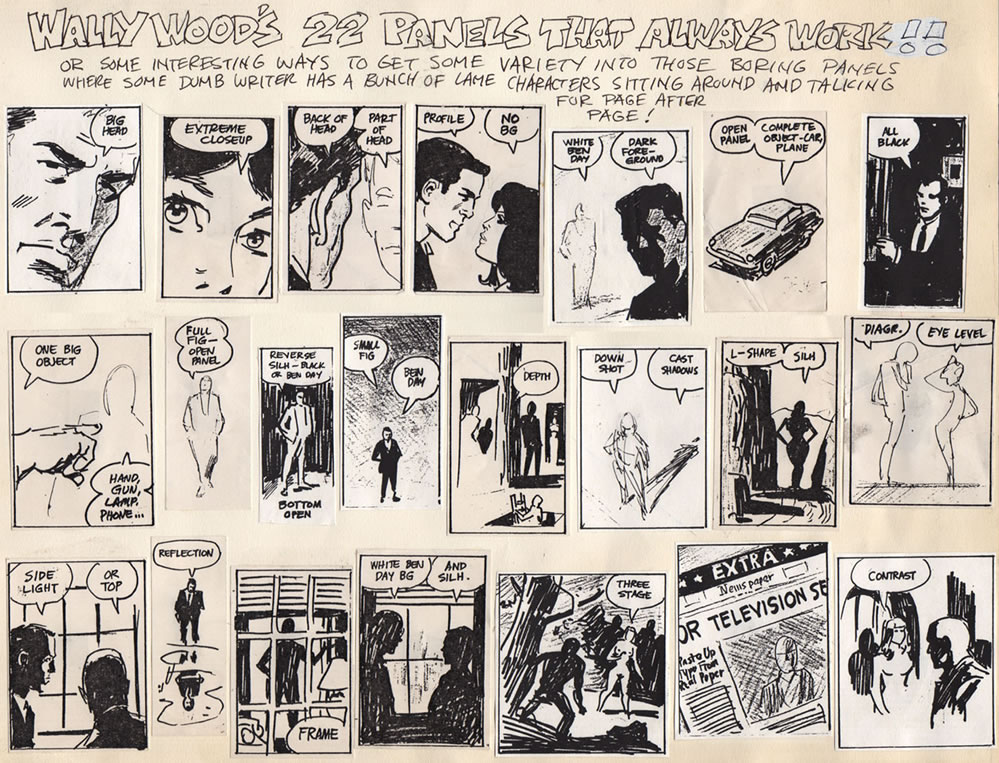