
Michael E. Shea's Blog, page 29
October 11, 2020
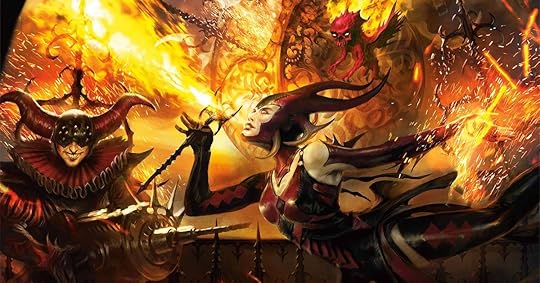
Using the Guilds of Ravnica in Eberron
Mashing up the ideas from published D&D books is one of the best ways to capitalize off of the massive benefit from published books while, at the same time, turning published worlds into one of our own. Today we'll take two campaign sourcebooks from very different origins: the Guildmaster's Guide to Ravnica and Eberron: Rising from the Last War. While they each have a unique focus, both of these books work surprisingly well together. We can, for example, use the guilds from Ravnica to fill out some of the lesser known factions of Eberron.
Let's take a look.
Rakdos and the Mockery
Eberron's pantheon includes a group of sinister gods known as the Dark Six. Little is given for these six gods other than evocative names and a couple of lines of description. The Guildmaster's Guide to Ravnica, however, gives over huge sections to their guilds. What if we took material from Ravnica's Cult of Rakdos and turned it into the cult behind the Mockery, one of the dark six?
The Children of Mockery, as we'll call them, often perform in small towns, villages, and cities. For the most part they stay just above the law but their shows often turn violent and it isn't uncommon for members of the audience to disappear during the performances. The Children also host bloody gladiatorial events that draw in contestants from all over Khorvaire. It is said the Children have their own city of entertainment just on the edge of the Demon Wastes though no one knows exactly how to find it until it wants to be found.
Monsters of the Droaam sometimes split their loyalty between the Children of Mockery and the Daughters of Sora Kell. There's a shaky truce between the two groups, one that could shatter under the wrong circumstances.
Some say a demon leads the Children of Mockery and acts as the master of ceremonies in this hidden city of blood and debauchery.
Using the Cult of Rakdos for the Children of Mockery gives us a ton of value. We fill in a few lines of text in Eberron: Rising from the Last War with a huge section of the Guildmaster's Guide to Ravnica. We have all kinds of fantastic art we can use and show our players. We have an awesome selection of monsters and stat blocks that fit perfectly with the Mockery. It works perfectly and requires almost no work at all from us to integrate.
Gruul Clans and the Droaam
The wild and bestial nature of the Gruul clans works well within the Droaam, the nation of monsters in Khorvaire. The various clans can be lifted right from Ravnica and dropped in as clans within the loose bonds of the Droaam who follow the daughters of Sora Kell, the three hag leaders of the Droaam.
Orzhov Syndicate and Karrnath
The bond between the living and the dead in the nation of Karrnath fits well with the lawful evil Orzhov syndicate, a guild of bankers and religious leaders ruled by the undead. The banking aspect of the Orzhov isn't a clean fit but the societal connection between the living and the dead fits very well indeed.
Golgari Swarm and Avassh, the Twister of Roots
We can delve deep into the realms of the Daelkyr, the lords of madness in the depths of Khyber and draw upon the Golari swarm to fill out the followers of Avassh, the Twister of Roots. It's given only a single line in Eberron: Rising from the Last War that's mostly filled with evil plant stuff but the necrotic hivemind of the Golgari swarm fits nicely with that description. The locations and monsters work perfectly for this necrotic-touched plant-based lord of madness.
House Dimir and House Thuranni
The dragonmarked house of Thuranni is a good fit for the material from House Dimir in the Guildmaster's Guide to Ravnica. The fact that the house could be led by a vampire is pretty compelling and the overlap of spies and assassins makes it a good fit.
Izzet League and House Cannith
The chaotic and inventive nature of the Izzet League fits well with House Cannith. Both of them seek invention over all and may have caused catastrophic chaos in the past.
Simic Combine and the Cult of the Dragon Below
The strange fascination of magic and biology can fall under the umbrella of the cults of the Dragon Below. Cult members may exist in other dragonmarked houses or hidden away in the chambers beneath Sharn conducting horrible experiments that focus on the nexus of biology and magic we find with the Simic Combine.
Art, Maps, Adventure Seeds, NPCs, Monsters
When we pull the guilds out of Ravnica, we get a ton of material we can drop into our Eberron game largely untouched. The guilds in the Guildmaster's Guide include fantastic art, adventure seeds, location maps, NPC descriptions, and awesome monsters. All of this expands our Eberron game without us having to do much work at all. Steal, mash up, and build new worlds you and your players can experience.
New to Sly Flourish? Start here, subscribe to the weekly newsletter, or support Sly Flourish on Patreon!
Check out Mike's books including Return of the Lazy Dungeon Master, the Lazy DM's Workbook, Fantastic Adventures, and Fantastic Adventures: Ruins of the Grendleroot.
Support Sly Flourish by using these links to purchase the D&D Essentials Kit, Players Handbook, Monster Manual, Dungeon Master's Guide, or dice from Easy Roller Dice.
Send feedback to @slyflourish on Twitter or email mike@mikeshea.net.
This article is copyright 2020 by Mike Shea of Sly Flourish.


October 4, 2020
Thinking Two Horizons Out
In Return of the Lazy Dungeon Master I recommend focusing attention on what we need to run our next game. This mostly comes down to the eight steps of lazy DM prep:
Review the characters
Create a strong start
Outline potential scenes
Define secrets and clues
Develop fantastic locations
Outline important NPCs
Choose relevant monsters
Select magic item rewards
In chapter 16 of Return of the Lazy Dungeon Master I also recommend spiral campaign development in which we start at the characters' current positon and build up what's around them. Where are they now? What's going on there? Who will they meet? What might they have to fight? What might they discover? Where will they go?
We can think of this as the first horizon. What can the characters see when they look around? What's within their view and within their reach?

If we're planning to run more than just one session, though, we probably need to think not just about what's around the characters now but where they might be in the future. We need to know this so we can drop in the right hooks, hints, secrets, foreshadowing, and clues in front of them now. What's over the next horizon?
This is the second horizon. What is over the hill? What's beyond the wood? What's outside the city? What's buried beneath the old citadel?
If we want to drop seeds of future adventures, we need to think two horizons out.
The area of that second horizon can be far bigger than the first. Let's think about it mathematically for a moment and pretend we're talking about actual horizons — the distance between the characters and what they can see. If we pretend the first horizon is 1 mile out from the characters, that's an area of about 10 miles. But if the second horizon is 5 miles out? That's about 1,000 square miles we'd have to fill out. That's a lot of prep for lazy dungeon masters.
Planning Three Hexes Out
Instead of trying to fill out a thousand square miles with interesting stuff, we can take an approach from Micheal "Chgowiz" Shorten and think three hexes out. What are three interesting places the characters might explore outside of their current hex? For us, these three hexes out corresponds to the second horizon.
Turning that 1,000 mile second horizon into three hexes makes it managable. Three is a great number. We can all remember three places. It's a good selection of options without being overwhelming. What three major locations sit outside of the characters' current position? That's not too hard for us to come up with and a group can likely come to a consensus about which location they want to go to next if given three options.
We also don't need to fully fill out these locations before we start dropping in hints and clues. We don't need full maps of the locations or full rosters of monsters, NPCs, and treasure. We mostly just need the hook and can drop that right into our secrets and clues.
Example: Locations Outside Deepdelver's Enclave
Let's pretend we have a small adventuring outpost called Deepdelver's Enclave (the town central to the adventures in Fantastic Adventures: Ruins of the Grendleroot). We want to come up with three interesting places outside of the town tied to hooks, rumors, or secrets that we can drop in front of the characters in our next game. What do we need?
We can start by digging into the Dungeon Master's Guide and look at the tables in chapter 3 and chapter 5. Mixing together the "Dungeon Locations", "Dungeon Creator", "Dungeon Purpose", and "Event-based Goals" tables, we can generate locations such as:
The lair of a destroyed lich in the middle of a nearby subterranian desert still festering with the lich's malovelent magic and monsters.
A group of dwarves recently uncovered a prophecy that a ruined yuan-ti temple within town will soon become the central site of a great evil coming into the land.
A cult of the elemental prince Yan-C-Ben has taken interest in a beholder's lair on an island in an underground lake. The characters are asked to assess the situation and see what danger it might hold for the locals.
You can also use this 1d20 Adventure Seed list to generate interesting adventure ideas and mix them with Eberron factions or Forgotten Realms factions if you happen to be playing in those game worlds. Random lists inspire the hooks and locations we can drop two horizons out from the characters' current position.
Looking Two Horizons Out in Published Campaigns
Looking two horizons out while running a big published adventure means reading a chapter ahead. When running such adventures it helps to know what options will soon be in front of the characters when they're done with their current session. Reading up on those future options helps us know what hints to drop in our current game. If we time things right, these options hit the table at the end of the session and the players can decide what to do next to help us plan the next session. This lets us focus our reading around the area the players already decided on. If such decisions land at the beginning of a session instead of the end of one, we end up having to prepare for all possible options or wing it. That's not ideal.
When possible, help players choose their next path at the end of a session to help you focus your prep on the path they chose.
Where to Keep These Horizons
When you've thought two horizons out and have some ideas, where do you put them? If following the eight steps from Return of the Lazy Dungeon Master they fit well in our secrets and clues and fantastic locations. Hints of future events, NPCs, or situations work well as secrets and clues.
If we're identifying interesting locations in our look over the horizon, these fit in as fantastic locations. We don't need to fill these locations out too far. A good evocative name serves fine such as "burning forest", "Skyfall Tower", or "Karshak's Creche". These two-word names often give us enough to get our heads going in the right direction if we do need to fill them out in the future. A name alone is often enough to drop hints to the characters without wasting a lot of time on places the characters will never bother to see.
Two Horizons Out in a Spiral Campaign
Thinking two horizons out is a key component of spiral campaign development. We build a campaign from the characters' current position outward. It's a key component for us lazy dungeon masters to keep our world evolving, make it feel real, and spend less time on material our players may never see.
New to Sly Flourish? Start here, subscribe to the weekly newsletter, or support Sly Flourish on Patreon!
Check out Mike's books including Return of the Lazy Dungeon Master, the Lazy DM's Workbook, Fantastic Adventures, and Fantastic Adventures: Ruins of the Grendleroot.
Support Sly Flourish by using these links to purchase the D&D Essentials Kit, Players Handbook, Monster Manual, Dungeon Master's Guide, or dice from Easy Roller Dice.
Send feedback to @slyflourish on Twitter or email mike@mikeshea.net.
This article is copyright 2020 by Mike Shea of Sly Flourish.
September 27, 2020
Average Hit Points of a D&D Character
Sometimes it's useful to have a rough gauge of how many hit points we can expect D&D characters to have at any given level. Will our deadly trap be truly deadly? Will the dragon's breath weapon TPK the party? Every so often questions like this come up.
Granted, we can simply ask our players for their maximum hit points and work with that or we can keep a rough gauge of character hit points on hand. But, with the wide range of classes, constitution bonuses, and feats; how can we determine average hit points?
To answer this question I developed a simple Monte Carlo simulator of character hit points. This simulator determined the hit points for 200,000 randomly generated characters from 1st through 20th level across all classes. It includes weighted probabilities for constitution bonuses and the weighted likelihood that a character takes the toughness feat.
The table below summarizes these simulated characters with the median HP value across the 10,000 simulated characters of each level, their quartiles, the standard deviation, and a simpler equation of 7 x Level + 3 which ends up nearly as accurate up through 16th level and is likely good enough on its own.
level
25%
50%
75%
std
7 x lvl + 3
1
8
10
13
2
10
2
14
18
21
4
17
3
20
24
30
6
24
4
24
31
39
8
31
5
32
39
48
10
38
6
38
46
57
12
45
7
44
53
66
15
52
8
50
60
75
17
59
9
56
67
84
19
66
10
62
74
93
21
73
11
68
81
102
23
80
12
74
88
111
25
87
13
80
95
120
28
94
14
86
102
129
30
101
15
92
109
138
32
108
16
99
129
148
35
115
17
105
138
157
37
122
18
111
145
166
40
129
19
117
153
175
43
136
20
123
161
184
44
143
When to Use This Table
Much of the time we build our campaign worlds without regard to the characters' specific level of statistics. Instead, we let the situation dictate how the world works. Sometimes, though, we want to know if we're headed into a danger zone or whether something is going to be easier than the story dictates. In this case, it helps to know what the average hit points are at a given level. At the same time we don't want the world to react too closely to the characters. If we built it around the exact hit points of the characters, the world would overfit. Instead, we keep the average hit points in mind as a rough gauge to recognize when something might be too easy or too hard.
Keep the equation in mind of "7 X level + 3" as a rough gauge. When we want to know how powerful some trap, hazard, or monster is compared to the characters; use this equation to estimate the risk of the threat. We can also take comfort in knowing that it's pretty close to the more detailed simulation of 200,000 characters.
Keep such simple tools on hand to help you steer the game's focus on the story of your shared adventures.
New to Sly Flourish? Start here, subscribe to the weekly newsletter, or support Sly Flourish on Patreon!
Check out Mike's books including Return of the Lazy Dungeon Master, the Lazy DM's Workbook, Fantastic Adventures, and Fantastic Adventures: Ruins of the Grendleroot.
Support Sly Flourish by using these links to purchase the D&D Essentials Kit, Players Handbook, Monster Manual, Dungeon Master's Guide, or dice from Easy Roller Dice.
Send feedback to @slyflourish on Twitter or email mike@mikeshea.net.
This article is copyright 2020 by Mike Shea of Sly Flourish.
September 20, 2020
Dreamscape Investigations
What if we combined the reverse-clues of Memento, the dreamscapes of Inception, and in-media-res clue-gathering scenes from the video game Return of the Obra Dinn into a model for dream-based investigations? Let's take a look how that might work in an Eberron game.

The Situation: A Ghost Ship on the Edge of Dal Quor
Our story begins as the characters head to the Northern Wind, a ghost ship in the docks of Sharn returned from Xen'Drik. Leto Skalle, a gold-ringed member of the Aurum, financed the ship's journey and the expeditions of its crew into the ruins of the arcane giants of Cul'sir. On it's return, Leto Skalle's mercenaries took what it brought back and left the ship and its crew to rot in the docks below Sharn. The characters travel to the ship to learn what happened there, what the expedition brought back from Xen'drik, and why no one has seen the crew since it returned.
When they arrive on the ship they begin to realize that the ship rests on an unheard-of manifest zone between the world and the dream world of Dark Quor.
Stealing Three Angles of Storytelling
This investigative model steals from three angles of storytelling from three sources of fiction; two movies and a video game. First, we're going to model our descriptions of the borders between worlds from the movie Inception. As the characters step into the borderlands they see huge buildings seemingly built of sand. They turn and watch a life-sized model of Sharn collapse as a billion tons of sand crash down from a falling tower. They look out over the sea only to see see a stretch of blue-gray sand swirling in ethereal breezes and crawling with powerful and tormented sorrowsworn. The dream-like state of this borderland can be fueled with the strange twisted nature of the dreamscapes in Inception. We can, if we want, even play with the dilations of time between layers of the dreamscape if we wish. Perhaps the characters spend days, months, or even years in the dreamscape only to return just moments from when they left the real world.
As the characters explore the ship, they come across clues. They find a severed and torn hand on the ground. They find bloody handprints on bars of a doorway meant to prevent a mutinous crew from reaching their captain. They find a strange three-bladed dagger forged by the Sulatar drow. They find a scrap of the contract between Leto Skalle, the captain of the Northern Wind, and the Tharashk dragonmarked explorer who would locate a sought-after Xen'drik ruin and the mysterious power contained within it.
We could reveal these clues in reverse order, as in the movie Memento. First, we see Leto Skalle's mercenaries removing their treasure from the hull of the Northern Wind while sealing up the remainder of the crew (including the characters) with the ghouls who have taken over the ship. Next the characters learn of the fate of the captain of the ship as the mutinous crew attempts to capture and eat him. Next they learn of the Sulatar drow attack on the expedition, an attempt to return what was stolen from the ruins. Next they find themselves in the ruins itself, drawing a huge Eberron dragonshard from a black-iron vault kept in the center of the giant ziggurat. Next they locate the ziggurat itself before being attacked by ankhegs. Next they find themselves at the mysterious dock on Xen'drik where an old hag curses them and hands them a scarred coin. Next they find themselves on the docks of Sharn negotiating their journey with the same Leto Skalle who, months later, would leave them to their deaths.
Each step happens in reverse order, giving the characters (and the players) a piece of the mystery. They learn of the end before they get to the beginning. Only when they reach the beginning do they have the whole picture.
This can all take place in the first person. As in Return of the Obra Dinn, the characters witness the situation themselves. The dreamscape of Dal Quor pushes them into these scenes where they must defend themselves from ghouls, cannibal mutineers, murderous shadow assassin drow, giant wraiths defending the shard, and ankheg defenders of the ziggurat. The characters feel the press of the scarred coin in their hand. They bear first-hand witness to the fated agreement between the crew of the Northern Wind, the Finders Guild, and Leto Skalle. They see it all.
Ensuring Player Agency
It's tricky to ensure that dream-based investigations still give the players agency over the story. Because these dreamscapes often look at past events, our instinct is to ensure the characters don't change the past. Aside from the biggest events taking place in the past — the things already true in the current world — we might let them change the past and use it to shift the current and future story in ways that were already not solidified.
For example, as the characters are swept through the dreamscape realm of Dal Quor in our Eberron game, they witness an expedition in Xen'drik recovering a huge Eberron dragonshard kept in a vault within an arcane giant ziggurat. The giant wraith guardian of the shard (a wraith with double hit points and two attacks instead of one) animates and attacks. The character's can't actually prevent the expedition from getting the shard; the shard is already in the possession of the campaign's villain in the current day; but the characters have agency to destroy the wraith however they wish including dropping the huge black iron sarcophagus lid on the giant's skull head; shattering it and leaving an artifact intact in the actual present. Like the fortune telling scene in Curse of Strahd, we can use the unexpected discoveries in the dreamscape investigation to build the story in the future before it has been determined and make it all fit well in the story.
Pitfalls of Dream Sequences
Running dreams in D&D requires careful work. Many people hate both dreams and flashbacks in fiction for good reasons. Dreams and flashbacks don't actually move the story forward. Things don't happen. Things in the real world aren't moving forward. Doing something in a dream isn't really doing anything at all.
Thus, when we run D&D games in which the characters partake in a dream, make it really valuable. Make it matter. The characters have to acquire knowledge they need, and the players want, so the accomplishment is there.
In our borderland dreamscape between the world and Dal Quor, things can be real. The characters can actually acquire the three-bladed glaive carried by the drow shadow assassins. The characters can hold the scarred coin in their hand. They can learn valuable information that can discredit Leto Skalle in the eyes of the Aurum or make him the enemy of the Finder's Guild and House Tharashk.
Most of all, things matter. Every clue the characters learn has to matter. We need to continually ask ourselves "so what?" every time we build out a scene or offer a piece of information. Why will the players care? Why will it be worth their time to struggle through battles they know aren't real? What can they gain that makes it worth the effort? This is important in every scene in D&D but its particularly important in dream sequences or historical flashbacks, even if our approach is cool and edgy.
A Unique Model for Investigation
These ideas are one possible way to build an adventure around investigation. Instead of making skill checks and revealing clues, what if every piece of evidence teleported the characters to the scene and they act in the scene first hand to see what happened? What if they put together each piece of the puzzle into the full picture? What if they could talk to people now dead? What if they could stare from the bow of a ship embedded in the sands of dreams, watching as the world of yesterday literally collapses as time moves forward?
Stepping into the world of dreams gives us the freedom to tell fantastic stories outside the bounds of the realities set in our fantasy worlds. With a careful touch, such an adventure can be one remembered for a lifetime.
New to Sly Flourish? Start here, subscribe to the weekly newsletter, or support Sly Flourish on Patreon!
Check out Mike's books including Return of the Lazy Dungeon Master, the Lazy DM's Workbook, Fantastic Adventures, and Fantastic Adventures: Ruins of the Grendleroot.
Support Sly Flourish by using these links to purchase the D&D Essentials Kit, Players Handbook, Monster Manual, Dungeon Master's Guide, or dice from Easy Roller Dice.
Send feedback to @slyflourish on Twitter or email mike@mikeshea.net.
This article is copyright 2020 by Mike Shea of Sly Flourish.
September 13, 2020
Running D&D Games in Eberron
I love Eberron. D&D's fantasy world of high magic, noir intrigue, and swashbuckling adventure manages to be fresh and new and still hold true to the core of D&D. Everything in D&D is in Eberron but not in the way you would expect.
Late 2019 Wizards of the Coast released Eberron: Rising From the Last War, the Eberron sourcebook for the 5th edition of Dungeons & Dragons. It's a fantastic book that gives us a ton of source material for this fantastic world. Though the original release of Eberron is nearly 20 years old, Eberron: Rising From the Last War gives us a clean and fresh look at Eberron. It's all we need to dig in and run some great D&D games with a fresh coat of paint.
Today we're going to look at a few tips for making the most from a D&D Eberron campaign, some inspired by a Twitter conversation on the topic. Let's dig in.
Squeeze Everything Out Of Rising From the Last War
Eberron: Rising From the Last War is an awesome book and we can use every part of it if we allow ourselves to. The book's introduction is a wonderful way to dive into the setting quickly as it brings home the most important aspects of the world and narrows in further and further the more you read. Every chapter offers looks at the world, the locations, the factions, the villains, and the details of the city of Sharn.
As you plan out your campaign, embrace the focus of this book. Sure, you can set your campaign in the outskirts of the Lhazaar Principalities but why not set it right in the middle of Sharn? A huge part of the book covers Sharn and many of those factions and Dragonmarked houses have a place in the city. The city itself is a huge melting pot of powerful organizations, super-rich patrons, criminal syndicates, and shady explorers all sitting on top of the ruins of the Dhakaani goblin empire dating back thousands of years. Sharn itself is the perfect place to set a campaign and a great hub for the characters to explore further out into the world.
The patrons and adventure options in Rising From the Last War offer interesting hooks for the characters. Introduce them as you go, with a clear group patron to begin with and some intriguing plots between the other patrons. If your group is up for it, have a high-ranking member of the Aurum invite the characters to a dinner party and introduce them to other faction members and Dragonmarked representatives. If such a dinner party gets boring, time for some Daask gnolls to burst through the windows!
Eberron: Rising From the Last War is a great big book covering this whole campaign setting. Absorb it and use every part of it to build the world for you and your players.
The Book is the Player Handout
Speaking of your players, we should, of course, include a solid session zero for our game. You can learn more about session zeros in chapter 17 of Return of the Lazy Dungeon Master. In short, before your campaign begins, sit down with your players, discuss the themes of the game, have the players build their characters together, and tie them to a group faction to get them started. Here's a sample Eberron session-zero handout I used for my own games.
Because it's rich with character options, your players likely want to buy their own copies of Rising From the Last War. When they do, recommend to them that they read the introduction to the book and as much as they can of chapters 1, 2, and 3. Chapters 1, 2, and 3 are player-facing chapters. It's safe for them to read and will give them a much richer understanding of the world in which they will be playing. Few players will likely read three whole chapters of the book but if they get through the introduction and skim-read the interesting parts of the rest, they'll get a lot out of it. The more you and your players read the book, the more they'll get out of the campaign.
Read Exploring Eberron
Keith Baker, the lead creator for Eberron, wrote an Eberron director's cut called Exploring Eberron available in print and PDF from the DM's Guild. Keith built this book around the material not covered in Rising from the Last War and it's an awesome companion. Exploring Eberron covers a range of material not given much attention previously with details you can bring right into your game. As a companion to Rising, it's a fantastic book and worth the money.
The DM's Guild also has a new series of Eberron adventures called the Oracle of War series. It begins with The Night Land and continues onward. It also includes Salvage Bases and Missions, an excellent adventure generator you can use for your own adventures in the Mounrland.
Absorb Eberron Seed Material
Unlike most European fantasy worlds, Eberron isn't based on rewrites of ancient mythology. It's heart is clearly in popular culture. Eberron has themes drawn from from the Cold War, the rise of World War 2, 1920s pulp fiction, and pop fiction from our own time. The original Eberron sourcebook included a list of inspirational movies. These included:
Brotherhood of the Wolf
Casablanca
From Hell
The Maltese Falcon
The Mummy
The Name of the Rose
Pirates of the Caribbean
Raiders of the Lost Ark
Sleepy Hollow
I'd also recommend a few other movies:
Fifth Element
Notorious
Blade Runner and Blade Runner 2049
Inglourious Basterds
Embrace Eberron's Themes
The movies above give us a good feel for the themes of Eberron and we should embrace these themes in our campaign. A healthy mix of spies and the hunt for ancient artifacts works well in our Eberron stories. Make sure you bake these themes into your world. My own campaign is built around the themes from Raiders of the Lost Ark, my favorite movie of all time.
The whole high-fantasay nature of Eberron is one to highlight. We can build a checklist of events that support the themes we want to have in our Eberron adventures. These might include:
An airship battle
A lightning rail heist
Delving into ancient Dhakaani ruins
Seeing the Race of Eight Winds in Sharn
Falling or being in the way of someone falling in Sharn
Intrigue with shady members of the Aurum
Caught in a struggle between Dragonmarked houses
Feeling the tension of an imperfect treaty of Thronehold
Seeing the strange sights of the Mournland
Hunting down ancient relics of the giants of Xen'Drik
There are lots of such events that make an Eberron campaign unique; make your own list and run through them during your campaign.
Connect Your Adventures to the Setting
The history in Eberron is rich and deep. Between Rising From the Last War and Exploring Eberron we have a tremendous wealth of lore we can drape over our own campaigns. Everyone and everything the characters come across can be part of this lore. It's never just goblins, its members of the New Dhakaan or spies of the Daask. It's never just a couple of thugs in an alley, it's dwarven members of the Boromer clan. It isn't just a rich patron, it's a gold-ringed member of the Aurum who needs things done quietly.
You can use this list of 1d100 Factions of Eberron as a tool to help you drape the world in lore. This lore is what makes Eberron unique among fantasy worlds. While we DMs can hang onto our traditional D&D understanding, we can wrap this understanding in the color of Eberron and make it unique.
Culture Above Race
There's been a lot of attention towards D&D's troubled history dealing with races. A quick glance through the [Monster Manual] shows a narrative that paints all orcs as "savage raiders and pillagers" and all goblins as "small, black-hearted, selfish humanoids that lair in caves". Eberron drops such stereotypes. Goblins once ruled Khorvaire in an empire greater than any ever since. Orc druids followed the dragon Vvaraak and became the Gatekeepers who pushed the aberrents of Xoriat into the depths of Khyber. Now goblins and orcs can be found alongside other humanoid races in Eberron. Any sentient species can be as good or bad as the acts they commit or the principles they follow. This isn't only a good concept to use in Eberron but in any of our D&D games. Not only does it avoid racist stereotypes but it leads to much more interesting stories as well.
A New World of Noir Intrigue, High Magic, and Swashbuckling Adventure
Eberron is a fresh world that fully embraces what we love about D&D and expands it in wonderful new directions. Use Rising From the Last War to its fullest. Bathe your adventures in lore. Fill your mind with the right inspiration. Share tales of high adventure with your friends and family.
New to Sly Flourish? Start here, subscribe to the weekly newsletter, or support Sly Flourish on Patreon!
Check out Mike's books including Return of the Lazy Dungeon Master, the Lazy DM's Workbook, Fantastic Adventures, and Fantastic Adventures: Ruins of the Grendleroot.
Support Sly Flourish by using these links to purchase the D&D Essentials Kit, Players Handbook, Monster Manual, Dungeon Master's Guide, or dice from Easy Roller Dice.
Send feedback to @slyflourish on Twitter or email mike@mikeshea.net.
This article is copyright 2020 by Mike Shea of Sly Flourish.
September 3, 2020
A Framework for One-on-One D&D Games: Sherlock Holmes and Watson
Playing D&D with one player and one DM is a wonderful way to play the game. With one player and one dungeon master, we can truely focus our stories on the character. Playing D&D one-on-one is not a lesser form of D&D. It's a different way of playing as rich and entertaining as playing D&D with a group. If you haven't tried it, give it a shot.
To see some one-on-one D&D in action, watch Enrique Bertran and I play through Dragon of Icespire Peak one-on-one. The adventures of Barundar and Bing were great fun to play and taught me a whole lot about running one-on-one D&D.
More recently, while stuck at home during the pandemic, my wife and I have been playing D&D one-on-one and we've really enjoyed it. Playing D&D with someone you live with is a whole different kind of game. Instead of sitting down at a table for three to four hours in one session, you can break the game up into pieces and play out each piece in its own separate and shorter session. You can even play some of the sessions in different environments, such as while taking a walk or preparing dinner.
This has resulted in a different framework for D&D, with different phases for the different kinds of scenes taking place. Because this is a pick-up-and-go game, it's also different than a fully fleshed out campaign. Each session can be its own focused quest, maybe even from a job board similar to the one in Dragon of Icespire Peak from the D&D Essentials Kit.
Today we're going go talk about this framework for one-on-one D&D including adventure generation and the phases of play taking place.
Quick Summary for this One-on-One D&D Framework
This framework for one-on-one play includes three phases of game prep and three phases of gameplay. Most of them are short and can be done just about anywhere. Only the final phases of prep and play work out like our standard D&D games. Here's a quick summary.
Prep Step 1: Prepare three job descriptions. Prepare three one- or two-sentence job descriptions using tables from chapters 3 and 5 from the Dungeon Master's Guide . A job consists of a patron asking the characters to do a job for them at an interesting location. The tables and your own ideas can fill in the blanks.
Gameplay Phase 1: Choosing a Job. In this phase, which can be played anywhere in about 15 minutes, the DM describes the three jobs roleplaying from the point of view of the sidekick character ("Watson") and the player ("Sherlock") roleplays picking one of three jobs with plans to meet the patron.
Prep Step 2: Fill out the job and patron NPC. The GM takes the chosen job and fills it out into three to five sentences. In particular, the GM fills out the NPC using the NPC tables from chapters 3 and 4 from the Dungeon Master's Guide or Donjon's random NPC generator.
Gameplay Phase 2: Meeting the Patron. In this 15 to 30 minute roleplay session, the character meets with the patron NPC, introduced by the sidekick, and learns more of the NPC's backstory and the reason for the job. Questions can be asked, Intelligence (Insight) checks can be rolled. The characters learn the details of the job and we DMs learn what's important to our player.
Prep Step 3. This step follows our normal prep for a D&D game. We prepare the adventure using the eight steps from Return of the Lazy Dungeon Master . Grab maps from Dysonlogos, fill in the details, balance encounters for one-on-one play and we're ready to go.
Gameplay Phase 3: Running the Adventure. In this phase, we play the planned adventure like a normal D&D session.
Now let's look at the details of this framework for one-on-one play.
Sherlock Holmes and Watson
This style of one-on-one play works well for a Sherlock Holmes and Watson style game in which clients come to the characters with jobs, the main character chooses the job, and then the character and sidekick go on the job itself. Sherlock is clearly the player character while Watson is the sidekick character mechanically played by the player but roleplayed by the dungeon master. The characters can have their own home and headquarters where they meet with prospective clients instead of continually hanging around a job board but you can change how this partnership works in a lot of ways.
The D&D Essentials Kit includes rules for sidekicks but you can also have the player roll up two full characters, designating one of them as their main character and the other as the sidekick. The Dungeon Master's Guide talks about this in chapter 5 under NPC Party Members.
Prep Session 1: Generating Jobs
As the DM, we begin by generating three potential jobs. We can use tables from chapters 3 and 5 from the Dungeon Master's Guide to select adventure goals, patron NPCs, villains, dungeon locations and origins, and other details. We can also mix in larger faction tables for our particular game world such as this 1d100 Factions of Eberron to tailor things closer to the game world in which you play.
We need prepare nothing more than three short job descriptions; just enough to give the player an idea what the job entails. We prepare three such jobs this way and write them down in preparation for our first gameplay session.
Gameplay Session 1: Choosing a Job
We now come to our first gameplay session, choosing a job. This session can be played anywhere in about fifteen minutes. The DM should have a list of the jobs somewhere. A 3x5 card or a list on our phone works just fine.
For this phase, the DM roleplays the sidekick, "Watson", and the player roleplays their character, "Sherlock". We assume the sidekick is responsible for meeting with clients around the town, city, or other spark of civilization in which the characters spend their time. The sidekick comes back to their headquarters and describes the three jobs to the character. The main character, roleplayed by the player, then chooses the job. Next up is meeting the client.
Prep Session 2: Filling out the Job
We now know which job we need to prepare. We don't have to prep the whole adventure at this point. We don't know what will come from the meeting between the main character and the patron and we should stay flexible. Instead, we expand our one or two sentence job description, particularly in filling out the details of the patron NPC. Who are they? What do they really want? We can use tables from the Dungeon Master's Guide to generate details about our patron NPC or use the Donjon random NPC generator to fill them out as well. Again, we can add in campaign-specific factions to add some world richness to the characters.
Gameplay Session 2: Interviewing the Client
This is another roleplay session taking about 15 to 30 minutes. In this scene, the characters interview the patron, asking them about the job and learning more about what is entailed. Our prep for this session hopefully helps us answer these questions. Some rolls might take place here, particularly Intelligence (Insight) checks, and maybe some spellcasting like zone of truth. We can still play this session just about anywhere as long as the player has access to their character sheets and can roll some dice. The D&D Beyond mobile website can help here with both.
Prep Session 3: Building the Adventure
At this point our player has chosen a mission and understands the job. Now we actually prep the session. We can go through the eight steps from Return of the Lazy Dungeon Master and fill out the adventure. We can grab a map from Dysonlogos, fill in some details using the dungeon chamber tables from appendix A of the Dungeon Master's Guide, fill it in with some appropriate monsters, falling back to the random monster tables in Xanathar's Guide to Everything if we choose. For these one-on-one sessions, we don't have to go too crazy. Usually, a few rooms with some interesting secrets to uncover and a handful of monsters to fight is enough. We'll want to pay special attention to balance encounters for one-on-one play so we don't overdo it.
Gameplay Session 3: Running the Adventure
Finally, we actually run the main session for our adventure. This might take an hour or two depending on how big a dungeon you build. I've found four or five rooms with two or three combat encounters is enough. We can, if we want, include a travel scene as the characters go to the location or we might handwave it and start them at the beginning of the location and go from there. It's up to you.
A Different Way to Play D&D
Because we're playing D&D with just one player and one DM, we don't have to hang on to the model we use when playing with a full group. If we happen to live with the person we're playing with, we can drop in a quick scene from our game whenever we can fit it into our schedule. Playing together as a couple means sharing a world all our own and visiting it whenever we want. It's a great way to play D&D.
New to Sly Flourish? Start here, subscribe to the weekly newsletter, or support Sly Flourish on Patreon!
Check out Mike's books including Return of the Lazy Dungeon Master, the Lazy DM's Workbook, Fantastic Adventures, and Fantastic Adventures: Ruins of the Grendleroot.
Support Sly Flourish by using these links to purchase the D&D Essentials Kit, Players Handbook, Monster Manual, Dungeon Master's Guide, or dice from Easy Roller Dice.
Send feedback to @slyflourish on Twitter or email mike@mikeshea.net.
This article is copyright 2020 by Mike Shea of Sly Flourish.
August 30, 2020
The Most Valuable DM Tool: A Good List of Names
For a video on this topic, take a look at the Most Important Lazy D&D DM Tool: A Good List of Names on Youtube.
Names are hard. It's hard to come up with them. It's hard to remember them. Throughout our game we'll often find ourselves improvising an NPC and while most of the characteristics of our NPCs can be easily improvised, it's hard to improvise names. In a twitter poll on the topic, hundreds of DMs mentioned a good list of names as their number one improvisational aid.
There are many sources for good names. The Player's Handbook has suggested names for all of the races in the book and we DMs can use those names just as easily as the players can. Xanathar's Guide to Everything has piles of names we can use. If you have Xanathar's Guide at the table, stick a 3x5 card in that section of the book and keep it on hand when you're playing.
A lot of DMs use the website . I'm a huge fan of the website donjon for all my random needs. I even wrote my own .
When it comes to lists of names, keep the list short. We don't need ten thousand names for any given session. A handful of names will do. Print out a single page or write out a dozen or so names on a 3x5 card and they'll serve you for a while. Our goal is to grab a name quickly and we can't do that if we have too many to sift through.
Second, write that name down when you use it. The minute we assign a name to an NPC we've plucked it out of the ether and made it into something real. That NPC exists now, along with that name. Write the name down in your notes and keep track of it from then on. You never know when a throwaway NPC is going to become someone important.
As lazy dungeon masters, our goal is to find the most effective tools to help us improvise during the game. We want tools that keep us flexible and able to move and shift as the story builds out at the table. A good list of names is one such tool, probably the most popular such tool. Find a good list of names, keep them on hand during the game, and write those names down when they become real.
New to Sly Flourish? Start here, subscribe to the weekly newsletter, or support Sly Flourish on Patreon!
Check out Mike's books including Return of the Lazy Dungeon Master, the Lazy DM's Workbook, Fantastic Adventures, and Fantastic Adventures: Ruins of the Grendleroot.
Support Sly Flourish by using these links to purchase the D&D Essentials Kit, Players Handbook, Monster Manual, Dungeon Master's Guide, or dice from Easy Roller Dice.
Send feedback to @slyflourish on Twitter or email mike@mikeshea.net.
This article is copyright 2020 by Mike Shea of Sly Flourish.
August 23, 2020
Improving Pacing
"The key to becoming a great GM, more than anything else, is an understanding of pacing."
- Monte Cook and Shanna Germain, Your Best Game Ever
As dungeon masters who take their craft seriously, we continually sharpen our skills. For some of us, this is a lifelong pursuit. The beautiful complexity of the RPG hobby gives us the opportunity to improve our craft in many different ways over the years, each leading us to run a better game for our family and friends. A few such skills include the ability to improvise, an acceptable understanding of the rules, the ability to listen and empathize, enthusiasm, time management, balanced facilitation, and on-the-spot creativity.
If we want to keep the energy up during our game, though — if we really want to keep everyone interested — there are few more important skills than pacing.
Action drives great stories. Sometimes we DMs lose ourselves in the depth and background of our adventures and campaigns. Sometimes we lose ourselves in the details of our NPCs and the history of the world. We use every one of the thousand words it takes to describe the picture. But action — the action of the characters — drives our stories. The characters need to do things.
Good pacing requires understanding how the game feels at the moment and ensuring it feels fun. It means keeping up forward momentum and also knowing when to pull back to let things just be when the time is right.
When in doubt have a gnoll come through a door with a bow in their hand.

In the book Hamlet's Hit Points RPG sage Robin Laws describes the importance of oscillating upward and downward beats to keep players interested in the game. Good things happen, then bad things happen, then good things happen. A story with too many upward beats becomes boring and stale. A story with too many downward beats feels hopeless and depressing. Mixing upward and downward beats keeps people interested.
We don't always know when we're going to be at the crest of a series of upward beats or at the valley of a bunch of downward beats. During the game, the story goes where the story goes. We have to be prepared to move the beats around on the fly. Have the characters just had a series of hard fights while traveling through the wilderness? Maybe it's time to run into two thugs in the woods. Did the characters just have a series of unfortunate events involving traps and specters in a nasty dungeon? Maybe they break through a wall and find a holy font they didn't expect.
Maintain a good pace of upward and downward beats in your game. Keep the tools and ideas on hand to change the pace as you play.
"What Do You Do?"
Focusing on getting quickly to this question forces us DMs to make the narrative of our story actionable. It's no good for a bunch of PCs to sit around and listen to an NPC wax history for twenty minutes. In any given scene it behooves us to understand what options the PCs have to act upon. Sometimes we might not even realize there is an opportunity to act but our players surprise us with some action. Don't negate it. Let them interact. Let the story evolve based on their actions.
When we're building out locations, for each area we build, we can ask ourselves "what can the characters do here?". Looking around a big room or watching a scene take place isn't getting the characters into the action. Even in a room full of ancient mosaics and bones the characters can investigate. They can research things. They can discover secrets and clues. Think about the verbs of the room. Look over the list of skills and think about which ones are applicable in any given situation.
Turn things over to the actions of the characters as fast as you can.
Start Strong
The first step of the eight steps of game preparation offered in Return of the Lazy Dungeon Master is to prepare the strong start. What's going on when the game begins to draw the players into our shared fantasy? Sometimes it might be a fight. Sometimes it might be a celebration in the local town. Sometimes a body might fall out of the sky with their throat cut and a bloody amulet clutched in one hand. Use the strong start to get the pace of our game off on the right track.
If you're lost for ideas for strong starts, check out the Framing Events section in chapter 3 of the Dungeon Master's Guide.
Start strong.
Watch the Clock
It's easy for DMs to lose track of time when running a game. When we run a game, we're in our element, we find "flow". Losing our sense of time is one of the truest indicators that we've found this flow, but it can be hell on our pacing. Using a timer or watching the clock throughout a game gives us an idea how much time has passed and how much time we have left in our session. Using a timer helps us ensure our scenes are as long as they need to be and not any longer.
When planning for a key encounter, keep in mind when that encounter needs to start and be ready to skip ahead to that encounter if time demands it. Setting a timer for every hour is a good way to keep a feel for the pace, but choose any time period that makes sense for you. It's always better to end a little early than to run late.
Ending on a cliffhanger is a great way to keep your players excited for the next game while also opening yourself up for an easy strong start. Don't be afraid to end the game when the characters kick in the door to the final boss's lair. At least you know where the next session begins.
Head clear. Mouth shut. See much. Say little.
As a DM, we fill the air with the most words of anyone at the table but it's our eyes and ears that tell us if our pacing is off. Watch your players. Look at their body language. They'll show you if your pacing is off. Are they leaning forward or leaning back? Are they paying attention or surfing Facebook? Some relaxation is to be expected, this is recreation after all, but if you're seeing a lot of it from more than one player, it's time to move things along.
If one player seems disconnected, gently draw them back in. Have their character make a skill check to notice something. Tug on their background or heritage.
Don't be afraid to step back and ask people how things are going. Take a five minute bio break every 90 minutes and ask people if they're having fun. Ask what they're enjoying and ask what they want to see more of.
A Lifelong Pursuit of Excellent Pacing
Like all of the skills of great dungeon mastery, a mastery of pacing isn't something we'll achieve overnight. We'll never be perfect at it. Like all things, mastering pacing takes practice and continual improvement. We have to learn it for ourselves and our group. Lucky for us, we get to practice it while doing something we love and do it for the rest of our lives.
New to Sly Flourish? Start here, subscribe to the weekly newsletter, or support Sly Flourish on Patreon!
Check out Mike's books including Return of the Lazy Dungeon Master, the Lazy DM's Workbook, Fantastic Adventures, and Fantastic Adventures: Ruins of the Grendleroot.
Support Sly Flourish by using these links to purchase the D&D Essentials Kit, Players Handbook, Monster Manual, Dungeon Master's Guide, or dice from Easy Roller Dice.
Send feedback to @slyflourish on Twitter or email mike@mikeshea.net.
This article is copyright 2020 by Mike Shea of Sly Flourish.
August 16, 2020
Running Descent into Avernus Chapter 2
Note: This article contains spoilers for the adventure Descent into Avernus.
This article is one of a series that covers tips and tricks for running the hardback D&D adventure Descent into Avernus. The others include:
Running Descent into Avernus: The Fall of Elturel
Running Chapter 1 of Descent into Avernus
If you'd rather watch a video on this topic, you can watch my youtube video on running Descent into Avernus Chapter 2.
Most Important Tip for Running Descent into Avernus
In previous articles I described this tip but will do so again because it's the best way to make sure your players have a clear motivation to play through this motivation.
Tie the characters to Elturel, Reya Mantlemourn, and the Hellriders.
As written, the characters have little motivation to dive into hell to save Elturel, a city they may never have been to, for Reya Mantlemourn, a woman they haven't ever met. If you tie the characters to Elturel, Reya Mantlemourn, and the Hellriders, they will have a clear motivation to follow through with the main story of this adventure. You can read more about this in Running Descent into Avernus: The Fall of Elturel.

Easily Ran As Written
Unlike chapter 1 and chapter 3, we can largely run Descent into Avernus chapter 2 as written. It's a straight forward chapter with a clear line of quests and straight forward locations. The flowchart in the chapter shows us clearly what must be done, though its important to understand that the goal of the chapter is to lead the characters to Fort Knucklebone to meet Mad Maggie and ask about the location of the Sword of Zariel and the Bleeding Citadel that surrounds it. That is the quest sinew that connects the characters' arrival in Avernus to the main story of the adventure.
We can certainly tune parts of this chapter as we run it, tailoring it for the stories that resonate best with the characters, but mostly this chapter doesn't need modification to keep the overall thread of the adventure going.
Wildcard: Shield of the Hidden Lord
In Chapter 1 the characters likely acquired the Shield of the Hidden Lord, an artifact possessed by the arch-devil Gargauth. This is a fantastic vehicle for secrets and clues and as a fun bit of corruption in the party if you're into that sort of thing. Gargauth's motivation is to escape the shield, which he fails to do when he arrives in Avernus with the rest of the characters. At that point he likely doesn't know how to escape or who might help him do so, so he'll stick it out with the characters guiding their direction towards his escape. Whether the character sense his evil or not may come out over time. If they try to dump the shield, you may want to give them good reason to hang onto it. Perhaps the shield finds its way back to them on the arm of a horned devil or some other way. Make it clear that the power and knowledge of the shield can help them.
In particular, it's possible Gargauth knows of Fort Knucklebone and the sage Mad Maggie who can help the characters locate the Sword of Zariel.
Use the Shield of the Hidden Lord as a vehicle for secrets and clues and a guide in Avernus when you need it.
The Atmosphere of Elturel
When the characters arrive and travel through Elturel reinforce the sights, sounds, and smells of hell. The sky burns and roils above them. The air smells of sulfur and brimstone. Towering black iron spikes pull the massive chains to the soul-screaming River Styx below. Don't lay it all on at once but continually reinforce the alien and damned nature of the world around them. Channel your Hellraiser.
When the characters arrive at one of the two bridges you can describe the huge drop to the wasteland below including the huge massive chains and the spikes lowering the city to the river.
Descent into Avernus has an excellent set of encounters you can run in Elturel. Shake up the encounters based on the pacing of the game. The characters shouldn't face combat encounter after combat encounter against devils and the like. There are plenty of roleplay encounters you can weave in for a change of the story. Let the characters see wars between demons and devils in the streets. Let them see a powerful narzugon riding through the streets on its nightmare with its hell lance leaking burning droplets of molten metal onto the ground. This very narzugon may be Haruman from chapter 3, one of Zariel's generals. Of course, let the characters see it, not fight it, or it will be a quick and bloody battle.
If you're looking to expand Elturel, consider the DM Guild supplement Encounters in Avernus. It's an excellent set of random encounters you can drop into Avernus, the River Styx, or Elturel itself.
Look to drop in an encounter each time the characters travel from one notable location to another. When the characters arrive they may face one interesting encounter on their way to the bridge. Than another between the bridge and High Hold.
When they reach the bridge, it's a great time to reintroduce Grace Lyn, the girl from Fall of Elturel who survived the descent of Elturel into hell. She can be an excellent emotional draw of the characters and a great motivation for the characters to save the city.
High Hall
When the characters get to High Hall they fight more devils and then meet up with the remaining refugees of Elturel. Here they learn that Uldar Ravengard went to the cemetery of Elturel to recover the Helm of Torm's Sight. If you've woven Gideon Lightward in, he can be found here as well.
One bit of fun in my own campaign was changing Gideon Lightward into the leader of the Hellriders now revealed as a vampire. He recruits the characters to close the demonic gate of Baphomet but really he wants to recruit them into the Blood War. Gideon can be one of Zariels generals as well, one who followed her path to darkness and prepared Elturel for its descent. We can have a lot of fun following Zariel's generals this way including Gideon, the vampire Jandor Sundstar in chapter 3, the narzugon Harumon, and the ghost Yael who pierced the Sword of Zariel into the ground of Avernus. This can be a great line of lore to reveal throughout the adventure.
The scenes in High Hall are also great ways to reconnect with Reya and her own motivations in Elturel and discover Lulu's strange connection to the plane. Like the Shield of the Hidden Lord, Lulu is a great vehicle for secrets and clues as well as giving just the right information at the right time to help the characters move forward.
With the refugee meeting completed, the characters head to the cemetery of Elturel to save Uldar Ravengard and learn of the next leg in their quest to save Elturel.
Cemetery of Elturel
Three interesting things happen at the cemetery. First, the characters save Uldar Ravengard and bring him back to High Hall. Second, the characters close Baphomet's gate in the ossuary. Third, the characters face off with Gideon Lightward.
We can run this as-is or we can add a bit of fun. In my own game, as mentioned, I turned Gideon Lightward into both a vampire and the leader of the Hellriders in Elturel. As a vampire, Zariel gave him immunity to the light shining down from the Companion for all those years, letting him hide in plain sight. Now, in Avernus, Gideon shows his true form and recruits the characters by explaining that, as allies of the Hellriders, their best course is to become devils and fight back the hordes of demons as Zariel wishes. We could have Gideon weakened by his own fight with the minions of Baphomet if we want the characters to stand a chance fighting a full-fledged vampire or he could leave disappointed when the characters turn him down, saving Gideon for a future encounter.
As for closing the gate we can spice things up by adding a couple of demonic pillars in the room that the characters must shatter to close the portal before a host of fiendish minotaurs step through the gate. On the other side the characters can see a twisted abyssal layer that looks like an endless labyrinth, the lair of Baphomet. When the characters close the gate, they can save Uldar, have any final confrontation with Gideon, and get back to High Hold.
Final Steps
With Uldar back at High Hold the characters can either cast a remove curse or conduct a ritual to remove the helm from Uldar. At that point Uldar describes the knight, Yael, driving Zariel's sword into the ground of Avernus and creating the Bleeding Citadel. The only question is where it is and no one seems to know. At this point, someone; maybe Gargauth, maybe Lulu, maybe a devil the characters have spoken to; lets the characters know that their next step is to find Mad Maggie at Fort Knucklebone.
Now the characters make their journey, one way or another, down the huge chains to the surface of hell and their journey across Avernus begins.
New to Sly Flourish? Start here, subscribe to the weekly newsletter, or support Sly Flourish on Patreon!
Check out Mike's books including Return of the Lazy Dungeon Master, the Lazy DM's Workbook, Fantastic Adventures, and Fantastic Adventures: Ruins of the Grendleroot.
Support Sly Flourish by using these links to purchase the D&D Essentials Kit, Players Handbook, Monster Manual, Dungeon Master's Guide, or dice from Easy Roller Dice.
Send feedback to @slyflourish on Twitter or email mike@mikeshea.net.
This article is copyright 2020 by Mike Shea of Sly Flourish.
August 9, 2020
Instant NPCs for Fifth Edition D&D
Note, this article has been updated from the original posted in February 2016.
When improvising an NPC or custom monster during the game, you can often start with a base DC between 10 (easy) and 20 (hard). If you end up needing combat statistics for your NPC or monster, grab the closest stat block from the Monster Manual and reskin it for flavor. If you want some quick creature statistics, try out the following formulas (round down):
AC / DC = 12 + 1/2 CR
Attack Bonus / Primary Saves = 3 + 1/2 CR
Hit Points = 15 + 15 x CR
Base Damage = 5 + 5 x CR
The Importance for Improvising NPCs
Monte Cook, designer of the third edition of D&D and the Numenera roleplaying game, wrote an interesting article called PCs versus NPCs in which he discusses the time we often waste putting together statistics for NPCs. These non-playing characters (NPCs), he argues, just show up, talk for a bit, and disappear forever. Here's an excerpt:
NPC (and creature) detail is one of the ways in which designers and GMs are often forced to waste a lot of time. That's because the game has all these great rules for fleshing out PCs and making them cool and interesting. A game that explores how well a PC is at combat, at interaction, at a wide variety of skills and actions, and makes all those things equally interesting is a great game. But then, it comes time to make NPCs.
Monte argues that the details our game needs for player characters to stay interesting doesn't apply to NPCs or monsters. Often some quick statistics are all we need to run most NPCs and monsters. Numenera and the Cypher RPG system has an easy way to manage this. A creature in Cypher only needs a level. The rest of the monster's statistics can be easily generated from this single number between 1 (easy) and 10 (very hard).
5e's design won't let us design a system as simple the one in the Cypher system for combatant NPCs. Monsters in D&D have a lot of crunch to them with six attributes, hit points, armor classes, saving throws, attack scores and detailed attacks. Luckily we have the Monster Manual to handle all of this for us.
Pick a Number Between 10 and 20
At its core, D&D 5e comes down to rolling a die, adding a modifier, and checking it against a difficulty check (DC). In just about any interaction that has a challenge, the DC is all we really need to come up with between a range of 10 (easy) and 20 (hard). Anything below 10 we can assume the characters just do without a check. Anything above 20 is likely too hard unless they're picking the doors to Lolth's vaults in the Demonweb Pits.
When a PC wants to interact with an NPC in some way that might be challenging for example being diplomatic, lying their asses off, or threatening them; all we need to do is ask ourselves "on a scale of 10 to 20, how difficult is this?". The answer to that question is our DC check.
Any particular NPC may have strengths or weaknesses when dealing with the PC. Maybe they're not very easy to intimidate (DC 16) but might succumb to flattery (DC 11).
Reskinning for Combat Statistics
Coming up with DCs for interactions with NPCs isn't too hard, but what about combat? Again, we can't have a system as easy as the Cypher System for this. Instead, we can choose one of two systems that still make it very easy.
First, use the NPC statistics in the back of the Monster Manual. We might be tempted to build new stat blocks or determine that the NPC stat blocks don't fit the NPC we have. Most of the time, though, it really doesn't matter. Choose the closest stat block that fits and go with it. If we need some higher power NPC stat blocks or more variety, we can use the NPCs from Volo's Guide to Monsters. For spellcasters, feel free to change up their spell lineup to fit the new NPC you've created.
If for some reason one of those stat blocks won't do, we can reskin a monster stat block from the Monster Manual into something closer to what we want or need. For example, if we want a barbarian warlord who hits like a freight train, we might use the fire giant stat block for the warlord.
Reskinning stat blocks is the most powerful improvisational tool for D&D.
Quick Monster Stats
The section "Monster Statistics by Challenge Rating" from chapter 9 of the Dungeon Master's Guide has statistics you can use to build a quick NPC or monster on the fly. For a looser and easier system, consider the following baseline statistics. First, choose a challenge level for your NPC or monsters. Consider that a single monster of a given challenge rating is roughly equivalant to four characters of that level. Use the following formulas to determine the rest of a creature's statistics:
AC / DC = 12 + 1/2 CR
Attack Bonus / Primary Saves = 3 + 1/2 CR
Hit Points = 15 + 15 x CR
Base Damage = 5 + 5 x CR
That's about all you need to build a quick NPC stat block if you'd rather not look up a stat block in the Monster Manual. It's definitely a loose system and not perfectly matched to the math of 5e D&D but the whole challenge rating system is likewise imperfect. In particular, it doesn't work well for monsters below CR 1 although just using the baseline stats would work (AC 12, +3 attacks and saves, 15 HP and 5 damage). Still, this will get the job done in a pinch.
You are, of course, encouraged to tweak the results of the above formulas to fit the specific monster. Just don't spend too much time on it.
For a better and more useful look at generating monster statistics on the fly, check out 5e monster manual on a business card including this really useful single-page PDF for selecting monster stats at any challenge rating.
Choose Tools to Help You Improvise
Its easy for us to complicate our lives without thinking about what we're doing. It's comfortable to worry more about monster statistics than the more open and creative components of our D&D games. The truth is, monster and NPC statistics just don't matter that much. Reskinning a stat block from the Monster Manual saves us a ton of time and, 99 times out of 100, works just as well as custom building a monster from scratch.
Keep the tools on hand that you need to improvise a great game. Start with a DC between 10 and 20 based on the situation and, if you need to, reskin a stat block from the Monster Manual. It's the easiest and most powerful way to run NPCs at the table.
New to Sly Flourish? Start here, subscribe to the weekly newsletter, or support Sly Flourish on Patreon!
Check out Mike's books including Return of the Lazy Dungeon Master, the Lazy DM's Workbook, Fantastic Adventures, and Fantastic Adventures: Ruins of the Grendleroot.
Support Sly Flourish by using these links to purchase the D&D Essentials Kit, Players Handbook, Monster Manual, Dungeon Master's Guide, or dice from Easy Roller Dice.
Send feedback to @slyflourish on Twitter or email mike@mikeshea.net.
This article is copyright 2020 by Mike Shea of Sly Flourish.
Michael E. Shea's Blog

- Michael E. Shea's profile
- 39 followers

