
Jeff Potter's Blog, page 6
January 30, 2011
Poaching Salmon… Using the Office Toaster Oven
Greg Bocquet and I filmed a few fun short videos for TheStreet.com's site. Here's one of them: poaching salmon in olive oil using your office toaster oven. Enjoy!


December 1, 2010
An Interview with Adam Savage of Mythbusters
For my book, Cooking for Geeks, I interviewed food scientists, researchers, and chefs; but one of my favorite interviews was the one I did with Adam Savage, co-host of Discovery Channel's MythBusters. And yes, Adam is just as much fun and as animated in real life as you'd suspect from watching the show.
Jeff: How do you go about testing a myth?
Adam: One of the earliest things we realized on the show is that you always have to have something to compare to. We would try to come up with an answer like: is this guy dead, is this car destroyed, is this an injury? And we would be trying to compare it to an absolute value, like X number of feet fallen equals dead. The problem is the world is very spongy and nonuniform, and trying to nail down a value like that can be really difficult. So we always end up doing relative tests. We end up doing a control under regular circumstances and then we test the myth under identical circumstances, and we compare the two things. In that comparison, we get to see our results.
We did one where we were testing whether or not you could tenderize steaks with explosives. We had to figure out what tenderness is. The problem is you can give two different people each a piece of steak from the same cut compared to a piece of steak from a different cut, and they might come up with two different assessments of which one is more tender. We actually did a whole day of testing that didn't end up on film because we realized we were using the wrong parameters for assessing steak tenderness. The USDA actually has a machine for testing the tenderness of steak that measures the pounds of force it takes to punch a hole through a steak. We replicated that machine and to our great surprise, it worked exactly as it was supposed to. Coming up with something for $50 that equals the USDA testing equipment: that was thrilling!
Jeff: How can testing a myth translate into learning more about cooking?
Adam: Changing one variable is probably the single hardest thing for people to understand. Change only one variable. It's not like changing only a small number of variables; it's really changing one variable at a time, because only then do you know what caused the change between your first test and your second test. You get so much clarity from the process that way.
I'm an avid cook. My wife and I both cook a lot of elaborate things, and we really do love playing around with single variables, changing things and learning how things work. We were reading Thomas Keller, and he talked about how salt is a flavor enhancer, and he mentioned that vinegar does a similar thing. It doesn't add a new taste, but it often alters the taste that's there. My wife was making a cauliflower soup, and it was kind of bland. I didn't want to put any more salt in it, because I could tell it was about to go in the wrong direction. We tossed in a little bit of vinegar and the whole thing just woke up. It was thrilling! I love that.
Jeff: Have you done other myths related to food?
Adam: We have — certainly a whole bunch of drinking myths. We did poppy seed bagels to see if eating a poppy seed bagel causes you to test positive for heroin, which is absolutely true. In fact, parolees are completely forbidden from eating poppy seed bagels. They're told if you test positive for drugs, we are not going to wonder why. You are just going to go back to jail, so make it easy, don't eat poppy seeds.
I had a whole episode written called "The Surreal Gourmet," which ended with tenderizing steak with dynamite, but it had all those other things like poaching fish on your catalytic converter or cooking eggs in your dishwasher. Jamie loves the idea of tenderizing meat in the dryer.
Jeff: I thought of roasting almonds in a dryer, but not tenderizing meat.
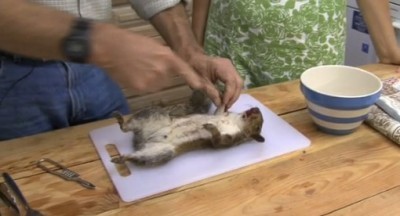
Adam: Also, the idea of "is it safe to eat fresh road kill?" We think that would be just hilarious and gross.
A reader sent me a note, pointing out that The Telegraph, of all places, had a video of cooking with roadkill—in their case, a squirrel:
November 30, 2010
Talk @ Harvard – Dec 2nd, 7 pm, Barker Center
This Thursday, I'l be at Harvard () giving a talk (and signing books if you bring a copy—I'll have a few copies on-hand). Dara and Larissa at The Food Literacy Project are putting the event on, and created this awesome poster.
November 24, 2010
Simple Rosemary Mashed Potatoes
Continuing along with the theme of a "15 Minute Thanksgiving Meal", here's how to make mashed potatoes in just a few minutes.
Microwave until cooked, about 6 minutes:
3 to 4 medium red potatoes (600g)
After cooking, cut the potatoes into small pieces that can be mashed with the back of a fork. Add and mash together:
1/2 cup sour cream (120g)
1/3 cup milk (85g)
4 teaspoons butter (20g)
2 teaspoons finely chopped fresh rosemary leaves (2g)
1/4 teaspoon salt (2 large pinches – 1g)
1/4 teaspoon ground pepper
And here's a quick video shot by the fine folks over at how2hereos.com of me making this:
November 23, 2010
How To Cook The Perfect Thanksgiving Turkey in Fifteen Minutes
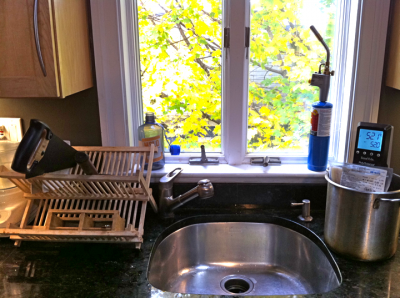
Yes, that is a saw in my drying rack.
In a nutshell: sous vide the turkey breast and slow-cook the turkey legs. Fifteen minutes of "chef" time; perfect texture and flavor every time.
Turkeys are "hard" to cook because different parts of the bird are composed of different ratios of proteins that happen to require different temperatures and cooking times to obtain ideal doneness. You can cook the "perfect" thanksgiving turkey by splitting up the bird into the two main parts—the breast and the legs—and cooking each of them separately.
First, the turkey breast. Like most breast meats in poultry, turkey breast is extremely lean and low in collagen, meaning that once the actin proteins cook and denature, you'll have a tough, dry hunk of meat. The Food Safety & Inspectional Services (FSIS) at the USDA recommends cooking turkey to an internal temperature of 165°F / 74°C, well above the temperature at which the turkey breast looses its moistness. Why this temperature? Because it will kill any pathogens related to food-borne illness instantly (well, within 10 seconds), which is a really good thing to do. But you can cook things at lower temperatures, if you hold them for a long enough duration to properly pasteurize them. The FSIS actually provides guidelines for this as well—see page 5 of www.fsis.usda.gov/oppde/rdad/fsisnotices/rte_poultry_tables.pdf for details.
To cook the "perfect" turkey breast, cook it use the sous vide cooking method at 140°F, holding for at least 28 minutes once the breast has reached temperature. For details on how to build your own sous vide setup, see my blog post on a DIY sous vide setup, or just plunk down the cash and buy a Sous Vide Supreme or a unit from PolySci.
What about the dark meat? This turns out to be even easier to do than the breast—no sous vide setup necessary. Like duck legs, turkey legs are high in collagen, which takes a while to break down and become tender. Cooking the turkey leg in a slow cooker works fantastically well, for exactly the same reasons that cooking duck legs in a slow cooker works: with sufficient heat and time, the collagen will break down, but moisture in the meat will remain in-place.
To cook the "perfect" turkey leg, drop the turkey leg into a slow cooker, fill with water, and add a few tablespoons of salt. The salt will brine the turkey leg as it cooks, skipping any pre-brining step. And as for the water? Traditionally in something like duck confit you'd use duck fat, but the only function of the fat during cooking is to convect heat into the duck leg. Water works just as well, and is a heck of a lot cheaper. Plus, you can brine the leg with salt water (the salt will dissolve into the water, but not the oil).
Once you've got your turkey leg immersed in saltwater, flip the slow cooker on and walk away. Let it cook for at least six hours; although longer is better. You can even go overnight, if you want to set it up the day before your feast. The slow cooker will keep the liquid hot enough that no food-borne or spoilage bacteria are going to grow; it's actually safer than your fridge.
But wait, you ask—what about the crispy brown skin? Neither slow cooking nor sous vide reach hot enough temperatures for the Maillard reaction, which is responsible for that browned outside and rich, toasty flavors, from occuring. To get that beautiful brown crispy outside, place the cooked meat, skin-side up, under a broiler set to low for a few minutes, until the skin crisps up.
One more thing: your turkey leg might not fit in your slow cooker. In which case, dear reader, I suggest grabbing a saw and working out any aggressions about the TSA, IRA, or other TLA while hacking off the end of the leg. (You know, I've actually only had pleasant experiences with the TSA and IRS, to give credit where credit is due.) And yes, it is scary how easy it is to saw through a 1″ bone with a cheap wood saw. (I have better photos of all of this, sitting at home on my camera that I forgot to sync before hitting the road. Sigh.)
November 13, 2010
What is it?
What is it? Leave your guesses in the comments…
Answer here in a few days… And perhaps a cool prize or something, if I can figure out something suitably cool.

November 2, 2010
Hacking Your Slow Cooker: D.I.Y. Sous Vide Setup
If you're only going to try one thing from my book, Cooking for Geeks, I'd recommend sous vide—essentially ultra-low temperature poaching. By holding foods like eggs at precise temperatures, you can control which proteins will cook and which ones won't. Perfect soft-poach egg? Perfect medium-rare steak? Perfect fish? These all become super-easy with sous vide.
High-end restaurants use this technique all the time, and with a little care, you can safely do sous vide cooking at home as well. You do need to be aware of proper time-at-temperature guidelines to safely pasteurize any pathogens that might be present, but honestly, it's quite easy. If you want more details on sous vide, I highly recommend checking out Douglas Baldwin's "Practical Guide to Sous Vide." (Or see the first half of chapter 7…)
The pros use a piece of chemistry lab gear called an immersion circulator (units by PoliSci; around ~$1k new). For consumers, there's at least one unit on the market (Sous Vide Supreme, ~$450). If you have the cash and want something that just works, it's certainly not a bad option. But if you're not ready to shell out that much, or want bragging rights to a hacked slow cooker, you can wire up your own version that's almost as good. Here's how:
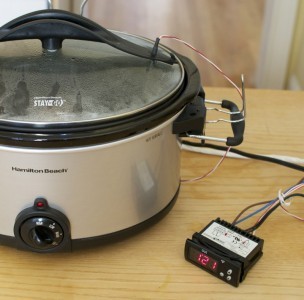
1. First, the slow cooker. The slow cooker will serve as the brawn, holding the water and providing the heat source. Snag a cheap slow cooker—you need one that will turn back on after losing power. Look for one that has a physical knob; the digital ones reset and stay off after power has been cut and then restored.
2. Next, the thermocouple. If you have a standard kitchen probe thermometer (which you really should), the probe—long braided cable, metal probe—is a thermocouple. For a sous vide rig, you'll need a type J thermocouple, which is made of materials that give it good sensitivity in the temperature ranges of sous vide cooking. This should cost around $15 to $20; search online for "type J probe" or search for part 3AEZ9 on www.grainger.com.
3. Finally, the temperature controller. Just about any thermocouple-based temperature switch will work; look for one that runs off 12 volts DC, such as Love Industries' TCS-4030, which runs about $75. Snag a 12-volt wall wart (AC/DC power adaptor) while you're at it.
Once you have all the parts on hand, it's a relatively straightforward procedure to perform the lobotomy on the slow cooker: hook the thermocouple up to the probe inputs on the switch and connect the 12-volt power supply to the switch, then snip the slow cooker's electrical cord (or use an extension cord to preserve the original plug on the slow cooker) and run one side of it through the switch. If necessary, create a small hole in the lid of the slow cooker and poke the thermocouple through. Make sure you use enough water in the slow cooker that the thermocouple makes contact with the water when the lid is on!
Take a look at this photo of a piece of meat that's been cooked via sous vide: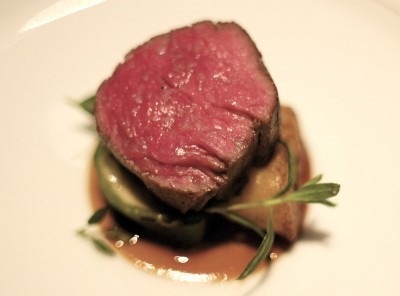
This piece is cooked rare/medium-rare. Perhaps not your personal preference, but the thing to notice here is the lack of any gradient of doneness on it. It's essentially rare/medium-rare all the way up to the edge. After being cooked sous vide, meats are typically dropped into a hot cast iron pan or placed into a hot oven very briefly to brown the outside, since sous vide cooking isn't hot enough for Maillard reactions to occur. (The Maillard reaction is the breakdown of proteins and simple sugars, resulting in the characteristic brown color and rich, nutty aromas of roasted meats and baked breads.)
When you cook a piece of meat using a traditional method, you're essentially steering two variables at the same time: internal temperature (to, say, 140°F) and external temperature (above ~310°F). It's a balancing act, and timing and application of heat require attention.
With sous vide, though, you essentially make these two variables independent. You cook the meat in an environment of 140°F, taking care of the internal temperature variable; and then finish it off in a super-hot environment to bring the outside surface up to 310°F—but without needing to wait for the interior to come up to temperature, because it's already there. And because these two variables are now independent, you don't have to worry about the timing, or about trying to hit the two temperatures at exactly the same time. That's the magic of sous vide.
October 31, 2010
Pumpkin Soup
Soups don't have to be complicated, as this simple pumpkin soup shows. This was originally a butternut squash soup recipe in Cooking for Geeks, but like any good geek—that'd be anyone who's curious how things works and is willing to play with things—I thought, "Hey, pumpkin is a gourd, too; so that should work!" Sure enough, it does. And with hundreds of millions of pumpkins showing up on doorsteps across our nation today (November 1st), it's also a great way to reuse, reduce, and recycle!
Purée in a food processor or with an immersion blender:
- 2 cups (660g) pumpkin, peeled, cubed, and roasted (about 1/2 a small "pie" pumpkin)
- 2 cups (470g) chicken, turkey, or vegetable stock 1 small
- (130g) yellow onion, diced and sautéed
- 1/2 teaspoon salt (adjust to taste)
Notes
I'm a huge fan of weighing ingredients out, instead of using volume measurements. Whether you use weight or volume, keep in mind that the quantities are for the prepared ingredients and are only rough suggestions. Prepare each item individually. For example, for the pumpkin, peel it, then coat it with olive oil, sprinkle it with salt, and roast it in the oven at a temperature around 400–425°F / 200–220°C until it begins to brown. When you go to purée the ingredients, hold back some of the pumpkin and some of the stock, taste the purée, and see which you think it needs. Want it thicker? Add more pumpkin. Thinner? Add more stock.
This soup by itself is very basic. Garnish with whatever else you have on hand that you think might go well, such as garlic croutons and bacon. Or top with a small dab of cream, some toasted walnuts, and dried cranberries to give it a feeling of Thanksgiving. How about a teaspoon of maple syrup, a few thin slices of beef, and some fresh oregano? Chives, sour cream, and cheddar cheese? Why not! Instead of purchasing items to follow a recipe exactly, try using leftover ingredients from other meals to complement the squash soup.
If you're in a rush, you can "jump-start" the pumpkin by microwaving it first. Peel and quarter the pumpkin, using a spoon to scoop out the seeds. Then, cube it into 1–2" / 3–5 cm pieces, drop it into a glass baking pan that's both oven and microwave safe, and nuke it for four to five minutes to partially heat the mass. Remove from microwave, coat the pumpkin with olive oil and a light sprinkling of salt, and roast it in a preheated oven until done, about 20 to 30 minutes. If you're not in a rush, you can skip the peeling step entirely: cut the pumpkin in half, scoop out the seeds, add oil and salt, roast it for about an hour (until the flesh is soft), and use a spoon to scoop it out.
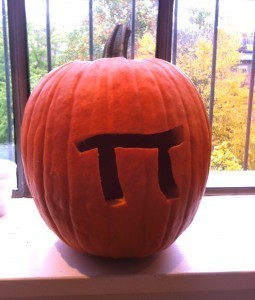
Pumpkin "pi" inspired by an image I saw online—I think Gizmodo. -J
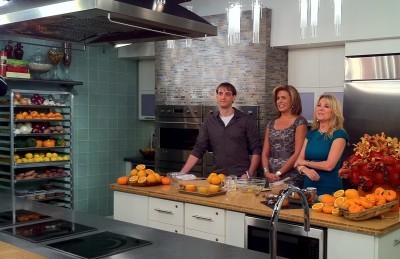
Behind The Scenes: The Today Show

"There's no biz like show biz"—ain't that the truth—and live national TV is like nothing else. The Today Show broadcasts 4 hours of live content each day, five days a week. I cannot imagine the amount of work that goes into finding talent and producing content.
What's it like being a guest on a show like The Today Show? In a word: incredible.
The work started a few weeks before my appearance. A phone call, after seeing the piece on my book in USA Today: "Would you be interested in being on The Today Show?" Of course. Then there's a flurry of short emails: "What can you show our viewers in five minutes? Something fun, visual, and interesting?" They had a copy of the book and suggested "Brownies In An Orange." Fun? Check. Visual? Check. Interesting? Depends. There's not a lot of deep connections to food science here (well, caramelization, oven temp, and how flavors go together). But viewers just want to be entertained, and the producers know what will work on their show. Check.
The day before—4:30 PM. Rehearsal. One of the show's food stylists (they have two) and the segment producer (they have many) and I meet on-set to do a run through of the segment. Kathie Lee and Hoda aren't present; this isn't a full rehearsal. It's mostly a coaching session and prop run-through. (It's really awkward to realize you're missing a whisk or bowl when on live TV with millions of viewers watching.)
Oh, food stylist? Her job is to make sure all the physical objects—bowls, spoons, beauties—are laid out correctly, and actually procure and produce all the actual food. And it's all real and edible—no "cheats" going on here. The Today Show has an off-set kitchen where they actually cook and prep everything for the guests. I think the only food I touched was the orange I sliced while on camera and the brownie batter I sampled. I didn't even get to taste the baked one! (Hoda ate the whole thing, I think.)
As for the producer, her job is to make sure that I have a sense of where the segment is supposed to go. What questions might get asked of me? Make sure you give 3 to 4 sentence long answers, not too short! And at all costs, avoid dead silence. Keep talking. Keep it energetic.
Day of—8:30 AM. On-set call time. I was slotted for the 10 am to 11 am hour; but not even the producer of the segment knew what exact time I'd be on, or if they'd need me for teasers (those little "coming up later this hour…" bits). So, 8:30 AM it was. I booked a hotel two blocks away (paper-thin walls—did not sleep well at all!—thank god for hair and makeup).
So yeah, hair and makeup. It makes a difference. It's weird. First, anti-glare. All over the face. Then they hit you with powder, and brushes, and sponge foams, and I really don't remember because a) she was fast, and b) I had my eyes closed most the time. The president of a major non-profit was sitting to my right going through the same thing. To my left was a kinda-cute dancer. I chatted with the makeup person—"You must see an amazing number of interesting people"—"Yup!"—and then she booted me back to the green room. Someone tells me "wow, you don't even look like you have makeup on!" Which makes me wonder: is that a compliment or insult? She said it was a compliment. I take her word for it; filing it away to puzzle over later.
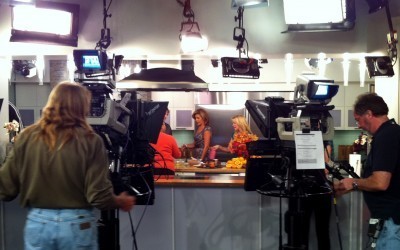
One detail: there are TVs everywhere. With HUGE RED CLOCKS RIGHT BELOW THEM THAT YOU CAN'T MISS. This is f'ing mission control. Every room. The studio itself is multiple sets, split over two, maybe three floors. Next to the green room is the mic room—really, mic broom closet—where they have something like 200+ wireless microphones all racked up on their charging stations. I peaked into the control room itself. If you've seen the movie The Truman Show, that's along the right lines, only The Today Show's control room is way more impressive. There's something like 25+ people in there—the EP (executive producer) all the way down to the current segment producer. Camera feeds in from everywhere. (With so many different sets in the studio, they have different cameras at each set.) I have no idea how they manage their audio feeds.
It's mind-blowingly complicated.
We sit and wait in the green room for another hour. I chat with someone sitting next to me, she's the president of UNICEF. They call her, she walks out of the room… and onto the TV screen we're watching. Does her thing; very comfortable; then walks off the TV screen… and back into the green room. This repeats itself half a dozen times. It begins to feel normal.
10:15 AM. Jeff Potter? Let's go up to the kitchen set. You're on at 10:46.
Off we go.
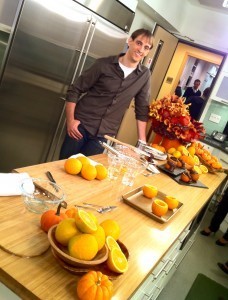
I walk into the kitchen set, and wow. Sometime 6 PM the night before and day of, an art director had taken a pass. Oranges cut in half, beautifully piled up next to tiny pumpkins. Beautiful arrangement of flowers. The works. It looked fantastic; magazine-cover like.
10:30 AM. The producer and food stylist walk in. Another guy—maybe a camera operator? or segment director?—is also there. I yank the plastic wrap off the bowl. The producer reminds me: make sure to give direction to Kathie Lee and Hoda to mix the brownies. I'll be demoing how to slice up the orange while the two of them mix the brownie batter. I secretly hope that the three of us end up just eating brownie mix, which I think would be really funny.
10:40 AM. It starts getting a bit crowded. People are flowing into the room. The audio guy hands me a mic. I've done enough of this by now to know to clip it to my left side, since I'm facing left. I ask the producer "Do I need to do a level check?"—"No, no, they've got you."

10:41 AM. More people flow in. It's a stampede. The entire crew has to run between sets during commercial breaks. Hoda and Kathie Lee included. Everything's surprisingly calm, almost casual, although there is a very serious professionalism around this crew. They're there to do their jobs; and have fun doing it. Everyone from the top down is spot-on to work with; everyone has their roles; everyone knows who to hand off questions to. With live TV, you have to be easy to work with, it's clear.
10:44. Kathie Lee and Hoda walk in. Actually, I don't remember, they might have run. This is where my memory starts to get fuzzy. The situation has so much—pressure?—that's not actually the right word; it's just that it's so well-structured that you can flip into auto-pilot mode almost. It's like running: you can't really think about it as putting one foot in front of the other, your mind is working at a higher level than the mechanics of how it works.
10:45. Kathie Lee, Hoda, and I are chatting. It's mostly "So what are we doing here?"—"Making brownies in an orange. Thanks for having me on!"—"Oh of course." I say something about the SNL parodies of them. Some guy starts calling out numbers while we chat about random stuff for 60 the next minute or so, mostly I think just to get a sense of 30 what our rapport is like. I'd watched about four hours of YouTube clips 15 the night before of the two of them—learning to play volleyball (under studio lights—yikes), getting bird-poop facials, being entertaining—so felt like 10 I had a pretty good sense 5 of them. 3 (2) (1)
10:46.They snap their heads to the teleprompter and read off the script. We're live. My heart has dropped out of me. I hadn't been nervous until the guy called out 5 and I realized that We. Were. Doing. This. Now. I'm not actually nervous with this stuff anymore; it's more the feeling one gets while standing on a high bridge: you know you can't actually fall, but your body just says "this isn't naturalllll" and the reptilian portion of your brain manages to rear its head anyway. There's absolutely nothing natural about having two news anchors standing to your left while looking forward into a bunch of weird-looking gear and trying to pretend like it's absolutely normal. "Oh this? Like having coffee in the morning. I do it every day!"
Which is actually the secret to TV. Do your homework; know exactly what you're going to be doing; know exactly what might go wrong (in my case, my number one fear was that I might cut myself with the knife and de-rail the segment). And then, convince the reptilian portion of your brain—the part that dumps adrenaline into the bloodstream—that it's actually not important, and thus, nothing to be afraid of.
10:50. We're done. I don't actually remember any of it. At all. Except that I licked the brownie batter, twice (trying to be a little bit goofy to cancel out any appearance of looking uncomfortable). And that Kathie Lee Gifford called me ADORABLE on national TV.
I'm later told that I was good. Friends and family who've watched it have complimented me—apparently I'm a natural—but I haven't had time to actually watch the clip yet. I'll do it after writing this, but wanted to get my memories written down before seeing it.
October 27, 2010
Brownies In An Orange
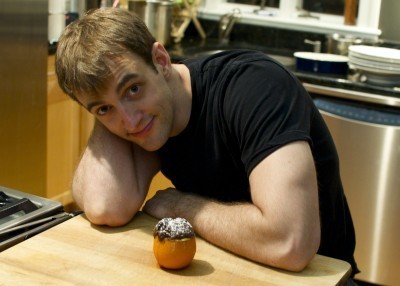
Brownies In An Orange might not strike you as being geeky at first glance, but there's tons of food science at work as those brownies cook. And if there's one thing which defines a geek, it's curiosity and wondering how things works—which is why knowing even a little bit of food science can help you turn out a better meal!
Making this quick—and kid-friendly—dessert is easy. Here's how.
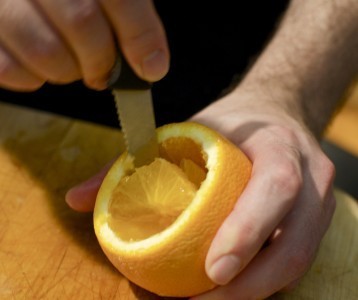
Prepare the oranges. Place an orange on a cutting board, and grab a short, serrated paring knife. Cut off just a little bit of the bottom of the orange, so that it won't roll around when placed on a baking tray. Then, cut off the top of the orange, this time, cutting off enough so that you can see the actual flesh of the orange. Next, cut out the flesh of the orange. I do this by making one long round cut around the inside of the pith—that's the white bit of the peel—and then making a few diagonal cuts through the center of the orange, popping out wedges of the orange. Don't cut all the way through to the bottom, though! Trust me, it sounds a lot more complicated than it is; and any way that you can get the orange pulp out will work. (Here's a quick-'n-dirty YouTube video I made for Deb over at The Today Show showing this, if you want a visual aid.) Drain any orange juice from the center, and you've got your hollowed-out oranges. Leave a bit of pulp on the inside; it'll flavor the brownie mix!
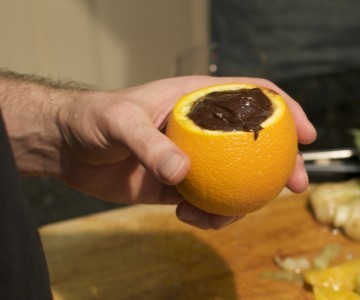
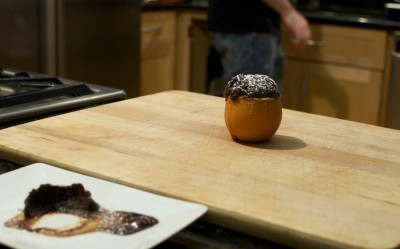
Fill the oranges with your brownie batter. Use your favorite recipe to make a batch of brownie batter from scratch, or just snag a box and follow the mixing directions on the back. This isn't a sophisticated dessert—it's just about having fun in the kitchen and getting you to see things in ways you might not have thought of before. Don't fill the oranges all the way to the top; they'll overflow! Which isn't bad, actually: any brownie mix that flows over the sides and bakes onto the outside will just add visual appeal and leftovers for the chef to nibble on when no one is looking. Here's a photo of me doing it the wrong—but delicious!—way.
Bake! Set your oven to 325°F or 350°F—whatever your recipes says—and bake for around 20 to 25 minutes. There's no exact set time for when they'll be done; it really depends how gooey versus set-up you like your brownies. You can use a toothpick to check doneness, looking for the toothpick to come out only slightly-coated. But if you under-bake these, they just come out as delicious chocolate-orange molten lava cakes. Really, there's no wrong way to cook these. Dust with powdered sugar and serve.
So where's the food science in here? All over the place! Here is just a peek at some of the food science—and geeky thinking—behind Brownies In An Orange.
Why set the oven to 325-350°F? Since baking is all about adding heat to the food, you'd think that a few degrees difference wouldn't matter. But it does! That's because different chemical reactions occur at different temperatures. Water boils at 212°F. (Well, if you live at altitude, then lower; and if you have stuff like salt or sugar in the water, higher.) But water boiling off around 212°F isn't the only reaction. Sugar begins to caramelize and visibly turn brown at around 356°F—just above that 350°F temperature! This reaction adds complexity and depth to the flavor of baked goods. You want this to happen for some baked goods—peanut-butter cookies, for example, so we bake those at 375°F—but not other times, such as brownies, where you want the flavors of the chocolate to come through, which is why we bake them slightly cooler.
Why doesn't the orange burn? Because it doesn't get hot enough! There's a lot of water present in the rind, as well as the brownie batter. Think about the cooked brownie: it's not brittle, dry, and tough—that's because there's still a lot of water present after being baked. Putting food into an oven set to 325°F doesn't mean that the food itself is going to get to 325°F when it's done. This is why we time how long we bake things—it's all about pulling it out of the oven once the baked good comes up to the appropriate temperature. A loaf of bread in a 400°F oven, for example, is actually done when the outside of bread gets to around 310°F and the internal temperature is somewhere around 200°F.
Why do orange and chocolate taste so good together? It has to do with the chemicals that make up the odors responsible for each ingredient. Similarity in compounds seems to be a good predictor of compatibility of ingredients. (See foodpairing.be for cool details.) This is why some combinations that sound odd at first actually work together so well. Watermelon and feta cheese? Fantastic, and a great summer-time salad.


