
Rachael Ray's Blog, page 36
January 17, 2014
Baking Favorite: Raspberry Bars
I prepared a lot of holiday cookie trays for my baking business this season, and I was somewhat surprised by the overall favorite in a very unofficial poll of my customers. You would think frosted Christmas cut out cookies, chewy molasses cookies, or mint brownies would have been tops.
But, no. Surprisingly, these raspberry bars stole the show.
After trying them, you’ll see why. Rich, buttery shortbread is topped with not-too-sweet raspberry jam, and the pièce de résistance is the granola topping. These are crazy delicious.
Plus, no one knew how easy they were. It’s criminal.
Let’s get on with how to bake them, shall we?
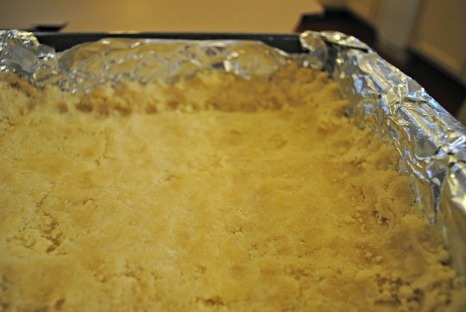
First, make the shortbread crust. Combine softened butter, sugar, and vanilla with an electric mixer, then add flour, lemon zest, and kosher salt to form a stiff dough.
Pat the dough into a prepared pan lined with foil and sprayed with non-stick cooking spray. Pro Tip: Wet your hands to make it easier to work with the dough and press it evenly into the pan.
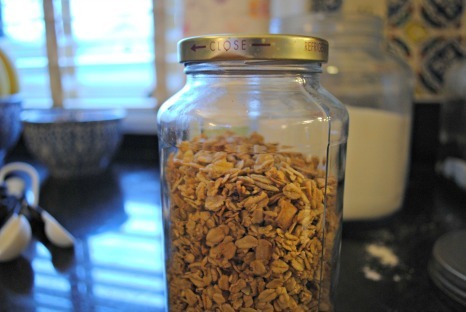
Spread 12 ounces (usually one small jar) of raspberry preserves evenly on top of the crust. Top with one cup of your favorite granola (I use either store-bought or this recipe for absolutely addictive granola).
Bake at 350 F for 40-45 minutes, or until lightly browned.
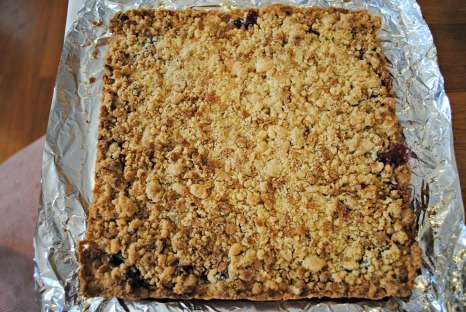
Sprinkle with confectioners’ sugar when cooled, and cut into even squares.
![ras bars baked 2[1]](https://i.gr-assets.com/images/S/compressed.photo.goodreads.com/hostedimages/1390078713i/8139827.jpg)
Raspberry Bars
Ingredients
2 sticks butter, softened
3/4 cup sugar
1 teaspoon vanilla
2 1/4 cup flour
1/2 teaspoon lemon zest
1/2 teaspoon kosher salt
12 ounces raspberry preserves
2/3 cup granola
Confectioners’ sugar
Directions
1. Preheat oven to 350 F. Line an 8-inch square baking pan with foil, leaving an overhang on two sides so you can easily remove the bars when they are baked and cut into even squares (more on this handy trick here!), and spray with non-stick cooking spray.
2. Combine butter and sugar with an electric mixer until fluffy. Add the vanilla and mix to combine.
3. Whisk together the flour, lemon zest, and salt in a small bowl and add to the butter mixture. Then, mix until just combined – it will be a dry, stiff dough.
4. Pat dough evenly into prepared pan with wet hands to make it easier to work with the dough.
5. Evenly spread the raspberry preserves on top of the crust. Sprinkle granola evenly on top of the preserves.
6. Bake for 40-45 minutes, or until lightly browned. Let cool completely before sprinkling with confectioners’ sugar and cutting into squares.
Looking for more delicious bar cookie recipes? Try these!


January 16, 2014
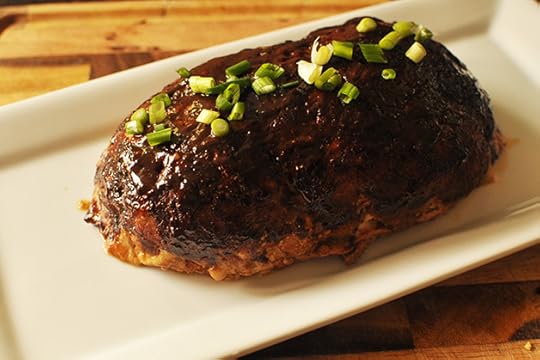
A Comfort Food Twist: Asian-Style Meatloaf
Meatloaf often gets a bad wrap. You either love it or you hate it.
In my experience, most people dislike meatloaf. They think of the dry, bland-tasting stuff that some diners serve. The truth is, meatloaf can be amazing.
After all, it’s ground meat and you can dress it up however you like. I like to think of it like a large meatball, and play around with different combinations depending on my mood.
This week, I decided to take my meatloaf to a new part of the world. Well, not literally, but you know what I mean! I kept the standard ingredients of egg, breadcrumbs, and garlic. But, I swapped my usual ketchup, worcestershire sauce, and onions for hoisin sauce (Asian-style BBQ sauce), soy sauce, and scallions. I even changed my standard bread crumbs from Italian to panko.
The combination was a hit, and now I have a new favorite meatloaf recipe. So next time you think you don’t like meatloaf, try your hand at creating a new version. Consider your favorite flavor combinations and give it a try. You won’t be disappointed!
Asian-Style Meatloaf
Serves 4
Ingredients
1 lb ground beef, turkey, or chicken
1/2 cup panko bread crumbs or plain breadcrumbs if you can’t find panko
2 tablespoons soy sauce
4 tablespoons hoisin sauce, divided
1 large scallion, finely chopped
1 clove garlic, minced
Instructions
1. Preheat oven to 350 F. Line a baking sheet with foil and coat with oil.
2. In a large bowl, combine ground meat, bread crumbs, soy sauce, 2 tablespoons hoisin sauce, scallion, and garlic. Mix with your hands until just combined.

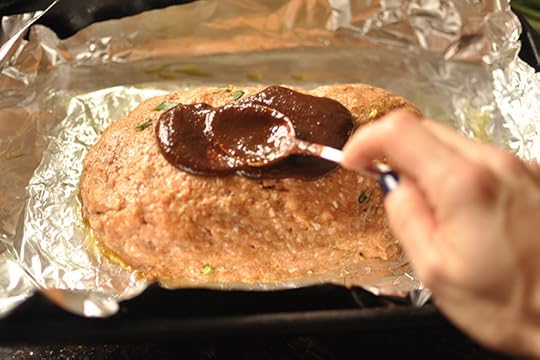
3. Form the meat in the prepared pan into a log shape. Spread remaining hoisin sauce all over the meatloaf and place in the oven. Bake for 50-60 minutes.
4. Garnish with a few scallions, slice, and enjoy.
Loving these flavors?
Use up your hoisin sauce with Hoisin-Sweet Onion Pork Chops or try some Spicy Shrimp Noodle Soup.
January 14, 2014
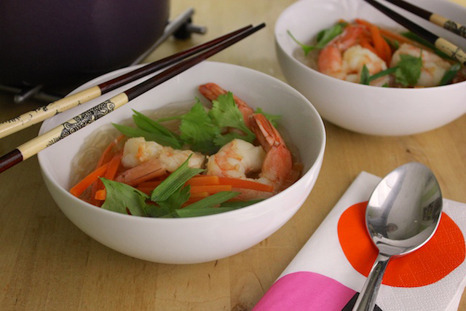
Dinner Deal: Spicy Shrimp Noodle Soup
A glance at current restaurant menus or stroll down the aisles of the supermarket will show anyone that global flavors are definitely trending right now. Ingredients and dishes from Southeast Asia, Latin America, and the Mediterranean, among others, can be found almost everywhere.
The tough part of bringing that flavor into your own kitchen can be sourcing all of the necessary ingredients. Without loads of dried chiles, tortillas, and spices, Mexican and Latin American foods just don’t have the same zing. A stellar Thai-style curry would be nothing without lemongrass, ginger, kefir lime leaf, and chile paste.
Tip: If you’re eager to try out some global flavors but aren’t quite ready to overhaul your pantry with the necessary ingredients, check out the stock aisle.
Several companies have started making flavored chicken and vegetable stocks that are easy to use and have all the rich and hearty flavors of a global kitchen. They’re a great way to experiment with some new flavors or add a boost to your favorite globally-inspired meals.
Spicy Shrimp Noodle Soup
Makes 4 servings
Ingredients
1 (3.75-ounce bag) bean thread cellophane noodles
1 tsp. vegetable or peanut oil
1 cup matchstick-cut carrots
4 cups Thai-Ginger flavored chicken broth
1 lb. frozen cleaned shrimp, defrosted
1 tbsp. soy sauce, as needed
2 green onions, chopped
1/4 cup cilantro leaves, torn
Sriracha, for serving
Lime wedges, for serving, optional
Instructions
1. Bring a kettle of water to a boil.
2. Arrange the cellophane noodles in a deep mixing bowl and pour the water over them. Let the noodles sit until softened, about 15 minutes.
3. While the noodles are softening, place a medium pot over medium heat with the oil. Add the carrots to the pot and cook, stirring occasionally, until they just begin to soften, about 2 minutes. Add the broth to the pot and bring the liquid up to a bubble.
4. Simmer the soup until the carrots are tender, about 5 minutes. Add the shrimp to the pot and simmer until they’re cooked through, 3 to 4 minutes. Season the broth as needed with soy sauce.
5. To serve, drain the cellophane noodles and divide them between four serving bowls. Ladle the broth, carrots and shrimp over the noodles. Garnish each bowl with green onions and cilantro. Serve with sriracha and lime wedges (if desired).
January 11, 2014
Chicken Salad – Buffalo Style!
Store-bought rotisserie chicken is my friend – and it should be yours too. It’s the most amazing shortcut to some of my favorite dishes. In fact, every time I think I’ve exhausted ways to use it, I come up with another one.
Of course, if you’d prefer to prepare your own, the process is quite simple. Once you buy a roasting chicken, loosen its skin and add fresh herbs underneath (if you like), and then rub softened butter all over the skin. Season with salt and pepper, and roast it in the oven at 400 F for 1 hour and 15 minutes. Here’s a great recipe to try!
But back to the matter at hand: this delicious salad. The perfect quick brunch or lunch recipe, Buffalo Style Chicken Salad is a hybrid of two classic recipes: chicken salad and buffalo wings.
I’m actually thinking of serving these on mini bagels or tiny slider rolls for Super Bowl Sunday – they’ll be a touchdown!
Buffalo Chicken Salad
Makes 2 sandwiches
Ingredients
1 1/2 cups store-bought rotisserie chicken, shredded
1 large stalk of celery, chopped small
1 tbsp. of red onion, finely minced
1/2 cup mayonnaise
2-3 tbsp. buffalo hot sauce such as Franks Redhot
1/4 cup feta or blue cheese, crumbled
2 mini bagels, cut in half lengthwise
Salt and pepper to taste
Instructions
1. In a large bowl combine, chicken, celery, and onions.

2. In another smaller bowl, stir together mayo, hot sauce, and cheese. Mash with a fork until well combined.
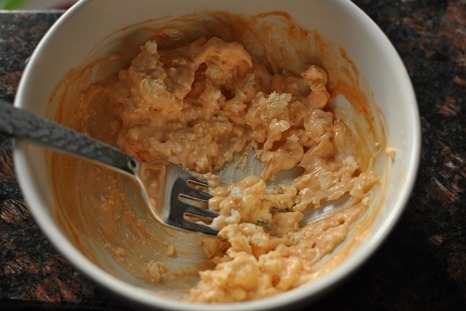
3. Stir into chicken mixture and place onto mini bagels.
January 10, 2014
Weekly Meal Planner: Comfort Food Edition
Welcome to the Weekly Meal Planner! Whether you work all day and are out of steam when the dinner hour hits, or are fresh out of ideas and in a cooking rut, we are here to make your life easier. Note: We’ll include tips for picky eaters and easy food swaps if you don’t have an ingredient on-hand.
Most of the country has been in a deep freeze, so we’ve pulled out some comfort food favorites and hearty soups to warm up this week’s meals. Let’s get started!
Meatless Monday

Lunch: You can use this Cream of Celery Soup as a base for creating your own creamy veggie soup. Swap in the veggies of your choice – carrots, zucchini, and broccoli are all good options – for the celery if you’d like.
Dinner: Broccoli and Cauliflower Gratin Mac ‘N Cheese is an easy dinner to kick off the week. Make it the day before and refrigerate until you are ready to bake.
Dessert: Cranberry Walnut Oatmeal Cookies are healthy and delicious. Bonus: They freeze well.
Tuesday
Lunch: Spinach, Artichoke and Tuna Tortellini Salad is a tasty pantry salad that you can make all year. It’s a terrific lunch for brown-bagging, too!
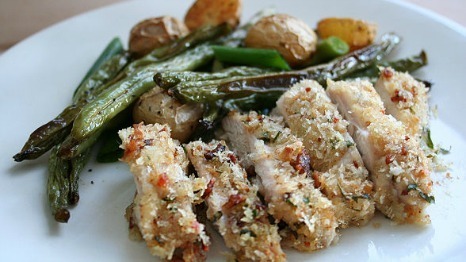
Dinner: Crispy Bacon Breadcrumb Chicken and Smoky Roasted Green Beans and Potatoes is destined to be a family favorite. The entire meal is roasted in the oven, so prep couldn’t be easier!
Snack: Mini Muffin Jelly Doughnut Bites make a great after-school snack. Refrigerated biscuit dough is repurposed into hot doughnuts sprinkled with powdered sugar. Watch them disappear before your very eyes!
Wednesday
Lunch: Chunky Roasted Tomato, Potato and Garlic Soup is light and satisfying. You’ll never reach for a can of tomato soup again. The secret is roasting the tomatoes, which brings out their summer sweetness even when they are not in season.
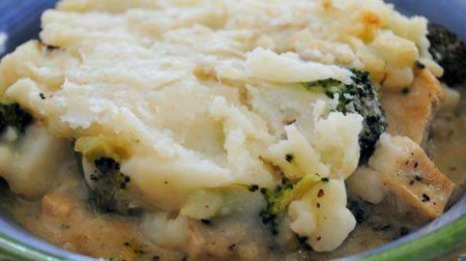
Dinner: Chicken and Broccolini Shepherd’s Pie is a comfort food favorite. If you can’t find broccolini, broccoli is a good substitution. For a lighter twist, you can also swap out half of the potatoes for cauliflower.
Dessert: Peanut Butter Caramel Swirled Brownies are fudgy and decadent. They’re best when served cold – and in small portions!
Thursday
Lunch: You’ll never miss the mayo with this bright and zesty Chicken Salad with Yogurt-Ranch Dressing.
Dinner: Put together a quick and easy taco bar with these Flank Steak Tacos. You can prepare them with chicken or fish, or some of each.
Snack: Homemade Pickle Chips are so good, you’ll never go back to store-bought again. They keep for up to two weeks in the refrigerator.
Friday
Lunch: Cobb Pasta Toss takes a classic salad and transforms it to a pasta dish!
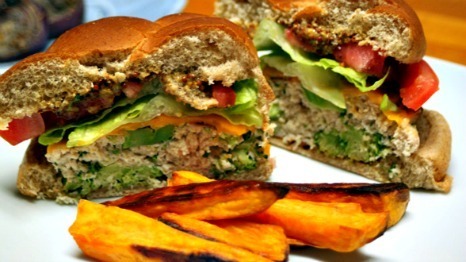
Dinner: Make Friday Burger Night with these healthy and delicious Broccoli and Cheese Turkey Burgers. No need to make a side veggie – the broccoli is cooked right in the burger! For the spice-averse, skip the jalapeño and hot sauce.
Dessert: Pies on Sticks are super fun for kids to make. Nutella and banana is also a favorite filling combo.
Entertaining Saturday

Brunch: Monte Cristo Waffle-Wiches put your waffle iron to work. Ham and cheese sandwiches are dipped in an egg batter and fried in the waffle iron. Delish.
Dinner: Garlic-Chili Shrimp with Greek Spaghetti and Feta is a snap to prepare and will impress your guests.
Cocktail: Save the cocktail for after dinner and serve a grown up milkshake: Root Beer Russian Float.
Family Sunday

Brunch: The Oven-Puff Pancake will be a hit with kids. Set out your favorite toppings like fresh berries, syrup, and powdered sugar.
Dinner: Meaty Baked Ziti is the perfect Sunday supper – it feeds a crowd and can be made ahead.
Dessert: Apple Pie Sundaes are a deluxe combination of store-bought pastry cookies and caramel sauce, sautéed apples, and vanilla ice cream. Replace the brandy with apple juice, or even water, for the little ones.
10 Out-of-the-Box Uses for Aluminum Foil
Aluminum foil is a staple in most (if not all) kitchens. I know when I run out, it’s a major inconvenience. Wrapping leftovers in plastic wrap just doesn’t cut it.
I find myself reaching for foil for many more purposes than simply storing leftover pizza:
1. Sharpen scissors: Fold a sheet of foil over a few times to make eight layers total. Take your dull scissors, and make about 10 cuts to sharpen the blades.
2. Prevent quick breads from over-browning: Tops of quick breads, like banana bread or zucchini bread, have a tendency to over-brown before the middle is cooked through. If your bread is getting too dark (or burning!) before it’s done, loosely tent the loaf with foil about half-way through baking time.
3. Cut even dessert squares (pictured above): When making a bar cookie or brownies, cutting these desserts inside your pan is difficult and often results in less-than-perfect bites. Fix that by lining the pan with two criss-crossed sheets of foil (make sure there’s an overhang) so you can easily lift the baked (and cooled!) batch of treats out of the pan.
Then, place the foil and baked treats on a cutting board. Cut down the middle, and then cut each half in half or thirds (depending on the size and shape of your pan). Then, rotate the cutting board by 90 degrees and repeat with the uncut sides. Voila! Pro tip: Chilled bars or brownies are easier to cut, too.

via Flickr / thebittenword.com
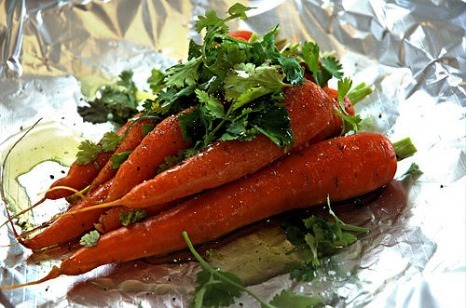
4. Cook an entire meal: Many recipes call for cooking a protein and veggies in a parchment paper sack. No parchment paper on-hand? Use two sheets of aluminum foil with the same results. Here’s how:
Place veggies (I like spinach, thinly sliced mushrooms, and scallions) in the middle of two 12 inch by 16 inch sheets of foil sprayed with non-stick cooking spray. Place a fish fillet or boneless chicken breast (pounded a bit if thick) on top, drizzle with a little olive oil and lemon juice, and season with salt and pepper.
Wrap tightly by first folding the two short sides in, then the longer sides, and then rolling tightly together so you have a compact sack. Bake on a cookie sheet at 400 F for 25 minutes.
5. Cut down on oven cleaning: Prevent messy bits and drips from collecting on the bottom of your oven by placing a sheet of foil on the bottom rack (if your oven has two racks, place the rack you cook on in the middle of the oven and the bottom rack on the lowest tier). Be sure to periodically check and replace the foil.
6. Steel wool stand-in: In lieu of steel wool, use a ball of aluminum foil to scrub off caked-on food from pots, pans and dishes. You can also use this substitute to scrub caked-on bits from outdoor grill grates.

Via Flickr / Genista
7. Save on cleanup: Line baking pans and cookie sheets with aluminum foil to cut your cleanup later. This works with just about anything you bake in the oven, from lasagna to chicken breasts. For messier dishes, like bacon, line with two or three foil sheets. Be sure to spray with non-stick cooking spray for easy food removal when serving.
8. Make your own toaster oven baking sheet: When baking a small batch of french fries or roasting a smaller serving of veggies like asparagus or broccoli, it’s easier to use the toaster oven rather than your larger oven.
There is no need to dig out the special toaster oven sheet that came with the appliance – just fold a piece of foil in half and form sides to make your own disposable baking sheet.
Via Flickr / salimfadhley
9. Grilled cheese sammie melter: There’s nothing worse than biting into a grilled cheese when the cheese isn’t melted. For a perfectly melt-y sandwich every time, try this: When you flip the sammie, turn the heat to low and cover the sandwich loosely with a piece of foil until the second side is golden brown. Melted cheese, guaranteed!
10. Pie crust protector: Avoid burnt pie crust edges by crimping foil around the edges prior to placing the pie in the oven.
Like these tips? Try these 10 Handy Uses for Parchment Paper, too!
Super-Soft Peanut Butter Chocolate Chip Cookies
The first big blizzard of 2014 hit us this week along with two snow days. When snow falls, I get the urge to bake – and eat.
Nothing says “snow day” to me like baking cookies.
I am a lover all things peanut butter and chocolate. One of my family’s favorite cookies are Flourless Peanut Butter Chocolate Chip Cookies.
But I made a new peanut butter chocolate chip cookie on Snow Day No. 1 that may trump our old favorite. They are super soft and moist, and they keep for up to five days, texture fully intact. I doubt there will ever be any left after five days, unless you make a double batch!
Here’s how you make them:
Cream the butter and sugars. Next, add the egg, peanut butter, and vanilla, and mix well.
Then, add the dry ingredients and mix until just combined – do not over-mix. Fold in the chocolate chips. (Try not to eat any of this dough – I dare you!)

Refrigerate the dough for 30 minutes, minimum. Refrigerating prevents spreading and improves the flavor and texture of your finished product.
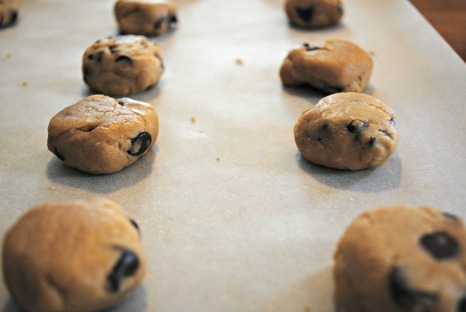
When you are ready to bake, form tablespoon-sized balls (I use a mini ice cream scoop) about 2 inches apart on a parchment paper-lined cookie sheet.
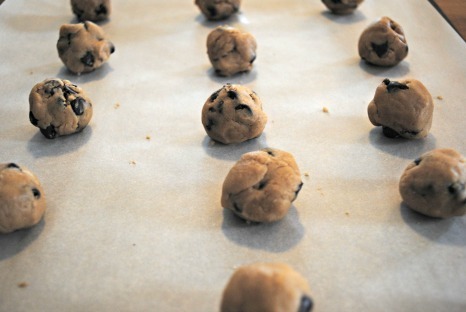
Press down on each ball to slightly flatten each. You can use a glass, or your (clean) hand works just as well.
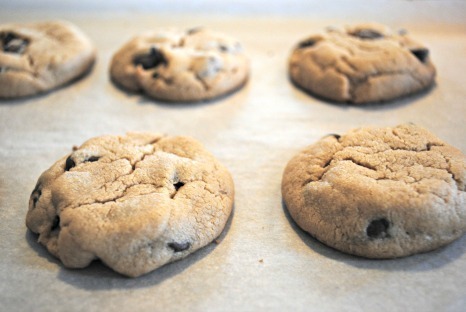
Bake for 9-10 minutes at 350 F until set. The cookies will appear very pale and not completely baked when you take them out. Don’t worry! This is the beauty of the super soft cookie and why they are so delicious.
Also, the cookies will firm up as they cool. Let them cool for 5-10 minutes on the cookie sheet, then transfer them to a rack to cool completely.
Super-Soft Peanut Butter Chocolate Chip Cookies
(Adapted from a recipe from sallysbakingaddiction.com)
Ingredients
1/2 cup butter, softened
1/2 cup brown sugar
1/4 cup granulated sugar
3/4 cup creamy peanut butter (not natural-style)
1 egg
1 tsp. vanilla
1/2 tsp. baking soda
1 1/4 cups flour
Pinch of salt
1 1/4 cup chocolate chips
Directions
1. Mix the butter and sugar with a mixer on medium speed until creamy. Add the peanut butter, egg, and vanilla and beat until well- combined.
2. Whisk together the baking soda, flour, and salt in a small bowl, and slowly add the dry ingredients to the peanut butter mixture, mixing until just combined.
3. Fold in the chocolate chips and chill the dough in the refrigerator for at least 30 minutes.
4. When ready to bake, preheat oven to 350 F.
5. Drop tablespoon-size (approximate) balls onto parchment paper-lined cookie sheets, and press each cookie down to slightly flatten.
6. Bake for 9-10 minutes until set and very light in color. They will appear under-done.
7. Let cool on cookie sheet for 5-10 minutes and transfer to a rack to cool completely.
8. Store at room temperature, tightly covered, for up to 5 days.
Hankering for more peanut butter chocolate treats? Try these:
Chocolate Peanut Butter Cupcakes
Oatmeal Peanut Butter Chocolate Chip Scones
January 9, 2014
8 Healthy (and Satisfying) Salads
Anyone else have a renewed motivation to eat a bit healthier right now?
It’s the start of a new year, and there’s something invigorating about the chance for a fresh take in the food department.
Nothing’s more fresh than a salad of course, but let’s face it, they can get a little bit boring or leave you feeling less-than-full.
These eight salads get the job done and will have you asking for seconds (which is perfectly acceptable, in this instance!)
Dig in!
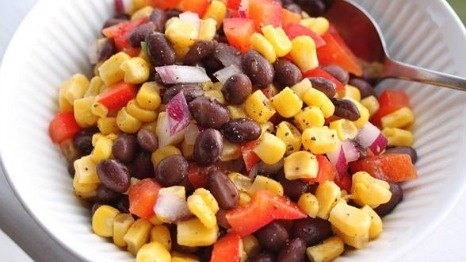
Chopping, sorting, and mixing are minimal in this zesty Southwestern salad. Eat it on its own, or serve with your favorite chips or some grilled chicken for an even heartier meal.
White Bean Salad with Preserved Tuna and Parsley Vinaigrette

This lean salad packs a mean protein punch. Beans and tuna combine to keep you powered-up and full. Perfect for lunch!
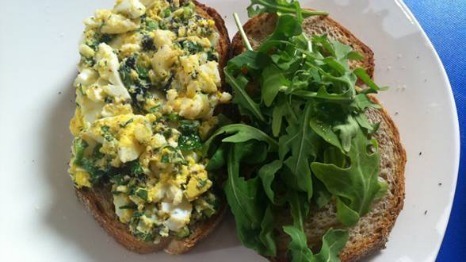
This mayo-free version of classic egg salad is still satisfying and flavorful, with a combination of fresh herbs and tangy Dijon. Eat as a sandwich, side, or main!
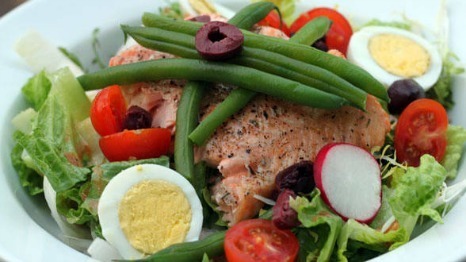
The French Riviera comes to your dinner table in this high-protein salad. Mixed greens are dressed in a vinaigrette that’s bright and tangy and topped with eggs and salmon.
Grilled Vegetable Couscous Salad
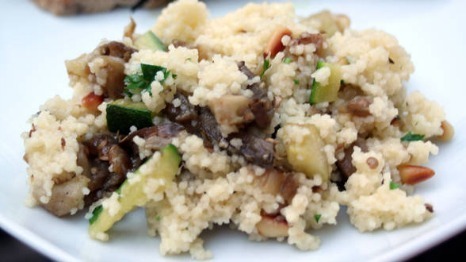
Couscous (granules of wheat flour – might not sound tasty, but it is!) adds body to this flavorful salad. The roasted vegetables really shine, and while eggplant and zucchini are featured here, you could sub in favorites like broccoli, squash, or carrots for your own spin.
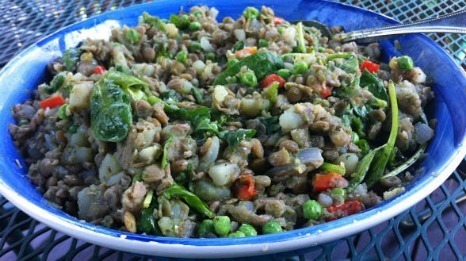
This salad will fill you up, and definitely not let you down. Make this protein-rich salad (thanks lentils!) as a filling main or delectable side.
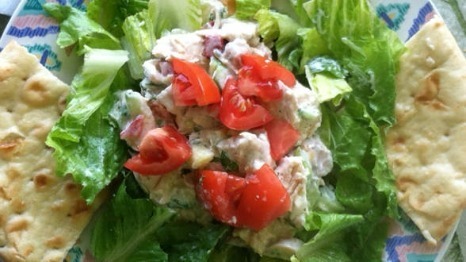
Green Grilled Chicken and Vegetable Salad with Warm Pita Bread for Wrapping

Switch up dinner or lunch with a quick trip to the Mediterranean. And depending on your preferences, the pita bread is optional – you’ll love it with or without!
Spinach Salad on Garlic Croutons
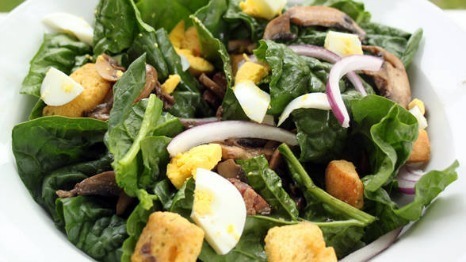
The trick to this salad is making your own crusty garlic croutons. Combine them with a few bites of pancetta, and you’ve got a perfect dish for lunch or dinner.
[Top image via Flickr / timsackton]
January 3, 2014
Stay Organized with This Week’s Meal Planner
Welcome to the Weekly Meal Planner! Whether you work all day and are out of steam when the dinner hour hits, or are fresh out of ideas and in a cooking rut, we are here to make your life easier. Note: We’ll include tips for picky eaters and easy food swaps if you don’t have an ingredient on-hand.
Happy 2014! Whether your resolution is to eat healthier or get a home-made dinner on the table for your family most days of the week, we are here to help. Let’s get started!
Meatless Monday
Lunch: Get your kale on with this flavorful Caesar-Style Kale Pesto Pasta.
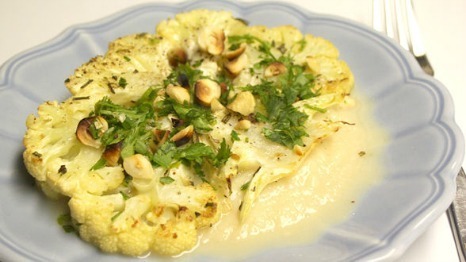
Dinner: Enjoy a veggie “steak” tonight with Cauliflower Steaks with Cheesy Cauli-Puree and Hazelnut Gremolata.
Dessert: Splurge on dessert with Dark Chocolate Brownies.
Tuesday
Lunch: Hearty and healthy, Sliced Steak and Mushroom Barley Soup will definitely tide you over until dinner.
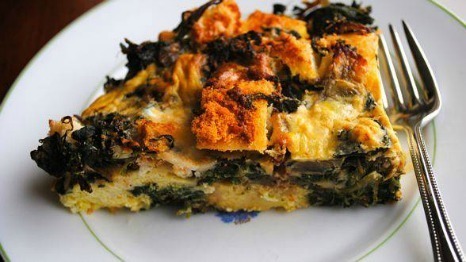
Dinner: Take it easy tonight and make The Ultimate Breakfast for Dinner: Sausage and Spinach Egg Strata. Assemble the casserole up to a day in advance and bake when you are ready to serve. If you have picky eaters, swap in their favorite veggie for the spinach.
Dessert: Ooey-Gooey Jam Jar Bars are a nostalgic treat – you can use whatever jam you have in your fridge.
Wednesday

Lunch: Spinach Calzone Grilled Cheese elevates the lowly grilled cheese sammie to something special with fresh mozzarella, spinach, and ricotta.
Dinner: It’s Burger Night! Bacon Burgers with Caramelized Onions and Gorgonzola are a meal in themselves. Insider tip: Make a double batch of caramelized onions and enjoy in sandwiches and pizzas throughout the week. You can store them in the fridge for up to seven days.
Snack: Salsa Verde Dip is a bottom-of-the-jar dip with five flavorful ingredients. Serve with your favorite chips.
Thursday

Lunch: Maple-Dijon Burgers are a quick and tasty sandwich that brings breakfast to lunch.
Dinner: Kids will love this Mexican-inspired Taco Pasta Toss. Feel free to adjust or omit the spice for little ones.
Dessert: No one will be able to resist two favorite desserts combined into one treat in decadent Blondie-Topped Brownies.
Friday

Lunch: Toasted Orzo Chicken Soup will cure what ails you! Freeze the leftovers in individual portions for future lunches.
Dinner: Rachael lightens up the typical Sloppy Joe with her Buffalo Turkey Sloppy Joes. You can even replace the sour cream in the sauce with Greek yogurt. Make it ahead and that you can leave bubbling on the stove for family members to assemble as they’re ready to eat.
Snack: You won’t be able to stop snacking on Sesame Popcorn - no ordinary movie-night treat!
Entertaining Saturday

Brunch: Chopped ham and shredded cheese are cooked right in the waffles with Croque Madame Waffles. Use any boxed pancake/waffle mix you have on-hand.
Dinner: Your guests will beg to come back after you serve them Easy Rib Roast with Mom’s Horseradish Sauce. The star of this dish is a no-cook sauce with sour cream, horseradish, and applesauce.
Cocktail: Kick off your night with a Scotch Sour.
Family Sunday

Brunch: Soul Pancakes are sweet and a little bit spicy. Adjust the amount of cayenne pepper – or omit altogether – if your family is spice-averse. You’ll want to make the cinnamon- and vanilla-infused maple syrup again and again.
Dinner: This Reuben Patty Melt Casserole translates a favorite deli sandwich into a classic casserole that feeds a crowd. Swap out the beef patties for turkey patties if your family prefers.
Dessert: Velvety Pistachio Cake is topped with a creamy mascarpone cheese-based glaze.
Gluten-Free Breakfast: Quinoa Pancakes
We eat a lot of pancakes in our house – a lot! I love to play around with different, flavored pancakes to give my boys something new and exciting to try, depending on the season.
Recently, I decided to try my hand at some gluten-free quinoa pancakes. If you aren’t familiar with quinoa, its a good gluten-free source of protein, iron, and fiber. And don’t stress if you’ve never heard of it before – you can find quinoa flour in the natural or baking section of most supermarkets these days.
These pancakes do have a slight nutty flavor, which I really enjoy. I also love that I can eat a pancake breakfast and not have the carb-crash after doing so.
For your own spin, and to give your favorite pancake recipe a nutritional boost, try replacing half of your all-purpose flour with quinoa flour.
Quinoa Pancakes
Makes approximately 12 pancakes
Ingredients
2 cups quinoa flour
2 tbsp. light brown sugar
2 tsp. baking powder
2 tsp. cinnamon
1 1/2 cups milk
2 tbsp. canola oil, plus more for cooking
1 tsp. vanilla extract
2 eggs
Instructions
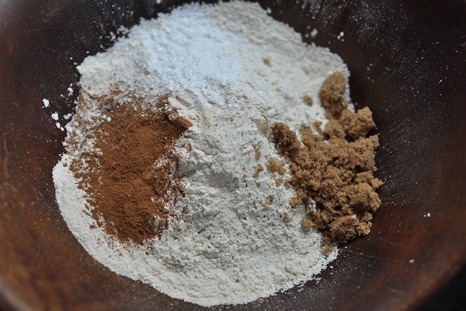
1. In a large bowl, whisk together quinoa flour, brown sugar, baking powder, and cinnamon.
2. In another bowl, whisk together milk, oil, vanilla, and eggs until well-combined.

3. Stir the wet ingredients into the dry ingredients and mix until combined.
4. Heat a well-oiled, large skillet or griddle over medium heat. Add batter to skillet/griddle in 1/4 cup scoops, and cook until small bubbles just begin to form on the pancake’s surface.
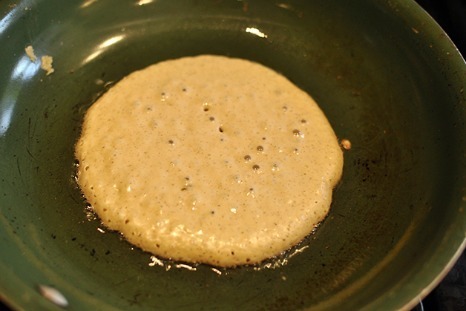
5. Flip and cook the opposite side for another 1-2 minutes.
6. Serve immediately with syrup.
More gluten-free goodness, please!
Very Fine (and Gluten-Free!) Viennese Crescent Cookies
Perfect, Gluten-Free Squash Muffins
Gluten-Free Apple Cake
Rachael Ray's Blog

- Rachael Ray's profile
- 296 followers

