Suman Sourabh's Blog, page 2
September 28, 2024
Use This AI Tool to Generate Alphabets Out of Anything
I just found a cool and fun Alphabet Generator AI tool that can generate images of all the 26 letters of the English alphabet based on a prompt.
Introducing GenType.
Table of ContentsWhat is GenType?Steps to use GenType1. Sign in2. Write a prompt Prompt Testing1. Prompt 1Scope of Improvement2. Prompt 23. Prompt 3ConclusionWhat is GenType?According to Google, GenType is an AI experiment that helps anyone create a custom alphabet out of anything, using Imagen 2. With a single prompt, generate all 26 letters of the alphabet.
 Steps to use GenType1. Sign in
Click on “Sign in with Google button” and sign in with your preferred Google account.
 2. Write a prompt
 On the left, just type a prompt which will tell GenType from which material or thing the alphabets will be made of.

For example, I wrote this prompt: “just flowers”
This was the result:
GenType just took the prompt and generated all the 26 letters in the English alphabet with flowers.
 I like how some of the letters seem so accurate in terms of visuals
Basically, it arranged all the flowers so that they form a specific letter.
Cool, isn’t it?
I can even open a specific letter image and regenerate it if I don’t like it, copy it and download it on my device.

That’s fine and all but let’s test the responses of GenType with some more prompts.
Prompt Testing1. Prompt 1“cats”
Here’s the response:

My expectation was that GenType will generate the images of alphabets using different cat positions and forms.
But in reality, it used multiple cats to form a specific letter.
By the way you can also write anything using the newly generated alphabets.
 Scope of Improvement
If you look at the letter “S” image carefully, can you determine what’s happening there?
 Are the cats twisted or something? That looks painful!
Because I really don’t know what’s happening in the above image, but this is significantly different than the other letter images.
Maybe GenType could have provided an image using the formula applied on the other images.
Let me know what you think.
2. Prompt 2“a programming code font with dark background”
Response:

Honestly, I didn’t even know what to expect from the above prompt. But at first thought, I expected that the letter images would have single letters with a typeface used in the context of writing code like “Consolas” on VS Code.
But in the response, GenType clubbed different words together and arranged it accordingly to form a specific letter.
 Quite decent, right?
3. Prompt 3Do you think that GenType could have done something different here?
“a convoy of cars on a mountain road on a sunny weather”
Response:

My expectation was that the images will have realistic roads that would have curves based on the letters of the English alphabet just like the letter Z below:
 My expectation was correct but not sure if they really are vehicles!
Instead majority of the images had the cut out portion of the roads and vehicles and simply were pasted over a mountain’s image.
 That’s funny! There’s definitely a scope for improvement here.Conclusion
Although there is a lot of improvement needed in some cases, GenType does a “not bad” job of generating alphabet images out of nothing!
Try GenType, the new Alphabet Generator AI tool by Google Labs.
Which prompts did you write?
Read more: 5 Ways I Use ChatGPT as a Frontend Web Developer
The post Use This AI Tool to Generate Alphabets Out of Anything appeared first on Suman Sourabh | Tech Blog.


September 7, 2024
This is How I Convert PDF to Markdown
I have used multiple online tools to convert PDF documents to Markdown format, but none of them came close to Marker.
Along with basic Markdown conversion, it formats tables, converts most equations to latex, extracts and stores images.
Here’s how I use Marker to extract PDF content and convert them into valid Markdown.
Environment UsedWindows 11
PrerequisitesAs per Marker’s GitHub repository, it requires the installation of:
PythonPyTorch 1. Install Python > 3.8
Go to Python Downloads page and download the latest version of Python.

Install the setup by following the instructions.
2. Install PyTorchNote: For PyTorch to be installed correctly, you must have Python 3.8 or higher installed on your system.
To install PyTorch, go to its official website and you will something like the image below:

You can tweak those options to see which one would fit best for your system. Once you have your command, open PowerShell or Command Prompt and paste your command there.
Here’s the command that I used to install PyTorch:
pip3 install torch torchvision torchaudio --index-url https://download.pytorch.org/whl/cu118PyTorch will begin installing on your system…

It will take some time to download and install as the main file amounts to a size of 2.7 GB.
After a few minutes, PyTorch will be installed.

Now, the prerequisites are over. Next, you can go ahead and move to the actual Marker stuff.
Clone MarkerYou can clone Marker project on your local system with the following command:
git clone https://github.com/VikParuchuri/marke...After cloning, the Marker GitHub repo would look something like this:

We have cloned the repository but still we cannot convert the PDFs into Markdown format as we haven’t installed Marker.
Steps to Install Marker1. Create new environmentOutside of the newly cloned Marker GitHub repository, create a new environment for converting PDF to Markdown files.
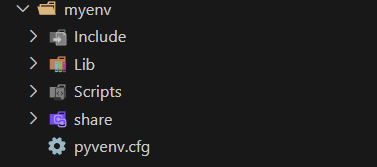
python -m venv myenvThis will create a myenv folder consisting of multiple files.
 2. Activate the environmentmyenv\Scripts\activate
This will activate the the newly created environment.
 3. Install “marker-pdf”
This command will actually install marker-pdf with the pip package manager.
pip install marker-pdfNow we are ready to convert PDF documents to Markdown files!
4. Convert PDF format to Markdown
To convert a PDF to Markdown, we need two things:
Input path of the PDF Output pathBecause the command for the conversion is something like this:
marker_single "input_path" "output_path" - batch_multiplier 2 - max_pages 12Hence, inside the cloned marker GitHub project folder, I will create two folders:
pdfs: My input folderoutput: My output folderAnd I will use a sample PDF for the Markdown conversion and paste it inside the pdfs folder.
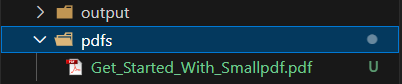
Now, to convert the PDF “Get_Started_With_Smallpdf.pdf”, I will use the following command:
marker_single "D:/projects/marker-pdf/marker/pdfs/Get_Started_With_Smallpdf.pdf" "D:/projects/marker-pdf/marker/output" - batch_multiplier 2 - max_pages 12Here’s what the other two arguments mean according to Marker GitHub repo :
--batch_multiplier is how much to multiply default batch sizes by if you have extra VRAM. Higher numbers will take more VRAM, but process faster. Set to 2 by default. The default batch sizes will take ~3GB of VRAM.
--max_pages is the maximum number of pages to process. Omit this to convert the entire document.
Once the command is executed, Marker will initiate the conversion and save the Markdown to the output folder.

The cool thing about Marker is that it extracts all the images associated with the PDF and stores it along with the main .md (Markdown) file.
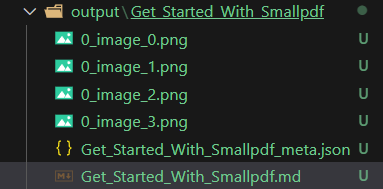 It even generates a metadata file in json format
 All the images are extracted in the .png format
Awesome! We have converted the PDF into Markdown. But wait!! How’s the output in Markdown look?
PDF InputHere’s the PDF that we supplied Marker as the input file
 Markdown Output# Welcome To Smallpdf
Ready to take document management to the next level?

## Digital Documents—All In One Place
With the new Smallpdf experience, you can
 freely upload, organize, and share digital documents. When you enable the 'Storage' option, we'll also store all processed files here.
## Enhance Documents In One Click
When you right-click on a file, we'll present
 you with an array of options to convert, compress, or modify it.
## Access Files Anytime, Anywhere
You can access files stored on Smallpdf from

your computer, phone, or tablet. We'll also sync files from the Smallpdf Mobile App to our online portal
## Collaborate With Others
Forget mundane administrative tasks. With Smallpdf, you can request e-signatures, send large files, or even enable the Smallpdf G Suite App for your entire organization.
Pretty good, right?
ConclusionIn this tutorial, we used Marker to extract the content of a PDF and convert it into Markdown format.
Of course, the PDF had only one page, but Marker is capable of a lot many pages and it does a fine job with that!
You can try and play with it yourself!
The post This is How I Convert PDF to Markdown appeared first on Suman Sourabh | Tech Blog.
July 21, 2024
Build a No-Nonsense Search API with Express
A few months ago I used Node.js and Express to build Recite, a free to use REST API that returns quotes from popular novels. Just hit this API route and you get a random quote before you.
But in this post, let’s see how we can build a search API with Express JS which can return relevant quotes that matches our search query.
ScenarioOn our MongoDB database, there’s a collection called “Quotes”, which has a bunch of quotes from popular books containing a the quote itself, the name of the book and the author, length of the quote, and no. of words.
{_id: string,
// the actual quote from the book
quote: string,
// name of the book
book: string,
// name of the author
author: string,
// length of the quote
length: number,
// total words in the quote
words: number,
// date and time of first published
createdAt: string,
// date and time of update (if any)
updatedAt: string
}
When a user searches a query, relevant quote(s) should display that are the best results for that particular query.
Here’s how we can do it.
Steps1. Create an Express appnpm init -yThis will create a bare minimum Node.js project by taking “yes” as a default answer to any of the questions asked while creating the project.
To install Express,
npm install express2. Create the ServerCreate an index.js file on the root directory, then copy and paste the code below:
const express = require("express");const connectDb = require("./utils/connectDb"); // database connection file
const app = express();
connectDb();
app.use(express.json());
app.use("/api", quoteRoute);
const port = 6001;
app.listen(port, () => {
console.log(`listening on http://localhost:${port} `);
});
You can setup the connection of your MongoDB server using this guide.
3. Create a routeWe need to hit an API route to get the relevant quotes. Here we can define that route.
const router = express.Router();router.get("/quotes/search", searchQuotes);
In the next step, we will create the searchQuotes controller function.
4. Create Search controller functionThis is the main function that will actually search and fetch the relevant quotes from the database.
const searchQuotes = async (req, res) => {try {
const { query } = req.query;
if (!query) {
return res
.status(400)
.send({ success: false, message: "Please provide a search query." });
}
const quotes = await QuoteModel.find({
$or: [
{ quote: { $regex: query, $options: "i" } },
{ author: { $regex: query, $options: "i" } },
{ book: { $regex: query, $options: "i" } },
],
});
if (quotes.length > 0) {
res.status(200).json({
success: true,
query: query,
total: quotes.length,
data: quotes,
});
} else {
res.status(200).json({
success: true,
message: "No result found",
});
}
} catch (error) {
console.error(error);
}
};
In the above code,
First, I am taking out the query from the API URL.const { query } = req.query;If a query is not specified it the API request, I am returning an error message instructing the user to provide a search query.if (!query) {return res
.status(400)
.send({ success: false, message: "Please provide a search query." });
}I am finding the relevant quotes from the QuoteModel schema that I have defined in my project to store quotes. Then I am applying a logical OR condition and finding if the relevant query string exists in any of the three fields (quote, author, and book) using regular expression and setting it as case-insensitive.const quotes = await QuoteModel.find({
$or: [
{ quote: { $regex: query, $options: "i" } },
{ author: { $regex: query, $options: "i" } },
{ book: { $regex: query, $options: "i" } },
],
});If there is at least one relevant quote, I am returning it in the response in the form of an array of quote objects.If NOT, I am returning “No result found”.if (quotes.length > 0) {
res.status(200).json({
success: true,
query: query,
total: quotes.length,
data: quotes,
});
} else {
res.status(200).json({
success: true,
message: "No result found",
});5. Test it!
Open Postman or any other API testing tool to test your new API route!
I am going to type the URL below and search for a query in my MongoDB collection.
http://localhost:6001/api/quotes/search?query=harper
When I hit this API request, this is the response that I receive on Postman.
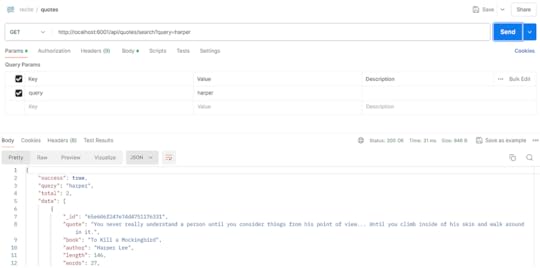
I get 2 quotes that matches “harper” and in this case, it comes in the author’s key.
What if I don’t enter a query?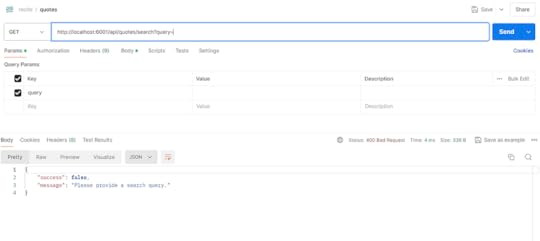
I get a bad request (400 error) response saying, “Please provide a search query.”
ConclusionThis is how you can create a simple search API using Node.js and Express js.
Contact me on X (Twitter) or LinkedIn to ask me any question about this.
Try Recite in your project.
Read more: 5 Ways I Use ChatGPT as a Frontend Web Developer
The post Build a No-Nonsense Search API with Express appeared first on Suman Sourabh | Tech Blog.
July 6, 2024
5 Ways I Use ChatGPT as a Frontend Web Developer
As a Frontend Developer working on Next.js and using various UI libraries, it is very time consuming to do basic things on our own. But if I have ChatGPT at my disposal, why shouldn’t I use it.
Therefore, this post discusses 5 ways on how I use ChatGPT to do some frontend tasks.
Table of Contents1. Format JSON2. Create UI Skeletons3. Generate Random Data (Array, Objects)For example:4. Regular ExpressionsFor example, consider this scenario.5. Find Code SolutionsConclusion1. Format JSONAs a Frontend Developer, I have to deal with a lot of data coming from multiple APIs and they generally return data in a JSON format.
When dealing with APIs on React Native, if you do not use a JS remote debugger, all the data coming from console.log statements will be displayed on the console of VS Code. And it will be unformatted, ugly and very hard to read.
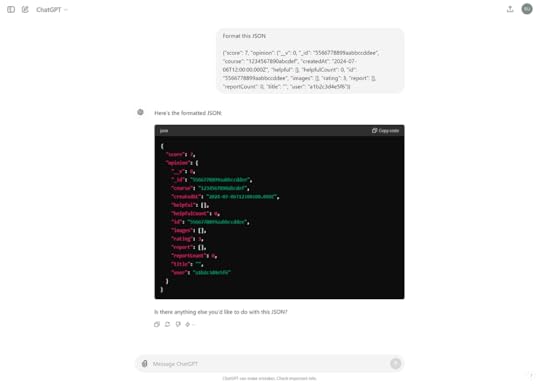
Therefore, I copy that data from the console, open ChatGPT and type this prompt:
“Format this JSON”
And I paste the copied data below this prompt.
Then ChatGPT generates a well formatted JSON.
Cool, right?
This makes it highly readable and I am able to clearly distinguish between multiple properties and use it on the frontend code.
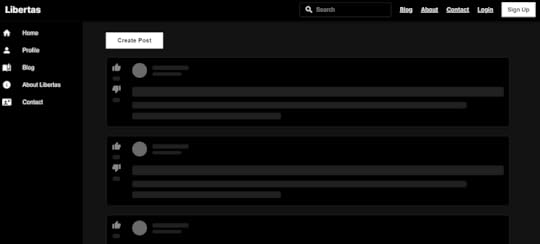
2. Create UI SkeletonsDisplaying skeletons instead of a simple loading spinner is a great way to enhance the UI/UX as it creates an illusion of a fast loading website. Moreover, it tells the user exactly where the data is going to display.
I try to use skeletons wherever possible and to create them, I use ChatGPT.
For example, if I am using Material UI library with Next.js, I do the following:
Click the screenshot of a component on the UI whose skeleton I want to create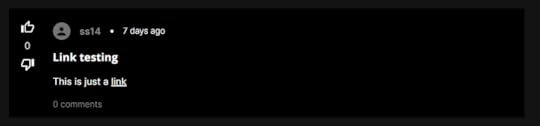 Open ChatGPT and write the below prompt:
“Generate an MUI skeleton for this component in Next.js”
And I paste the screenshot and the prompt on the input. ChatGPT generates the code for the skeleton.
For this, it generated this code:
import React from 'react';import Skeleton from '@mui/material/Skeleton';
import Stack from '@mui/material/Stack';
import Box from '@mui/material/Box';
import Avatar from '@mui/material/Avatar';
import ThumbUpIcon from '@mui/icons-material/ThumbUp';
import ThumbDownIcon from '@mui/icons-material/ThumbDown';
import Link from '@mui/material/Link';
const PostSkeleton = () => {
return (
);
};
export default PostSkeleton;
Usually it isn’t pixel perfect, so I make a little adjustments to the code, mainly with width and height and the row or column layout.
But ChatGPT does about 80% of the job, so I guess it’s good.
Here’s the final result on the UI of Libertas (an online discussion platform, the project I have built)
 3. Generate Random Data (Array, Objects)
Whenever I need to test some UI or basic JavaScript, I take help of some random data in the form of dummy array or object. And I use ChatGPT to give me that data.
For example:Suppose I need an array of some book names, I just type the below prompt and let ChatGPT do the magic.
“Give me an array of strings consisting of random book names (JSON)”
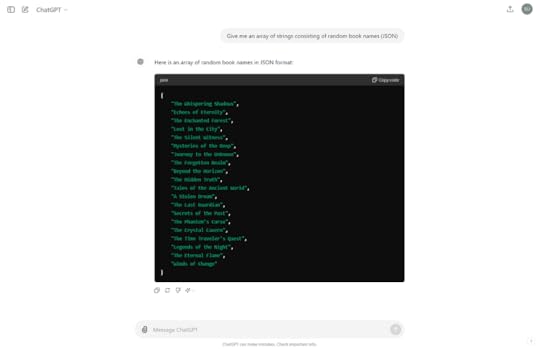
Here, ChatGPT has generated an array of some book names.
["The Whispering Shadows",
"Echoes of Eternity",
"The Enchanted Forest",
"Lost in the City",
"The Silent Witness",
"Mysteries of the Deep",
"Journey to the Unknown",
"The Forgotten Realm",
"Beyond the Horizon",
"The Hidden Truth",
"Tales of the Ancient World",
"A Stolen Dream",
"The Last Guardian",
"Secrets of the Past",
"The Phantom's Curse",
"The Crystal Cavern",
"The Time Traveler's Quest",
"Legends of the Night",
"The Eternal Flame",
"Winds of Change"
]
This is a fantastic way of putting the focus on the actual work instead of writing your own dummy data.
4. Regular ExpressionsBelieve it or not, this might be one of the biggest use cases of ChatGPT. The concept of regular expressions seem to be from some another planet as there are multiple things to remember in this.
When you play with strings on your code, there will be a time when you are bound to encounter regular expressions.
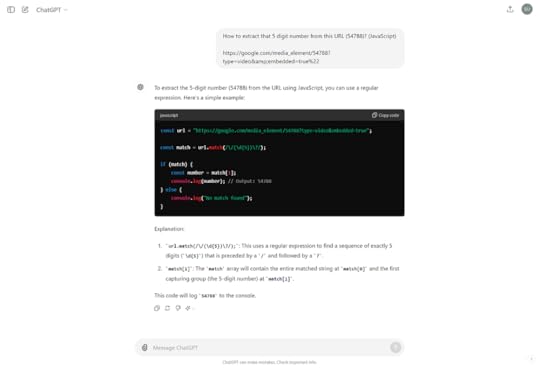
For example, consider this scenario.Here’s a URL: https://google.com/media_element/54788?type=video&embedded=true%22
I want to extract the 5 number digit number: 54788
Here, instead of using my brain, I ask ChatGPT.
“How to extract that 5 digit number from this URL (54788)? (JavaScript)”
Now, I can go further ahead and wrap this in a function. Or … just ask ChatGPT do that 
Ahh … the good old “asking AI for the solutions” thing.
Yes, it is helpful many a times.
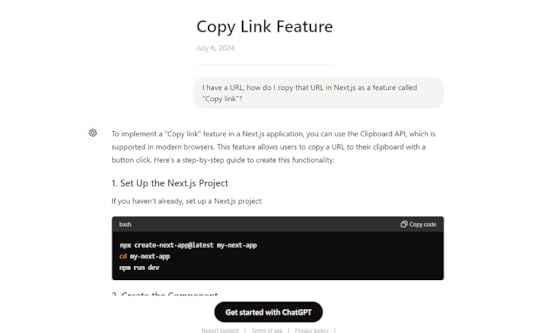
In my scenario, I wanted to create a “Copy link” feature that will copy the current URL present on the browser’s search bar. I used ChatGPT for this.
Prompt: “I have a URL, how do I copy that URL in Next.js as a feature called “Copy link”?”
ChatGPT gave me a response that included creating the Next.js project and using the Clipboard API to copy the link.
Asking any kind of solution to the AI is pretty basic use case but it is really helpful.
ConclusionIsn’t ChatGPT helpful? I bet it is.
Hope you learnt something new from this post and how you can use this AI tool to do your frontend tasks.
Let me know for which tasks you use ChatGPT.
The post 5 Ways I Use ChatGPT as a Frontend Web Developer appeared first on Suman Sourabh | Tech Blog.
June 30, 2024
Build an FAQ Page on Nextjs with Material UI
This blog will mention how you can build a simple but good looking FAQ section or a page on your Nextjs application with Material UI design library.
Table of ContentsWhat is an FAQ section?Popular Examples of FAQSteps to Build an FAQ section on Nextjs with MUI1. Create a Next.js app2. Install Material UIFor npmFor yarn3. Install Material UI Icons4. Create an FAQ Component, but how?Which component to use for this?5. How to use Accordion?6. Customize it (Optional)7. OutcomeConclusionWhat is an FAQ section?An FAQ (Frequently Asked Question) section is something which includes a bunch of popular questions and answers that the users may have about a product or an organization.
Almost all of the websites have this section. It is extremely helpful for the users as all the questions are at one place and by reading it, a broad understanding about the website or product is clear.
Popular Examples of FAQ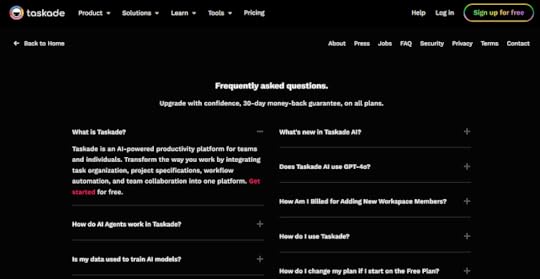 Taskade
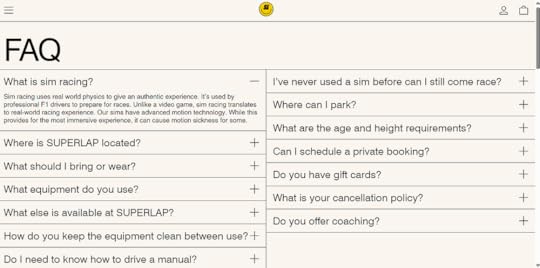 Superlap
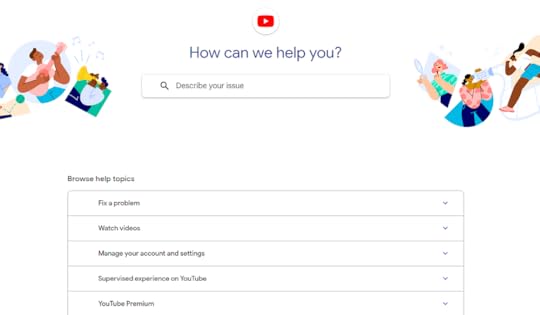 YouTubeSteps to Build an FAQ section on Nextjs with MUI1. Create a Next.js app
Open the terminal in VS Code or a text editor of your choice and run the following command:
npx create-next-app@latestThis will create a barebones Next.js app on your local system.
2. Install Material UIRun the following command.
For npmnpm install @mui/material @emotion/react @emotion/styledFor yarnyarn add @mui/material @emotion/react @emotion/styled3. Install Material UI IconsWe will need this to display the dropdown icon for a component which we will use for the FAQ. To install this, run the following command.
For npm
npm install @mui/icons-materialFor yarn
yarn add install @mui/icons-material4. Create an FAQ Component, but how?Normally, FAQs are created by using a component where the answer of a question is hidden and when the user clicks on the question, the answer gets displayed on the screen.
If the user clicks on the question again, the answer gets hidden.
Which component to use for this?5. How to use Accordion?“Accordion” is the answer.
A simple code for an MUI accordion component can be this:
expandIcon={}
aria-controls="panel1-content"
id="panel1-header"
>
Accordion 1
Lorem ipsum dolor sit amet, consectetur adipiscing elit. Suspendisse
malesuada lacus ex, sit amet blandit leo lobortis eget.
Paste the above code on any of your Next.js pages.
import ArrowDropDownIcon from "@mui/icons-material/ArrowDropDown";const FrequentlyAskedQuestions = () => {
return (
expandIcon={}
aria-controls="panel1-content"
id="panel1-header"
>
Accordion 1
Lorem ipsum dolor sit amet, consectetur adipiscing elit. Suspendisse
malesuada lacus ex, sit amet blandit leo lobortis eget.
);
};
In the above code, I have created a FrequentlyAskedQuestions page.
You can change the content of this page easily by fetching the data from a locally stored JSON file or from a server.
Let’s discuss about fetching data from a JSON file in the next step.
6. Customize it (Optional)Create a JSON file and name it something like “sample.json” and paste the content below:
[{
"question": "What is Libertas?",
"answer": "Libertas is an online discussion platform where users can post content, comment, and vote on other users' posts. All for FREE. No premium subscription."
},
{
"question": "How do I create an account on Libertas?",
"answer": "You can create an account by visiting the Libertas homepage and clicking on the 'Sign Up' button or by clicking on the 'Sign Up' button at the top navigation bar. You can sign up using your email address."
},
{
"question": "How is this different from Reddit?",
"answer": "There is no need for any karma points or something. You can get started just by signing up! Plus, you won't get banned or restricted without any reason. If you do get banned (which we hope not), we will tell you the reason."
},
{
"question": "Is there any minimum points required to post on Libertas?",
"answer": "No. There are no points required for you to post and interact on Libertas."
},
{
"question": "Who moderates Libertas?",
"answer": "There are no moderators. You have the liberty to engage on Libertas."
},
{
"question": "Can I report a post on Libertas?",
"answer": "Yes, we want Libertas to be a safe and fun place for everyone. You can report a post by clicking on the 'report post' button below a post. We will review it as soon as possible."
},
{
"question": "How can I search for content on Libertas?",
"answer": "You can search for content using the search bar at the top of the Libertas website. Use keywords or phrases related to the topic you are interested in."
}
]
The above code is the content that I have used in the FAQ page on Libertas, an online discussion platform. You can use something like this to include on your blog page too. On Next.js, you can build a blog with MDX.
Fetch the data by importing the json file on the FAQ page.
import faq from "@/sample.json";Use map function and wrap it inside an MUI Grid component.
import ArrowDropDownIcon from "@mui/icons-material/ArrowDropDown";const FrequentlyAskedQuestions = () => {
useEffect(() => {
document.title = "Frequently Asked Questions | Libertas";
}, []);
return (
container
gap={2}
sx={{ px: 8, mb: 20, maxWidth: "1000px", mx: "auto" }}
>
{faq.map((question, index) => (
expandIcon={}
aria-controls="panel-content"
id="panel-header"
>
{question.question}
{question.answer}
))}
);
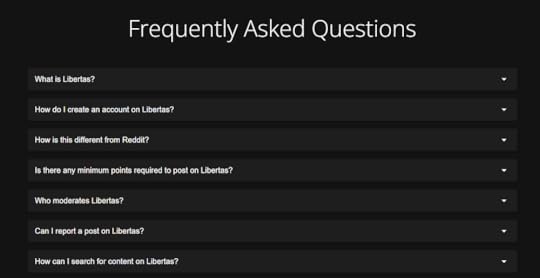
};7. Outcome
This is how the UI would look. You can play with this of course.
 Conclusion
Hope now you can create or build an FAQ section on your Nextjs app. Try to use inspiration from popular FAQ pages to enhance the overall look and feel.
But don’t forget about the user experience!
Try Libertas here (this link will take you away from this blog)
Contact me on X (Twitter) or LinkedIn to ask me any question about this.
The post Build an FAQ Page on Nextjs with Material UI appeared first on Suman Sourabh | Tech Blog.
June 15, 2024
How to Use MDX in Nextjs to Create Killer Blogs?
This blog will showcase how you can display blogs using MDX and Markdown syntax on your Nextjs application which uses app router.
But why?
Here’s the ProblemYou want to display blogs on your Next.js application. That too with a simple and easy syntax like Markdown.
How do you do it?
SolutionUse @next/mdx package.
What is “@next/mdx”?According to Next.js documentation on @next/mdx
The @next/mdx package is used to configure Next.js so it can process markdown and MDX. It sources data from local files, allowing you to create pages with a .mdx extension, directly in your /pages or /app directory.
MDX is built on top of Markdown that lets you write JSX in Markdown files. That means now we can use variables and other components inside Markdown.
How cool is that?
So how to implement it?
Steps to implement @next/mdx in Next.js1. Create a Next.js applicationOpen the terminal in VS Code or a text editor and run the following command:
npx create-next-app@latest2. Install @next/mdx packageIf using yarn:
yarn add @next/mdx @mdx-js/loader @mdx-js/reactOr if using npm:
npm install @next/mdx @mdx-js/loader @mdx-js/react3. Modify next.config.js fileThis is a crucial step to configure MDX into Next.js.
const withMDX = require("@next/mdx")({});/** @type {import('next').NextConfig} */
const nextConfig = {
pageExtensions: ["ts", "tsx", "js", "jsx", "md", "mdx"],
};
module.exports = withMDX(nextConfig);4. Create mdx-components.js file in root directory
Markdown maps to HTML elements and if you want to customize those HTML elements, such as increasing the fontSize property of element, you can use mdx-components.js file for it.
Essentialy, this file allows us to customize the styling of the HTML elements. More on this later.
// This file is required to use @next/mdx in the `app` directory.export function useMDXComponents(components) {
return components;
// Allows customizing built-in components, e.g. to add styling.
// return {
// h1: ({ children }) => {children},
// ...components,
// }
}5. Create a page.mdx file in app directory
Now, we will actually create the page where we can show our first blog.
To do this, inside the app directory:
a. Create a blog folder
b. Inside the blog folder, create a my-mdx-page folder
c. Inside my-mdx-page folder, create a page.mdx file
Path will be this: app\blog\my-mdx-page\page.mdx
Paste the following content in page.mdx file
# Your First Blog with MDX!This is a blog page with MDX on Next.js app.
Here, you can write a blog with Markdown syntax!
**Bold** text, _Italic_ text6. Run the project
Run the following command:
yarn devHit this URL: https://localhost:3000/blog/my-mdx-page
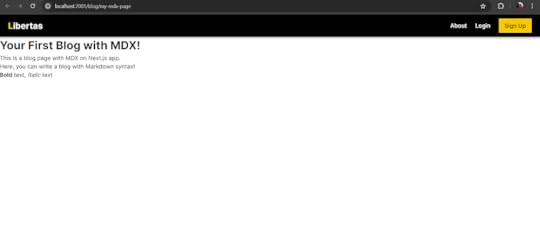
NOTE: In your bare minimum Next.js app, the above navigation bar at the top won’t be present. This is because the above screenshot is from Libertas, my Next.js app.
We have completed the hard part! This is how the blog is displayed.
But to make this more eye catching and easily readable to an average reader, you can do the following:
7. Add styles and layoutCreate a components folder in the root directory.Inside it create a file called mdx-layout.js and paste the following code:export default function MdxLayout({ children }) {// Create any shared layout or styles here
return (
style={{
maxWidth: "800px",
margin: "0 auto",
padding: "2rem 1rem",
}}
>
{children}
);
}
The above code will give an outer layout or a container to our Markdown blog content. We will wrap everything inside this layout component.
Next, in the page.mdx file, paste the following code:import MdxLayout from "@/components/mdx-layout";# Your First Blog with MDX!
This is a blog page with MDX on Next.js app.
Here, you can write a blog with Markdown syntax!
**Bold** text, _Italic_ text
export default function MDXPage({ children }) {
return {children};
}
Above, we have wrapped everything in the page.mdx inside the MdxLayout component with help of the children prop.
Now, if you hit the /my-mdx-page URL, the output will be like this:
 8. Customize HTML elements
Remember we had the mdx-components.js file in the root directory of the app? Now is the time to use it to customize the content inside page.mdx file.
In our output, we see that there is very little spacing between the text. Let’s change that.
Copy and paste the code below in mdx-components.js file:
// This file is required to use @next/mdx in the `app` directory.export function useMDXComponents(components) {
// Allows customizing built-in components, e.g. to add styling.
return {
p: ({ children }) => (
{children}
),
h1: ({ children }) => (
{children}
),
h2: ({ children }) => {children},
h3: ({ children }) => {children},
h4: ({ children }) => {children},
h5: ({ children }) => {children},
ul: ({ children }) => (
{children}
),
ol: ({ children }) => (
{children}
),
li: ({ children }) => {children},
...components,
};
}
Now, the elements above will have some margin at the bottom.
If I add more content inside page.mdx file, then with above code in mdx-components.js file, the output blog will be something like this:
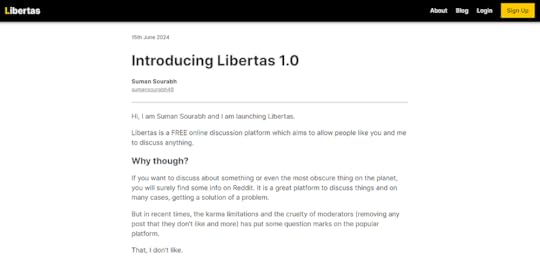 This is the first blog that I wrote when I launched Libertas, a Free online discussion platform
Pretty cool, isn’t it?
SummaryHere, we learnt how to use MDX, Markdown, and @next-mdx package to display a blog on Nextjs application with the app directory.
ResourcesLibertasGetting Started: Installation | Next.js (nextjs.org)Configuring: MDX | Next.js (nextjs.org)@next/mdx — npm (npmjs.com)Contact me on X (Twitter) or LinkedIn to ask me any question about this.
Read more:
How to Create a Password Reset Flow in Next.js?2024 Guide to Infinite Scrolling in React/Next.jsHow to Create Toggle Password Visibility with Material UI and Nextjs?The post How to Use MDX in Nextjs to Create Killer Blogs? appeared first on Suman Sourabh | Tech Blog.
June 8, 2024
How to Create a Password Reset Flow in Next.js?
One of the most annoying experiences for a user is to forget their password.
To make it even more aggravating, some reset password flows are so badly designed that the user would just think of not using the application again.
Therefore, it is really crucial to have a solid UX for the password reset process. This is one of the problems that I encountered while building Libertas, an online discussion platform, built with Next.js.
Hence, I surfed on the internet and got inspired by this article.
Here’s how I created a password reset flow in Next.js and how you can do it too.
Table of ContentsHow a Password Reset Flow should look like?1. “Forgot password?” link2. Type email, get an email with a password reset link3. Click the link, go to “Reset Password” page4. Type and confirm the new password5. Authenticate with the new passwordSteps to implement password reset flow in Next.js1. Create a Next.js app2. Create a Login page3. Add the “Forgot password?” link4. Create a Forgot Password page5. Send the “Change Password” mail to the usera. Install nodemailerb. Setup nodemailerc. Create the controller to send email to the userd. The mail in action6. Create a “Reset Password” page7. Create controller to reset the password on the backend8. AuthenticateConclusionBut first…
How a Password Reset Flow should look like?
Ideally, the password reset flow should have 5 steps that are pretty straightforward. They are listed below:
1. “Forgot password?” link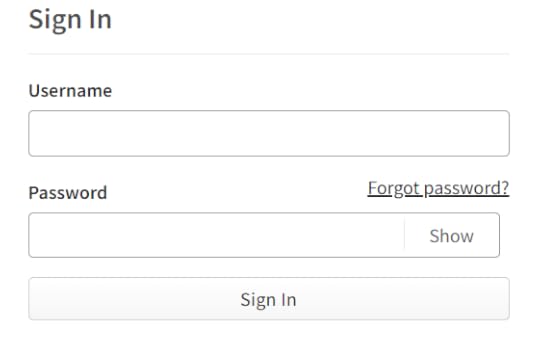 2. Type email, get an email with a password reset link
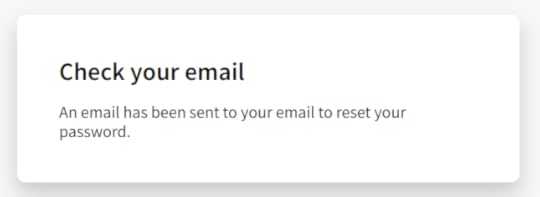 3. Click the link, go to “Reset Password” page
 4. Type and confirm the new password
 5. Authenticate with the new password
For the final step, some would argue that why not just get the user automatically signed in after confirming their new password. But maybe this is largely avoided just to add an additional layer of security.
Steps to implement password reset flow in Next.js1. Create a Next.js appType the following command:
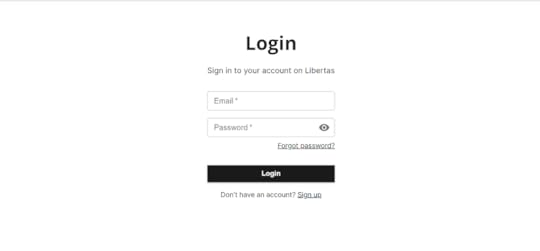
npx create-next-app@latest2. Create a Login page
Code:
"use client";import ErrorText from "@/components/errorComponents/ErrorText";
import LoadingButton from "@/components/pageComponents/LoadingButton";
import { GlobalContext } from "@/services/globalContext";
import { Button, Stack } from "@mui/material";
import Link from "next/link";
import { useContext, useEffect, useState } from "react";
import TextInput from "../../components/formComponents/TextInput";
import { useRouter } from "next/navigation";
import { colors } from "@/theme/colors";
import PasswordInput from "@/components/formComponents/PasswordInput";
import TitleText from "@/components/pageComponents/TitleText";
const Login = () => {
const { loading, login, loginError, user } = useContext(GlobalContext);
const [email, setEmail] = useState("");
const [password, setPassword] = useState("");
const router = useRouter();
const submitHandler = (e) => {
e.preventDefault();
// console.log(email, password);
login(email, password);
};
useEffect(() => {
if (user) {
router.push("/feed");
}
}, [user]);
useEffect(() => {
document.title = `Login | Libertas`;
}, []);
return (
style={{ display: "flex", justifyContent: "center", padding: "4rem 0" }}
>
{loginError && }
type="email"
placeholder="Email"
value={email}
onChange={(e) => setEmail(e.target.value)}
required={true}
/>
password={password}
handlePassword={(e) => setPassword(e.target.value)}
showCapsLockOnMessage={true}
/>
href="https://sumansourabh.in/recover-password"
style={{
fontSize: "0.875rem",
color: "#000",
textDecoration: "underline",
}}
>
Forgot password?
variant="contained"
type="submit"
style={{
textTransform: "capitalize",
backgroundColor: colors.button.background,
fontWeight: "600",
borderRadius: "0rem",
marginTop: 30,
}}
>
Login
{loading && (
)}
Don't have an account?{" "}
href="https://sumansourabh.in/sign-up"
style={{ color: "#000", textDecoration: "underline" }}
>
Sign up
);
};
export default Login;
TextInput component:
import { TextField } from "@mui/material";import React from "react";
const TextInput = ({
type,
placeholder,
value,
onChange,
required,
nameOfInput,
}) => {
return (
type={type}
label={placeholder}
value={value}
onChange={onChange}
fullWidth
required={required ? required : false}
size="small"
name={nameOfInput}
/>
);
};
export default TextInput;
PasswordInput component:
import { faCircleInfo } from "@fortawesome/free-solid-svg-icons";import { FontAwesomeIcon } from "@fortawesome/react-fontawesome";
import { Visibility, VisibilityOff } from "@mui/icons-material";
import { IconButton, InputAdornment, Stack, TextField } from "@mui/material";
import { useState } from "react";
const PasswordInput = ({ password, handlePassword, showCapsLockOnMessage }) => {
const [showPassword, setShowPassword] = useState(false);
const [capsLockOnMessage, setCapsLockOnMessage] = useState("");
const handleClickShowPassword = () => {
setShowPassword(!showPassword);
};
// detect if caps lock is on
const handleKeyUp = (e) => {
const capsLockOn = e.getModifierState("CapsLock");
if (capsLockOn) {
setCapsLockOnMessage("Caps Lock is on");
} else {
setCapsLockOnMessage("");
}
};
return (
size="small"
type={showPassword ? "text" : "password"}
label="Password"
value={password}
onChange={handlePassword}
required={true}
InputProps={{
endAdornment: (
aria-label="toggle password visibility"
onClick={handleClickShowPassword}
edge="end"
>
{showPassword ? : }
),
}}
fullWidth
onKeyUp={handleKeyUp}
/>
{showCapsLockOnMessage && !!capsLockOnMessage && (
{capsLockOnMessage}
)}
);
};
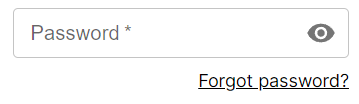
export default PasswordInput;3. Add the “Forgot password?” link
Then an email will pop up on the user’s Gmail account.
href="https://sumansourabh.in/recover-password"style={{
fontSize: "0.875rem",
color: "#000",
textDecoration: "underline",
}}
>
Forgot password?
I have used a component of Next.js, which on clicking, goes to “/recover-password” page.
 This is how it looks like4. Create a Forgot Password page
Code:
"use client";import ErrorText from "@/components/errorComponents/ErrorText";
import TextInput from "@/components/formComponents/TextInput";
import LoadingButton from "@/components/pageComponents/LoadingButton";
import TitleText from "@/components/pageComponents/TitleText";
import { GlobalContext } from "@/services/globalContext";
import { colors } from "@/theme/colors";
import { Button, Stack } from "@mui/material";
import { useContext, useEffect, useState } from "react";
const RecoverPassword = () => {
const { loading, passwordRecoveryEmailError, sendPasswordRecoveryEmail } =
useContext(GlobalContext);
const [emailOrUsername, setEmailOrUsername] = useState("");
const submitHandler = (e) => {
e.preventDefault();
sendPasswordRecoveryEmail(emailOrUsername);
};
const isButtonDisabled = !emailOrUsername;
return (
style={{ display: "flex", justifyContent: "center", padding: "4rem 0" }}
>
title="Recover Password"
text="It's okay, we have got this!"
/>
{passwordRecoveryEmailError && (
)}
type="text"
placeholder="Email or username"
value={emailOrUsername}
onChange={(e) => setEmailOrUsername(e.target.value)}
required={true}
/>
variant="contained"
type="submit"
style={{
textTransform: "none",
backgroundColor: colors.button.background,
fontWeight: "600",
borderRadius: "0rem",
}}
sx={{
"&.Mui-disabled": {
color: "grey",
},
}}
disabled={isButtonDisabled}
>
Send me a reset password email
{loading && (
)}
);
};
export default RecoverPassword;
sendPasswordRecoveryEmail function is in the next step.
5. Send the “Change Password” mail to the userTo send the email to the user, I used nodemailer package in my Node.js/Express backend.
a. Install nodemailerWith npm
npm i nodemailerWith yarn
yarn add nodemailerb. Setup nodemailerI have used “Gmail” as the service, so before creating the controller to send password recovery email to the user in their Gmail account, I had to setup nodemailer with the help of this page.
c. Create the controller to send email to the userconst sendPasswordRecoveryEmail = asyncHandler(async (req, res, next) => {const { emailOrUsername } = req.body;
if (!emailOrUsername) {
res.status(400);
return next(new Error("Field is required"));
}
// Find the user
let userAvailable;
if (emailOrUsername.includes("@")) {
userAvailable = await UserModel.findOne({ email: emailOrUsername });
} else {
userAvailable = await UserModel.findOne({ username: emailOrUsername });
}
if (!userAvailable) {
res.status(400);
return next(new Error("User is not found"));
}
const html = `
Hi, ${userAvailable.name},
Here's your password recovery link
Reset password here
Best regards, Libertas
`;
const transporter = nodemailer.createTransport({
service: "gmail",
auth: {
user: process.env.GOOGLE_ACCOUNT_USER,
pass: process.env.GOOGLE_ACCOUNT_PASS,
},
});
if (userAvailable) {
// sending email with nodemailer
const info = await transporter.sendMail({
from: '"Libertas" ', // sender address
to: userAvailable.email,
subject: `Reset your Libertas password`, // Subject line
html: html, // html body
});
res.status(201).json({
success: true,
message: "Password recovery email has been sent succesfully",
id: userAvailable._id,
email: userAvailable.email,
info: info,
});
} else {
res.status(400);
return next(new Error("Something went wrong!"));
}
});
In the above code:
I am allowing the user to type either their “username” or “email”.const { emailOrUsername } = req.body;I am checking if the user with that email or username exists in the database. If not, I throw an error.// Find the userlet userAvailable;
if (emailOrUsername.includes("@")) {
userAvailable = await UserModel.findOne({ email: emailOrUsername });
} else {
userAvailable = await UserModel.findOne({ username: emailOrUsername });
}
if (!userAvailable) {
res.status(400);
return next(new Error("User is not found"));
}I have created a simple html markup that will show on the email that goes into the user’s Gmail account.const html = `
Hi, ${userAvailable.name},
Here's your password recovery link
Reset password here
Best regards, Libertas
`;Next, I have configured the nodemailer transporter. I have specificed “gmail” as the “service” and used my Google username and password which was setup with this.const transporter = nodemailer.createTransport({
service: "gmail",
auth: {
user: process.env.GOOGLE_ACCOUNT_USER,
pass: process.env.GOOGLE_ACCOUNT_PASS,
},
});jIf the user is available in the database, I send the mail to their Gmail account.if (userAvailable) {
// sending email with nodemailer
const info = await transporter.sendMail({
from: '"Libertas" ', // sender address
to: userAvailable.email,
subject: `Reset your Libertas password`, // Subject line
html: html, // html body
});
res.status(201).json({
success: true,
message: "Password recovery email has been sent succesfully",
id: userAvailable._id,
email: userAvailable.email,
info: info,
});
} else {
res.status(400);
return next(new Error("Something went wrong!"));
}
d. The mail in actionAbout half of the code above is not necessary as typing only email will work for most users, but in Libertas, I gave the option to find the user by both their “username” and “email”.
If nodemailer works successfully, an email will pop up on the user’s Gmail account.
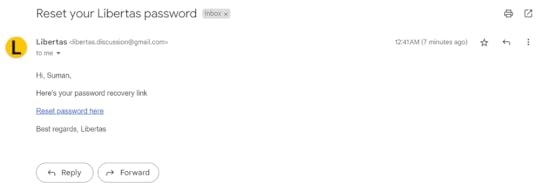 I haven’t created an email template yet, hence the plain text
It is a good practice to let the user know about what happened when they clicked on the “Send me a password recovery email” button.
This way they won’t be left hanging.
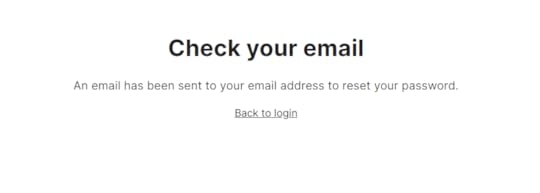 I created this feedback page, letting the user know that an email has been send to their account
Code for above “feedback” page is:
"use client";import { Stack } from "@mui/material";
import Link from "next/link";
import { useEffect } from "react";
const PasswordRecoveryEmailSent = () => {
return (
style={{ display: "flex", justifyContent: "center", padding: "4rem 0" }}
>
alignItems="center"
spacing={2}
style={{ marginBottom: "2rem", textAlign: "center" }}
>
Check your email
An email has been sent to your email address to reset your password.
href="https://sumansourabh.in/login"
style={{
fontSize: "0.875rem",
color: "#000",
textDecoration: "underline",
}}
>
Back to login
);
};
export default PasswordRecoveryEmailSent;6. Create a “Reset Password” page
When the user clicks on the “Reset password here” link on the email, I redirect them to the the “Reset password” page where they can create a new password.

Code:
"use client";import ErrorText from "@/components/errorComponents/ErrorText";
import TextInput from "@/components/formComponents/TextInput";
import LoadingButton from "@/components/pageComponents/LoadingButton";
import TitleText from "@/components/pageComponents/TitleText";
import { GlobalContext } from "@/services/globalContext";
import { colors } from "@/theme/colors";
import { Button, Stack } from "@mui/material";
import { useContext, useEffect, useState } from "react";
const ResetPassword = ({ params }) => {
const [user, setUser] = useState(null);
const [password, setPassword] = useState("");
const [password2, setPassword2] = useState("");
const { loading, getSpecificUser, resetUserPassword, passwordResetError } =
useContext(GlobalContext);
useEffect(() => {
let mounted = true;
const fetchUser = async () => {
const data = await getSpecificUser(params.emailOrUsername);
if (data?.data?.success) {
setUser(data?.data?.user);
}
};
fetchUser();
return () => (mounted = false);
}, []);
const submitHandler = (e) => {
e.preventDefault();
resetUserPassword(user?._id, password, password2);
};
const isButtonDisabled = password.length > 0 && password2.length > 0;
return (
style={{ display: "flex", justifyContent: "center", padding: "4rem 0" }}
>
{passwordResetError && }
type="password"
placeholder="New password"
value={password}
onChange={(e) => setPassword(e.target.value)}
required={true}
/>
type="password"
placeholder="Confirm password"
value={password2}
onChange={(e) => setPassword2(e.target.value)}
required={true}
/>
variant="contained"
type="submit"
style={{
textTransform: "none",
backgroundColor: colors.button.background,
fontWeight: "600",
borderRadius: "0rem",
}}
sx={{
"&.Mui-disabled": {
color: "grey",
},
}}
disabled={!isButtonDisabled}
>
Change Password
{loading && (
)}
);
};
export default ResetPassword;
The above code contains a form that runs a submitHandler function that further calls the resetUserPassword function that resets the user’s password.
7. Create controller to reset the password on the backendI created a resetPassword controller to read both the password and confirmPassword values, compare both and update the user details with the new password.
const resetPassword = asyncHandler(async (req, res, next) => {const { id, password, confirmPassword } = req.body;
if (!password || !confirmPassword) {
res.status(400);
return next(new Error("Both password fields are required"));
}
// Find the user
if (password !== confirmPassword) {
res.status(400);
return next(new Error("Passwords do not match"));
}
const hashedPassword = await bcrypt.hash(password, 10);
const updateUser = await UserModel.findByIdAndUpdate(
id,
{
password: hashedPassword,
},
{
new: true,
}
);
if (updateUser) {
res.status(201).json({
success: true,
message: "Password has been reset succesfully",
user: updateUser._id,
});
} else {
res.status(400);
return next(new Error("Something went wrong!"));
}
});
I have takes the above controller and used in this PUT route:
router.put("/reset-password", resetPassword);Then I called the above route on the frontend.
Once the new password is validated, user will see the page below:

Code for the above page:
"use client";import { Stack } from "@mui/material";
import Link from "next/link";
import { useEffect } from "react";
const ResetPasswordSuccess = () => {
return (
style={{ display: "flex", justifyContent: "center", padding: "4rem 0" }}
>
alignItems="center"
spacing={2}
style={{ marginBottom: "2rem", textAlign: "center" }}
>
Password successfully reset!
Let's go! Your password has been changed successfully!
href="https://sumansourabh.in/login"
style={{
fontSize: "0.875rem",
color: "#000",
textDecoration: "underline",
}}
>
Login
);
};
export default ResetPasswordSuccess;
Here, you have a two choices:
Automatically redirect the user to the “Login” page.Leave it upto the user about the next steps.8. AuthenticateFinal step of the reset password flow is to login with the new password.
That’s it! Was it too much? No worries, take it slow, step-by-step.
ConclusionThis post discussed how I created a password reset flow on Libertas. You can use the above process in your React/Next.js application too!
If you need any help, you can contact me on LinkedIn and Twitter. I usually try to reply fast.
Read more:
2024 Guide to Infinite Scrolling in React/Next.jsHow to Actually Upgrade Expo and React Native Versions to Latest?How to Create Toggle Password Visibility with Material UI?The post How to Create a Password Reset Flow in Next.js? appeared first on Suman Sourabh | Tech Blog.
June 2, 2024
How to Build a Document Viewer in Nextjs?
This guide will show you how to display a document viewer component using react-documents package in a Nextjs application.
With this package, you can show the following types of documents:
pptpptxdocdocxxlsxlsxpdfLet’s start.
Table of ContentsSteps to create a Document Previewer1. Create a Next.js project2. Install react-documents package3. Add the code for document preview4. Add a document URL5. Final resultConclusionSteps to create a Document Previewer1. Create a Next.js projectOpen a text editor of your choice (I use VS Code) and type the following command in the terminal:
npx create-next-app@latestFollow the instructions and a new Next.js app will be created.
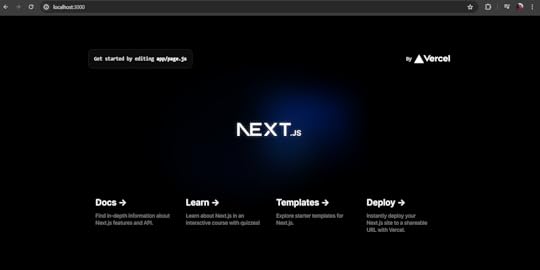
You can run the app with npm run dev and go to http://localhost:3000 to see your application.
 The Nextjs app on http://localhost:30002. Install react-documents package
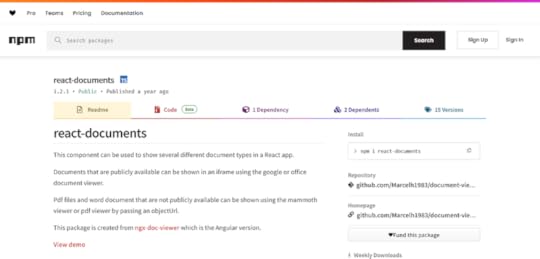 react-documents home page on npm
Install the react-documents package with this command:
npm i react-documentsNow, in your package.json file, the following line will be added:
"react-documents": "^1.2.1"3. Add the code for document previewCopy the code below into the page.js file present in this path: app\page.js
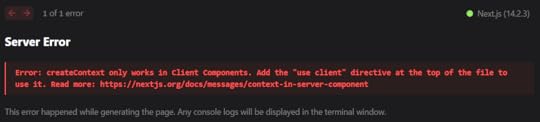
Do not save just yet as it will throw a runtime error.
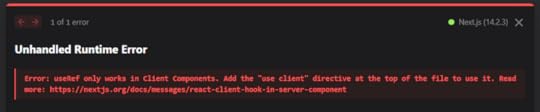 The ugly runtime error that Nextjs developers run frequently to
To prevent this error, paste the code below on the top of your page.js file:
"use client";Now, code will look like this:
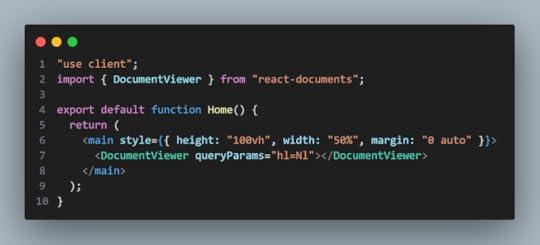
If you save now, this is how your project will look like on the browser.
This is because we did not add the location or the URL of the document, so nothing can be previewed.
4. Add a document URLYou can use this PDF URL:
https://www.w3.org/WAI/ER/tests/xhtml/testfiles/resources/pdf/dummy.pdf
Now, add the code below to the DocumentViewer component.
url="https://www.w3.org/WAI/ER/tests/xhtml..."Now, code will be like this:
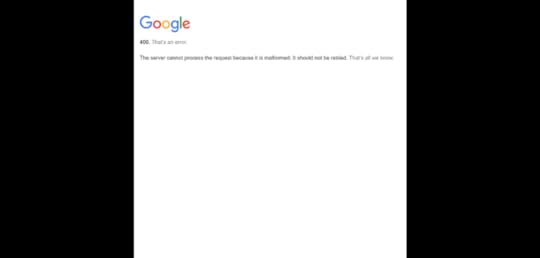
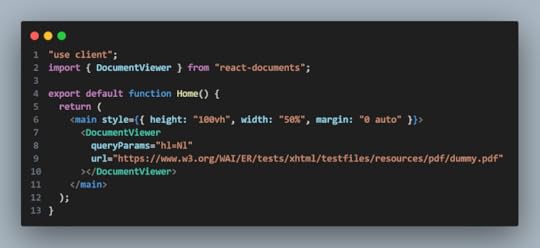 5. Final result
Save the project and check the browser. The PDF will be displayed on the viewer component.
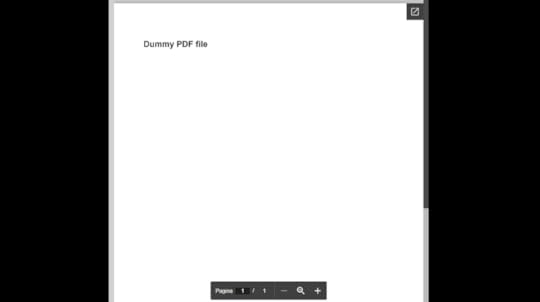
You can enhance the look and feel of the page by adding a few styles.
ConclusionThis guide talked about how to display a component for document viewer in a Nextjs app with the help of react-documents package. Likewise you can follow the same procedure for React.
Additionally, you can use one more package called React PDF Viewer for displaying just PDFs on the Nextjs/React application.
The post How to Build a Document Viewer in Nextjs? appeared first on Suman Sourabh | Tech Blog.
May 27, 2024
How to Display a PDF in Nextjs Using React PDF Viewer?
This blog talks about how you can display a PDF file in your Nextjs app.
Table of ContentsPrerequisites1. Create a Next.js project with the following command2. Run the Next.js projectSteps to use React PDF Viewer:1. Install a few packages2. Copy the original code3. Run the project4. Fix the server error5. Run the project again6. Copy styles7. Run the project for the final timeFinal codeConclusionPrerequisites1. Create a Next.js project with the following commandnpx create-next-app@latestFollow the instructions and a new Next.js project will be created.
2. Run the Next.js projectType the following command on the terminal.
npm run devOpen a web browser like Chrome, and go to http://localhost:3000. You will see your new Next.js project running.
Now, we will use the React PDF viewer component to display the PDF file on the page.
You can refer this documentation to get started: Getting started – React PDF Viewer (react-pdf-viewer.dev)
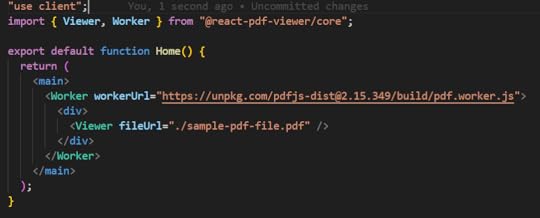
Steps to use React PDF Viewer:1. Install a few packagesnpm install pdfjs-dist@3.4.120npm install @react-pdf-viewer/core@3.12.02. Copy the original codeGo to Basic usage – React PDF Viewer (react-pdf-viewer.dev) and paste the code on page.js inside the project.
import { Viewer, Worker } from "@react-pdf-viewer/core";export default function Home() { return ( );}3. Run the projectYou will encounter an error
This is a pretty common error in Next.js about the usage of client components. Basically, it just says that React PDF Viewer component uses some code that can only work on client components and not the server components.
4. Fix the server errorWhat you have to do is just type “use client” on top of your page.
Now, the overall code becomes this
 5. Run the project again
Now you will encounter another error.

This error comes when there is a mismatch in the versions of the worker and the pdfjs-dist package.
To fix this, just change the version of pdfjs-dist inside the workerUrl to 3.4.120.
If you run now, you will see the PDF being displayed on the page.
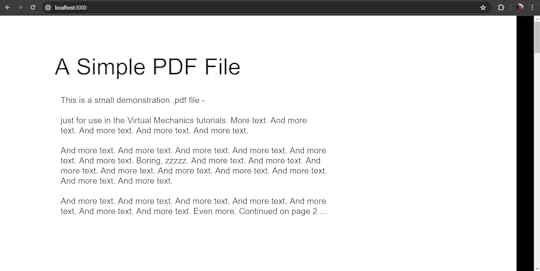
But hold on! There’s something weird.
Look at the right side of the page, there’s a black background which looks odd.
6. Copy stylesTo make the styling correct, copy and paste the styles from this page: starter/nextjs at main · react-pdf-viewer/starter (github.com)
// Import the styles provided by the react-pdf-viewer packagesimport "@react-pdf-viewer/default-layout/lib/styles/index.css";import "@react-pdf-viewer/core/lib/styles/index.css";Now, you will encounter another error:
Module not found: Error: Can't resolve '@react-pdf-viewer/default-layout/lib/styles/index.css'To resolve this, install this package:
npm install @react-pdf-viewer/default-layoutNow, final dependencies are
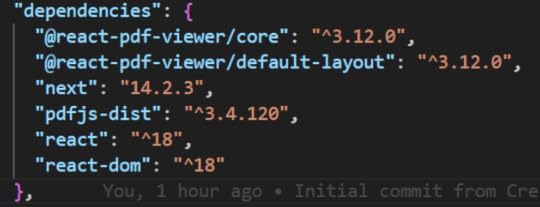 7. Run the project for the final time
Upon running the project now, the PDF will be displayed on the full page.
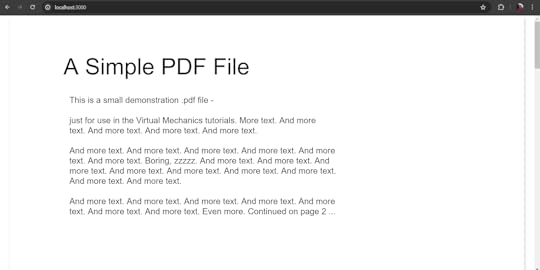 Notice that the black background color at the right side is goneFinal code"use client";import { Viewer, Worker } from "@react-pdf-viewer/core";import "@react-pdf-viewer/default-layout/lib/styles/index.css";import "@react-pdf-viewer/core/lib/styles/index.css";export default function Home() { return ( );}Conclusion
In this blog post, we saw how you can display a PDF previewer on a page in Nextjs application.
Read more:
2024 Guide to Infinite Scrolling in React/Next.jsHow to Actually Upgrade Expo and React Native Versions to Latest?How to Create Toggle Password Visibility with Material UI?The post How to Display a PDF in Nextjs Using React PDF Viewer? appeared first on Suman Sourabh | Tech Blog.
How to Display a PDF in Nextjs?
This blog talks about how you can display a PDF file in your Nextjs app.
Table of ContentsPrerequisites1. Create a Next.js project with the following command2. Run the Next.js projectSteps to use React PDF Viewer:1. Install a few packages2. Copy the original code3. Run the project4. Fix the server error5. Run the project again6. Copy styles7. Run the project for the final timeFinal codeConclusionPrerequisites1. Create a Next.js project with the following commandnpx create-next-app@latestFollow the instructions and a new Next.js project will be created.
2. Run the Next.js projectType the following command on the terminal.
npm run devOpen a web browser like Chrome, and go to http://localhost:3000. You will see your new Next.js project running.
Now, we will use the React PDF viewer component to display the PDF file on the page.
You can refer this documentation to get started: Getting started – React PDF Viewer (react-pdf-viewer.dev)
Steps to use React PDF Viewer:1. Install a few packagesnpm install pdfjs-dist@3.4.120npm install @react-pdf-viewer/core@3.12.02. Copy the original codeGo to Basic usage – React PDF Viewer (react-pdf-viewer.dev) and paste the code on page.js inside the project.
import { Viewer, Worker } from "@react-pdf-viewer/core";export default function Home() { return ( );}3. Run the projectYou will encounter an error
This is a pretty common error in Next.js about the usage of client components. Basically, it just says that React PDF Viewer component uses some code that can only work on client components and not the server components.
4. Fix the server errorWhat you have to do is just type “use client” on top of your page.
Now, the overall code becomes this
5. Run the project againNow you will encounter another error.
This error comes when there is a mismatch in the versions of the worker and the pdfjs-dist package.
To fix this, just change the version of pdfjs-dist inside the workerUrl to 3.4.120.
If you run now, you will see the PDF being displayed on the page.
But hold on! There’s something weird.
Look at the right side of the page, there’s a black background which looks odd.
6. Copy stylesTo make the styling correct, copy and paste the styles from this page: starter/nextjs at main · react-pdf-viewer/starter (github.com)
// Import the styles provided by the react-pdf-viewer packagesimport "@react-pdf-viewer/default-layout/lib/styles/index.css";import "@react-pdf-viewer/core/lib/styles/index.css";Now, you will encounter another error:
Module not found: Error: Can't resolve '@react-pdf-viewer/default-layout/lib/styles/index.css'To resolve this, install this package:
npm install @react-pdf-viewer/default-layoutNow, final dependencies are
7. Run the project for the final timeUpon running the project now, the PDF will be displayed on the full page.
Notice that the black background color at the right side is goneFinal code"use client";import { Viewer, Worker } from "@react-pdf-viewer/core";import "@react-pdf-viewer/default-layout/lib/styles/index.css";import "@react-pdf-viewer/core/lib/styles/index.css";export default function Home() { return ( );}ConclusionIn this blog post, we saw how you can display a PDF previewer on a page in Nextjs application.
The post How to Display a PDF in Nextjs? appeared first on Suman Sourabh | Tech Blog.