Brian Meert's Blog, page 10
March 11, 2024
How To Use Custom Facebook Audiences

Are you looking to take advantage of Custom Facebook Audiences?
This feature lets you reach the people who matter most to your business. By targeting specific groups based on their past interactions with your brand, you can create highly personalized ad experiences. Custom Audiences can make a significant difference if you aim to re-engage past customers, increase loyalty, or drive conversions.
Let’s walk you through the process of creating and using Facebook Custom Audience.
What Is a Custom Facebook Audience?
A Custom Facebook Audience is a type of audience you can create for your advertising campaigns on Facebook using your own data. Essentially, it lets you target ads to people who have interacted with your business somehow. This could include:
People who have visited your website (tracked through a Meta pixel).Your existing customers whose contact details you upload to Facebook.App users, if you have an app and track user engagement.Video viewers, people who have watched your videos on Facebook.You can use this data to tailor your advertising to individuals familiar with your brand and make your ads more relevant and effective. This helps increase the chances of engagement and conversion because you’re reaching out to an audience with a proven interest in your business.
Types of Facebook Custom AudiencesUnderstanding the different types of Custom Audiences can transform your marketing strategy. The following are the types of Facebook Custom Audiences:
1. Customer list audience.The customer lists audience lets you upload your saved audience on your contact lists (email addresses or phone numbers) directly into Facebook. This audience type matches your data with Facebook users, allowing you to directly target ads to your existing customers on the platform. It is ideal for businesses with a robust customer database to re-engage past customers with new offers, products, or updates.
2. Website traffic audience.This type of audience targets people based on their interactions with your websites. You can track visitors’ actions and create audiences based on specific behaviors, such as visiting a particular page or making a purchase. But first, you need to install the Facebook pixel on your site. Website traffic audience is best for businesses aiming to retarget website visitors who didn’t make a purchase or those looking to cross-sell related products.
3. App traffic audience.The App traffic audience targets users based on their interactions with your mobile app. You can segment audiences based on specific actions taken within the app, such as reaching a certain level in a game, adding items to a cart, or completing a purchase. This custom audience type suits mobile app developers or businesses with an app-centric consumer interaction looking to increase engagement or promote in-app purchases.
4. Offline activity audience.This type focuses on users who have interacted with your business offline. Whether they purchased in your store or attended an event, you can use data from offline interactions to target these individuals on Facebook. This option is suitable if you have a significant offline presence and aim to bridge the gap between offline activities and ad account operations.
5. Engagement audience.Engagement audiences are created based on how users interact with your content on Facebook and Instagram. You can target people who have engaged with your posts, watched your videos, filled out a lead form, or interacted with your page in any other way. This audience type is perfect for brands looking to capitalize on the interest shown by users who have already interacted with their content on these platforms.
6. Lookalike audience.While not a Custom Audience per se, Lookalike Audiences deserve mention as they are built from Custom Audiences. You can create a Lookalike Audience to find Facebook users similar to those in your Custom Audience, expanding your potential customer base. It’s ideal for advertisers wanting to reach new users who share characteristics with their best existing customers, potentially increasing conversion rates.
Steps To Use Facebook Custom Audiences
Whether you want to increase sales, boost engagement, or drive traffic, these audiences help you reach the right people at the right time. The outline below are straightforward steps you can take to use Custom Facebook Audiences effectively:
Step 1: Access Facebook Ads Manager.You must log in first to access your Facebook Ads Manager, where all your advertising activities are managed. If you haven’t set up an Ads Manager account yet, you should create one using your Facebook account.
Step 2: Go to Audiences.Once you’re in Ads Manager, locate the ‘Audiences’ section. This is typically found under the ‘Assets’ column in the main navigation menu. Clicking ‘Audiences’ will bring you to a dashboard where you can manage all your audience-related settings.
Step 3: Create your Custom Audience.In the Audiences dashboard, click the ‘Create Audience’ dropdown and select ‘Custom Audience.’ This will prompt you to choose the source of the audience you wish to create.
Step 4: Set up your audience.Depending on the source you choose, the setup will vary:
Customer File: You’ll upload a CSV or TXT file with your customer data and map the fields to ensure Facebook correctly identifies names, email addresses, etc.Website Traffic: You’ll need to specify the type of visitors to target, such as all website visitors, visitors to specific pages, or visitors by time spent.App Activity: Define the type of app engagements that qualify users to be included in your audience, like completing a purchase.Offline Activity and Engagement: Choose the specific interactions or engagements that will form the basis of your audience.Step 5: Define the audience size and parameters.You can refine your audience by adding further parameters such as demographics, interests, and behaviors. This step is crucial as it allows you to narrow your focus and increase the relevancy of your ads.
Step 6: Save and use your audience.Once your Custom Audience is created, save it. You can now use this audience for any of your campaigns. Select it as the target audience when setting up a new campaign.
ConclusionCustom Facebook Audiences are an invaluable tool for marketers looking to enhance the precision and effectiveness of their advertising efforts. By carefully selecting and targeting specific groups, you can significantly improve engagement and conversion rates, making your advertising spend more efficient. Start using Custom Facebook Audiences today to transform your digital marketing strategy!
Do you need to run ad campaigns on Facebook? Contact the leading Facebook ad agency.
Frequently Asked QuestionsWhat is a Custom Facebook Audience?A Custom Facebook Audience is a Facebook advertising tool that allows you to create lists of specific individuals to whom you can target your ads.
Can I use Custom Audiences for retargeting campaigns?Yes, Custom Audiences are particularly effective for retargeting campaigns.
How often should I update my Custom Facebook Audiences?Regularly updating your Custom Facebook Audiences ensures that your advertising campaigns remain relevant and effective.
Related ArticlesFacebook Retargeting: Reconnecting with Your Audience


March 9, 2024
How To Discover Fake Instagram Followers

How do you discover fake Instagram followers?
The integrity of your social media following can significantly impact your brand’s reputation and effectiveness. Instagram fake accounts can skew engagement metrics, mislead potential collaborators, and even hurt the credibility of your Instagram account.
Here’s a straightforward guide to help you spot and manage fake followers on your Instagram profile.
Why You Should Check for Fake Instagram Followers

Instagram is a vital space for interaction, marketing, and influence. However, this importance also makes it a target for less ethical practices, such as buying fake followers to gain more followers. Below, we will explain why it’s crucial to keep tabs on these counterfeit followers and maintain a clean, authentic list of active followers:
1. Enhances engagement accuracy.The primary value of an Instagram account comes from engagement: likes, comments, shares, and genuine interactions with content. Fake follower accounts skew these metrics. They inflate follower counts but don’t participate in meaningful ways, which dilutes the engagement rate.
This metric is crucial for brands and genuine Instagram influencers who use engagement rates to measure the impact and reach of their content. High-quality, active, real followers contribute to a more accurate assessment of how well content performs. It is essential to filter out the noise caused by inactive, fake account owners or bots.
2. Maintains credibility and trust.Authenticity breeds trust. For influencers and brands, the trust of their audience is their most valuable asset. If your followers discover that you buy Instagram followers, it can damage your account’s reputation, reducing your perceived authenticity and integrity.
While marketing on social media platforms, consumers value transparency. Having a follower list bloated with fake free followers can lead to skepticism and diminish the trust of potential partners or customers.
3. Attracts quality partnerships.Many businesses and brands look to partner with influencers on Instagram to reach their audiences. These companies often perform thorough audits to ensure that they invest in influencers whose audiences are real and engaged.
An Instagram account with many fake followers is less attractive to these businesses, and they may lose out on lucrative partnership opportunities. Regularly checking and removing fake followers can help maintain an attractive profile for potential partnerships.
4. Improves content strategy insights.Understanding your audience is key to crafting content that resonates and engages with your target audience. Fake followers, however, provide misleading data that can skew analytics.
This distortion can lead to incorrect assumptions about your audience’s values, potentially leading to less effective content strategies. Avoid buying Instagram followers and Keep your follower base clean. Doing this ensures the data you collect about user interactions accurately reflects your true audience.
5. Avoids algorithm penalties.Instagram’s algorithms prioritize content with higher engagement, assuming it’s more valuable to users. An account with many followers but low engagement may be posting uninteresting or irrelevant content, prompting the algorithm to show your posts to fewer people. Maintaining a clean list of followers and not buying followers improves your engagement rate, favorably positioning your content within the platform’s algorithms.
6. Upholds advertising ROI.The return on investment (ROI) is paramount for those who invest in Instagram ads. Advertising to fake followers is throwing money away because these followers will not convert into customers. By ensuring your follower base is genuine, you can maximize your advertising spend and enhance the efficiency of your marketing efforts.
How To Use an Instagram Fake Follower Checker

An Instagram fake follower checker can help you identify and manage fake followers effectively. Here’s a simple procedure on how to use these tools to keep your Instagram account clean and genuine:
Step 1: Choose the right tool.Several tools are available to check fake followers on Instagram. Popular options include FakeCkeck.co, HypeAuditor, and Social Blade. Choose a tool that fits your needs, whether it’s simplicity, depth of analysis, or budget.
Step 2: Connect with your Instagram account.Most fake follower checkers will require you to connect your Instagram account. This typically involves logging in through the platform, which allows the tool to access your follower list and engagement data. Ensure you use a reputable, secure authentication service to protect your account details.
Step 3: Run the analysis.Once your account is connected, initiate the analysis. The tool will scan your follower list and use various metrics and algorithms to identify potential fake accounts. This may include checking for activity levels, profile completeness, and engagement authenticity. The time it takes to complete the analysis can vary depending on the size of your follower list and the tool’s complexity.
Step 4: Review the results.After the analysis is complete, review the results provided by the tool. Most services will categorize followers into real, inactive, and fake. They might also provide additional insights, such as the percentage of your real followers, to help you understand your account’s health.
Step 5: Take action.With the information from the fake follower checker, you can take action. This could mean removing fake followers and adjusting your content strategy.
Step 6: Maintain regular checks.Fake followers can accumulate over time, so it’s a good idea to make these checks a regular part of your social media strategy. Depending on your account activity and growth, you should run a check monthly or quarterly.
ConclusionMaintaining the authenticity of your Instagram following is crucial for the credibility and effectiveness of your social media presence. You can ensure your followers are genuine and engaged by staying vigilant and using the right tools. This helps portray an accurate representation of your influence and builds meaningful relationships with your audience.
Advertisemint is an Instagram ad agency that can help you build your following the right way. We can connect you to your target audience and market your products and services.
Frequently Asked QuestionsHow can I tell if a follower on Instagram is fake?Fake followers often have no profile picture, no posts of their own, a strange ratio of followers to following, and their names might include random numbers or letters.
Why should I worry about fake followers on my Instagram account?Fake followers can negatively impact the credibility and authenticity of your Instagram account.
What tools are recommended for checking fake followers on Instagram?Several tools are well-regarded for their ability to identify fake followers, including FakeCheck.co, Social Blade, and HypeAuditor.
Related Blog PostsThe Best Instagram Selfie Captions
March 7, 2024
The Complete Guide to Facebook Ads Objectives

Are you wondering how to choose the right Facebook ads objectives?
Facebook advertising can be daunting, but you can boost your chances of success by understanding ad objectives. Each objective is designed to align with specific goals, whether you’re looking to generate leads, increase sales, or boost brand visibility.
By selecting the appropriate objective, you can tailor your ads to perform optimally for your desired outcome. Let’s explore the latest Facebook campaign objectives and how to choose the right option.
Facebook’s New Strategy for Streamlined Advertising (ODAX)In 2022, Facebook rolled out a new framework for ad campaigns called ODAX, or Outcome-Driven Ad Experiences. This innovative approach is designed to make advertising on Facebook and Instagram more straightforward and effective by focusing on specific business outcomes.
ODAX simplifies the ad campaign process by allowing advertisers to directly link their ads to their business goals. This is a shift from the previous model, which offered a broad range of campaign objectives that could sometimes complicate the strategy development process.
The Six New Ad Objectives Under ODAX

Facebook’s restructuring of its ad objectives into six categories is designed to streamline campaign setup and optimization. Below, we will explore these objectives and understand how they can be leveraged for different marketing goals:
1. Awareness.Awareness campaigns are foundational, aimed not directly at sales but at engaging potential customers who might explore your brand. By creating compelling content that narrates your brand’s story or piques interest, these campaigns collect valuable data to create custom audiences. Optimizations you can set include Impressions, Reach, and Ad Recall Lift, all geared toward increasing visibility rather than immediate conversions.
2. Traffic.This objective focuses on driving visitors to your website or product pages, which is essential for nurturing future conversions. Particularly useful when combined with content marketing strategies, thiw objective builds a foundation for robust conversion campaigns.
It is effective when starting with a fresh pixel and helps gather data necessary for retargeting. Key optimizations include Landing Page Views, Link Clicks, and Daily Unique Reach.
3. Engagement.Engagement objectives are all about interaction. This Facebook ads objective boosts your social footprint and post engagement rates, whether it’s likes, shares, comments, or video views. It’s also designed to help promote events and offers, making your brand more lively and interactive.
You can customize your approach with specific optimizations depending on where you want conversions (such as your website, app, or Facebook page). These optimizations include Direct Messages on Messenger, Instagram Direct, and WhatsApp.
3. Lead generation objective.The lead objective is perfect for businesses that have already made an impression on their audience. It is designed to capture interest from those familiar with your brand and might consider purchasing. By using channels like your website, Messenger, and Instant Forms, this objective efficiently gathers lead data to nurture potential customers toward making a purchase.
4. App promotion.If you aim to increase app installations, the App Promotion objective targets individuals likely to download and engage with your app. Optimizations focus on App Installs and Events, with a Value option to maximize return on ad spend by targeting users based on the potential purchase value they bring.
5. Sales objective.The ultimate objective for e-commerce businesses, the Sales objective, targets individuals with strong buying intent at the bottom of the sales funnel. Utilizing catalog sales generated from your e-commerce store’s product feed, this objective creates personalized shopping experiences directly in users’ social feeds.
This objective helps convert interest into sales, whether someone is a click away from purchasing or needs a reminder of their previous interests. If you accept payments, conversion locations can be set across your website, app, and messaging platforms.
Selecting the Right Facebook Campaign Objectives
Exploring Facebook advertising can seem complicated, especially when selecting the right ad objective. With so many available options, how do you know which is best suited for your business goals? Below, we will discuss how to choose the right Facebook campaign objective for your business:
Step 1: Understand your goals.Firstly, take a moment to clarify your goals. Are you looking to increase brand awareness, drive website traffic, generate leads, or boost sales? A clear understanding of your objectives will guide your decision-making and ensure you choose the most suitable ad objective.
Step 2: Know your audience.Consider your target audience and what action you want them to take. Are they more likely to engage with your brand on Facebook, visit your website, or make a purchase? Understanding your audience’s behavior will help you align your ad objective with their preferences and interests.
Step 3: Explore the ad objectives.Facebook updated its ad objectives. Explore the latest updates to determine which ad objective suits your brand.
ConclusionMastering Facebook ad objectives is essential for creating effective advertising campaigns that drive results. Whether your goals may be, Facebook offers a variety of objectives to suit your goals. By understanding each objective and implementing best practices, you can use Facebook ads to grow your business and reach new heights.
Advertisemint is the best Facebook ads agency for businesses of all sizes. We have the necessary experience and tools to help achieve your marketing goals.
Frequently Asked QuestionsWhat are Facebook Ads Objectives?Facebook Ads Objectives are the goals you set for your advertising campaigns on Facebook.
How do I choose the right Facebook Ad Objective?Choosing the right Facebook Ad Objective depends on your business goals and desired outcomes.
What are the different types of Facebook Ad Objectives?Facebook offers six categories of ad objectives: Awareness, Traffic, Engagement, Lead Generation, App Promotion, and Sales Objectives.
Related ArticlesHow to Analyze Facebook Ads Performance
March 6, 2024
Facebook Interest Targeting: The Complete Guide

Are you looking to take advantage of Facebook interest targeting?
As its name suggests, Facebook interest targeting enables advertisers to connect with users based on specific parameters. You can use it to create Facebook ads that resonate with people most likely interested in your products or services.
This guide will discuss how interest targeting works and how you can use it to maximize your advertising campaign.
What Is Facebook Interest Targeting?

Facebook interest targeting is a feature that allows advertisers to direct their ads towards users who have shown interest in specific topics on the platform, such as hobbies, activities, or liked pages. By analyzing user interactions and preferences, Facebook helps businesses tailor their ads to users with a better chance of purchasing their products or services. This method increases the effectiveness of ads by ensuring they reach a more relevant audience, potentially boosting engagement and sales for advertisers while providing users with more pertinent ad content.
Facebook Interest ListThe Facebook interests list is not a static, one-dimensional catalog. It’s a dynamic, multi-layered array of categories spanning various life aspects. Here are some of the primary categories you might encounter:
Entertainment: This includes movies, music, books, television shows, and more. If you’re promoting a new album or a book launch, it is advisable to target users interested in similar genres.Fitness and Wellness: From yoga enthusiasts to hardcore gym-goers, this category allows you to target individuals based on their fitness habits and wellness interests.Food and Drink: Whether you’re a gourmet or fast food lover, this category lets you tailor your culinary ads to the right palate.Hobbies and Activities: This broad category can include anything from gardening to drone flying, offering a wide scope for targeting based on leisure activities.Shopping and Fashion: Ideal for retailers, this category helps target users based on their shopping behaviors and fashion preferences.Sports and Outdoors: Target users based on their favorite sports, teams, or outdoor activities, perfect for promoting sporting events or outdoor gear.How To Get Started With Facebook Interest TargetingYou can find Facebook interest targeting within the Facebook Ads Manager. Here’s a simple step-by-step guide on how to access it:
Log in: Sign into your Facebook account and go to the Ads Manager.Create or edit an ad: Start creating a new ad or edit an existing campaign.Audience section: In the setup process, you’ll see a section labeled “Audience.”Detailed Targeting: Within this section, look for an area called “Detailed Targeting.” Here, you can enter specific interests that relate to your target audience.Add interests: Type in interests related to your product or service. Facebook will suggest interests that you can select to refine your audience.Importance of Facebook Interest Targeting
Facebook interest targeting is crucial for businesses because it enhances the effectiveness of Facebook advertising in several key ways:
Relevance: It allows businesses to show their ads to people who have already shown an interest in similar products or topics. This means the ads are more relevant to the viewers, increasing the likelihood of engagement.Efficiency: Businesses can use their advertising budget more efficiently by focusing on a specific group of people who are more likely to be interested in what they’re selling. This reduces waste on viewers who are unlikely to convert into customers.Increased conversion: When ads reach the right people, the chances of these viewers taking action, such as making a purchase or signing up for more information, are much higher.Customer insights: Using interest targeting helps businesses learn more about their customers’ preferences and interests. This insight can be invaluable for tailoring future marketing strategies and product developments.Competitive edge: Businesses that effectively use Facebook interest targeting can gain an edge over competitors by capturing the attention of potential customers more effectively and creating more tailored marketing messages.Tips for Effective Interest Targeting on FacebookHere are some practical tips to help you optimize your interest-targeting strategy for better results:
1. Understand your audience.Before you begin interest targeting, take time to understand your audience. What are their hobbies? What kind of content do they consume? Use Facebook Insights and your analytics to gather information about your existing customers and followers. This data will give you clues about the interests that might resonate with your potential customers.
2. Start with broad categories.Facebook categorizes interests broadly, such as “Fitness and wellness” or “Food and drink.” Starting with these broad categories can help you reach a large group of people interested in your topic. From there, you can observe which segments engage the most and refine your targeting based on those insights.
3. Refine with niche interests.Once you can handle broad categories’ performance, explore more specific interests. Facebook allows you to target users based on detailed interests, such as fans of a specific fitness guru or lovers of a particular culinary style. Targeting niche interests can increase the relevance of your ads and improve engagement rates.
ConclusionUnderstanding Facebook interest targeting is a skill and a strategic advantage in digital advertising. It can help you enhance engagement, optimize your ROI, build meaningful connections with your audience, and make informed, data-driven decisions. So, employ interest targeting and watch your Facebook advertising campaigns become more impactful, resonant, and, ultimately, successful.
Do you need experts to advertise your products or services on Facebook? Contact the best ad agency on Facebook.
Frequently Asked QuestionsHow does Facebook interest targeting work?Facebook interest targeting analyzes user data, including pages they like, posts they engage with, ads they click on, and other activities. Based on this data, Facebook categorizes users into different interest groups, and advertisers can then choose from various interests to target their ads.
Why is Facebook interest targeting important for advertisers?Facebook interest targeting is important for advertisers because it allows them to reach a highly relevant audience with their ads.
Can I combine multiple interests in my Facebook ad targeting?Yes, you can combine multiple interests in your Facebook ad targeting.
Related ArticlesFacebook Retargeting: Reconnecting with Your Audience
March 5, 2024
How To Create An Instagram Poll

What do you know about Instagram Poll?
Instagram Polls are a fantastic way to increase interaction and gain valuable insights from your audience. Whether you’re looking to gather feedback, entertain your followers, or just spark fun conversations, polls can do it all. This feature, embedded within Instagram Stories, allows users to pose questions and see results in real-time.
This guide will show you how to leverage Instagram polls to create more dynamic and interactive content.
What is an Instagram Poll?
Instagram Polls are a feature in Instagram Stories that lets you ask your followers a question and give them up to four choices as answers. When you post a poll, your followers can directly tap on their preferred option in your story. This is a great way to interact with your audience, gather opinions, or make more decisions based on what your followers like. The poll results are shown in real-time, so you can see which option is winning as votes come in.
How To Create an Instagram Story Poll
Instagram Polls have emerged as a captivating feature that injects interactivity into your Stories. The following are easy-to-follow steps for creating polls for your Instagram Stories:
Step 1: Open your Instagram stories.Firstly, access your Instagram Stories. Launch your Instagram app and tap the “+” icon above your news feed. After that, click “Story.”
Step 2: Choose your background.Before you introduce your poll, select the background for your Story. You can snap a new photo, record a video, or choose an image from your gallery. Think of this as setting the stage for your poll. The background can be a hint or a visual cue about the question you’re about to ask.
Step 3: Access the poll sticker.With your background ready, tap the sticker icon (smiley face) at the top of the screen. This opens a menu filled with interactive features. Look for the “Poll” sticker to create an engaging question.
Step 4: Craft your poll.Once you tap the poll sticker, a text box appears where you can type your question. Be clear and concise, as you want your audience to understand the question instantly. Add the options below your question.
Step 5: Position your poll.Place your poll anywhere on the screen after typing your question and setting the answers. You can drag and resize the poll sticker to ensure it’s perfectly integrated into your Story’s design.
Step 6: Share your Story.Once your poll is ready, hit the “Your Story” button at the bottom of the screen to share it with your followers. The poll will stay live for 24 hours, giving your audience ample time to vote and share their opinions.
Step 7: Check the results.Are you curious about what your audience thinks? You can check the poll results in real-time. View your own Story and swipe up. You’ll see the votes for each option and who voted for what. It’s a great way to gain insights and even spark conversations based on the results.
How Brands Use Instagram Polls

Instagram Polls can transform passive scrolling into active participation, offering insights, boosting engagement, and even influencing decision-making. Here are inventive ways brands use polls on Instagram to captivate their audience and enhance their marketing strategies:
1. Crowdsourcing product decisions.Imagine being part of a brand’s product development process. That’s exactly what some savvy brands do: they use polls on social media posts to let their followers vote on product colors, names, or features. This makes followers feel valued and heard and gives the brand insights into their audience’s preferences.
2. Interactive Q&As.Instead of the standard Q&A sessions, brands spice things up by incorporating polls into their Q&A stories. This approach makes the session more interactive and provides a structured way for followers to share their opinions and preferences.
3. Trend spotting.By asking followers to vote on emerging trends, brands can get a pulse on what’s hot and what’s not. This engages the audience and gives the brand valuable data on the trends that resonate most with their target market.
4. Behind-the-scenes decisions.Brands pull back the curtain and invite followers to decide on behind-the-scenes aspects. This includes choosing the theme for an upcoming photo shoot or the location for an event. Transparency and inclusivity build a stronger connection between brands and their followers.
5. Fun and games.Polls don’t always have to be serious. Many brands use them to inject humor and playfulness into their content. They ask their followers to vote on lighthearted topics or participate in mini-games, enhancing the overall brand experience on Instagram.
6. Influencer collaborations.When brands collaborate with Instagram influencers, polls can be a great way to integrate the influencer’s audience with the brand’s. They ask engaging questions reflecting the influencer’s persona and the brand’s image.
7. Educational content.Polls offer a unique way to educate followers about the brand or industry-related topics. By framing this information in a poll format, brands can make learning interactive and memorable.
8. Feedback loop.Beyond product feedback, brands use polls to get insights into their overall strategy, content preferences, and what followers want to see more or less of. This continuous feedback loop helps brands align with their audience’s evolving preferences.
ConclusionInstagram polls are a medium for connection, insight, and engagement. They break the fourth wall of social media, allowing creators and viewers to interact in a meaningful, fun way. Create your own Instagram Stories Poll and join the interactive fun on Instagram!
Are you considering running an ad campaign on Instagram? Contact the best Instagram ad agency.
Frequently Asked QuestionsCan I customize the answers in my Instagram poll?When you create a poll in your Instagram Story, the default answer options are “Yes” and “No.” However, you can customize these to whatever you’d like.
How long does my Instagram poll last?Instagram polls are tied to your Stories, so they last 24 hours.
How can I see the results of my poll?Swipe up on your Story, and you’ll see who voted and their choice.
Related ArticlesWhat is the Instagram Follower Tracker?
March 3, 2024
Tips for Beating the Instagram Algorithm

Are you trying to understand the Instagram Algorithm?
Instagram has become more than just a video content and photo-sharing app; it’s a powerful platform for businesses, influencers, and individuals. Understanding how Instagram’s algorithm works can be the key to gaining visibility and growing your presence.
This article is a beginner’s guide to mastering the Instagram algorithm.
What is Instagram’s Algorithm?The Instagram algorithm is a smart system that decides what posts users see on their Instagram feed. It’s a helpful guide that looks at a user’s past activity to show content they’ll likely enjoy. It sorts through the millions of posts to pick the best content to improve our Instagram experience and make it more personalized.
How Does the Instagram Algorithm Work?
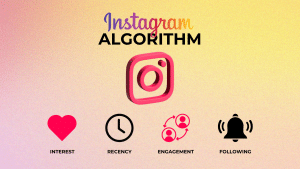
Instagram algorithms are designed to tailor your feed posts to your preferences, ensuring you see content that resonates with you the most. It achieves this through a combination of factors, including your interactions for the past few weeks, the content itself, and even the timeliness of the posts. The following are further explanations of how the Instagram Algorithm works:
1. Your activity matters.Ever noticed how the Instagram posts you engage with the most tend to show up more frequently? The algorithm considers your likes, comments, shares, and even the Instagram users you follow. It learns from your interactions to gauge your interests and preferences.
2. Engagement is key.Instagram aims to keep users engaged and active on the platform. The algorithm prioritizes posts that receive higher levels of engagement, such as likes, comments, and shares. This means that content that resonates with a larger audience is more likely to appear on your feed.
3. Timeliness counts.While the algorithm strives to show you the most relevant content, it also considers the timeliness of posts. Recent posts precede older ones, ensuring you stay up-to-date with the latest happenings from accounts you follow.
4. Relationship factor.Your relationship with other users significantly affects what appears on your feed. Posts from accounts you interact with frequently are prioritized to promote a sense of connection and community on the platform.
5. Content type diversity.Instagram values diversity in content types, including photos, videos, Stories, and Instagram Reels. The algorithm aims to provide a varied and engaging experience by showcasing different forms of content based on your preferences and past interactions.
6. Explore page recommendations.Beyond your feed, the Explore page offers personalized recommendations based on your interests and interactions. The algorithm analyzes your activity to curate a selection of posts, accounts, and topics that you’ll find engaging and relevant.
Instagram Algorithm Tips for Every Content Format

Understanding the nuances of the Instagram algorithm is key to maximizing your reach and engagement. Below are concise tips for mastering Instagram’s algorithm for every content format available on the platform:
1. Instagram feed algorithm tips.Regular posting helps keep your target audience engaged and tells the Instagram algorithm that you’re an active participant. You can schedule Instagram posts in advance to automatically publish your content to users’ feeds.
Encourage likes, comments, and shares by creating interactive content. Ask questions, use call-to-actions, and respond to comments to boost engagement. Also, high-quality images and well-crafted captions catch users’ attention and are favored by the algorithm.
2. Instagram explore page algorithm tips.Create content that encourages users to comment, share, and save. The more interaction your post receives, the higher the chance it appears on the Explore page. Also, Engage with comments promptly to boost your post’s activity, signaling to the algorithm that your content is engaging.
Use engaging and interactive captions. Ask questions or encourage comments to boost engagement. In addition, use a mix of broad and niche hashtags to increase your content’s discoverability. Keep them relevant and update your list regularly to adapt to trending topics.
3. Instagram Story algorithm tips.Regular Stories keep your audience engaged and increase the chances of your content appearing first in the Stories feed. Utilize polls, questions, and swipe-up features to interact with your audience. Also, maintain a consistent style and tone in your stories to build brand recognition and keep viewers interested.
4. Instagram Reels algorithm tips.Leverage trending audio and formats to increase visibility, as the algorithm prioritizes trending content. But while it’s good to follow trends, adding a unique twist can help your content stand out and get favored by the algorithm. In addition, engage with comments on your Reels promptly to boost their visibility and reach.
ConclusionUnderstanding the Instagram algorithm as a beginner might take time. But with consistent effort and a strategic approach, you can significantly enhance your Instagram presence. Stay authentic, engage with your community, and experiment to find what works best for your unique audience.
Are you considering running ad campaigns on Instagram? We are the best Instagram ad agency.
Frequently Asked QuestionIs it important to use hashtags, and how many should I use?Hashtags are crucial for discoverability. Instagram allows up to 30 hashtags per post, but it is generally recommended that you use 5-10 relevant hashtags.
Does the time I post on Instagram affect how the algorithm treats my content?Yes, timing can influence your content’s performance. Posting when your audience is most active increases the chances of immediate engagement, a positive signal to the algorithm.
How can I make my content more likely to appear on the Explore page?Focus on creating high-quality, engaging content that resonates with your target audience to increase your chances of appearing on the Explore page.
Related ArticlesWhat is the Instagram Follower Tracker?
How To Optimize Your Ad Campaigns With Facebook Ad Testing

Do you know how to optimize your ads using Facebook ad testing?
With Facebook ad testing, optimizing your ad campaigns is more achievable than ever. By systematically experimenting with different ad elements, you can refine your approach and maximize your campaign’s impact.
This blog post will discuss how you can test Facebook ads to drive better results for your business.
How To Master Facebook Ad Testing
Finding a winning strategy for your Facebook marketing campaign can be challenging. However, testing Facebook ads allows marketers to refine their approach and unlock the full potential of their campaigns. Below, we’ll explore how you can discover a winning strategy through effective Facebook ad testing:
1. Define your goals.Before ad testing, you should clearly define your objectives. Are you aiming to increase brand awareness, drive website traffic, or boost sales? Understanding your goals will guide your testing strategy and help you measure success accurately.
2. Start with audience segmentation.Effective ad testing begins with understanding your audience. Segment your audience based on demographics, interests, and behaviors to create targeted ad sets. By tailoring your ad set to specific audience segments, you can deliver more relevant content and improve your chances of success.
3. Test different ad formats.Facebook offers various ad formats, including image, video, carousel, and more. Experiment with different formats to see which resonates best with your audience. Monitor engagement and click-through rates to determine the most effective ad format for your campaign objectives.
4. Experiment with ad creatives.The creative elements of your ads, such as headlines, ad copy, and visuals, are crucial in capturing your audience’s attention. Test different variations of ad creative to see which performs best. Pay attention to factors like messaging, imagery, and tone of voice to identify what resonates most with your target audience.
5. Utilize A/B Testing.The A/B testing feature can be found in the Facebook Ads Manager Dashboard. It is also known as split testing and involves comparing two versions of an ad to see which performs better. Start by testing one variable at a time, such as a headline or image, to isolate the impact of each element. Once you identify a winning variation, repeat and test to optimize your results continuously.
6. Implement advanced testing techniques.In addition to A/B testing, consider implementing more advanced techniques like multivariate and sequential testing. Multivariate testing allows you to test multiple variables simultaneously. At the same time, sequential testing involves testing different strategies to determine the most effective approach over time.
7. Leverage Facebook’s testing tools.Facebook provides a range of built-in tools to streamline the ad testing process. The Split Test feature allows you to create controlled experiments within your ad sets. Meanwhile, the Dynamic Creative feature automatically tests different combinations of ad elements to optimize performance. Use these tools to gain valuable insights and refine your strategy.
How To Find the Right Budget to Test Ads on Facebook
When running Facebook ads, one of the most common questions businesses face is: “What budget should I use for testing?” Finding the right balance between affordability and effectiveness is crucial for optimizing your ad campaigns. The following are some key considerations to help you determine the ideal budget for testing Facebook ads:
1. Start small and scale gradually.If you’re new to Facebook advertising or testing a new campaign, it’s wise to start with a modest budget. A smaller ad spend allows you to minimize risk while gaining valuable insights into what works for your audience. As you gather data and optimize your campaigns, you can gradually increase your budget to scale your efforts effectively.
2. Consider your objectives.Your budget for testing Facebook ads should align with your campaign objectives. Different objectives may require different budget allocations in the ad creation process. For example, campaigns focused on lead generation or conversions may require a higher budget to achieve meaningful results.
3. Calculate the cost per test.Consider the cost per test to determine an appropriate budget for testing Facebook ads. How much do you need to spend to gather statistically significant results? A common rule of thumb is to allocate enough budget to run multiple ad variations to ensure accurate data analysis. Factor in the cost per click (CPC) or cost per conversion (CPC) to estimate the budget required for each test.
4. Account for audience size.The size of your target audience also plays a crucial role in determining your testing budget. If you’re targeting a small niche audience, allocate a higher budget to reach a sufficient number of people and gather meaningful data. Conversely, if you’re targeting a large audience, you can achieve significant results with a smaller budget.
5. Test across multiple variables.When allocating your testing budget, consider testing multiple variables simultaneously. Experiment with different ad creatives, targeting options, and ad formats. This will allow you to gather comprehensive insights and optimize your campaigns more effectively. Allocate the budget accordingly to ensure each variable receives adequate testing.
6. Monitor performance and adjust budgets.Once your tests are live, closely monitor their performance and adjust budgets as needed. Allocate more budget to high-performing ads or ad sets, and reallocate budget away from underperforming ones. Continuously optimize your budget allocation based on real-time data to maximize ROI and achieve your campaign objectives.
ConclusionFacebook ad testing is great for optimizing your ad campaigns and maximizing their impact. By experimenting with different ad elements, you can understand your audience’s preferences and refine your strategy accordingly. A data-driven approach and a commitment to continuous improvement can unlock the full potential of your Facebook ad campaigns.
Do you want to entrust your Facebook marketing to experienced professionals? Contact the leading Facebook ad agency.
Frequently Asked QuestionsHow do I know which elements to test in my Facebook ads?The elements to test in your Facebook ads depend on your campaign objectives and audience demographics. However, common elements to test include ad creative, targeting options, ad formats, and call-to-action buttons.
How long should I run my Facebook ad tests?The duration of your Facebook ad tests depends on several factors, including your budget, audience size, and the level of statistical significance you aim to achieve.
What metrics should I track when analyzing Facebook ad test results?When analyzing Facebook ad test results, track key metrics that align with your campaign objectives. Common metrics to monitor include click-through rates (CTR), conversion rates, cost per click (CPC), return on ad spend (ROAS), and engagement rates.
Related ArticlesTips for Making Effective Facebook Ads
March 2, 2024
Managing Facebook Ads With the Facebook Ads Manager

Would you like to learn how to manage Facebook ads?
Whether a small business owner or a budding marketer, you need the Facebook Ads Manager. This tool allows you to effectively manage your campaigns and reach your target audience.
This guide will teach you everything about managing Facebook ads with the Ads Manager.
What is Facebook Ads Manager?Facebook Ads Manager allows users to create, manage, and analyze their advertising campaigns on Facebook, Instagram, and other platforms in the Facebook network. It offers a centralized platform where you can set up your ads, decide where they will appear, and define the audience you want to reach.
With Ads Manager, you can track the performance of your campaigns in real-time, adjust your budget, and tweak your ads based on their performance. This makes it an excellent tool for businesses of all sizes to reach their desired customers effectively and measure their marketing efforts’ impact.
Requirements for Creating a Facebook Ads Manager Account

Creating a Facebook Ads Manager account is crucial for businesses utilizing social media advertising. This platform allows you to efficiently manage your ad campaigns on Facebook, Instagram, Messenger, and other Facebook services. Here are the prerequisites you need to satisfy before you can set up your Facebook Ads Manager account:
1. Have a Facebook account.Before you can start using Facebook Ads Manager, you need a personal Facebook account. This account serves as your gateway to accessing the Ads Manager platform. It doesn’t mean you’ll be using your personal profile to show ads; rather, it’s necessary for authentication and administrative purposes. Ensure that your personal account is in good standing, as compliance with Facebook’s terms and services is crucial.
2. Create a Facebook Business Page for your business.You cannot run ads through Facebook Ads Manager without a Facebook Page. The Page represents your business on Facebook and is where you’ll manage your branding, engage with your audience, and run your ads.
Setting up a Facebook Business Page is straightforward. All you need is to provide your business details, such as your business name, category, and contact information. You can also customize your Page with images, descriptions, and more to align with your branding.
3. Prepare a payment method.Facebook requires a valid payment method before you can start running Facebook ads. You can typically use a credit card, debit card, or PayPal account. Go to your Ads Manager’s ‘Billing’ section to set up your payment method. This step ensures no interruption in your ad campaigns due to payment issues.
4. Integrate Meta Pixel.Integrating Meta Pixel is an essential step for businesses aiming to maximize the effectiveness of their advertising campaigns on Facebook. While not a strict prerequisite for creating a Facebook Ads Manager account, setting up a Meta Pixel can be beneficial.
One of the biggest benefits of the Meta Pixel is its ability to track user interactions on your website that stem from your Facebook ads. Whether they are viewing a specific page, making a purchase, or signing up for a newsletter, the pixel tracks these actions. Hence, it provides clear insights into how well your ads are performing in terms of generating real results.
Steps To Create and Use Facebook Ads Manager

Facebook Ads Manager is your go-to tool for creating, managing, and tracking your ad campaigns on the platform. Below is the step-by-step process of creating and using Facebook Ads Manager to run successful ad campaigns:
Step 1: Link your Page to your Meta Business Suite.First, visit the Meta Business Suite website. You’ll need to log in using your personal Facebook account credentials. Remember, the Meta Business Suite is essentially the new and improved version of the old Facebook Business Manager. It offers more features and a better interface for managing your business’s online presence.
Step 2: Set up your Ads Manager account.Log into the Meta Business Suite and navigate to the “Business Settings.” This area is your control center for all account management tasks. Under the “Accounts” header, you’ll find the “Ad Account” option designed to manage your advertising operations. Within the Ad Account section, you have several actions to choose from. These actions include creating a new ad account, claiming an existing one, and requesting access to an ad account.
Step 3: Add your team to your ad account.Collaboration is key in advertising. If you’re working with a team, it’s crucial to assign them the appropriate roles in your Facebook Ad Account.
Log into your Ad Manager and go to the “Ad account settings.” This section is designed to help you manage various aspects of your ad account, including team roles.
Look for the “Ad account roles” section within the Ad account settings. Here, you can add team members and assign them one of three levels of access: admins, advertisers, or analysts.
Step 4: Create your ad campaign.Before advancing further into the mechanics of advertising on Facebook, it’s crucial to grasp the three-tier structure of an Ad Account on Meta. This hierarchy helps organize your advertising efforts into manageable parts and streamlines the process of creating effective campaigns. It consists of campaigns, ad sets, and ads.
Step 5: Set Up Effective Ad Sets for Your Facebook CampaignSetting up ad sets is crucial to crafting a successful Facebook ad campaign. Follow the steps below to set up effective ad sets:
Firstly, decide on the conversion location.Next, determine what you want these ads to achieve.Decide how much you want to spend on this ad set and when your ads should run.Define who will see your ads.Finally, select where your ads will appear.Step 6: Craft your Facebook ad.Once you’ve configured your ad sets, it’s time to build your ad. Here’s a simplified process for crafting a compelling Facebook Ad:
Begin by giving your ad a unique name that is easily identifiable.If your campaign involves influencer marketing, switch on the partnership label.Select your ad setup by using an existing post from your Facebook Page or uploading new creative assets.Upload your ad creatives.Determine what happens when people click on your ad.Set up tracking mechanisms to analyze how people interact with your ads.ConclusionThe effective management of your Facebook ads is necessary to maximize your ROI. Fortunately, the Facebook Ads Manager can ease your marketing effort. You can also get professional advertisers to create and manage your ads by hiring a Facebook advertising agency.
Frequently Asked QuestionsHow do I get started with Facebook Ad Manager?To start with Facebook Ads Manager, log in to your account and go to the Ads Manager dashboard.
What are the key components of a successful Facebook ad campaign?They include defining clear objectives, understanding your target audience, creating compelling ad content, setting a realistic budget, and monitoring performance.
How can I target specific audiences with my Facebook ads?You can use demographic and detailed targeting to refine your audience and ensure your ads reach the right people.
Related Blog PostsFacebook Messenger Bots for Marketing
February 27, 2024
Banner Sizes for Facebook: A Quick Guide

Do you know the standard banner sizes for Facebook?
Creating a visually appealing Facebook cover photo is essential for capturing your audience’s attention. However, with various devices and screen sizes, it’s crucial to get the size right for optimal display.
This quick guide will discuss the recommended sizes for Facebook cover photos to ensure your Facebook page looks its best on all devices.
What are the Standard Facebook Cover Photo Dimensions?
Your cover photo is displayed at the top of your Facebook page. It’s an excellent opportunity to showcase your brand or convey a message. Using a PNG file for cover photos with logos or text may yield better clarity.
It’s important to note that your profile picture will partially cover the left-hand side of your cover photo. Additionally, your Facebook image sizes may be cropped or resized to fit different screens, so ensure that important elements are centered and visible.
Here are the essential details of a perfect cover photo:
Aspect ratio: 16:9Minimum Size: Must be a minimum of 400 pixels wide and have a height of 150 pixels.Optimal Format: Runs fastest as an sRGB JPG file with dimensions of 851 pixels wide by 315 pixels tall and below 100 kilobytes.The Differences Between the Size of a Perfect Facebook Cover Photo on Desktop and Mobile DevicesYou should understand that the same cover photo would display differently on desktop and mobile devices. The following will explain the differences between the standard size of a Facebook cover image on mobile and desktop devices:
1. Desktop device.On desktop devices, Facebook cover photos are displayed prominently at the top of your profile page. Here’s what you need to know about the standard size of a Facebook page’s cover photo on desktop devices:
Size and dimensions: Desktop cover photos should be 851 pixels wide by 315 pixels tall.Alignment: Cover photos align to the left side of the screen. This provides ample space for profile pictures to be displayed in the bottom left corner, partially overlapping the cover photo.Full bleed: Cover photos extend horizontally across the screen. This creates a full-bleed effect that captures attention and provides a visually appealing backdrop for your profile.Aspect ratio: The ideal aspect ratio for cover photos on desktop devices is 16:9, ensuring that the image fills the available space without distortion.2. Mobile devices.Social media image sizes adjust to fit smaller screens when viewed on mobile devices. Here’s what you should keep in mind about the standard size of a Facebook cover photo on mobile devices:
Size and dimensions: Cover photos on mobile devices have a reduced display size compared to desktop, typically around 640 pixels wide by 360 pixels tall.Alignment: Cover photos on mobile devices maintain a left-aligned position but may appear slightly cropped or resized to fit the smaller screen size.Profile picture overlay: On mobile devices, the profile picture overlays the bottom left corner of the cover photo, similar to desktop devices. However, due to the smaller screen size, the profile picture may partially obscure the cover photo.Aspect ratio: The aspect ratio remains consistent with desktop devices at 16:9, ensuring that the cover photo maintains proportions across different devices.How To Create a Stunning Facebook Cover Photo
Your Facebook cover photo is visitors’ first impression of your profile, so making it visually appealing is crucial. Are you promoting your brand, showcasing your creativity, or simply expressing yourself? Follow the steps below to create the perfect Facebook cover photo:
Step 1: Choose the right dimensions.As mentioned above, Facebook recommends that cover photos be 851 pixels wide by 315 pixels tall for optimal display on desktop devices. For mobile devices, aim for a size of around 640 pixels wide by 360 pixels tall to ensure compatibility across different screen sizes.
Step 2: Select a compelling image.Your cover photo should reflect your personality or brand identity. Choose an eye-catching, relevant, and high-quality image. This could be a striking photograph, an illustration, or even a collage representing your interests or business.
Step 3: Add text sparingly.If you decide to include text in your cover photo, keep it concise and easy to read. Avoid cluttering the image with too much text, as it may become difficult to read, especially on mobile devices. Use bold, legible fonts to ensure that the text complements the overall composition.
Step 4: Consider branding elements.For businesses or organizations, incorporating branding elements can reinforce your brand identity and increase brand recognition. These branding elements include logos, color schemes, or taglines. Be sure to integrate these elements seamlessly into the design without overshadowing other important aspects of the cover photo.
Step 5: Use online design tools.You don’t need advanced design skills to create a stunning cover photo. Many online tools and platforms offer templates, graphics, and editing features that can help you effortlessly create professional-looking designs. Some popular options include Canva, Adobe Spark, and PicMonkey.
Step 6: Experiment with layouts and effects.Get creative with different layouts, overlays, and effects to make your cover photo stand out. Play around with cropping, filters, and color adjustments to enhance the visual impact of your image. Experiment until you find a style that resonates with your aesthetic.
Step 7: Preview and adjust.Before finalizing your cover photo, preview how it will appear on desktop and mobile devices. Pay attention to how the profile picture interacts with the cover photo and make any necessary adjustments. Doing this ensures that important elements are not obscured or cropped out.
ConclusionOptimizing your banner sizes for Facebook is crucial for maintaining a professional and engaging online presence. By following these guidelines, you can ensure that your cover photos look their best across desktop and mobile devices. Remember to keep your cover image visually appealing, relevant, and consistent with your brand identity for maximum impact.
Are you planning a Facebook advertising campaign? Contact the best Facebook ad agency for the best results.
Frequently Asked QuestionsWhat is the ideal size for a Facebook profile banner?The recommended size for a Facebook profile banner is 820 pixels wide by 312 pixels tall.
What dimensions should I use for a Facebook cover photo?For optimal display on desktop devices, your Facebook cover photo should be 820 pixels wide by 360 pixels tall.
How should I size images for shared posts on Facebook?Shared images on Facebook should ideally be 1,200 pixels wide by 630 pixels tall to ensure clarity and engagement.
Related ArticlesFacebook Messenger Bots for Marketing
A Beginner’s Guide to Making Instagram AR Filter

Would you like to know how to make an Instagram AR filter?
These filters use augmented reality technology to apply fun effects to your Instagram content. From dog ears to surreal landscapes, AR filters can turn an ordinary post into an eye-catching one. Interestingly, you can create your own Instagram AR filter to increase engagement and offer interactive experiences.
This article will discuss how to create Augmented Reality filters on Instagram.
What Are Instagram Augmented Reality AR Filters?
Instagram AR filters are digital effects that you can use on Instagram to alter or enhance photos and videos in real time. They use augmented reality (AR) technology to overlay graphics and special effects onto your camera’s view. This means you can add things like animal ears, makeup, sunglasses, or even fantastical scenery to your images as you take them.
These filters are not only fun to play with but also allow users to express creativity and share unique content. They are accessible within Instagram Stories, and you can also try out filters created by other users or even design your own using specific tools provided by Instagram.
What Are the Latest Instagram Stories AR Filter Trends?Instagram Stories continues to evolve, offering users new ways to express themselves and engage with followers. One feature that has captured the attention of users worldwide is the ever-expanding library of Augmented Reality (AR) filters. Below, we will discuss the latest Instagram Stories AR face filter trends:
1. Continuous innovation.Instagram is constantly introducing new AR filters to keep users entertained and engaged. From seasonal filters celebrating holidays and events to collaborations with artists, celebrities, and brands, there’s always something fresh and exciting to try.
2. Interactive experience.The latest AR filters on Instagram Stories are more interactive than ever. Users can now find filters that respond to gestures like blinking, smiling, or raising eyebrows. Hence, they add an extra level of engagement and fun to their stories.
3. Multi-participant filters.Instagram has introduced filters that multiple people can use in the same frame. These multiplayer filters enable users to interact with each other in real time, making group stories even more dynamic and entertaining.
4. Try-on filters.One of the most popular trends in Instagram Stories AR filters is the rise of try-on filters. These filters allow users to virtually try on makeup, sunglasses, hats, and other accessories. Providing a fun and interactive way to experiment with different looks.
5. Branded AR filter.Brands and businesses are increasingly using Instagram Stories AR filters as a marketing tool. Many companies create custom filters that users can apply to their stories, increasing brand visibility and engagement among followers.
6. User-generated filters.In addition to filters created by Instagram and brands, users get in on the action by creating and sharing their AR filters. This democratization of filter creation allows for a diverse range of creative expressions.
Benefits of Creating Your Custom FilterWhy should you create AR filters for Instagram Stories, and what makes them such a powerful tool for storytelling and expression? The following will explore the reasons why you should create custom filters for your marketing campaign:
1. Stand out from the crowd.With millions of users sharing stories daily, finding ways to make your content stand out is essential. AR filters offer a unique opportunity to add a personal touch to your stories and capture your audience’s attention in a crowded feed.
2. Stay ahead of trends.AR filters are a hot trend on social media platforms, with new and innovative filters constantly popping up. By creating your filters, you can stay ahead of the curve and capitalize on emerging trends before they become mainstream.
3. Monetization opportunities.As Instagram continues to explore new ways to monetize the platform, creating AR filters could open up potential revenue streams for creators. Whether through sponsored filters, brand partnerships, or in-app purchases, you can turn your filter creations into a source of income.
How To Create Custom AR Filters on IG

With creativity and technical know-how, you can design personalized filters that reflect your unique style and personality. Below are easy-to-follow steps on how to create custom filters:
Step 1: Get familiar with Spark AR Studio.Before creating AR filters, it’s essential to familiarize yourself with Meta Spark Studio, Facebook’s platform for building AR experiences. Download the software from the official website and explore its features and capabilities.
Step 2: Choose your idea.The first step in creating an AR filter is to develop a concept. Think about the type of effect you want to create: a face distortion, a virtual try-on experience, or a game-like interaction. Let your imagination run wild, and brainstorm ideas that align with your brand or personal style.
Step 3: Design your filter.Once you have a concept, it’s time to bring it to life in Spark AR Studio. The software provides various tools for creating 3D objects, animations, and interactions. You can start by importing 2D or 3D assets or creating them from scratch using the built-in tools.
Step 4: Add interactivity.One of the most exciting aspects of AR filters is their ability to interact with users in real time. Add interactive elements such as touch gestures, face tracking, or object recognition to make your filter more engaging and immersive.
Step 5: Test and refine.As you work on your filter, test it frequently to see how it looks and performs in different environments. Use Spark AR Studio’s preview feature to test your filter on different devices and adjust it as needed.
Step 6: Publish your filter.Once you’re satisfied with your filter, publish it to the Spark AR Hub. It will be reviewed before being made available to users. Be patient during the review process, as your filter may take some time to approve. Once your filter is live on Instagram, remember to promote it to your followers.
Conclusion.Instagram AR filters have revolutionized how we interact with social media, turning ordinary selfies into extraordinary works of art. With their endless variety and potential for creativity, AR filters have become an integral part of the Instagram experience. Whether you’re looking to express yourself, engage with your audience, or make a positive impact, Instagram AR filters offer a world of possibilities at your fingertips. So why don’t you explore the magic for yourself?
Are you looking to run ads on Instagram? Contact the best ad agency on Instagram.
Frequently Asked QuestionsDo I need coding experience to create AR filters for Instagram?No, you don’t need coding experience to start creating AR filters for Instagram.
Can I create AR filters on any device?Spark AR Studio allows Mac and Windows computers to create AR filters on either platform.
Do I need to pay to publish my AR filters on Instagram?No, publishing AR filters on Instagram is free.
Related Blog PostsWhat is the Instagram Follower Tracker?