
Mike Elliott's Blog, page 16
April 2, 2017
How to Strip Old Varnish from a Wood-Canvas Canoe
by Mike Elliott, Kettle River Canoes
email: artisan@canoeshop.ca
Without a doubt, the most horrible job in the restoration of a wood-canvas canoe is stripping the varnish from the interior. It is messy, stinky, agonizing work that takes forever and cannot be rushed. Truly, the only positive thing to be said about stripping varnish is that as long as you keep going, the job will end.
However, it is not always necessary to strip the old varnish. If the interior varnish is in good shape – not peeling, cracked or gone altogether – you can simply clean the interior with TSP (tri-sodium phosphate) and rough up the surface of the varnish with fine steel wool. After vacuuming the interior and removing any residual dust and débris with a tack cloth, you are ready to apply new varnish. In my experience, if the varnish is stripped with chemicals, the canvas has to be replaced as well. As a result, one big job leads to another. That is why many people opt for simply cleaning the interior and applying new varnish to whatever is still there.
If, as is often the case, the interior varnish is peeling away, breaking apart or gone completely, the varnish has to come off in order to rebuild the interior finish from the ground up. Sometimes, the varnish is peeling so much that it comes off with a combination of a paint scraper, coarse steel wool and a lot of elbow grease. I have tried sanders and “sandpaper stripping wheels” powered by a variable-speed drill, but soon gave them up when I saw that I was removing just as much wood as varnish.
When it comes right down to it, the best way to remove all of the old varnish (and still have the original ribs and planking left intact) is to apply chemical strippers. I strip the old varnish before removing the old canvas. This way, the chemicals tend to stay inside the canoe. They soak into the old canvas and lift the filler and paint from the canvas, so unless you are extremely careful with the chemicals, you cannot strip the interior varnish without then putting a new canvas on the canoe.
I have heard of some people using a pressure washer to remove the chemicals from the hull once they have done their job. This would work well as long as the nozzle is wide enough to reduce the pressure to avoid ripping the planking apart. One downside I see to removing the chemicals with a pressure washer is that the work is usually done outside, often in your backyard. Consequently, all those nasty chemicals end up on the ground and (probably) in the water-table. At the very least, you succeed in killing the grass in that corner of the backyard.
When stripping varnish, the first step is to protect yourself from all those nasty chemicals. The commercial products usually contain dichloromethane (commonly used as a propellant in aerosol cans) and methanol (wood alcohol). Sometimes toluene (lacquer thinner) rounds out the mix. Besides long sleeves, long pants and an apron or coveralls, be sure to wear gloves (heavy-duty latex/neoprene), a respirator and eye protection. Have lots of water close at hand to wash off any stripper that contacts your skin.
It is essential to maintain a wetted surface when using varnish strippers. It evaporates quickly, so be sure to use lots of this stuff and do the canoe in small sections. I usually divide the job into four quarters of the canoe. Once the stripper has been poured onto a section of the canoe, use a sturdy scrub-brush (natural bristles) to spread the chemicals around and ensure that they get into every corner and let it work on the old varnish for about 20 minutes. When it turns dark brown and becomes thick, you know it is working.
Use a scrub brush and a scraper to remove the stripper.
Any stripper remaining in the canoe can be cleaned out with TSP mixed in a pail of water. Use a scrub brush, a scraper and/or steel wool to ensure that remaining stripper is removed from all of the nooks and crannies. Once the hull interior has dried, I go over the wood again with medium or fine steel wool to remove the last of the TSP and/or chemical stripper residue. Then, vacuum the interior to remove the dust and steel wool fragments to finish the job.
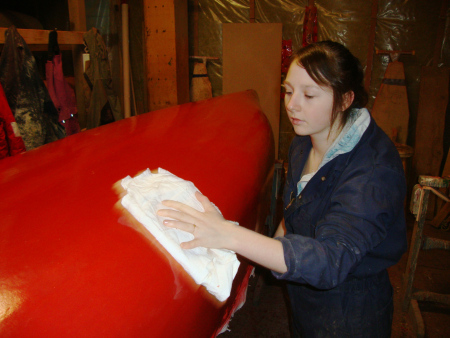
This takes as long as it takes – no short cuts. As with almost everything in life, if you don’t do a good job on the foundation work, it just creates problems later on. As much as I want this job to be done as quickly as possible, there is no way to speed it up. It takes time to do a thorough job. In 2014, I coordinated the restoration of two 30′ C-15 Racing War Canoes (circa 1949) for the museum in Penticton, BC. A crew of six people took five weeks and four times through the canoes with those nasty chemicals to remove all of the old varnish. They were happy to see the end of that job.
All of this (and much more) is described in my book – This Old Canoe: How To Restore Your Wood Canvas Canoe.
If you live in Canada, CLICK HERE to buy the book.
If you live in the USA, CLICK HERE to buy the book.
If you live in the UK, CLICK HERE to buy the book.
Si vous habitez en France, CLIQUEZ ICI acheter le livre.


March 19, 2017
How to Repair Rotted Rib-tops in a Wood-Canvas Canoe
by Mike Elliott, Kettle River Canoes
email: artisan@canoeshop.ca
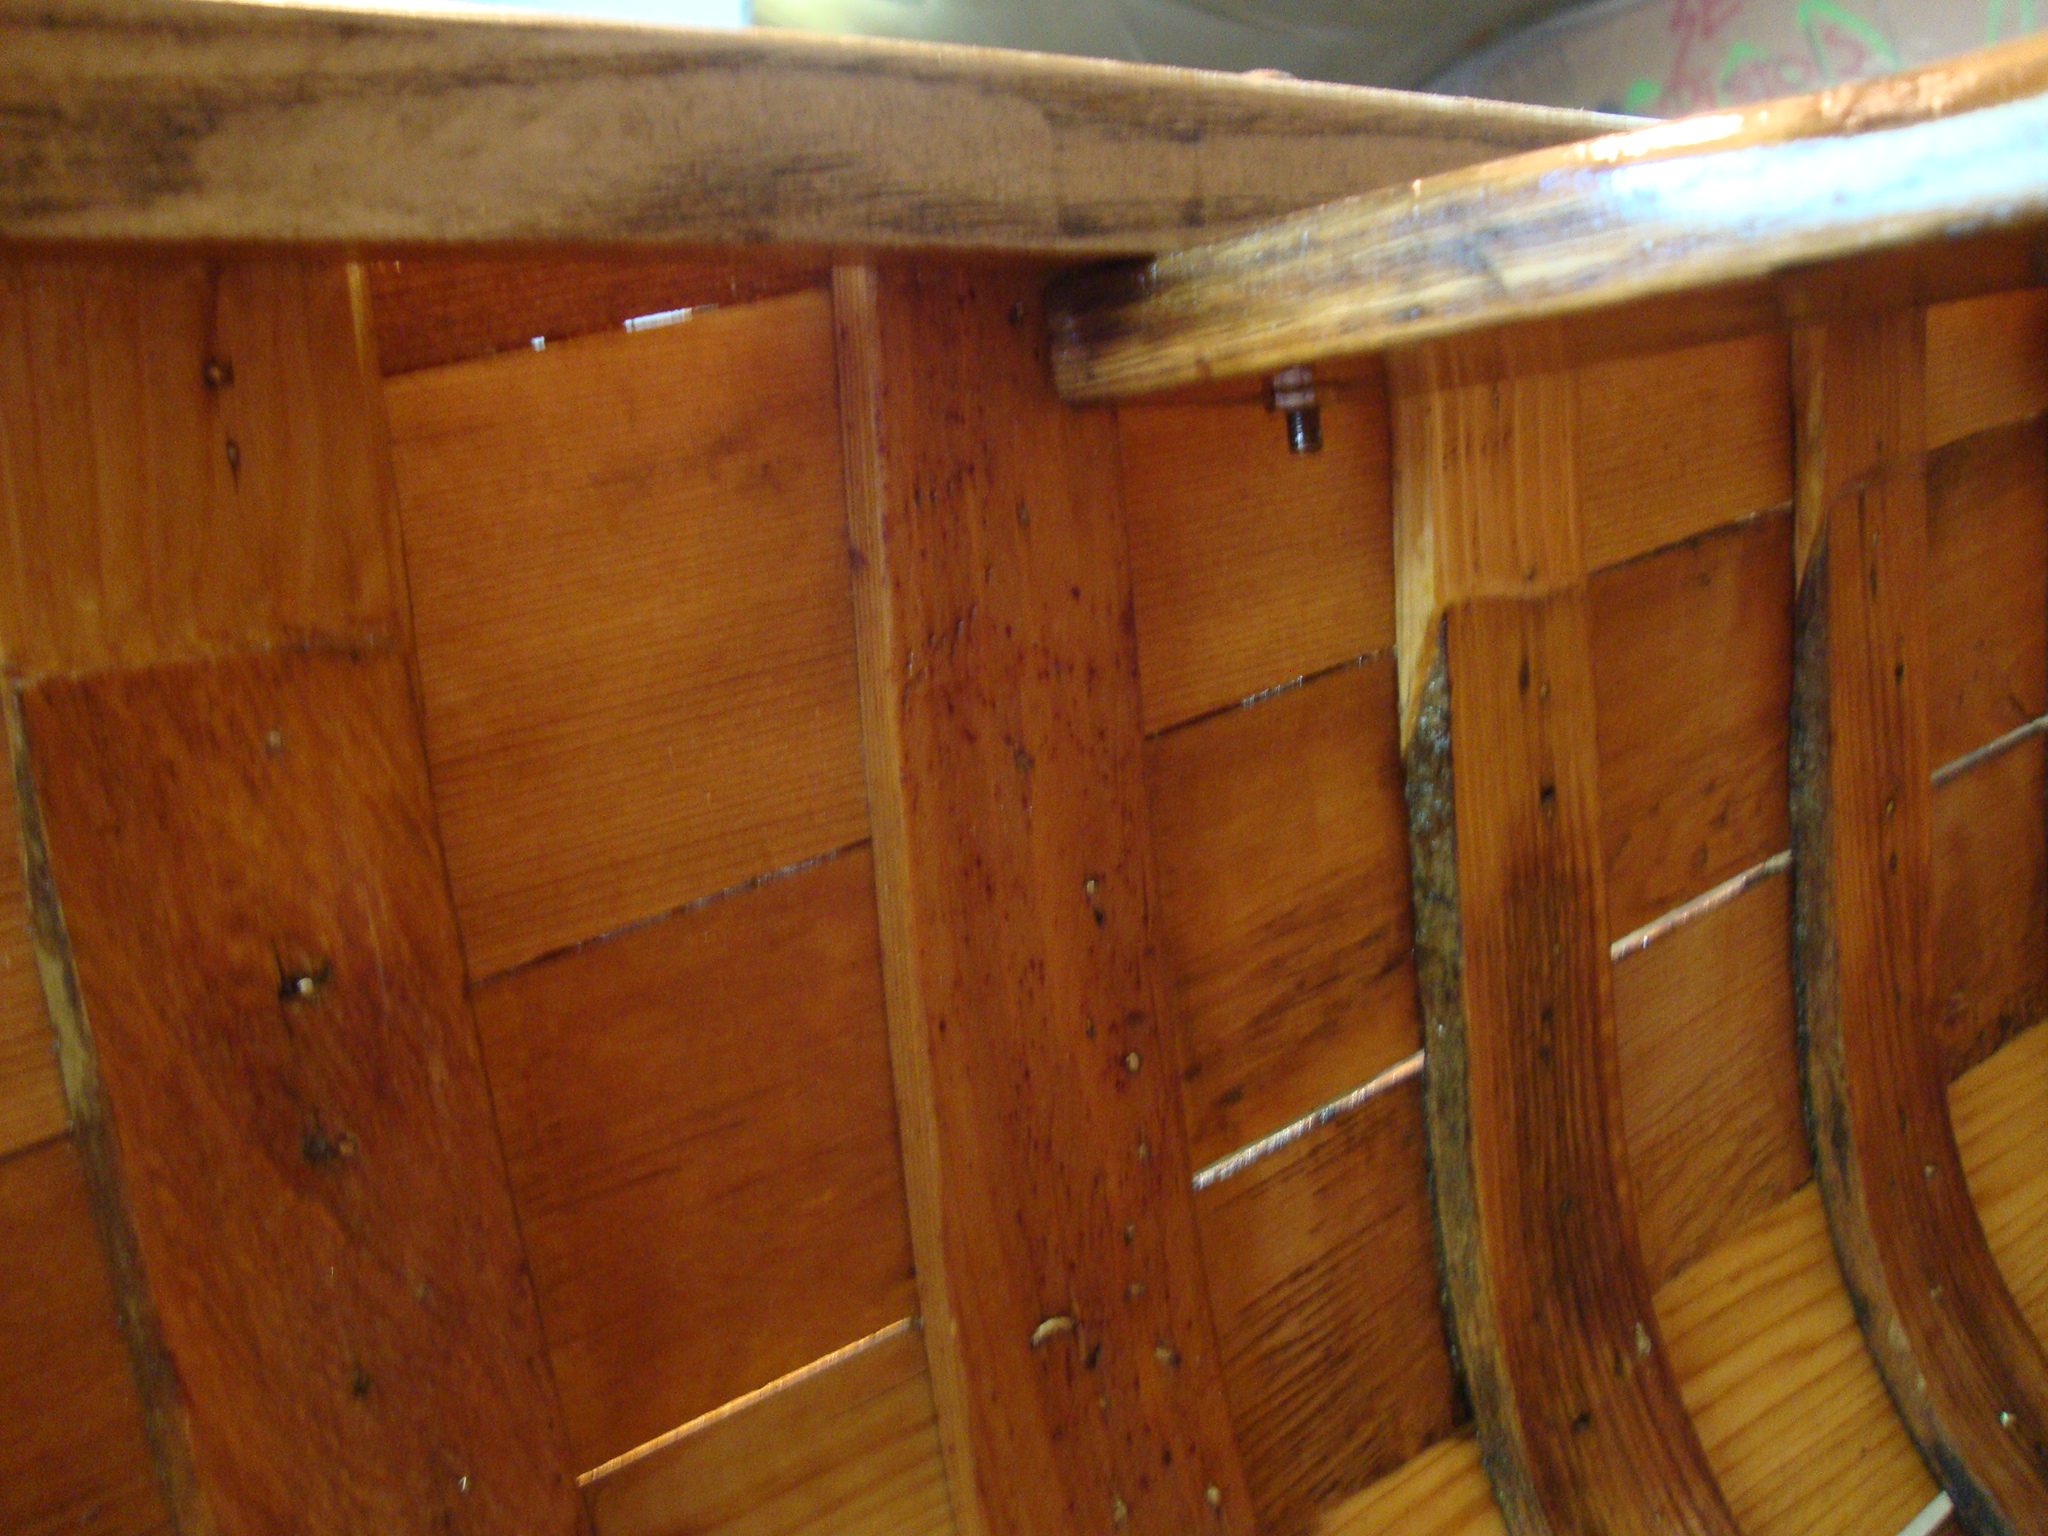
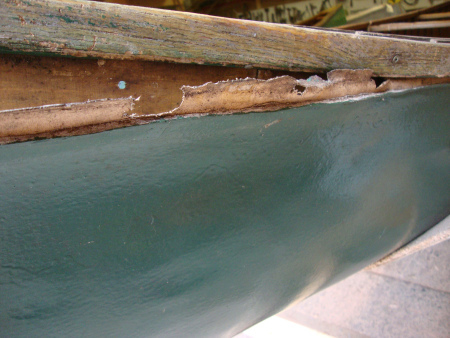
While repairing your wood-canvas canoe, you may come across some ribs that are perfectly good except for a small portion attached to the inwale. Rather than replacing the ribs, it is possible to repair the rib-tops.

First of all, you need access to a substantial portion of the damaged ribs in order to do the repair. Remove the planking along the sheer line to expose all of the damaged rib-tops. Identify each piece of planking as it comes off since you may be able to replace the original pieces once the repairs are completed.

Now, machine new cedar to replace the damaged rib-tops. Sometimes the rib-tops are tapered, so make sure each replacement piece is cut and shaped to match the original wood.

Cut the rotted top off the rib to be repaired. I use a Japanese utility saw with 14 teeth per inch.

Create a scarf angle in the original rib. For a solid scarf joint, the glued surface ought to be at least six times that of the rib thickness. Therefore, ribs 3/8” thick have a scarf angle with a surface area approximately 2¼” long. You can use a rasp to make the scarf. I use a 4” angle grinder that is set up with a 24-grit sandpaper disc. It makes quick work of the job – perhaps too quick, so careful attention and a light touch are needed.

Line up the new wood with the original rib and mark the location of the matching scarf.

Create the matching scarf in the new cedar.

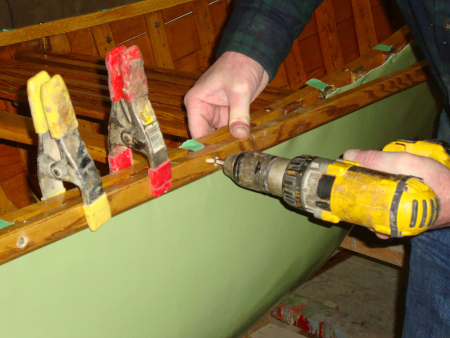
Glue the new wood to the original rib and clamp it in place with spring clamps. I use either a water-proof resorcinol glue (such as Weldwood or Dural) or a polyurethane glue (such as Gorilla Glue). The resorcinol glues are water-based which makes clean-up a breeze. After clamping the new piece in place, wipe away any excess glue with a damp rag. When dry, it sands easily and blends well with the wood. Polyurethane glue sets more quickly, sands easily once cured and creates a very strong bond. Lacquer Thinner is used to clean up polyurethane glues. I use these two glues interchangeably.

The repaired rib-top is fairly rough at first.

However, a quick sanding evens out the joint and creates a clean repair.

Attach the rib-top to the inwale (I use 7/8” 14-gauge bronze ring nails, copper canoe nails or brass canoe tacks) and trim the rib-top flush with the top edge of the inwale.

When faced with rib-top repairs next to each other, it is easiest to do every second rib-top to avoid clamping difficulties. Therefore, it takes a couple of days to complete all of the repairs.
If most of the rib-tops in your canoe are rotted, it is still possible to repair the ribs rather than replace every rib in the canoe. Since every rib will be cut, the original sheer-line will be lost. Therefore, the first step is to establish a reference line for the sheer-line. Go around the canoe with a carpenter’s pencil and mark a position 5” below the top of each rib. Where the entire top of the rib has rotted away, skip to the next rib and mark the reference point there. This will give you enough reference points to create a fair line the full length of the canoe. Now, tack a spruce batten (approximately ¼” x ¾” x 16’) at the reference points to create a fair reference line.
As mentioned before, every second rib will be repaired. Unless you have hundreds of 3” spring clamps, it will take a week or two to splice new wood into every rib. Once done, mark each new rib-top 5” above the reference line and cut every rib to re-create the original sheer-line of the canoe.
Reattach the original planking and replace damaged planking with new cedar. Stain the new wood to match wood in the rest of the canoe.

The finished product is strong and solid. Many of the rib-tops repairs extend less than an inch below the inwales, so it was difficult to realize that they had been replaced.
All of this (and much more) is described in my book – This Old Canoe: How To Restore Your Wood Canvas Canoe.
If you live in Canada, CLICK HERE to buy the book.
If you live in the USA, CLICK HERE to buy the book.
If you live in the UK, CLICK HERE to buy the book.
Si vous habitez en France, CLIQUEZ ICI acheter le livre.


March 12, 2017
Bill Greenwood: A Man and his Wood-Canvas Canoes
by Mike Elliott, Kettle River Canoes
email: artisan@canoeshop.ca

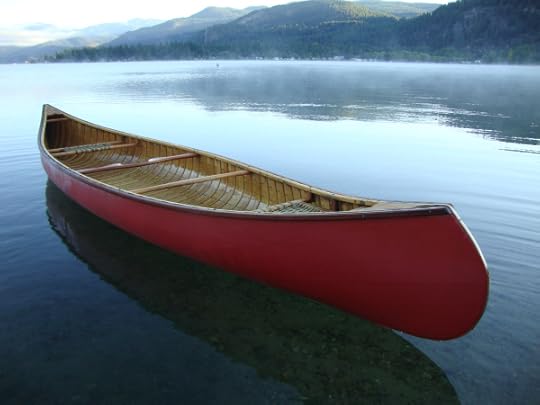
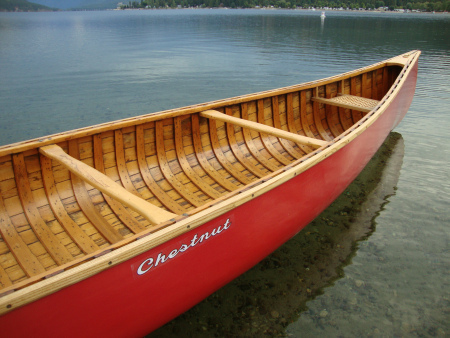
Unless you live in British Columbia, you have probably never heard of Bill Greenwood or Greenwood canoes. And if you want to start a fight amongst wood-canvas canoe enthusiasts, just ask them to name the prettiest canoes ever made. In Maine, you would hear names like Morris, Gerrish and White. In Ontario, Peterborough canoes are top of the list. But in British Columbia, people speak about Greenwood canoes in hushed tones and bow down to Bill Greenwood’s exquisite water craft.

There is some information available about Bill or his canoes. There is a website devoted to Bill, his company and his family. Checkout greenwoodcanoecompany.com
The information presented here has been collected from people who bought their canoes directly from the builder at his shop as well as some anecdotes from Jim Kinzell, who worked with Bill as an apprentice from 1969 to 1975. Dave Lanthier from Kamloops gave me a small biography produced in 1972 as an assignment for a physical education course at a college. My information is incomplete. That said, Bill Greenwood and Greenwood Canoes deserve recognition in the world of wood-canvas canoes.
As I understand it, Bill was born in 1912 and was an active outdoorsman who loved hiking, skiing, canoeing — just about anything that got him outside. Then, he suffered a stroke while hiking in the mountains. He was 24 years old. As part of his rehabilitation, Bill decided to learn how to build canoes. He boarded a train in Vancouver, BC and made his way to Old Town, Maine. He hung around the Old Town Canoe Company shop and absorbed everything he could about canoe building until they realized what he was doing and kicked “the spy” out. Bill spent some time at other canoe factories including the Peterborough Canoe Company in Ontario before returning to British Columbia and setting up Greenwood Water Craft Company. The shop location changed a number of times over the years until he established a large shop complex on Mitchell Island in Richmond, BC in the late 1960′s.
Not surprisingly, the lines and details of Greenwood Canoes borrow heavily from the “Maine Guide” canoes of Old Town and other builders in Maine. They all sport wide, flat bottoms and have very little rocker. The stem profile is heavily curved (often forming a complete half-circle) and the hulls all contain a lot of tumblehome. Bill’s 16’ (4.9 meter) canoes did not have a centre thwart, but instead had both bow- and stern-quarter thwarts as was typical of Maine Guide canoes. Many of the canoes had bottoms reinforced with half-ribs between the main ribs to create a strong comfortable floor. And Bill absolutely refused to make a canoe without a keel. In fact, one of my clients asked Bill to leave the keel off the canoe he was ordering. Apparently, Bill said something like, “My canoes have keels.” When my client told Bill that many Chestnut Canoes paddled very well without a keel, Bill said, “If you want a Chestnut Canoe, then buy a Chestnut Canoe.” My client told me that story while I was preparing the restoration work order on his 17’ (5.2 meter) Chestnut Cruiser.
The workmanship in Greenwood canoes is outstanding. He used “aircraft quality” Sitka Spruce for the double-tapered ribs. The wide planking was made of old-growth Western Red Cedar (edge grain). The stems (and slat seats) were White Oak while the rest of the canoe was trimmed in Philippine Mahogany (Luan). All of the woodwork was flawless – tight planking, graceful lines and elegant detailing. The one drawback in many Greenwood canoes built in the early 1970’s is the fact that he used steel screws to attach the mahogany outwales. Apparently, Bill was feuding with one of his suppliers. He wanted 1.5” (37 mm) #8 brass wood screws in lots of 1,000 while the supplier insisted on selling lots of 10,000. Bill ordered steel screws from another supplier in lots of 1,000. I have had to cut that beautiful mahogany into hundreds of tiny pieces because the steel screws had corroded to the point of being fused into the wood. I’m sure Bill thought he had won the war with his supplier, but it has made the restorer’s job much more difficult 40 years later.
The quality of the workmanship is all the more impressive when you consider the fact that Bill worked almost entirely with one hand. The stroke affected his left side. Consequently, his left hand was crippled to the point that he had limited use of it. His daughter, Susan, told me that Bill referred to his left hand as “Duddy” – his dub of a left hand. My understanding is that he used jigs for almost every step of production. That and a few very good assistants in the shop (including George Fletcher and Jim Kinzell) made it all work beautifully.

Greenwood Canoes came in lengths from 15’ (4.6 meter) to 18’ (5.5 meter). He had two basic models – the Pleasure Model (12” – 30 cm – deep) and the large volume Prospector Model (14” – 36 cm – deep). He built a full range of lengths in both models (as well as a 12′ car-top boat) until 1970. One client of mine has a beautiful home in North Vancouver overlooking the entire Lower Mainland. He had ordered a canoe from Bill in 1970 and was expecting a call any day to say that the canoe was ready. Then, he heard a news report of a large fire on Mitchell Island in Richmond. He looked out over the valley from his home and saw a big cloud of smoke. The Greenwood Water Craft shop was engulfed in flames. The next day, my client went to the site and saw Bill kicking through the ashes that used to be his shop. He said, “I only had time to grab two canoes – The yellow one over there — that’s yours.”
Bill rebuilt the business with a limited number of moulds and continued building canoes until he sold the business in 1975. According to Doug Ingram of Red River Canoe and Paddle, the moulds ended up in Cranberry Portage (a small community in Northern Manitoba east of Flin Flon). Apparently, they were never used again and are now in very poor condition. Bill died in 1979. His contribution to the world of wood-canvas canoes is significant here in British Columbia. People bow their heads in reverence to these stunning works of art.
All of this (and much more) is described in my book – This Old Canoe: How To Restore Your Wood Canvas Canoe.
If you live in Canada, CLICK HERE to buy the book.
If you live in the USA, CLICK HERE to buy the book.
If you live in the UK, CLICK HERE to buy the book.
Si vous habitez en France, CLIQUEZ ICI acheter le livre.


March 5, 2017
How to Make and Install Half-Ribs in Wood-Canvas Canoes
by Mike Elliott, Kettle River Canoes
email: artisan@canoeshop.ca
photo from “Tales from Misery Ridge: One Man’s Adventures in the Great Outdoors” by Paul J. Fournier. (Island Port Press, 2011)
About 130 years ago, fishing guides on the east coast of North America (most notably in Maine, New Brunswick and Quebec) started building wood-canvas canoes that they could use in order to take their clients up and down the shallow, rapid salmon rivers in the region. They used the local birch bark canoes as templates. The guides would be standing up all day in the canoe as they poled it upstream and down or held the canoe in place while the client fished for salmon. The canoes needed to be stable and rugged with a strong, comfortable bottom. They designed canoes that had wide, flat bottoms which made them stable with a very shallow draft. To strengthen the hull against the inevitable encounters with rocks, they did one of two things:
a) Build the canoe with lots of ribs spaced very close together (0.5″ to 0.75″ – 13 mm to 19 mm apart).
b) Space the ribs normally (1.5″ to 2.0″ – 38 mm to 50 mm apart) and insert extra ribs between them that extended across the bottom of the canoe. These “half-ribs” created a strong, comfortable floor in the canoe.
At my canoe restoration shop, a client sometimes asks me to insert half ribs into their canoe in order to create a stronger bottom. Unfortunately, if you simply pressed shorter ribs into the bottom of the canoe between the regular ribs, the hull would become misshapen – especially if the bottom was not entirely flat. Therefore, retro-fitting half-ribs into a wood canvas canoe is done in the following way. Note, that this is done while the old canvas is off – before a new canvas is stretched on.
1) Cut and shape the new rib material from clear, straight-grained cedar. The half-ribs are about 1″ (25 mm) wide and the same thickness as the original ribs in the canoe. The sides of the half-ribs are chamfered about 10°. Sand the top edges lightly to round them off a little. Soak the new half-ribs for 48 to 72 hours. Then, steam them for about 50 to 60 minutes and bend them over the outside of the hull between the regular ribs. Allow the new ribs to dry for at least 48 hours. Just as when creating an exact replica for a broken rib in the canoe, the half-ribs are bent in a location so that the shape of the rib on the outside of the hull is the same as the dimensions required on the inside. The taper of the hull is such that the inside dimensions are achieved by bending the rib one station closer to the near-end of the canoe. Precision is not as critical for half-ribs as would normally be required since the ribs will not be curving around the chine of the canoe. Use a pencil to mark the centre-line on each new rib.
2) Remove the new ribs from the outside of the canoe and place them in the required positions between the regular ribs. Make sure the centre-line on each new rib is lined up with the centre-line of the canoe. Hold the new ribs in place with spring clamps on the inwales.
3) The length of each half-rib will vary so that they match the taper of the hull dimensions. The actual length of each rib is entirely up to you. Use a straight-edge to help determine the length of each rib and use a pencil to mark both ends.
4) One at a time, cut each half-rib to length.
5) Use a random-orbital sander and 80-grit paper to chamfer the ends of the rib.
6) Place the half-rib back into the desired location and secure it with one tack about halfway between the centre-line and one end of the rib. Make sure the rib is centered between two original ribs. Repeat this procedure on the other side of the rib making sure that the half-rib is centered between the original ribs. This can be done by one person, but is much easier when one person holds the half-rib and clinching iron while a second person drives the tacks with a cobbler’s hammer.
7) Once the half-rib is centered and straight, secure it with a full complement of tacks.
8) Repeat steps 4 to 7 for each half-rib in turn.
The entire canoe restoration process is described in my book – This Old Canoe: How To Restore Your Wood Canvas Canoe.
If you live in Canada, CLICK HERE to buy the book.
If you live in the USA, CLICK HERE to buy the book.
If you live in the UK, CLICK HERE to buy the book.
Si vous habitez en France, CLIQUEZ ICI acheter le livre.
If you have read the book, please post a review on Amazon and/or Goodreads and/or any other review site.


February 26, 2017
Bill Mason’s “Path of the Paddle” Films — Homage to Wood-Canvas Canoes
by Mike Elliott, Kettle River Canoes
email: artisan@canoeshop.ca
The National Film Board of Canada (NFB) website is a treasure trove of beautiful short films. Among my personal list of favourites is the Path of the Paddle series by Bill Mason. Of the four films in the series, Path of the Paddle Solo Whitewater (1977) is the one I tend to watch over and over again. Not only is the photography outstanding, I get a thrill every time I see a wood-canvas canoe being jockeyed through 3′ (one meter) standing waves in a wild river.
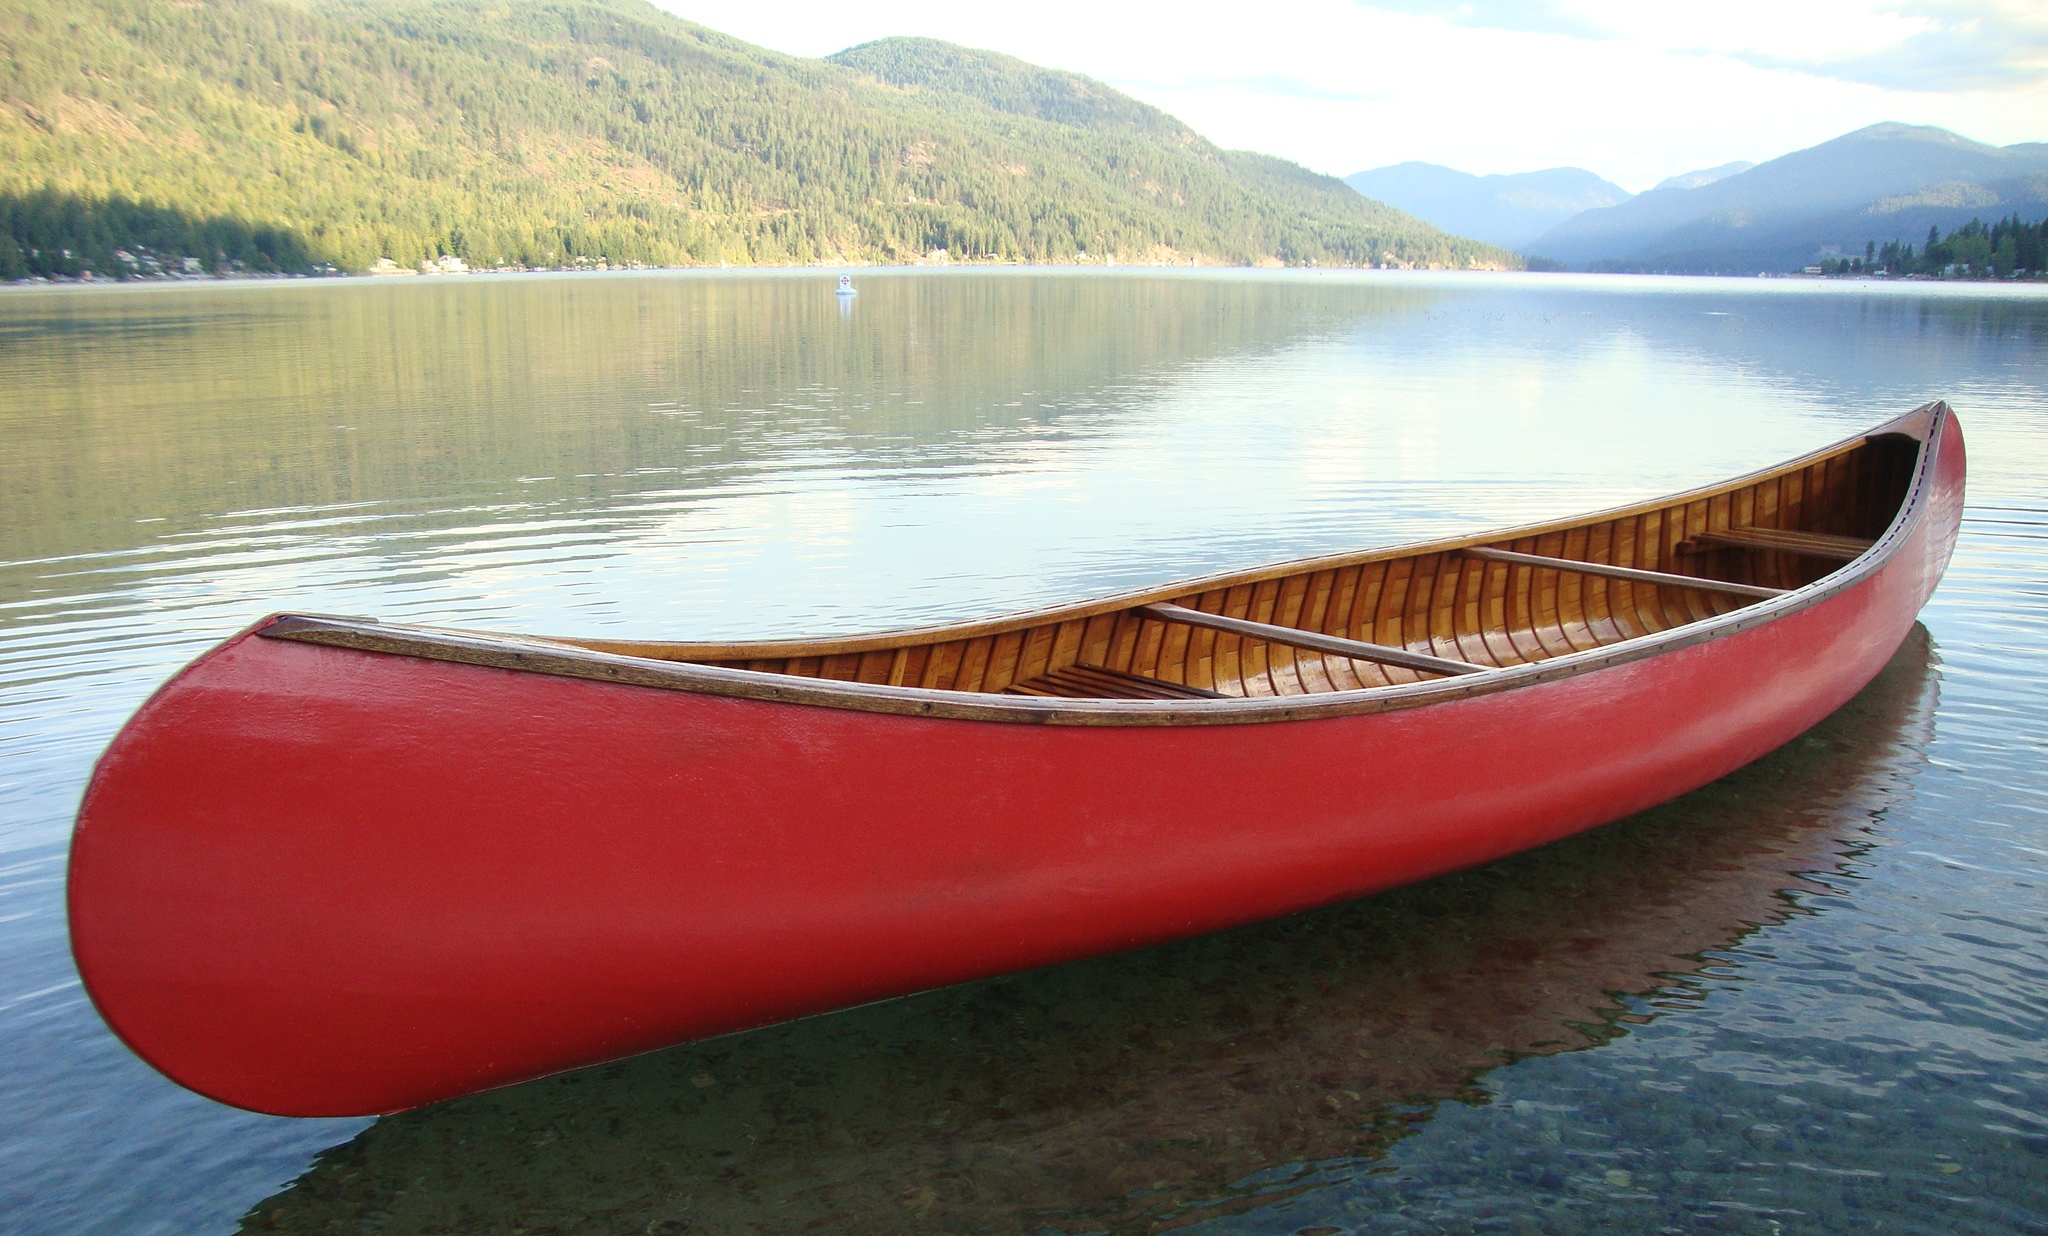
The canoe featured by Bill Mason in the film is a Chestnut Pal (16′ pleasure canoe). Its gorgeous lines, distinctive red colour and hand-woven cane seats gives the film a touch of class.
One of my favourite occupations while watching any film, is looking for and finding continuity glitches. In this one, Bill navigates his Chestnut Pal through a particular set of rapids. Meanwhile, the canoe is alternately being paddled empty and then is loaded with canoe packs — switching back and forth as if by magic.
I enjoy watching the Chestnut Pal handle challenging rapids with grace and style. For a general-purpose canoe that is 12.5″ (32 cm) deep with a 36″ (92 cm) beam, its ability to handle these conditions is impressive. That said, I like to keep in mind that Bill was able to run the same section of river many times and select the runs that worked out (the key to good story-telling is good editing).
For anyone unfamiliar with wood-canvas canoes, this film is an education in just how durable they are. I love watching Bill bumping and thumping off rocks in his Chestnut Pal. Especially impressive is one sequence where the canoe hits an exposed boulder broadside in the river and lives to tell the tale.
Bill plays fast and loose with cinematic continuity during a sequence discussing how to handle the canoe in high-water conditions. We watch him start into a class 3 rapid in his Chestnut Pal (note the hand-woven cane seat).
Then, the canoe miraculously survives an near upset. Indeed, this would have been a miracle if Bill was paddling his Chestnut Pal. However, a closer look reveals that the canoe capable of handling this situation was not a Chestnut Pal but rather a Chestnut Prospector (16′ wilderness tripping canoe) that is 14.5″ (37 cm) deep — note the all-wood slat seats.
The Chestnut Prospector is perfectly designed to handle class 3 rapids. The extra depth keeps the water out of the canoe as does the fact that the hull is flared (V-shaped) about 4′ (1.2 meters) from each end. Bill painted all of his canoes the same colour in order to allow him to interchange them during filming.
The photography in these films is absolutely stunning. The image of a red canoe on the water has become a major part of Canadian iconography due in no small part to Bill Mason and his use of red Chestnut canoes in his films.
The Chestnut Pal is one of the best general-purpose canoes ever designed. However, it is not designed to handle class 3 rapids. Apparently, that did not stop Bill Mason from trying. I applaud him for showing us the limits of this amazing canoe.
I encourage you to make your way to the NFB website and check out the Path of the Paddle films by Bill Mason. They are, for me, well worth the time and effort.


February 12, 2017
The Canoe – A Film Written and Narrated by James Raffan
by Mike Elliott, Kettle River Canoes email: artisan@canoeshop.ca
I recently came across a short film called The Canoe. It has just been released (2017) and is written and narrated by James Raffan (author, director emeritus of the Canadian Canoe Museum). Running 27 minutes, this short film examines the role of the canoe in shaping the lives and life connections of several people. It opens with a voice-over narration by James Raffan as we watch him paddle a beautiful old Chestnut Bobs Special canoe over calm, misty water.
The Connector – The first profile in the film is of Michelle Savoie. She comes from a long line of canoe people tracing back to the voyageurs. She and her family see the canoe as the connecting force in their family.
The Champion – Alexandra McGee is an elite-level competitor in white-water slalom canoeing. The discipline and focus required to become a champion helped her overcome many personal challenges.
The Explorers – Gary and Joanie McGuffin are authors, photographers, educators and explorers. They have used canoes to create a life together that is full of wonder and beauty. They find something new around every bend in the river.
The Settler – Michael Zhang left a hectic life in China to create a life in Canada full of joy and peace. He and his family find that joy and peace every time they get out on the water in their canoe.
The Mentor – Gail Bannon helped the young people in the Fort William First Nation reconnect with their culture and heritage by teaching them how to build a birch bark canoe.
I hope you enjoy this film – I certainly did. For me, it brought into sharp focus the truth about canoes. They are a powerful cultural linchpin in the Canadian Identity. The canoe is an essential part of our sense of self, sense of family and sense of community. Enjoy.
 [image error]
January 29, 2017
“This Old Canoe: How To Restore Your Wood-Canvas Canoe” is Now Available at Lee Valley Tools
by Mike Elliott, Kettle River Canoes
email: artisan@canoeshop.ca
About a year ago, when I was in the final stages of writing This Old Canoe: How To Restore Your Wood-Canvas Canoe, I was also developing the marketing plan for the book. Many self-published authors want to get their book into as many retail outlets as possible. However, my book is written for a very focused niche audience. I nurtured my audience over a number of years through this blog. Consequently, the bulk of my marketing campaign was and is through the use of social media and my book is primarily available through on-line sources. That said, I also hoped that my book would be available in one national retail chain.
I first approached Lee Valley Tools in June 2016. I delivered a promotional package personally to their head office in Ottawa, Ontario. I was there as part of my book tour. WoodenBoat magazine had just published a positive review (written by Jerry Stelmok) which I included as part of the package for Lee Valley Tools. I was hopeful that they would choose my book as part of their retail offerings. I heard back from them almost immediately to confirm that they had received my package, They also had a number of technical questions for me concerning availability, shipping, etc. I was thrilled with such a quick response. Then, all communication stopped.
By the end of November 2016, I had resigned myself to the idea that Lee Valley Tools was not going to carry This Old Canoe. Then, I got a phone call. Apparently, it had taken more than five months for Lee Valley to find someone within their organization who had enough knowledge of wood-canvas canoes to provide them with a credible internal review of my book. They called me to say that the review was “glowing” and they were looking forward to making This Old Canoe available to their customers. Click here to see This Old Canoe available at the Lee Valley Tools on-line store.
I will be helping to promote my book with a number of in-store events as well as original articles in the Lee Valley Tools newsletter. The schedule for these events and articles has yet to be determined. A few days after the phone call from Lee Valley, I slipped on a patch of black ice and tore my right quadriceps tendon (just above my knee cap). The surgery to repair the tendon was on December 7, 2016 and I am now working through several months of healing and physiotherapy to get back to full strength and range of motion. Once I am mobile again, I’ll let you know when and where I will be appearing in Lee Valley Tools stores.


January 15, 2017
A Restorer’s Guide to the Chestnut Bobs Special Wood-Canvas Canoe
by Mike Elliott, Kettle River Canoes
email: artisan@canoeshop.ca
The blogs I do on the specifications of canoe components for various types of canvas-covered canoes seem to be quite popular. Apparently, I am the only one out there taking the time to write about this stuff and share it with others on-line. This time around, I am presenting a restorer’s guide to the Bobs Special from the Chestnut Canoe Company.
This canoe was one of two lightweight pleasure canoes built by Chestnut (the other was an 11’ solo canoe called the Featherweight that weighed about 38 pounds). Before I talk about the canoe, I’d like to clarify the name. According to Roger MacGregor in his book When the Chestnut was in Flower, Henry and William Chestnut were real history buffs. The telegraph code for the 15’ 50-Lb. Special was BOBS and made reference to Lord Roberts, a major figure during the Second Boer War in South Africa. Over the years, as this wide, light-weight canoe became more difficult to keep under the weight limit of 50 lbs. (the average weight was 58 pounds while the carrying capacity was 700 pounds), they changed the name. I have seen a variety of Chestnut catalogues call it Bob’s Special, Bob Special and Bobs Special. So, feel free to take your pick.
If you happen to have a Bobs or have been lucky enough to come across one in need of some TLC, you will notice what a sweet little canoe this is. It paddles like a dream which is surprising for a canoe that is 37” (94 cm) wide. Its bottom has a shallow-arch that reduces the waterline width when paddled with a light load. There is a fair amount of rocker in the ends which adds to its maneuverability. At the same time, it is not difficult to stand up in a Bobs – making it ideal for fly-fishing or general recreational paddling for a less experienced paddler.
One little note here: I am listing all of the dimensions in inches. I apologize to all of you who are working in metric. The canoes were built with imperial measurements originally, so I find it easier and more accurate to stick with this measurement scale.
[image error]
Inwales –The inwale is a length of White Ash or Douglas Fir 15/16” high with the edge grain visible on the top surface. It is fashioned to fit the tumblehome present on most Chestnut canoes. Therefore, the top surface is 9/16” wide while the bottom width is 11/16”. The last 18” or so at each end is tapered down to about ½” wide (top and bottom) along the sides of the decks. All of the transverse components (centre thwart and seats) are attached to the inwales with 10-24 (3/16”) galvanized steel carriage bolts. I replace these with 10-24 silicon-bronze carriage bolts.
The gunwales (both inwales and outwales) are pre-bent about 18” from the ends. If you are replacing these components, the wood will have to be soaked for 3 days, heated by pouring boiling water over them and bent onto custom-built forms in order to get a proper fit.
[image error]
Outwales – The outwales are also made of White Ash or Douglas Fir. Depending on when the canoe was built, the outwales may have a chamfered edge on the bottom of the outside surface. Water often gets trapped under the outwales and results in rot on the inside surface of the originals because they assembled the canoe first and then applied paint and varnish. Consequently, the inside surfaces of the outwales are bare wood. Therefore, I usually end up replacing this component. Prior to installation, I seal the wood on all surfaces with a couple of coats of spar varnish. Unlike the original builders, I do all of the painting and varnishing first and then assemble the canoe.
[image error]
Decks – The decks the Bobs Special were made of hardwood – usually maple, white ash or white oak. Sometimes, they used mahogany to help reduce the overall weight. By the time you start restoring your canoe, the decks are often rotted along with the stem-tops and inwale-ends. They are attached to the inwales with six 1¾” #8 bronze wood screws. As with the outwales, I help prevent future rot by sealing the decks on all surfaces with a couple of coats of spar varnish. The deck extends about 18” into the canoe from the end.
[image error]
Stem-Top – You will rarely if ever have to replace the entire stem. However, I rarely see an original stem-top that is not partially or completely rotted away. Because the top 6” or so of the stem is straight, you can usually make the repair without having to pre-bend the wood to fit the original stem-profile.
[image error]
Keel – The Bob Special had a regular (tapered) keel installed. Use a piece of hardwood (the original was ash) and taper each end to 3/8” wide. The overall length is about 13’. It will accept the brass stem-band which is 3/8” wide.
[image error]
Ribs – The Bobs Special was constructed with so-called “regular” ribs (2-3/8” wide) that were ¼” thick instead of the normal 3/8”. They create a light-weight canoe but are not as robust as the regular ribs. You will probably encounter several broken ribs in your canoe restoration.
The edges of the ribs are chamfered in most Bobs Specials. Replicate the angles found in your canoe. Often, the edge closest to the centre of the canoe has tapered ends (11° chamfer) while the edge closest to one end of the canoe is chamfered about 25°.
Planking – The planking in Chestnut Canoes was made of either Eastern White Cedar or Western Red Cedar. Although the planks started out at 5/32” thick, you will probably be shaving replacement planks down to match the original planks. Again, this results in a lighter, less robust canoe. You will probably encounter many broken planks in your canoe.
Seats – The seat frames are made of ¾” ash, oak or maple that is 1½” wide. Both seats are suspended under the inwales with 10-24 carriage bolts and held in position with 5/8” hardwood dowel. The rear stern seat dowels are 1¾” long while the front dowels are ¾” long. All of the bow seat dowels are ¾” long. The forward edge of the bow seat is about 51½” from the bow-end of the canoe while the forward edge of the stern seat is about 39½” from the stern-end of the canoe.
Centre Thwart – The thwart is made of ¾” ash that is 2½” wide. It tapers from the centre to create handle grips on either side that are 2” wide. They were attached directly under the inwales with galvanized steel 10-24 carriage bolts. As with every component in the canoe, I seal the entire thwart with a couple of coats of spar varnish prior to installation and replace the original galvanized steel bolts with silicon bronze bolts.
All of this (and much more) is described in my book – This Old Canoe: How To Restore Your Wood Canvas Canoe.
If you live in Canada, CLICK HERE to buy the book.
If you live in the USA, CLICK HERE to buy the book.
If you live in the UK, CLICK HERE to buy the book.
Si vous habitez en France, CLIQUEZ ICI acheter le livre.


January 8, 2017
How to Remove Fiberglass from a Wood-Canvas Canoe
by Mike Elliott, Kettle River Canoes
email: artisan@canoeshop.ca
For those of you new to this blog and have not heard me on this topic before, let me be as clear as I can be: To anyone thinking about applying fiberglass to a wood-canvas canoe, I say, “DON’T DO IT!” To anyone wanting to remove fiberglass from a wood-canvas canoe, the short answer is: HEAT.
Wood-canvas canoes are a product of a by-gone era; a time before planned obsolescence — when things were built with the long term interests of the consumer in mind. The whole idea of building a canoe with wood and canvas was to have a vessel that lives and breathes. These canoes work in the natural environment and are part of it. They are held together with tacks and screws – no glue. The wood flexes and moves with the water around it. When part of the canoe breaks or rots, it can be repaired or replaced with comparative ease because it is designed to be taken apart. As long as there are people who know how to restore canvas-covered canoes, they will live forever.
It has been about forty years since these canoes were the standard in the marketplace. Not only has the technology of wooden canoe repair faded into obscurity, but the mindset of both manufacturers and consumers has also changed. Synthetic materials are now generally seen as better – easier, tougher and longer lasting. The consumer has been convinced that the new materials can improve that which is outdated or at least maintain it quickly and easily.
When it comes right down to it, wooden canoes and fiberglass just don’t mix. Since the ribs and planking are held together with tacks, they flex and move naturally. Over the years, the tacks tend to work loose and eventually have to be either re-clinched or replaced. Conversely, fiberglass resin is rigid. Once applied, it tends to resist any movement. The combination of a flexible hull and a rigid outside layer results in cracked or delaminated resin. The tacks can also wear against the resin from the inside to the point where they come right through the resin. It can take several months or several decades, but at some point the canoe needs to be repaired and the fiberglass has to come off. It is then that the real problem with fiberglass on a wood canoe comes to light. All of that synthetic resin has to be removed. It is a long, painstaking process that usually has you cursing the person that put the stuff on in the first place. The moral of the story is: Avoid applying fiberglass to the hull of a wood-canvas canoe. Learn how to re-canvas the canoe or find a professional to do it for you.
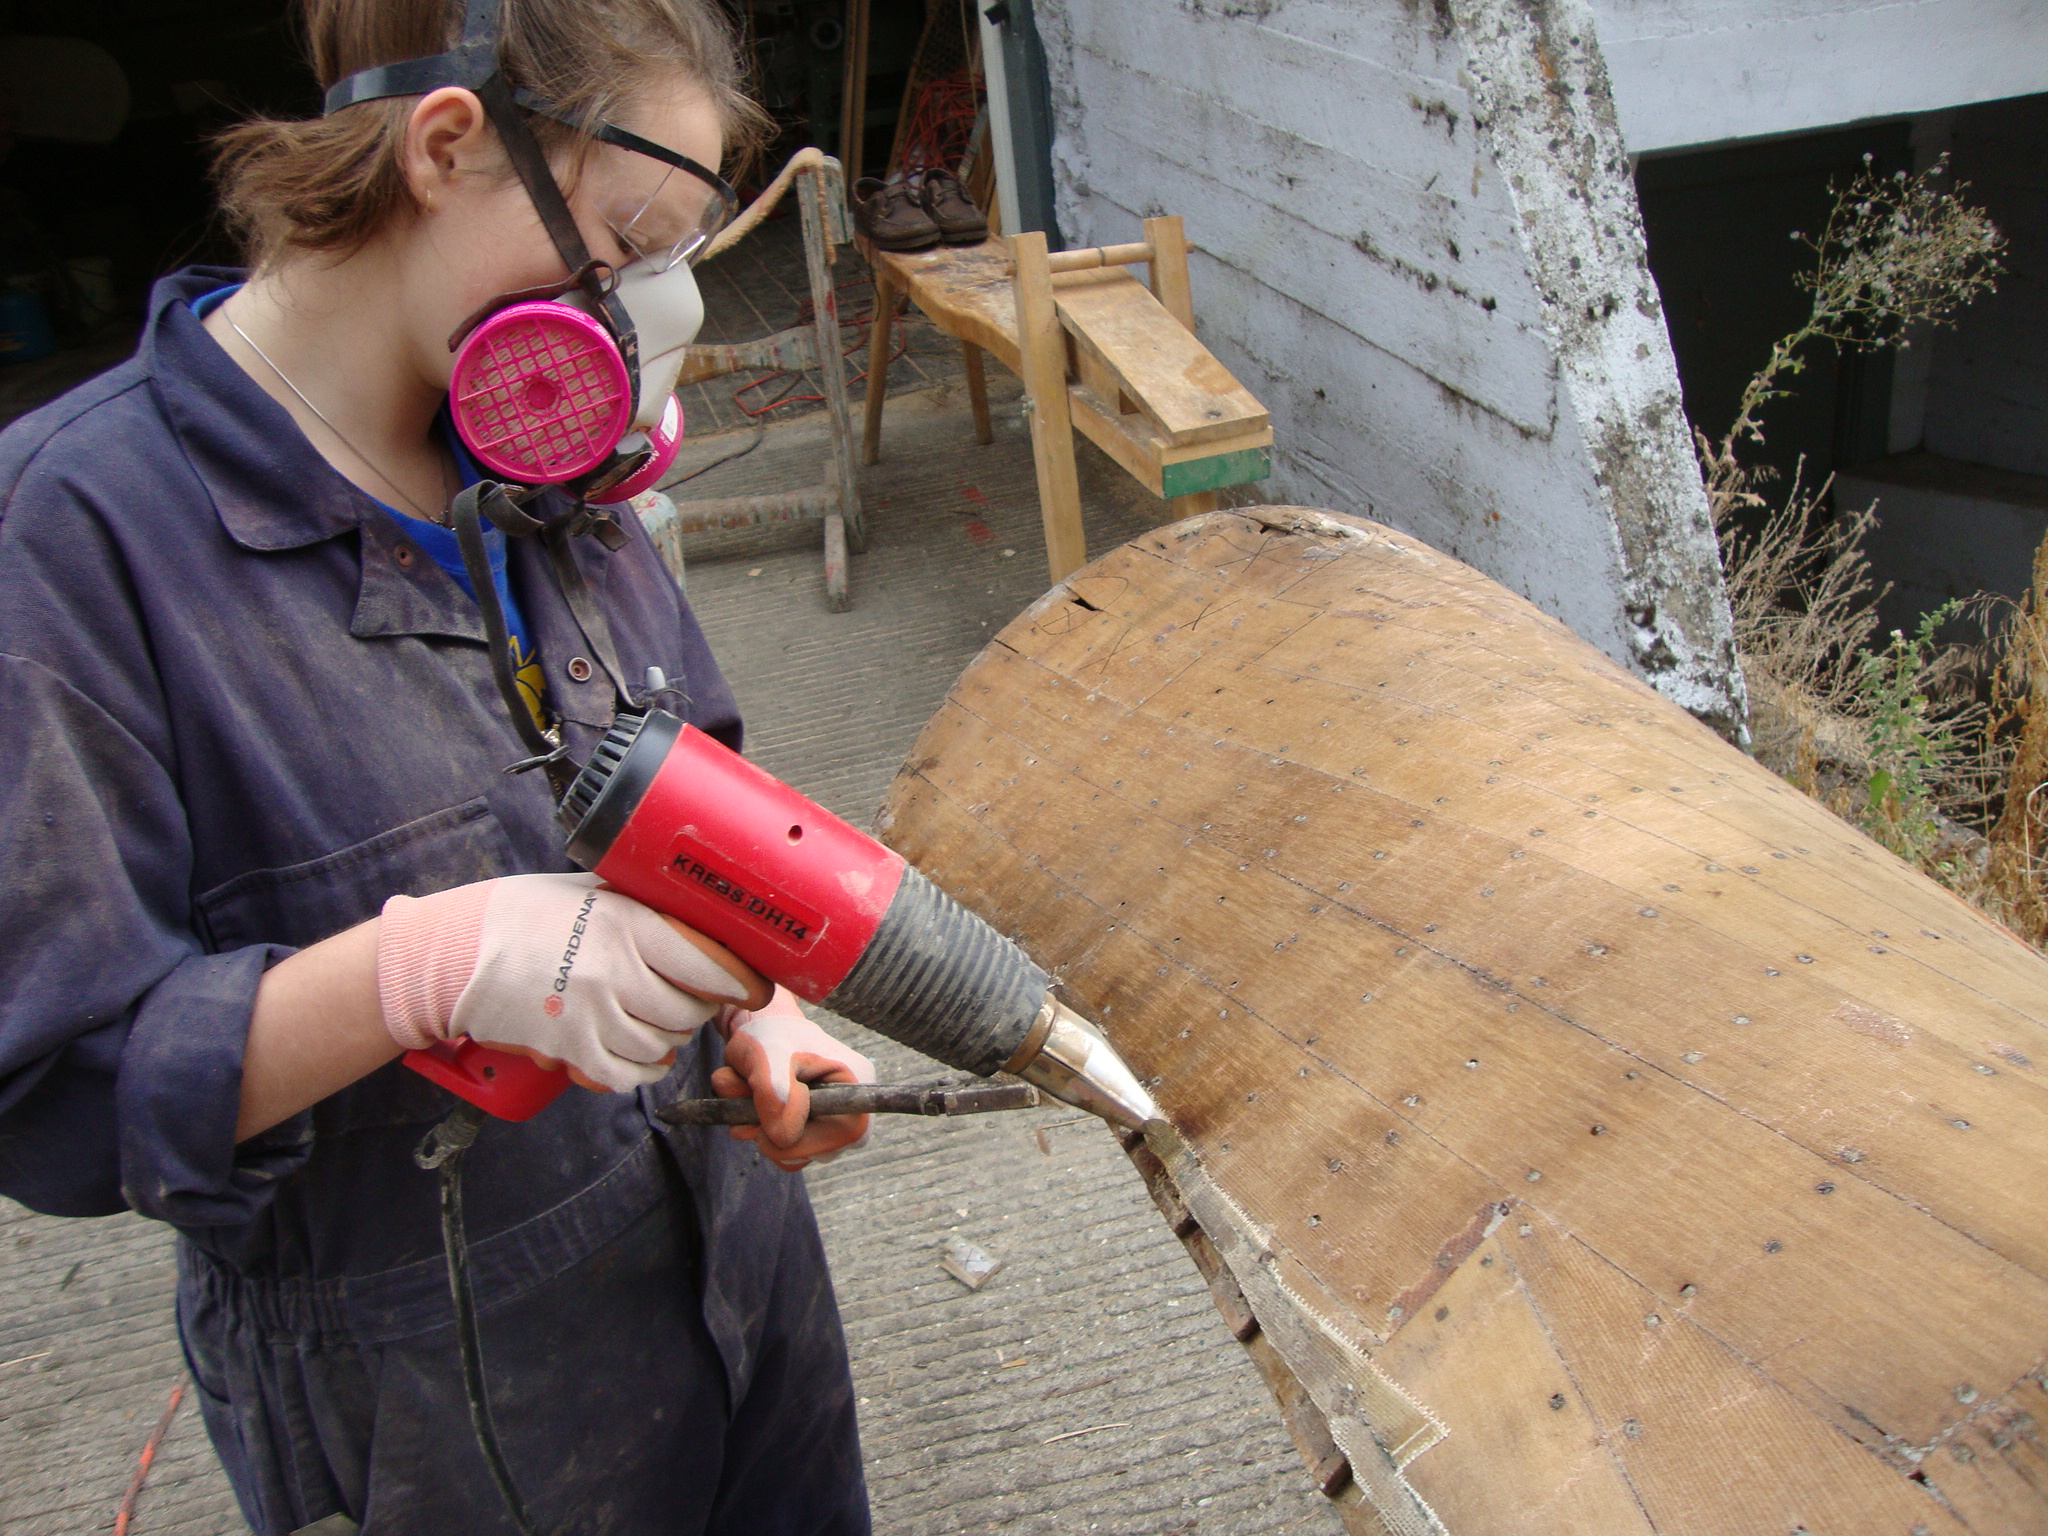
This leads us into the next question: How do you remove fiberglass from a wood-canvas canoe? All you require is a professional-grade heat-gun, a 2” putty knife, a pair of pliers, safety equipment (work gloves, safety glasses and a respirator mask) and lots of patience. The first step is to move the canoe into a well ventilated work space – preferably outdoors. Then start at an edge of the canoe and apply heat to the resin.

At this point it is important to note that fiberglass resins come in two basic types – polyester and epoxy. Polyester resins were the first to be developed. If your canoe had fiberglass applied to it in the 1970’s or earlier, you can bet that polyester resins were used. They tend to become brittle and deteriorate rapidly, so if the fiberglass on your canoe is delaminating it is most likely that you are dealing with a polyester resin. Fortunately, this makes the removal of the fiberglass relatively quick and easy. In many cases, the cloth can be ripped off by hand with very little need for heat. When I say rip, please be gentle. If you get carried away and pull at the fiberglass cloth too rapidly, you could end up tearing sizeable chunks of planking off the canoe as well (I speak from first-hand experience).

Epoxy resins hit the market in a big way in the 1980’s and are the standard today. They are applied by first mixing a hardener with a resin in a two-part formula. What results is a strong, tough plastic that bonds very well to wood. Unfortunately, this means that the removal process is arduous and painstaking.
[image error]
As mentioned earlier, start at an edge of the canoe and apply heat to the resin. If you are dealing with epoxy resin, you will probably have to apply the heat for several minutes before the cloth begins to respond to your attempts to lift it with the putty knife. At some point, it does let go and the fiberglass cloth can be separated from the canoe. Then move a few centimeters and continue the process. Again, polyester resins let go fairly quickly. You will find that large sheets of cloth come off in fairly short order. I usually grab the cloth with a pair of pliers rather than with my hand. Even with work gloves on, the pliers prevent nasty encounters with heat and/or sharp edges of fiberglass (again, this is the voice of experience talking).
[image error]
Once all of the fiberglass cloth is removed, return to the canoe hull with the heat gun and a putty knife. Apply heat to any patches of resin still stuck to the wood. Then, scrape the resin off. Be prepared to settle into hours of tedious work. It typically takes 15 to 20 hours to remove the fiberglass cloth and resin from a 16′ canoe.

Once you are back to the bare wood, the restoration is like that of any other wood-canvas canoe. So, enjoy the pleasures of life in the slow lane, stay away from fiberglass and celebrate the fact that you have a wood-canvas canoe.
Many people complement me on the great fiberglass job on my canoes. They are shocked to learn that the canoes are covered with painted canvas.
All of this (and much more) is described in my book – This Old Canoe: How To Restore Your Wood Canvas Canoe.
If you live in Canada, CLICK HERE to buy the book.
If you live in the USA, CLICK HERE to buy the book.
If you live in the UK, CLICK HERE to buy the book.
Si vous habitez en France, CLIQUEZ ICI acheter le livre.
If you have read the book, please post a review on Amazon and/or Goodreads and/or any other review site.


December 18, 2016
How to Paint Your Wood-Canvas Canoe
by Mike Elliott, Kettle River Canoes
email: artisan@canoeshop.ca
Once the canoe has been canvassed, the filler has been applied and the keel and stem-bands have been installed, it is ready for paint. Here are five secrets for a professional paint job:
Tip #1 – Paint First, Then Assemble – Fifty years ago, the canoe builders in the factories were in production mode. To save time and space, they installed the outwales before applying varnish and paint. However, this caused two problems in the years to follow. First, the canvas under the outwales is not protected with paint. Second, the inside surface of the outwales is bare, unprotected wood. Over years of use, water can become trapped under the outwales. This moist environment can be ideal for growing the fungi that cause rot.
Two things can happen: a) the canvas can rot under the outwales causing the canvas to detach from the canoe and; b) the outwales can rot from the inside out.
To avoid these problems, paint the canvas and varnish the outwales (being sure to seal all of the surfaces) before the outwales are installed. Some builders go so far as to apply varnish along the cut edge of canvas before the outwales are installed.

Tip #2 – Sanding, Sanding and More Sanding – Generally speaking, the more you sand, the smoother the final finish. Also, the more meticulous you are about sanding, the better the end results. Before starting to paint the filled canvas, sand the filler with 120-grit sandpaper. I use a random-orbital sander for this job.
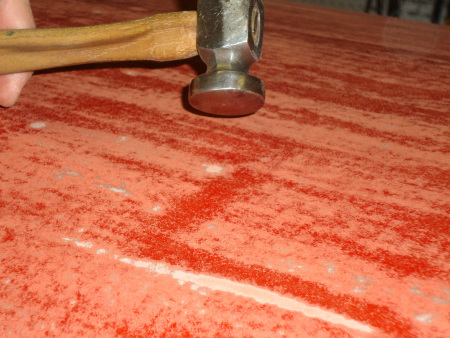
Any tacks in the canoe hull that are not flush to the hull will show up as you sand. It is essential to stop sanding immediately and re-clinch the tack to avoid creating a nice, round, tack-sized hole in the canvas.
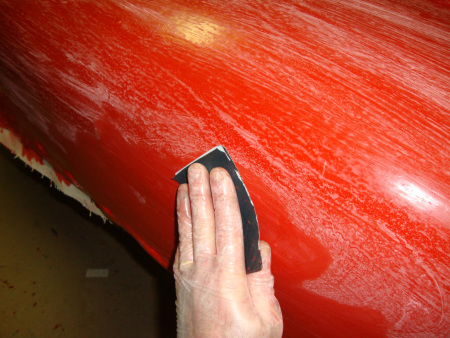
For all practical purposes, oil-based alkyd enamel paint is essentially heavily pigmented varnish. Both are handled in exactly the same way except that while the surface of varnish is scratched with steel-wool between coats, the paint surface is scratched with wet sandpaper. I use 120-grit wet sandpaper between the first and second coats of paint. I then use 220-grit wet sandpaper between the second and third coats and, if necessary, 320-grit wet sandpaper between the third and fourth coats. As always, be sure to clean the surfaces well before applying the finish. Remove sanding dust with a brush or vacuum. Then, clean remaining dust with a tack cloth.

Tip #3 – A Little Thinner – Some articles about oil-based paints and varnishes would have you believe that avoiding streaks and bubbles in the final finish is one of life’s great challenges. In fact, there is no great mystery to it. Thin the paint (or varnish) about 12% with mineral spirits (paint thinner) before using it. The thinned paint will self-level once it is applied. The additional solvent also allows the paint to dry before sags and drips develop. For a canoe, any alkyd enamel works well and provides a tough, flexible finish. Recent changes to federal regulations in Canada make it difficult, if not impossible, to buy oil-based marine enamel. Just go to your local hardware store and pick up a gallon of oil-based “rust paint”. The label will say “For Metal Use Only”. I’m sure they just forgot to include “Canvas-Covered Canoe” in the label. I would gladly use a water-based paint for the canvas, but at this point, oil-based alkyd enamel is the only paint that works.
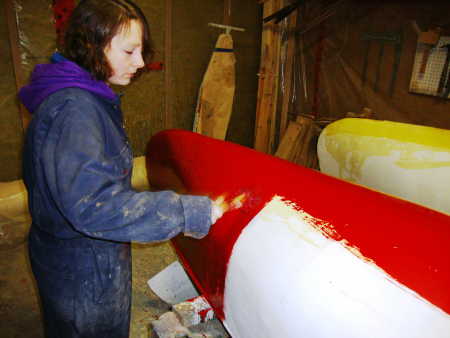
Tip #4 – Tip It, Then Leave It – As with any paint, you must maintain a “wet edge” while applying it to a large surface. Therefore, it is important to work in small sections of the canoe. Apply the paint quickly and vigorously to get complete coverage. Don’t worry about streaks or bubbles. Just make sure the paint covers the area without using too much. I use a high-quality natural bristle brush to apply the first and second coats.

I use a disposable foam brush to apply the third (and, if necessary, the fourth) coat of paint. Once you have paint applied to a small section of the canoe, hold the brush at a 45° angle to the surface and lightly touch the brush to the wet surface. Move the brush quickly over the surface to “tip” the finish. Do this first vertically from top to bottom and then horizontally. After the section is painted and tipped in two directions, move to the next section. Continue in this way until you have done the entire canoe. Check to make sure there is no excess paint dripping anywhere – especially at the ends. Then, go away and leave it alone for 48 hours.
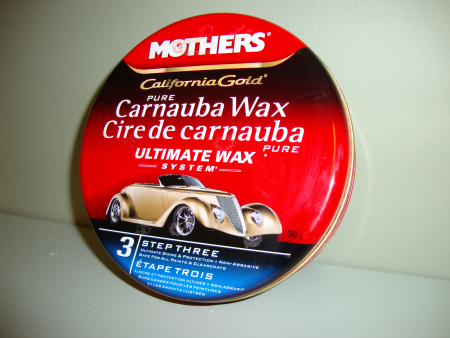
Tip #5 – Protect Your Work – Are we done yet? Well, that depends on whether or not you want to protect that beautiful new finish. Once I have applied the final coat of paint and allowed it to dry for two days, I apply a coat of carnauba wax (pronounced car-NOO-bah) obtained at the local auto supply shop.
Follow the directions and use lots of muscle (or a good buffing wheel). If you’ve never tried it, waxing the canoe is worth it just for the experience of shooting effortlessly through the water. It’s like waxing a surfboard – the results are amazing. Also, the paint is protected from minor scuffs and scratches. Any oil-based finish takes several months to cure completely, so the wax helps protect it in the early months of use.
All of this (and much more) is described in my book – This Old Canoe: How To Restore Your Wood Canvas Canoe.
If you live in Canada, CLICK HERE to buy the book.
If you live in the USA, CLICK HERE to buy the book.
If you live in the UK, CLICK HERE to buy the book.
Si vous habitez en France, CLIQUEZ ICI acheter le livre.
If you have read the book, please post a review on Amazon and/or Goodreads and/or any other review site.


![[image error]](https://canoeguybc.files.wordpress.com/2013/03/repairs-06-sg.jpg)
![[image error]](https://canoeguybc.files.wordpress.com/2013/03/clean-03-cm.jpg)
![[image error]](https://canoeguybc.files.wordpress.com/2013/03/before-12-lcca.jpg)
![[image error]](https://canoeguybc.files.wordpress.com/2013/03/strip-02-cl.jpg)
![[image error]](https://canoeguybc.files.wordpress.com/2013/03/repairs-03-jk.jpg)
![[image error]](https://canoeguybc.files.wordpress.com/2013/03/repairs-03-sg.jpg)
![[image error]](https://canoeguybc.files.wordpress.com/2013/03/strip-02-el.jpg)
![[image error]](https://canoeguybc.files.wordpress.com/2013/03/repairs-10-sg.jpg)
![[image error]](https://canoeguybc.files.wordpress.com/2016/04/students-restoring-canoes-in-penticton.jpg)
![[image error]](https://canoeguybc.files.wordpress.com/2016/02/mockup-02.jpg)
![[image error]](https://canoeguybc.files.wordpress.com/2014/03/sheerline-reference-03.jpg)
![[image error]](https://canoeguybc.files.wordpress.com/2014/03/rib-top-repair-05.jpg)
![[image error]](https://canoeguybc.files.wordpress.com/2017/03/greenwood-bow-caned-seat.jpg)
![[image error]](https://canoeguybc.files.wordpress.com/2015/03/16-greenwood-pleasure-02-corrected.jpg)
![[image error]](https://canoeguybc.files.wordpress.com/2015/03/imgp0430.jpg)
![[image error]](https://canoeguybc.files.wordpress.com/2016/03/canoe-poling.jpg)
![[image error]](https://canoeguybc.files.wordpress.com/2016/03/chestnut-ogilvy-close-ribbed.jpg)
![[image error]](https://canoeguybc.files.wordpress.com/2016/03/canoe-with-half-ribs.jpg)
![[image error]](https://canoeguybc.files.wordpress.com/2016/03/img_0515_sm.jpg)
![[image error]](https://canoeguybc.files.wordpress.com/2016/03/img_0558_sm.jpg)
![[image error]](https://canoeguybc.files.wordpress.com/2016/03/img_0561_sm.jpg)
![[image error]](https://canoeguybc.files.wordpress.com/2016/03/img_0562_sm.jpg)
![[image error]](https://canoeguybc.files.wordpress.com/2016/03/img_0564_sm.jpg)
![[image error]](https://canoeguybc.files.wordpress.com/2016/03/img_0565_sm.jpg)
![[image error]](https://canoeguybc.files.wordpress.com/2016/03/img_0566_sm.jpg)
![[image error]](https://canoeguybc.files.wordpress.com/2017/02/path-01.png)
![[image error]](https://canoeguybc.files.wordpress.com/2017/02/path-02.png)
![[image error]](https://canoeguybc.files.wordpress.com/2017/02/path-03.png)
![[image error]](https://canoeguybc.files.wordpress.com/2017/02/path-04.png)
![[image error]](https://canoeguybc.files.wordpress.com/2017/02/path-05.png)
![[image error]](https://canoeguybc.files.wordpress.com/2017/02/path-06.png)
![[image error]](https://canoeguybc.files.wordpress.com/2017/02/path-07.png)
![[image error]](https://canoeguybc.files.wordpress.com/2017/02/path-08.png)
![[image error]](https://canoeguybc.files.wordpress.com/2017/02/path-09.png)
![[image error]](https://canoeguybc.files.wordpress.com/2017/02/path-10.png)
![[image error]](https://canoeguybc.files.wordpress.com/2017/02/path-11.png)
![[image error]](https://canoeguybc.files.wordpress.com/2017/02/canoe-01.png)
![[image error]](https://canoeguybc.files.wordpress.com/2017/02/canoe-03-michelle-savoie1.png)
![[image error]](https://canoeguybc.files.wordpress.com/2017/02/canoe-04-alexandra-mcgee.png)
![[image error]](https://canoeguybc.files.wordpress.com/2017/02/canoe-05-gary-joanie-mcguffin.png)
![[image error]](https://canoeguybc.files.wordpress.com/2017/02/canoe-06-michael-zhang.png)
![[image error]](https://canoeguybc.files.wordpress.com/2017/02/canoe-07-gail-bannon.png)
![[image error]](https://canoeguybc.files.wordpress.com/2017/01/this-old-canoe.png)
![[image error]](https://canoeguybc.files.wordpress.com/2017/01/lee-valley-tools-carries-this-old-canoe.png)
![[image error]](https://canoeguybc.files.wordpress.com/2017/01/lee-valley-store.jpg)
![[image error]](https://canoeguybc.files.wordpress.com/2014/01/bobs-special-06.jpg)
![[image error]](https://canoeguybc.files.wordpress.com/2014/01/grey-owl-standing-in-a-bobs.jpg)
![[image error]](https://canoeguybc.files.wordpress.com/2014/01/bobs-special-08.jpg)
![[image error]](https://canoeguybc.files.wordpress.com/2014/01/prebent-outwales.jpg)
![[image error]](https://canoeguybc.files.wordpress.com/2014/01/chestnut-canoe-planking.jpg)
![[image error]](https://canoeguybc.files.wordpress.com/2014/01/chestnut-seat.jpg)
![[image error]](https://canoeguybc.files.wordpress.com/2014/01/chestnut-canoe-thwart.jpg)