
Emiko Davies's Blog, page 9
December 5, 2019
What we are drinking now

I have been wanting to talk about wine on my blog, with the help of my sommelier husband, Marco Lami, and now, off the back of our very successful White Truffle and Wine Retreat a couple of weeks ago, I thought I’d share some of the wines we enjoyed that Marco chose for us.
“My idea [during the retreat] was to give another perspective of Tuscan wine,” Marco told me, “Tuscan whites tend to be fairly neutral. Trebbiano for example is a neutral grape which is why it’s usually blended with Malvasia, an aromatic varietal. But measured use of macerating on the skins is a way to bring out the character of the wine.”
If you macerate a white grape long enough, allowing skin contact (and therefore colour extraction from the skins), you’ll end up with a so-called “orange wine”, with varying degrees of orange-ness — a white wine made like a red. Marco prefers to call them macerated whites, than “orange” (I have written more about Tuscan macerates whites for Life & Thyme here).

One of such wines that we love is Castello dei Rampolla’s Trebianco. This beautiful, historic winery, located in Panzano in Chianti in the heart of Chianti Classico, was one of the first to experiment with international grape varietals, especially for their reds, and has been biodynamic for the past twenty years. Their ‘Trebianco’ is made with Chardonnay, Traminer, Sauvignon Blanc and Malvasia grapes that are fermented, skins on, in terracotta amphorae for 10 days, before being aged in the amphorae a further year — something that gives the wine a savouriness and softens the tannins, “It makes it a really versatile wine,” says Marco, who pairs it with, “Honestly, anything! You can drink it like a red wine, pairing it with cheese, liver, pork or veal, roast fish.” We drank it during the retreat with a hearty dish of handmade egg yolk and ricotta ravioli covered in melted butter, parmesan and white truffles.
The Chianti Classico “Bucciarelli” sangiovese is one we like as a table wine — an every day but elegant wine. We served it together with pizza cooked in the woodfired oven after a particularly wet day out exploring the Chianti Classico region (below, in all its autumnal glory!). It’s a typical Chianti Classico, that is, savoury on the palate, notes of sour cherry, bright acidity and good tannins. It would also go really well with a bistecca alla fiorentina – or any steak really. This producer, Antico Podere Casanova, is organic and is based in Castellina in Chianti, where they also run an agriturismo).

The dessert wine is produced by Paterna, who make also a delicious white, a combination of white Malvasia, Trebbiano and Orpicchio, an almost extinct indigenous Tuscan varietal, partially fermented with skins (we drank them all before I could get a photo of the bottle!). They are based in Terranuova Bracciolini, which is a 15 minute drive from where we were based for the retreat near Montevarchi so it was nice to have an extremely local wine to taste. Paterna are a Cooperative, a winery and a farm, organic since their beginnings in 1982. Their vin santo (pictured here) is a classic Tuscan dessert wine made with Malvasia and Trebbiano grapes that are picked in September and hung to dry for a few months until they become sugar-concentrated raisins (the photograph below is from another winery we love and visit during the retreat, Cosimo Maria Masini, of their San Colombano grapes drying for vin santo), then pressed, fermented and left to age in small Tuscan barrels called caratelli for 3-4 years. “It’s rather like a sweet sherry in that it has oxidative notes, since the caratelli are entirely sealed and they don’t get topped up,” says Marco. I ask him to explain what this means and he adds, “Over the years there is evaporation and therefore there is oxygen in the caratelli that gives nutty, sherry-like notes to the vin santo.”

Of course the classic pairing of vin santo is with biscotti (almond cantuccini). But this is so delicious that Marco prefers to pair it with something more important than humble biscotti: chicken liver, black or white truffles, a cheese platter, chestnut desserts like castagnaccio, pillow soft Sienese ricciarelli biscuits and spicy panforte. Basically, it’s perfect for the festive season.
I hope you like this little snippet of a few wines we love, I’m thinking to make it more of a regular thing — what do you think?


November 6, 2019
Grape and fig leaf spoon sweets
In late October I spent a week on the island of Andros, back in the same beautiful place I was in in June, charming Melisses. And can I say, late October was, unexpectedly, perhaps even more beautiful than in June? It was warm and sunny, punctuated by a few intensely windy days, but perfectly warm actually to be in summer attire on the beach (the girls thought the water was great too, though it was definitely chillier than it was in June).


We were there for a photoshoot — this time someone else photographing, the sweet, talented Taryn from Quartier Collective, and this time it was my girls getting photographed, dressed up in the cutest Tea Collection threads (of which I will share more once the Spring/Summer 2020 collection is announced!). It was an incredible week together of five families and 11 children sharing, bonding, making memories and lifetime friends and looking utterly adorable while they were at it. We explored the town of Chora, picked olives by the sea, had picnics on deserted beaches and adopted (momentarily) every cat we found.
So I could actually sit back a little, relax a little, and nosy over to the kitchen to see what Allegra, Maxi and Anna were preparing for us that day (although I couldn’t resist one day getting into the kitchen to make some of Georgina Hayden’s tahinopita – sweet tahini bread swirls – with some leftover pizza dough). Every morning, in the beautiful dining room, there was breakfast waiting for us: hard boiled eggs drizzled in olive oil and dusted with pepper, Allegra’s granola, Greek yoghurt so thick a spoon can stand up straight in it, dark tahini, and a collection of about 8 or 10 jars of spoon sweets and jams made by Anna, the housekeeper. I was immediately hooked on Anna’s grape spoon sweets: Whole white grapes cooked in a syrup perfumed with rose.


After a few mime-like “discussions” and me peering over Anna’s shoulder as she made another batch, I felt like I could manage to make it at home: the rose scent comes from a few sprigs of rose geranium leaves picked out of the garden (heavenly!) and Anna doesn’t use too much sugar. The leaves give the syrup a unique floral character, very similar to roses but not quite. I suppose you could use a splash of rose water in its place but I wonder if it would almost be overpowering. As I don’t have any rose geranium at home I thought I could replicate something similar by using fig leaves, which also lend a delicious, floral note to syrup. The result is so good that even once the grapes have been picked out of it, I’m still conserving the perfumed syrup to drizzle over yogurt and fruit.
I read many recipes that said to cover the grapes with sugar overnight and then bring them to a simmer the next day, so I have done it that way, even though Anna cooked them right away.


Grape spoon sweets with fig leaf
1 kilogram of white grapes
600 grams of sugar
2-3 fig leaves
1 lemon
Rinse the grapes and pull off the stems. Place them, still dripping, in a wide saucepan and cover with the sugar. Leave overnight (or for a few hours). Place over low heat, squeeze over the lemon juice and gently bring to a simmer. Once the sugar is dissolved, add the fig leaves (try to bury them under the grapes so they are submersed in liquid) and continue to simmer uncovered the grapes begin to look translucent and the syrup has set, about 1 hour. Keep a little saucer in the freezer to test (as you would a jam) if the syrup is set or not. A blob of hot syrup on the cold saucer should, after a moment, wrinkle a little when you poke it with a finger. You may need to tilt the plate to see it in the right light.
Pour the hot spoon sweets into sterilised jars, pop the lids on and then boil the filled, sealed jars in a pot of water for 10 minutes. Let cool, then store in a cool dry place. Once opened, store in the refrigerator.
This is absolutely delicious with yogurt as a dessert or breakfast. I think even with a plain sponge cake and some whipped mascarpone or ricotta it would be pretty special.

October 14, 2019
Sicilian chocolate, almond and lemon torta

In Carol Field’s In Nonna’s Kitchen, this delicious dessert is called a Torta ripiena di mandorle e cioccolato, in other words, an almond and chocolate tart. Or perhaps you could more literally translate it as a tart filled with almonds and chocolate.
Field found this recipe in the handwritten journal of Giovanna Passannanti, a Sicilian woman who was in her eighties when the book was published in 1997. Aside from the almonds and chocolate, it has also got an entire lemon – juice and zest – and a very generous handful of candied orange pieces in it. I was so curious about the very simple combination of citrus, almond and chocolate that I had to bake it — and is it something “spectacular”, as Field herself describes it.

Because I love language and especially the language of food, this has also been making me think about the word torta, which in Italian is used to describe what we would call a ‘tart’ in English (did you notice, they even sound similar because these words have the same Latin root, torda, which once just simply referenced a round, flat, baked thing wrapped in pastry — indeed this recipe is) but torta also refers to many other things, including cake, quiche, pie and even pizza.
The word torta is often used to describe things in crusts, in particular, savoury dishes like a quiche (torta salata, literally a ‘savoury tart’ or a torta rustica, ‘rustic tart’, which is often made with puff pastry — Ada Boni has about 16 of these recipes in her 1929 cookbook The Talisman, which are made with everything from octopus to artichokes and feature puff pastry, bread dough or a simple butter and flour pastry — interestingly, these outnumber her sweet torte) or even specific recipes like Liguria’s torta pasqualina (literally Easter pie), which is a brilliant dish of very thin layers of dough encasing layers of ricotta, chard and eggs, and torta della nonna, which is basically a custard pie, covered on top and bottom with a whole disc of pastry, dotted with pine nuts.
Looking back at the very first torta in Medieval cuisine, it was a pastry encasing a filling — think the ‘twenty four blackbirds baked in a pie’ from the old nursery rhyme. It was also a gastronomic innovation — at once a container to cook in but also to carry food around in, practical, easy to make and easy to keep. Alberto Capatti and Massimo Montanari in La Cucina Italiana: Storia di Una Cultura lay out a very convincing argument that the torta or pie originated in Italy before spreading across Europe.
By the Renaissance, the pastry for the torta became not just practical but also edible (in the middle ages, the main function of the pastry — usually flour and water — was to hold the contents and allow them to cook). Bartolomeo Scappi’s Opera (1570) includes a section dedicated to everything you need to know about Renaissance torte and crostate, which are not all that different (the word crosta means crust). Scappi differentiates between a crostata and a torta by how the filling ingredients are treated — the former contains whole pieces while the torta contains a minced filling. There is nothing that he cannot reproduce as a torta, write Capatti and Montanari, citing a crostata filled with prunes and sour cherries and another with crab and prawns. Scappi’s pastry is made with either butter or lard and is applied in thin layers, rather like a puff pastry, both top and bottom — as I imagine it, his torta is not far off from that Ligurian torta pasqualina.
Just as in the Renaissance, torta can also be the name of a pizza too, particularly in southern Italy. Take the torta calabrese for example (Ada Boni has a wonderful recipe in Talisman). It’s not a cake. It’s pizza dough, divided in two parts, one part covering the bottom of a tin with high sides. A cooked filling of tomato, tuna, anchovies, olives and capers goes in and then it’s closed on top with the rest of the dough and baked until golden brown and puffed. A Neapolitan version is filled with a tomato sauce with mozzarella, prosciutto and boiled eggs.
But not only. Torta is also commonly used to describe a pudding, or a flan or something slightly wobbly with no crust — baked rice puddings, for example. Pellegrino Artusi has a number of these kind of desserts in his 1891 cookbook that are flourless and made primarily with ricotta, potato or pumpkin, or even bread. He has just one recipe for crostata and he explains, “Per crostata io intendo quelle torte che hanno per base la pasta frolla e per ripene conserve di frutta o la crema.” In other words, a crostata is a tart with a shortcrust pastry base filled with jam or custard (or in Lazio and nearby Maremma, ricotta). He instructs to top the filling with strips of pastry as wide as a finger, criss-crossing them.
Crostata still today describes quite specifically Artusi’s definition. I see it often misused in English to describe things that no Italian would call a crostata (rustic, freeform tarts I’m looking at you), when really Italians use it to describe one of these. We have translated crostata into ‘tart’ …but ‘tart’ is not necessarily always a crostata!


Torta ripiena di mandorle e cioccolato
Almond, chocolate and citrus tart
This is my slight adaption (of Carol Field’s adaption) of this delightful chocolate-almond-citrus torta to fit a smallish cake tin (20cm diameter). Not having any eggs or butter in the filling, this keeps very well in an airtight container for a week. It’s absolutely delicious with coffee.
For the pastry:
125 grams cold butter
250 grams flour
50 grams sugar
1 whole egg plus 1 egg yolk
zest of 1 lemon (optional but lovely)
For the filling:
120 grams sugar
Juice and zest of 1 lemon
250 grams almond meal
50 grams candied orange peel
100 grams dark 70% chocolate
I used my favourite shortcrust pastry recipe, which you can find in all my cookbooks in some form: cold butter rubbed into flour with some sugar (I used about 50 grams this time), one whole egg and one yolk. I think some lemon zest in the crust is lovely too if you have an extra lemon lying around. Flatten into a disc and chill (the dough, that is, but you too) for 30 minutes. Roll to 5mm thickness and line a tin with the pastry, trimming the excess. Keep this extra dough, roll out again to 5mm and cut into 2cm thick strips and keep these chilled.
For the filling place the sugar in a smallish saucepan with the zest and lemon juice. Once the sugar dissolved, add off the heat the candied orange peel (I think you could use also fresh orange, or candied citron or zucca – as per the original handwritten recipe – if you can get it) and the dark chocolate. When smooth and melted, combine with almond meal, then immediately smooth it over the top of the pastry base (if you wait too long and it hardens, you can warm the mixture again over a bain marie). The strips of pastry from earlier go criss-crossed over the top and the tart is ready to be baked at 180 degrees celsius for 30-35 minutes or until crisp and lightly golden.
October 6, 2019
Pecorino e Vino: A cheese making and wine culinary retreat, 22-27 June 2020
I’m so excited to be able to announce that for our new culinary workshop next summer, we have Cressida McNamara from Pecora Dairy on board to teach cheese making. Together with me and Marco Lami, my sommelier husband, we will be hosting five wonderful days of cheese, wine and Tuscan food in the Val d’Orcia, one of the most breathtaking parts of Tuscany.

We will base ourselves in Pienza, the heart of pecorino cheese country, in a stunning villa with a 360 degree view of the surrounding undulating Tuscan hills, on a highly curated trip to bring you our favourite food and wine experiences in Tuscany, with Cressida’s expertise on the cheesemaking-front. The Val d’Orcia is so beautiful and so characteristically, uniquely Tuscan that the entire valley is protected as a UNESCO world heritage site.
Our days together will consist of our most favourite things: a combination of day trips to beautiful local towns, hands-on cooking classes, visits to a cheese farm (the one that started this blog, actually), eating out at our favourite trattorias, wine tastings and even a visit to a family run flour mill. We will cook together and enjoy aperitivo every night together, but for those who prefer a bit of down time and lounging by the saltwater pool at the gorgeous villa we’ll be calling home, you can choose to do that too and just join in on the eating part! See below for all the details.


Pecorino e Vino: Cheesemaking and wine culinary retreat
22-27 June 2020 (5 nights, 5 days)
Pienza, Tuscany
Cost: from 2,200 euro per person
Highlights:
2 cheesemaking sessions with award-winning cheesemaker
2 cooking classes with cookbook author Emiko Davies
2 winery visits with wine tastings and wine pairings with sommelier Marco Lami
Visits to a local cheese farm with cheese tastings and a local flour mill
Visits with free time to the towns of Pienza, Montalcino and Bagno Vignoni
2 dinners in our favourite restaurants
Breakfast, lunch and traditional Tuscan dinners cooked with organic produce
Be immersed in a beautiful Tuscan villa with a pool in a UNESCO World Heritage landscape
The itinerary:
Day 1: Late afternoon arrival at the villa and welcome aperitivo, followed by homemade wood-fired pizza dinner.
Day 2: Visit to a family run, organic, ancient grain flour mill to see how their flour and pasta is made, followed by a visit to an organic sheep farm for a tour of the farm and a tasting of their delicious “Pecorino di Pienza” raw milk cheeses. We will also pop in to the gorgeous fifteenth century town of Pienza, a city designed for Pope Pius II as the “ideal Renaissance city” and we will have dinner at a charming local trattoria.
Day 3: After breakfast we will spent the morning on our first cheesemaking session with Cressida. After a light lunch and free time for a dip in the pool or relaxing at the villa, we will have a pasta masterclass with Emiko, and eat what we have made together for dinner. Marco will guide us through a lesson in pairing cheese and wine before dinner.
Day 4: The morning will be spent on our second cheesemaking session with Cressida. Then we will spend the second part of the day visiting Montalcino, the home of Tuscany’s most important wine, where Marco will take us to two very special wineries. We’ll have time for a stroll through the town and aperitivo, of course. Dinner in a wonderful restaurant in Montalcino.
Day 5: After breakfast we will spend the morning making schiacciata and crostata with the stoneground flour from our visit earlier and preparing an easy lunch. In the afternoon, we will visit the ancient spa town of Bagno Vignoni, which has a sixteenth century thermal pool as its central ‘piazza’ and has long been an oasis thanks to the healing waters. We’ll have free time to spend here (maybe some might like to relax at the spa and see why people have been coming to these hot springs since Etruscan times). Dinner will be a classic Tuscan bistecca cooked over coals at the villa for our last night together.
Day 6: Breakfast and goodbyes!
Retreat cost per person: 2,200 euro in double occupancy, single supplement: 600 euro (3 available)
What is included in the price:
5 nights accommodation in a beautiful Tuscan villa
day trips and transport included in the itinerary above
Winery visits and tastings
Cheese tasting and farm visit
5 healthy breakfasts, 4 lunches and 5 dinners, including two meals out at local restaurants
all wine during meals
Two cooking classes
Two cheesemaking classes
Cheesemaking equipment to take home
Wine tastings and pairings with a certified sommelier
Not included in the cost:
Airfare and travel costs to and from the villa
Travel insurance


We will be based in the Val d’Orcia, an untouched, beautiful valley lying roughly between Siena and Orvieto with the most picturesque, unique Tuscan landscape. Think cypress trees and undulating wheat fields and every film set in Tuscany that you can think of from The English Patient to Gladiator. The villa that we will call home for the retreat is set on a hill top with 360 degrees views of the valley. Villa Pienza is a beautiful, traditional Tuscan home with 6 bedrooms and 6 bathrooms, air conditioning and wifi. There is an 18 ft (5.5 meter) long salted, heated pool, several communal kitchens, a cosy loungeroom, a pool table, outdoor and indoor dining spaces and a vegetable garden at our disposal.
All the rooms are double but three are available for single occupancy at an additional price of 600 euro (first come first served) — if traveling alone but you would like the doubly occupancy rate and don’t mind getting to know a roommate, we will be happy to pair you in a twin room with someone else wanting to do the same thing. Please quote the room name when booking if you have a preference:
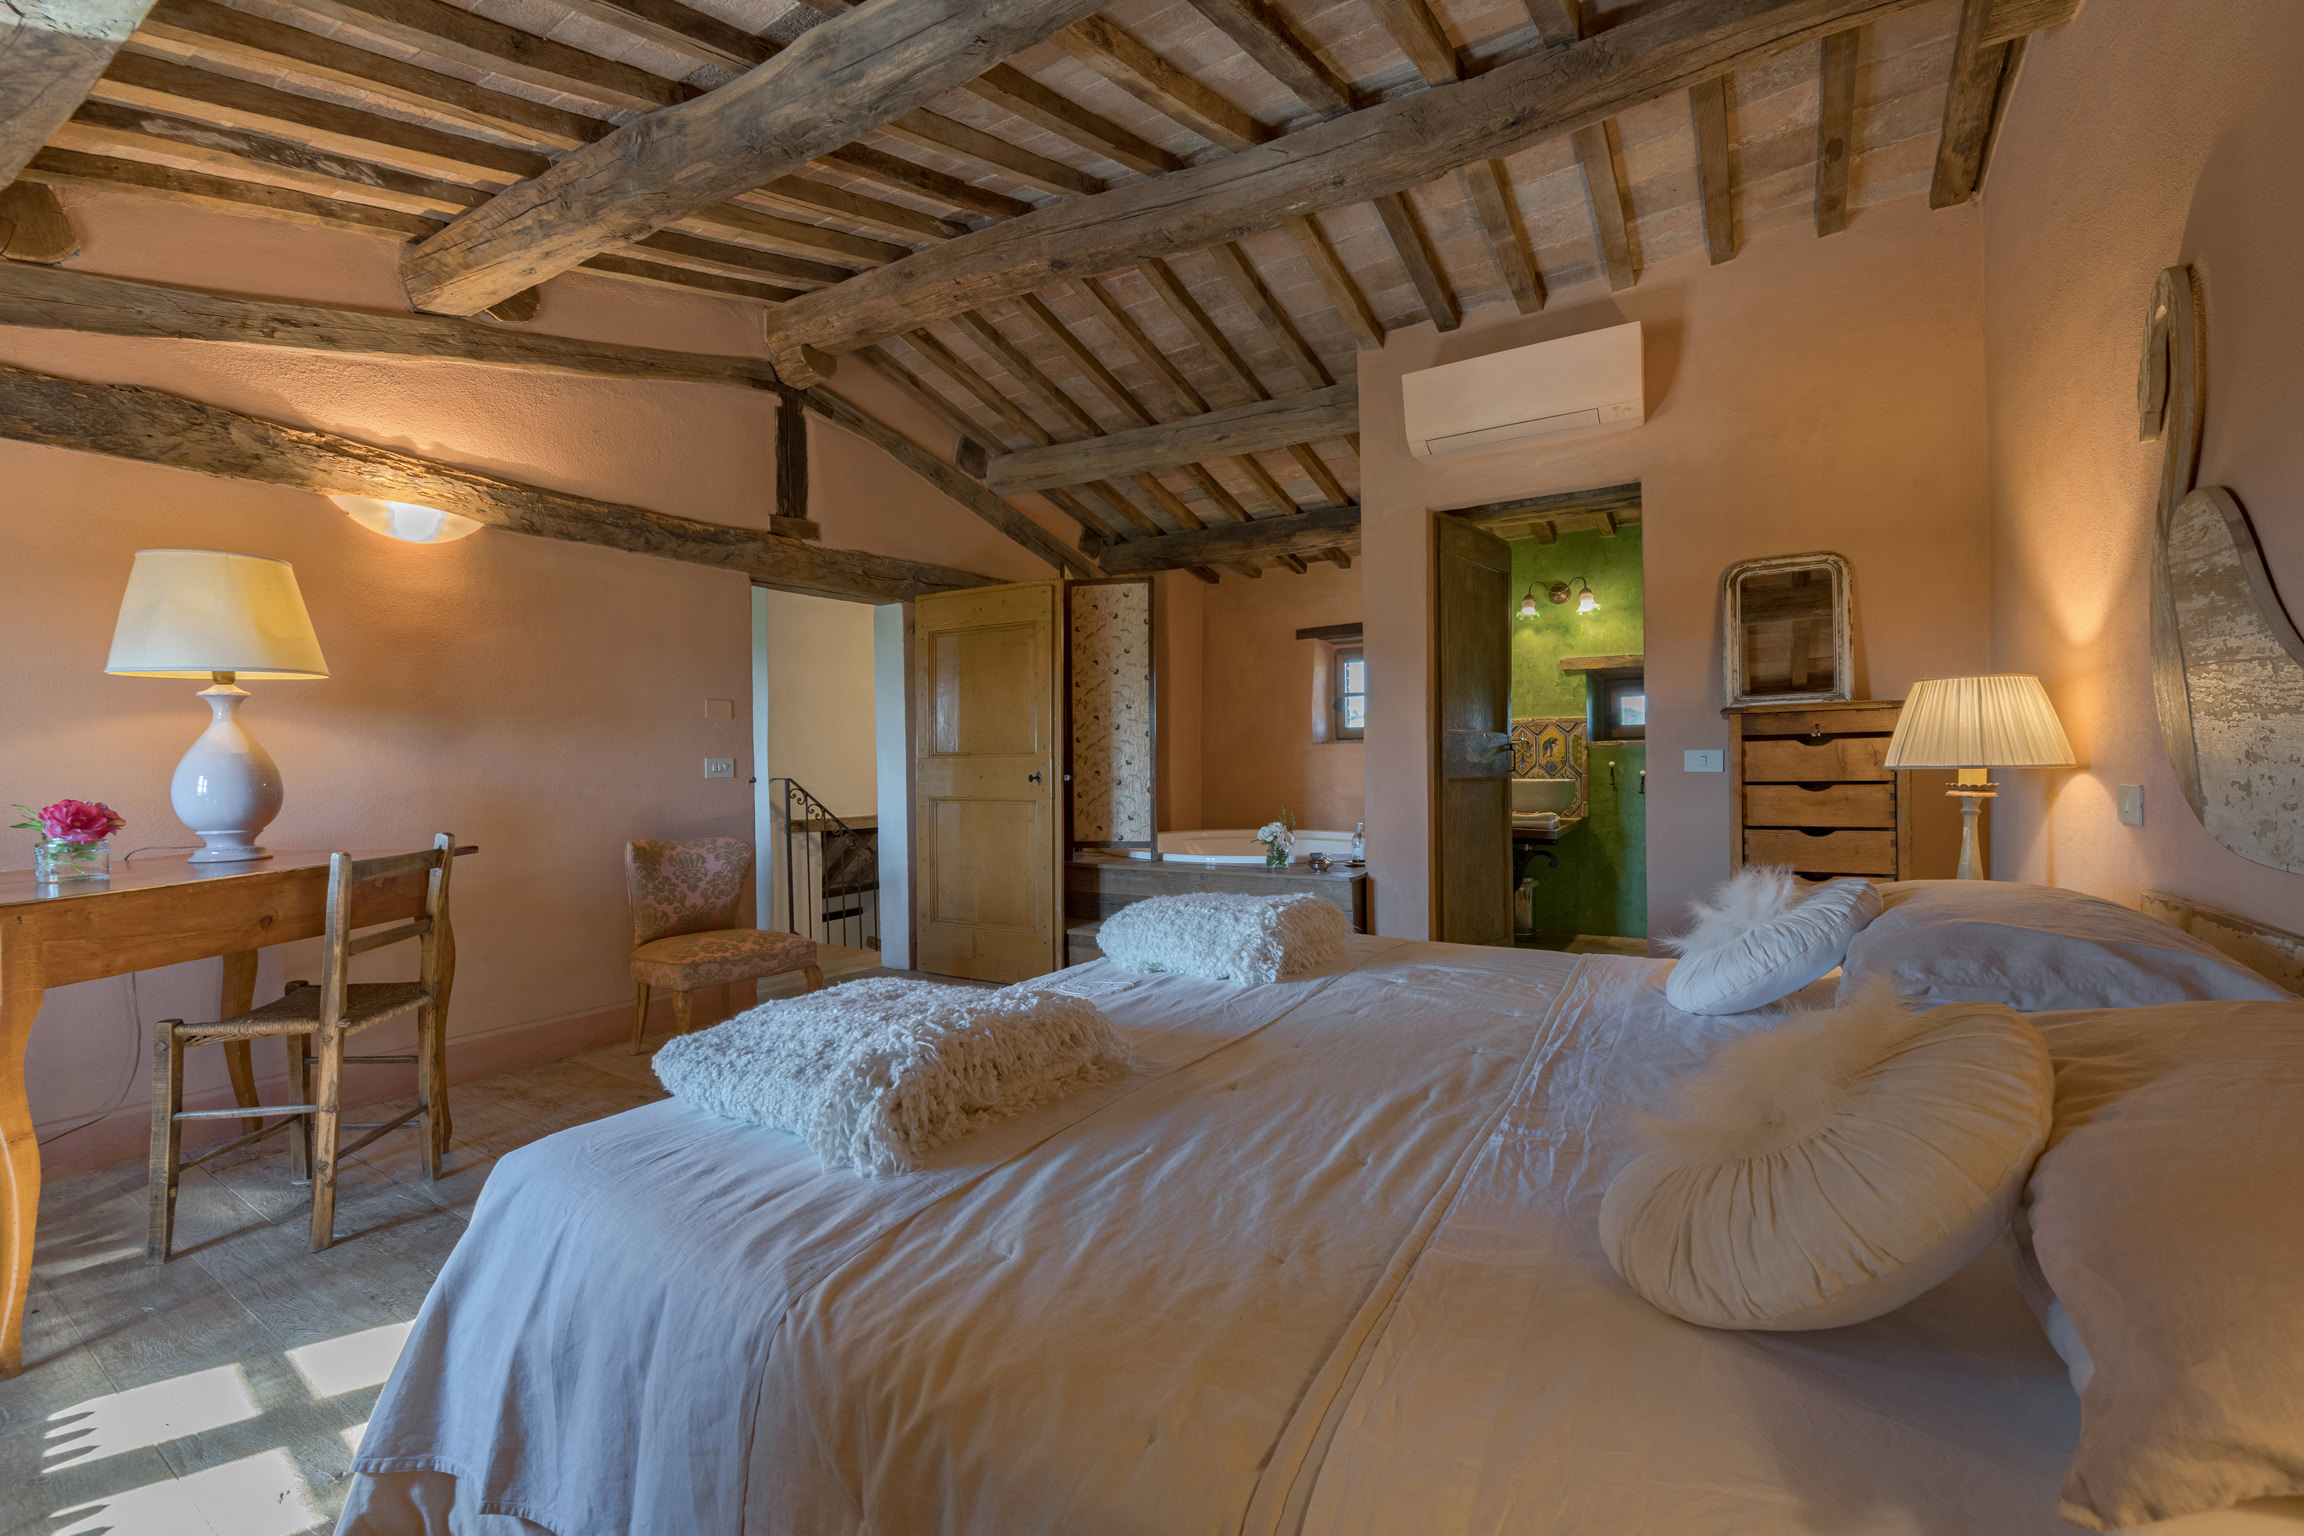
PRINCESS ROOM – on the ground floor, this room is named for the romantic, handmade canopy over the double bed (cannot be made into twins). Ensuite with a huge double head shower. Also available as a single.
SWAN ROOM – this large room upstairs has a super king size bed and a huge hydromassage jacuzzi along with an ensuite with shower. Special for a couple but this can also be made into twins.
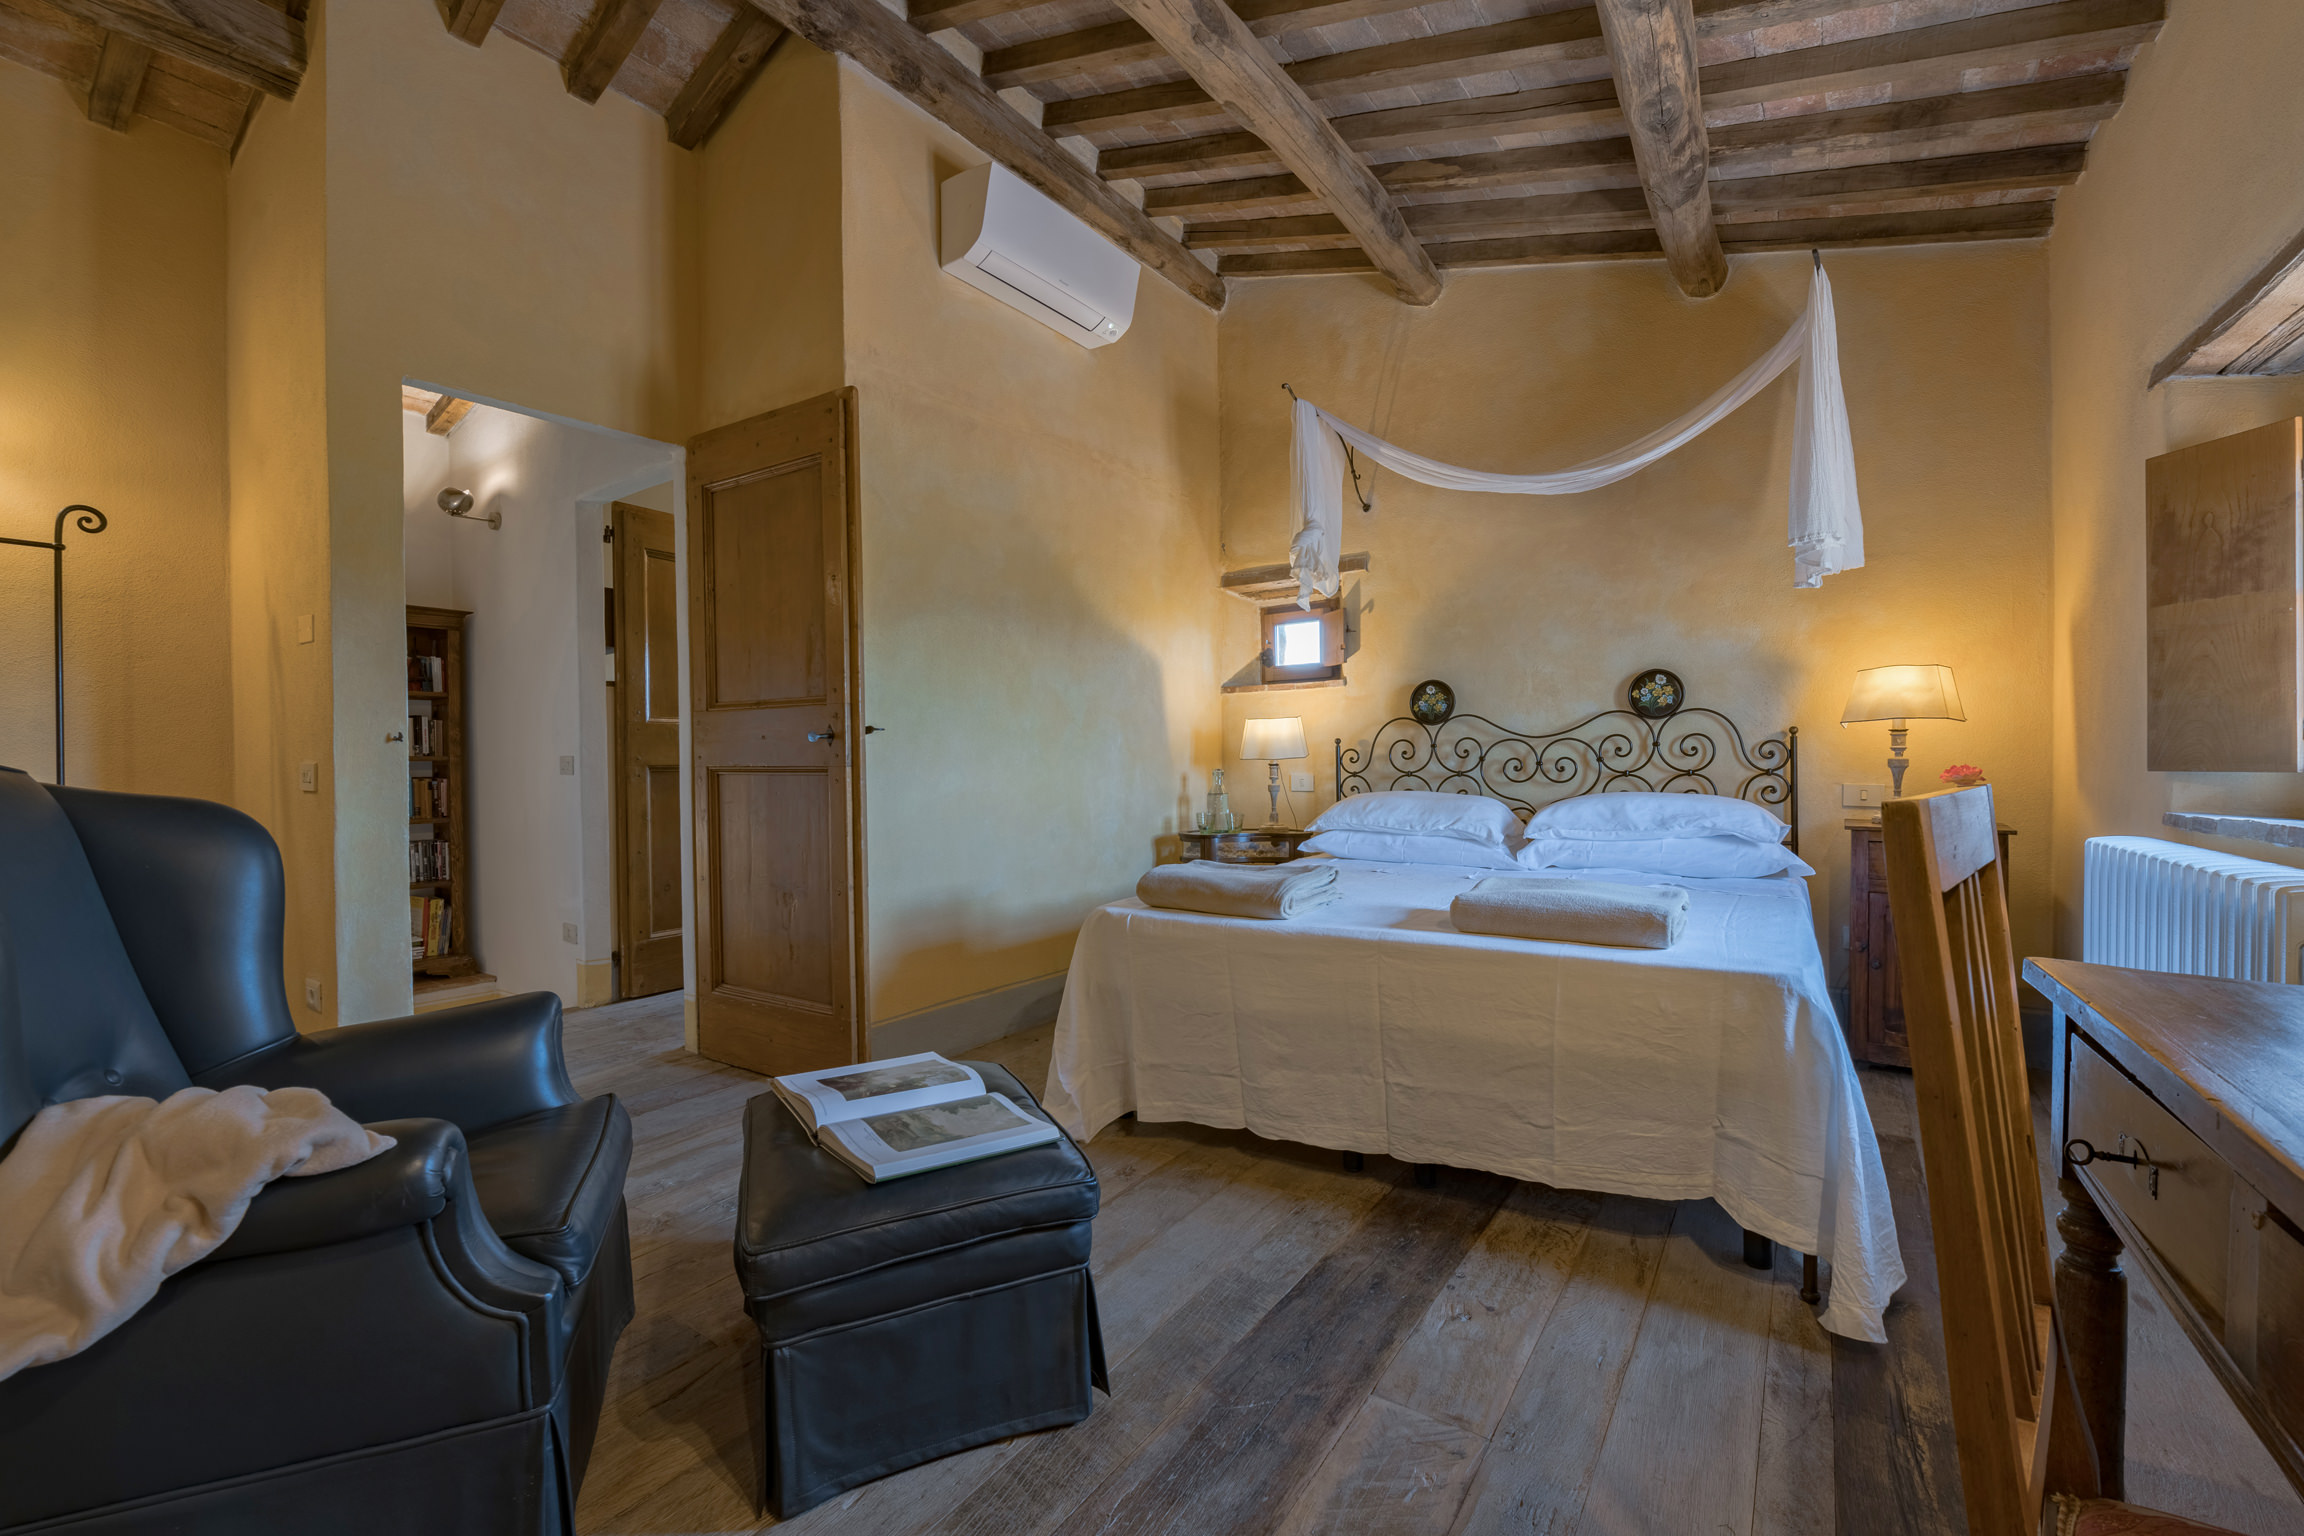
SKY ROOM – second bedroom upstairs with beautiful pale blue walls and double bed which can be made into twins, and an ensuite bathroom with double sinks and double shower heads. It shares a communal loungeroom with a pocket terrace with the peach room.
LILLA ROOM – a charming room with special vintage pieces, this bedroom has an external bathroom with a hydromassage tub and opens onto the dining room on the ground floor. Available as a single.
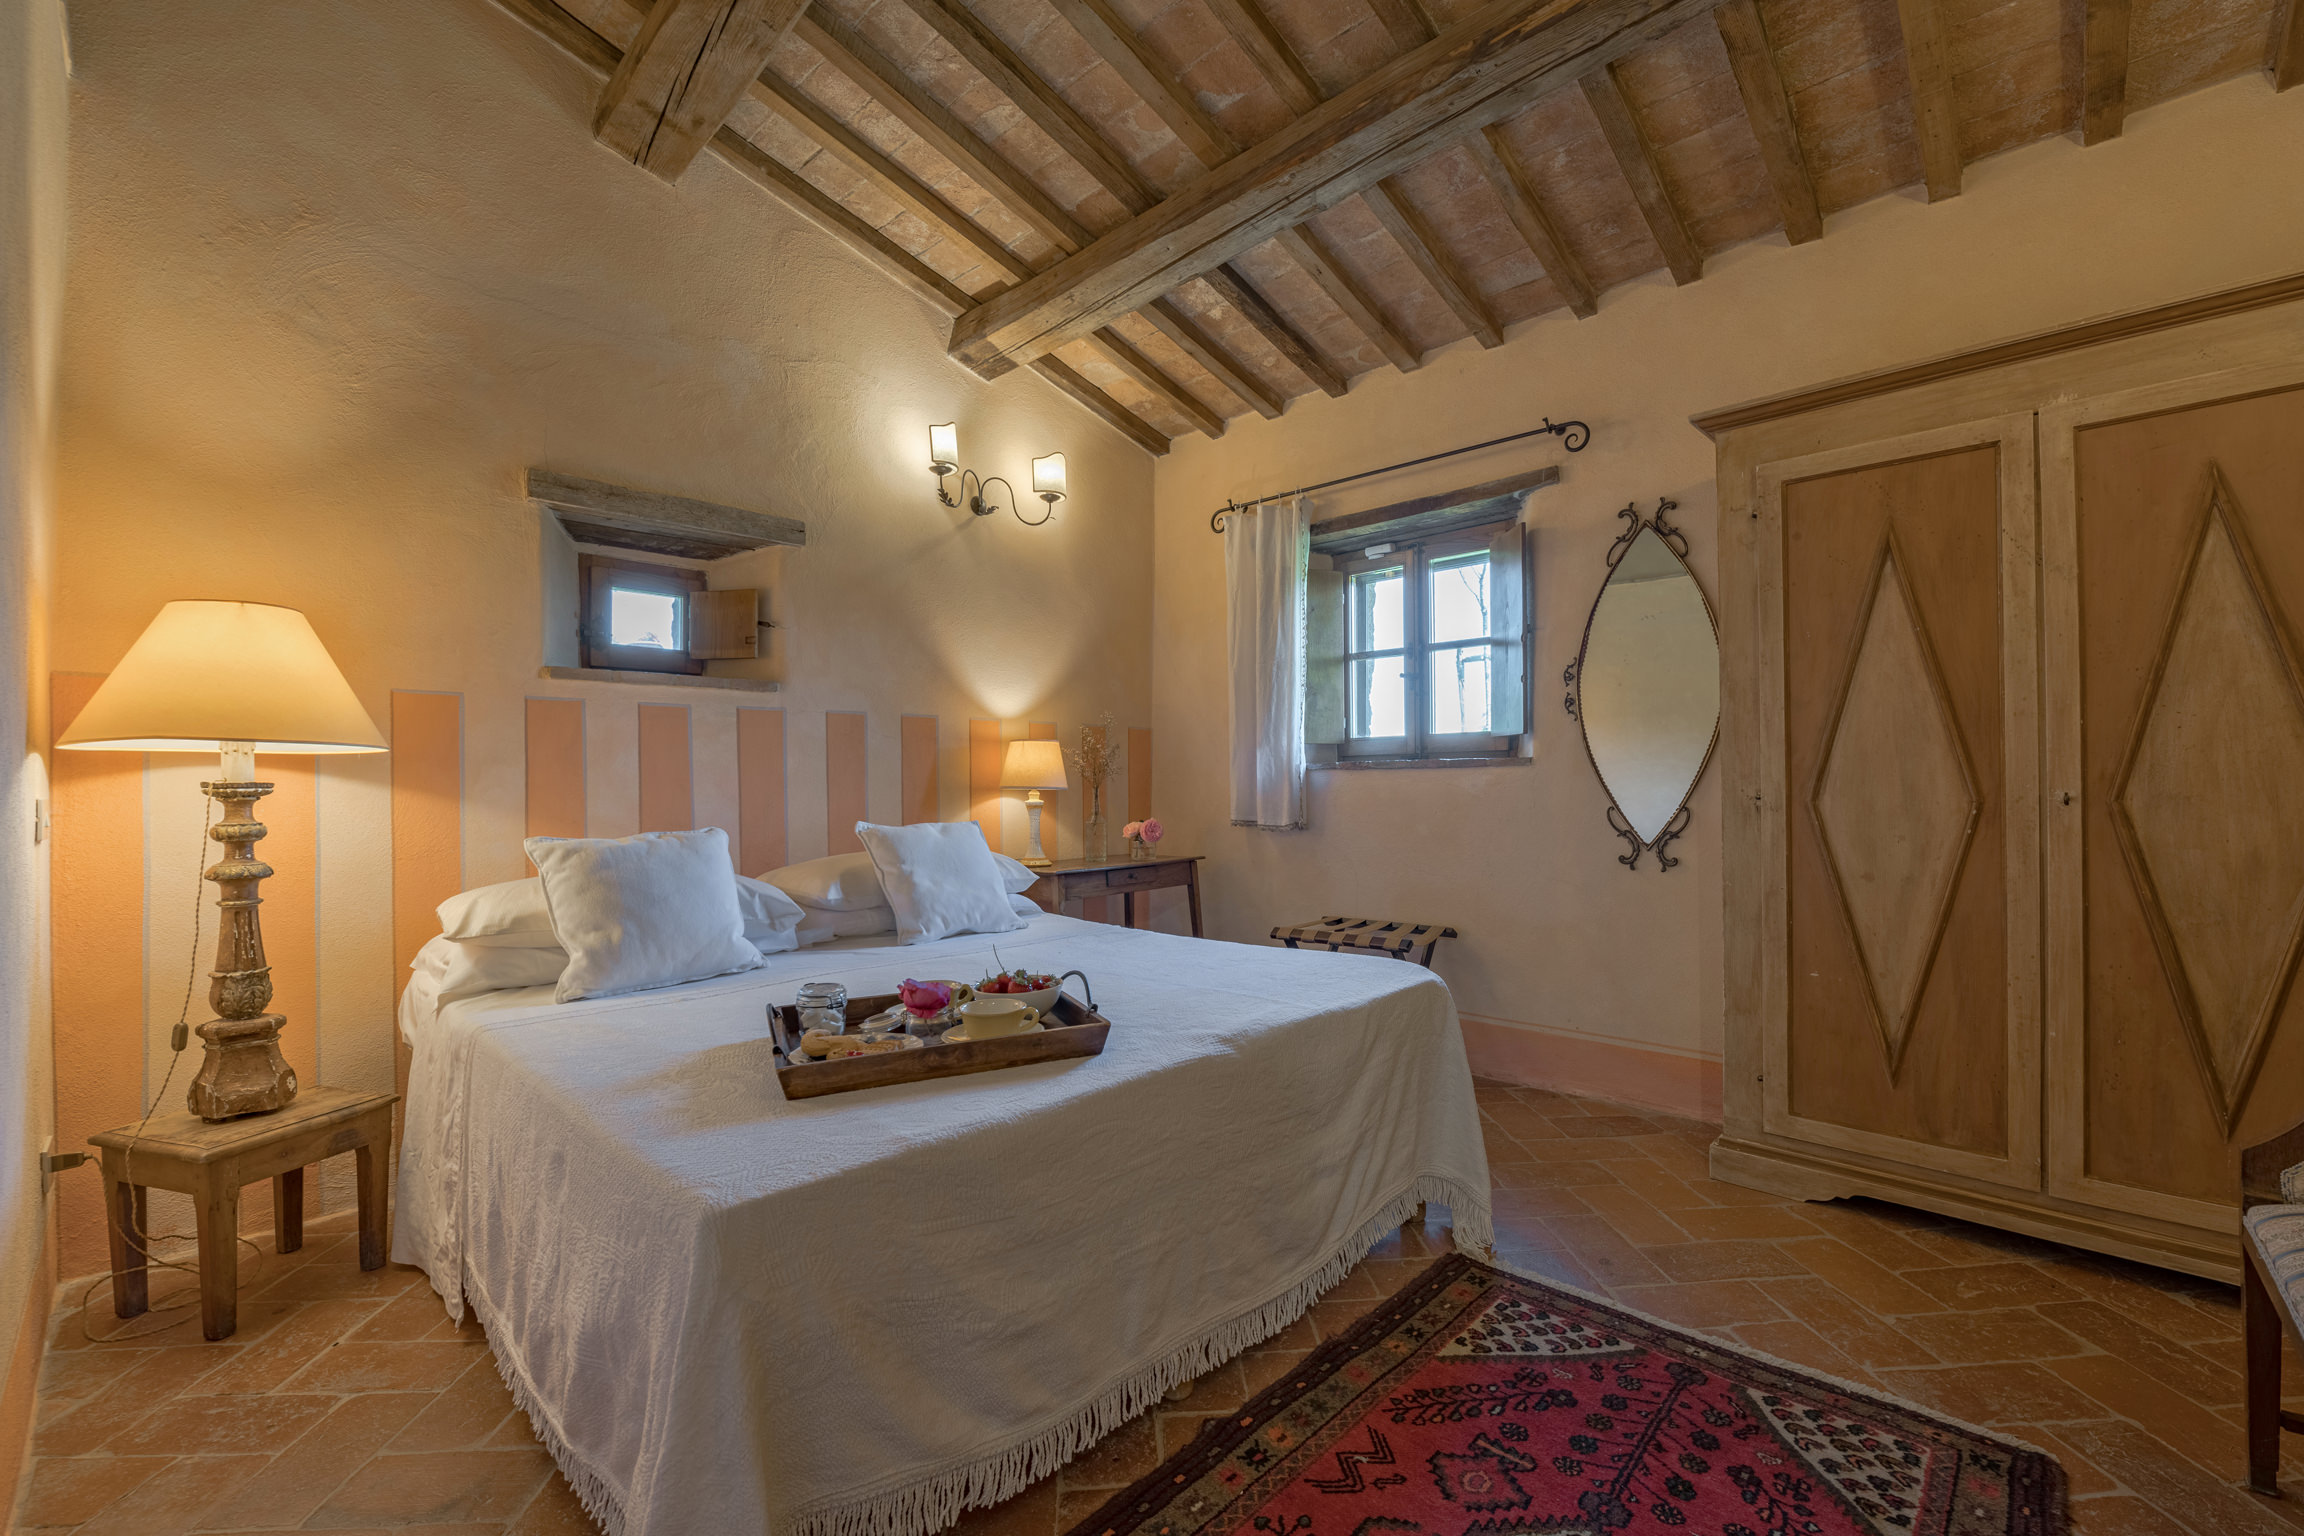
OCHRE BEDROOM – an upstairs room fitted out in neutrals, with an ensuite that has a hydromassage tub. Available also as a single.
PIENZA ROOM – this elegant ground floor room can be a double or twin shared room and has an ensuite bathroom.
To book your place:
We require a deposit of 50% upon booking which you can do directly here; the remaining 50% should be paid by 15 April 2020. When booking, please specify if there is a room you prefer (I will do my best to update the website with those that have already been booked, but the bookings may come hard and fast so please select a second preference too incase your first is unavailable) and whether you would like single occupancy (paying a supplement fee) or double occupancy. If coming with a friend or partner, please let us know so we can match up the bookings otherwise let us know if you are happy to share with any roommate. Also please let us know of any dietary requirements when you book. The booking is non-refundable but if you need to cancel, we can accept someone to take your place. You must have your own travel insurance to participate.
Getting here:
Pienza is in the province of Siena. The closest international airports are Florence, Perugia and Rome. You could rent a car from the airport, Pienza is roughly 80km from Perugia (1 hour drive), 115km from Florence (1 hour and 45 minutes drive) and 190km from Rome (2 1/2 hour drive). The nearest train station if you’re coming from Perugia, Florence or Rome is Chiusi-Chianciano Terme and from there we can organise transfers from the station for arrival and departure (about 36km, a 45 minute drive) or there are several local busses. For train schedules check the Trenitalia website.
Tuscany in June:
Expect hot weather! Tuscany in late June is very warm with long, sunlit days and warm, breezy evenings. We will do our best to ensure everyone is comfortable with the heat – there will be breaks at the hottest time of the day (for a dip in the pool or a rest in your air-conditioned room), cool drinks and fresh meals suited to the warm weather. We encourage you to dress comfortably for the heat and wear comfortable shoes for day trips and farm visits – and don’t forget your swimmers!
Your hosts:

Cressida McNamara is an award-winning cheese maker from the Southern Highlands of NSW in Australia, who creates raw artisan ewe’s milk cheeses alongside her husband, Michael at Pecora Dairy. The milk from their own flock of East Friesian sheep create cheeses which express the unique flavours of the terroir and the landscape of the farm. Theirs is the first cheesery in Australia to make raw milk cheese, which recently won the coveted national Delicious Produce Awards trophy (Photo above by Flore Vallery-Radot).

Emiko Davies is an Australian-born cookbook author who has called Florence home for over a decade. She was a restaurant critic for The Good Food Guide in Australia for several years and has written about Tuscan traditions and Italian cuisine on this blog since 2010 as well as for publications such as Saveur, The Guardian, Conde Nast Traveler, Gourmet Traveller and Corriere della Sera, to name a few. She has written three cookbooks on regional Tuscan cuisine. Photo above by Hana Davies.

Marco Lami, born and bred in Tuscany, is a certified sommelier and has worked with Australia’s top chefs, including Neil Perry at Rosetta, George Calombaris at The Press Club and Andrew McConnell at The Builder’s Arms. He was the head sommelier at Michelin-starred Il Pellicano and is currently the sommelier at Il Palagio at Florence’s Four Seasons Hotel.
Things to note:
The retreat will take place with a minimum of 6 and maximum of 12 participants. If we do not reach the minimum, the retreat will be cancelled and you will be refunded 100%. The itinerary is a guide; we reserve the right to make changes in case of bad weather or unforeseen circumstances where we may need to change the order of activities or replace some of the activities with something equally wonderful.
Retreat cost per person: 2,200 euro in double occupancy (single supplement: 600 euro)
To book now with your deposit click here or email: workshops@emikodavies.com

September 19, 2019
A guide to spaghetti con le vongole
 One of the most iconic Italian pasta dishes ever, spaghetti con le vongole is a firm favourite of our whole family — which is saying something as my eldest daughter is a dreadfully picky eater! Anyone who has to cook for a picky eater will appreciate that feeling of immense satisfaction (and perhaps relief) at being able to cook just one thing that everyone can enjoy together — well, for us, it’s this.
And it just happens to also be a very quick, very easy, healthy and sustainable dish to make (wins all around), and although you should take care to rinse and pick through the clams, as well as purge them if necessary (all of which can be done ahead of time), the actual cooking time is a cinch, making this also a good one for entertaining as you don’t have to slave over a stove all evening. We recently made this — and it was the star of the show — for a Sunday Suppers dinner in the hills of Florence at the breathtaking Settignano Tuscany Homes (some photos at the end of this post).
Here below I’ve put my guide to everything you should know about clams and preparing them, whether for spaghetti or a seafood stew or anything else (panzanella with clams? Why not?). You can also find a lot of this information in my second cookbook, Acquacotta.


What clams to use
While the native vongole veraci (literally meaning “true” vongole, ruditapes decussatus or venerupis decussata, otherwise known as Carpet shells) are the classic Mediterranean clam for this pasta dish, the name is a bit of an oxymoron these days as even in Italy the default clam has — thanks to its popularity — been replaced with its Pacific Ocean relative venerupis philippinarum (vongole filipine or Manila clam in English), introduced to and farmed in the Adriatic to satisfy the hunger for clams (the above photo shows these, note — they are never labelled as vongole filipine but as vongole veraci as in Italy sellers do not have to distinguish between these two clams).
Often sold next to the “vongole veraci” are lupini — smaller, grey clams with tasty meat, these are more likely to be wild than farmed and because they are found in the open sea, they tend to be quite salty! You will not need to use salt for this recipe anyway but you may even want to pay attention to how much salt you add to the pasta cooking water. The photograph of the final pasta dish is made with lupini and you can see them in the blue net below.
Whenever we come across them, telline (donax trunculus) are a really special treat. Also known as arselle in Tuscany or wedge clams in English, they are flat, small bivalves with a white to grey to lavender hue. Telline are harder to find and have a short season (May-September, usually easier to find outside of the hottest months of July and August) but are incredibly tasty. Marco often recounts stories of his father during their family holidays on the Tuscan coast wandering off to rake through the sand for hours and coming home with buckets full of arselle. Unfortunately, they’re not as easy to find anymore and there are many restrictions these days on fishing them, so when you do happen to find them at the market or the fishmongers, this is reflected in their price.
When we lived on Monte Argentario in southern Tuscany, you could find wedge clams along the shallow, fine, sandy beach of Feniglia (the same beach where the exiled painter Caravaggio died in 1610) and we loved to sit at a trattoria like Il Braccio, right on the beach, with sandy feet and the sea breeze in our hair and a plate of spaghetti with as-local-as-you-can-get clams and a glass of wine — pretty much the perfect meal.
You can really use any clam you like with this recipe, the procedure is pretty much the same. In Australia, you could even use pipis which are probably the closest thing to telline.

How to prepare clams
Clams are sold live and need to be prepared with care so that you are eating only the freshest clams and not grinding any sand between your teeth. To prepare clams before cooking, it’s traditional in Italian kitchens to purge them of any sand that might be inside the tightly shut shells – there’s nothing worse than biting into on sand while eating your pasta. The idea is to filter the sand out by soaking them in water. Everyone has different advice on how to do this — much of it, filtered down through family lore and a persistence of old wives tales.
I take the advice of lifelong clamming expert Hank Shaw, American journalist, forager and author of Hunt, Gather, Cook and the blog, Honest Food, both of which offer more in-depth advice on the subject.
The first thing to know is that most commercially available clams and mussels have already been filtered. If you’ve bought your clams in a supermarket or they are vacuum packed, they are likely to be ready to go – just follow step 1 below for weeding out any bad ones and step 5 in case there are any closed dead ones hoarding a shell-full of sand – trust me on this one, it sounds tedious but it could be the most important step! If you have even one of these shells (which although look closed, when tapped hard enough will break open easily), open in your pan while tossing, your entire dish will be ruined. If you’re sourcing them from a fishmonger and you’re not sure, just ask if they have already been purged.
If you need to purge the clams yourself, the best procedure is this:
Rinse clams quickly under water, weed out any with crushed shells or that are open and don’t move when touched or squeezed. Put the clams in a large non-reactive bowl (such as glass or ceramic) or a large shallow dish (such as a casserole).
Cover the clams in salt water by 2-3cm. Actual seawater (filtered to remove any sand) is best, of course, but otherwise use sea salt (not regular table salt) and water to a salinity of about 3.5% (or 35 grams to every litre of water). Fresh water will kill the clams. Try not to shock them to death by changing their temperature too rapidly so keep them somewhere relatively close to their current temperature. If they have been stored chilled (for example at the fishmongers), then you can use cool water and keep them chilled in the fridge, otherwise set them somewhere like in a cool corner of the room.
Purge for at least 1 hour. I find this time sufficient for clams bought from the fishmonger. If you leave them for significantly longer than that, check on them from time to time and change the water so they don’t die from loss of oxygen. Tapping or agitating them, they should close (perhaps slowly, but they should eventually completely close). The last thing you want is to forget about them all day and come back to a bowl of dead clams.
Remove the clams with a perforated spoon or with hands to a colander (don’t tip the water out directly into the colander as you’ll end up pouring any purged sand back over them).
You’ll see Italian fishmongers tapping, or bouncing, their clams on the counter to weed out any dead ones that look like they are closed – it’s useful to do this, as tedious as it might sound (if you’ve got little ones running around, they might like to help). With a plastic chopping board underneath, tap or bounce the clams one by one. Live ones will stay tightly shut. If there is a dead one in there, it will open when you do this – and will likely be full of sand that you’ve just saved from getting into your sauce. Now you’re ready to cook them.

Spaghetti con le vongole
In Italy, mussels and clams are often sold in plastic nets weighing either 500 grams or 1 kilogram, so the recipe here is for cooking 1 kilogram of clams. It would easily feed 6 but if you can buy by the weight, you can pare this back to about 750 grams of clams and 320 grams pasta for 4 serves. Otherwise if you only need a smaller portion, you can also prepare the vongole as follows then save the remaining sauce and clams — Marco likes to pull the meat out of the clams first — and you can freeze this sauce, ready to defrost, reheat and toss through spaghetti in an instant. This is based on my recipe for spaghetti with wedge clams from Acquacotta, my second cookbook.
Serves 6
1 kilogram clams
3-4 tablespoons olive oil
2 cloves of garlic, chopped
250 ml dry white wine
500 grams dried spaghetti
handful of flat-leaf parsley, chopped
Rinse clams quickly under water, weed out any with crushed shells (a tiny chip or crack are usually fine) or that are open and don’t move when touched or squeezed (rule of thumb: if they are open before cooking, they’re dead. If they don’t open after cooking, they’re dead. Throw them away). Purge the clams, if necessary, for at least 1 hour (see how and when to purge clams, above). And regardless of whether or not you’re purging, do not skimp on step 5.
Put a large pot of water on to boil for the spaghetti.
In a wide skillet over medium heat, place 2 tablespoons olive oil and the garlic. Let sizzle for 1 minute until pale golden, then add the clams. Toss briefly to coat the clams, then add the white wine. Turn up heat to high then cover and cook, giving a good shake here and there, for 1 minute and a half longer, or until all the clams have opened. Remove from heat and set aside. Note that you won’t need any extra salt here, but you can add ground pepper or chilli to taste.
When the water is boiling, add salt (1 teaspoon for every litre of water is ideal), then the spaghetti and cook until al dente (see the recommended time on the package). Drain, reserving about 60 ml of the cooking water if needed. You’ll need a recipient large enough to toss everything together – use the pot that the pasta was cooked in if the skillet is too small to hold everything. Toss the spaghetti with the remaining olive oil, parsley, the clams and all their juice. If the pasta needs any extra liquid to keep it all juicy (and this should be juicy!), add the reserved cooking water and perhaps another glug of oil and toss it all together vigorously to create a creamy emulsion. Serve immediately with empty bowls on the table for the discarded shells.
A tip: You can make a really creamy liquid the way Marco loves to do it by draining the liquid from the clams and placing this liquid in a skillet. Then take the pasta out a couple of minutes before it’s ready and finish cooking them in the simmering clam liquid. In this shallow liquid, the starch in the pasta will come out, helping create a creamy sauce. I like to still have a small cup nearby with some of the pasta cooking water just to top up when necessary — the sauce is what makes this dish. Marco also likes to shell all the clams when he makes this (I have a feeling it’s so he can eat it quicker, without having to fiddle with shells), but I love seeing the shells eat in this dish — and if you ask me, you eat with your eyes as well, you know — and I don’t mind pulling the meat out of the shells as I eat. As a result, we have come to a compromise. We usually remove half the shells and leave the other half in their shells.


August 8, 2019
A handful of ingredients. Pasta with mascarpone + walnuts

I am instantly drawn to recipes that require only a few ingredients. I don’t know what is more appealing, the simplicity of the recipe or the curiosity that draws me in: will it really be that good? I often find these recipes in old cookbooks. Somehow I think we over complicate things now, adding more than what is necessary or perhaps covering up for less than delicious ingredients. Let’s face it, when you’re cooking with a handful, or less, ingredients, you need to begin with the best ingredients you can afford. Punto (that’s Italian for ‘period’!). And then less is definitely more.
I mean, what a beautiful thing a simple tomato salad is with just salt and olive oil (maybe even some mozzarella) when it is made with real, in season, local heirloom tomatoes and punchy extra virgin olive oil — need I say more?
But I’ve also made walnut cake with three ingredients (four if you count the lemon zest that adds a nice fragrance).
A favourite all purpose cure all meal of scrambled eggs and anchovies only requires four, including the herbs.
Give me a plate of artichokes and all you need is lemon, parmesan and olive oil to turn them into my favourite salad ever and this baked whole fish on a bed of garlicky, herby mushrooms only needs six things and it’s got your main and side dish covered.
So this recipe is one of those to add to this list of simple, yet totally satisfying dishes made with a handful of ingredients: pasta, butter, mascarpone, parmesan and walnuts. It’s not my recipe, but it’s my interpretation of a beautiful one out of Elizabeth David’s Italian Food, a cookbook originally published in 1954. And another plus of simple recipes — they usually don’t take long either. This sauce is put together in minutes, while the pasta is cooking so dinner is ready in less than 10 minutes.
If we are talking good ingredients probably the hardest thing to get may be very good, fresh mascarpone — it is easy to make your own. I do this when I’m not in Italy and I love it (and all you need is cream and lemon juice and although you do want to do it the day before, it requires extremely little effort. You can read how in this post. But otherwise, use store bought mascarpone for this quick fix dinner. It’s one that Elizabeth David herself describes as “rich” so you may want to have it with a nice crunchy, zingy salad to get your greens in and cut through the richness.


Pasta with mascarpone and walnuts
Serves 3
240 grams dried pasta (Elizabeth David calls for chiocciole, shells)
a knob of butter
150 grams of mascarpone
60 grams walnut kernels, finely chopped
60 grams of finely grated parmesan cheese
Place the pasta in a pot of boiling, well-salted water and check the suggested cooking time on the packet (shave off one minute for al dente pasta).
When the pasta is half cooked, melt the butter and mascarpone together in a skillet wide enough to toss the pasta in later — do not let the mixture boil, you just want it to melt. Make sure the table is set and your dining partners are sitting at the table, ready and waiting. This kind of pasta sauce is best consumed right away!
When the pasta is 1 minute away from it’s cooking time, drain, reserving about 100 ml of the cooking water separately. Pour the drained, steaming pasta into the pan with the warm, melted mascarpone, and, off the heat, toss, adding a splash or as much as you need of the pasta cooking water to help the sauce coat the pasta. Add the walnuts and the parmesan, toss together and serve immediately.
July 28, 2019
Ricotta, feta and mint ravioli on a windswept Greek Island

I knew before I even got there that I would fall in love Andros, a mountainous, rugged Greek island, the northernmost of the Cyclades archipelago. When Allegra asked me to host part of a creative workshop at her stunning, cliffside B&B, Melisses, that sits between Chora, the capital, and the port, I jumped at the chance!
Mornings began with beautiful breakfasts of summer fruit, copious amounts of thick Greek yoghurt, tahini, and Allegra’s homemade oven-roasted granola, flecked with flower petals and plenty of nuts, plus “freddo espresso”, the Greek version of caffe shakerato, in other words, espresso and ice shaken together. Allegra led us on visits around the island, including an evening saunter through Chora, the charming capital of Andros, and a beautiful lunch on a crystalline beach at a taverna where, plastic chairs and tablecloths and all, I could have sat and ate and drank the entire week! Greek salad with a slab of local cheese, tzatziki with a garlicky bite, grilled sardines, moussaka, stuffed zucchini and tomatoes, the ever-present vlita (boiled amaranth greens) and ice cold slices of watermelon made the perfect meal.


Back at Melisses, we made ravioli with a Greek touch (actually these are inspired by a filling you can find in Cyprus), filled with ricotta, feta and mint that we picked out of the garden (the recipe follows below). We picked green beans and young red onions right out of the vegetable patch for a delicious side dish where the blanched beans are tossed in breadcrumbs, onions, herbs, lemon juice and oil. I also made a version of my favourite chocolate cake, dotted with fresh cherries and slightly under-baked so that the centre remains fudgy and a sponge soaked in fragrant fig leaf syrup and topped with Greek pistachios.
In the afternoon, Kathryn Davey introduced us to vegetable dyeing — something I was easily convinced to get hooked on! We collected plants from around Melisses, fig leaves and rosemary and more, while Kathryn also showed us beautiful pinks from madder, yellow from tumeric and there was nothing more mesmerising than dunking swatches of fabric, silk scarves, linen aprons and cotton bags in the unctuous buckets of indigo dye. Kathryn is a wonderful, patient, sensitive teacher, I wish we could have spent an extra week together making things! For dinner, Marco prepared our favourite pizza dough for woodfired pizza (I even made a ‘dessert’ pizza with homemade mascarpone) and talked us through a Greek wine tasting.


My favourite activity hands down was a visit to a hidden, traditional fisherman’s cottage with no electricity or hot water in a rustic spot unreachable by car. Sea urchins were pulled out of the sea to snack on under the trees after a cooling dip in the water. Here, the water arrives right at grape vines that trail along the dry ground next to eucalyptus trees and wild figs.
The white washed cottage provided our lunch venue, for which we had prepared, picnic style, an array of delicious things. I made some savoury tarts (from a recipe in Acquacotta), and a favourite summery bean salad inspired by Patience Gray’s Honey from a Weed (her whole story on Naxos reminded me exactly of this day). Letitia made babaganoush from eggplants out of the vegetable patch that were blackened in the dyeing ashes of the woodfired oven the night before and she picked the sweetest apricots I’ve ever had and hand-staining mulberries right off the trees for dessert and orange wine (made right below the cottage) was passed around. A most memorable summer experience.


Ricotta, feta and mint ravioli
400 g plain (all-purpose) flour, plus more for dusting
2 eggs, plus 5 yolks (set aside 1 egg white for later)
2 tablespoons water
80 g feta cheese
100 grams butter
a large handful of fresh mint leaves
grated parmesan cheese, for serving
Serves 4 generously
Put the flour in a bowl and make a well in the centre. Place the eggs, 4 of the yolks (save one for the filling) and water in the well. With a fork, begin to whisk the eggs, incorporating the flour little by little until you can no longer whisk with the fork. Use floured hands to combine the rest of the flour until you have a smooth, elastic dough. Wrap in plastic wrap or pop under a bowl on the bench and let it rest at least 30 minutes.
For the filling, mix the ricotta, feta and one yolk, along with a good pinch of salt, until smooth. Set aside (if necessary, in the fridge) until needed.
Cut the dough into four pieces and dust with plenty of flour. Roll out one portion of the dough using a pasta machine or rolling pin at a time, keeping the rest covered. The dough should be thin enough so that you can see your hand through it.
Working on strips of pasta at least 10 cm (4 in) wide and as long as you like, place 1 teaspoon of filling onto the pasta sheet about 5 cm (2 in) apart. Beat the leftover egg white from earlier and brush it all around the filling. Then place a sheet of pasta of the same width and length over the top and, working quickly, press the pasta sheet down carefully around each spoonful of filling, being careful not to trap too much air. Work from one side to the other and, if needed (and if you have two extra hands helping you), work one raviolo at a time. With a fluted pastry wheel cutter or a sharp knife, trim the ravioli so that you have a 1 cm (1/2 in) border around the filling. Continue until you finish the pasta and filling.
Cook the ravioli immediately in a saucepan of salted, boiling water over a medium heat until al dente, about 5 minutes.
In the meantime, make the sauce by melting the butter in a large frying pan over a medium heat. Add a ladleful of the pasta cooking water and swirl the pan to create a slightly emulsified sauce.
When the ravioli are ready, drain them with a slotted spoon, add to the butter sauce, along with the fresh mint leaves and toss gently to coat. Serve with some grated parmesan cheese, if desired.
June 5, 2019
Florence food and wine summer workshops


We have had such an incredible response to our White truffle and Wine retreat in November that we couldn’t wait to share a few more dates for similar — but ‘mini’ versions — food and wine focused workshops. The first will be in July 2-5, 2019, and the second will be in September 10-13, 2019, which will coincide with the wine harvest season. We plan to repeat these workshops in 2020 too so let us know if you have an interest in visiting next year!
So what will these summer workshops be like? Think a couple days of idyllic eating and drinking in Florence with me and my sommelier husband Marco Lami.
We really want to show off our neighbourhood, Settignano, so we will spend most of our time here. It’s beautiful, it’s not touristy, the views are incredible and it’s only 15 minutes drive out of the historic centre of Florence. We’ll start with a welcome aperitivo at our favourite wine bar, tasting some wonderful things and getting to know each other. We’ll have a day dedicated to wine where we visit a local winery up the road and do an explorative and chatty wine tasting unlike any other under the guidance of a passionate and immensely knowledgeable sommelier who has worked in Melbourne’s and Tuscany’s top restaurants (that’s Marco) and finish up with a classic Florentine dinner in an old school trattoria. The next day will be all about food, spending a morning at the market, tasting things, buying seasonal produce and browsing the flea market, then we will cook a hands on Florentine feast (and eat!).
Dates: July 2-5, 2019 + September 10-13, 2019
Location: Florence
Cost: From 480 euro per person (see below for details)
This workshop has an option with a gorgeous accommodation package in our neighbourhood of Settignano where we will be based for the tasting and cooking lesson, but also an option to just join us without the accommodation if you’ve already got your own thing organised or you live in Florence.

Day 1: In the early evening, join us for a welcome aperitivo at our favourite wine bar in Settignano. We’ll get to know each other, introduce you to the neighbourhood and taste some delicious things with a couple glasses of wine.
Day 2: A wine-focussed day. We will visit an organic winery in the Florentine hills in the morning and taste their hand-crafted wines. Then, sommelier Marco Lami will lead us on a unique, conversational, delicious wine tasting paired with a light lunch, followed by some free time in the afternoon. We meet back for dinner in a local trattoria that feels like stepping into nonna’s dining room.
Day 3: We meet in Florence to spend the morning at the best local market. I’ll introduce you to my favourite stalls and seasonal foods, from fresh produce to coffee and pastries to panini with plenty of time to taste things and for shopping at the flea market too. Then we head up to the Florentine hills for an afternoon of cooking and we end with an early dinner with a view over the countryside and wine.
About the accommodation and our workshop venue: Nestled in the hills above Florence in my own gem of a neighbourhood, Settignano, is this beautiful home away from home. Here, with views over the olive tree-studded Florentine countryside we will be cooking and tasting wine. For those who choose the accommodation package, you’ll also get to enjoy the beautifully appointed, luxurious rooms of the Vespro house and the wonderful swimming pool. The house has air conditioning and three double bedrooms each with ensuite, as well as shared living rooms over two floors. Check in is between 4-6pm and payment for the accommodation is directly at the venue.
Workshop only: 480 euro per person
Price includes generous welcome aperitivo, winery visit, wine tasting, dinner at a trattoria, market tour with coffee, pastry and panino, cooking class with wine, transport during the workshop. Not included is breakfast, accommodation, travel insurance, transport to and from the workshop or getting to Florence.
Accommodation + workshop package: 960 euro per person (double occupancy*)
Price includes 3 nights accommodation (and did I mention they have a beautiful swimming pool? See the photo below!), breakfasts every morning and the entire workshop above. Not included: 3 euro city tax, travel insurance, transport to and from the workshop or getting to Florence. *If you would like the double room as single occupancy only there is an additional 285 euro single supplement fee.
Payment for the workshop is non-refundable. However, in unforeseen circumstances or change of heart, we can accept change to a different date or you can find someone else to take your place.
To secure your place now, book your spot directly here.
For any further questions, email me at info@emikodavies.com — we look forward to sharing our table with you!


May 20, 2019
“Olive leaf” pasta with tomato and mozzarella

I’m so in love with this pasta — just two ingredients (three if you count a splash of water), spinach and durum wheat flour, rolled and coaxed into the shape of olive leaves. No eggs. It’s basically a green dough for orecchiette, the classic Pugliese ‘little ear’ pasta shapes. Because they are hand-rolled, orecchiette are generally a little thick and when cooked have a good bite to them, they hold their shape well and so they are good with chunky sauces, especially a vegetable sauce — the classic sauce is with cime di rapa, flavoured with a touch of garlic and anchovies, but tomato sauce is the go-to when cime di rapa are out of season. Like orecchiette, these ‘olive leaves’ are hand made with the help of a butter knife and are pulled against a wood board to create a long, leaf shape with a rough side that is particularly good for catching sauce.
These photographs (except the last one of the finished dish) are by Florence-based Danish photographer Pernille Stockmal, who wanted to take some photos of me making some coloured pasta, so for a bit of fun I made squid ink tagliolini as well, but these foglie di ulivo, olive leaves (thank you dear husband Marco for the idea) really stole my heart. We were shooting at my favourite location, Valdirose, indoors, but when it came to the foglie di ulivo I suggested we take the tray outside and sit in the dappled light to make them. Pernille said, “But would that be strange to be making pasta outside?” “Of course not!” I answered and pulled out my phone to show her photos of the tradition of nonne making orecchiette outside on the streets of old Bari (if you don’t know of them, as Pernille didn’t, here is a video by Elizabeth Minchilli where you can see the trays full of pasta and chairs outside for the busy nonne!). It was the perfect inspiration. I sat down to make the foglie di ulivo and baby Luna climbed up onto my lap to squish some pasta in between her chubby hands and these photos were the result!


Foglie di ulivo con pomodoro e mozzarella
‘Olive leaf’ pasta with tomato sauce and mozzarella
Note: For the greens, you will need about 1 kilogram of fresh spinach — or try cime di rapa or nettles, any seasonal greens will do here — boiled or steamed, drained and pureed finely in a food processor or blender until paste-like and very smooth. Of this, measure out 200 grams for the pasta. For the water, quanto basta means as much as you need , a few splashes/sloshes (no more than about 100 ml) should do it.
Serves 4
400 grams of semolina rimacinata (fine ground durum wheat flour)
200 grams of pureed, cooked spinach or other greens (see note)
lukewarm water, quanto basta (as much as you need)
Combine the semolina with the pureed spinach to get it to a quite firm, smooth dough, adding a splash or two (or three) as needed of lukewarm water. Once the dough is well combined, let it rest under a bowl 15 minutes minimum, 30 is better.
Keeping the ball of dough under a bowl or very lightly damp teatowel so it doesn’t dry out, break off a few small pieces of dough the size of a chickpea, roll them into thin logs (or twigs, really) with three fingers, about 4cm long, tapered towards the ends (when you get into a rhythm this is easy to do by putting pressure in the right places with your outer fingers as you roll). Then with one hand holding the little log, use a butter knife to scrape from the centre of the log outward to make a flat leaf shape. Place in a single layer on a board (I always prefer working on wood for pasta) dusted with semolina. Continue with the rest of the dough. You can let this pasta dry out in the sun or on a bench top before cooking if you would like to conserve it for several days, or you can cook them right away.
Cook for 3-5 minutes or until al dente. This is delicious with a simple tomato sauce and torn pieces of mozzarella (recipe follows)!
Tomato and mozzarella sauce
3 tablespoons extra virgin olive oil, plus more for drizzling
1-2 garlic cloves, whole but peeled
400 ml tomato passata
handful of basil leaves
150 grams of fresh buffalo mozzarella, torn
Heat the olive oil and garlic gently over low heat in a skillet. I like to smash my garlic slightly with the side of a kitchen knife but keep it otherwise whole and simply infuse the oil with it rather than chop it up but if you prefer to have the garlic chopped finely in the sauce, go right ahead and do that. When the garlic begins to sizzle and turn golden (watch that it doesn’t burn) and fragrant, you can remove the cloves. Tip in the tomato passata, season with some salt and pepper and add some water — about 60 ml or 1/4 cup or so. Bring the sauce to a lively simmer and let it cook 10 minutes. Throw in the basil leaves, torn up if large, whole if small. Serve with the pasta and scatter the mozzarella pieces over each dish. Finish with a drizzle of olive oil over the top.
May 5, 2019
Why our favourite pizza dough is Roman

My husband Marco has been on the search for his perfect pizza dough. He has long been the one in our family who loves making and experimenting with dough (like with this recipe for Bonci’s focaccia pugliese). You see, he loves pizza and bread and it’s no exaggeration to say he could happily live off them alone if it weren’t for the slightly negative reaction he gets when he eats it, thanks to a wheat intolerance. He has been managing it by eating bread and pizza sparingly (as sparingly as one can when it is your favourite thing to eat) and by choosing, when he does eat it, the best quality he can.
So making our own dough has been great as we can choose the flour (our favourite kind is a low gluten, semi wholemeal, stone ground ancient grain! That’s quite a mouthful but we are lucky to have a number of great options that we have access to here in Tuscany), we can give it a long, slow rise with a very small amount of yeast (which translates to easier to digest) and these things not only appear to help Marco eat pizza more more often, they’re fun too!


Cue the arrival of our new pizza oven arrived — an Ooni Pro Outdoor Pizza Oven. A few small pieces of wood, half an hour and you have a wood burning oven that can run as high as 500 degrees Celsius (932 F) to bake delicious pizza in a minute or two. We’ve basically made pizza every other day. We are officially obsessed!
Marco’s ideal pizza for the home oven isn’t a Neapolitan style dough. It’s a Roman one (gasp!). The difference is a Neapolitan dough is firmer to handle, it is hand moulded into a circle with a thick crust which grows puffy and fluffy in the oven and has a good chew to it, while a Roman dough is a very wet, sloppy dough that often gets eased into a long, rectangular tray and is sold by the slice in bakeries (known as “pizza a taglio”). It’s usually thinner, with a crisp rather than chewy result, described with the wonderful, onomatopoeic Roman word, scrocchiarella.
The Roman dough masters are without a doubt Gabriele Bonci of Pizzarium and Stefano Callegari, the genius behind Trapizzino (what happens when you put a pizza and a tramezzino together) and Marco’s pizza dough is basically influenced by them both. I suggest anyone interested in delving in deeper having a look at the following videos (in Italian with English subtitles) for Bonci’s take on Roman pizza dough and Callegari’s Roman pizza dough.
A few things to take away from their explanations and techniques that we like to apply to our favourite dough too:
High water to flour ratio for a highly hydrated, wet and sticky dough.
Not too much yeast — just 2 grams for each kilogram of flour for this long rise
Sift the flour. It aerates the flour, introducing oxygen.
Use farro (spelt) flour. Bonci notes how it is a very hardy ancient grain and undergoes a lot less chemical treatment than regular wheat flour does, even on an industrial level.
Add salt towards the end of mixing (we like to use Callegari’s suggestion of 2% of the weight of the flour in salt; so 30 grams for 1.5 kg of flour, I know, it sounds like a lot but it isn’t)
And one thing that is Marco’s: Try a bit of white wine in the dough in place of some of the water — we use about 250 ml (a cup)


La nostra pizza romana preferita
Our favourite Roman style pizza dough
Makes about 10-12 individual pizze
900 ml lukewarm tap water (or try 650 ml water and 250 ml of dry white wine)
3 grams of fresh yeast (about a hazelnut sized pinch; you can also use dry yeast, just use a tiny pinch!)
1 kg organic farro flour (tipo 1 if you can), sifted
500 grams organic wheat flour (tipo 00), sifted
30 grams of fine sea salt (about 2 scant tablespoons)
a good drizzle of olive oil, plus some for greasing the bowl
extra flour of either type for dusting
Method:
Pour the water into a large bowl and dissolve the yeast in it. Add the farro flour (Callegari likes to tip it from a height to aerate it) and mix with a fork until you have a thick batter. Let the dough rest for about 10 minutes then add the rest of the flour. When it becomes too thick to continue mixing with a fork, you can use a spatula or your hands and if you find it easier, you can tip it out onto a floured board to mix. When almost all the flour has been incorporated, add the salt and a generous splash of olive oil and continue mixing to combine to a very sticky dough. Grease the bowl with some olive oil and place the dough back into the bowl, with another splash of olive oil over the top and rub it all over so the dough won’t dry out. Cover with a tea towel and place in the fridge or a cool spot for a long, overnight rise (ideally 12 hours minimum).
About 3-4 hours before you want to cook the pizza, remove it from the fridge and let it come to room temperature.
Handle the dough carefully. Gently pry it from the edges of the bowl and tip the dough in one go onto a well floured board. Portion the dough into 200 grams pieces (you’ll be dealing with something roughly the size of a cricket ball or a fist), dust well with flour and shape into a ball and set to one side. Continue with the rest of the dough.
Heat the oven to the highest it goes.
When ready to prepare your pizza (see below for a few of our favourite pizza toppings), take a ball of dough, which should now be as soft as an earlobe and as smooth as a baby’s bottom, and on a well-floured board, flatten with your hands or a small rolling pin. Working from the centre outward, gently push and turn the pizza, (or hold it up perpendicular to the board and let gravity help you stretch it), coaxing it into the size of a plate. It should be quite thin in the middle and you may even get a hole or two — just patch it up and keep going gently, making sure you have enough flour underneath that it doesn’t catch and stick.
If using a pizza oven, place the flattened pizza dough on a well-dusted peel and then add your toppings. If baking in your oven, place the dough on a baking tray or stone and add the toppings. Bake until hot, puffed and the cheese is melted and bubbling. If you are cooking in your regular home oven and find the bottom isn’t baking quite as well as you’d like, try placing it on the lowest shelf possible for some time (I’d preferably do this for the first half of cooking, then move it up to get nicely golden on top for the second half).
Some tips:
I would suggest adding basil or other herbs fresh at the end after cooking; ditto prosciutto crudo or fresh cheese such as stracchino. We also love a simple margherita with chopped fresh cherry tomatoes and rocket (arugula) tossed with olive oil added after cooking.
Here are a few current favourite toppings. You’ll notice two of them are “bianco“, white, which is without the tomato passata base, but if you prefer, feel free to leave it in (Marco prefers the artichoke pizza “rosso” or with tomato, I prefer it bianco). Swipe the passata with the back of a spoon over the base of the pizza until covered — some parts will have more and some less, don’t be tempted to add more, 2 tablespoons is plenty. Then cover with your chosen toppings.
For margherita pizza:
2 tablespoons of tomato passata seasoned with salt for each pizza
70-80 grams of mozzarella for each pizza, torn or sliced
Splash of olive oil
Fresh basil leaves to add after cooking
For artichoke and ham pizza:
For a vegetarian version simply leave off the ham:
1/2 artichoke for each pizza (prepared this way)
1/2 lemon for the artichokes, 1/2 lemon to squeeze over the pizza after cooking
3-4 slices of prosciutto arrosto (this is roast ham, you can also use prosciutto crudo; I would suggest putting it on after the pizza comes out of the oven) per pizza
40 grams mozzarella (or a few dollops of fresh stracchino), torn per pizza
30 grams shaved parmesan per pizza
Splash of olive oil
For a lemon and anchovy pizza:
For a vegetarian version substitute the anchovies with capers or some delicious olives such as Ligurian taggiasche or large green Sicilian olives. Make sure to pit them before putting them on the pizza by flattening them with the side of a large kitchen knife — the olive pit should slip right out.
1/2 organic lemon, thinly sliced, per pizza
70-80 grams of mozzarella for each pizza, torn or sliced
5-6 anchovy fillets per pizza
fresh mint, parsley or oregano (or all three!)
splash of olive oil
some dried or fresh chilli, finely chopped (optional)
These are just a few ideas. We did one with grilled asparagus and guanciale (which goes delightfully crisp and sizzles), one with a parmesan base and raw broad beans and prosciutto on top. We even made a blueberry pizza (the idea being it is a bit like a Florentine schiacciata all’uva but grapes not being in season yet, blueberries did the trick). The best part of doing a pizza party is to get all the ingredients ready in advance, have plenty of dough and have fun with each pizza and the topping combinations as you go!


If you’d like to join me for a cooking class or a book signing, make sure to check the Events page for information and links to booking!
Emiko Davies's Blog

- Emiko Davies's profile
- 13 followers

