
Emiko Davies's Blog, page 10
April 30, 2019
Introducing Tortellini at Midnight


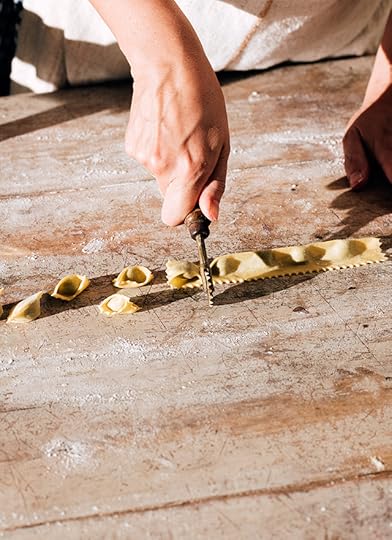
I’ve shown you the behind the scenes and you may have seen some of the recipes, like Nonna Anna’s polpette and the love story behind them, or this comforting rice pudding but I realised I still hadn’t properly introduced you to Tortellini at Midnight.
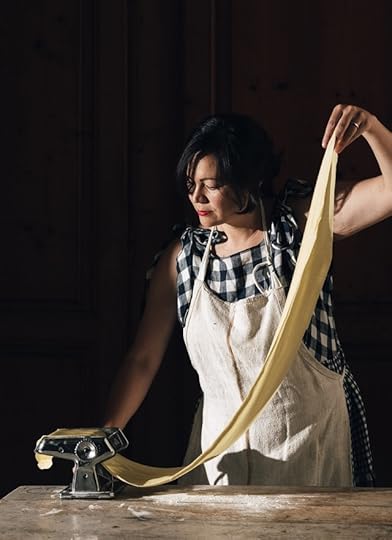
It’s a cookbook with a family story woven throughout it that follows the ancestors of my husband Marco’s family from Taranto in Puglia to Turin in Piemonte and finally to Tuscany. It’s not just a recipe book of our family recipes, though, it’s full of traditional regional recipes and mostly they are recipes for making for sharing with your family or loved ones. I wanted to share this kind of a story because I feel like this movement of the family from one place to another is something that many could relate to. Even though we may move, family recipes are what keep us connected to our past, our roots, our family members. We simply like to cook and eat the food that reminds us of the people who cared for us and for that reason on the table of my Tuscan mother in law appear family dishes that come direct from Puglia, like those polpette (even though she has never even been to Puglia before!). I loved that and wanted to explore more the dishes that run through the family yet come from different regions.
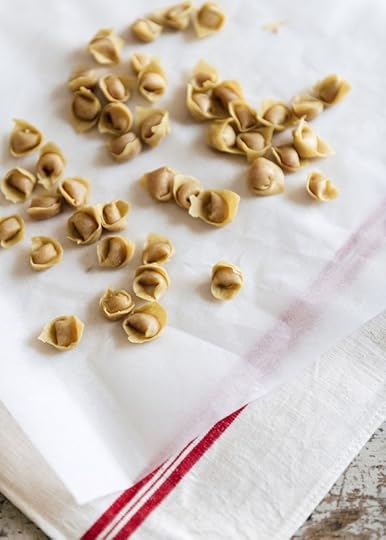
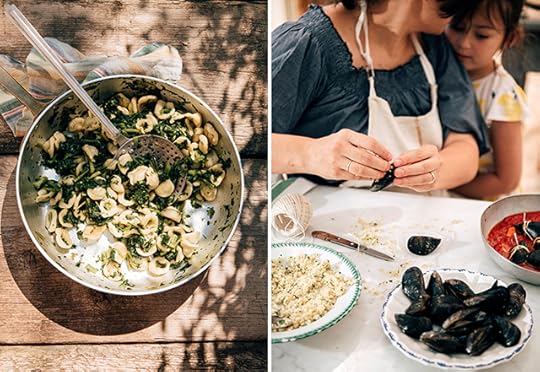
The book is divided into three chapters, the three places and regions that the family come from: Taranto in Puglia, Turin in Piedmont and Tuscany. They happen to be my three favourite food regions in Italy too, so there was that. Throughout, I tell the stories of the dishes and the ingredients that influence those cuisines and that appeared on the table the most, whether it’s red and yellow peppers, mussels, the many ways with boiled beef or tortellini served at midnight.
The front of the book has a beautiful foreword by Tessa Kiros, a friend and mentor, whose cookbooks were the among the first I fell in love with. In the back of the book I’ve also listed some of the menus that were most common on my in-laws’ table for the holidays (deep fried artichokes for Easter, baked apples for All Saints Day and tortellini for the new year, for example) and written about the cookbooks that inspired me throughout the research of the book.

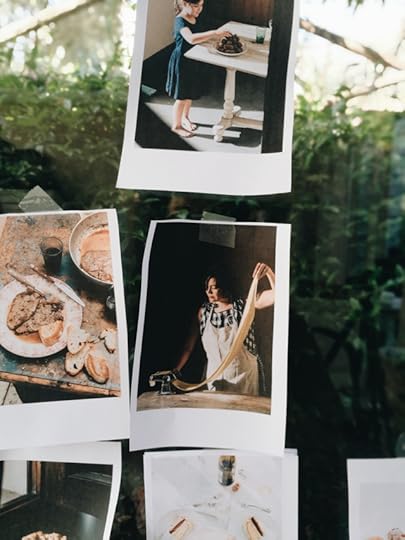
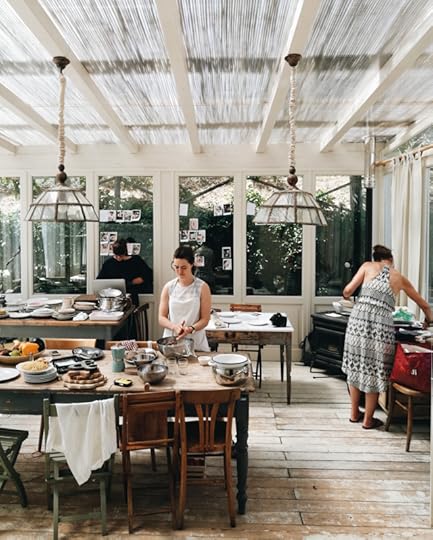
These beautiful photographs from the book shared here were styled by Deb Kaloper and photographed by Lauren Bamford at the lovely B&B of my friend Irene Berni and her family, Valdirose, just outside of Florence (more on that on this blog post).
I hope you enjoy reading it and cooking from it and hopefully it inspires you to collect the stories and recipes from your own family favourites. I love seeing what people have been cooking, if you use instagram and care to, tag #tortelliniatmidnight.
Here are a few lovely things people have had to say about the book:
“Emiko Davies has that wonderful gift of making you want to rush straight into the kitchen. But perhaps not quite straight: I want to linger cosily with the book, with its beautiful pages of recipes and stories from her Italian family. Tortellini at Midnight is infused with warmth: a love letter to Italian home cooking.” — Nigella Lawson (and she’s shared the recipe for ziti al forno from the book)
“Hours have past and for a little while I felt like I was in Italy—it is truly stunning, the recipes familiar but unique, the stories, you can see are from the heart.” — Danielle Alvarez, head chef, Fred’s (Sydney)
‘You had me at Mozzarella in Carrozza! Tortellini at Midnight is an intimate and nostalgic journey into rural Italian home cooking. Its stunning photography of both food and locations will instantly make you ache to be there amongst it all, sampling panzerotti from a pugliese street vendor or devouring bowls of miniature agnolotti del al plin. As always, Emiko’s writing is engaging and personal, peppered with knowledge, humour and boundless love for Italy. If you have set your number to one Italian cookbook only to buy this year, make it THIS book.” — Silvia Colloca, cookbook writer and TV host
“I love this book. Full to overflowing with beautiful stories and insane amounts of great regional dishes: the food that is the heart and soul of Italian life.” — Margot Henderson, chef and co-owner, Rochelle Canteen (London)


April 7, 2019
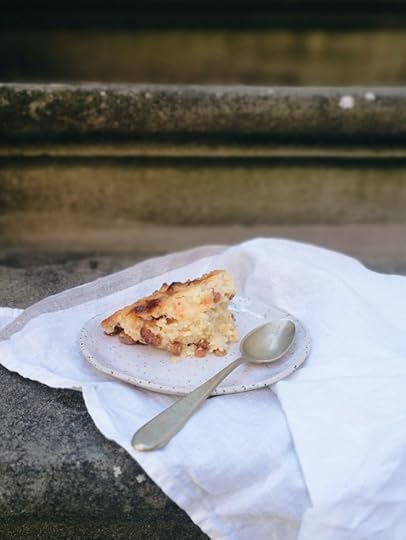
Budino di Riso (Baked rice pudding) from Tortellini at Midnight
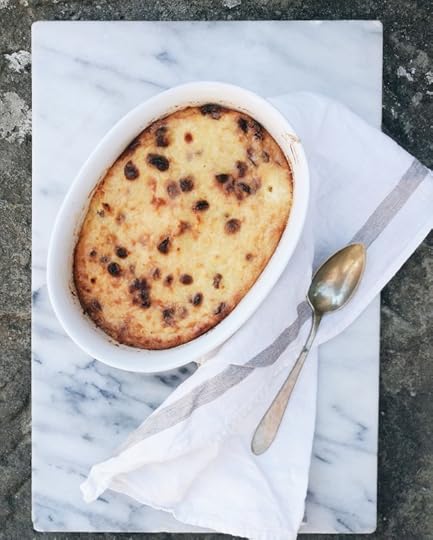
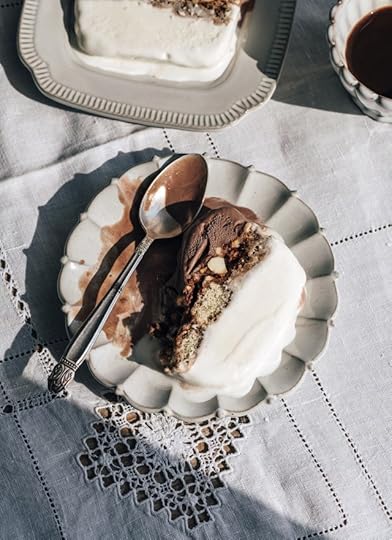
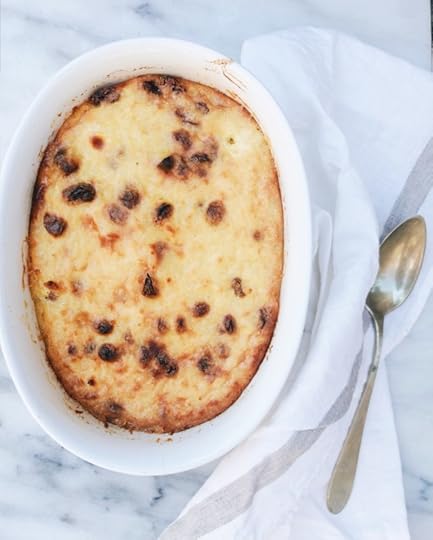
This isn’t a pretty dessert, let’s face it. But then so many treats that you could label comforting aren’t usually, are they? And I would put this in the same category as bread and butter pudding, rice or semolina pudding, even french toast or pancakes. It’s simply good, rather wholesome, definitely rustic and absolutely homely.
An oldie (literally; it comes from Pellegrino Artusi’s classic cookbook from 1891) but a goodie, I’ve made a few modifications to the nineteenth century version. This baked rice pudding was a constant when my mother in law, Angela, was growing up, and it was often served with the family’s favourite dessert topping of warm, liquid chocolate (a mixture of cocoa powder, sugar and warm milk with a spoon full of flour, a bit like a thick hot chocolate), spooned over the top. Being such a simple preparation, you could jazz this pudding up with some stewed or fresh fruit, depending on the season, some fresh cream, whipped until slightly thickened, or you could swirl some homemade jam (I would go for lemon marmalade) or chopped chocolate through the rice before cooking. Flavour-wise, it’s really a blank canvas, gently flavoured with some lemon zest and vanilla (plus a hint of rum if you like it) so if you want to change things up, it’s perfect for that. I can’t help but think of it as bread and butter pudding but made with rice instead – it tastes remarkably familiar to me because of this — so anything you might do to a bread and butter pudding I think you could do to this!
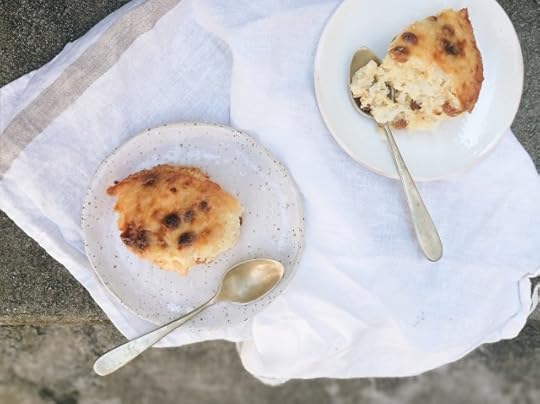
Like most baked puddings, this is definitely best eaten when it has not long been out of the oven. It doesn’t keep well for longer than a day or two as the rice tends to harden (I eat the leftovers for breakfast the next day). So although it’s usually made in one large baking dish, if you’re serving fewer people you can halve this quantity and bake in individual ramekins.
This recipe is from my third cookbook, Tortellini at Midnight, a collection of family recipes from Taranto to Turin to Tuscany, published by Hardie Grant Books.
Budino di Riso (Baked rice pudding)
Serves 8-10
750 ml milk or as needed
160 grams short-grain rice such as arborio
100 grams of sugar
½ vanilla pod, seeds scraped
zest of 1 lemon (and orange is also nice)
40 grams butter, plus more for greasing
100 grams of raisins
2 whole eggs
2 egg yolks
splash or more of rum, cognac or vin santo (optional but I highly recommend it)
1 tablespoon breadcrumbs (if making this gluten free, you can use almond meal)
Place the rice in the milk in a medium saucepan and bring to a simmer with a pinch of salt. After 10 minutes, add the sugar, vanilla seeds, lemon zest and butter and continue cooking over low-medium heat for 30 minutes or until the rice is very soft and the milk is almost all absorbed (if you notice the rice is absorbing the milk too quickly, add more milk – up to another 250 ml – until the rice is cooked). Remove from heat.
Heat oven to 180ºC.
When the rice mixture has cooled slightly but is still hot, add the raisins, eggs, yolks and rum and stir well.
Grease a solid 25cm cake tin or similar sized baking dish with butter and scatter over breadcrumbs to coat all sides. Pour the rice mixture into the tin or dish and bake for 20 minutes or until the top is golden brown.
January 16, 2019
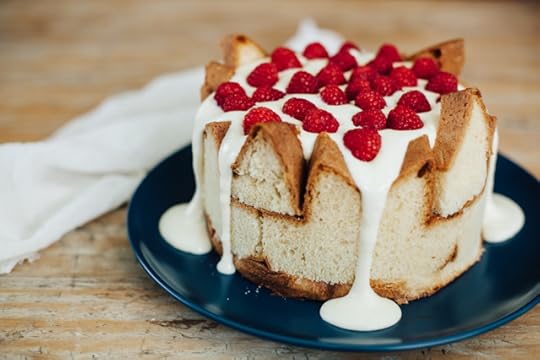
Homemade Mascarpone for a No-Bake Raspberry Pandoro Cake

I’m back home in Australia for a couple of months, a blissfully extended holiday with the family before a busy and exciting book tour! It’s been a long time since I’ve spent Christmas and New Year’s here, let alone my mother’s January birthday, so I wanted to create a very special birthday cake for her. Around this time, the raspberry bush — taking over a large corner of the garden — flourishes and every day there is ripe, juicy fruit for the taking.
Also around this time, pandoro and panettone, left over from Christmas and stacked high in pyramids in stores and delis, are heavily discounted (this one I picked up for A$4.00. About 2,50 euro. And it wasn’t even the cheapest one). So I decided to combine the two and the obvious thing missing was something lovely and creamy — what I ended up dreaming of was a sort of tiramisu, but instead of coffee, raspberries and instead of savoiardi, fragrant pandoro. It reminded me of the delicious, floppy, tart raspberry tiramisu I have had often at a tiny eatery in Florence called Vini e Vecchi Sapori, on the edge of Piazza Signoria.
And here’s the other bit, I wanted to make homemade mascarpone for the tiramisu. Not to be fancy or make things too complicated, but for much more mundane reasons, mainly — it is cheaper and it much more delicious. In Italy, I never make mascarpone as it’s available everywhere and it’s always good. But here in Australia I’ve never really had a good mascarpone, too often it tastes like it’s past its prime. I’d much prefer to have it fresh, made myself. And despite what you may think, homemade mascarpone is actually ridiculously easy. It’s simply cream, heated almost to a boil. Lemon juice is added and the mixture gets strained. That’s really all there is to making traditional mascarpone.

I’ve had many people say, oh so it’s like ricotta but with cream! But no, it’s not at all like ricotta. Ricotta, which means “re-cooked”, is made from whey, leftover from the cheese making process, which is reheated and has acid added to it. The liquid whey begins to form, as if by magic, fluffy white flecks of curds. It’s quite amazing to experience — you can read my very long and researched post about the making of it at home here (and this is not the old milk and lemon juice, which is a curd, but not ricotta). The result is a milky, soft, lumpy and sweet product.
Mascarpone on the other hand, a centuries old tradition from Lombardy in Italy’s north, once just a seasonal, winter product, is made with cream. Once the lemon juice goes in, you don’t see any dramatic changes like you do with ricotta. In fact, you’ll pull it out in the morning and see it looks identical to when you put it in there! But when you touch it, you’ll see it has become denser, more solid, overnight. It’s sweet and very rich as you’d expect cream to be, but with a slight tang to it. The process and the end products are very, very different. If you ever find yourself with a surplus of mascarpone, it’s not just for tiramisu, you can do all sorts of things with it, like have it on pizza (which is incidentally the first time I wrote about homemade mascarpone) or turn it into a chocolate tart or stir it through pasta for an amazingly creamy sauce.
But back to this cake (or is it a tiramisu?). This dessert — you’ll want to start it the day before so you can make the mascarpone and leave it to set in the fridge. Then, ideally, you’ll want to start building the tiramisu at least a few hours before you will serve it so that it has time to soak and set. You can of course use savoidari (which you can also make yourself — here’s the recipe) and make a more traditional tiramisu but with raspberries — if so, you can take a look at this post for a more classic layering.

Homemade Mascarpone
Mascarpone fatto in casa
You’ll need a fine-meshed sieve and muslin, cheesecloth or similar. Don’t throw away the liquid left behind in the bowl — you can use this in pancakes instead of milk or add to scrambled eggs. Try it in a creamy mushroom soup instead of cream or in baked cakes instead of buttermilk or yogurt (this blackberry and mascarpone cake is a favourite of mine). The list is endless.
Makes about 500 grams mascarpone
1 litre cream
2 teaspoons lemon juice
Place the cream in a saucepan and bring to 90 degrees Celsius, or just before boiling. If you don’t have a candy thermometer just watch it like a hawk, before it boils you’ll see some tell tale signs that it’s getting close with plenty of steam and little bubbles forming around the edge of the pot. Remove from the heat, stir through the lemon juice and let sit for a few minutes, then pour over a fine-meshed sieve double lined with muslin set over a bowl. Let cool and leave in the refrigerator to set, preferably overnight.

Raspberry Pandoro Tiramisu
Tiramisu di pandoro ai lamponi
Although this is a no-bake dessert, I used a springform cake tin with removable base to help me keep the cake’s shape. In fact, I didn’t even use the base, I just used the cake tin like a belt, holding the cake together directly on the serving plate. If you don’t have pandoro, you can also do this with sponge cake or like a traditional tiramisu with savoiardi (lady finger) biscuits, which is lovely served round like a cake, by the way. On the other hand if you really want a challenge, you can also make your own pandoro! Here’s a recipe I wrote about by legendary baker Carol Field for Corriere della Sera a while back. And if you don’t have the time to make your own mascarpone, you can use store bought. Use frozen raspberries for the filling if you like, but I’d recommend a portion of them being fresh for the top of the cake.
Serves 8-10
500 grams fresh raspberries
60 ml (1/4 cup) dessert wine (or water)
3 very fresh eggs, separated
120 grams sugar
500 grams mascarpone
zest of 1 organic/unwaxed lemon
1 large pandoro (750 gram cake)
Place just over half of the raspberries in a small saucepan with the dessert wine (or water) and bring to the boil. Cook for about 2 minutes, then remove from heat and let cool.
Meanwhile, beat the egg whites in a bowl until firm peaks form. In a separate bowl, beat the yolks with the sugar until pale and creamy, then add the mascarpone and zest. Fold the egg whites through the mascarpone mixture. Set aside in the fridge if not using right away.
To create the tiramisu, slice the pandoro into 1cm thick slices across — so you have lovely star shaped slices of cake. A pandoro has a wider base at the bottom and a smaller base at the top, keep this in mind when forming your cake as some pieces will need to be trimmed to fit. Place a 26cm round springform cake tin (minus the base) on a serving plate and slide in the bottom slice of the pandoro to fit (trim where necessary). Cut two slices of the pandoro into four even quarters and place these around the edges of the cake tin as the sides of the cake. Spoon over about a third of the cooled raspberry sauce onto the pandoro base and spread evenly to the edges. Spoon over about a third of the mascarpone cream. Add a layer of pandoro (save any trimmed tips of the ‘star’ to fill in any holes), spoon over another layer of raspberry and spread to the edges, topped with another third of mascarpone cream. Add another layer of pandoro as before, and cover this with the last of the raspberry sauce.
At this point, if not serving the cake right away you can cover the cake and refrigerate it until just before serving — I highly recommend doing this at least to chill the cake and let it rest for a couple of hours or even overnight. Before serving, pour over the last of the mascarpone cream (it may dribble over the jagged edges of pandoro) and top with the remaining fresh raspberries.

Raspberry Pandoro Tiramisu with Homemade Mascarpone

I’m back home in Australia for a couple of months, a blissfully extended holiday with the family before a busy and exciting book tour! It’s been a long time since I’ve spent Christmas and New Year’s here, let alone my mother’s January birthday, so I wanted to create a very special birthday cake for her. Around this time, the raspberry bush – taking over a large corner of the garden — flourishes and every day there is ripe, juicy fruit for the taking.
Also around this time, pandoro and panettone, left over from Christmas and stacked high in pyramids in stores and delis, are heavily discounted (this one I picked up for A$4.00. About 2,50 euro. And it wasn’t even the cheapest one). So I decided to combine the two and the obvious thing missing was something lovely and creamy — what I ended up dreaming of was a sort of tiramisu, but instead of coffee, raspberries and instead of savoiardi, fragrant pandoro. It reminded me of the delicious, floppy, tart raspberry tiramisu I have had often at a tiny eatery in Florence called Vini e Vecchi Sapori, on the edge of Piazza Signoria.

And here’s the other bit, I wanted to make homemade mascarpone for the tiramisu. Not to be fancy or make things too complicated, but for much more mundane reasons, mainly — it is cheaper and it much more delicious. In Italy, I never make mascarpone as it’s available everywhere and it’s always good. But here in Australia I’ve never really had a good mascarpone, too often it tastes like it’s past its prime. I’d much prefer to have it fresh, made myself. And despite what you may think, homemade mascarpone is actually ridiculously easy. It’s simply cream, heated almost to a boil. Lemon juice is added and the mixture gets strained. That’s really all there is to making traditional mascarpone.
I’ve had many people say, oh so it’s like ricotta but with cream! But no, it’s not at all like ricotta. Ricotta, which means “re-cooked”, is made from whey, leftover from the cheese making process, which is reheated and has acid added to it. The liquid whey begins to form, as if by magic, fluffy white flecks of curds. It’s quite amazing to experience — you can read my very long and researched post about the making of it at home here (and this is not the old milk and lemon juice, which is a curd, but not ricotta). The result is a milky, soft, lumpy and sweet product. Mascarpone on the other hand, a centuries old tradition from Lombardy in Italy’s north, once just a seasonal, winter product, is made with cream. Once the lemon juice goes in, you don’t see any dramatic changes like you do with ricotta. In fact, you’ll pull it out in the morning and see it looks identical to when you put it in there! But when you touch it, you’ll see it has become denser, more solid, overnight. It’s sweet and very rich as you’d expect cream to be, but with a slight tang to it. The process and the end products are very, very different. If you ever find yourself with a surplus of mascarpone, it’s not just for tiramisu, you can do all sorts of things with it, like have it on pizza (which is incidentally the first time I wrote about homemade mascarpone) or turn it into a chocolate tart or stir it through pasta for an amazingly creamy sauce.
But back to this cake (or is it a tiramisu?). This dessert — you’ll want to start it the day before so you can make the mascarpone and leave it to set in the fridge. Then, ideally, you’ll want to start building the tiramisu at least a few hours before you will serve it so that it has time to soak and set. You can of course use savoidari (which you can also make yourself — here’s the recipe) and make a more traditional tiramisu but with raspberries — if so, you can take a look at this post for a more classic layering.

Homemade Mascarpone Mascarpone fatto in casa You’ll need a fine-meshed sieve and muslin, cheesecloth or similar. Don’t throw away the liquid left behind in the bowl — you can use this in pancakes instead of milk or add to scrambled eggs. Try it in a creamy mushroom soup instead of cream or in baked cakes instead of buttermilk or yogurt (this blackberry and mascarpone cake is a favourite of mine). The list is endless.
Makes about 500 grams mascarpone
1 litre cream
2 teaspoons lemon juice
Place the cream in a saucepan and bring to 90 degrees Celsius, or just before boiling. If you don’t have a candy thermometer just watch it like a hawk, before it boils you’ll see some tell tale signs that it’s getting close with plenty of steam and little bubbles forming around the edge of the pot. Remove from the heat, stir through the lemon juice and let sit for a few minutes, then pour over a fine-meshed sieve double lined with muslin set over a bowl. Let cool and leave in the refrigerator to set, preferably overnight.


Raspberry Pandoro Tiramisu Tiramisu di pandoro ai lamponi
I used a springform cake tin with removable base to help me keep the cake’s shape. In fact, I didn’t even use the base, I just used the cake tin like a belt, holding the cake together directly on the serving plate. If you don’t have pandoro, you can also do this like a traditional tiramisu with savoiardi (lady finger) biscuits, which is lovely served round like a cake, by the way. On the other hand if you really want a challenge, you can also make your own pandoro! Here’s a recipe I wrote about by legendary baker Carol Field for Corriere della Sera a while back. And if you don’t have the time to make your own mascarpone, you can use store bought. Use frozen raspberries for the filling if you like, but I’d recommend a portion of them being fresh for the top of the cake.
Serves 8-10
500 grams fresh raspberries
60 ml (1/4 cup) dessert wine (or water)
3 very fresh eggs, separated
150 grams sugar
500 grams mascarpone
zest of 1 organic/unwaxed lemon
1 large pandoro (750 gram cake)
Place just over half of the raspberries in a small saucepan with the dessert wine (or water) and bring to the boil. Cook for about 2 minutes, then remove from heat and let cool.
Meanwhile, beat the egg whites in a bowl until firm peaks form. In a separate bowl, beat the yolks with the sugar until pale and creamy, then add the mascarpone and zest. Fold the egg whites through the mascarpone mixture. Set aside in the fridge if not using right away.
To create the tiramisu, slice the pandoro into 1cm thick slices across — so you have lovely star shaped slices of cake. A pandoro has a wider base at the bottom and a smaller base at the top, keep this in mind when forming your cake as some pieces will need to be trimmed to fit. Place a 26cm round springform cake tin (minus the base) on a serving plate and slide in the bottom slice of the pandoro to fit (trim where necessary). Cut two slices of the pandoro into four even quarters and place these around the edges of the cake tin as the sides of the cake. Spoon over about a third of the cooled raspberry sauce onto the pandoro base and spread evenly to the edges. Spoon over about a third of the mascarpone cream. Add a layer of pandoro (save any trimmed tips of the ‘star’ to fill in any holes), spoon over another layer of raspberry and spread to the edges, topped with another third of mascarpone cream. Add another layer of pandoro as before, and cover this with the last of the raspberry sauce.
At this point, if not serving the cake right away you can cover the cake and refrigerate it until just before serving — I highly recommend doing this at least to chill the cake and let it rest for a couple of hours or even overnight. Before serving, pour over the last of the mascarpone cream (it may dribble over the jagged edges of pandoro) and top with the remaining fresh raspberries.

December 29, 2018
White Truffle and Wine Culinary Retreat, Tuscany 2019


We have spent so long talking about what we would do if we had a handful of days to show people our favourite food and wine experiences and finally, finally we are taking a deep breath and putting it out there — our first culinary retreat together, one focused on white truffles and wine!
Please join me and my sommelier husband, Marco Lami, on a highly curated trip to experience our personal favourite food and wine experiences in Tuscany. Autumn is arguably the best time of year to experience the local cuisine when specialties like wild mushrooms, chestnuts, new olive oil and truffles are in season — and it’s no coincidence that Tuscan wines go particularly well with these things.
We will stay in a stylish farmhouse in the Tuscan countryside, where home cooked dinners and wine tastings will be held at a long table by the open fireplace and where mornings can begin with a fresh, healthy breakfast, a hot espresso and an invigorating walk through the woods. Our days together will consist of our most favourite things: a combination of day trips to beautiful towns, plus visits to the local markets, hands-on cooking classes, cheese tasting and farm visit, eating out at our favourite trattorias, wine tastings, picking our own olives for oil and even being part of a truffle hunt. We will cook together and have aperitivo every night together, but for those who prefer a bit of down time and lounging by the fireplace, you can choose to do that too and just join in on the eating part! Sound like fun? See below for all the details.


Dates: 13-17 November 2019 (5 nights, 5 days)
Location: Tuscany
Cost: from 2,200 euro per person
Highlights:
2 full day cooking classes with cookbook author Emiko Davies
3 winery visits and 2 wine pairings with sommelier Marco Lami
truffle hunt and visit to San Miniato white truffle festival with free time to explore
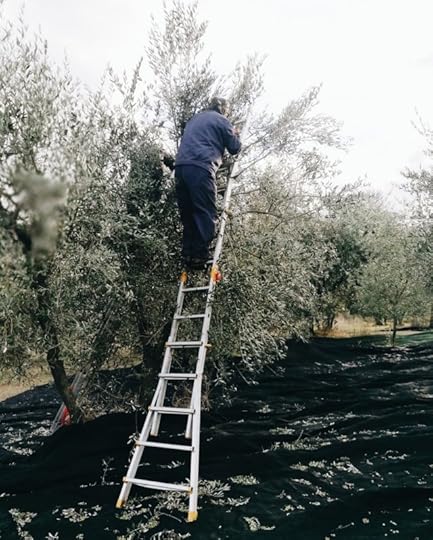
olive harvest experience
visit to and tasting at a goat cheese farm in the Chianti
2 dinners in our favourite trattorias
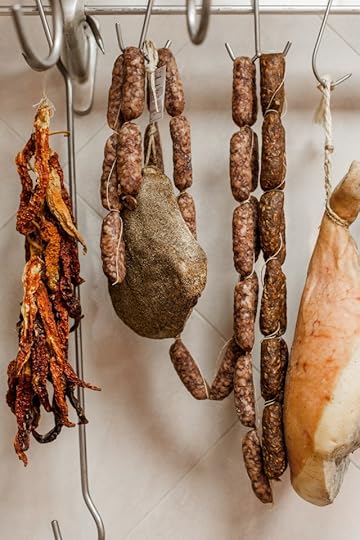
salumi tasting in our favourite butcher shop
be immersed in a beautiful Tuscan farmhouse
The itinerary:
Day 1: Arrival at the farmhouse and welcome aperitivo, followed by a home-cooked dinner.
Day 2: Visit the local market to pick out ingredients for cooking a traditional Tuscan meal together in a hands-on cooking lesson. In the afternoon, after lunch, we will harvest olives from the property and take a trip to the local olive oil mill to see how olive oil is made. Return to the house to cook dinner with wine pairings by Marco.
Day 3: After breakfast we will take a drive to the Chianti Classico region and visit an organic goats cheese farm with a cheese tasting, have a delicious lunch in a charming osteria, and of course, pop into some wineries. Back at the house, we’ll have a casual dinner of wood-fired pizza.
Day 4: Today we will take a day trip to Marco’s hometown of San Miniato. We will visit a biodynamic winery with a wine tasting, have a light lunch in a butcher shop and free time for a stroll through the National White Truffle market. Dinner will be in a local trattoria.
Day 5: We will start the day with a walk through the woods and a special truffle hunt followed by a cooking lesson with truffles and new oil, plus a wine lesson with Marco. We can spend the afternoon around the fireplace roasting chestnuts and chatting. A casual dinner at the farmhouse for our last night.
Day 6: After breakfast we will say our goodbyes!
Retreat cost per person: 2,200 euro in double occupancy (single supplement: 400 euro)
What is included in the price:
5 nights accommodation in a beautiful, renovated, private farmhouse
day trips and all transport included in the itinerary
Winery visits and tastings
Cheese tasting and farm visit
5 healthy breakfasts, 4 lunches and 5 dinners, including two meals out at local restaurants
all wine during meals
Two full days of cooking classes
Daily wine tastings with a certified sommelier
A truffle hunt and truffles for the cooking class
Visit to olive oil mill and tastings
Not included in the cost:
Airfare and travel costs to and from the farmhouse
Travel insurance
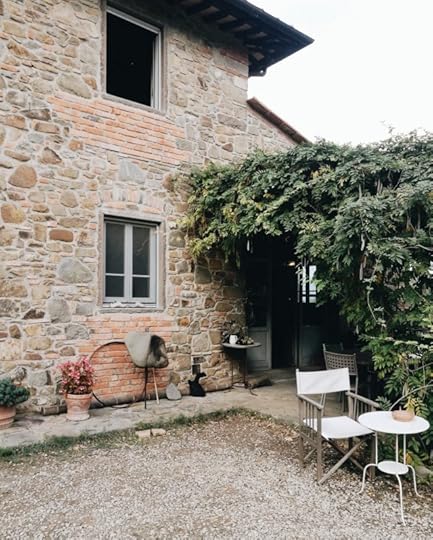
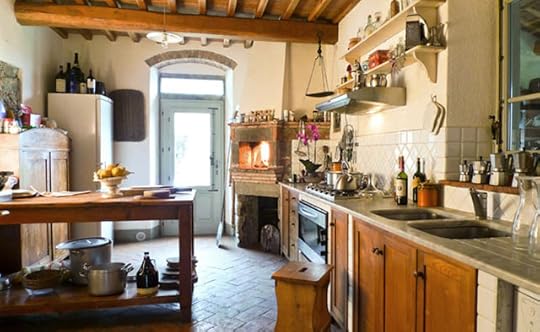
The farmhouse:
We will be based halfway between Florence, Siena and Arezzo in a beautiful spot, hidden away in the countryside, about 15 minutes by car from the nearest town. We will cook, dine and relax in a 300 year old Tuscan farmhouse set among a garden of ancient oak and olive trees. It has the best of the old world with modern conveniences – a comfortable lounge room with fireplace, long table for sharing meals, a large kitchen with wood fired ovens (one indoor, one outdoor), WiFi etc. All the rooms are double, some with en-suite, some with shared bathrooms (first come first served) — if traveling alone but you would like the doubly occupancy rate and don’t mind getting to know a roommate, we will be happy to pair you in a twin room with someone else wanting to do the same thing! Several rooms are available for single occupancy at an additional price of 400 euro. Please quote the room name when booking if you have a preference:
Rosas queen/twin bedroom with shared bathroom with tub/shower
Bellis queen/twin bedroom with private ensuite with tub
Laurus queen/twin bedroom with private ensuite with tub
Visteria twin bedroom with private ensuite with shower
Vitis queen bedroom with shared bathroom with shower
Viola twin bedroom with shared bathroom with shower


To book your place:
We require a deposit of 50% upon booking; the remaining 50% should be paid by 15 September 2018. When booking, please specify if there is a room you prefer (first come first served) and whether you would like double occupancy (if coming with a friend or partner, please let us know so we can match up the bookings otherwise let us know if you are happy to share with a roommate) or single with the supplement and please let us know of any dietary requirements when you book. The booking is non-refundable (except in the case that we do not reach the minimum number of 6 participants, then you will be wholly refunded) but if you need to cancel, we can accept someone to take your place. You must have your own travel insurance to participate.
Getting here: Closest international airports are Pisa, Florence, Bologna and Rome. You can rent a car from the airport or take a train via Florence to the closest train station of Montevarchi. We can organise transfers from the station for arrival and departure.
Tuscany in November:
We chose November for this trip because it is our most favourite time of the year. It is calmer, the tourist hoardes have thinned out and the finest Tuscan foods are at their best, including white truffles (we will catch the National white truffle festival in San Miniato, read more about it here), freshly pressed extra virgin olive oil, collecting chestnuts and more. Autumn in Tuscany is beautiful. It can be crisp, clear and sunny or foggy and wet, but it is always spent well with warming foods, wine, roasting chestnuts and traditions like harvesting olives and truffle hunting (see here for more articles and recipes where I wax lyrical about autumn in Tuscany).


Your hosts:
Emiko Davies is an Australian-born cookbook author who has called Florence home for over a decade. She was a restaurant critic for The Good Food Guide in Australia for several years and has written about Tuscan traditions and Italian cuisine on this blog since 2010 as well as for publications for Saveur, The Guardian, Conde Nast Traveler, Gourmet Traveller and Corriere della Sera, to name a few. She has three cookbooks on regional Tuscan cuisine. Her husband, Marco Lami, is a certified sommelier and has worked with Australia’s top chefs, including Neil Perry at Rosetta, George Calombaris at The Press Club and Andrew McConnell at The Builder’s Arms. He was the head sommelier at Michelin-starred Il Pellicano and is currently the sommelier at Il Palagio at Florence’s Four Seasons Hotel. He was born in San Miniato, home to Tuscany’s precious white truffles, so you will truly experience this part of the visit through the eyes (and tastebuds) of a local.

Things to note:
The retreat will take place with a minimum of 6 and maximum of 12 participants. If we do not reach the minimum, the retreat will be cancelled and you will be refunded 100%. The itinerary is a guide; we reserve the right to make changes in case of bad weather or unforeseen circumstances where we may need to change the order of activities or replace some of the activities with something equally wonderful.
Retreat cost per person: 2,200 euro in double occupancy (single supplement: 400 euro)
To book now with your deposit click here or email: info@emikodavies.com.
December 9, 2018
An Acquacotta-inspired Christmas

Some of my favourite ingredients from the Maremma, in southern Tuscany, are also those flavours that I love at Christmas — I’m talking about chestnuts, dried figs, nuts and chocolate, and game like guinea fowl. They are ingredients that make this season’s table feel special yet not over the top. I’d rather be comforted by a Christmas meal than overwhelmed by one and these dishes, for me, do just that.
These recipes are essentially all from my second cookbook Acquacotta, which I wrote while we were living on the southern Tuscan coast. I have tweaked them ever so slightly to make them perfect for Christmas. I love the food of this area not only for the way seasonal ingredients rule but also because they are extremely low maintenance — easy preparations that have maximum effect — which honestly makes catering for a special occasion so much easier. I made all these with a clingy, sick 6 month old baby on my hip, so I can attest to the fact that these are simple to prepare and everything can be done in stages ahead of time, making things less stressful.
The chestnut gnocchi — forever my favourite kind of gnocchi (also handy if you’re cooking for anyone intolerant to wheat flour) – is wonderful even dressed simply in butter and parmesan cheese or in a rich ragu. I’ve paired with the simplest walnut sauce, which isn’t in the cookbook but I have in a recipe for Food52. It’s delicious, creamy and incredibly easy to prepare, you can even do it a few days in advance.
I’d serve this with one of my favourite mains in the cookbook, pollo all’aceto, a delicious chicken stew spiked with vinegar, which comes from the town of Pitigliano on the Tuscan-Lazio border. To make it a bit special, try it with faraona, or guinea fowl, or other game. It is actually a preparation — rich with herbs, juniper berries and that splash of vinegar — which was traditionally used for game meat in the first place. I love this one-pot dish; it is utterly delicious with that vinegary kick (I quite like adding a small, hot chilli to this too). After browning the meat, you put everything back in the pan and simply let it bubble softly for an hour. You can make this in advance — it is even better the next day and more flavourful the next time you reheat it. Serve it with any those comfortable, starchy things — mashed potatoes, soft and creamy polenta or your favourite, crusty sourdough bread. A salad of greens or radicchio next to it is lovely.

For dessert, I love making a festive il tronco di natale, a Christmas log. I use my chocolate sponge roll recipe for the log (I have some versions here and here), a popular dessert on the Tuscan coast called simply tronco. It is a pillowy sponge roll, painted with Alchermes and usually filled with Nutella but I find the bought kind so sickly sweet that it hurts my teeth — so I make it with a less sugary, dark chocolate pastry cream. This makes it perfect for slathering with chocolate buttercream icing to turn into a Christmas log. I decorate it slightly differently every time I make it, either with candied walnuts that look like wood chips, crushed meringue that looks like lumps of snow, berries (here, corbezzoli or Irish strawberries, which grow outside my window) but the constant is always sprigs of rosemary frosted with sugar, which look like branches encrusted with snow. This log, too, is easy to make ahead of time — the pastry cream can be made several days ahead and once the sponge is made and rolled, it is actually better if you do this at least a day in advance. The icing can be made in advance too and simply warmed over a bain marie to loosen it again before decorating.
A final thing. Making pagnotella has become a tradition in our house. A fudgy, lightly spiced fruit bread that hails from Porto Santo Stefano in Monte Argentario, it is made with soused dried figs, nuts and chocolate, held together with just some flour. I love it so much and it is a sturdy, delicious cake that gets better with time so it makes a perfect little food gift. You can make one large one — rather like a large, round loaf of country bread, but I like the idea of turning the recipe into 10 small ones that you can wrap and give as gifts to your guests. This recipe warranted a post in itself — I have so much to say about it. So it’ll be coming this week in the next post!
I hope you find these dishes inspiring for your Christmas table too and wish you the very best for a calm, happy gathering with your nearest and dearest.

Gnocchi di castagne con salsa ai noci
Chestnut gnocchi with walnut sauce
Serves 4
For the walnut sauce:
150 grams walnut kernels (about 2 handfuls)
1 garlic clove, peeled
1 pinch salt
80 ml (about 1/3 cup) extra virgin olive oil
50 grams finely grated parmesan cheese (about a handful), plus more for serving if desired
a handful of fresh herbs (I like marjoram here)
For the gnocchi:
1 kg starchy potatoes (such as Dutch Creams and try to use ones roughly the same size)
2 eggs, beaten together
1 teaspoon salt
200 grams of chestnut flour, sifted
For the sauce:
Place all of the ingredients except for the cheese and herbs together in a food processor or blender. Mix in the cheese then set aside. This sauce (much like pesto) can keep well in an air-tight container in the fridge for several days to a week. When ready to use, there is no need to heat this sauce but you do want to add a good splash or two of the boiling gnocchi-cooking water until you have a very creamy, smooth sauce.
For the gnocchi:
Rinse the potatoes and place them whole in their skins in a pot and cover with cold water. Cooking them whole means they get less water-logged and therefore you have fluffier gnocchi which don’t need as much flour. Bring to the boil and cook until they are completely soft and a fork slips easily into their centres. Drain the potatoes and, while still hot, peel them – use a fork to ‘hold’ the potato for you in one hand while you peel the skin with a sharp knife using the other hand. Immediately mash them, spreading them out over a chopping board or a tray to allow the steam to escape as quickly as possible.
When you have fluffy and cool mashed potato, combine with the eggs and salt until you have a smooth, creamy mixture. Add the sifted chestnut flour until you have an easy to handle dough that rolls nicely without sticking (depending on the quality of the chestnut flour, you may or may not need all of the flour). Because these gnocchi have no gluten in them, you don’t need to worry about overworking the dough here as with regular gnocchi but it should be a pretty fast procedure.
On a work surface, lightly-floured with chestnut flour, cut the dough into four portions. Work with one piece at a time, roll the dough into a long log about 2 cm thick, then cut into pieces 2.5 cm long. Place finished gnocchi in a single layer on a tray lined with baking paper. Continue until the dough is finished.
Cook the gnocchi in a large saucepan filled with gently simmering, salted water (ideally, 1 teaspoon of salt per litre of water). Once the water comes back to a simmer and the gnocchi are floating, let them cook for a further minute or two.
To serve, remove gnocchi with a slotted spoon and place directly into warm serving bowls and pour over some of the walnut sauce. Garnish with the fresh herbs and serve immediately with extra parmesan if desired.

Faraona all’aceto
Guinea fowl stewed with vinegar
In Acquacotta, the original recipe is with chicken. An ancient dish derived from a method used to cook game meat, this comes from the town of Pitigliano on the Tuscan border. I like this cooked in a terracotta pan that can be brought to the table, the sauce left as is, but if you want a more elegant presentation you can remove the meat after cooking, blend the sauce until smooth, then place in a platter with the sauce drizzled over. It goes well with mashed potatoes, soft polenta or your favourite sour dough bread.
Serves 4
1 whole guinea fowl (about 1 kg), chopped into large pieces
3 tablespoons extra virgin olive oil
1 onion, finely chopped
1 carrot, peeled and finely chopped
½ celery stick, finely chopped
handful of fresh herbs such as basil, sage, parsley, oregano, calamint, fennel pollen
3 or 4 juniper berries
2 bay leaves
80 ml white wine vinegar
juice of 1 lemon
125 ml dry white wine
In a deep casserole dish, brown the guinea fowl pieces (in batches if necessary) in the olive oil over high heat until evenly coloured, about 5-7 minutes. Remove the meat from the pan and set aside while you cook the soffritto of vegetables in the same pan.
Add the onion, carrot and celery with a pinch of salt and turn heat down to low. Cook, stirring occasionally for about 10 minutes or until the vegetables have softened. Add the herbs, juniper berries and bay leaves, then pour over the vinegar, lemon juice and wine. The liquid will deglaze the pan, so scrape up any wonderful juicy brown bits from the bottom of the pan.
Return the meat to the pan with the vegetables, add about 500 ml of water and season with salt and freshly ground pepper to taste. Bring to a simmer and cook, covered, for 1 hour. Check occasionally, and top up with a little splash of water if needed. Towards the end, check for seasoning. Serve the guinea fowl with its sauce.


Tronco di natale
Chocolate Christmas log with candied walnuts and sugared rosemary
To make this suitable for anyone intolerant to wheat you can simply use 100 grams of cornstarch and leave out the flour. Both the pastry cream and the icing can be made several days ahead of time and stored in the fridge. Warm the icing slightly until smooth before decorating.
Serves 6-8
For the chocolate pastry cream:
2 egg yolks
60 grams caster (superfine) sugar
1 tablespoon 15 grams cornflour, sifted
250 ml warm milk
100 grams dark chocolate 70% cocoa, chopped
For the chocolate icing:
85 grams dark chocolate 70% cocoa
85 grams butter, cut into cubes
85 grams powdered sugar, sifted
For the sponge:
50 grams of cornstarch/cornflour
50 grams of plain flour
3 eggs (weighing 55-60 grams each), separated
100 grams of caster (superfine) sugar
To assemble the roll:
2-4 tablespoons caster (superfine) sugar
125 ml Alchermes (or rum)
rosemary sprigs
a few tablespoons of sugar
red berries (here, wild corbezzoli or Irish strawberries), as desired
powdered sugar for dusting
For the pastry cream, whisk yolks and sugar together until pale. Stir in cornstarch. Place in a saucepan and over low heat and add milk, little by little. Stir continuously until the mixture becomes smooth and thick, about 10 minutes. Remove from heat and fold in the chocolate until melted. When it is smooth and well-combined, cool quickly by spreading the pastry cream out into a shallow bowl. Place plastic wrap right over the top of the pastry cream so it doesn’t develop a skin and keep in the refrigerator until needed.
For the icing, melt the chocolate in a small, heat proof bowl over a bain marie or in the microwave, if you have one. Remove from the heat once smooth and melted, add the butter and stir until melted. Add the icing sugar and stir until smooth and thick. Set aside.
To make the sponge, sift the starch and flour together. Separate the yolks from the whites and place in two clean metal or glass mixing bowls. Whisk the egg yolks and the sugar with an electric mixer or electric egg beaters for up to ten minutes, or until the yolks become very pale and creamy. Clean the beaters very well, then whisk the whites until stiff peaks form. Gently fold in small amounts of the whites and the flours, alternately, to the yolks until just combined.
Pour into a 23 x 33 cm baking tray (you can also use a flat tray and spread the batter out to the size you like with a palette knife) lined with baking paper – the batter should be about 1cm high. Bake at 160ºC for about 10-12 minutes or until the top is very pale golden and springy in the middle.
Remove the sponge from the oven and let it cool ever so slightly so you can handle it easily – you still want to work with it while it is warm. Gently turn sponge upside down onto a sheet of plastic wrap scattered evenly with the caster sugar (this helps to stop that golden top from sticking to the plastic). Remove the baking paper to reveal a spongey soft cake. With a bread knife, trim the edges – this will stop the sides from cracking as they roll. Then, with a pastry brush, stain this side of the sponge evenly with Alchermes, you may have to do a couple of “coats” for a bright pink. Then generously spread the cooled pastry cream over the top, smoothing out evenly and leaving a 1cm border around the edges.
To assemble:
The rolling part is rather like rolling sushi, if you’ve done it – the tricky part is really in starting the roll, the rest is all about the right amount of pressure (not too tight, but not too loose). Picking up the short end of the sponge with the help of the plastic wrap, carefully roll the entire thing up firmly and then secure by wrapping completely in the plastic wrap. Keep in the fridge to chill for 1 hour or, ideally, overnight.
To turn it into a log, remove the plastic wrap carefully, and make a diagonal cut at one end of the log, to remove approximately a quarter of the log. Place this cut end on the side of the log as in the photograph below — if you need to prop it up a little bit, stick an almond or a walnut or even a bit of a cookie underneath!
To decorate the log, use a spatula or a palette knife to smooth the icing all over the cake. A palette knife will leave marks that look like “bark” all over. Some also like to use the tines of a fork for this effect. Leave to set while you prepare some decorations — I like to snip a few sprigs of rosemary from the garden. Rinse them, give them a shake then roll them in a few spoonfuls of sugar. Repeat if desired for a “frosted” look. Another easy decoration is candied walnuts — simply place a handful of walnuts in a small, nonstick pan. Add a couple of tablespoons of sugar and a knob of butter. Heat gently until the butter has melted into the sugar. Move the nuts around by shaking the pan. Watch the sugar turn golden brown, continue tossing the nuts so they do not burn. It is all very quick — it has to be as you don’t want either the nuts or the sugar to burn. Once you see the sugar is a caramel colour, pour the whole thing onto a layer of baking paper and let it set. Chop roughtly. Decorate the cake with red berries, the sugared rosemary sprigs and a sprinkling of candied nuts. Crushed meringues also work brilliantly as “snow”. Add a light dusting of powdered sugar.


November 30, 2018
Behind the scenes of Tortellini at Midnight

It’s been over a year in the making (more if you count the ones where this idea was taking shape in my mind!) and there are still another three months to wait but I couldn’t resist giving you a peek at the behind the scenes of the making of my upcoming cookbook, Tortellini at Midnight, which will be released in the UK, US and Australia in March 2019.
Like Florentine and Acquacotta (you can peek at their behind the scenes stories too, here and here), I’ve been blessed to work with the same incredible team on the recipe photographs — photographer Lauren Bamford and stylist Deb Kaloper – as well as designer Allison Colpoys. It’s simply amazing to see this book coming together and take on a tangible form, after having the idea for it floating around in my head for years. It really is a lot like watching a baby grow inside your belly (which did also actually happen; my second daughter, Luna, was born two weeks after I handed in the manuscript!).
What inspired Tortellini at Midnight is a love story, a story of a family that moved from the heel of Italy to its top in search of a better life. It is a collection of heirloom family recipes from my Italian in-laws, which I have traced back through generations that span the length of Italy, from the southern port city of Taranto to elegant Turin in the north, and finally, back to Tuscany, where we — my sommelier husband Marco Lami and I with our two daughters — call home.


Central to the book are the stories behind those who cooked the recipes. It begins with Anna Michela Comasia Maria Calianno, a noblewoman from Taranto who eloped with the postman, and her polpette, which are still being cooked in the family over a century later. Then there is her petite Tuscan daughter-in-law, Lina (decidedly the best cook in the family), who refused to use minced meat for her ragu; her son, Mario (dapper, Taranto-born, Turin-raised lover of cheese and Neapolitan songs), known for his wobbly crema-laden cake and treats like fried mozzarella sandwiches; her granddaughter, Angela, whose job in the kitchen growing up was to grate the Parmesan cheese (for a family of cheese lovers this was no small feat) and whose lasagne (made with store-bought grated cheese) is the most requested now at family gatherings. And her great grandson, Marco, who is heavy-handed with the wine (of course) when cooking.
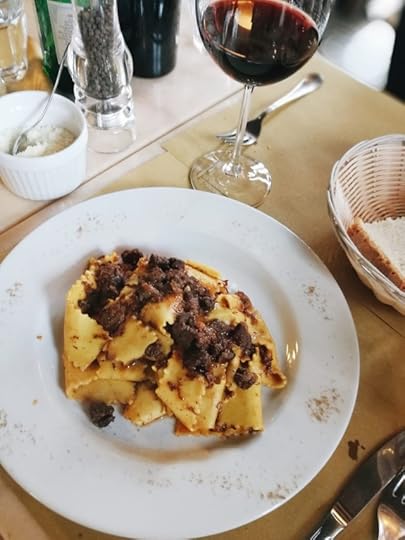
Why tortellini at midnight? Eating tortellini is close to time traveling for Marco. In brodo or in sugo, they are the taste of Sundays. Nonna Lina would offer them most Sundays, she had long done so. Sometime in the 1950s, long before Tuscans celebrated New Year’s with a party, Marco’s grandfather, Mario, started a trend serving bowls of tortellini in sugo at the stroke of midnight in his father-in-law’s bar, which was known as Ciuccellino. Accompanied by a glass of cheap spumante and rounds of Tombola, this is how they would ring in the new year.
I took several trips to Piedmont and Puglia for “research” (including family history research but really eating, mostly, and taking photographs for the location photographs throughout the book) and we photographed the recipes here in Tuscany, in my dream house — Valdirose. Irene Berni and her family are just about the sweetest, most generous, most genuine people you will ever meet and their family home-turned B&B was the perfect setting. I also had the help of Alice Kiandra Adams and my intern, Helen Johnson, in the kitchen, my mother-in-law Angela, who brought her lasagne and chicken roll to lunch on her birthday and my husband Marco helping cook, clean and look after children! There was a 6 week old (mine), a four month old (Lauren’s), a 5 year old (mine also) and an 8 year old (Alice’s!) on the shoot too, all during the hottest heatwave of the Tuscan summer, what an amazing week we had! I am so grateful. I cannot wait to share this with you.
Tortellini at Midnight is now available for pre-order here. And keep an eye on the events page, in February and March I’ll be hosting dinners, talks, book signings, cooking classes and workshops in Canberra, Sydney, Melbourne and Brisbane. Then in late March I’ll be in London and some fabulous workshops are being planned for Lisbon in May, Greece in June and Tuscany in November — stay tuned!


November 19, 2018
Chicken and ricotta meatballs (and cooking one-handed)

Disclaimer: you shouldn’t actually cook one-handed, especially if you’ve got a baby in the other arm. But I admit, as a mother of two with a partner who works nights, that I’ve tried it.
If you’ve ever been alone, trapped under a sleeping baby or limited due to holding an ‘unputdownable’ baby (I’m sure that’s a word, this is a small child who won’t sleep but you can’t put down anywhere else, such as a play mat, a high chair, a pram, a bed, a car seat, a crib, or your partner’s or other child’s arms, without screams and crying), you’ll relate to this post, I’m sure — and even if you haven’t experienced this, perhaps this will serve useful one day for a similar situation.
I found myself one evening, out of desperation, typing the words “meals you can prepare with one hand” into the search bar and coming up with nothing. There are plenty of helpful suggestions on meals you can eat with one hand (honestly, you can eat nearly everything one-handed, believe me, I’ve attempted), but not so much on what you can cook with one hand. I was of course hoping there was some mind-blowing secret to preparing something simple, tasty, comforting and nutritious to be able to cook and feed myself and my older daughter while holding a cranky, clingy, teething four month old baby on one hip. On a particularly difficult low point, I ended up making a peanut butter sandwich for her (spreading peanut butter with one hand is not as easy as it looks) and the leftover crusts became my dinner.
But then I realised why that secret doesn’t exist — because you’re not actually meant to cook with a small baby in one arm! Well, especially not one who can’t sit up on her own yet and has a tendency to lunge at anything shiny. Having had two babies who are unputdownable in their own different ways and a husband who works nights, I have learned to adapt. I have learned to be prepared. And this is the real secret to cooking one-handed with a baby.
Prep. You want to prepare as much as you can while you have two hands, possibly another adult around and either a calm or napping baby (for me, this is always the morning). I peel and cut vegetable sticks (pop them in an airtight container or glass filled with water in the fridge, this keeps them crunchy) or slices of fruit (dip apple pieces in slightly salted water to stop them from browning) for after-school snacks. Even slicing bread or grating cheese, or anything else that involves a sharp knife, is good to prepare ahead. Anything noisy like blending a soup, hummus or smoothie I try to do during this time too.
Make your meal ahead of time. If you can, think ahead. In the summer, I’d make big, hearty salads full of beans (often a variation of this one or this farro salad), canned fish or boiled eggs in the morning and keep them in the fridge ready to pull out for dinner. Or I’d make a big batch of peperonata, which gets tastier as the days go by, and reinvent it in various ways (on toast with mozzarella, as a pasta sauce, on top of grilled chicken or fish). Ditto for the meatballs here below — delicious in or out of the tomato sauce, in a sandwich, in pasta, on their own. In the cool weather, it’s minestrone, pumpkin soup, curry – things that are easy to reheat on the stove, do well being reheated and in batches so I can portion into servings that go in both the fridge and the freezer (for those days when I’m not so prepared). I can’t tell you what a lifesaver it has been just having jars of homemade pomarola or batches of frozen beef ragu around.
Eat leftover lunch for dinner. A variation on the above, sometimes, I’d just make my big salad a little bigger than normal and finish the rest at dinner.
Keep it simple. On hard days, when I haven’t had time to prepare anything, I resort to the easiest thing. My picky older daughter’s two favourite go-to meals are ones I can luckily manage in seconds: spaghetti olio e parmigiano (simply tossed with olive oil and parmesan cheese) and steamed rice with nori and avocado, cucumber and soy sauce. I can add pesto (a jar of this is often in the fridge) to the spaghetti or miso soup (when I’m in a pinch, I use the best packet kind, brought in our luggage from our last trip to Tokyo) to the rice for myself — the best flavour and nutritional boosters with minimal effort! Some other fantastically simple but delicious and nutritious dinner ideas: eggs in any which way; creamy chickpea soup (this is a recipe from my first cookbook Florentine, it’s literally, garlic, canned chick peas, water, some rosemary is nice if you have it, and blend) and mozzarella alla pizzaiola (or cheesy tomato toast as we decided to call it in this version for The Guardian).
Keep things handy. Make your kitchen work for you. Put the things you need/use often on shelves where you don’t have to bend down to get or stand on a stool to reach. Keep tea bags or whatever your favourite stand-by, calming beverage is, in a container with a lid you can pull off with one hand. Keep a pretty bowl of fresh, seasonal fruit on the table (the easiest way to get a healthy snack, one-handed). I’ve also made my older daughter’s favourite healthy snacks easy for her to reach — so if I’m trapped under a baby during a feed, she knows where to go to fix herself a snack until I can free myself (as a bonus, she and I are both enjoying her new found independence)!
It’s not rocket science but these things have helped me enormously and made it possible to prepare dinner alone, one-handed with a baby on one hip and a hungry nearly-six-year-old waiting in the wings.
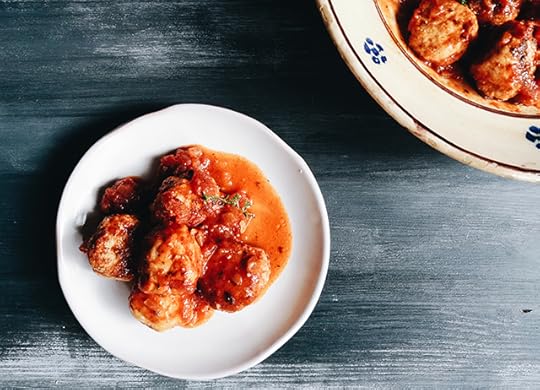
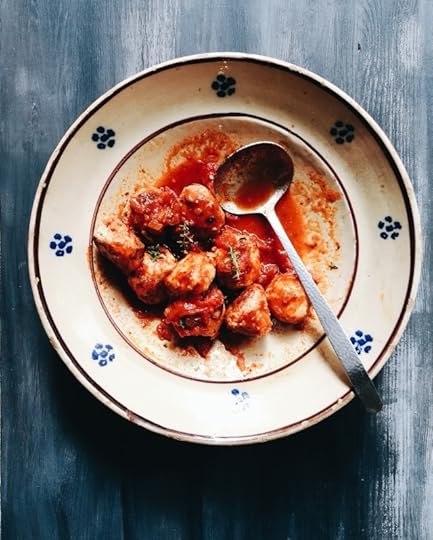
I leave you with this recipe for chicken and ricotta meatballs. They’re basically a delicate version of Nonna Anna’s beef and pork meatballs, thanks to the ricotta, and are lovely either on their own without the tomato sauce. My heart almost burst when my picky daughter, who likes these plain with mayonnaise, told me these were delicious. I’ve often eaten these at my favourite Teatro del Sale and Trattoria Cibreo but theirs are in a thick, rich tomato sauce, heavy on the garlic. I deliberately made these quite simple so that even picky eaters can appreciate them – leave the parsley out of the meatballs if you, too, have family members who protest anything green — and the tomato sauce is as simple as it gets. But if no one protests, go ahead and add some garlic, fresh herbs or even chilli to the sauce.
Polpette di pollo e ricotta
Chicken and ricotta meatballs
I like to use chicken thigh for these — more moist and flavourful than breast, but go ahead with breast if you prefer or that’s what you have. Turkey works too. And these are delicious reheated, if not better.
Serves 4
400 grams chicken thigh, deboned
250 grams ricotta
1 egg
50 grams grated parmesan
2 slices white bread, crusts off, chopped finely (or a handful of dried breadcrumbs)
1/2 teaspoon salt
2 tablespoons finely chopped fresh parsley (optional, if green things are objectionable)
3 tablespoons extra virgin olive oil
1 small onion, finely chopped
400 gram tin of tomato passata or tomato pulp
salt and pepper to taste
Place the deboned chicken thigh in a food processor and blitz until minced well. Place in a bowl along with the ricotta, egg, parmesan, white bread (or breadcrumbs), salt and parsley (if using). Mix well – hands are best. If you like, you can test for seasoning by pinching a small, hazelnut sized piece of the mince and frying it. Add salt or pepper as desired. Shape mince into balls a little larger than golf balls. If the mixture is quite soft (this may be particularly so if your ricotta is not firm but yogurt-like), you can use two tablespoons to help you. Set aside the balls on a tray or plate until you have finished shaping them all.
Heat olive oil over medium heat in a casserole pot or deep skillet. Sear the meatballs in batches until browned evenly, then remove to a plate until all the meatballs are cooked. You can serve them just like this otherwise carry on with the sauce below.
Turn heat down to low, add a little bit more olive oil if necessary and, in the same pan where the meatballs were cooked (no need to clean it out), gently fry the onion with a pinch of salt until tender and translucent. Add the tomato puree, fill the empty tin most of the way with water and add to the pan. Season with salt and pepper and bring the sauce to a simmer. Return the polpette back to the pot, turn the heat up to medium and bring the sauce to a simmer and cook, uncovered, until the sauce is reduced to your liking, stirring occasionally.
Serve immediately, with slices of crusty bread (otherwise keep in the fridge or freezer in an air tight container. Reheat in a pan with a splash of water until bubbling hot).
September 12, 2018
Pardini’s Hermitage: Paradise on Giglio Island
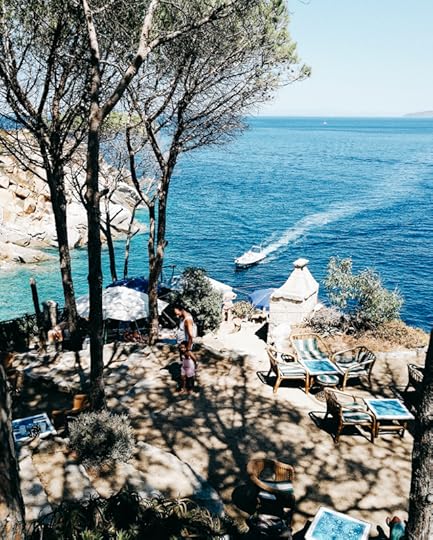
Late last August we had only a handful of days to go away somewhere, to escape the heat of Florence, the crowds, the daily grind. And so we decided to treat ourselves and spent them at Pardini’s Hermitage, a secret hideaway sort of a place on an island that is a gem in itself – Giglio Island, a very special place for us.
I was already attracted to it by the fact that the only way to get there is by boat. Not the island, I mean, I’m talking about Pardini’s. A short boat ride from Giglio’s port takes you to a remote part of the island where there are no roads, just a lovely, homely villa, set amongst eucalyptus trees and prickly pears, with granite slabs leading into the crystal water.
When we got there it was clear that we were going to be able to wind down here. The rooms — we were in a bungalow set apart from the main villa — were simple and homely. There was barely any phone reception, the wifi hardly worked. No TV. We could actually switch off.
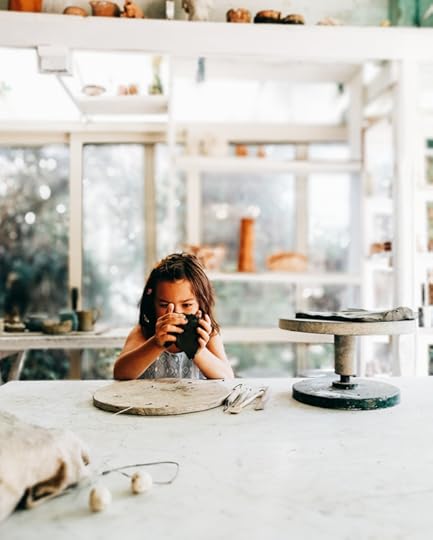
When you weren’t in the water, easing into a kayak or taking a dip (trying to avoid the sea urchins — Marco didn’t do so well on this one), the villa had a “music” room, and a games cupboard — in the evenings guests congregated around the piano and listen to someone sing. There was Mahjong and bocce (boules) and a ping pong table. Probably my favourite bit was the ceramics studio. A quaint, little, loved studio, where you could wander in, pick up some clay and some tools. Here we whiled away hours, in silence, smoothing and building, getting covered in clay. It was bliss.


Each day we had only to decide if we felt like swimming or playing first, and when it was time to eat we were called with the tingling of a bell.
In the evening, guests were invited to the main terrace of the villa for aperitivo, where we mingled, shyly at first, over a spritz and the view of the sea darkening in the waning light. Dinner was served in the main dining room — the freshest fish, handmade pasta, homemade ricotta.
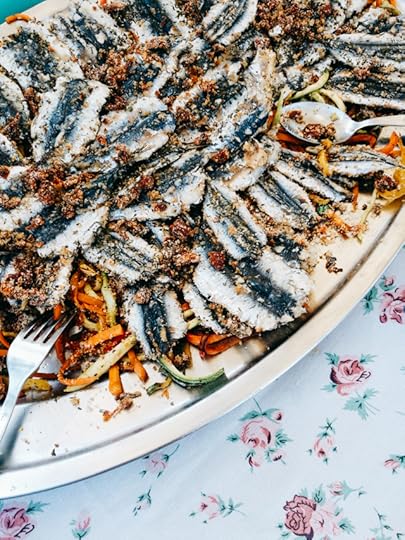
Lunch every day was served on another sea-view terrace (top photo): fresh salads (watermelon and caprino or padron peppers, almonds and chicken) and deep fried zucchini flowers or fresh anchovies. Wine. Slices of fresh fruit. They even have their own kitchen garden, complete with about 40 goats that supply milk for cheese and yogurt at the villa.
After a few days it felt like we had been away a few weeks. A real holiday.


Getting to Giglio Island:
You must take a ferry from Porto Santo Stefano on Monte Argentario in southern Tuscany, it is a 1 hour journey (there is a bar on board).
I do not recommend bringing a car to Giglio Island and especially not to Pardini’s Hermitage. There are plenty of private garage options to park your car in the port at Porto Santo Stefano. If you decide to explore Giglio while at Pardini’s, you can hire a boat (like the one that you’ll need to take you to Pardini’s Hermitage) to take you around the island. Or once in the lively port, there is a very good public transport system.
More on Giglio Island:
24 hours on Giglio Island (and our favourite winery)
Acquacotta, the cookbook (and see these Giglio Island recipes from it, Tomato and celery salad and Pizza stuffed with onions and anchovies)
Pardini’s Hermitage
July 30, 2018
Ad occhio, cooking by eye
Ad occhio, Italian for “by eye”. It’s a very natural way to cook, measuring by eye and cooking not by the clock but by the way something looks (or smells or feels).
It’s the way I first learned to cook – standing on a stool so I could look over my grandmother’s electric stove top, learning to scramble eggs. Or making pancakes dotted with banana slices or fried rice with eggs (still my go-to comfort food) with my mother. These are the things that I can remember cooking the most as a child, and things that you also don’t need recipes for – you simply need to look, feel and you just know when it’s “right”.
This is what home cooking is. I was inspired recently by my friend Sarah Fioroni at her suggestion to teach a cooking class all ‘ad occhio‘ – after all, traditional Italian cooking is done this way. A handful of flour, “enough” water to bring it together to a soft dough to roll into long, thick, uneven noodles for pici. How much is enough? As much as the flour can take – this is the concept behind quanto basta, abbreviated to q.b. – something you will often find in Italian cookbooks. You’ll know by the feel of it.
Then a sticky dough for schiacciata, layered, by eye, with torn figs, a scattering of raw sugar, then drizzled with olive oil, q.b. Baked for how long? Until it is golden on top, crisp round the edges and the figs oozy. Just take a look at it and you’ll know.

After having just turned in the manuscript for my third cookbook, I am a bit ‘reciped-out” and although I do like being precise and having all the information possible for those who need it (and that’s what the editors like!), I also like letting loose and just cooking – no books, no recipes, no measuring equipment.
I like using all of my senses — every single one — when cooking: watching, listening (you can hear when something is sizzling too fast, the water has reduced too much, or something isn’t simmering fast enough), inhaling all the smells that tell you that the schiacciata is ready or that there’s enough or not enough garlic in the sauce (Marco with his super sommelier smelling powers can even tell you when he can smell there’s not enough salt in the sauce), touching the dough to make sure it feels as soft as a six week old baby’s bottom and tasting – well, that one goes without saying. To me, these are how cookbooks should be, describing the sensory clues, what you should smell, what something should feel like or look like, how it should taste – because that is how you learn to cook intuitively and, let’s face it, not everyone is measuring their ingredients the same way, the source of heat and type of pot or pan can change the cooking time and its effects. Really, the numbers shouldn’t be the focus, but a guideline, a suggestion.
Following this idea in my cooking class recently was freeing, I felt like a child again (and it wasn’t just the rolling out of snakes or playing with sticky dough), standing on a stool and cooking ad occhio, reminding me after months of careful measuring and recipe testing of how joyful it is to just freely cook.
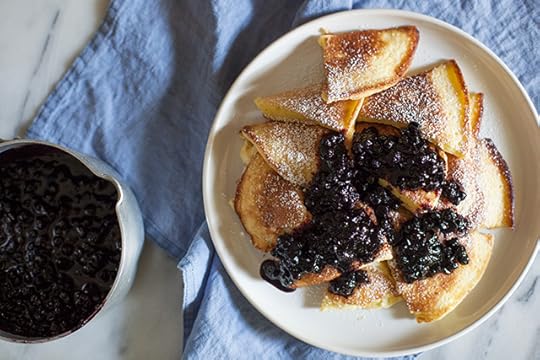
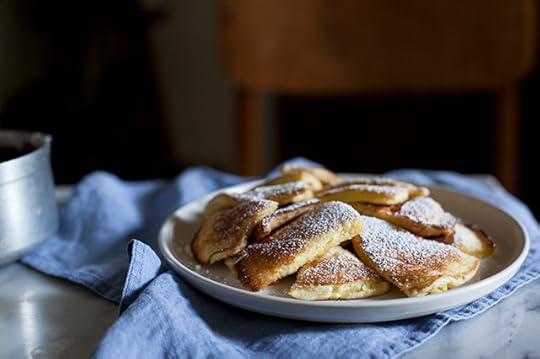
A couple months ago I had come across a recipe for these frittelle spezzettate, or Kaiserschmarren, fluffy, ‘broken up’ or shredded pancakes from Alto Adige in Italy’s far north (and Austria, which the region borders), and thought they’d be just the thing to go with an impulse buy from the market – tiny, sour wild blueberries from the Tuscan mountains. The whites are whipped separately, adding natural fluffiness and that plenty of butter is used to crisp the edges and add flavour. Some like to add raisins soaked in water (or rum). Otherwise they are made with a simple pancake batter, split up (or cut up) while in the pan, then served hot with wild berry jam — in my case, the wild blueberries, quickly cooked with a few spoonfuls of sugar.
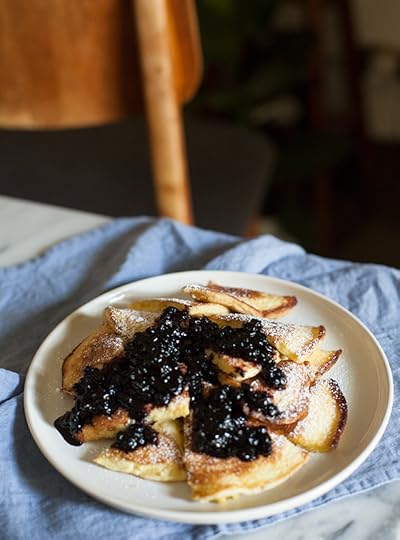
Frittelle spezzettate con salsa di mirtilli selvatici
Broken up pancakes with wild blueberry sauce
A non-recipe.
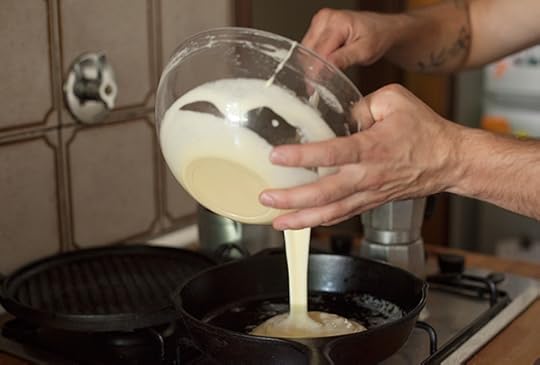
To make two to four (this depends on how hungry you are) serves, use three eggs, separated. Pop the yolks in a bowl along with a couple of handfuls of flour and enough milk to bring everything together to a smooth – but not too liquid – batter.
The whites go in another bowl, along with a couple of tablespoons of sugar. Whip to soft peaks, then fold into the rest of the batter. If you are using the rum-soaked raisins, add them.
Heat a knob of butter in a skillet and when melted, add a third of the batter to make a round, medium-sized pancake. When you begin to see a few bubbles appear on the surface, take a peek underneath. It should be a satisfying golden brown. Cut the pancake into four with your spatula then flip the four pieces and break these up further with your spatula into eight pieces. Add a little more butter if you like (I do).
Transfer to a plate and serve immediately with a dusting of icing sugar and berry jam or sauce, and continue with the rest to make two more pancakes. The cook gets to eat the last batch – these are best eaten warm.
Emiko Davies's Blog

- Emiko Davies's profile
- 13 followers

