
Focus, Follow Through and Finish: Lesson Two: Sort Your Brilliance
This is part two of a four-part course to help you map your projects. View the first lesson here.
How was your free-writing week? What was it like to have all your creative wishes out on paper? I know the first time I did this, I strutted for a good day or two afterward.
There was something so innocent yet powerful about releasing to the page all the projects I wanted to work on. To see all the things I wanted to learn, and all the places I wanted to go with my art. Kind of like that juicy feeling of possibility when you’re in a bookstore or art supply shop.
Ah, the dreaming. So much fun! Better still is taking those dreams one step at a time toward the exuberance of the finish line. Let’s move to the next phase, shall we?
You might want a few supplies. You don’t need to buy anything for this. Just use what you have. It can be super simple – pencil scrawls on a paper or colorful visuals. You might enjoy using:
• pieces of paper, big or page-sized
• multi-colored post-it notes
• stickers, stars
• colored pens or markers.
I mean it when I say DO NOT BUY ANYTHING to do this. So often we mistake buying things with making things and they are not the same. As I like to say, consumerism is the weakest form of creativity. Sure, it’s creative but not as potent as making things. Okay, on to the lesson.
The purpose of this week is to start sorting things into categories and to get a sense of the scope of work for each project. We’re still at the high-level planning phase here but this week’s work will guide you toward focusing your efforts.
Step one: List it!
Re-read your free-write, underlining specific things you want to do.
Next, in a separate document, put all those things into a list of writer or artist wants. Name the list something fun if you want.
Here are the first ten things on my list of 39 things my artist wants I did a few years back when I was just beginning to claim my seat in the art studio:
1. Time to explore and play and not have it have to relate to my business.
2. Scheduled time in the studio.
3. Finish the hand-drawn alphabet.
4. Re-read The Creative License.
5. Start drawing on bigger paper.
6. List pithy things I’ve said and illustrate them.
7. Illustrate things I’ve written like 29 Ways to Take a Creative Leap.
8. Study Maira Kalman’s process.
9. Keep drawing every day.
10. Read Orla Kiely’s book Pattern – make notes.
You can see my desires are all over the place. Some big projects, some small. Some focusing on improving my craft. Some possible, some daunting. It doesn’t matter how many items you have. Or how reasonable they are. We are still in the dreaming phase, merging toward a bit of order.
Step two: Sort into categories

Now that you have a list, let’s look for patterns. Read over your items to identify major categories. They could include:
• genres to try
• specific ideas to write
• publications, books or podcasts to access
• places you want to publish
Step three: Make a dream map
Identify no more than 5 categories. Now, on a separate piece of paper (you might want a big one for this), make a mind map. Each category gets a major circle. Each idea has its own circle within that category.
Looking at my list, I saw a bunch of things related to hand lettering. So I made a bubble on the map for lettering as a major category or area of focus. From that bubble we have:
• Choose a consistent font for my handwritten signs.
• Finish hand-drawn alphabet.
• Make 3-4 fonts and name them.
• Brainstorm how to do an illustrated column.
Step four: Make an action map

Each of these mini projects will require a series of action steps. Next, make bubbles with one action step per bubble.
From each project, add bubbles with action steps. You can also use colored sticky notes instead of writing on paper. That way you can have different projects with different colors and can also move the items around.
This listing and mind-mapping process should give you plenty to work on this week. Keep drilling down. It’s very possible that you won’t get to a sense of completion with your mind maps. That’s okay.
You’re not going to get ALL of the ideas into project bubbles. Some of those things on your dream list will happen now, many more will happen later. Some might never happen. That’s okay! We always have more ideas than we can actually implement.
Also, don’t worry about doing the projects yet, just keep getting specific about action steps that each one might require.
Keep mind mapping until you don’t see anything else to write down. Be sure to put the date on your maps. And jot down your questions; we’re having our group call in two weeks and there will be time for Q&A.
Next week: We will use magic to choose which projects to focus on sooner rather than later.
Have fun with this! Feel free to share your experience in the comment section below.
Warmly,
 Coach Cynthia
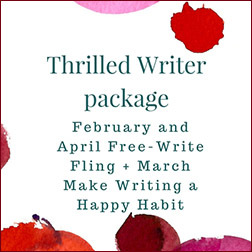
p.s. If you like this organic yet structured approach to productivity, you will love my class Make Writing a Happy Habit. I put everything I know about how to set up a solid writing practice into this class.
To uber-ize it, I’ve bundled it with two cycles of my popular Free-Write Fling class to make the Thrilled Writer program. We start February 1st; won’t you join us? Get your seat in our online writing workshop here.
The post Focus, Follow Through and Finish: Lesson Two: Sort Your Brilliance appeared first on Original Impulse .


