
Snowflake Pop-Up Card
25 Days of Paper 2015, Day 16
I have a confession and a challenge for you. The paper I picked for this project (Iridescent Ice Blue from GPC Papers) isn’t quite right. You have 4 small squares of it in your paper pack, plus the navy blue card stock.

I made the original model (pictured above) by printing out the template onto regular white office paper.

The problem with the iridescent is that the back side is white, and I didn’t anticipate how it would show in the pop-up (see the white sections in the middle left and right). So you have a choice – pick the paper you prefer!
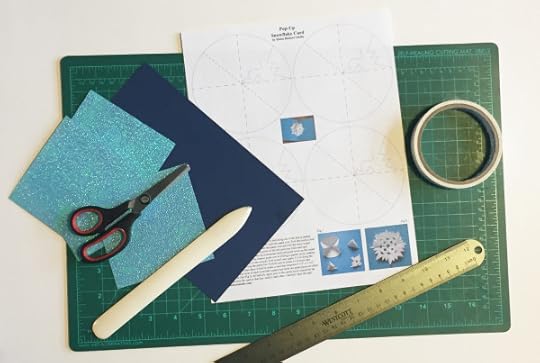
For this project you will need:
This template
Four 4″ squares of Iridescent ice blue paper (if desired)
Navy blue card stock (5-1/2″ x 8-1/2″)
Ruler
Scissors (yay, no craft knife today!)
Bone folder
Cutting mat
Tape (to adhere template if using iridescent paper)
Glue stick

Step 1: Cut Circles, First Two Folds: Cut out the four circles and fold each one in half along one of the heavy dashed lines with the printed pattern face out. Crease the fold and then unfold. Don’t turn the paper over. Fold the circle in half again, on the other heavy dashed line.

Step 2: 3rd Fold: Now turn the paper over and fold the circle in half along the lighter dashed line with the printed pattern on the inside. Unfold and turn over so that the blank side is face up.
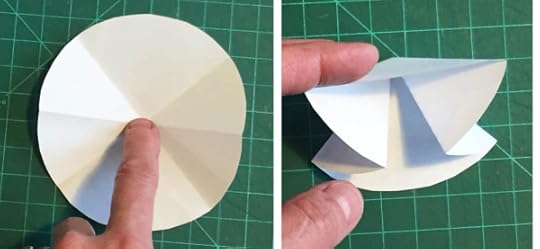
Step 3: Press & Tuck: Press firmly in the center where the folds meet. This will guide the folds and they will start to take the shape you see above right. Flatten into a quarter-circle as shown. The printed pattern will be on the outside (see below left).

Step 4: Final Fold: Fold the quarter-circle in half, with the printed pattern face up.

Step 5: Cut Shapes: Cut along all solid lines and remove bits and pieces. Repeat steps 1-5 for all four circles.

Step 6: Unfold One Step: Carefully unfold each segment so that it is a quarter-circle again. Make sure that it is still folded as in Step 3.

Step 7: Score the navy card stock in the middle.
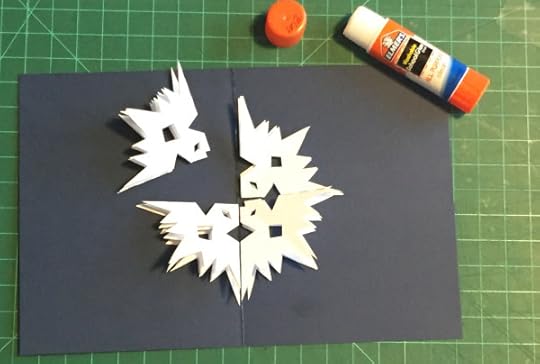
Step 8: Apply glue to the outer layer of each snowflake quarter and stick two petals on either side of the centerfold.

Step 9: Carefully apply glue to the top layer of all four petals and close the card so that they stick to each other. Carefully open the card to reveal the pop-up snowflake.

I’d love to see what you create! Share your ideas in the comments box below and show us what you made in the 25 Days of Paper FB group.
–––––––––––––––––––––––––––––––––––––––––––––––––––––––––
About the 25 Days of Paper 2015: It’s a great time to celebrate paper, and I’m delighted to share my ideas for using this amazing material with you. Throughout December, I’ll be posting a paper tutorial on even days, and every odd day will bring news about paper artists, stores, distributors and more! Receive updates via e-mail by adding your address in the upper right hand corner of this page. Enjoy the season, and feel free to leave a comment below and check out what people are making in the 25 Days of Paper FB Group!


