
Tyvek Accordion Lantern
25 Days of Paper 2015, Day 8

Technically, Tyvek® isn’t paper, but it folds really well, is super strong and water resistant. It’s that stuff they use in construction, protective apparel and packaging (no wonder I like it – it has qualities of paper and cloth). It comes in white (and black) and I use watered-down acrylic paints to pigment my sheets, brushing the paint on with a foam sponge and wiping off the excess. The staining picks up the texture in the Tyvek®, which creates a lovely pattern. I bought this Tyvek from Material Concepts.
For this project you will need:
Tyvek (the white fibrous sheet in your paper pack)
Acrylic paint (or other coloring medium, optional)
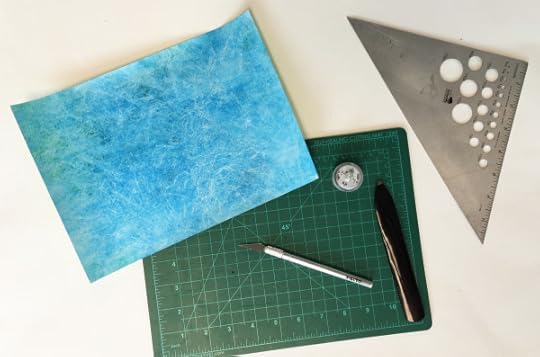
Cutting Mat
Craft knife
Ruler
Bone folder
Battery operated tea light (I ordered mine from 100candles.com – they even have colored lights)
Double sided tape, glue or velcro

Step 1: Staining the Tyvek®: I stained my Tyvek with one color of acrylic paint on each side. It’s simple (if you have paint – the Tyvek actually looks nice without paint, too). Add a small amount of water to thin the paint so that it rubs on easily with a sponge. Wipe the excess moisture off while rubbing the pigment into the sheet with a paper towel or the sponge. I recommend doing a small test first to see how your medium handles. Also have a piece of scrap paper underneath when staining, so that you can stain the edges.

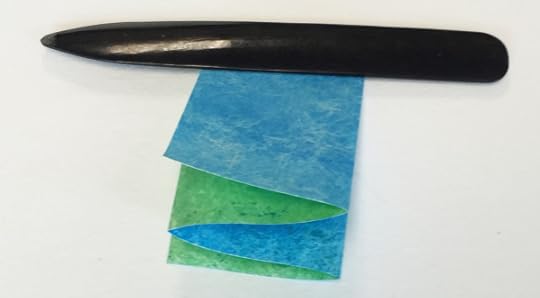
Step 2: Cut & Fold in Half: Cut a piece of Tyvek to 8-1/2″ x 3″. If you know how to fold an accordion, you can skip to step seven. Fold the strip of Tyvek in half as pictured, creating a mountain fold (as opposed to a valley).
Step 3: Fold in Quarters: Place the folded sheet on your work surface and first fold one end towards the center fold, then flip the piece over and fold the other end into that center fold as well.

Step 4: Reverse Folds: Unfold the entire sheet and reverse the valley folds so that all of the folds are mountains, as shown.

Step 5: Fold in Eighths: Start at the left-most fold and fold it to meet the left edge of the sheet. Bring each mountain fold over to that same edge, until all sections are the same size.
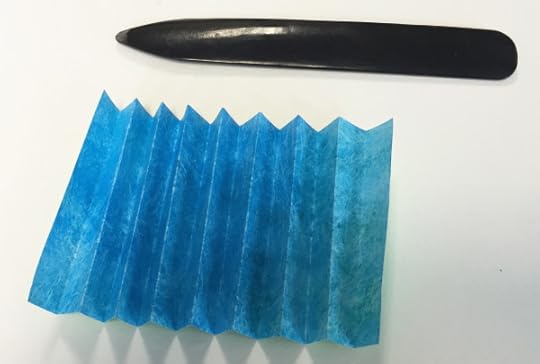
Step 6: Fold in Sixteenths: Repeat steps 4 and 5 – reverse all folds and then accordion fold into 16 sections. Phew, you’re done!

Step 7: Remove Section: Cutting off one of the small panels (you’ll have 15 remaining) seems to make the star pattern on the top of the lantern look better.
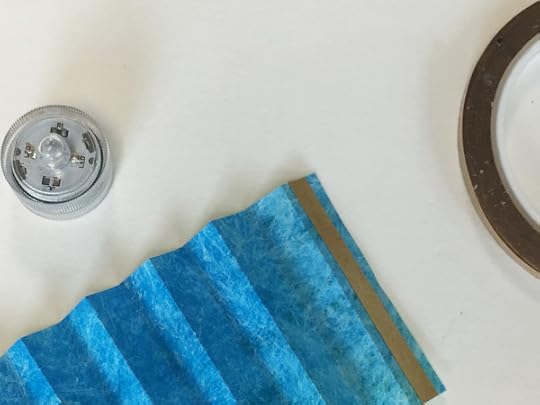
Step 8: Apply Adhesive: Attach a strip of double sided tape or glue to one of the end sections of the accordion, remove protective strip and adhere the other end to it.

I made several variations: cut the ends; gather one end; add tessellations; use velcro dots instead of tape. You can also punch holes through the double accordions for another effect.
Share your ideas in the comments box below or over in the 25 Days of Paper FB group.
–––––––––––––––––––––––––––––––––––––––––––––––––––––––––
About the 25 Days of Paper 2015: It’s a great time to celebrate paper, and I’m delighted to share my ideas for using this amazing material with you. Throughout December, I’ll be posting a paper tutorial on even days, and every odd day will bring news about paper artists, stores, distributors and more! Receive updates via e-mail by adding your address in the upper right hand corner of this page. Enjoy the season, and feel free to leave a comment below and check out what people are making in the 25 Days of Paper FB Group!


