
Cork Board Weaving

Cork Board Weaving
If you’re a parent (or student), then you’ve probably spent a lot of time recently in the office supplies section buying back-to-school items for the kids — I know I have. No matter how far ahead I plan there always seem to be several trips made to the store, as fellow adults elbow their way towards that last, kitty cat folder while our kids wander around in a pencil-selection-induced haze. It’s never the smoothest of operations, but on the up side I find the beefed-up stationary section to be a veritable playground of crafty potential. After all, some of my favorite organization containers include pencil cases and zippy bags found amidst the school supplies!
This year the small, square cork boards (intended for dorms or other small places) caught my eye. Traditionally, these are made to hold and display visual items so why not, I thought, use it as the actual vehicle to create one of those items? So, I threw one in my basket along with a box of pins and set off to turn it into an office supply loom. The result was a fun experiment with creating textiles out of scrap yarn and a dream! Here’s how you can give it a try.

Materials
Cork board
Straight pins
Tapestry needle
Plain string or Sport-weight yarn
Small amounts of varying weights, colors, and textures of yarn (Scraps from your stash!)
Scissors
How to Cork Board Weave:
Line up pins next to each other towards top of cork board; then again towards bottom (or the distance at which your finished piece will be a few inches/several centimeters shorter.)
Create warp: Tie a slip knot in string or plain yarn and place it on the top-left pin; bring string down to bottom-left pin and wrap around, then up to the next pin on top and wrap around. Continue wrapping string until you reach the last pin; tie knot.
Weave weft: Using tapestry needle and a strand (doubled for thinner yarns) of yarn and leaving a tail, weave over and under warp strands all the way across piece; turn and come back weaving the opposite way (so, under if you went over on the last row; under if you went over). Continue in this manner until you feel like you want to change colors; cut, leaving a tail. Begin weaving process with new color.
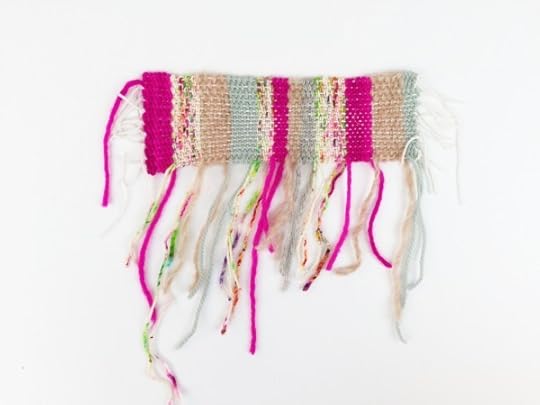
Continue until piece is as long as you want or is about 2-3″(5-7.5 cm) from pins.
Leave piece on cork board to display as is on a shelf or wall, or finish as follows:
Snip warp string close to the pins on either end. Knot strands together across to secure work.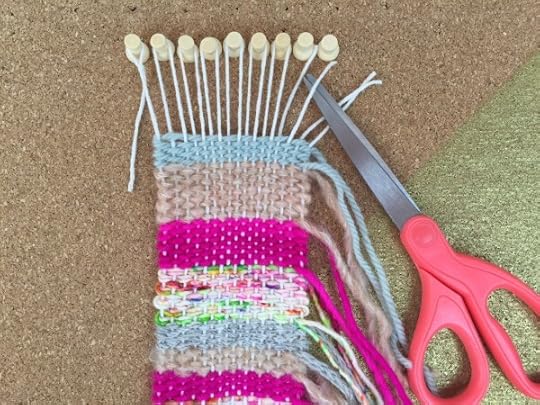
From here the world is your cork board-woven oyster. Weave in ends; or don’t — fringe is cool, too! Sew together to made a wristband, or cup cozy, or frame as is for a gloriously scraggly piece of art!
Enjoy!
xx,
Vickie
@vickie
Psst…parents, art teachers, and scout leaders, bookmark this project for a future teaching project. It’s a great intro to weaving for kids!


