Hollow Book, part 2…the exciting conclusion!
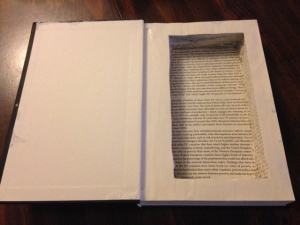
Last time I was showing my process of making a hollow book. It pretty much looked like this:

It’s a long process of patience and being aware of when the blade is getting dull so you can replace it. Cut, cut, cut!
Once you’ve cut all the way to the bottom (I stopped just short of the bottom because…reasons?) then you apply glue all over the inside, and the top of the hollowed section, so when you close the book, the spare page covers any mess you made (like the lines and raw cuts on the above image). You once again protect the front cover by wrapping it in seran wrap. Then apply weight.

After it dries, you open the cover, cut out a hole in the sheet you covered the hole with, and viola! You have a hollow book.
For storing things. Like money.

Of course there are lots of shapes and things you can do, but my skill isn’t up there yet.