
Week In The Life™ 2015 | First Steps In Creating An Album
Now that we've collected some photos and words (or at least the photos) for Week In The Life™ it's time to begin bringing them together into a tangible album.
People approach this process in a hundred different ways. Some people like to give a little space and time between documenting the week and putting their album together. Others like to dive right in and finish it up. My general approach is to work on it very soon after completing my week but sometimes, like last year when December Daily® was so close, it just isn't possible. Know that it's okay whenever you end up putting it together. There is often a real beauty that comes from waiting and separating yourself a bit from the content - different stories emerge when you look back vs. when you are documenting in the moment. There's also a beauty that's very evident in doing it right away - the stories and photos are fresh and top of mind and your enthusiasm for the project may still be moving you forward.
Whatever you decide to do it will be awesome, because what's really awesome is what you've captured from your life the last week.
As for me, my album will be photo and word-centric much like my approach in 2014. I guess you could say I'm not ready to let go of that style just yet (and many other projects I do include more product play). I also like seeing similarities in design as well as content from last year.
Another great resource as you are getting started is my Working On The Album post from last year. Lots of ideas and tips and things to think about.
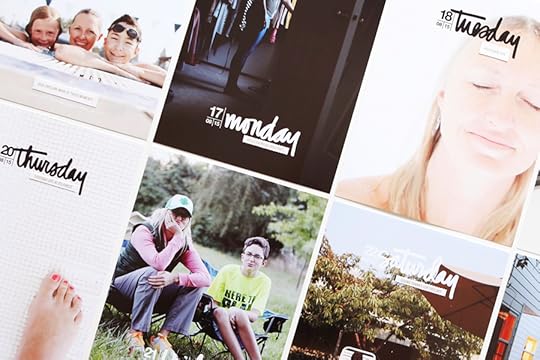
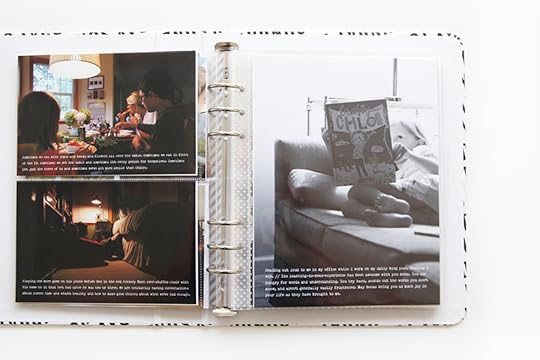
I eased into the "making" of this album yesterday by printing out my main photo for each day first. I like having a full-page 6 inch x 8 inch photo as a "start" for each day. I went back through, selected and edited the ones I wanted to use, placed them in the 6 inch x 8 inch templates in Photoshop (I'm just using a full page vs. the collage option) and printed here at home on my Epson R2000 printer. If you are interested in learning more about working with layered templates check out this post from last year.
After printing out each photo I added one of the perforated strip phrases from the kit.
There are no hard and fast rules for choosing your photos. I rely a lot on my gut - which ones grab my attention, which ones were my favorites from the day, which ones do I want to use full page? I considered having all the start photos for each day be self-portraits but ended up switching that up as I went along.
Here's a look at my 2015 Title Page:
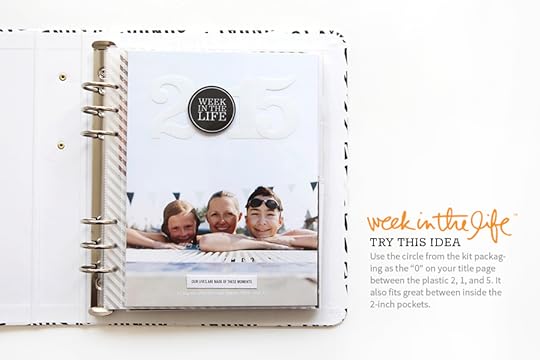
I considered using the 2-inch pocket page as my title page, but came back again and again to this photo. I played around with a few different ideas for a title that would be directly on top of the photo and ended up using the black sticker that was part of the kit packaging (I think I first saw Trisha Harrison using it in the 2-inch pocket page) in conjunction with the white plastic numbers. This means I won't use the numbers with each day of the week as I did last year, but I'm rolling with it. Along the bottom I printed the actual dates and then used the phrase "our lives are made of these moments" from the perforated strip sheet. There is also a "week in the life of us" and a "week in the life of me" included on that perforated strip sheet as well if you'd like to use that on your title page.
To adhere those white plastic numbers I used spray adhesive.
MONDAY START
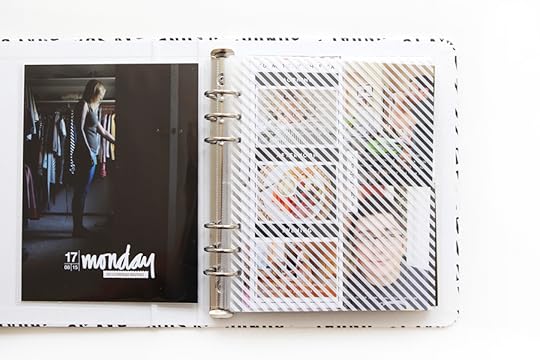
I started adding words directly to my photos and printing them out for Monday. My words are coming straight from my blog posts for last week. I've got all of Monday's photos printed and am currently deciding what to do with a bunch of 4 inch x 6 inch photos that I still want to include but don't have enough pockets for if I follow my own set-up. Last year I adhered those extra photos back to back and punched holes along one edge and added them to the album that way. I'm considering doing that again because I liked the look of it and Mondays are usually the day I have the most photos.
I'll share my completed Monday soon, but in the meantime here's another look at the end of my Monday:
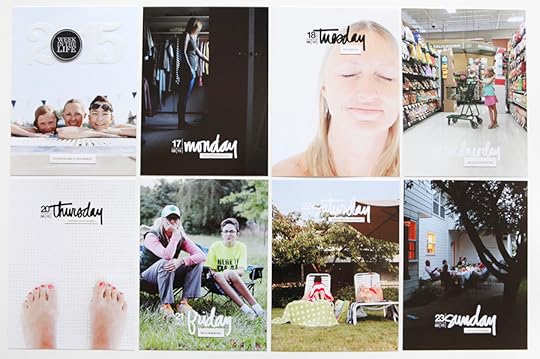
I'm going with a full-page 6 inch x 8 inch photo at the end of each day again as well (the templates include a photo collage option if you want to be able to fit even more photos). I like how it really puts the emphasis on the photos to begin and end that way.
As you can see, I've got my words on the photos and I just need to add some embellishments before calling it good. If you didn't write anything down as you went along last week here's something to consider: Look at the photo and think about what it means to you. What is the story behind the photo? What's important about it? What can you tell me about it that will tell me more about your life or what's important to you or who this person is who was in front of your lens? For the photos of Simon and Anna in the pool on Monday I literally sat here and looked at them and thought about what defines each of them right now and simply wrote that out (you'll see those images and words when I share my full Monday collection).
I'm using the font Remington Noiseless (same as last year) in 9 pt type or smaller.
For more Week In The Life™ posts check out my archives here .


