Dragon Wing bones and Goodreads contest
 My publisher is having a contest to give away 30 copies of The Drafter through Goodreads. If you’re not a member of Goodreads, you might want to check it out. It’s been in existence for a long time, and you can tailor it to you and your likes, keep track of upcoming books, and see what real readers are saying. It’s a great forum for readers. Here’s the link to the give-away. Simon and Schuster give-away: The Drafter
And if you’re unlucky, or want one signed, you can get them through B&N or Nicola’s, my local store. You have to place your order by August 5th to get in on the Sept 1st shipment for Nicola’s.
 Click to order signed/personalized with a note copy
We are up to knitting wing bones in the dragon knit along. They are basically I cords, which if you don’t know how to knit, they are easy and very versatile in your crafting. Sewing them on to the wing panels might look tedious at first, but I find it very zen like.
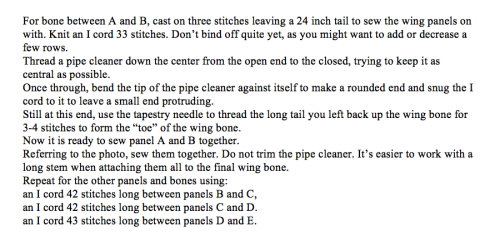
Instructions follow:
Now that you have the five wing panels, it’s time to make the bones and stitch them together.
Much of what makes this dragon special is how it is stitched together. I use to hate stitching, which is why I spent so much time learning how to knit in the round with DPNs so I wouldn’t have to, but after playing with a few techniques, I’ve found it to be very zen like and one of my favorite parts, and I enjoy taking my time with it and treating it as part of the craft instead of a hated necessity. The hardest part with sewing wings is knowing where to make that first stitch, so I made a few videos to get you started. As before, I’ll give you the down and dirty directions first, then the explanation below with the video supplementals.
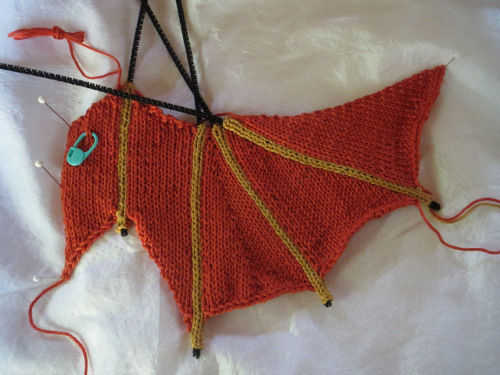
This is what you should end up with. And remember, don’t cut those pipe cleaners!
Tomorrow, I’ll give you the instructions for the right wing panels, and after that, how to attach the wing “backbone.” After that we do the feet, my favorite part.
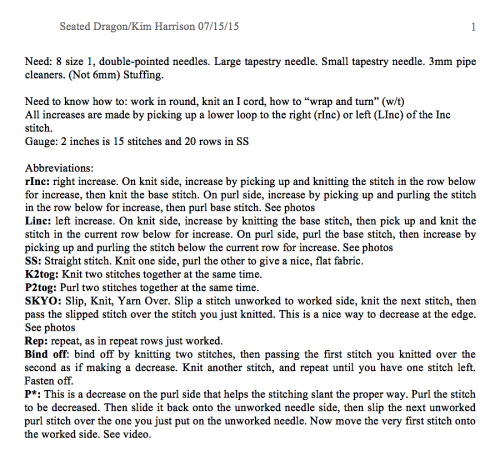
Instructions:
Knitting an I cord
Threading the pipe cleaner down the I cord and making the wing nail
Sewing an I cord to wing panels
Tightening the sewing
Move the stitching across the wing bone to start sewing a new panel on. i.e. where to start.
Finish stitching two panels together and fasten off.
Closing off the open end of the I cord between two panels.
Sewing an I cord to a slant panel
is a bit different because it doesn’t have “ladder rungs.”


