Building Your List with WordPress and MailChimp
This blog post is in response to a question from a Facebook Group I belong to, and I’m answering that question here. Thanks for the opportunity. Check out my other ProWebWriter Answers here.
List building is Internet Marketing 101. You won’t find a marketer that will tell you, “Hey, you don’t need to worry about building a list.” They all know the money’s in the list. If you’re on a tight budget (or not), MailChimp is a great place to start because:
It has a robust free plan
It’s super easy to use
You can easily export your lists to use with other services if you decide to switch in the future
With that being said, how the heck do you set it up on your WordPress site? Let’s get started.
Creating Your First List in MailChimp
Once you are logged into your accounts, it’s time to start creating. We’ll start in MailChimp.
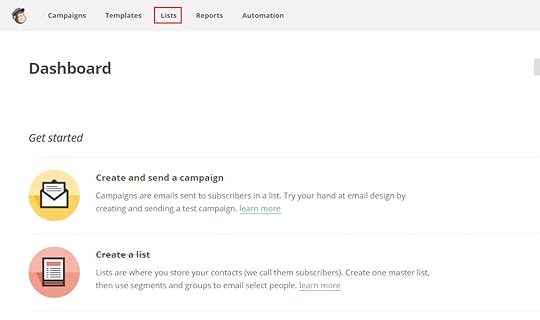
From your Dashboard, click Lists in the top navigation.
Click the Create List button in the top right of the Lists page.

MailChimp will then present you with a basic form where you will fill in information about your list. Below is an explanation of the fields on that form:
List name – Type the name of your list. You can create multiple lists, so be specific. You can see in the screen shot above, that I have named my list after the website it appears on
Default “from” email – Type the email you want your newsletter, email blasts, etc. created in Mailchimp to be sent from
Default “from” name – Type your name, the name of your website, or whatever you want to appear to your readers in the “from” area of their email
Remind people how they got on your list – Type a short reminder; something like this:
You’re receiving this email because you subscribed to my newsletter via my website at mywebsite.com.
Your contact information will be included. You can edit it if necessary. After that, you can check one of the three boxes to indicate how you would like to receive notification of new sign-ups.
Don’t forget to click Save!
You just set up your list! Nice work, but we’re nowhere near done yet. Now it’s time to create the sign-up form.
Setting Up Your Sign-Up Form
From the Lists page in MailChimp, click on the name of the list you just created.
The list page will open with a lot of stuff to do! Don’t be intimidated. We’re on a mission. Click Signup Forms.
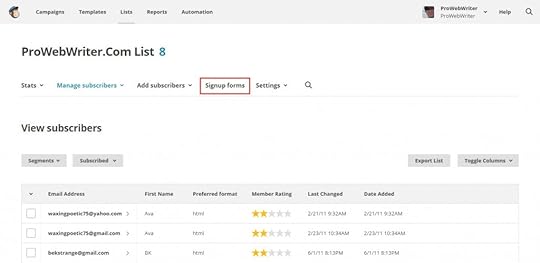
Don’t laugh at my tiny list! I’m trying here!
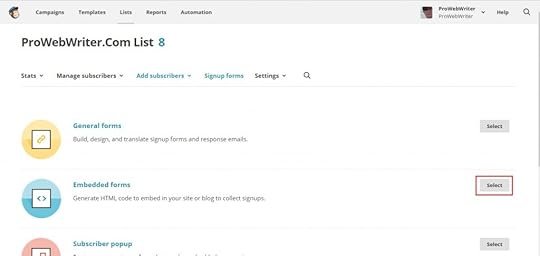
Click Select next to Embedded forms.
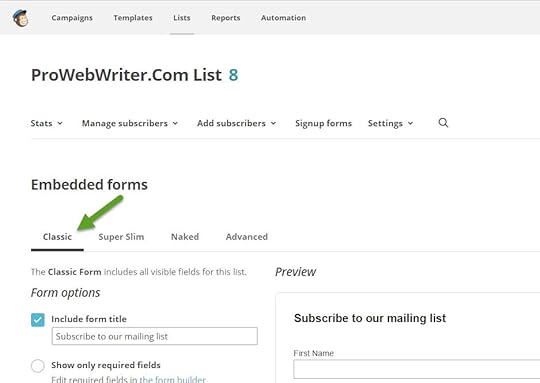
Listen, I’m not a MailChimp expert because who has time? I’m just going to go with Classic. It’s defaulted to this tab, and we’ll build our form here. If you want to know what the other tabs do, that’s another tutorial for a different day. We are trying to build a list here!
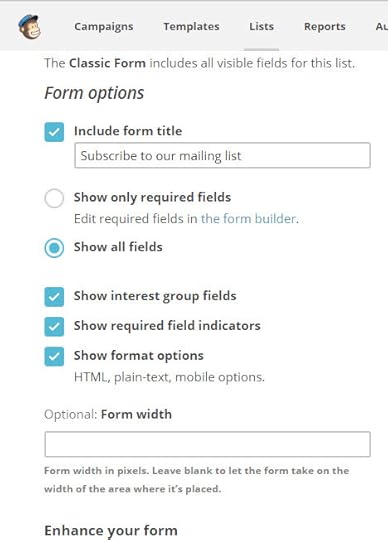
This also looks a bit intimidating. I’ll walk you through. We are concentrating on the Form Options to the left
Include form title – Check this box if you want a title included with your form. You may have to play around with this a bit once you see the form on your site. The cool thing is when you change the form here, it should change on your WordPress site via the MailChimp plugin widget
Show only required fields – Your form will only display the required fields when this radio button is clicked. I think the email field is the only one required by default
Show all fields – Your form will display all of the available fields. You get the basics here like Name and Email. You can change these as well as the required fields in the Form Builder. I won’t be covering all of that here
Show interest group fields – Click this check box to show your interest groups on your form. Disregard this for this simple tutorial. Uncheck this box
Show required field indicators – Check this box to show the red asterisk to indicated required fields
Show format options – This allows readers to choose HTML or plain text format
Ignore everything else.
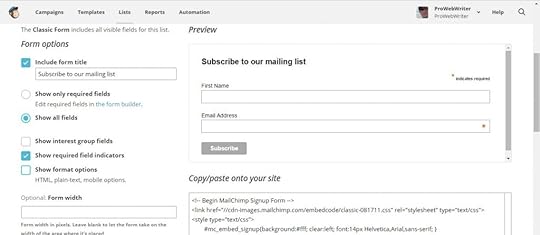
Below are the settings I prefer for a simple form that will capture the name and email address of those looking to opt into your list. You can see the entire form in the Preview.
You are done in MailChimp. Good job! Time to head over to your WordPress website. See you there.
Installing the MailChimp for WP Plugin for WordPress
Alrighty, we need to install that plugin. Let’s get to it.
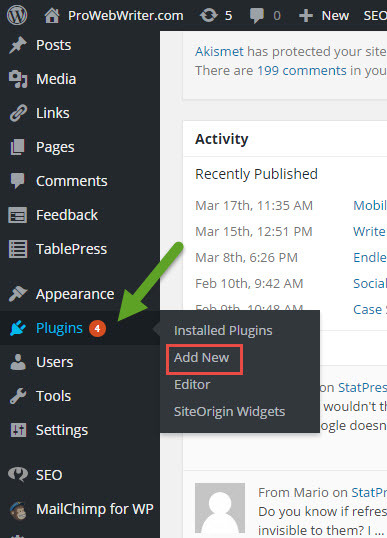
From your WordPress Dashboard, hover your cursor over Plugins, and select Add New from the fly-out menu.
I know I need to run updates! How tacky!
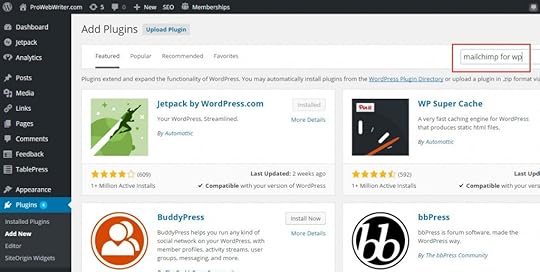
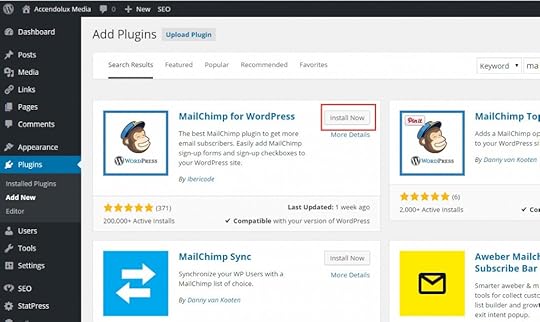
The Add Plugins page will open. Type “mailchimp for wp” in the search box in the upper right corner and press Enter.
You’ll get a ton of results, but it appeared front and center for me. I use the one by Ibericode. I’m going to switch to my test site, so I can show you the entire process. You’ll see a different site in the screen shots. Click the Install Now button.
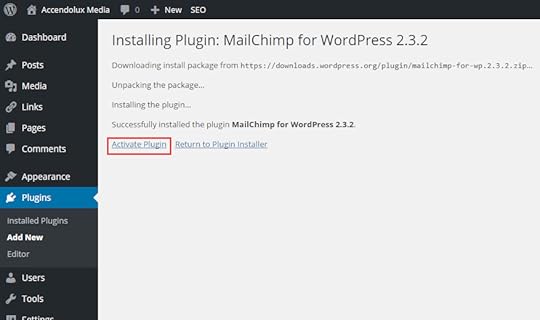
WordPress will install the plugin. Click Activate Plugin.
WordPress will activate the plugin. Now you can connect your MailChimp account. We’re getting there.
Configuring the MailChimp for WordPress Plugin
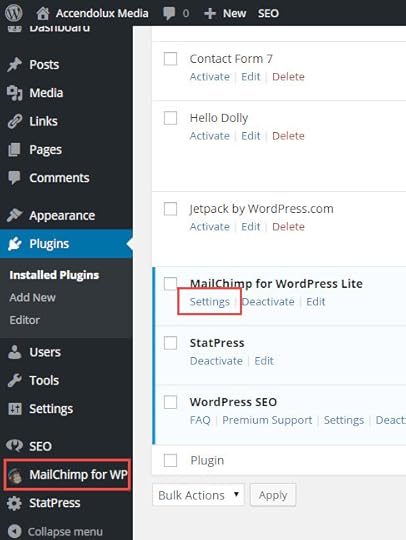
Access the plugin settings either by clicking MailChimp for WP in the left sidebar or by clicking the Settings link beneath the plugin name in your Installed Plugins list.
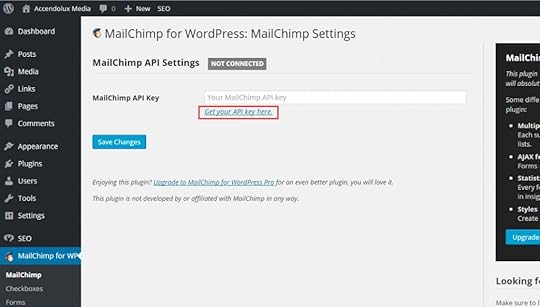
You can see we are not connected to MailChimp yet. Click the Get your API key here link.
MailChimp will open up in your browser. Click the Create A Key button.
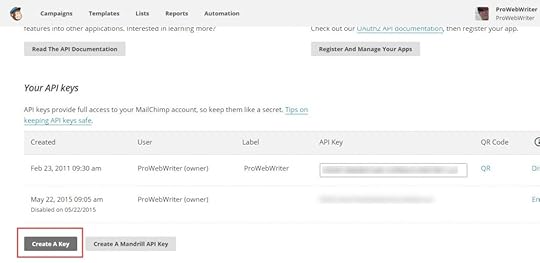
MailChimp will generate an API key for you. It will look like a long string of letters and numbers. Copy and paste this key into the MailChimp API Key field in the plugin settings in WordPress. Click Save Changes.
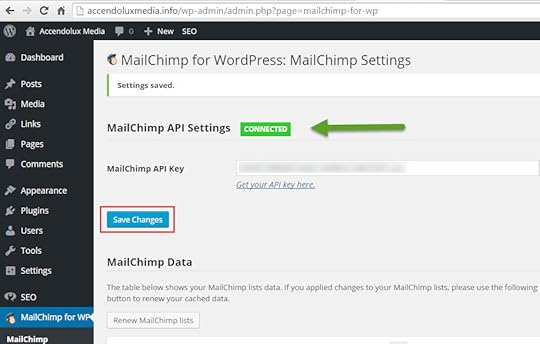
Now you’re connected as indicated by the green CONNECTED banner.
Almost done.
Inserting the MailChimp Sign-Up Form Into Your Posts and Pages
Putting your form on your website is as simple as placing a widget in your Pages, your Sidebar, or other widget area of your WordPress site. Check it out.
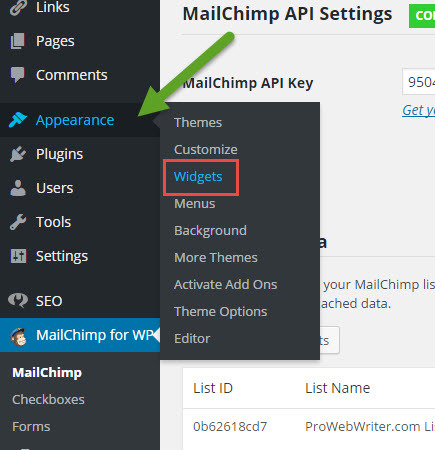
Hover your cursor over Appearance in the left navigation and select Widgets from the fly-out menu.
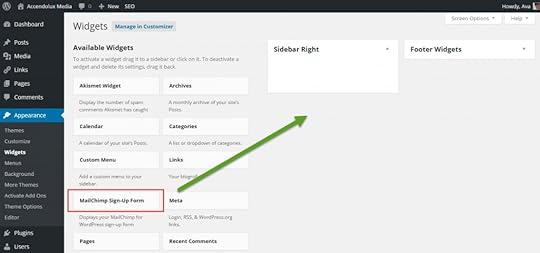
Drag and drop the MailChimp Sign-Up Form widget to one of your available widget areas.
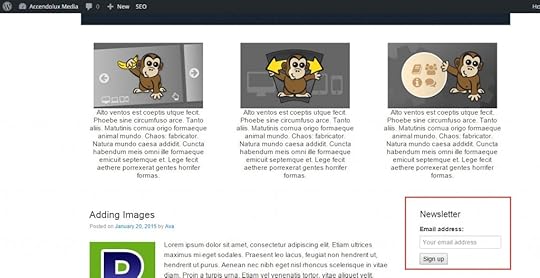
I dropped mine into the Right Sidebar which just happens to be kind of far down the page in this particular theme, but you can see the form on the front end of my test site below:
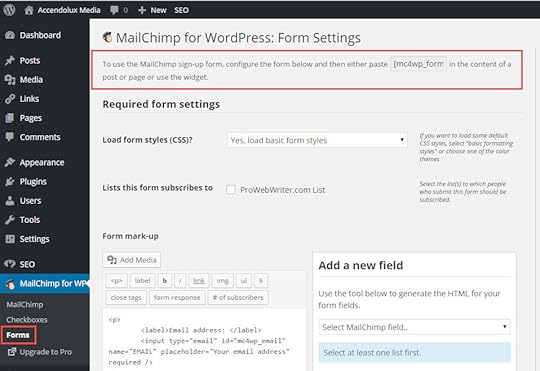
That’s it! You’re a genius! If you want to include your form in your Posts and/or Pages, you can do so with a shortcode provided by the plugin. To get the code, click Forms under MailChimp for WP. At the top of the page you will see the code. Copy and paste this code into your Post or Page where you want your form to appear.
 You’re an old pro now. I hope you get a million subscribers! If you liked this tutorial, there are a lot more WordPress tutorials inside the members area, and it’s FREE to join right now for life.
The post Building Your List with WordPress and MailChimp appeared first on ProWebWriter.com.