
Circle Appliques That Make “Wow” Quilts

Circle accents are everywhere—quilts, pillows, table runners, or handbags. Make a statement by sewing circles, spots, or dots with my no-stress appliqué technique. The sewing secret is to use fusible interfacing.
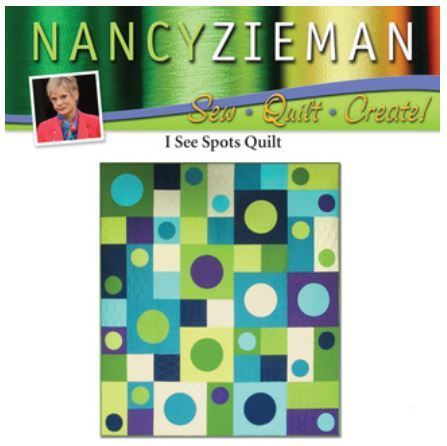
The featured quilt, I See Spots, recently hung on display at the Modern Quilt Guild’s QuiltCon conference in Austin. The bold colors, large blocks (18″ squares), and rectangle shapes (9″ x 18″) give the quilt a modern feel. But don’t think you need to make a quilt! Just one 18″ block would make an ideal pillow.

I See Spots
Create circles or spots without ever cutting a circle! How? Fusible interfacing is the key. Learn how to create this bed-sized quilt with the streamlined process of stitching circles instead of cutting them.
I See Spots is a bed-sized quilt with 18″ blocks, 9″ blocks, and 9″ x 18″ rectangles. The focal points are the circles or spots! Cast aside traditional appliqué techniques and learn the speedy way of creating and appliquéing circles. Want a smaller project? Scale down the quilt to a lap size or simply make a pillow.
Tools
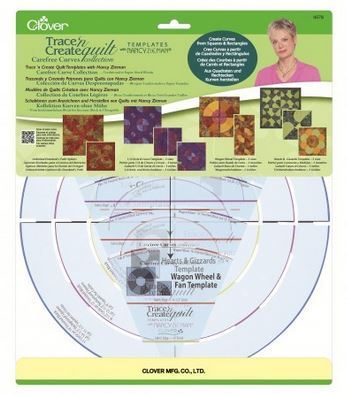
Trace ‘n Create Quilt Template—Carefree Curves Collection
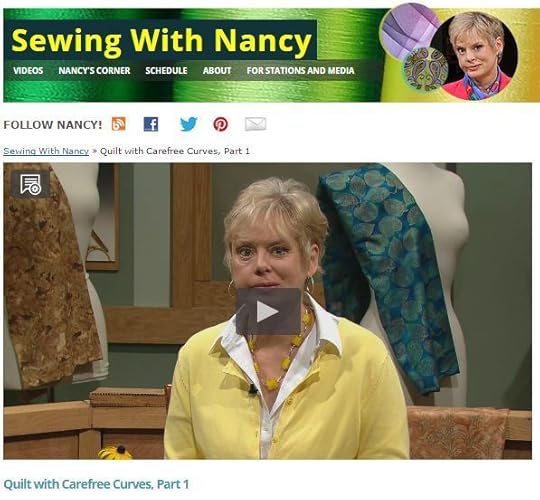
Note from Nancy: There are three templates in this collection, the 1/4-Circle & Circle Template will be used for this project. For other quilt design ideas, check out the book and Sewing With Nancy TV show, Quilt with Carefree Curves.
Point 2 Point Turner
Pellon SofShape Interfacing
Monofilament Thread
I See Spots Project Sheet
Fabrics Select eight fabrics in various shades of light, medium, and dark. If you’d like to personalize or change the color scheme, make certain to follow the standard rule of thumb for quilting and choose light, medium, and dark shades.
Note from Nancy: The fusible interfacing is the key to the construction of this design. Don’t choose a heavy fusible interfacing, light is best! This quilt was made using Pellon’s Sof-Shape.
Technique Instructions
The complete instructions to make the circles or spots are available in the I See Spots Project Sheet.
Create the Circles or Spots
Details on the strip size relative to the circle size and strip widths are marked on the template.
Layer same-sized interfacing and fabric blocks, right sides together.
Placing smooth side of interfacing to right side of fabric. Pin.

Place circle template on each block set.
Trace the circle.
Use a fine-point fabric-marking pen .


Set machine for a straight stitch, 2.0 stitch length.
Stitch directly on the traced line.
Note from Nancy: When stitching curves, I like to use a shorter stitch length, which provides a smoother finished curve.

Trim away excess fabric. For best results, use a pinking rotary cutter blade.

Trim away excess interfacing from interior, leaving 1″ of interfacing.
 Note from Nancy: Save the trimmed interior section of the interfacing to use when creating smaller circles.
Turn interfacing to wrong side.
Press curved edge, making certain seam is along the edge.

Fold background blocks and circles into fourths. Lightly press folds.

Unfold fabrics.
Center the small circles onto larger blocks, matching creases; pin.
Pair the circles to blocks as per the illustrated color guide I See Spots Project Sheet .

Fold each rectangle in half, meeting long edges. Lightly press the fold. Unfold the fabric.
Measure down 1-3/4″ from one end of each rectangle.

Align creases of circles with vertical creases on rectangle. Pin.
Pair the circles to rectangles as per the illustrated color guide.
Stitch Circles to Background Blocks and Rectangles
Thread needle with monofilament thread such as Madeira’s Monofilament thread .
Use all-purpose thread in the bobbin.
Set machine for either a straight stitch, narrow zigzag stitch, or blanket stitch.
Stitch circles to fabric.

Follow illustrated color guide to assemble and stitch blocks and squares.
Stitch blocks and squares using 1/4″ seam allowances.
Layer quilt top, batting, and backing.
Quilt using your favorite quilting techniques.

.

Finish quilt with binding.
Get the complete I See Spots Project Sheet at Nancy’s Notions.
Watch Carefree Curves Techniques Online
I demonstrate how to make circle appliqués during this Sewing With Nancy episode. Enjoy!

A big thank you to those of you who attended my two lectures: Seams Unlikely and Crafting a Sewing Business: One Stitch at a Time, checked in on my QuiltCon guest book, and entered to win a Carefree Curves template from Clover. The random giveaway winner is Judy Tucker! Congratulations, Judy!
——————

Have you entered your pillow into my 2015 Pillow Challenge? Entry deadline is next Tuesday, March 3, 2015. Join the fun and learn the details at my February 3 Blog Posting.
Bye for now,

Content in this feed is © copyright 2015 by Nancy Zieman and may not be republished without written permission. You’re welcome to forward the email to a friend or colleague but it’s not okay to add the RSS feed automatically as content on a blog or other website.


Nancy Zieman's Blog

- Nancy Zieman's profile
- 21 followers

