Creating & Editing WordPress Blog Posts
Hopefully by this stage you are starting to see just how easy it can be to manage your own website with a tool like WordPress!
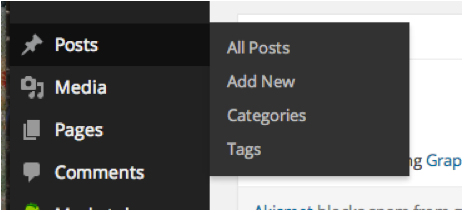
The process for creating and editing blog posts is the same as that used for pages. Once you’ve logged in to your admin account, you will want to use the menu along the left side of the page and find the Posts menu item. Just like we saw in the section on pages, when you hover over the Posts menu item you will see a secondary menu pop up. This time you get four options: All Posts, Add New, Categories, and Tags. We will cover Categories and Tags in another article. For now we will use the All Posts and Add New options.
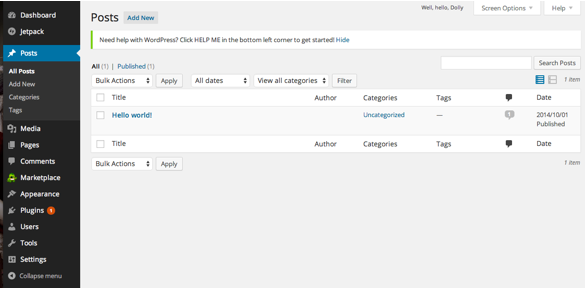
You can see the All Posts page looks identical to the All Pages page. The difference is one displays pages, while this one displays posts. Every blog post you’ve created will be displayed here. You can add a new post by clicking the Add New button along the top of the screen. You can Edit, Trash, or View each post from the menu beneath each post title, you can see the number of comments for that post, and you can see the date the post was published.
To edit an existing post, click on the title of the post—in this case the “Hello world!” post. You modify the title and the body of the post the same way you modified this information on a WordPress page. Simply type in whatever you wish in each section. Similar to a word processing program such as Word, you can see at the top of the Body section there are buttons that allow you to modify the text by bolding or italicizing or creating a bulleted list.

Another thing to note about the Post page are the options along the right side of the screen. Just like a page, you update a post you are editing, and publish a new post, and you do that in the first box to the right. Under that, you have some Format options, and then you’ll see a box for Categories, for Tags, and for a featured image. These are not important at this point—as I mentioned previously, we will explore these further in a later section, but they are areas you will use quite frequently as you become more comfortable with the tools of blogging on a WordPress platform.
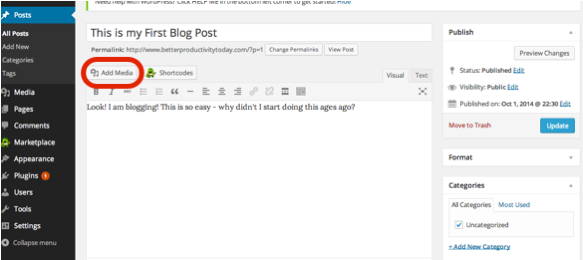
If you’d like to add an image to your post, you can use the Add Media button to do so. Pressing it will open up a screen that allows you to upload files. Click the Select Files button and then navigate to find the location of the file on your computer.
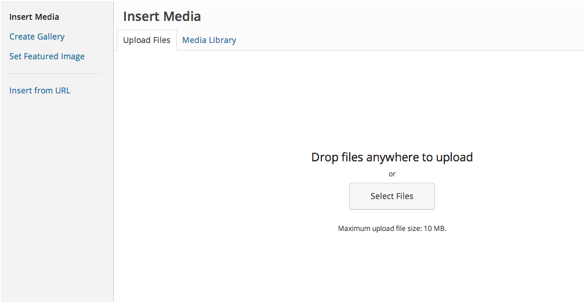
Once the file has been uploaded you have the option of adding a Title, a Caption for the image, Alternate Text, and the Description. You can also choose how you want the image aligned in the window and the size of the image. Only the URL (which auto populates), alignment, and size are necessary. You can ignore the others for now, though in time you will want to learn how to effectively utilize them to improve how others find your posts (otherwise known as search engine optimization, or SEO).

Once you are finished filling in this data, click the Insert Into Post button. As you can see below, it will insert the image into the post in the location and the size you specified. Note that it will insert the image wherever your cursor was within the blog post, so if you are having problems with where the image is populating make sure your cursor is where you want the image to be.
Once you are done with the post, click the Update or Publish button to make the post visible on your website. Now, pull up the front end of your website and check out your new blog post. Well done! You have all the tools you need right now to maintain your site and fill it with useful and relevant content, putting you ahead of the game building your author platform!
The remaining sections that follow cover some slightly more advanced concepts. We’ll talk about widgets—tools that allow you to easily add complex functionality to your site, and we’ll also talk about categories and tags before wrapping up with some basic blogging tips and tricks.
For previous articles in this series please see the articles below.
The Importance of a Website to Your Author Platform
Why You Need a Self-Hosted Website
Naming Your Website
Selecting a Registrar and Web Hosting Company
Installing WordPress
Picking and Installing a WordPress Theme
Creating and Modifying WordPress Pages