How to make your pictures behave in a WordPress blog post – A Tutorial
Welcome back to Bakerview Consulting!
I spend a lot of time explaining the finer points of manipulating graphics on WordPress Blogs. Everyone has trouble with pictures at one point or another, myself included! Today we are going to do an basic tutorial covering inserting pictures and editing them once they are there.
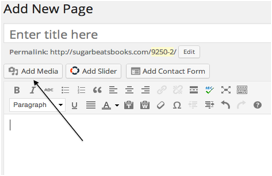
There are several ways of inserting a graphic into a WordPress blog today we are going to start from the Post edit screen.
As you can see from the graphic above, find the ‘Add Media’ button and click it.
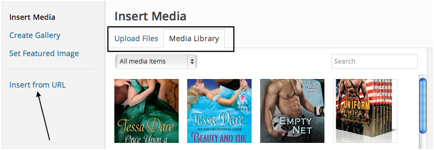
This will bring up the ‘Insert Media’ popup screen. As you can see above, there are three sources of pictures – you can find pictures in your Media Library, you can Upload Files from your computer or you can Insert from a URL.
Today we are going to assume that your picture is already in your Media Library. Click on the Media Library tab (if it isn’t already highlighted)
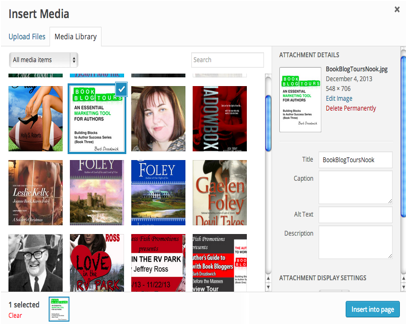
Find the picture that you want to insert into your blog post and click on it. As you can see from the graphic above, the picture will then have a check mark on it, and the information about the picture will be displayed to the right of the screen.
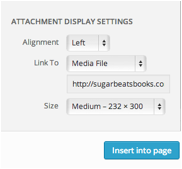
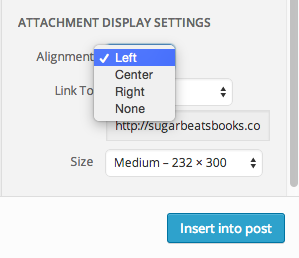
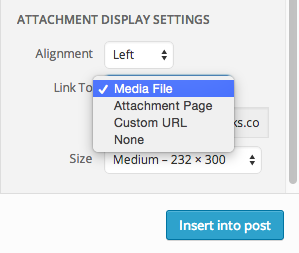
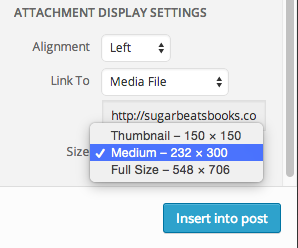
Scroll down to the bottom of the Insert Media screen and you’ll see the above graphic. This section allows you to determine where the picture will be place, what size it will be and if it will be attached to any link. Let’s talk about each one individually.
The Alignment dropdown seen above will allow you to place the picture on the left, right or in the center of the blog post. If you choose left or right, the text will automatically wrap around the picture. If you choose center, the picture will be isolated and the text will continue after the picture as you can see from this post as all the pictures are center aligned.
The Link To dropdown allows you to ‘Hot-link” a picture. In other words, you can enter a Custom URL – such as an Amazon link and when your picture is clicked on, the reader will be taken directly to that link on Amazon. This is commonly used when displaying cover graphics of books.
Lastly, you can choose the size that the picture will be when inserted. The sizes that are seen here are determined by your WordPress theme. Once the picture is actually in your post, you can edit it and choose a different size.
Once you are finished with this screen, click on the ‘Insert into post’ button and the picture will be inserted into your blog post.
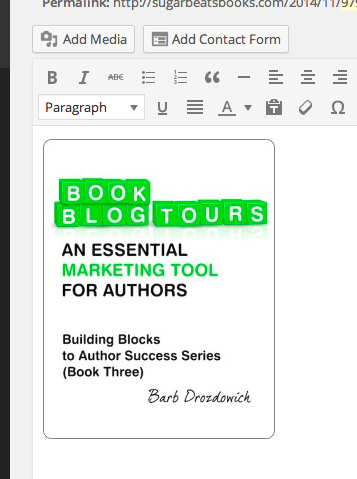
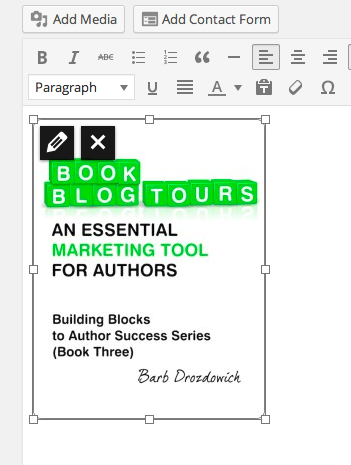
This is what your picture will look like when it is inserted into your post. Let’s say, you want to edit it – click once on the picture and you will see the graphic below.
You’ll notice that once you click on the picture, two icons appear in the upper left corner. To edit the picture, you need to click on the pencil icon. This brings up the ‘Image Details’ screen that you can see below.

Again you can see that you can adjust the Alignment of the picture and the Link To. Near the bottom of the graphic above, you can see that you can check the box to have the link (if your picture is linked) open in a new window/tab. Remember to check that little box – so important!
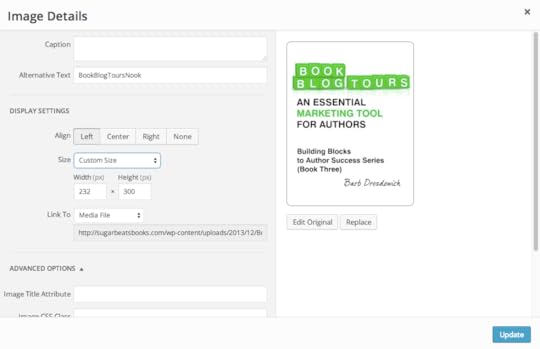 The last thing to talk about is the ability to customize the size of your graphic. As you can see in screen shot above, if you choose custom size, you will be presented with a width and a height field. By changing one number the other will change in proportion.
Once you are done adjusting the size, click on the ‘Update’ button and changes will be included.
I hope this post helps you wrangle your pictures. Stay tuned for more tutorials on managing pictures in the future.
The post How to make your pictures behave in a WordPress blog post – A Tutorial appeared first on Bakerview Consulting.

