Kate’s Undercurrent Cardi (with help); Buttonband insanity
It’s no secret: I’m rather a fan of Noro Kureyon. I’m especially a fan of color #242. I’ve made a hat, a crochet shawl and the Lanesplitter skirt out of this colourway.
It’s my favourite, because it’s all the colours I love and wear: black, grey, green, red, orange. And in classic Noro style, it’s done in a rather unexpected manner, with funky colour changes and blends.
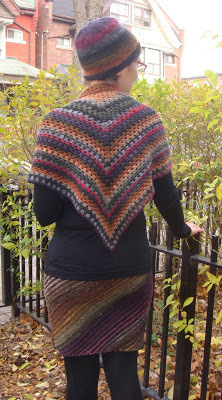
My “crazy Noro lady” outfit.
The minute we published the Undercurrent cardigan pattern, in mid-2011, I knew I had to have one. In colour 242, of course.
The downside to being a knit designer is that you rarely get to knit for yourself. I’m usually working on deadline projects, design projects, projects for books and magazines and other stuff. When I do get to knit for myself, I tend to go for plain socks – the sort of thing I can work on when I’m tired, or waiting for design inspiration, or when I’m in the line-up at the bank. My “me” knitting is usually projects that don’t require any thought or attention, and more to the point, projects that can be easily worked on in stolen moments and can carried around in my purse. Sadly, a sweater doesn’t fit these criteria.
I’d had a bag of Kureyon 242 sitting at the top for my stash for nearly three years, waiting for knitting time I was never going to have. So earlier this year, I arranged a barter deal with a skilled sample knitter I know: she would knit Undercurrent for me, as part of an exchange.
She worked on it over the summer, and returned the (beautifully knit) pieces to me a few weeks ago. I wanted to do the finishing. I’m VERY picky about the finishing.
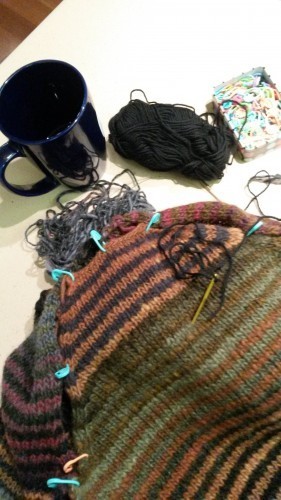
Setting in a sleeve requires clippy pins, sock yarn and coffee.
Plus I knew I wanted to make some adjustments to the buttonband.
I washed the pieces, finished up the hood, and then started on the front edging. For this design, it’s done in one piece, along the right front, up and over the edge of the hood, and down the left front.
Now, the thing about knitting this sort of buttonband is that you have to place buttonholes as you’re working. And before I started it, I didn’t really have any idea if I wanted buttonholes – and if I did, I wasn’t sure how many I would want.
I pinned the thing together at the sides so I could try it on, and made some measurements: I also knew I wanted the buttonband to be a bit deeper than called for in the pattern, but I wasn’t sure how deep.
So I knit the buttonband – nice and deep – without buttonholes. And then when it was the length I wanted, I bound most of it off (on the WS), all the way along to the top of the right front. The side where I would want the buttonholes.
And then! Then! I figured out how many buttonholes I wanted and where.
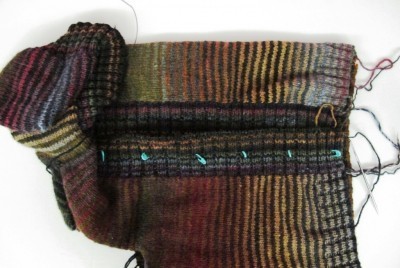
Buttonhole positions marked.
And then I made them!
How did I make them, you ask? Crochet hook!
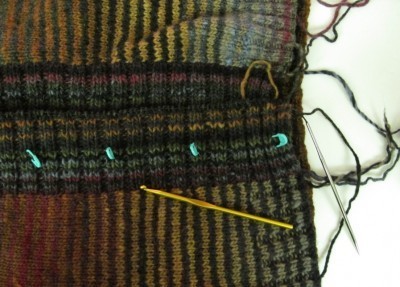
Magical buttonhole-making tool.
I’d left the stitches of that section live, and so I was able to strategically drop stitches where I wanted buttonholes to be. I dropped them down to the middle of the band, and converted what was a k2 to a (k2tog, yo) to make a hole. And I “ravelled” those two stitches back up.
There is one small drawback to this method – other than it being sort of insane – they’re not the same buttonholes that the designer specified, but they look good to me, and they’ll get the job done.
I’m absolutely thrilled with it. Many, many thanks to Kim without whom this would just be a bag of yarn…
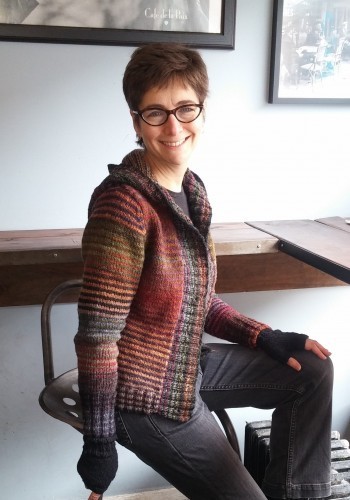
Just needs buttons now.
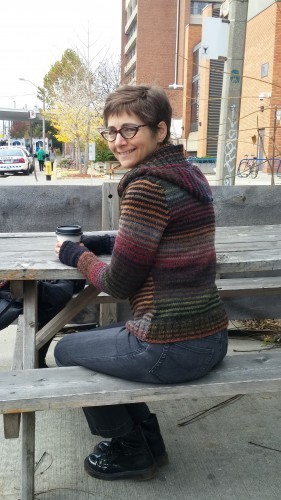
And it’s perfect.

Mandy Moore's Blog
- Mandy Moore's profile
- 6 followers


