Installing Word Press
Ok, now we start getting to the fun stuff! If you are interested in hand-coding the website yourself, have fun! No, seriously, it’s a great way to learn how all this stuff works together and, personally, I think it’s a lot of fun. But these days, it is also completely unnecessary if you don’t have the time or the desire. After all, we’re here to get your site up and running quickly and with minimal effort on your part, not to teach you how to be an ace at web development!
WordPress is here to save the day. It’s the Internet’s version of sliced bread. Or, more accurately, the Internet’s version of microwaveable lunches. WordPress took something that used to be complex (making lunch from scratch) and turned it into something anyone could do (pop a box into the microwave). With a few clicks of a button you can have a fully functional, sophisticated and gorgeous website.
The first step to getting your website up and running is to install WordPress in your account. You do this by logging into the account you created when you signed up with your hosting company. When you log in, you will be in your hosting company’s Control Panel (CPanel). This is home base for controlling the working side of your website—the side of things people don’t see. It’s sort of like the engine in your car: it runs things, controls things, but generally no one ever sees it except you and your mechanic web developer.
From there you find the part of the CPanel that allows you to install applications for your site. If you are using Bluehost, you can find it in a couple places – they have an area within CPanel they call Website Builders, and they also have something called Mojo Marketplace. For our purposes here, you can install WordPress through either, and the process is the same for both. In this example, I clicked on the WordPress icon within the Website Builders portion of CPanel.
Clicking into the WordPress area of Website Builders will pull up a site that gives you a bit of background information on WordPress itself. It also has a button along the top of the page that allows you to install WordPress. Pushing this button will bring you to a screen that allows you to pick which domain you want to install to. If you only have one domain it will likely already be selected for you. If you’ve purchased multiple domains you’ll have to select which domain you want to install WordPress to. Once you’ve selected the domain you wish to use, click the Check Domain button. Bluehost runs a check on the domain to make sure it is properly set up to allow a WordPress install. Your hosting company may simply have an Install button here.
As part of the install you’ll need to read the terms and conditions, click to verify you have reviewed them, and then finally complete the install.
Note: If you would like to design multiple websites utilizing WordPress, you will need a unique WordPress install for each domain.
Once installed, a window will pop up that tells you your install is complete and that will then lead you to a link to view your credentials (your username and password). When you install WordPress, the system will automatically create a username and password for you so you can log in to the admin panel for WordPress.
You’ll get a page that gives you the URL (domain name), the admin URL (the website address you use when you want to log in), as well as the initial username and password that was created for you when you installed WordPress. Log all of this information down and don’t forget it! You’ll need it.
Let’s say you selected the domain www.amazingwordswriter.com. This would be your public-facing URL, and your admin URL would be www.amazingwordswriter.com/wp-admin.
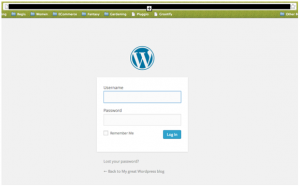
You are done with your hosting company now. You can log out of your hosting company’s website and navigate to the admin URL of your shiny new website! When you pull up that address (remember, it is www.your_site/wp-admin) you’ll get a window that looks like the following, with your web address in the URL line (as opposed to a blacked-out space). Using the credentials you got when you installed WordPress, log in to the admin panel for your site.
Your WordPress admin panel will look like the following:
Congratulations! If you navigate to your website—where people will end up when they browse to your address or find you in a search—you will see a demo site all set up for you with a standard look/feel that all new WordPress sites come with.
For previous articles in this series please see the articles below. Next week we’ll cover how to find and install a WordPress Theme!
The Importance of a Website to Your Author Platform
Why You Need a Self-Hosted Website
Naming Your Website
Selecting a Registrar and Web Hosting Company


