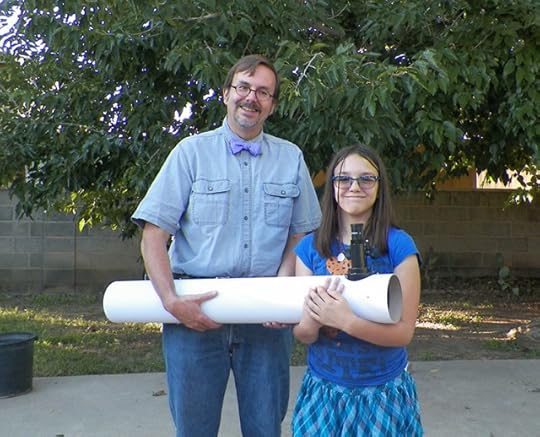
Making a Telescope
One of my first forays into the world of astronomy happened when I was fourteen years old. I was at an age where people started wondering what I was going to do with my life and my dad had recently passed away. I went to a meeting of the Riverside Amateur Astronomers in California and went home with a twelve inch telescope mirror and a wooden tube to mount it in. My plan was to build a Newtonian telescope—a design pioneered by Isaac Newton, which has a large light-collecting mirror at the back of the telescope. In the front is a 45-degree mirror that directs the light to an eyepiece.
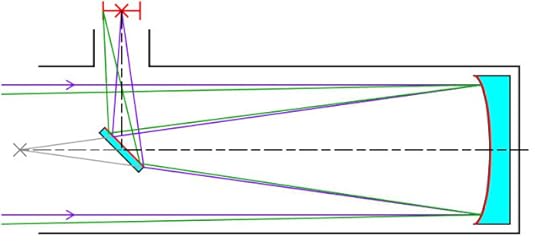
Illustration by Krishnavadela
I really had no idea how to build a telescope, Newtonian or otherwise. I eventually was able to mount the mirror in the tube, but never proceeded further on the project. My mom bought me a small, commercial telescope. I built a mount for it with a neighbor’s help and I went on to enjoy the night sky. I eventually sold that first telescope mirror and tube to a friend who made a nice Newtonian telescope out of it.
Of course, I went on to a career in astronomy and have learned much more about telescopes. So, a couple of weeks ago when my daughter mentioned she was interested in a science fair project where she compared the performance of her refracting telescope to a comparable reflecting telescope, I thought this was a great opportunity to revisit the idea of building a Newtonian telescope.
This time, I deliberately went for a small telescope. I wanted the aperture to be the same size as my daughter’s refractor. 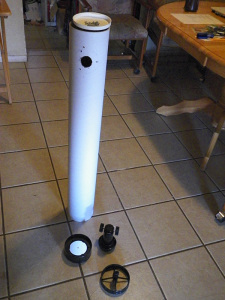 That meant an 80 millimeter primary mirror. I looked on eBay and found an 80mm primary mirror along with a flat diagonal secondary mirror for about $45. I went ahead and picked them up along with a rack and pinion focuser for a Newtonian telescope that cost about $17. I already had eyepieces. If you want to embark on the journey of making a telescope those are easily obtained from places like Orion Telescopes and Binoculars. Once the parts arrived, the only thing I needed to complete the telescope itself was a tube to mount it in. I thought about a couple of approaches, but decided the simplest was to mount the whole thing in a five-inch diameter mailing tube, which I could pick up at the local office supply store for about $7. You can see the complete set of parts to the left.
I faced two problems when I attempted to build a telescope when I was fourteen. First, I didn’t really have experience with tools. I was trying to figure out how to drill holes and saw boards with no one to really teach me. I’m lucky I didn’t cut off a finger! Second, I didn’t really understand the basics of how far apart to mount the telescope mirrors. The first problem was really the show-stopper all those years ago, because either the Riverside or San Bernardino Amateur Astronomers would have helped me figure out the second part. It turns out, figuring out the distances is perhaps the most important part, but it’s also very easy. You just need a few numbers to start:
The focal length of the primary mirror.
The distance from the center of the mirror to the edge of the tube.
The distance from the edge of the tube to your eyepiece (which you can get by putting the rack and pinion in the middle of its range and measuring the distance.)
When you buy a telescope mirror, the focal length is a number the seller should have. If not, there are assorted websites and YouTube videos that can tell you how to figure it out. 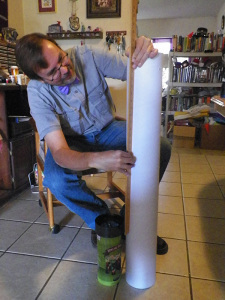 The focal length is the distance between the primary mirror and the place where you’ll form a focused image that you may view with your eyepiece. In essence, the focal length tells you how far apart to mount your primary and secondary mirror. A simple, good-enough way to get get that distance is to take the focal length and subtract the other two numbers above. Make sure the center of your secondary mirror is that far from the primary mirror. I started by making sure the secondary mirror was mounted level in the top of the tube. I drilled my holes with a Dremel tool. I then cut a hole even with the secondary mirror that allowed me to mount the rack-and-pinion focuser. Once that was in place, it was easy to get the measurements. I took it apart, mounted the primary in the right position and then moved on to the final step.
Once everything is mounted, you need to align the mirrors. In short, the primary mirror needs to be aimed straight up the tube, so it sees out. Also, the secondary needs be centered on the primary mirror. Finally, you need to make sure your rack-and-pinion focuser (and thus your eyepiece) is aimed directly at the secondary. Here’s a very good article about how to do just that: http://www.skyandtelescope.com/astronomy-resources/how-to-align-your-newtonian-reflector-telescope/
The thing is, Newtonian telescopes are pretty forgiving. Don’t stress if you don’t get any part of this process perfect. In about 24 hours, of getting all the parts, we were out and looking at the night sky with our homemade telescope. I still need to build a mount, but even lose as it is, it’s a great little telescope for looking at planets or the moon.
By taking me back to one of my first forays into science—and  one I didn’t especially succeed at the first time—this project definitely pulled me out of my comfort zone and reminded me of Larissa Crimson’s journey in my steampunk novel Lightning Wolves. If you’d like some inspiration for some mad science, you should check it out at Amazon, Barnes and Noble, or Smashwords.


